Make A “Hello” Mat
This post may contain affiliate links · This blog generates income via ads
Want to make a personalized Welcome or “Hello” Mat? I’m sharing how to do it using a DIY stencil and latex or chalk style paint. You could use a Cricut to cut out your stencil, or I’ll share a way to do it without a machine! Let’s get started.

This post was first published in June 2012 and has now been updated with new photos and information.
Supplies:
- small outdoor mat (I’ve used ones from Ikea or Walmart)
- latex paint or chalk style paint (I’m using Rustoleum Chalked Paint on my “Welcome” mat)
- small paint brush or foam brush
- computer, printer & cardstock paper
- Scotch Gard spray (optional)
- Exacto knife & self-healing cutting mat OR Cricut
Directions:

First, measure your rug and decide how big of a “hello” (or “welcome” or whatever other word) you’d like. I wanted mine exactly centered and not too large, but not too small. Then, using a fun font, type your “hello” in a new Word document or photo editing program on your computer. You’re welcome to use mine if you’d like: The DIY Mommy Painted Mat – Hello (PDF Download) Print it out on cardstock paper.
Using an Exacto knife, carefully cut out the letters and then all of the holes in the letters that need it (the “E”‘s, “O”‘s etc.).
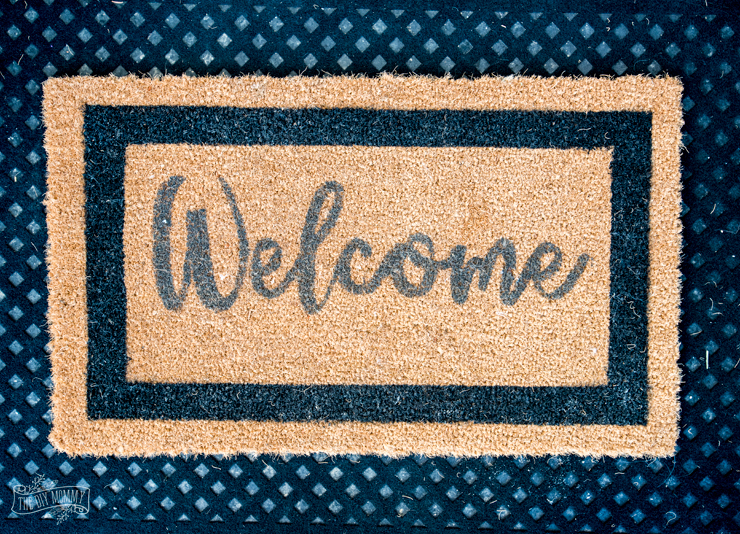
Alternatively, you can use a Cricut to cut your stencil onto cardstock. I made the mat below using my Cricut, and you can access my “Welcome” Cricut cut file project for that by clicking right here.
Save the holes from the E’s, O’s etc. – you’ll need them for your stencil!

Place the stencil on your rug, wherever you want it (I exactly centered mine) and tape it into place. Alternatively, use blobs of hot glue to keep the stencil in place (just test the hot glue on your rug first to make sure you can easily pull it off later!) Use double-sided tape or hot glue to place the “holes” of the letters in their spots.

Use a small paintbrush or foam brush to stipple the paint onto your stencil. There are actual stippling brushes you can buy, but I simply used an inexpensive craft paintbrush and foam brush. Hold the stencil down with your opposite hand as you go so that you don’t accidentally paint out of the lines. I had to stipple the paint to push it down because the rug was a little textured. If you’re using a flatter woven rug, it won’t be as tricky!

(Here’s a picture of me holding onto the “holes” of the “O” with my opposite hand while painting – finicky, but it worked! I’d suggest taping them first or using hot glue to hold them down as mentioned.)

I found two coats of latex paint was sufficient, or use one coat of chalk style paint. Make sure to let the paint dry for at least 2 hours between coats. After the second coat has dried, spray the painted section with Scotch Gard. Let dry overnight and then spray again, making sure to let the rug dry completely before use.

I made this “hello” mat 6 years ago and it still looks like this to this day!

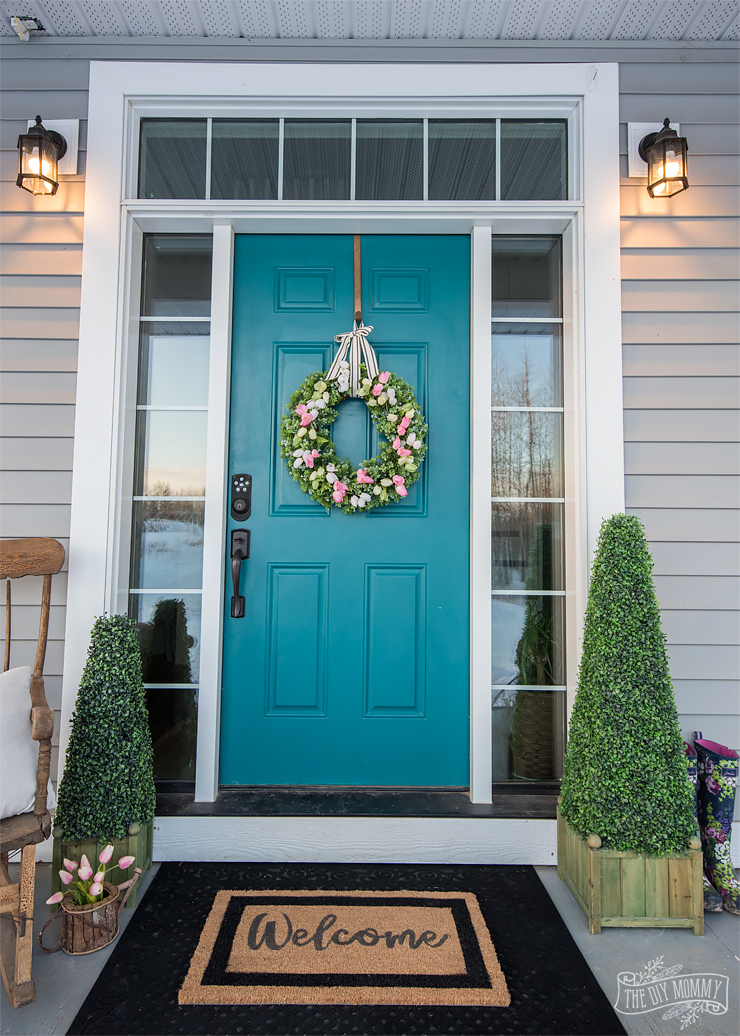
And this new “Welcome” mat is a… ahem… welcome addition to our Spring front door decor this year:
Enjoy your new customized front door mat!
Watch my new video below to see the step-by-step on how to make customized front door mat – plus I’m also sharing how to make a DIY tulip wreath and our front door decor for Spring!
Disclosure: We are a participant in the Amazon Services LLC Associates Program, an affiliate advertising program designed to provide a means for us to earn fees by linking to Amazon.com and affiliated sites.
Very nice Christina, I like it.
Thanks, Auntie Betty!
I walked past those ikea rugs the other day and was hoping you’d post the tutorial soon. So fabulous!! Adding it to my list of things to do. 🙂
Thanks, Amanda! It’s so simple, and I’m happy with how mine is holding up. 🙂
Hi! I just stumbled across this post and it’s awesome! I was wondering what font you used?
Hi Erin! The font I used is “Feel Script” and they have some great extra glyphs in the set – like the swily “H”. http://marketplace.veer.com/font/Feel-Script-UMT0000300
Thanks so much! I’m kinda a font junkie, so love finding new fonts to add to the collection.
No problem! I’m totally a font addict too. 🙂
Great blog post about door mats. I like it. Thanks for sharing it with us.