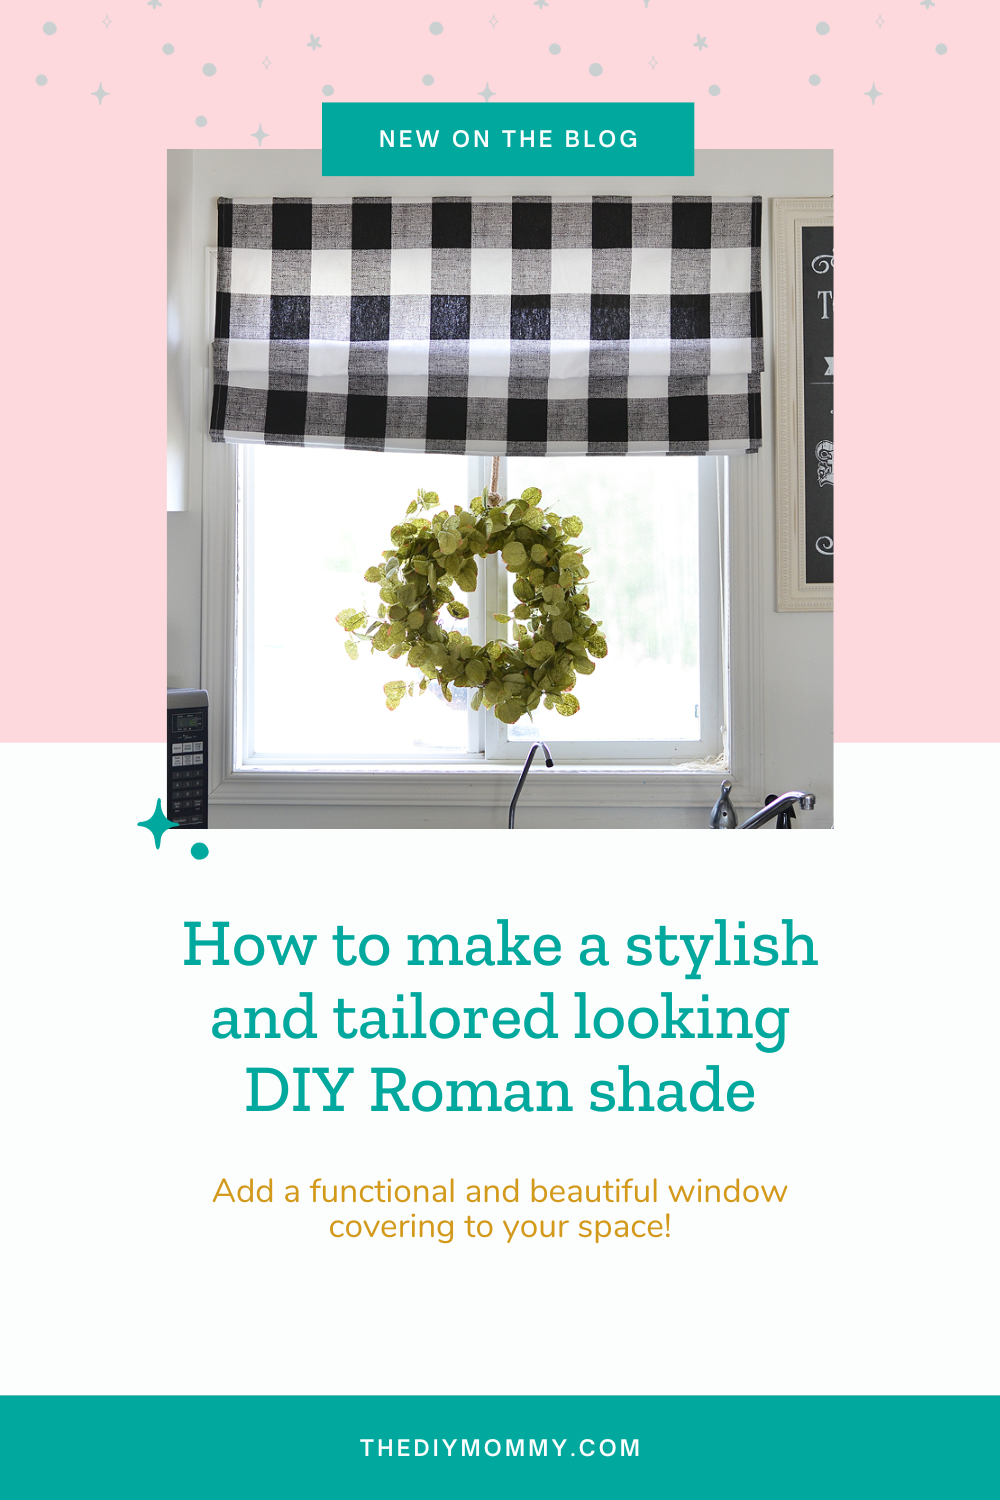
How to Make a Stylish and Tailored Looking DIY Roman Shade
This post may contain affiliate links · This blog generates income via ads
Learn how to make a stylish and tailored looking DIY Roman shade with this simple sewing tutorial. New window treatments are a great way to add function and beauty to your space. Plus, it’s just so much more exciting when you make them yourself! And making new Roman shades is a great DIY project for a new sewer, since it involves only straight lines. Come learn how to sew your own beautiful Roman shades with just a little bit of time and effort.

Disclosure: The fabric used in this project was provided to me for free by OnlineFabricStore.net. This post originally appeared in 2016 and has since been updated. And, this post contains affiliate links. When you purchase an item via these links, I receive a small commission at no extra cost to you.
Learning how to make window coverings yourself is a MUST if you want to add some personal DIY pizzazz to your home on a budget. You can add a pop of pattern or colour that infuses your space with YOU, for far less money than buying window coverings from a retail outlet! I’ve shared lots of fun DIY window covering tutorials on my blog like no-sew fabric covered blinds, gorgeous lined drapes, grommet topped drapes, and super easy drapes. Today, let me share one of my favourite window coverings to DIY: a Roman shade.
How hard is it to make your own Roman shades?
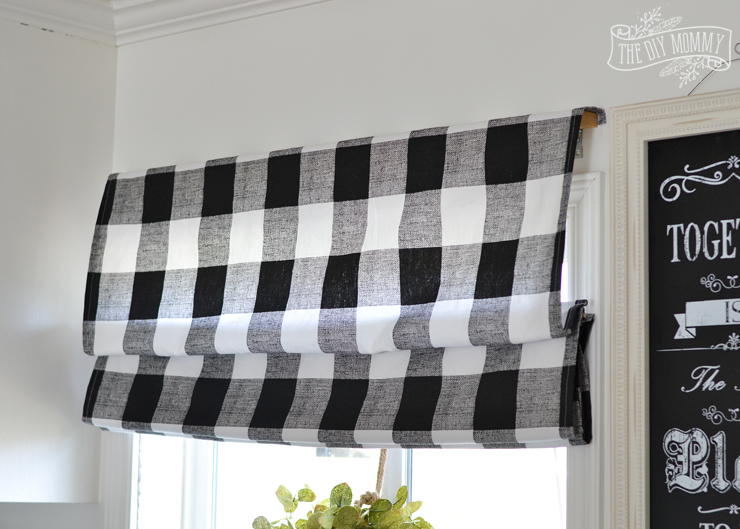
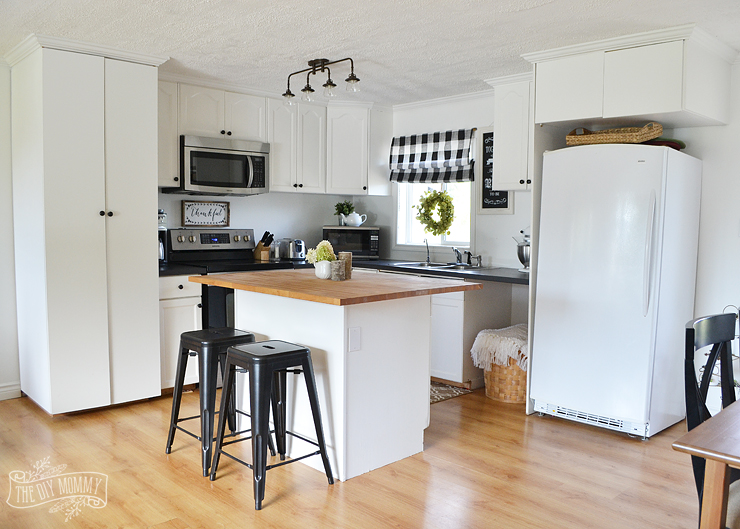
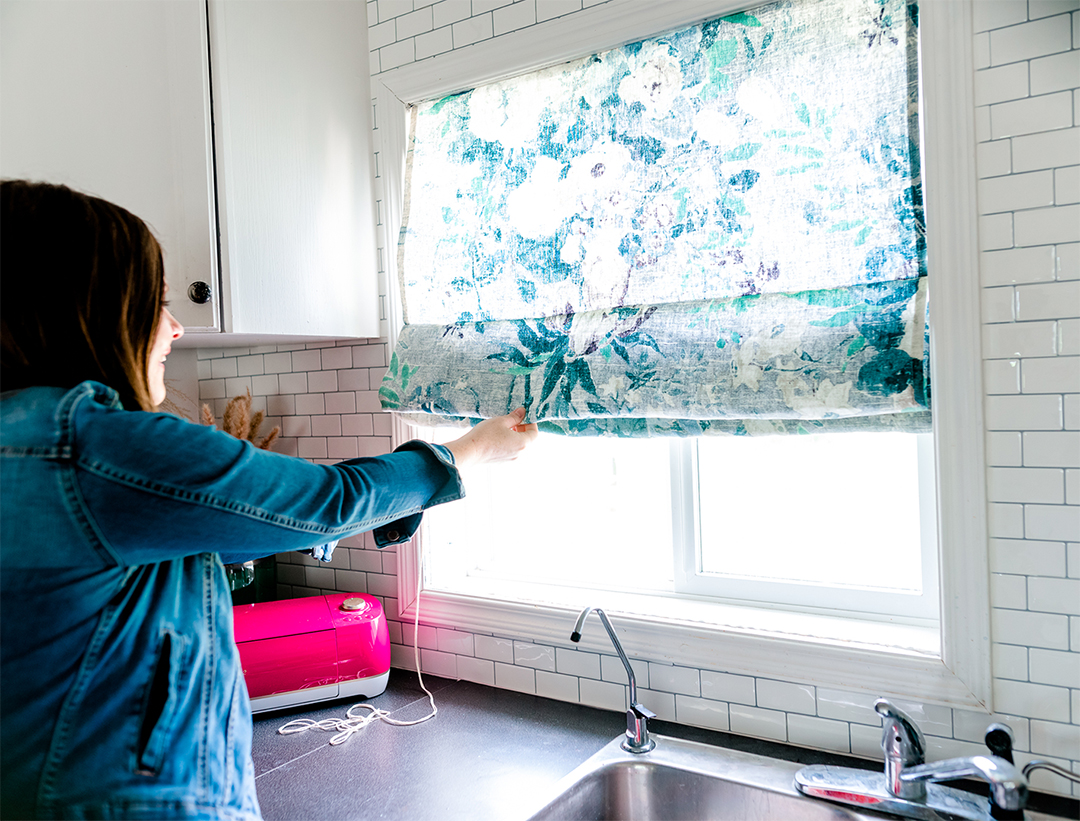
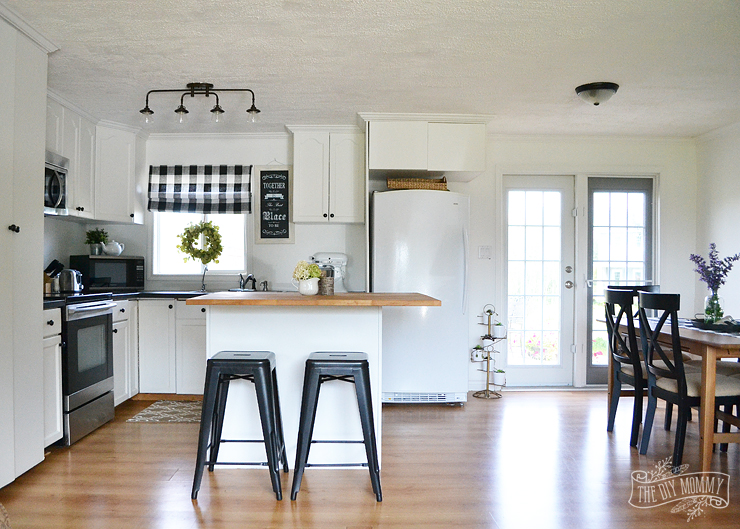
It’s not hard at all! Roman shades always look so lovely and tailored, but that doesn’t mean they are hard to make. I made this pretty little Roman shade for our guest cottage kitchen which you can tour right here, and I think it was a great little DIY that anyone with a sewing machine can make. They’re the perfect sort of window covering for a narrow window, a window where you want some privacy, or a window where you don’t want a drape that hangs to the floor. They are great for windows over the sink in a kitchen, a bathroom window, or a laundry room window too!
NOTE: This is NOT a good option for windows that a small child can access, because of the string. If you have small and curious children around, please use cordless fabric shades or cordless Roman shades. And, if you’d rather not sew and hot glue or fabric glue is more your style, you might like these no-sew fabric covered shades that I posted about previously. If you DO want a fabulous sewing project and you like the look of Roman shades, you should definitely try this one out! The pleats and drape of this Roman shade make it look fancy and it’s really quite a simple sewing project.
JUMP TO THE PRINTABLE INSTRUCTIONS
What is the best material to use to make Roman shades?
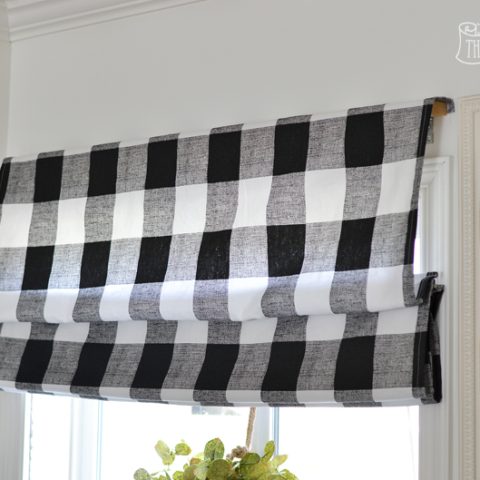
What you should look for is something light and easy to work with. You are not attempting a blackout blind with this DIY, just something decorative. So don’t choose a heavy material, and the colour doesn’t matter either! Go as light and pretty as you want. I have made a couple of these shades. The first was made from this gorgeous large-scale black and white plaid fabric from OnlineFabricStore.net. I absolutely adore it! I’m tempted to get it in a couple of other colours too. (Check out the coordinating toile I also found at OnlineFabricStore.net in the guest cottage bedroom here). This is one of my absolute favourite places to get fabric online. Their fabrics are beautiful and trendy, and I always love their superb customer service!
How to make custom Roman blinds?
If you’re wondering if I’m ever going to get to the how-to of these pretty Roman blinds, wait no longer. Here is the materials list and an explanation for how I made this gorgeous floral printed Roman shade with a step-by-step guide!
Watch this YouTube video below to see how to make a DIY roman shade:
Materials:
- 2 yards of your choice of fabric. I recommend a decorative fabric that is light and easy to work with
- 4 wood dowels that are 1/4″ in diameter and are as wide as you want your shade
- A 1 x 2″ piece of wood that’s as wide as you want your shade (if you want to paint this white like I did or another colour to make it blend in with your walls or window frame, paint it first!)
- 2 brackets to mount the shade to the wall (unless you want to mount your shade inside your window frame, in which case these brackets won’t be necessary)
- Screws for wall mounting
- 2 eye screws (sometimes called an eye hook)
- Thin nylon string (macrame cord works too)
- 8 small plastic shade rings
What equipment do I need to make a Roman blind?
You really don’t need much for this little project! The tools you need to have on hand are:
- Wood staple gun
- Sewing machine
- Needle & thread
- Screwdriver (if you are using the mounting brackets)
Instructions:
1. Measure the size of your window
The most accurate way to do this is to take a tape measure and write down the height and width of the window. This is where you need to decide if you want to use an outside mount or inside mount for your Roman shade, because it will affect your width measurement!
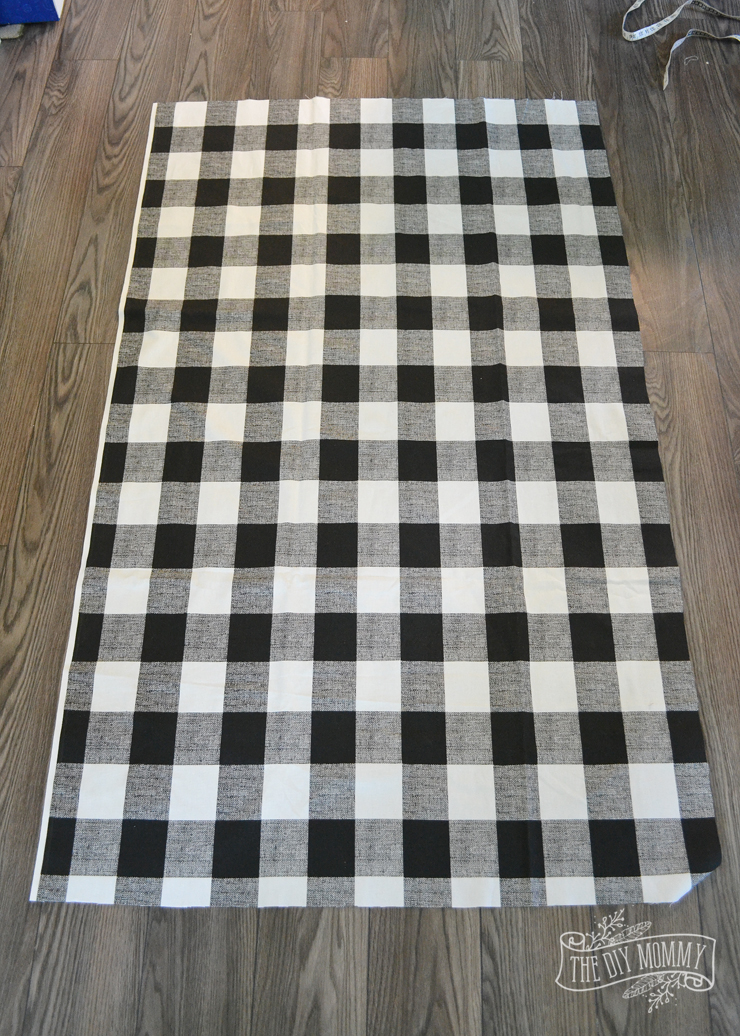
2. Cut your fabric
Then, it’s time to make your fabric the right size for your project. First, measure so that you have enough fabric for 2 inches wider than you want your shade to be and 7 inches longer, and cut away the extra fabric. Remember that you want your shade to completely cover the top edge of your window (and even a bit more) when it’s fully let down. I used Premier Prints Anderson Black fabric from OnlineFabricStore.net. I think it is an absolutely amazing fabric that was perfect for this project.
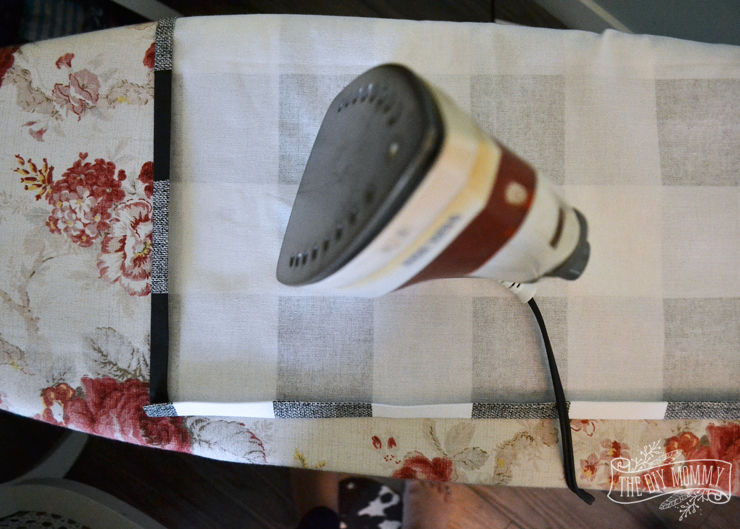
3. Sew the seams
Create your seam allowance by pressing the sides and bottom of the shade over 1/2″ to the wrong side. Fold another 1/2″ and press again. Then, sew these hems down with a sewing machine. Make sure to leave the two ends of the bottom hem open so that you can slide a dowel through it later.

4. Make the dowel pockets
Now it’s time to make the dowel pockets. If you’re wondering, “how far apart should dowels be for Roman shades?”, I’m about to tell you! Subtract 3″ from the remaining height of your fabric (for stapling your blind to your piece of wood later on) and divide that by 4. The resulting number will be how far apart you want each dowel casing. Mine ended up being 13″ apart. Start measuring from the bottom and mark where your dowel casings will be with a pin. You can also draw a pencil line with a ruler. Just make sure you mark the exact spots so your dowels are the right distance apart when your custom shades are done.
5. Sew the horizontal lines
Now you’re ready to sew the horizontal lines for the dowel casings! Fold your blind right sides together at each mark and pin. I confess, I’m a bit of a rebel when it comes to pinning and I didn’t do it for this step. However, if you’re a new sewer I recommend always pinning your lines because it will really help you make sure you sew the right place! For this step, you want to sew a 1/2″ seam at each mark and then insert a dowel into each casing you’ve created.
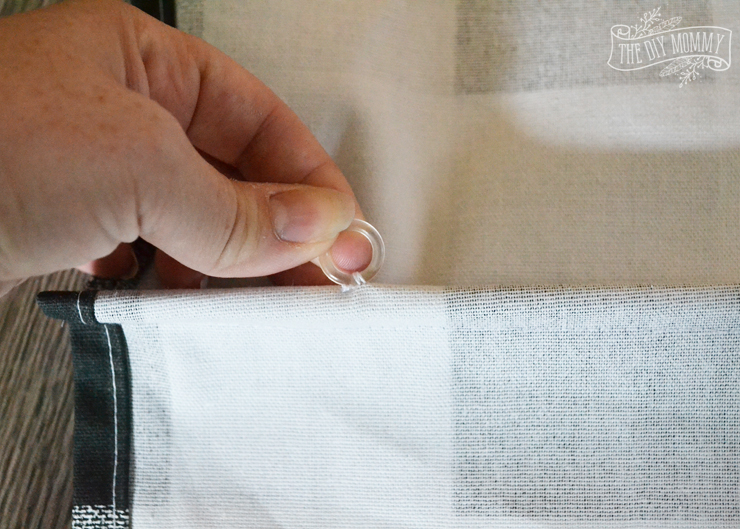
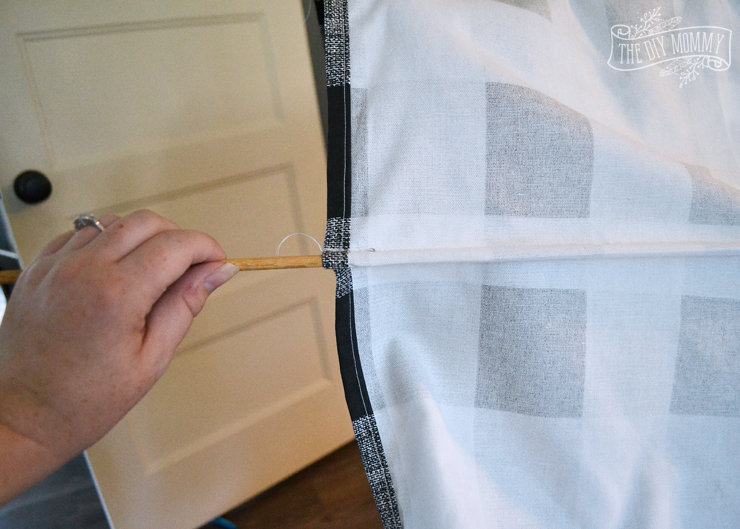
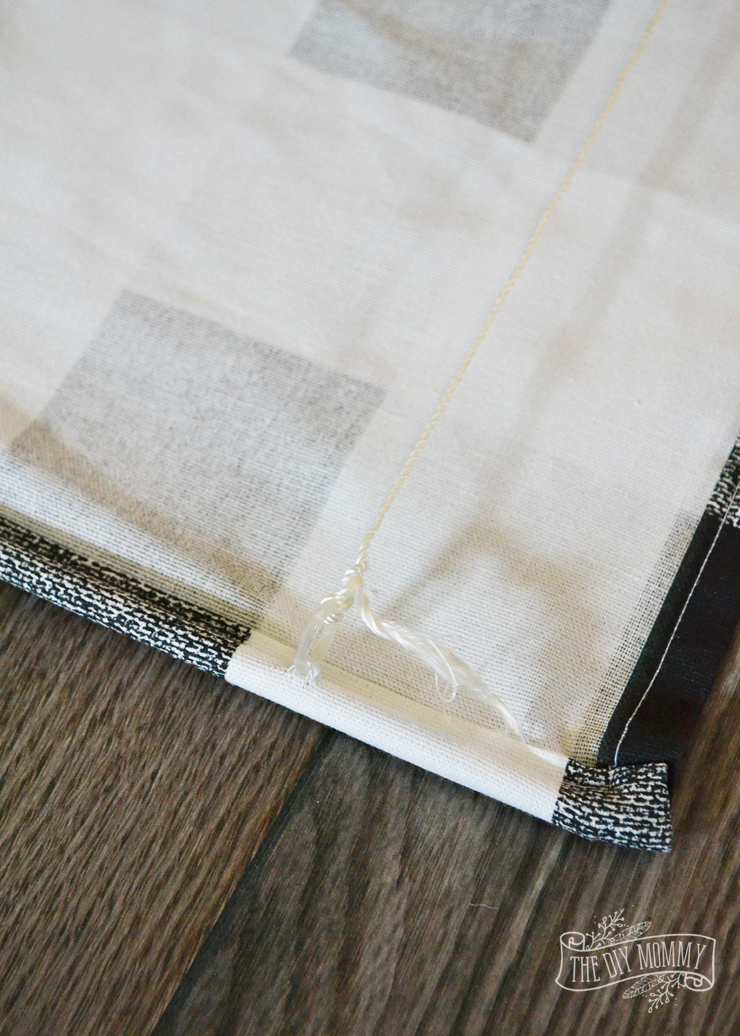
6. Adding the blind rings
Next, hand sew the small blind rings onto the blind. Sew one on each side of each dowel casing, about 3″ from each end. In this step, you are creating your mini-blind mechanism for raising and lowering the shade.
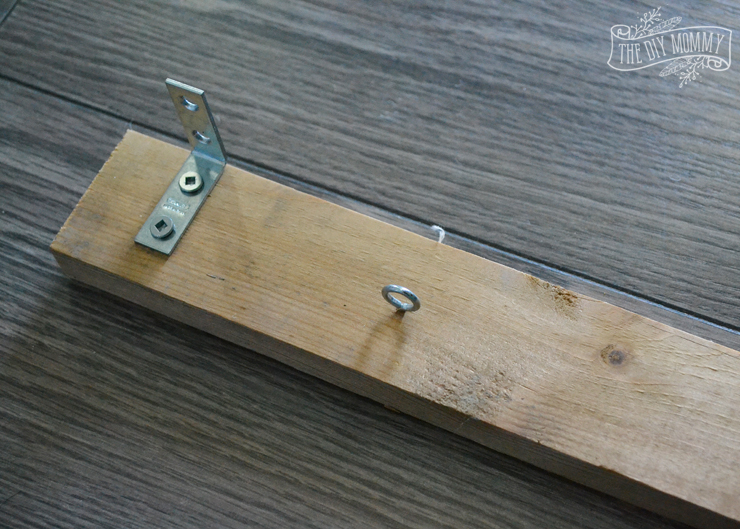
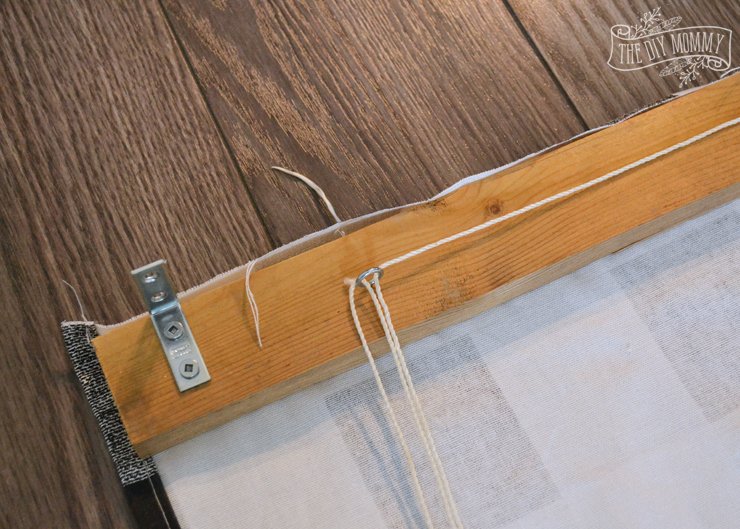
7. Prepare the wooden hanger
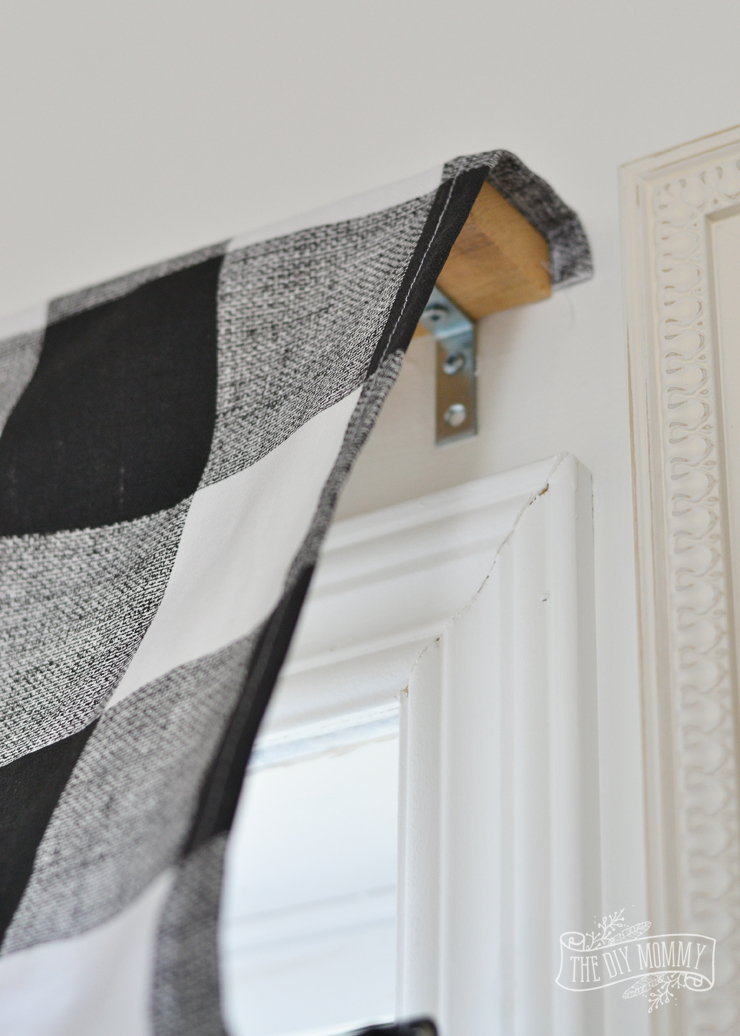
If you plan to do an outside mount for your shade, screw on your brackets about 1″ from each end. If you want to mount your shade inside your window frame, leave out this part! But whether you are doing an inside or outside mount, you will need to screw in the eye screws about 3″ from each end as shown. Don’t worry about the screw holes, everything will be covered by the fabric in the end!
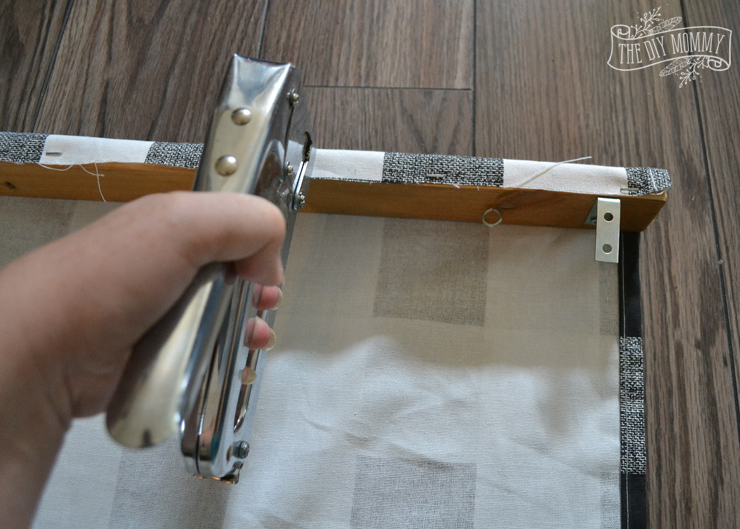
8. Secure fabric to the wooden hanger
Next, staple the fabric blind to the piece of wood by wrapping the fabric piece around the thick side of the wood and onto the thin side as shown.
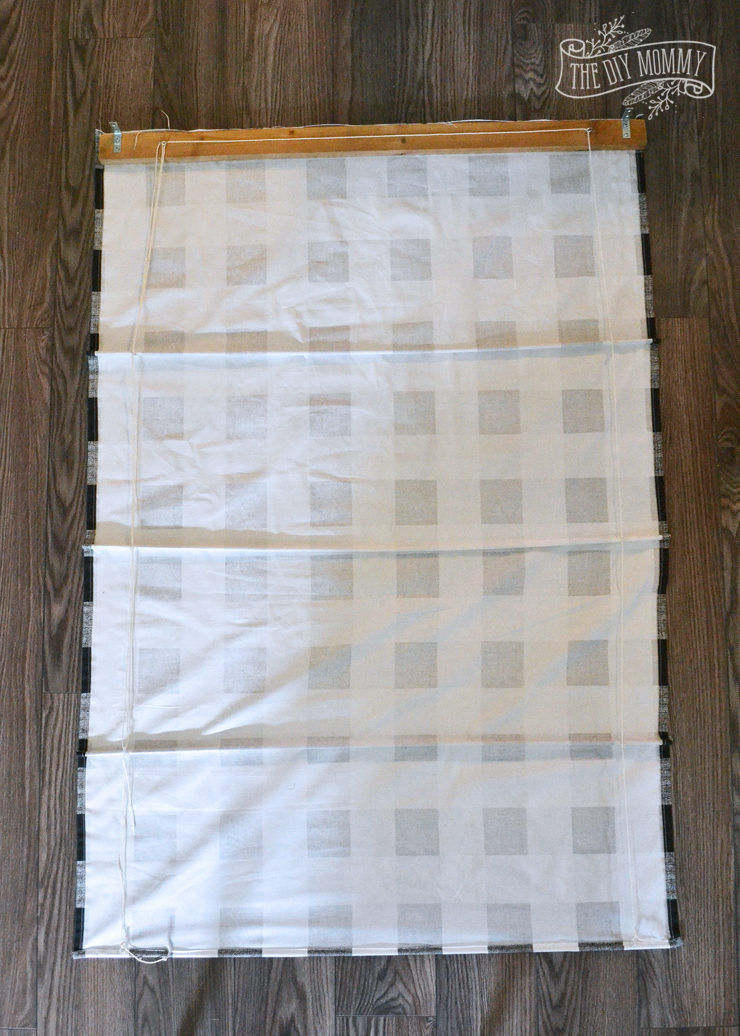
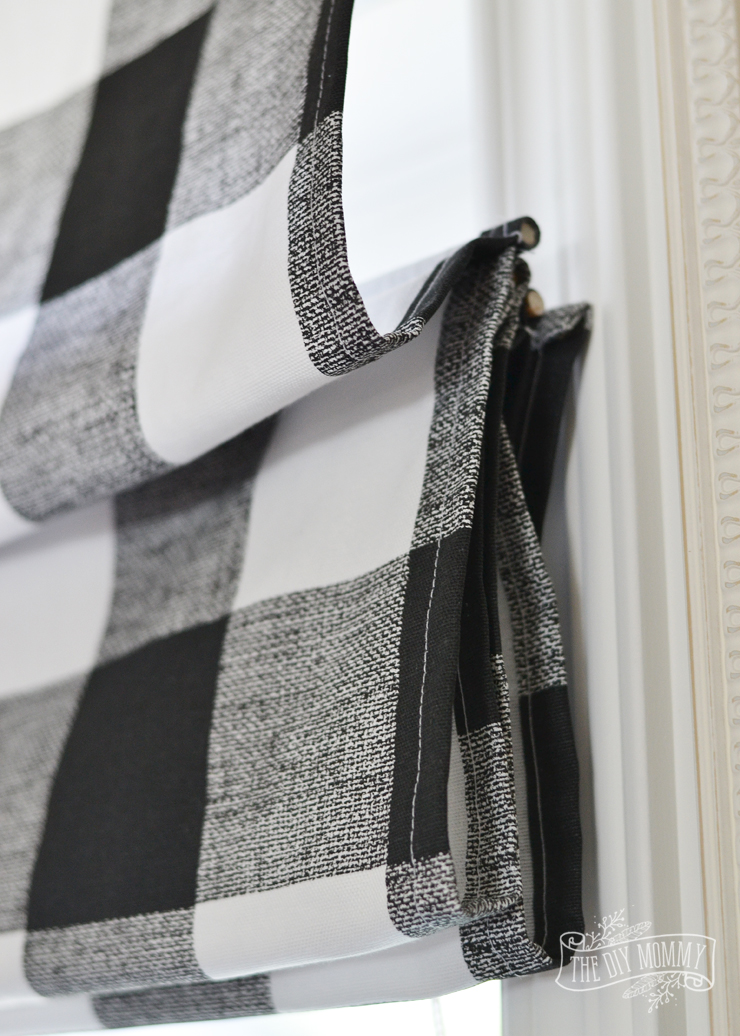
9. Attach the string
Finally, it’s time to tie on the nylon string that will pull the blind up and down. Use the photo above as a guide, and tie one end of the string onto the bottom right ring. Thread it upwards and through each ring above, through the right eye screw, through the left eye screw, and down through all of the remaining rings on the left. Leave at least 6″ of extra string and cut off the rest.
10. Continue stringing the blind
Now for the left side, tie one end of the string to the bottom left ring, thread it up and through each ring above, through and over the top left eye screw, and then back down through all of the rings on the left again. Leave some extra string and cut off the rest. Make sure to use good, solid square knots when tying the string so that it doesn’t come loose.
11. Mount the blind to the window
At this time you can mount your Roman shade above your window using the brackets if you are mounting on the outside, or just by screwing it directly into the window frame if you are doing an inside mount style.
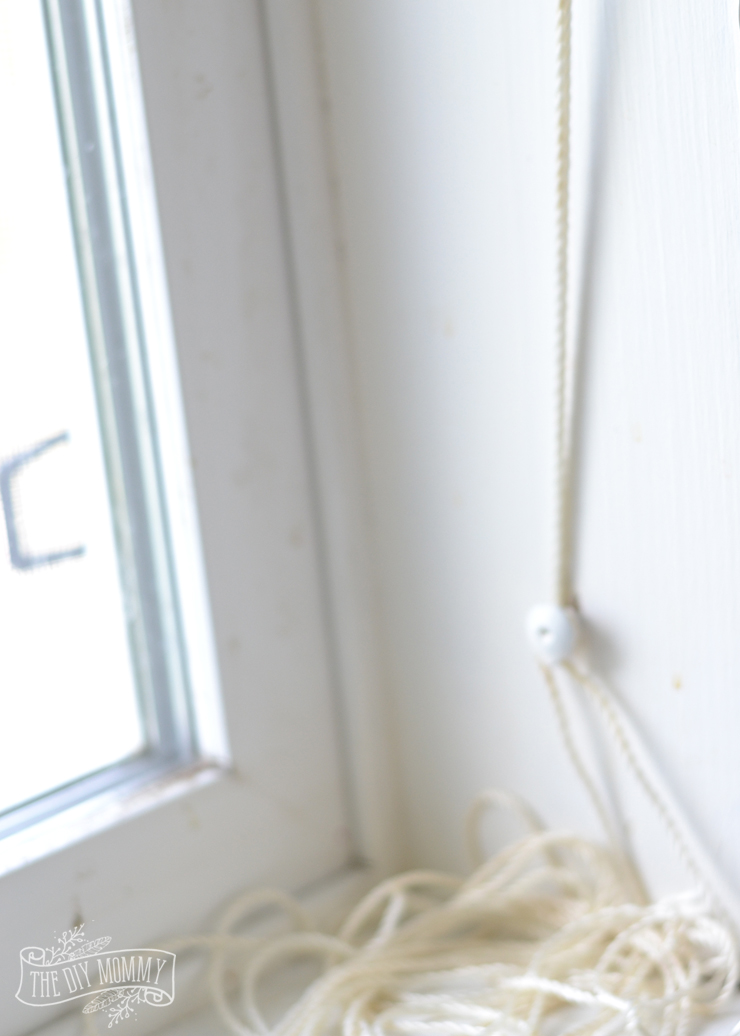
12. Install a hook to keep the shade in position
Install a hook or screw at the bottom side of your window to hold the extra string and wrap the string around it to keep the shade in the desired position.

That’s it, you’re done!
I hope you enjoyed this roman shade tutorial, and have used it to create your own custom window treatment that you can be very proud of! I would love to see your choice of fabric and what room you decided to make a window shade for. Tag me @thediymommy with your before and after window pics!
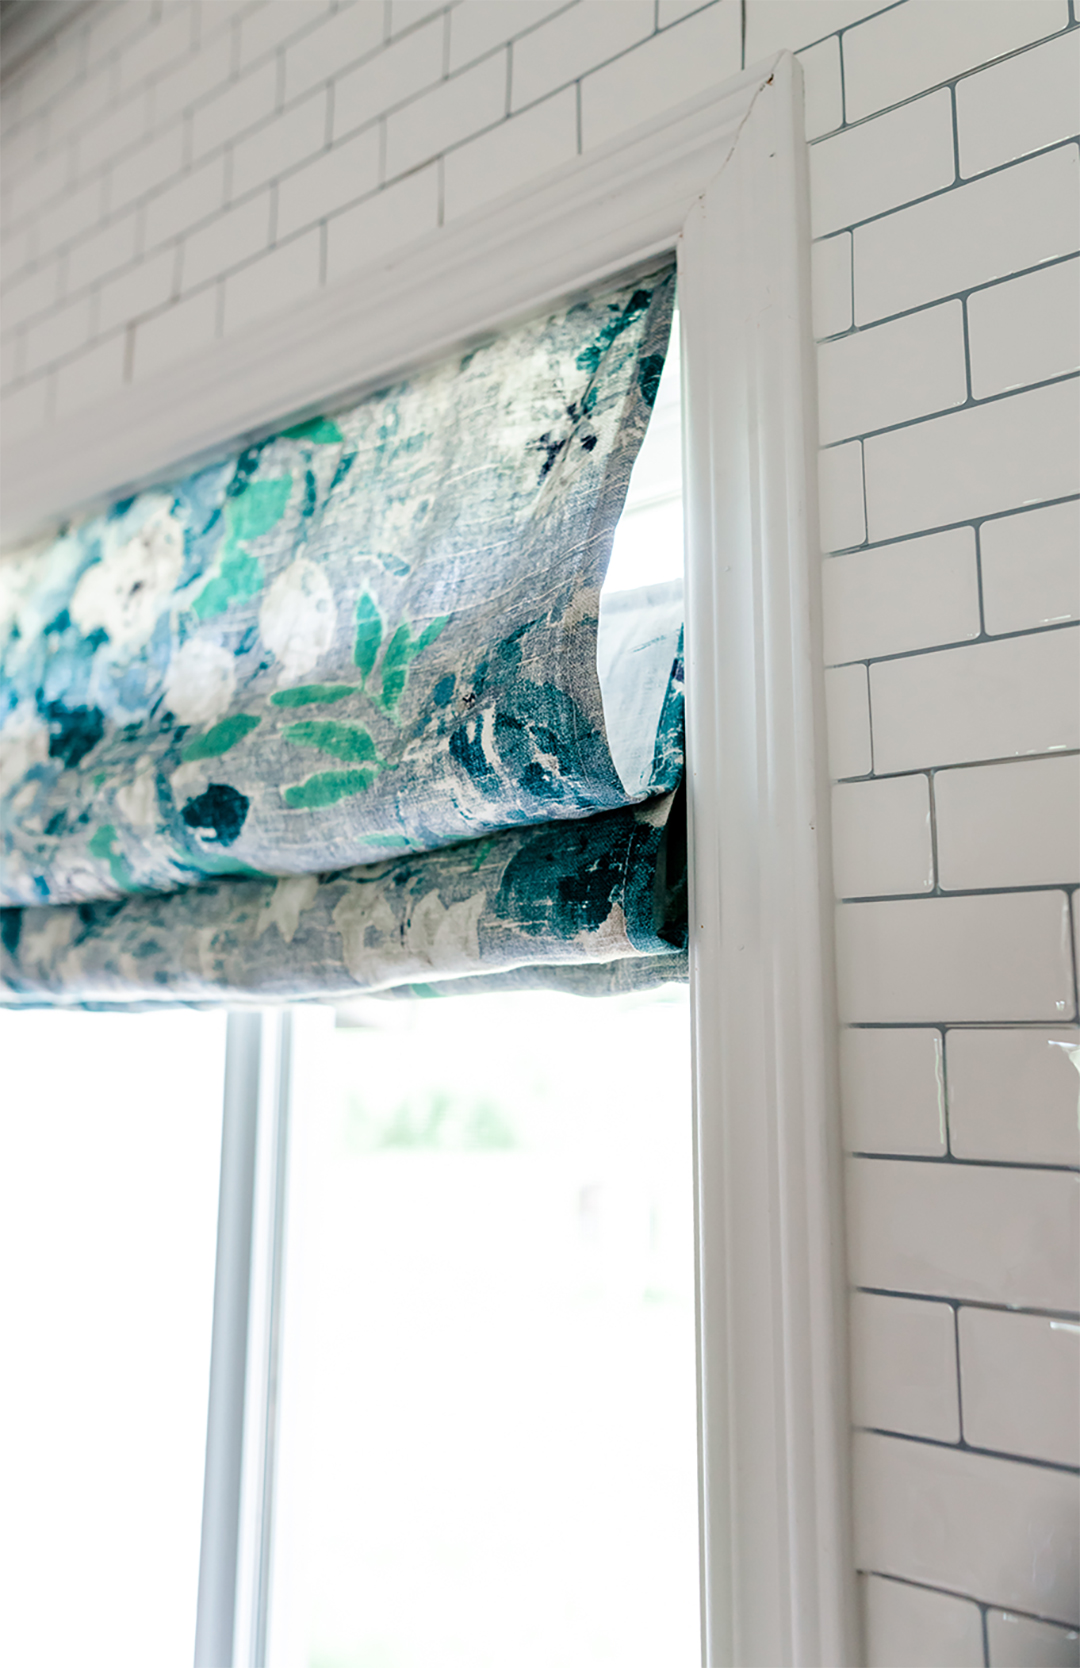
Doesn’t that look so chic?!
Make sure to check out all of the other rooms in our guest cottage to see where else we put this fabric:


Let’s make it!
Sew a DIY Roman Shade
Create a stylish and tailored window covering with a couple yards of fabric and some inexpensive supplies.
Materials
- 2 yards decor fabric
- 4 wooden dowels that are 1/4″ in diameter and are as wide as you want your shade
- A 1 x 2 piece of wood that’s as wide as you want your shade
- 2 brackets to mount the shade to the wall
- screws for wall mounting
- 2 eye screws
- thin nylon string
- 8 small plastic shade rings
- needle & thread
Tools
- sewing machine
- wood staple gun
Instructions
- Cut a piece of fabric that’s 2 inches wider than you want your shade to be, and 7 inches longer. Remember that you want your shade to completely cover the height of your window (and even a bit more) when it’s fully let down. I used Premier Prints Anderson Black fabric from OnlineFabricStore.net for this project.
- Press the sides and bottom of the shade over 1/2″ to the wrong side. Fold another 1/2″ and press again. Sew these hems down with a sewing machine. Make sure to leave the two ends of the bottom hem open so that you can slide a dowel through it later.
- Now it’s time to make the rest of the dowel casings. Subtract 3″ off of the remaining height of your fabric (for stapling your blind to your piece of wood later on) and divide that by 4. The resulting number will be how far apart you want each dowel casing. Mine were 14″ apart. Start measuring from the bottom, and mark where your dowel casings will be with a pin.
- Fold your blind right sides together at each mark and pin. Sew a 1/2″ seam at each mark and then insert a dowel into each casing you’ve created.
- Prepare the wooden hanger by screwing on the brackets about 1″ from each end, and screwing in the eye screws about 3″ from each end as shown.
- Staple the fabric blind to the piece of wood by wrapping the blind around the thick side of the wood and onto a thin side as shown.
- Finally, it’s time to tie on the nylon string that will pull the drape up and down. Use the photo above as a guide, and tie one end of the string onto the bottom right ring. Thread it upwards and through each ring above, through the right eye screw, through the left eye screw, and down through all of the remaining rings on the left. Leave at least 6″ of extra string and cut off the rest.
- For the left side, tie one end of the string to the bottom left ring, thread it up and through each ring above, through and over the top left eye screw, and then back down through all of the rings on the left again. Leave extra string and cut off the rest. Make sure to use good, solid square knots when tying the string so that it doesn’t come loose.
- Mount your Roman shade above your window using the brackets.
- Install a hook or screw at the bottom side of your window to hold the extra string and wrap the string around to keep the shade in the desired position.
Pin Me:
I love me a roman shade! I have bamboo ones in my house, but no I did not make them myself – I’m not that talented! I might be talented enough to make a fabric one though…? Thanks for the share! Love the black and white plaid. It’s both cozy and chic at the same time.
I’ve made 3 because of your easy instructions. Thank you so much. A great tutorial
Hi DIY Mommy,
Would it work for me to revise this roman shade, so that I inset into the window rather than on the outside of the frame?
It’s SO pretty!
thank you,
Sharon
Yes, you could adapt the roman shade to fit inside a window frame.
Beautiful job! It might be a good idea to add a room darkening liner for those of us who need to have privacy on our windows. I did this to my store-bought bamboo roman shades in my bedroom. What a huge difference it made. Now the whole world doesn’t have to see into my bedroom at night LOL
What a great idea, Joan!
Great directions, can’t wait to try this!
I love the look & your directions are very easy to follow. We have a wood cornice over a small bathroom window do you think there is a way to mount this inside the window, maybe a tension rod?
Thank you, Robin for the such kind words! You will have to give it a try and let us know how it works out!
If you put a third row of rings in the middle, the shade won’t sag in the middle.
Great tip Pamela!!
How would you thread the string through the middle row?
tie at bottom , thread up thru loops , thead thru left eye, down thru loops on right and proceed. as directed
Thank you for that advice,
Nice idea! So..If I try this, do u know the instructions regarding stringing through these new centre rings? I’m sure it’s prob an obvious answer but im just not seen no it. Yet. DIY mommy’s instructions on stringing this shade we’re actually the 1st time I ‘got it’ immediately as soon as I read it. I read many others over the years but just found the stringing instructions too confusing, so thx to her for writing it out well & easy to understand. ?
You know, i have a tinted bathroom window that’s been driving me nuts, its tinted so that others cant see in but they can see the silhouette of people when the lights on at night. Its a long window and drapes don’t look right in a bathroom, blinds are not an option either. I did want to use a roller blind but i couldnt find one long enough.
Now i find this idea of yours – and i like it. I think it would work brilliantly so I’m gonna get started on it tomorrow! Thanks.
We’re so happy you were able to find what you were looking for! Let us know how it turns out:)
Please tell me about the ceiling fixture. I love it and your design style.
You should of painted the board white before you used it so you couldn’t see the raw wood on ends. Like your idea but I have to make it so it can be taken down & washed. Couldn’t it be made with a bigger dowel to slide into top & have curtain rod hooks over window so rod would set in the rooks & sew on small circle things on back? I have glass door that goes from my bedroom to deck upstairs that I need something that covers door but I can raise to let in light & wash as I have 7 cats & 3 dogs in the house.
Attaching the blind withe Velcro to the front of the board and using Roman shade magnets and Roman shade magnet tape (to make little “pockets” to encase the magnets) will make it cord free and removable for cleaning.
I don’t like romantic shades….but they look great!
Thank you, Jessica
Your ‘guest cottage’ is at least twice the size of my “efficiency” unit in a low-income development, and I am so jealous of the quantity of windows, placement of them & doors, wood floors (!)…I wish I could move in.
Apart from all my jealousy, I seriously adore how you broke down the secrets of creating my own Roman shades. My (own) bedroom window faces another building so I get glare from our own security lights plus the ones opposite. I resorted to a light-blocking roller blind behind my regulation slat blind (fortunately the “reveal” is deep. But if I’d had this post back then…
Thanks for the kind words, Janis. Christina actually has a DIY on how she made a roller blind pretty. You should check it out ?.
https://thediymommy.com/make-a-no-sew-fabric-covered-black-out-blind/
The exposed board can be easily covered by neatly gluing on the fabric and encasing the ends. Paint the brackets to help them diseappear. I made Faux Roman shades that don’t need to close and no cords.
Where is your wreath from that hangs from the roman shade 🙂
Just wanted to thank you for the set by set instructions. I was having a hell of a time with the last part when you would have to thread the string threw. It just wouldnt work, but thanks to your directions I feel better now. Keep up the great sewing projects
Thank you for taking the time to put this instructionable together. It will be very helpful as I had no idea how to make one after my sister asked me to sew one for her bathroom.
Great post! You do it right and good luck! Regards
What’s up, the whole thing is going nicely here and ofcourse every one is sharing facts, that’s actually excellent,
keep up writing.
Useful information! My wife finished it from your guide. Thanks for sharing
Hello! Thank you so much for these clear and good instructions! First diy video that I understood totally! 🙂 Now my roman shades are on my window!! I made them from linen 🙂
have a nice week. Satu/Finland
Love the tutorial! I have a question – are you able to see the dowels on the front when not raised? It seems with only a 1/2 inch seam to hold them in place they might be visible. Thanks!
Hi! Love your shade!
I am making dark out shades for our bedroom so they are heavy. My problem is they are folding starting at the top instead of bottom. I have 5 cords starting at the bottom going up and running through screw eyes attached to wood strips spaced 10” apart.
Love the fabric! I always cover my board with white fabric or paint it white so you don’t see the board on the ends.
It’s so wonderful..!!!
Very helpful tutorial and you have mentioned step by step how we can sew a diy roman shade for our home. The color and texture looks stylish and unique. Thanks for sharing this..
With a little more fabric, you could “upholster” the board, matching the pattern of course, to make it more finished. BTW I’m pinning this one!
I love your roman shades! And your tutorial to make them is so easy to follow that I might actually be able to pull a few of these off myself! Thanks so much for sharing this at Farmhouse Friday!
So pretty! Could you mount it at the ceiling and make your window look so much bigger? I’m going to give it a try!
I cant print the directions without ads on 2nd page covering the content ?
I love this, but I would probably use a tension rod at the top, that way I could take it down, remove the dowels and throw it in the wash.
I would spray paint the head mounting board in white or cover it with cheap lining fabric. The wood is too visible, otherwise it’s perfect.
Hi – this looks doable! I have a question – the window I’m trying to cover is about 7.5 feet long. Do you think this still works for that that long of a run?
I want to make shades for my 63 inch long windows.I need to line them for room darkening and sun protection. Would this be too much fabric to have it fold nicely? Would it be too heavy or bulky?
Thank you. Exactly what I was looking for. ❤️
Made it and I’m nit crafty. Sew basic. I was confused out to run strings. Once I figured ou t there are 3 separate strings made sence. Oh I ran 4 sets of cords. One up middle it h was good decision si ce just was 39,”
I have to make not one but two of these for small bathroom windows. You made the process seem much less daunting. Pinning for reference. Thank you
Such a great project! I was a bit intimidated at first, but very easy step by step instructions. I made a very cute shade for my daughter’s kitchen. I modified the pull system, but It turned out awesome. Thanks so much!
Instead of buying dowels, I used bamboo barbecue skewers, they work perfectly if your windows are 32 inches or less and there are a dozen per pack
I think this post proved that your are my best friend
Informative blog and it was up to the point describing the information very effectively. Keep updating more post like this.
What a great and informative post! Thank you so much for sharing.