Beginner DIY Macrame Keychain Tutorial (2 Easy Patterns)
This post may contain affiliate links · This blog generates income via ads
Macramé has been around for centuries, but it has recently made a big comeback in the crafting world. Not only is it a fun and therapeutic hobby, but it’s also a great way to create unique and personalized decor and accessories. One of the easiest macrame projects to start with is a keychain. It is simple, quick to make, and the end product is super useful. In this tutorial, I’ll go over two beginner-friendly macrame keychain patterns.
If you love to craft, I bet you’ll love the art of macrame! I started experimenting with it a few years ago, and it’s one of my favourite de-stressing activities. Check out how I made a gorgeous macrame table runner here – it was such a fun DIY!
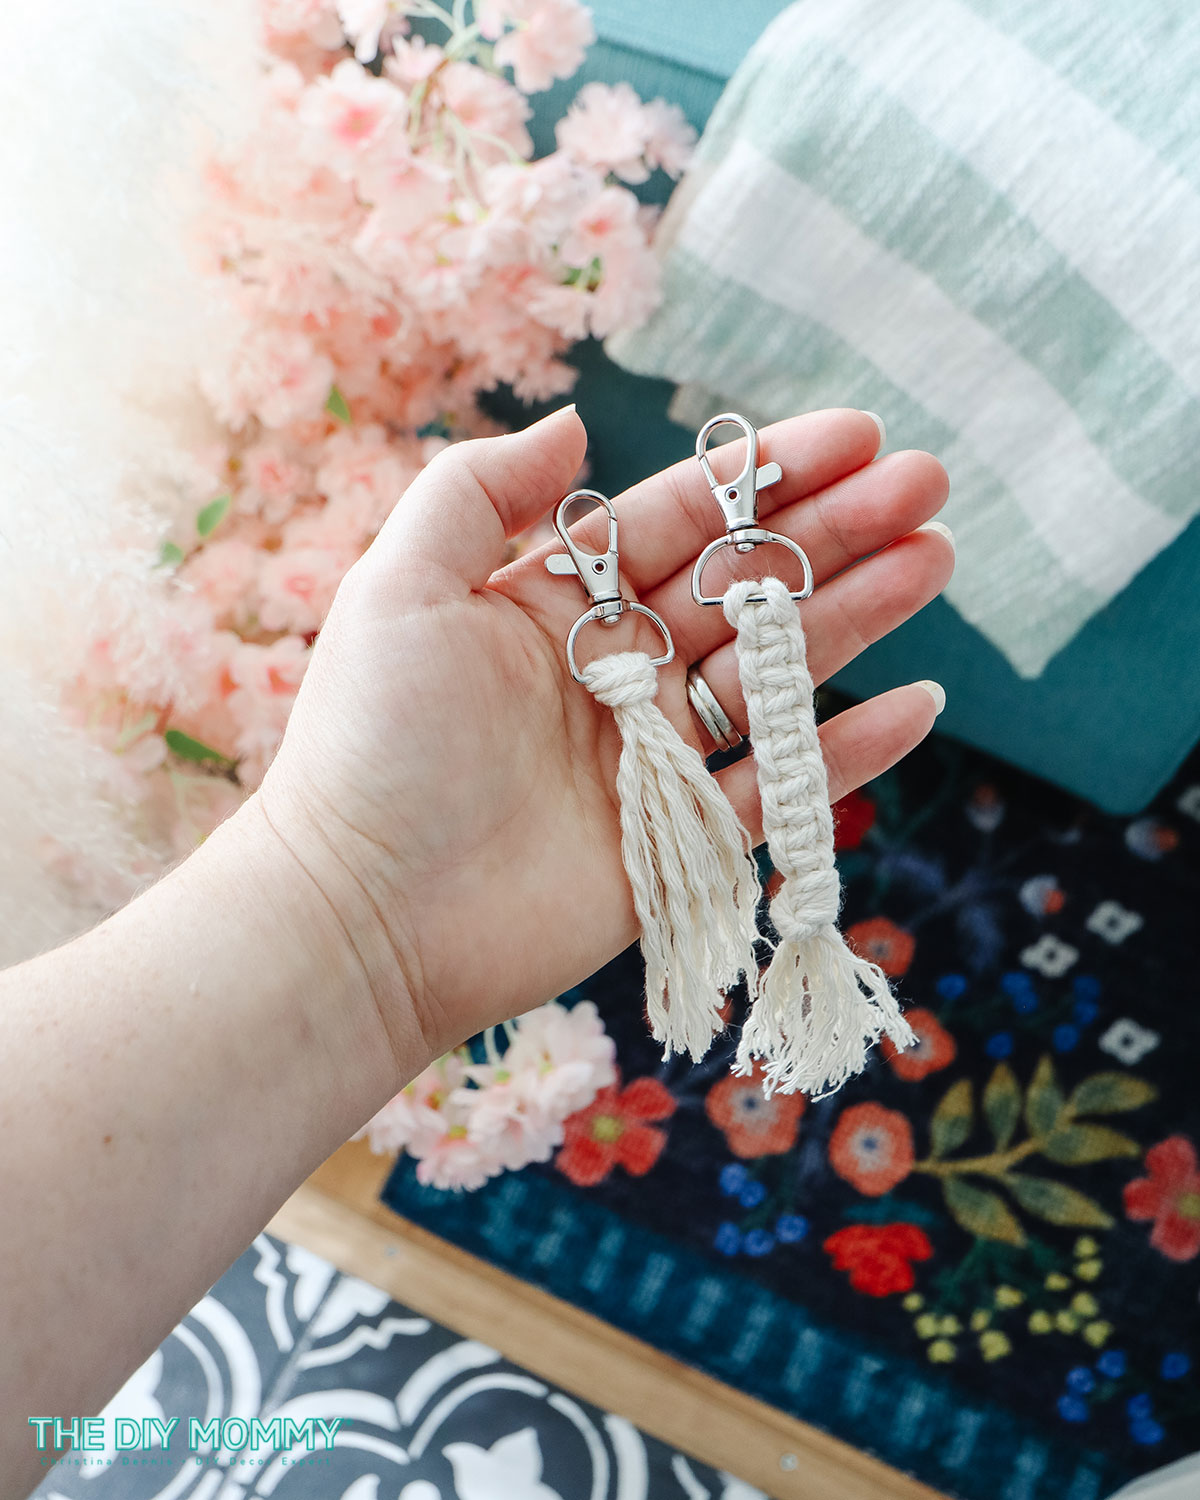
If you’re new to macrame, making a smaller project like these keychains is a fantastic way to dip your toes into this textile art. The tassel keychain is SUPER simple with only one macrame knot, while the square knot keychain is the next step up with two macrame knot styles. Both are very quick to make, and they would make lovely gifts. You can find the inexpensive materials required to make these on Amazon, and I’ve linked them below. Let’s get started with these easy step-by-step tutorials!
Watch my video on how to make both of these simple macrame keychains:
Pattern 1: Simple Tassel Keychain
What you’ll need:
- Cotton rope macrame cord, 3mm (approx 2 feet; I like the natural but you can buy it in your favorite color)
- Keychain clip with D ring
- Scissors
Instructions:
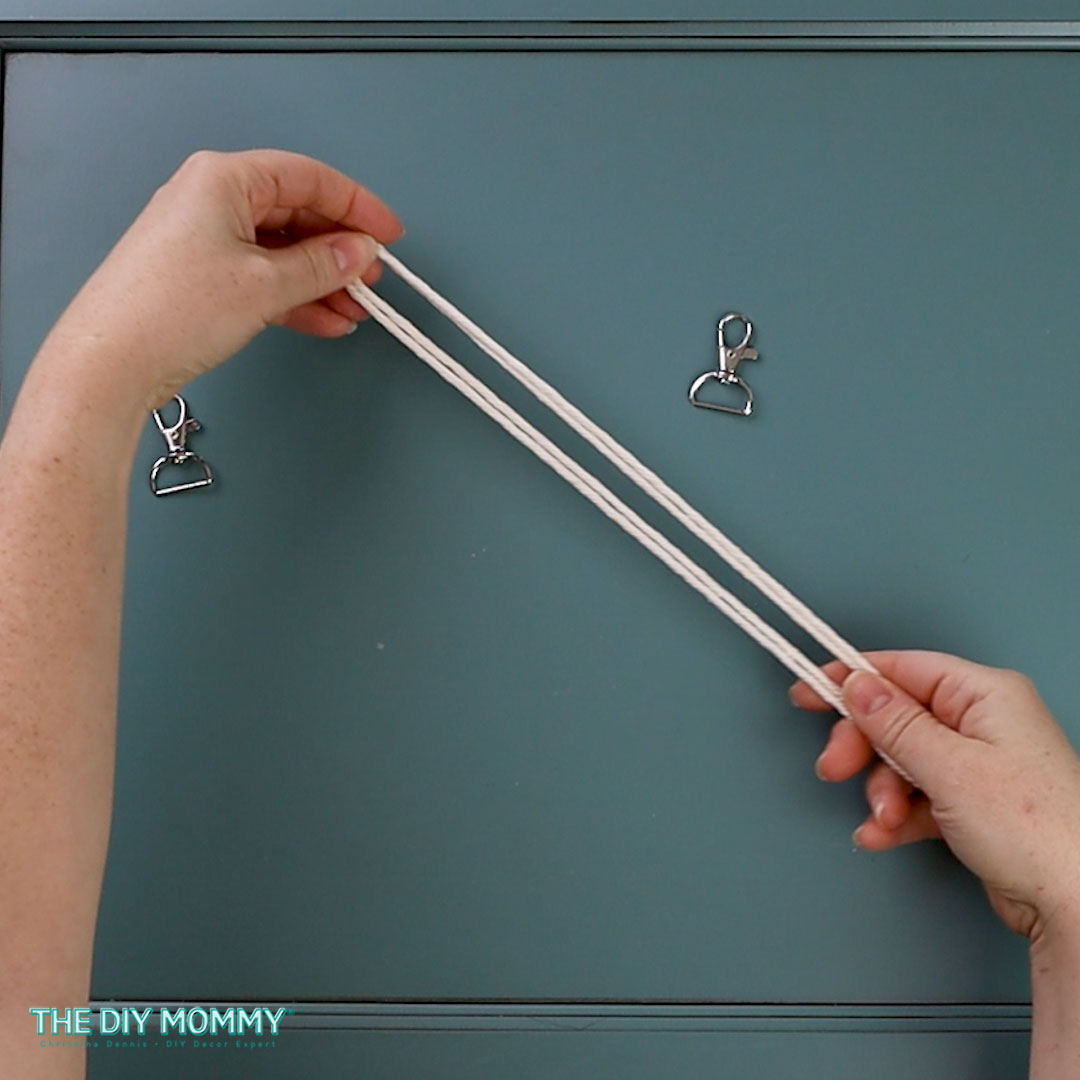
Cut 2 pieces of cord approximately 12 inches long each with scissors.
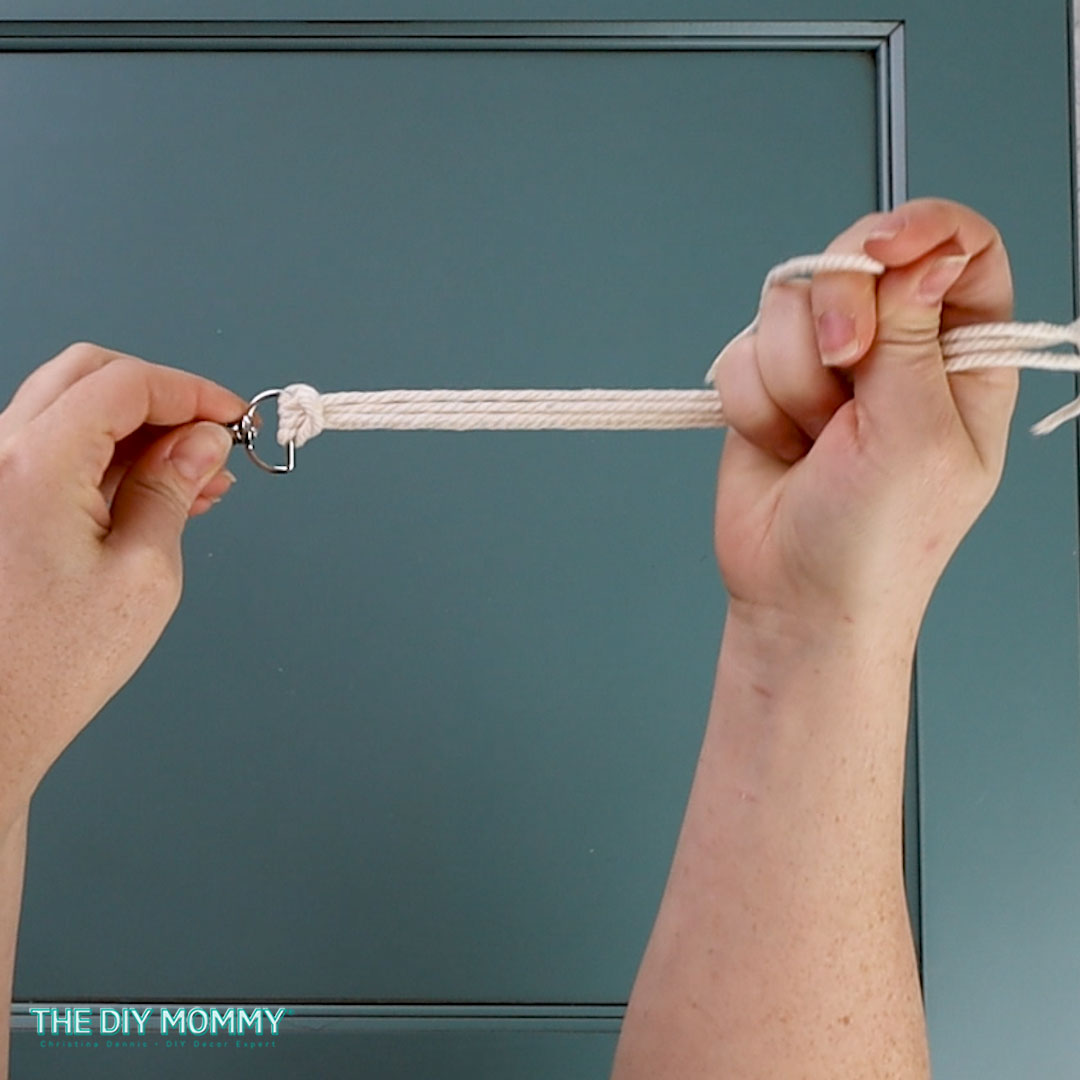
Holding the 2 rope pieces together, fold them in half. Put the folded end of the cord through the D-ring on the keychain, then pull the cut ends through the loop created by the fold. This is called a Lark’s Head Knot.
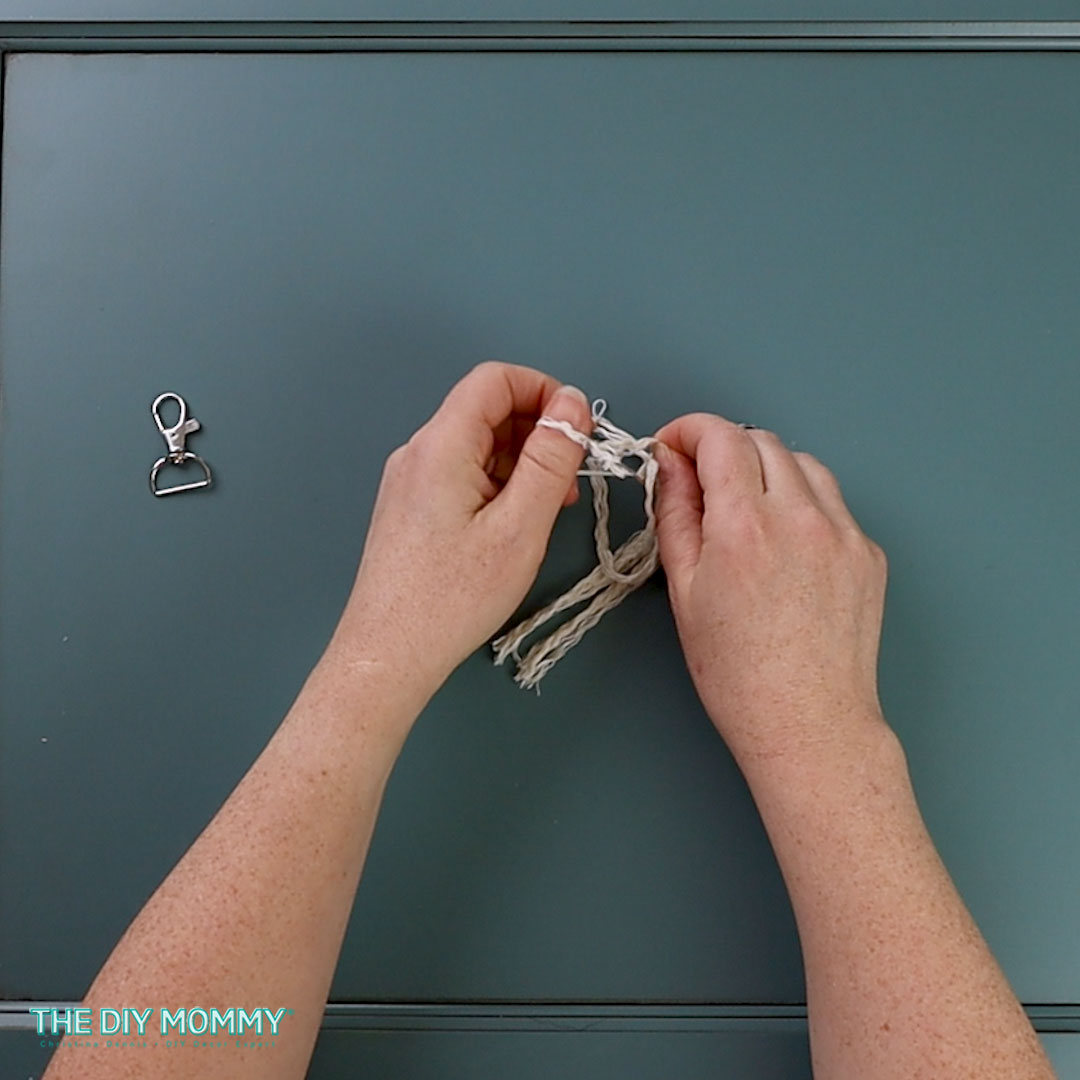
Trim the ends of the cord as desired, and fray them by pulling apart the twisted rope. Trim again as desired.
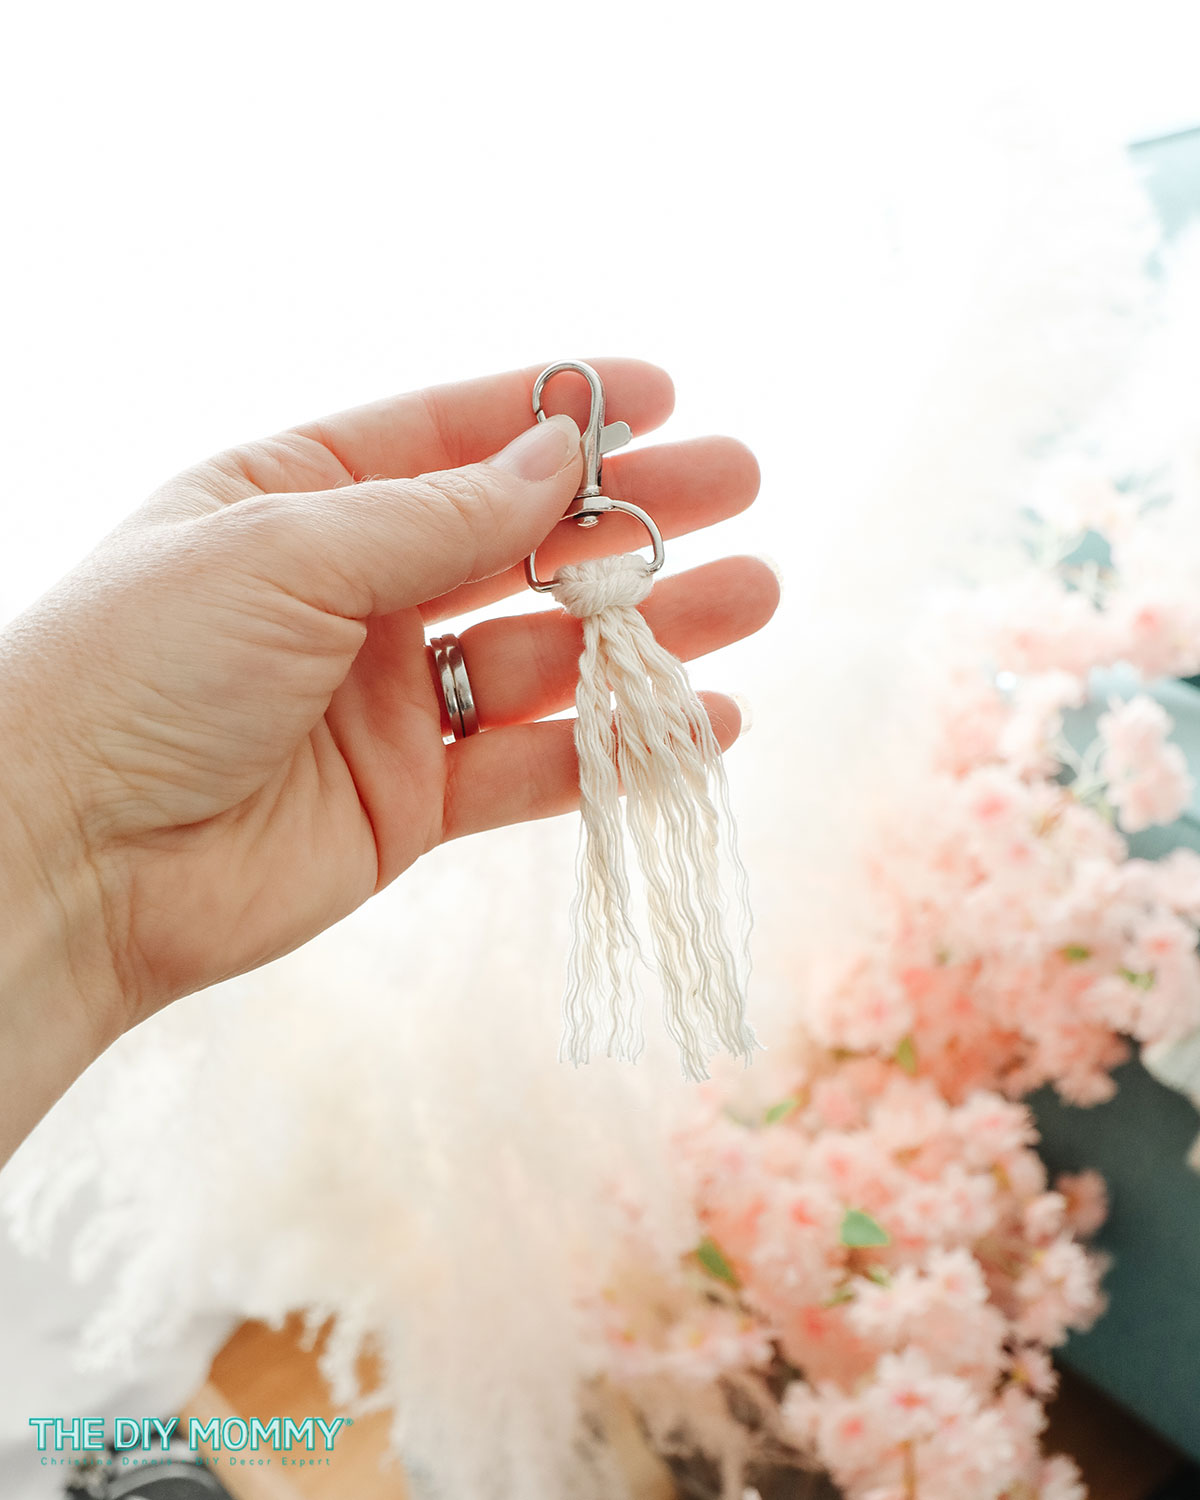
This easy macrame keychain only takes a few minutes to make, and I think the tassel is adorable! This is a great DIY to start with for an absolute beginner & to practice one of the most basic knots in macrame: the larks head knot.
Pattern 2: Basic Square Knot Keychain
What you’ll need:
- Cotton rope macrame cord, 3mm (approx 2 feet)
- Keychain clip with D ring
- Scissors
Instructions:
Cut 2 pieces of rope approximately 12 inches long each with scissors.
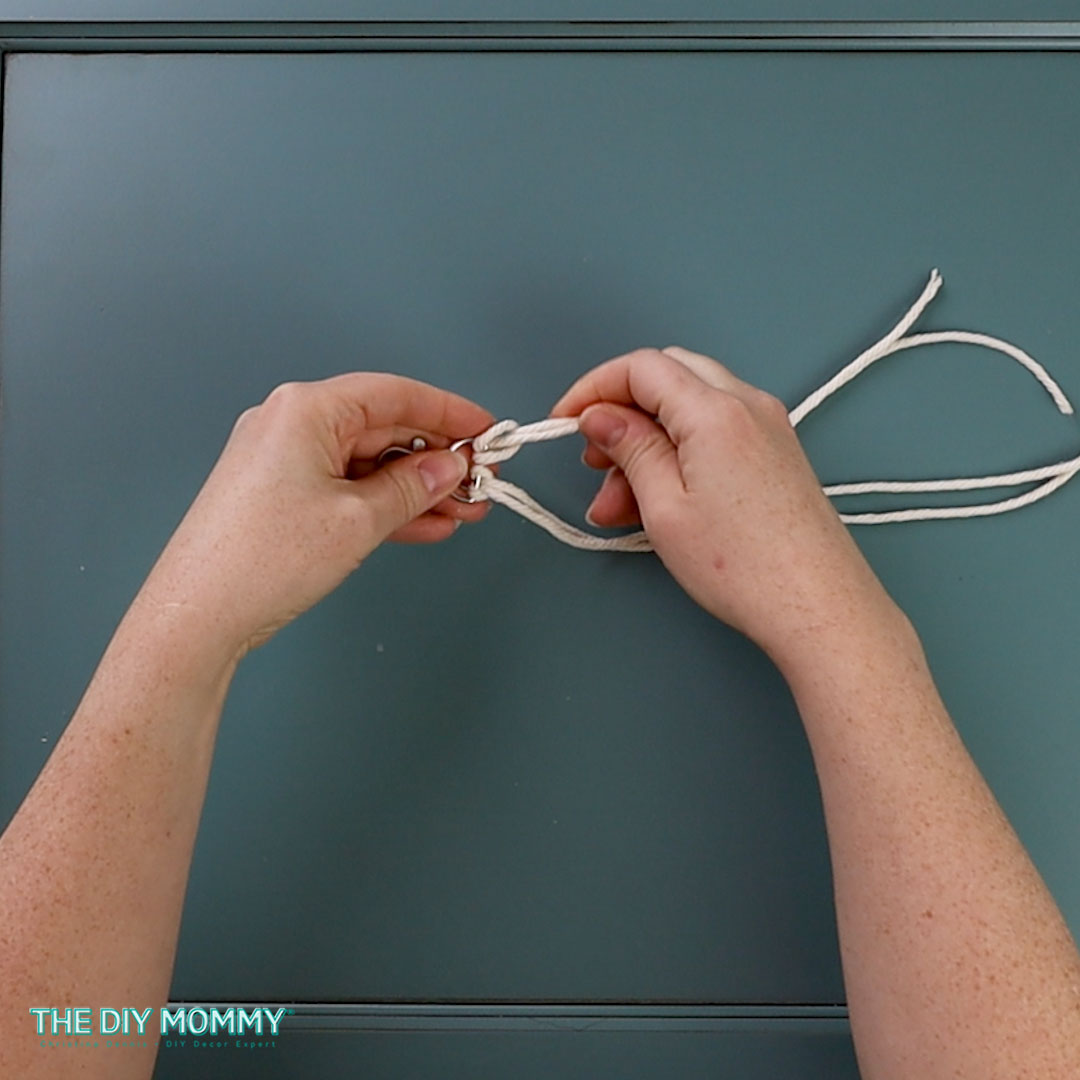
Fold each rope in half and attach each to the keyring using Lark’s Head knots.
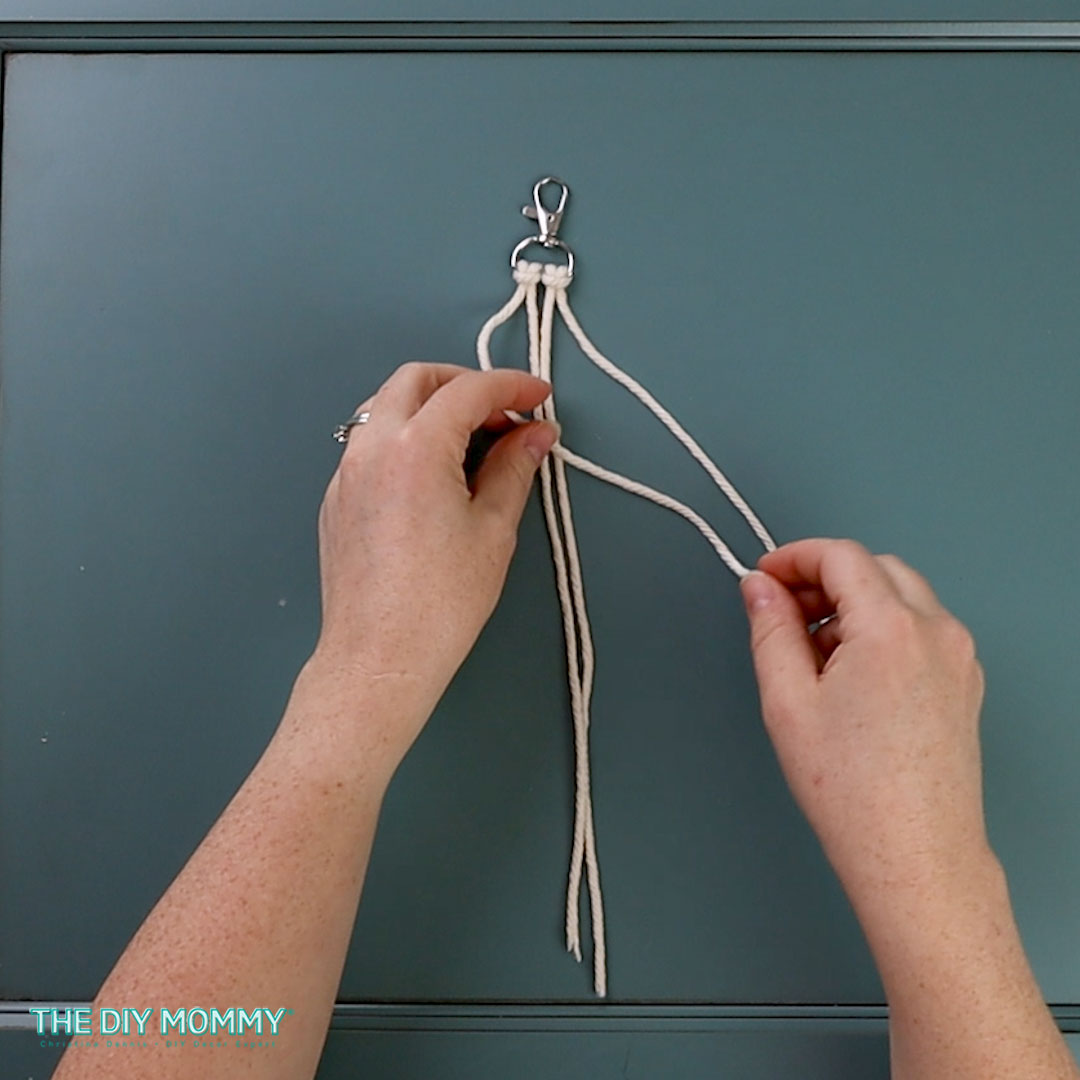
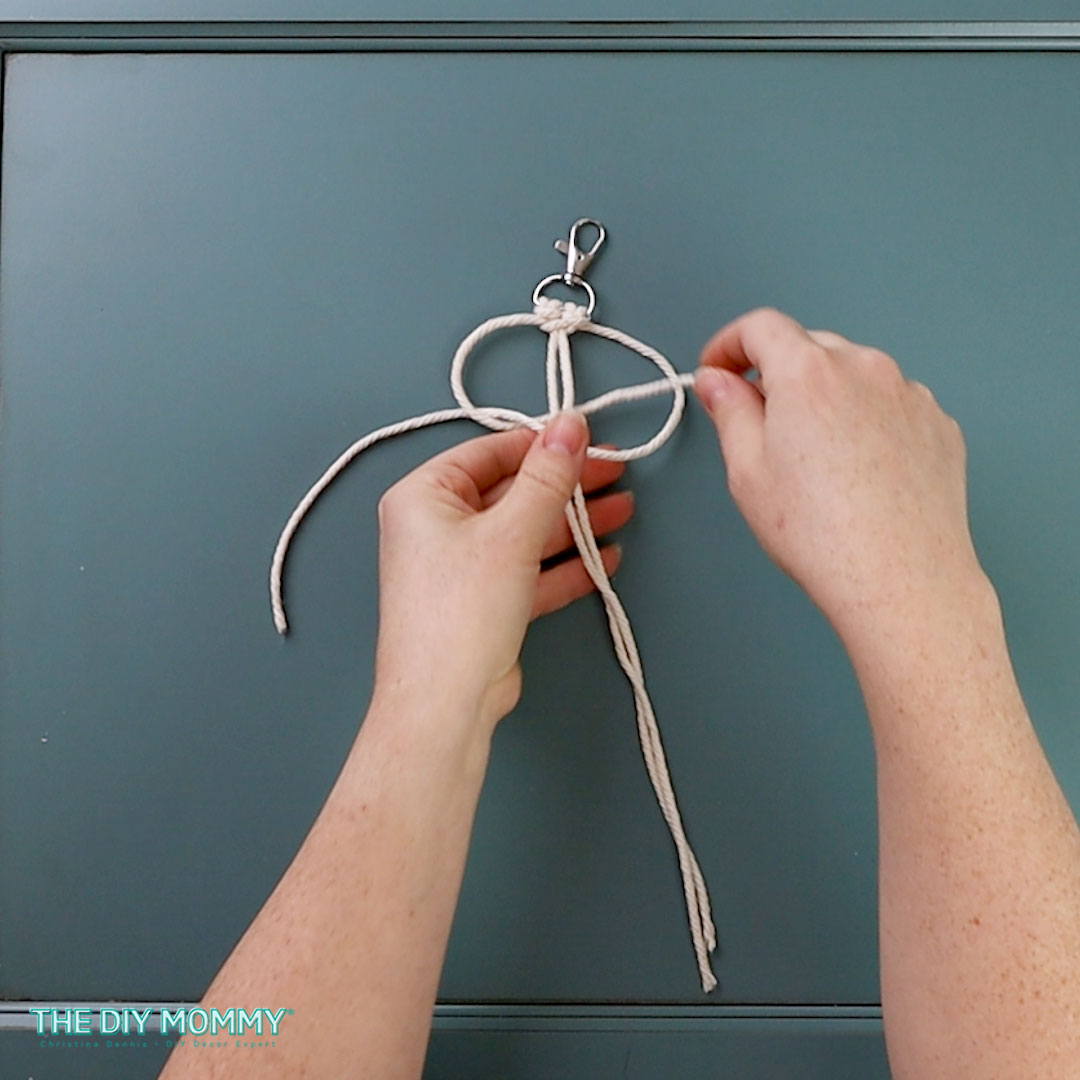
Take the outer left cord and make a “4” shape over the two middle cords.
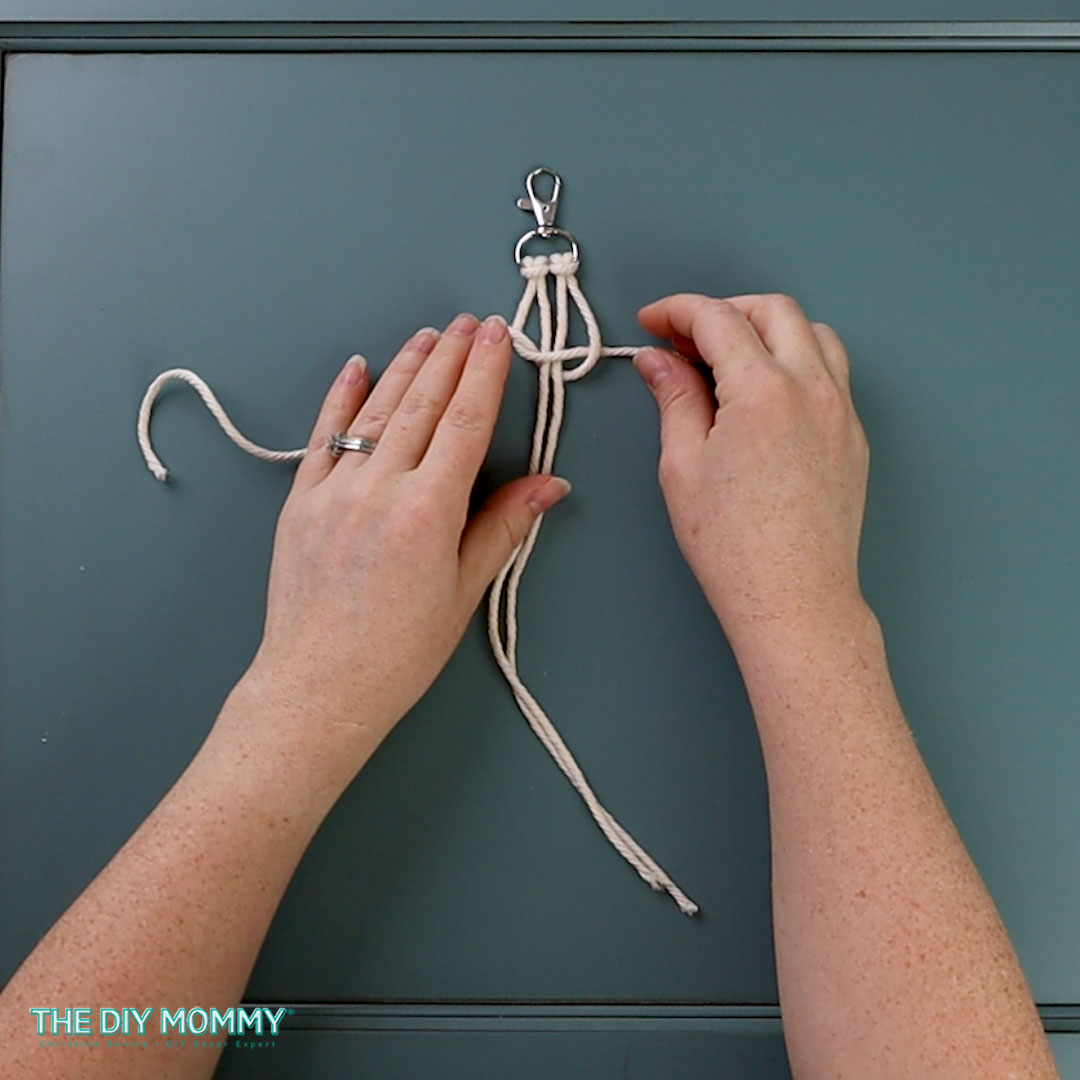
Bring the end of the outer right cord over the left cord, under both center strands, and up & through the loop created by the “4.”
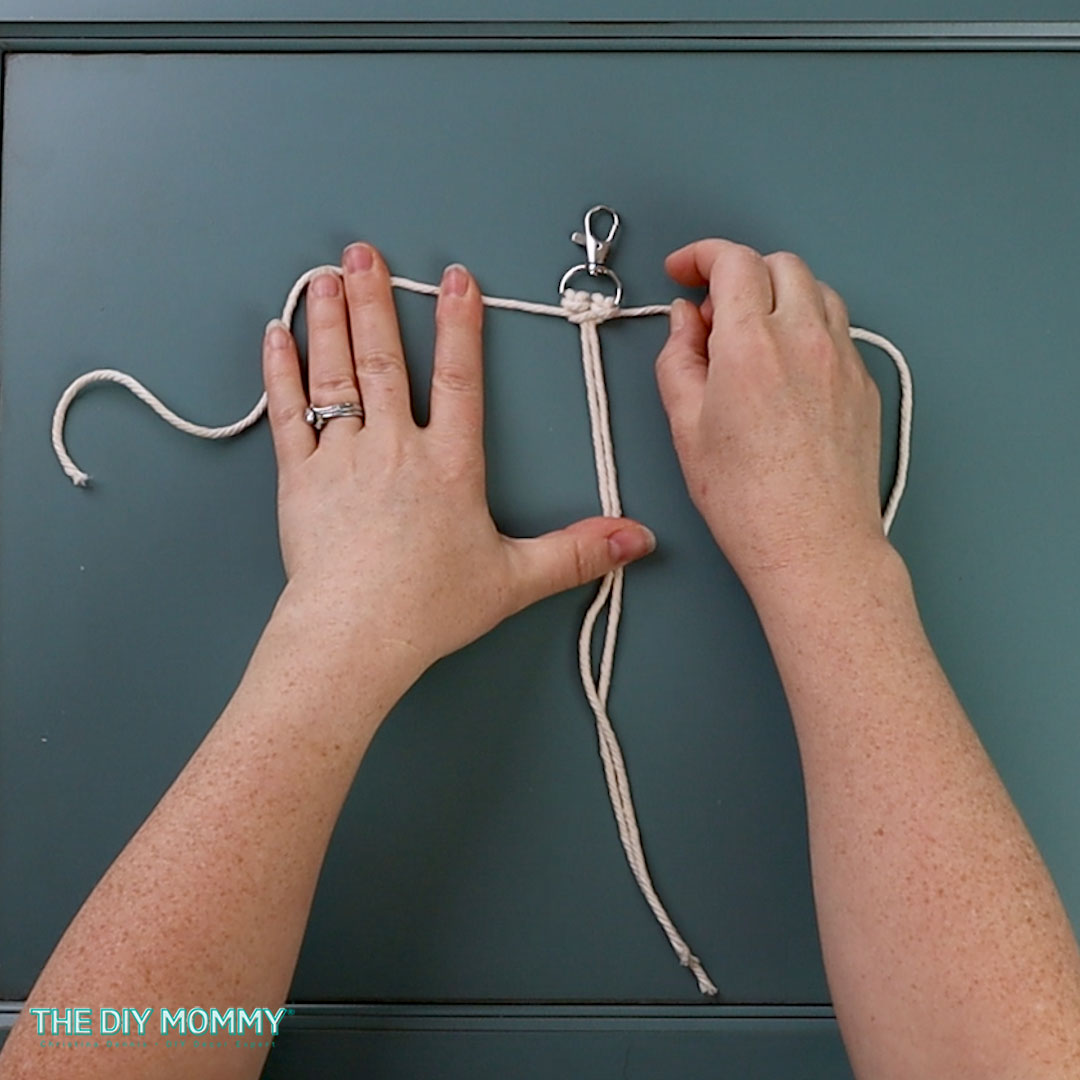
Pull the left and rope tight, and you’ve created the first half of a Square Knot.
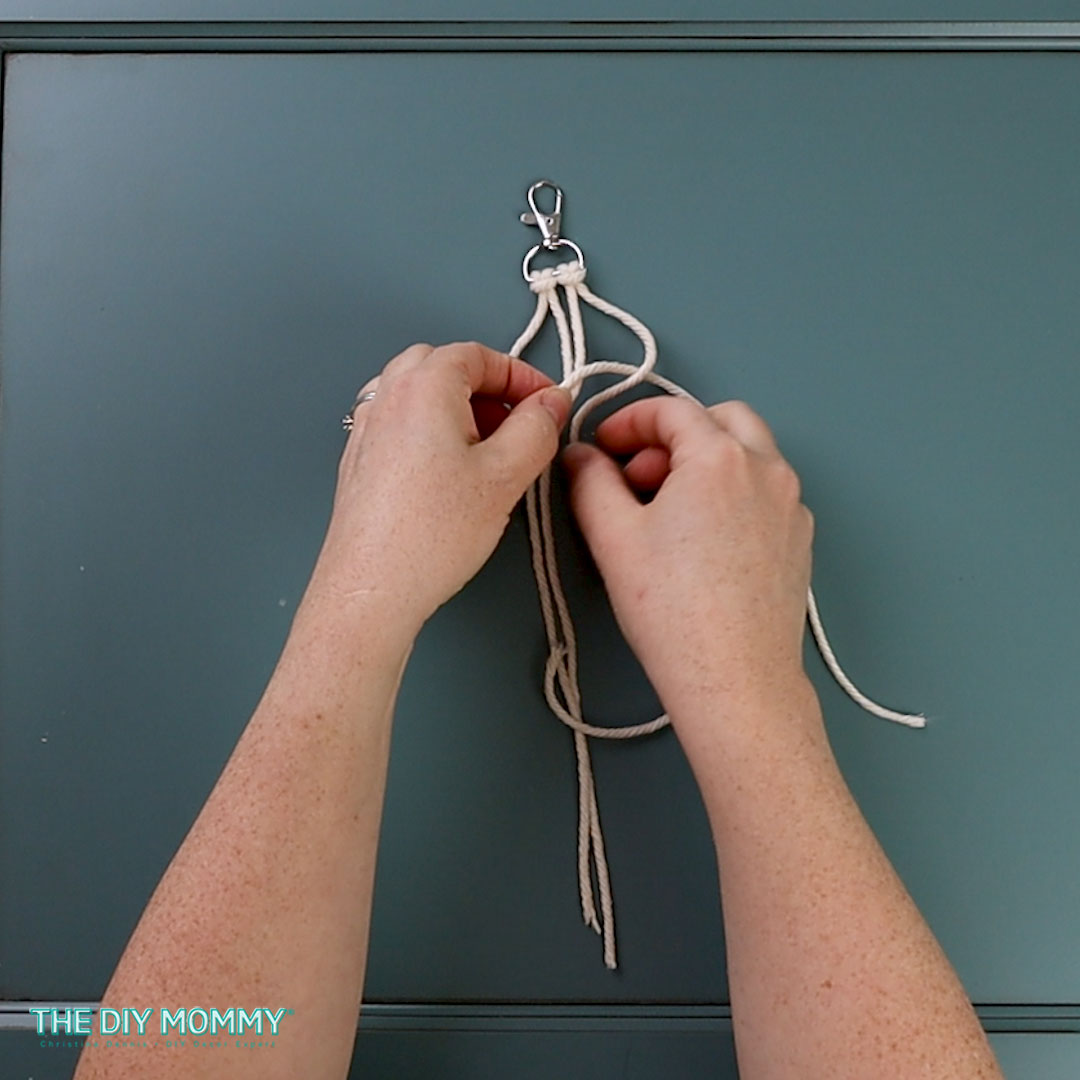
Repeat step 3 but starting with the right rope over the left rope. This creates the second half of a Square Knot.
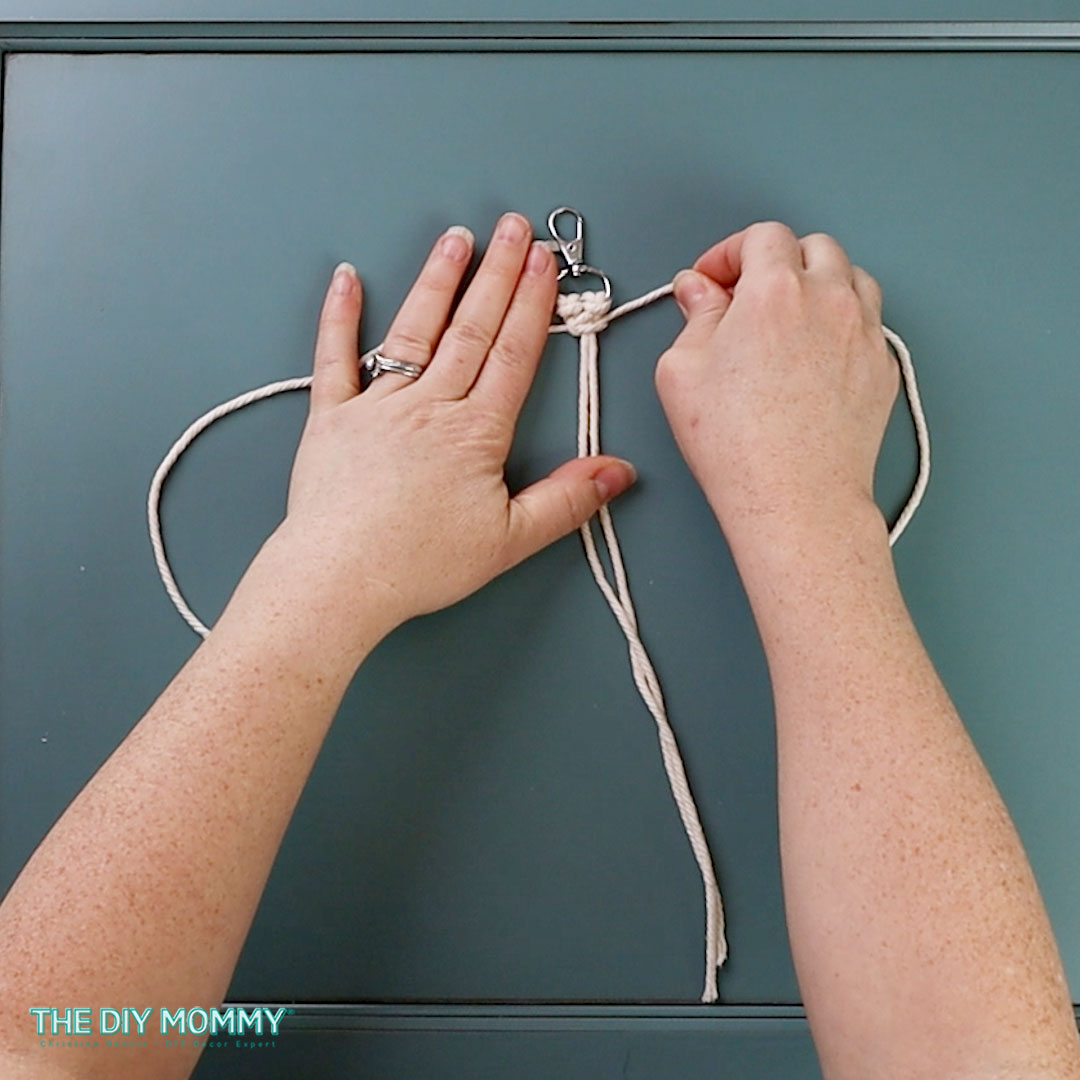
Tighten the knots by pulling both ropes at the same time.
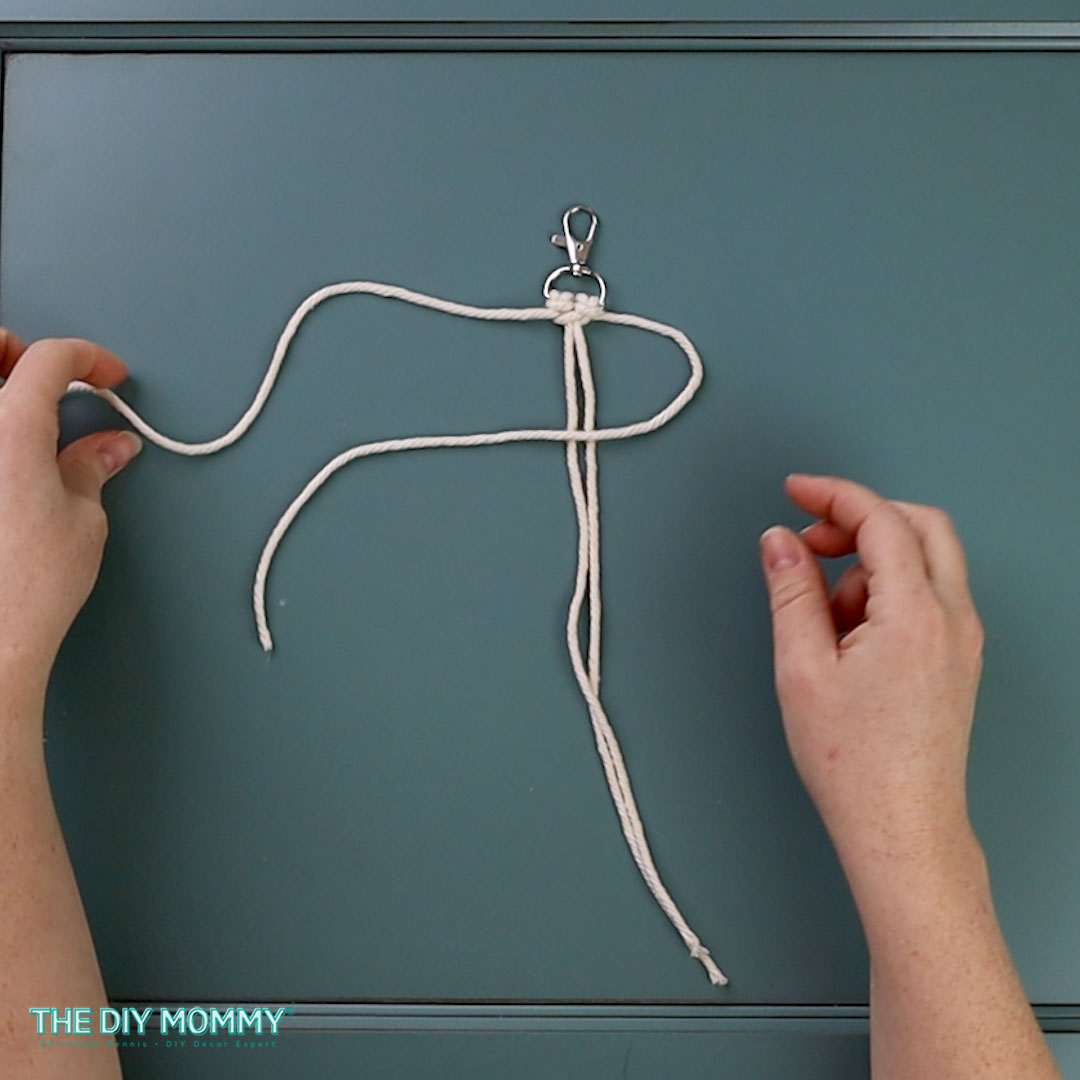
Repeat the Square Knot until the desired length is reached.
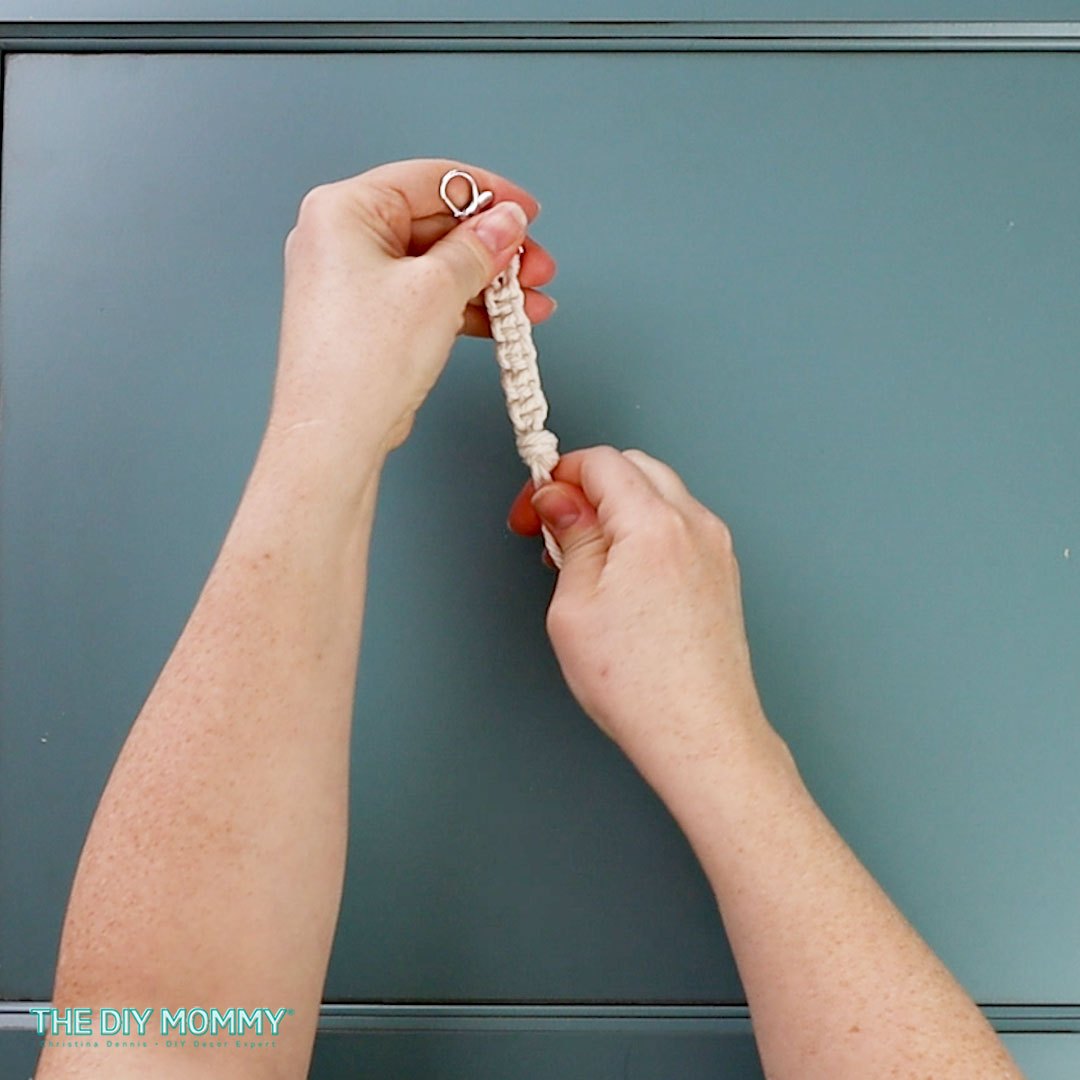
Cut the excess rope and tie a knot at the end.

Optional: You thread wood beads onto the cord at different spots in the square knots for added interest, or add a larger bead at the end before you tie the final knot.
These two easy patterns are just the beginning of the endless possibilities of macrame. Once you master these patterns, the sky’s the limit to create your own unique designs! Macrame is a great way to de-stress, be creative, and create something special. I hope these tutorials have inspired you to try your hand at macrame and create something beautiful and functional. Happy crafting!
Ready to try a more advanced macrame project?
- create a gorgeous hoop wreath with macrame detail with my step-by-step instructions on this blog post
- make some simple wall hangings like this macrame wall hanging I made in my Youtube video (I linked to an easy video tutorial in the description box)
- learn how to make a stunning macrame table runner right here
- create beautiful macrame feather gift toppers
PIN ME:
