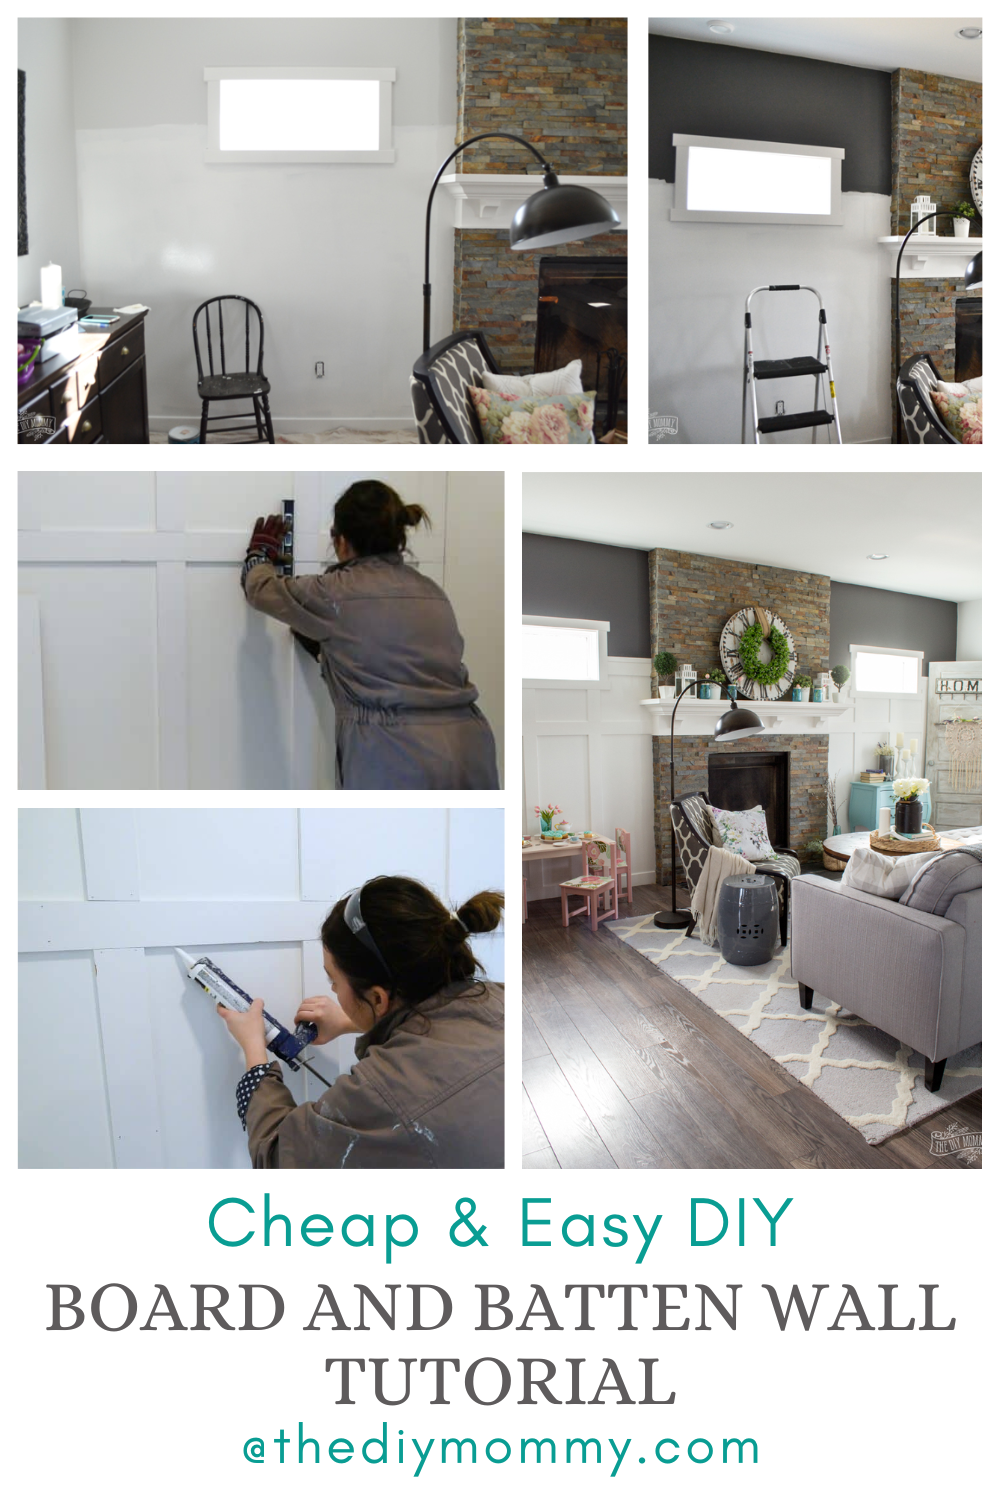
Cheap And Easy DIY Board And Batten Wall Tutorial
This post may contain affiliate links · This blog generates income via ads
I used to say “PAINT!” whenever someone asked me for my favourite way to makeover a space on a budget. You can change the look of a space or an item dramatically with a fresh, new paint color and it’s a relatively easy DIY. However, I’ve also done enough board and batten DIYS now to say, “can you board and batten a wall too?” as part of my answer! I have come to believe that a DIY board and batten accent wall is the perfect inexpensive way to refresh so many spaces. I have used this technique in bathrooms, entryways, and now my living room!
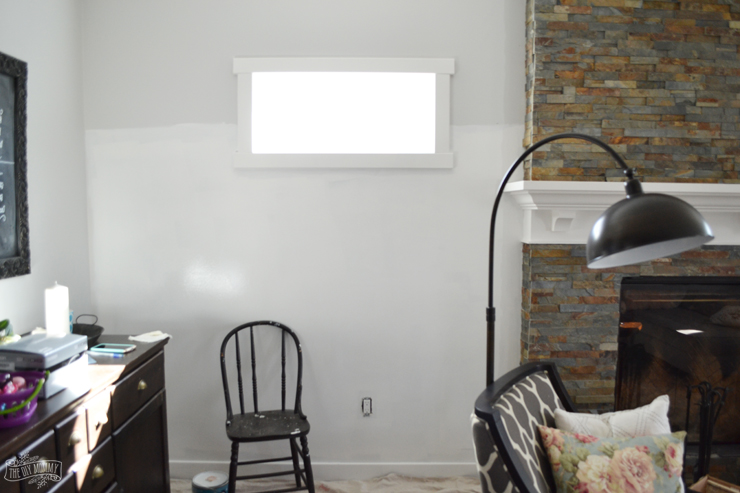
The wall behind our fireplace wall was so boring and blah. I have wanted to add some architectural detail to it for quite some time now, so it was the perfect board and batten project. Some fresh paint and light construction were all this space needed to feel brand new! Come see how I did it and get my instructions for how you can create your own beautiful and interesting wall space.
I’ve DIY’d a few board and batten walls now, (like my hook wall), and I’ve picked up some tricks to make them look really professional.
1. Plan where you want your vertical and horizontal boards to be
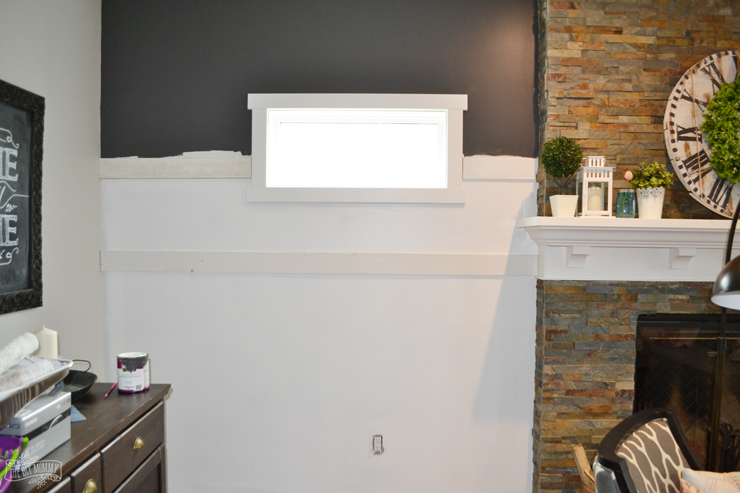
First of all, decide how high you want your board & batten trim feature wall to be. For this project I decided it would look nice to have the white board & batten go about two-thirds up the wall. This worked out to six foot lengths.
Next, decide how far apart you want your “battens” to be. I like my vertical boards to be no more than 18 inches apart.
Then, measure and mark your trim placement on your wall. Step back and have a look at it. Move the marks as necessary. I think it’s important to plan your wall first and draw it out to see how it looks. In our case, I was working with the two transom windows on either side of the fireplace, plus one wall is longer than the other. Don’t forget to plan around any outlets, light switches, or other non-negotiables on your wall! It took me a little bit of planning to decide how I wanted our wall to look. However, it was worth the effort to do it properly in the end.
For our board and batten trim, I decided to use baseboard trim and use a router to curve the bottom edge of the baseboard. That way, I didn’t have to do anything fancy to join the batten pieces to my current baseboard. The width of the trim matches.
The next step is to put one coat of paint on your wall in the color of your board & batten trim. Paint the area where you plan to install it. I’ve learned this the hard way. It helps to put at least one coat of paint on the wall with your brush and roller before you start your trim work. It makes it easier to finish painting afterwards!
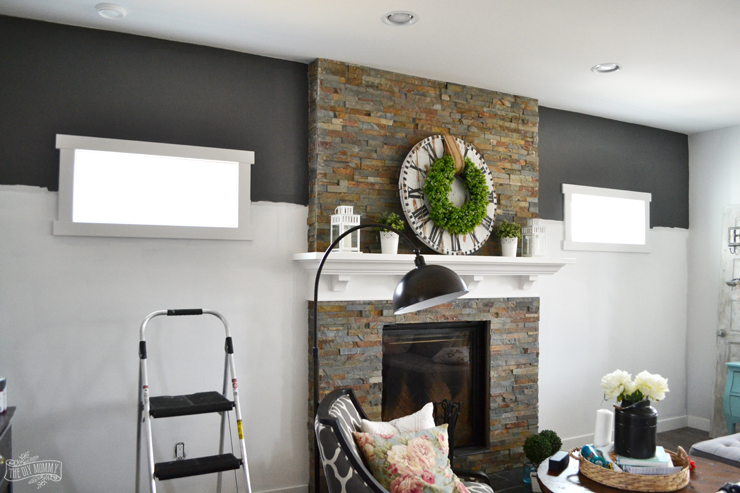
I used BEHR’s Whisper White for the board and batten area. For dramatic effect I painted the top third of the fireplace wall BEHR’s Shades On. I like the serious contrast between the white and charcoal. I think it adds flair and interest!
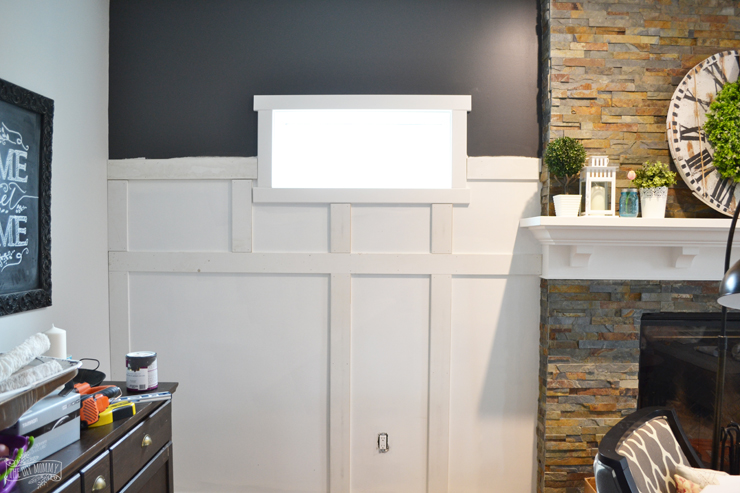
2. Measure and cut your boards and battens
Next, measure and cut your horizontal trim boards with a cross cut saw and install them carefully on the wall with a finishing nail gun. Use a stud finder to nail the trim into the studs in your wall. I used a measuring tape and a level to ensure my trim was straight. I decided to have two horizontal pieces of trim for my board and batten, but I’ve also done walls with just one.
Then, measure and cut your vertical battens. Remember to factor in the existing baseboards when you decide how long they need to be! Install them on the wall with a finishing nailer and a little construction adhesive because they probably won’t be nailed into studs. Remember that this method of installation means that you are now committed to board and batten. Taking down glued-on boards will mean fixing drywall in the future! Fortunately for me I don’t think I will ever get tired of this look.
3. Fill and caulk for a smooth finish
Then, fill nails holes and joints with wood filler. I’ve grown to like this better for nail holes and joints than caulking because wood filler doesn’t shrink. I do use caulking and my caulk gun to fill and smooth the seams where the trim meets the wall. Don’t be afraid of caulking, it’s easier than you think! Just apply a short line of caulk to the seam you want to fill, wipe the excess caulk off with paper towel or a soft cloth, and keep going all the way down the seam. You can do this!

4. Paint the wall and add trim if desired
Once the wood filler and caulking is dry, sand down any rough spots and paint everything with one or two coats of paint.
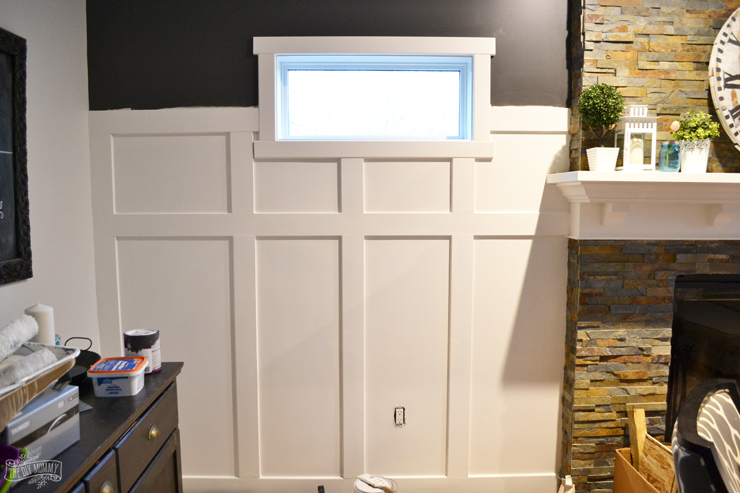
I decided to add one final piece of 1″ x 2″ trim as the top horizontal board to my board and batten which you can see here in the final look. I think it adds just a little more character and depth.
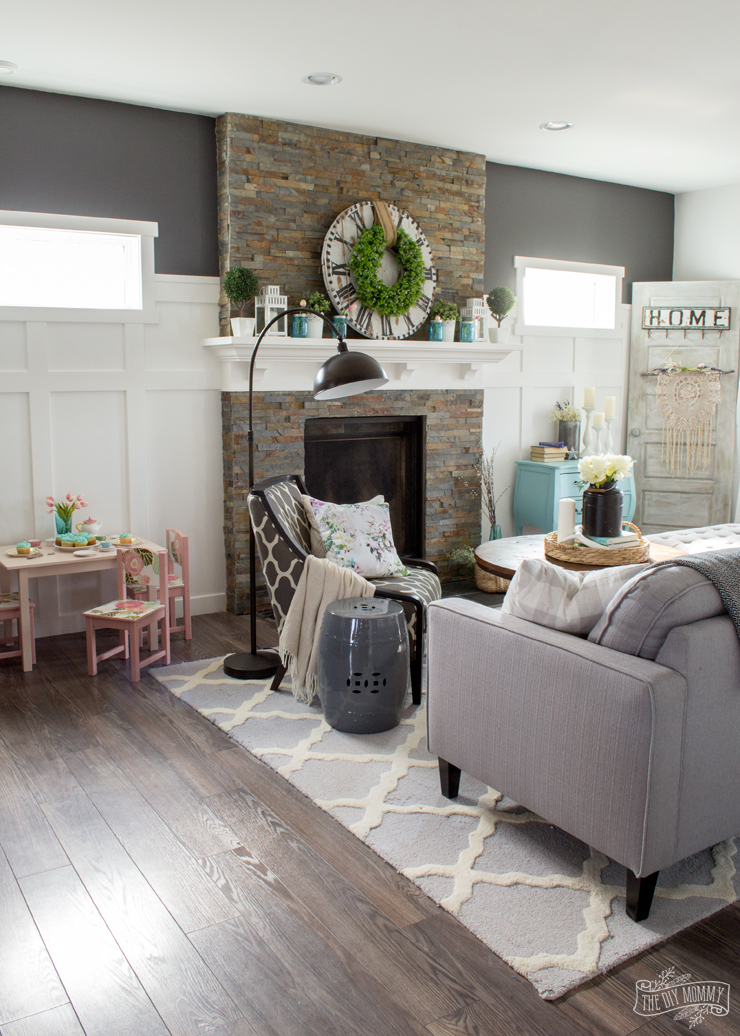
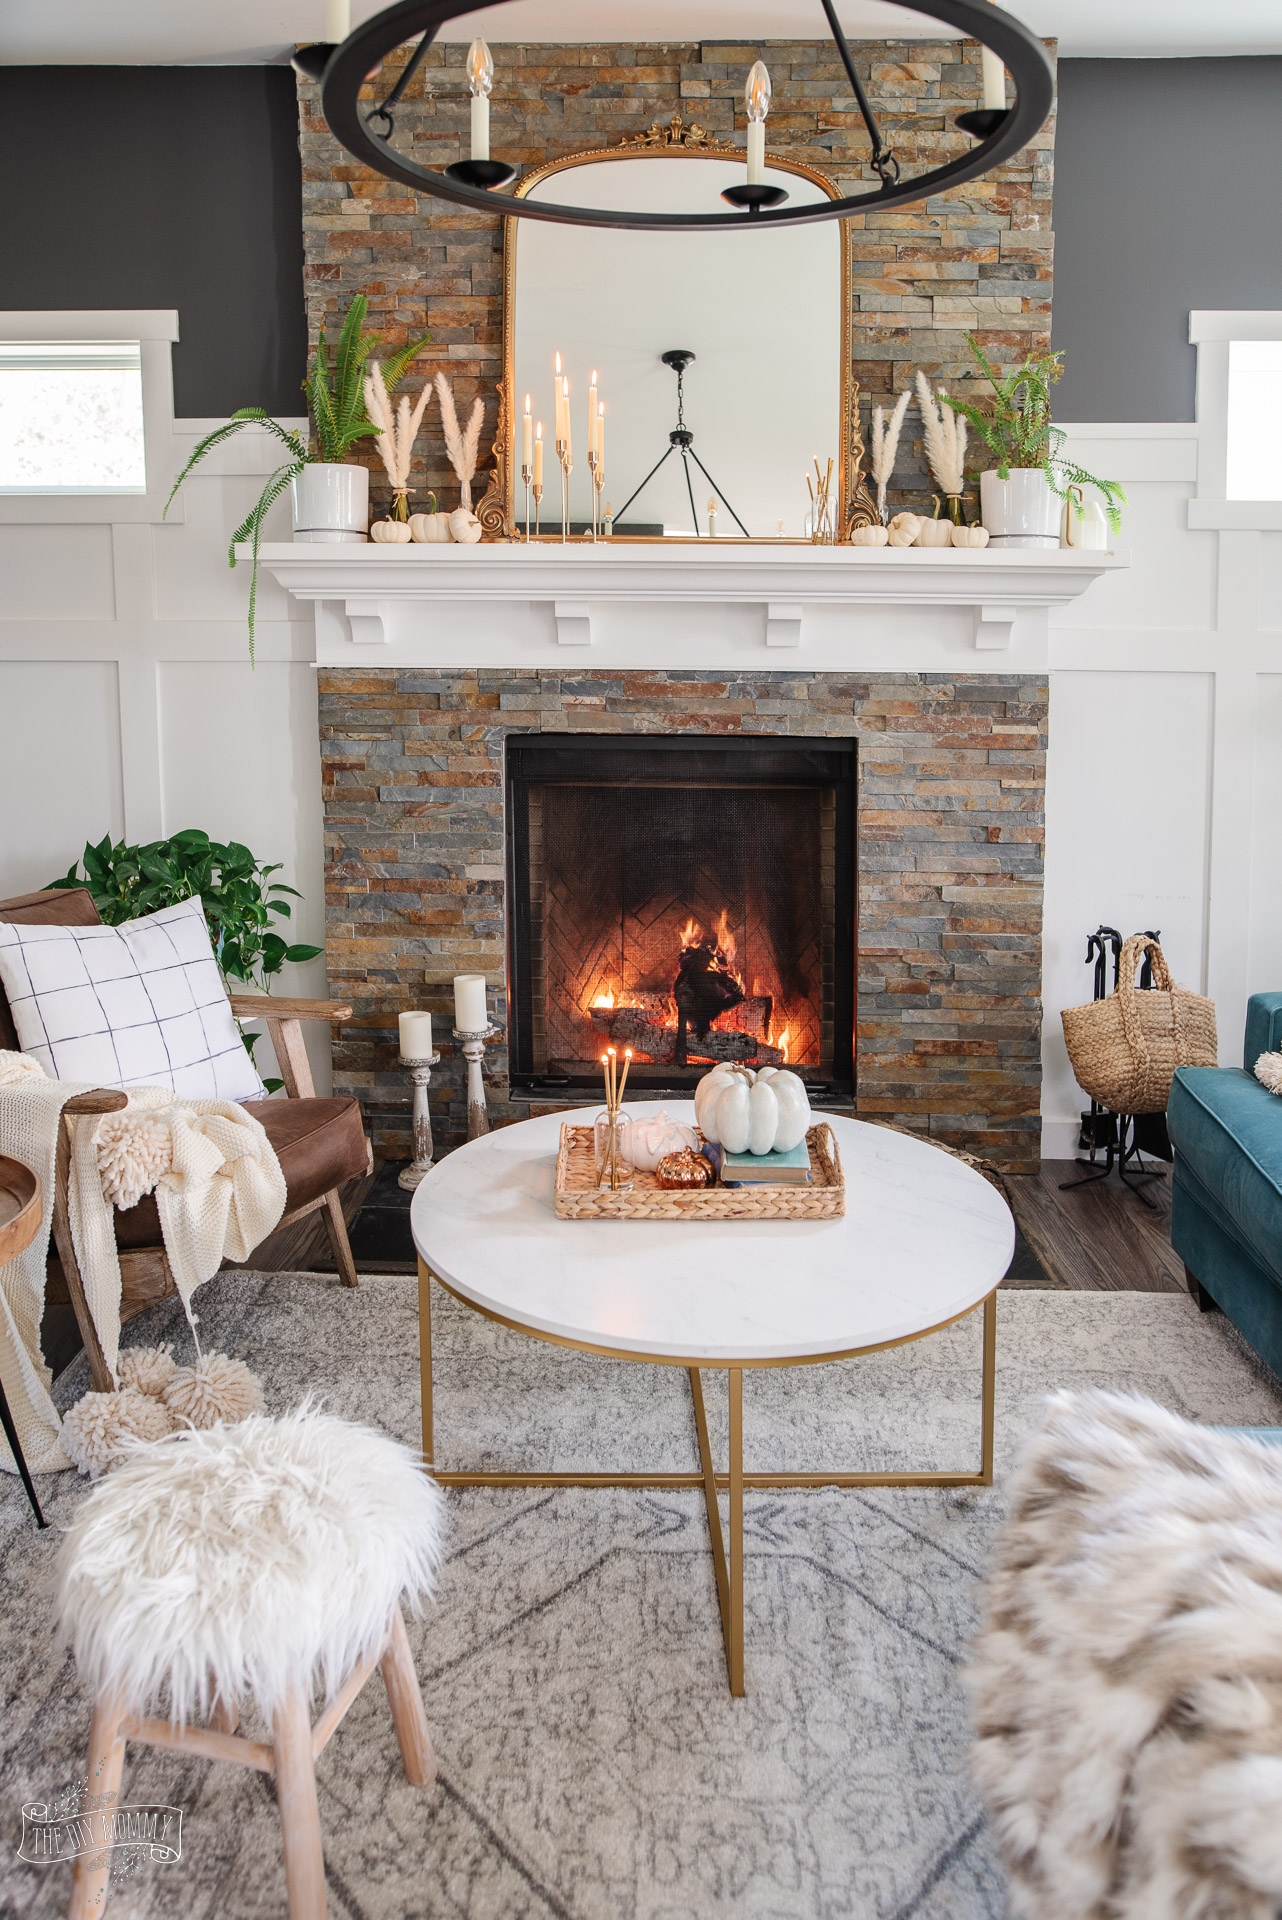
Our fireplace wall DIY project looks so good! I love how the white mantel blends seamlessly into the white board and batten. The fireplace now seems tied in to the rest of the wall. If you want to go even more in depth with how I accomplished this project, watch my video tutorial to get more details! I hope this DIY board and batten wall has inspired you to transform one of your spaces. If you give it a try I’d love to see your results, tag me @thediymommy on Instagram.
Pin Me!