DIY Room Painting Tips (+ Little C’s Bedroom Makeover Progress for the ORC)
This post may contain affiliate links · This blog generates income via ads
Just like knowing how to make throw pillow covers and drapes, I think that knowing how to paint a room is a really good essential tool that a DIY decorator should have in their arsenal. A fresh coat of paint makes a world of difference in how a room looks and feels. Do you have a room you want to try painting yourself? Let me share some simple room painting tips with you – from one DIYer to another! I also wanted to share our progress for Little C’s bedroom makeover for the One Room Challenge, and – yes! – it involves a DIY paint job.
In case you missed it from last week, I’m taking part in the One Room Challenge hosted by Calling it Home this Spring and I chose to give my 7 year old daughter’s room a makeover. You can see our inspiration & colour scheme for the room here.
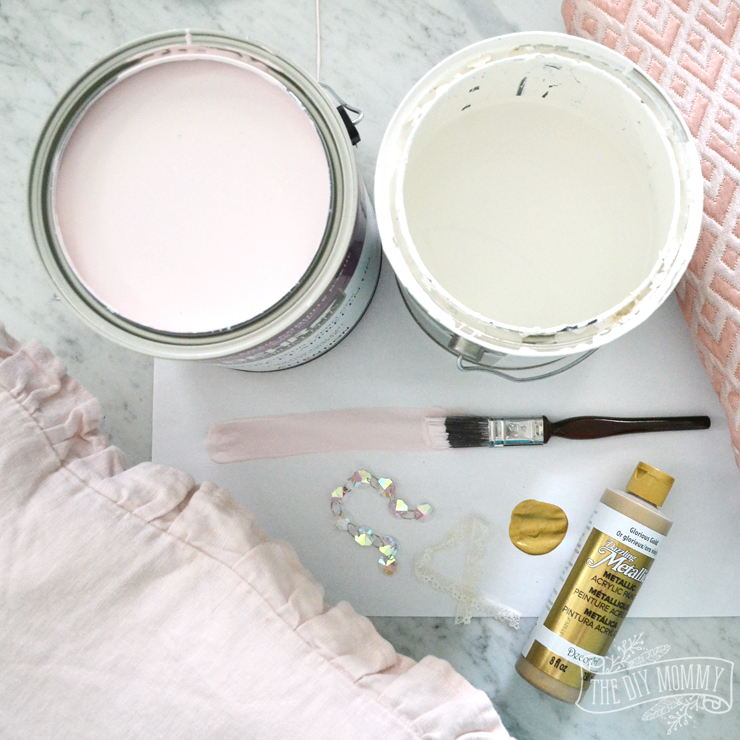
We chose to go with a colour called Prelude to Pink from Cloverdale, and I colour matched that to a Behr Paint + Primer. The trim and some of the furniture in the room will be painted Simply White from Benjamin Moore. I also grabbed a can of good primer to paint over the very vibrant purple wall colour that’s currently in the room, and a couple varieties of gold spray paint for accents.
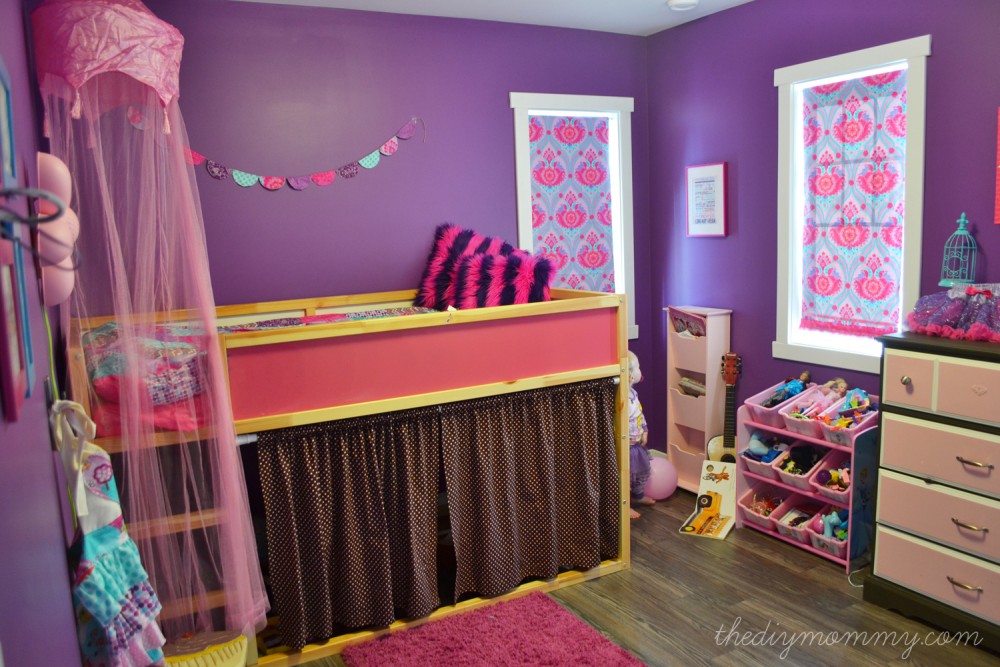
Here was Little C’s room when we started:
And here it is right now:
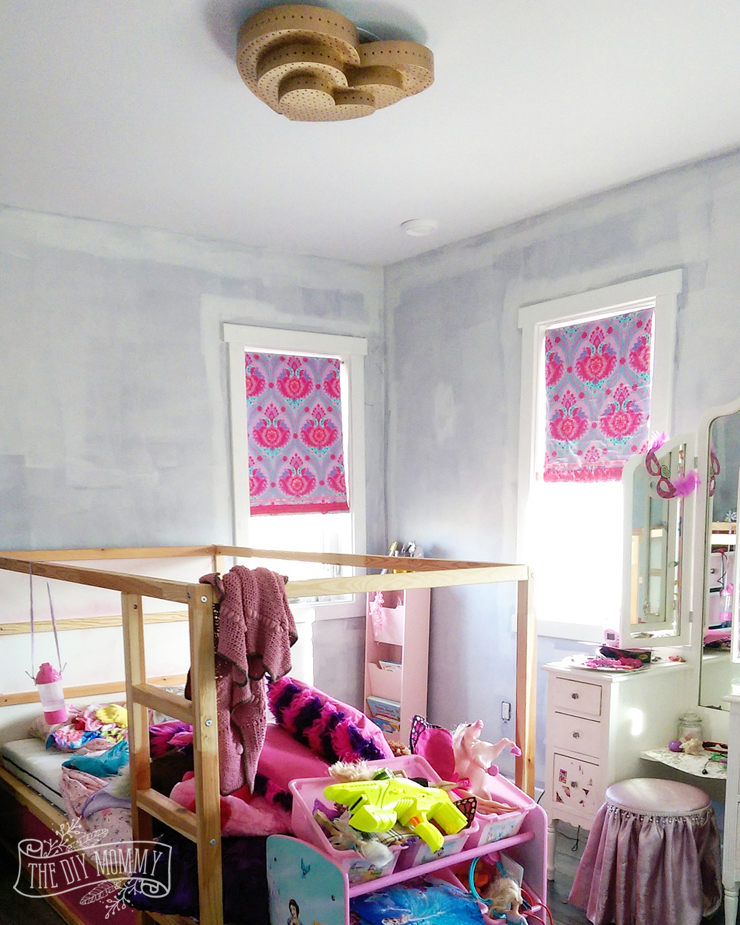
I spray painted her heart light fixture in gold, and I primed the entire room.
I also caulked around her trim (which was never done properly because we moved into our house before all of the details where finished) and I’m currently painting it with the Simply White paint.
It’s been a lot of work already! Little C still needs to sleep in here, so I’ve been constantly sliding furniture back and forth as I paint. I’m almost finished painting the trim, and then I’ll move onto her lovely pink wall colour, so we’re both excited for that!
My husband and I have painted a lot of rooms over the last 10 years or so. It’s a great way to save some money and completely update a space!
Here are my top 7 DIY room painting tips:
- Caulk and paint the trim BEFORE you paint the walls. It’s so much easier to cut the wall colour into the trim than the reverse.
- Buy a paint that’s a paint + primer blend. It covers so much better, so you’ll be painting less.
- When searching for a paint colour, look for one that is a little “muddy” looking. A little bit of a grey tone in a colour will give it a more sophisticated look. You might be surprised at how bright a colour looks in your home in daylight!
- Buy a sample pot of your chosen paint colours, and paint a large swatch of each of them on your walls. You won’t be able to get a good idea of how the colour will look on your walls from the small paint chip.
- Study those large swatches on your walls over a full day and see how the colour changes with the light in your home.
- Cut in like this. The trick is doing one pass with your brush that’s not too close to the ceiling or trim, and then another pass is right next too it with the same loaded brush.
- Roll your paint on like this. The secret is to make sure you’re feathering out the edges of your paint so that you don’t leave streaks.
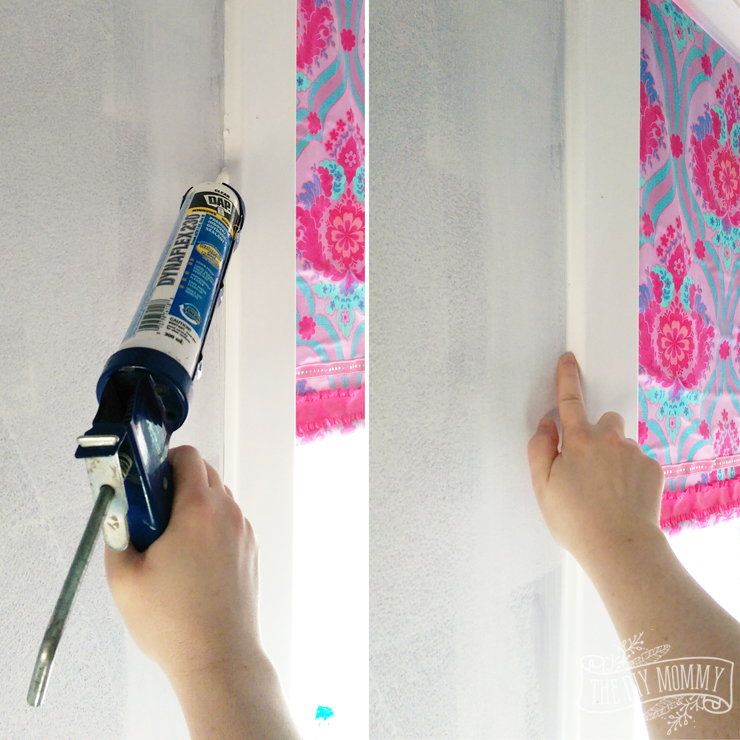
Also, here’s my #1 caulking tip: when flattening / pushing the caulk into a seam after you apply it, wet your finger with water or a baby wipe. It works SO much better and makes the seam so smooth! It’s life changing. Trust me. Caulking between the trim and the walls before you paint is so essential to making your room look finished.
I hope you found those tips helpful! Stay tuned next week for more One Room Challenge progress, and don’t forget to visit all of the other participants’ blogs by clicking here.
I’m excited to put these tips to work as I prepare to paint my room for the ORC! Can’t wait to see more progress on your daughter’s room! SO fun!
Thanks, Krystle! Can’t wait to see what you’re up to too!
Christina I adore the direction that your room is headed towards! You did SO much better than I did in my room this week.
I would love for you to share this post at Thoughts of Home on Thursday. I think our readers would really enjoy it!
Good luck in the upcoming week!
Thanks so much, Laura!
Thanks so much, Christina for these tips. There is a marked difference between the before and after of the room although I love the room before. I love the ambience and it’s cool and relaxing. Don’t blame me though 🙂
so glad for getting DIY room painting tips from here. I’m excited to put these tips to work as I prepare to paint my room for the ORC! Can’t wait to see more progress on your daughter’s room! SO fun!
Thanks for this my dear.Its very help.Thank for this..my dear.I like it.They would look so good in my city
Hi I love love this post! Her room is beautiful, its going to be my inspiration for my daughters room. I was wondering how you color matched prelude to pink to a Behr paint? Ive tired 5 paint samples in her room but yours is exactly what Ive been attempted to recreate. Also what primer did you use? The previous homowners to my new home have a very dark color on the wall that my primer wont cover well 🙁
Hi! Christina took the paint chip to Home Depot and had them match it. She used Kilz Primer 🙂
This post really too helpful for me to do blog commenting. Thank you for sharing.
Amazing DIYs on Room Painting. As a DIY fan, this idea helps me to makeover my bedroom easily. I often visit your blog and found it useful. Thanks for sharing.