• Skip to primary navigation
  • Skip to main content
  • Skip to primary sidebar
The DIY Mommy
  • Decor
  • DIY
  • Clean + Organize
  • Printables
  • Recipes
  • Life
  • The Academy
  • Shop My Home
  • About
  • Contact
    • Facebook
    • Instagram
    • Pinterest
    • Twitter
    • YouTube
menu icon
go to homepage
search icon
Homepage link
  • Decor
  • DIY
  • Clean + Organize
  • Printables
  • Recipes
  • Life
  • The Academy
  • Shop My Home
  • About
  • Contact
    • Facebook
    • Instagram
    • Pinterest
    • Twitter
    • YouTube
  • ×

    Home » DIY Crafts

    How to Build A Giant Framed Pegboard

    Published: Apr 17, 2015 by Christina Dennis · This post may contain affiliate links · This blog generates income via ads · 17 Comments

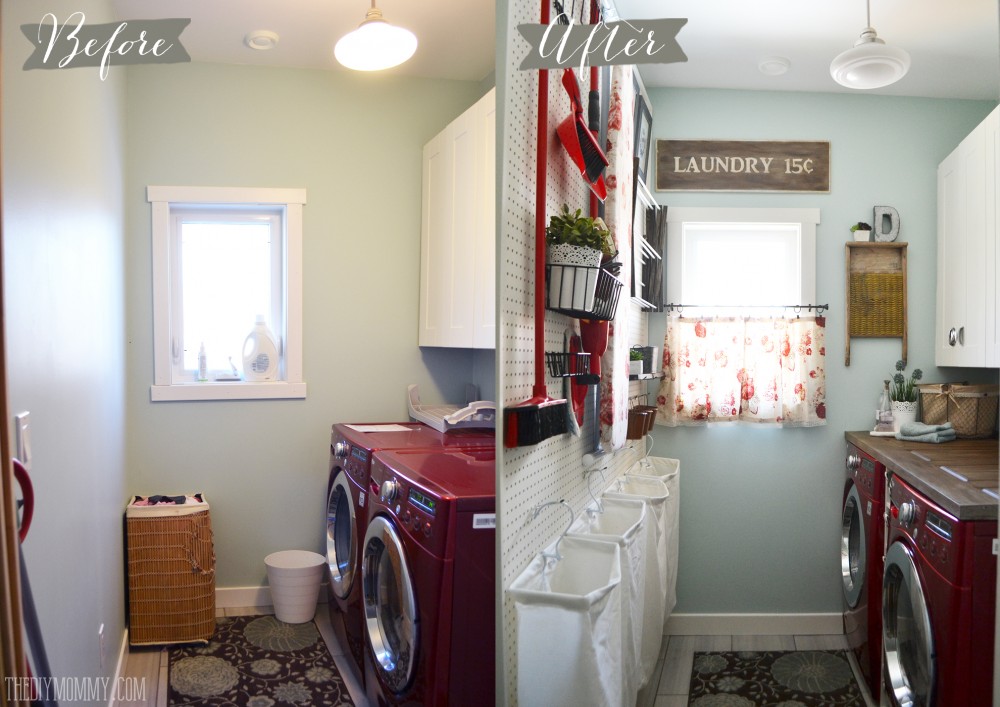
    Do you remember our laundry room makeover from last week? I'm still so very happy with the space, and I was thrilled to find out that it was featured on Good Housekeeping and Country Living this week! What a pleasant surprise. (I immediately phoned my mommy, of course!) Today, I want to share with you how we built and framed the giant 6 x 8 foot pegboard that's on the West wall of our laundry room. It's really my favourite part about this room, and I think it's what makes our laundry room makeover unique.

    How to build a giant DIY framed & wall-mounted pegboard

    This giant, wall mounted and framed pegboard was a team effort. My hubby picked up the supplies and installed it, and I caulked and painted it. It cost us about $80 in supplies and took a day to make.

    DIY aqua & red vintage inspired small laundry room design idea with a giant pegboard

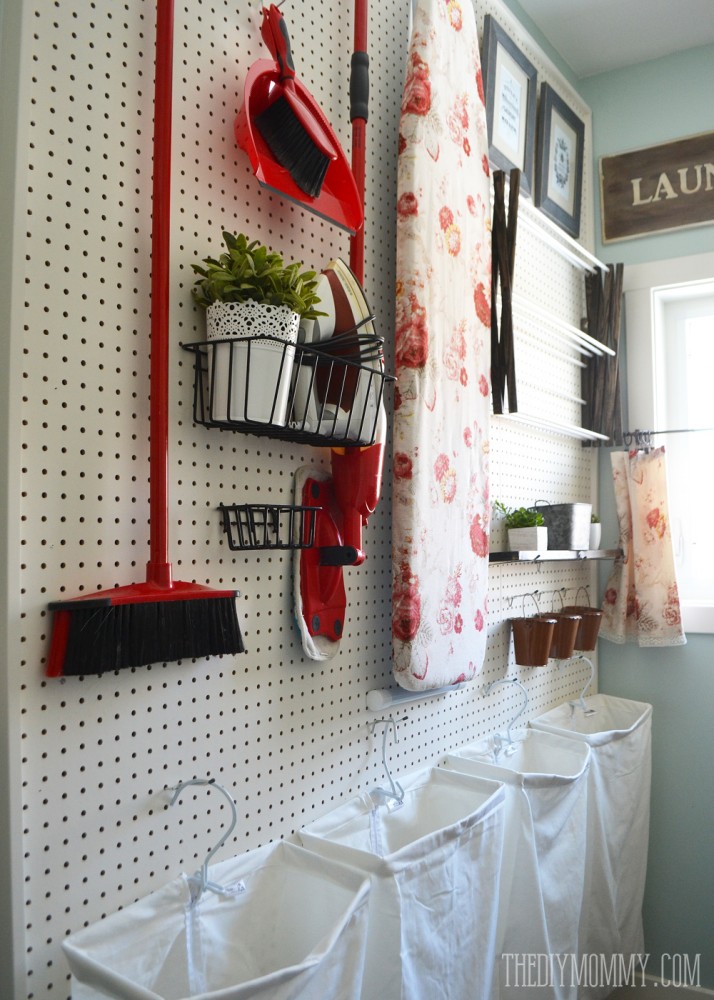
    I wish I could show you a straight-on photo of the wall, but our laundry room is so narrow that I'd need some sort of fancy wide angle camera lens (that I don't have)! Hopefully you can get the gist of it from the photos I have. It really is HUGE!

    DIY aqua & red vintage inspired small laundry room design idea with a giant pegboard

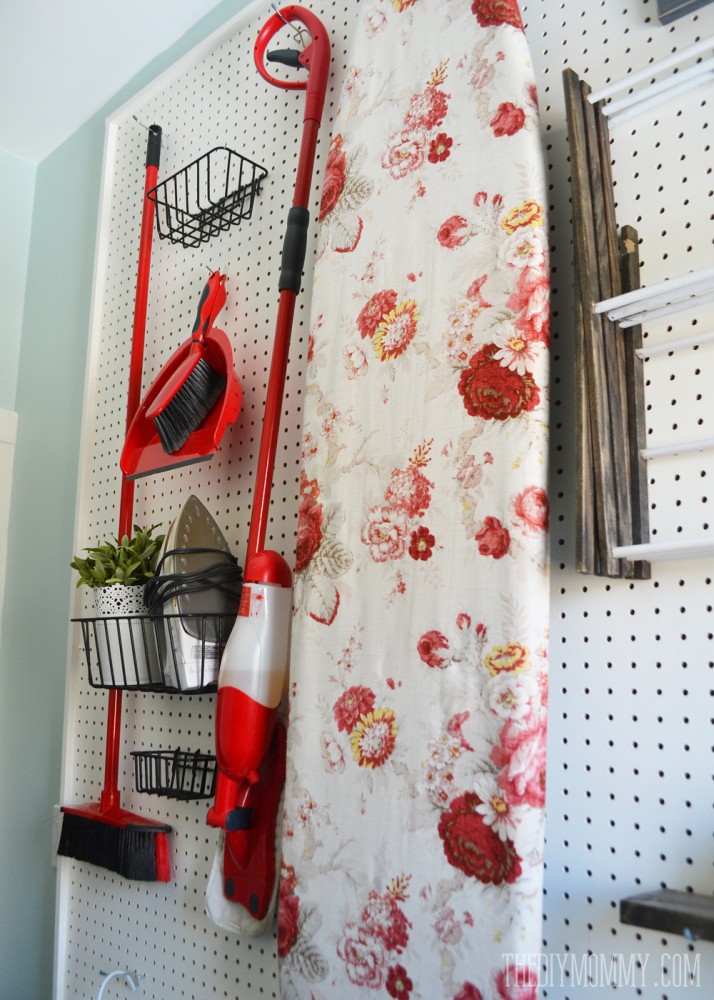
    Originally, I wanted the pegboard to measure 6 x 6 feet, but the pegboard sheets come in 8 x 4 feet so Hubs convinced me to add a couple of feet to the top of the peg board to best use the material. I'm really glad he did, because I'm loving the extra space on top! I thought it would be wasted, but I hang my long-handled tools up there (like my broom, mop and ironing board) and I can easily grab them from the bottom.

    If you're curious about the things I've hung on our pegboard or want to see a video tour of the laundry room, head on over to this post.

    Here's how to make a giant, wall mounted and framed 6 x 8 foot pegboard just like ours:

    Materials:

    • 2 sheets of 4 x 8 foot pegboard (we found ours at Lowe's)
    • 8 foot long pieces of 1" thick plywood that you can cut into strips on a table saw (what we did) OR four 8' long 1 x 4" or 1 x 3" pine planks
    • two 6' long 1 x 3" pieces and two 8' long  1 x 3" pieces of MDF or pine (for frame)
    • wood glue
    • nail gun
    • latex caulk
    • latex paint, brush & foam roller

    Directions:

    How to build a giant DIY framed & wall-mounted pegboard

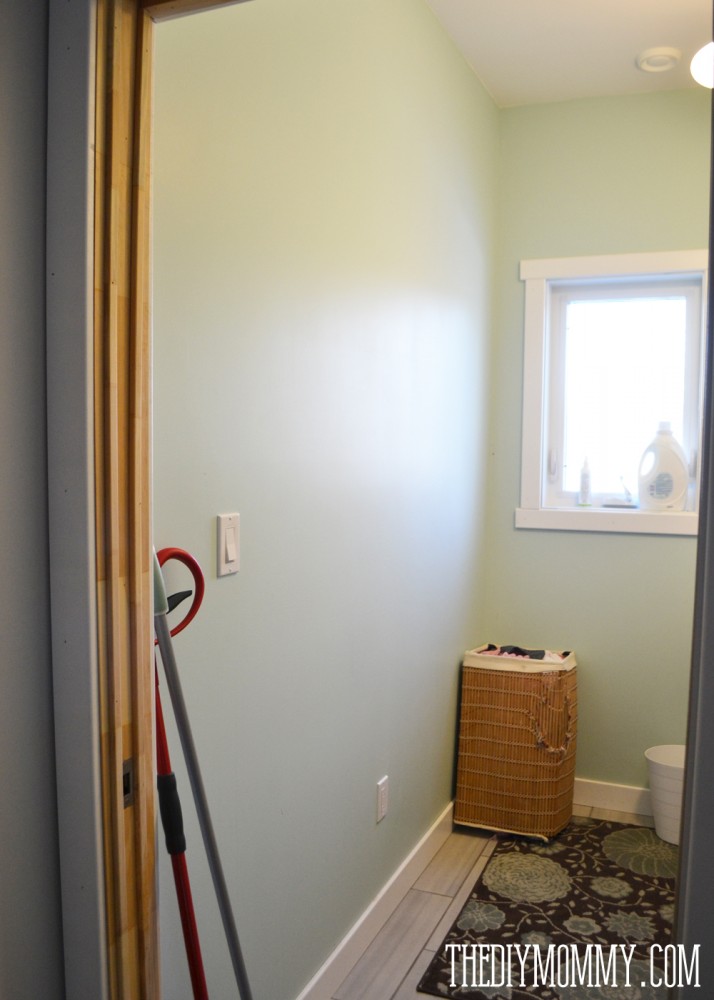
    Start with a clean, bare wall.

    How to build a giant DIY framed & wall-mounted pegboard

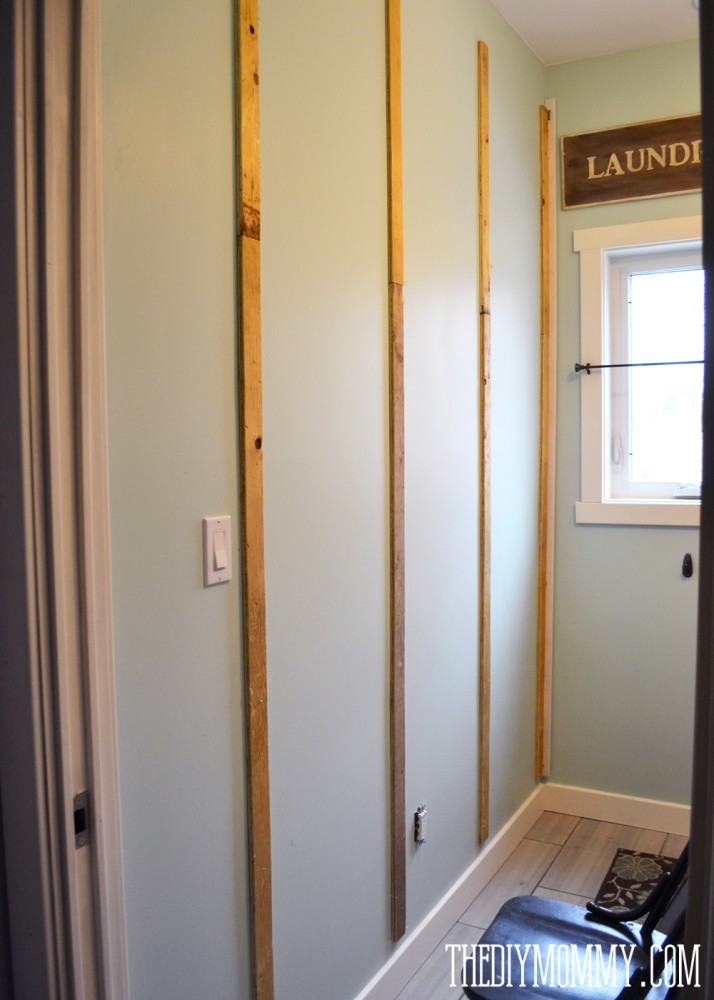
    Nail and glue the four plywood strips / pine strips vertically to the wall. Space them evenly. This will make the pegboard sit away from the wall so that it functions. Let the glue dry and ensure that the strips are securely fastened to the wall.

    How to build a giant DIY framed & wall-mounted pegboard

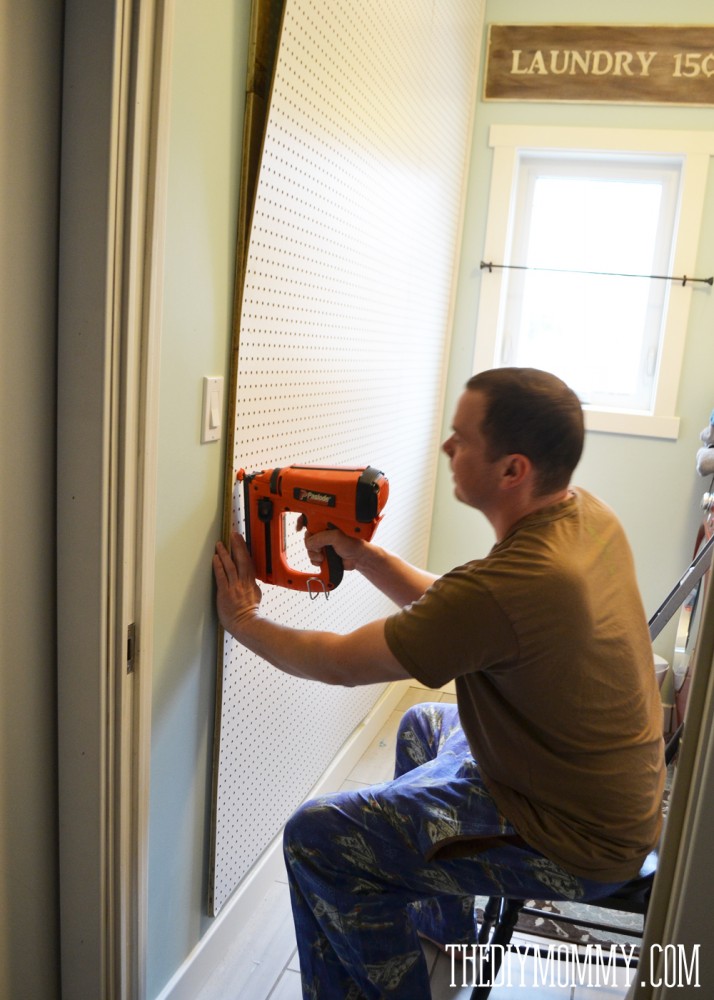
    Cut 2 feet off of one of the sides of one of the pegboard panels so that you have one panel that measures 8 x 4', and one that measures 8 x 2'.

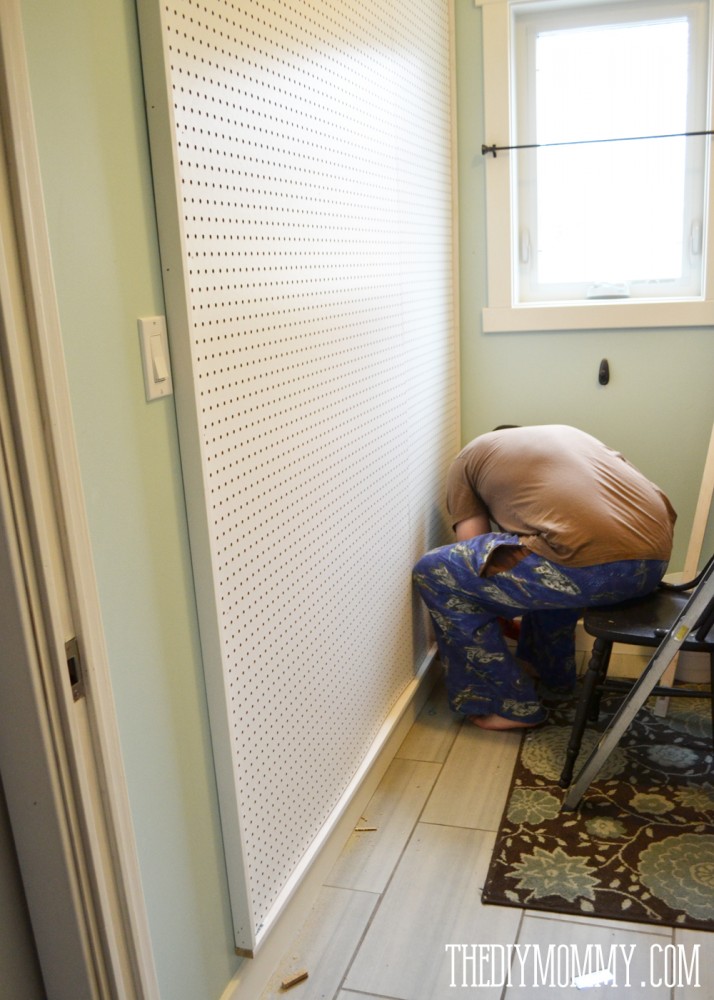
    With a nail gun, nail them the panels to the strips that you've mounted on the wall. The joint should be nailed onto one of the wooden strips.

    How to build a giant DIY framed & wall-mounted pegboard

    Cut your frame pieces to size and nail them to the plywood / pine backing pieces. The frame helps hide the gap and adds a bit of detail to the pegboard. We opted for blunt cuts on the corners of our frame, but you could also mitre them if you have the urge!

    How to build a giant DIY framed & wall-mounted pegboard

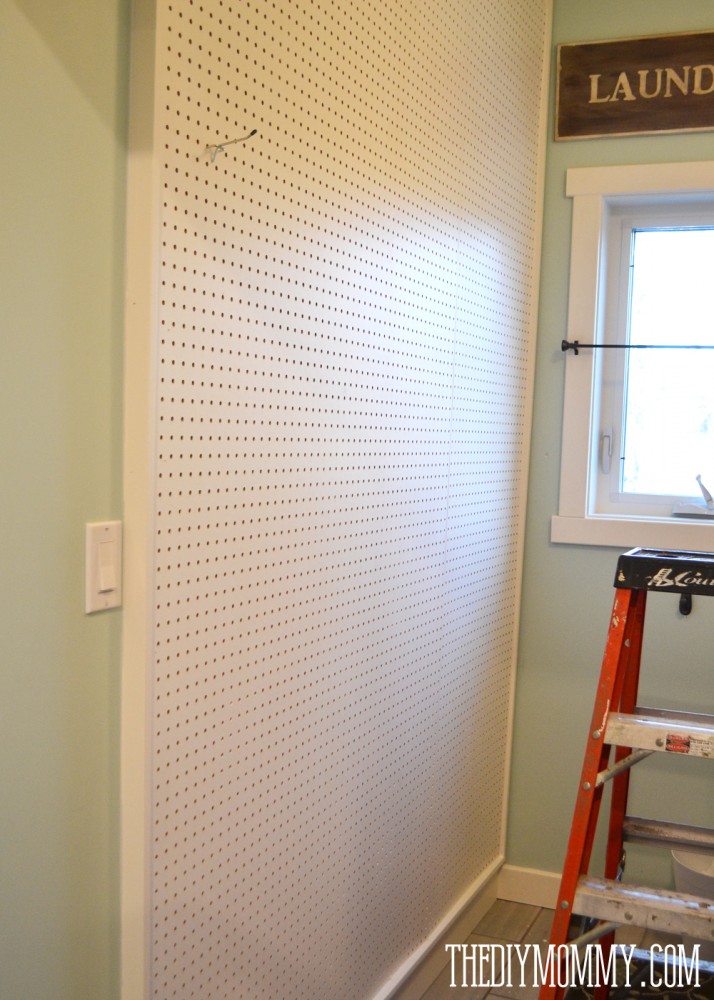
    Caulk all of the gaps around the frame and outside the frame. Once the caulk has dried, paint the frame and the entire pegboard your desired colour. I chose to keep our pegboard white, and painted it the same colour as our trim in the room.

    DIY aqua & red vintage inspired small laundry room design idea with a giant pegboard

    That's it! Your giant pegboard is finished and you're ready to decorate it and hang all of your tools. If you want more info & links to where I found all of my pegboard doo-dads, they're all on this post.

    Have a great weekend, DIY friends!

    More Inspiration

    • DIY Thrift Store Candle using a kitchen canister
    • Turn an IKEA SORTSO rug into a gorgeous pillow
    • How to Make Money with your Cricut in 2023
    • DIY Dollar Tree Heart Shaped Wreath

    Reader Interactions

    Comments

    1. Krista @ the happy housie

      April 18, 2015 at 8:18 am

      Awesome, awesome, awesome. Pinned, and I can already think of two places that I want to do this in our house!!

      Reply
      • Christina Dennis

        April 19, 2015 at 10:02 pm

        Thanks so much, Krista! Oh man, I love this thing. You definitely have to build at least one in your house!

        Reply
    2. Kat

      May 05, 2015 at 1:47 pm

      We have a small one in the garage but this one is huge. What a great idea to put it in the laundry room. Thanks for sharing!

      Reply
    3. Melissa

      February 26, 2019 at 4:58 pm

      I just found your laundry room and it looks great! I’m getting ready to hang peg board in my laundry and was wondering how yours has held up? Would you do anything differently? I can’t wait to complete mine.

      Reply
      • Lindsay - The DIY Mommy

        February 27, 2019 at 8:28 am

        No Christina is loving it as is. Have fun making your own

        Reply
    4. Varun Sharma

      July 07, 2020 at 1:33 am

      The blog post is really helpful and informative. Thanks for sharing it.

      Reply
    5. Gunasekara Pandian

      November 07, 2020 at 5:12 am

      Excellent recipe goona try this for outdoor grill party on my flattop grill

      Reply
    6. Natalie

      May 11, 2022 at 4:00 pm

      I love the idea of this laundry room pegboard! My husband is concerned about the weight of the clothes in the hampers. How is has it held up for you over the years now? I'd love to switch to the hanging hampers!

      Reply
      • The DIY Mommy

        May 17, 2022 at 9:28 am

        I have not had any problems.

        Reply

    Trackbacks

    1. Motivational Monday | Craft Blog Link Up says:
      April 19, 2015 at 7:00 pm

      […] How To Build A Giant Framed Pegboard from The DIY Mommy. […]

      Reply
    2. Upcycled Candle Jar Cotton Ball Holder {Motivational Monday 4.19.15} | Southern Couture says:
      April 19, 2015 at 7:01 pm

      […] How To Build A Giant Framed Pegboard from The DIY Mommy. […]

      Reply
    3. Motivational Monday 33 - Dwelling In Happiness says:
      April 19, 2015 at 7:02 pm

      […] How To Build A Giant Framed Pegboard from The DIY Mommy. […]

      Reply
    4. How to build a giant, framed pegboard for your laundry or utility room | Edmonton Area Real Estate :: LiveInEdmonton.ca Real Estate Group says:
      April 29, 2015 at 2:02 am

      […] you want the pegboard to look like more of a finished, feature piece in a room like a laundry room. Here’s a tutorial from The DIY Mommy on how to install and frame a large 6′ x 8′ pegboard that can help organize your laundry […]

      Reply
    5. How to Install a DIY Giant Pegboard Wall {Craft Room Makeover} - The Happy Housie says:
      May 14, 2015 at 4:01 am

      […] first read a great tutorial for how to install a giant pegboard over on the DIY Mommy.  She did an entire wall in pegboard and IT. IS. AMAZING.  You really have to see […]

      Reply
    6. A Craft Room Office Pegboard Gallery Wall (With Video Tour) | The DIY Mommy says:
      February 9, 2016 at 11:09 pm

      […] here’s the after! HOORAY! Using a scrap piece of pegboard left over from our laundry room pegboard wall, I made a really functional and pretty pegboard and art gallery wall for my desk […]

      Reply
    7. Motivational Monday - A Crafted Passion says:
      March 14, 2016 at 3:42 pm

      […]  How To Build A Giant Framed Pegboard from The DIY Mommy. […]

      Reply
    8. Teen Boy's Room Reading Nook & Pegboard Storage says:
      January 15, 2017 at 3:06 pm

      […] Pegboard must be mounted on a frame. Do not mount pegboard directly to a flat surface or you won’t be able to get the hooks into the board. Here is a link to a simple tutorial on how to make a pegboard frame. […]

      Reply

    What do you think? Cancel reply

    Your email address will not be published. Required fields are marked *

    This site uses Akismet to reduce spam. Learn how your comment data is processed.

    Primary Sidebar

    Welcome!

    Christina Dennis, The DIY Mommy

    I'm Christina and I'm sharing budget-friendly DIY & decor ideas to create a cozy home and life you love!

    Read more about me

    Latest Posts

    • DIY Thrift Store Candle using a kitchen canister
    • DIY Pillow from IKEA SORTSO Rug
      Turn an IKEA SORTSO rug into a gorgeous pillow
    • 10 Places to Find Cheap Home Decor and Accessories

    What's my home decor style?

    Discover the home decor style that best fits your personality and lifestyle. This two-minute quiz is going to give you the direction you need to start the big, bold room makeovers that you've always wanted to try!

    Find out now!

    Archives

    Footer

    ↑ back to top

    About

    • About The DIY Mommy
    • Privacy Policy
    • Disclosure Policy
    • Terms of Service

    Newsletter

    • Sign Up! for emails and updates

    Contact

    • Contact

    As an Amazon Associate I earn from qualifying purchases.

    Copyright © 2009 - 2023 The DIY Mommy. "The DIY Mommy" is a registered trademark.