How to Install a Rustic Wood Ceiling with Stikwood (One Room Challenge Week 2)
This post may contain affiliate links · This blog generates income via ads
We’re making over our master bedroom for the One Room Challenge this Fall, and so far I’m THRILLED with the progress! I decided to dive right in to the makeover and start with what I think will be my favourite part of the room – the DIY reclaimed wooden tray ceiling. Let me show you how I installed this ceiling all by myself with the help of a few tools and Stikwood.
In case you missed it, here’s my first makeover post that shares my plans and a mood board for the space.
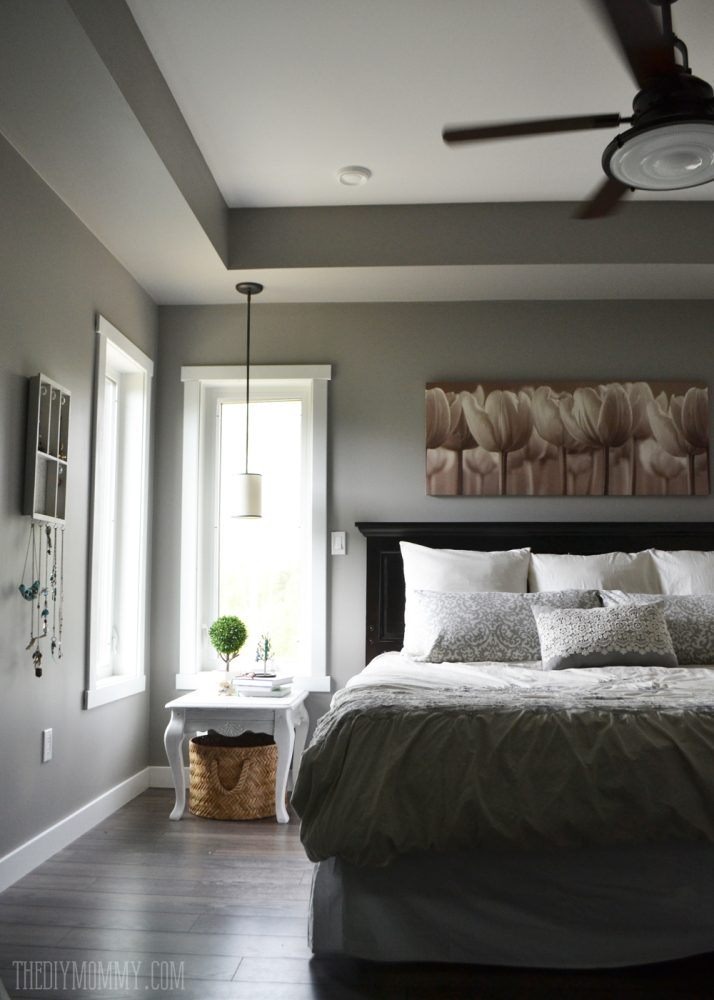
Because I’m making our room into a soft, romantic space I knew that I needed some texture to really make it special. I’ve always loved the tray ceiling in our master bedroom, but I wanted to make it pop! What better than to clad it with some rustic wood? I knew I wanted this look, but I needed to find a way to be able to install it myself.
The ceiling before:
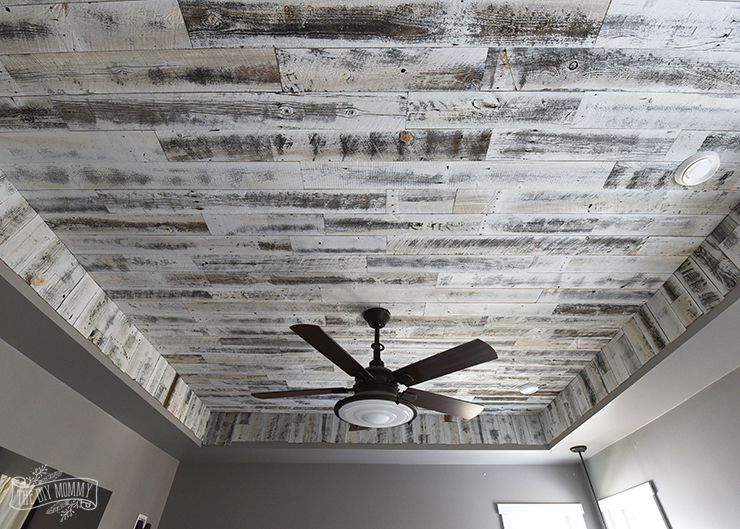
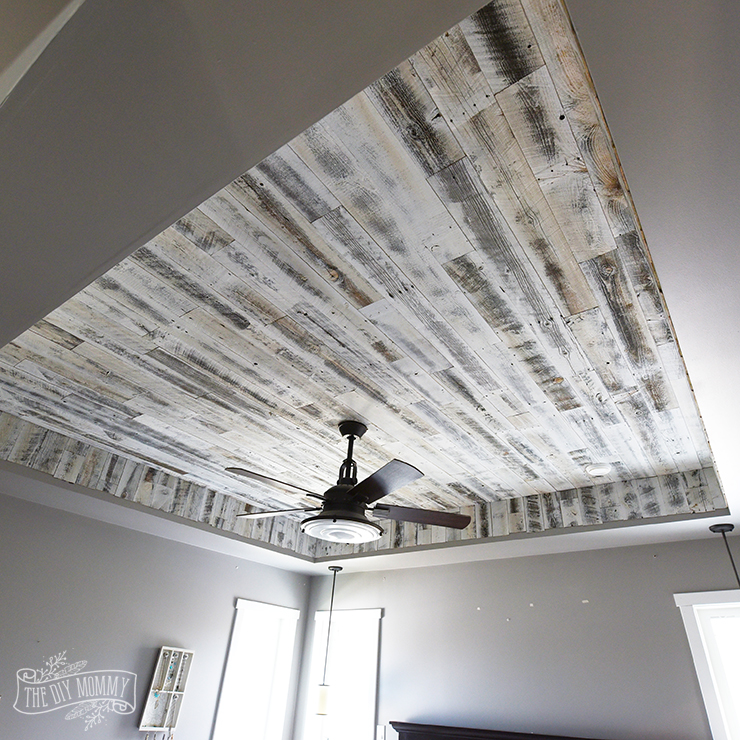
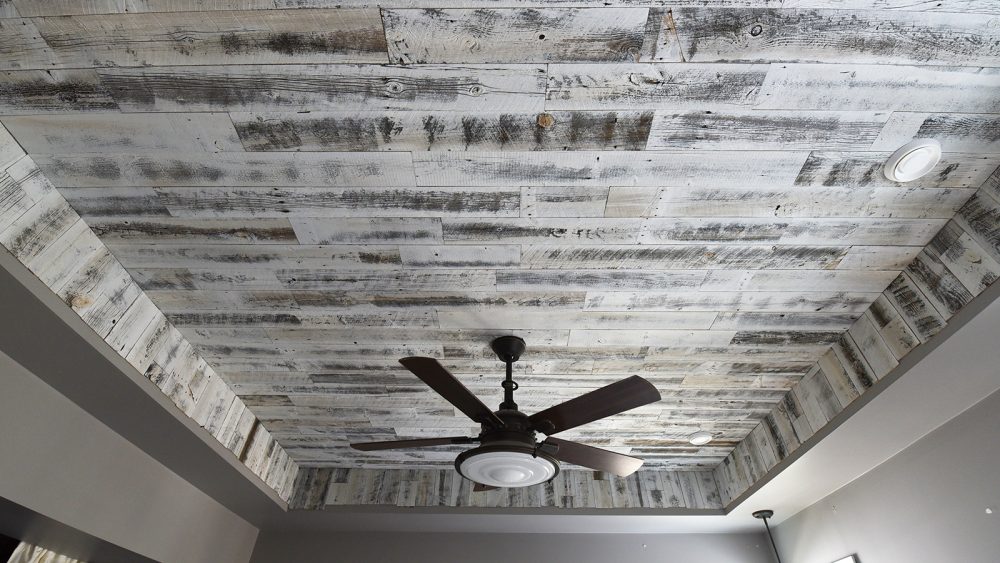
The ceiling after (minus the trim that I’ll be adding):
When I found Stikwood, I knew it was the PERFECT material for this job. It’s real wood, but it’s super-thin and has a sticky back so it’s easy to apply to almost any surface. At first I was a little hesitant about applying this to my ceiling, but when I read that it could be applied and that it would stay, I wanted to try it out!
For my 10 x 10 foot (ish) ceiling, I used just under 4 boxes (160 square feet) of Reclaimed Weathered Wood White Stikwood. There are several different lengths of Stikwood in each box, so I varied the lengths as I went along applying them to my ceiling to give it a staggered, rustic look.
This product is on the pricey side, however it’s incredibly easy and quick to install. For this look, it’s a fabulous way to go if you want to DIY the installation!
As far as tools went, I used a laser chalk line (you could use a regular chalk line if you’re working on a wall), a ladder, a compound miter saw, a small hand saw, and a measuring tape. I also enlisted by hubby to cut a few pieces vertically with his table saw for the end pieces. The process took me about 6 hours to complete, and I’m incredibly happy with the outcome! Now, I’m going to trim the bottom of the ceiling out with some crown moulding to give it a finished look.
To see how I installed this gorgeous ceiling, watch my video below:
![]()
Make sure to follow along with all of the other exciting room makeovers in this season’s One Room Challenge right here.
Disclaimer: This post is sponsored by Stikwood. As always, all of the opinions here are my own. I only recommend companies that I use and love myself. This post also contains affiliate links.
WOW! Your ceiling looks incredible!! What a great idea
Thanks, Jo-Anna!
I love the look of the Stickwood and would love to use it on my ceiling. The only problem is it is so expensive. It would cost me $3000 to do my ceiling. Although I love the product, I’m wondering if this post was not sponsored by Stickwood if you would have spent the $2240 to do your ceiling? It’s great that they did sponsor you and I have nothing against that. I’m happy for you and it looks AMAZING! What I’m asking is would it be worth paying the full price for the same look?
It’s a great question, Charla! I agree that it’s pricey. What I said in my video (and I’m going to edit this post to add) is that while the product is expensive, it’s easy + fast to install. So the cost savings is in the installation. A person might be able to DIY a similar look with strips of wood, but my guess is that it would take a long time to strip down the wood, distress it, and install it with wood glue and nails. So, it really boils down to the ease of use and how much time you have to spend! This will be the feature if the room, so I think it’s worth the cost. Hope that helps!
Very cool!
Thank you Mrs. Major Hoff 🙂
You are my hero! Seriously girl you’re always so fearless and busy! This looks amazing, I just can’t wait to see how this turns out, I know it will amazing!
Christina!!!!! This looks incredible! I bet you just stare up at the ceiling with a big smile every time you enter that room now! SO perfect!
Wow, Christina! What a statement your ceiling makes! Can’t wait to see what you do this week!
How cool! So you didn’t need nails or screws? I’ll keep this in mind if I’m ever working with more rustic inspired clients 🙂
Looking good so far!
You don’t need any nails or screws it just sticks right on. So simple and easy to work with!
Very nice. I love it. I can’t believe it’s not real…looks amazing. Thanks for the links to Stikwood!
Thank you, Matthew! So glad you enjoyed the tutorial ?
Love the ceiling! However, I think it kinda looks like wallpaper because the sides are also done in the faux wood. It would have look more like true wood if you only had finished the ceiling.
Love this look. Wondering if it would stick on a popcorn ceiling?? Glad I found you for all the inspiration. ❤️
Thank you! They don’t recommend putting it on a popcorn ceiling, but it should work on something just a little textured.
Can you tell me how it’s held up? Has there been any peeling? Falling off pieces?
Nope! It still looks great!
Wow, this is wonderful and helpful at the same time. Thanks for this. However, hiring the professional and right contractor is really important because it will surely get the job done right without any accident or damage.
Great job! I know it was not part of the makeover but can you share the source of the fan?
I would love to know this as well.
I’m wondering about the fan too. Love the ceiling, but the fan looks great with it too. Good Job!!!!
Hi! This is the fan: https://www.amazon.com/Kichler-300018BSS-56-Inch-Hatteras-Stainless/dp/B003F1ERUU/ref=as_li_ss_tl?th=1&linkCode=sl1&tag=tdm0f-20&linkId=9092c77e00d20eda24bd99e480630e0d&language=en_US
Any chance you know what kind of lighting your hubby installed inside the crown molding on your ceiling? You mentioned that he did it, but I couldn’t find any information on it, and I’d love to copy your idea on my tray ceiling. Thanks!
He tucked a strip of LED lights behind the crown moulding we installed in the tray ceiling.You can see the images in this post: https://thediymommy.com/our-modern-french-country-master-bedroom-one-room-challenge-reveal/