How to Install Peel and Stick Tile Backsplash
This post may contain affiliate links · This blog generates income via ads
After a few installations of peel and stick backsplash, I have to say that it’s one of my favourite budget-friendly updates! It’s so simple to install, so it’s an easy DIY project that’s good for beginners or experts alike! Let me show you how to install peel and stick tile backsplash.
What is peel and stick tile?
Peel and stick tile is a very thick vinyl peel sticker that has the texture and colour of ceramic or porcelain wall tiles. It usually comes in 12″ or 10″ square sections that you can piece together to create a backsplash.
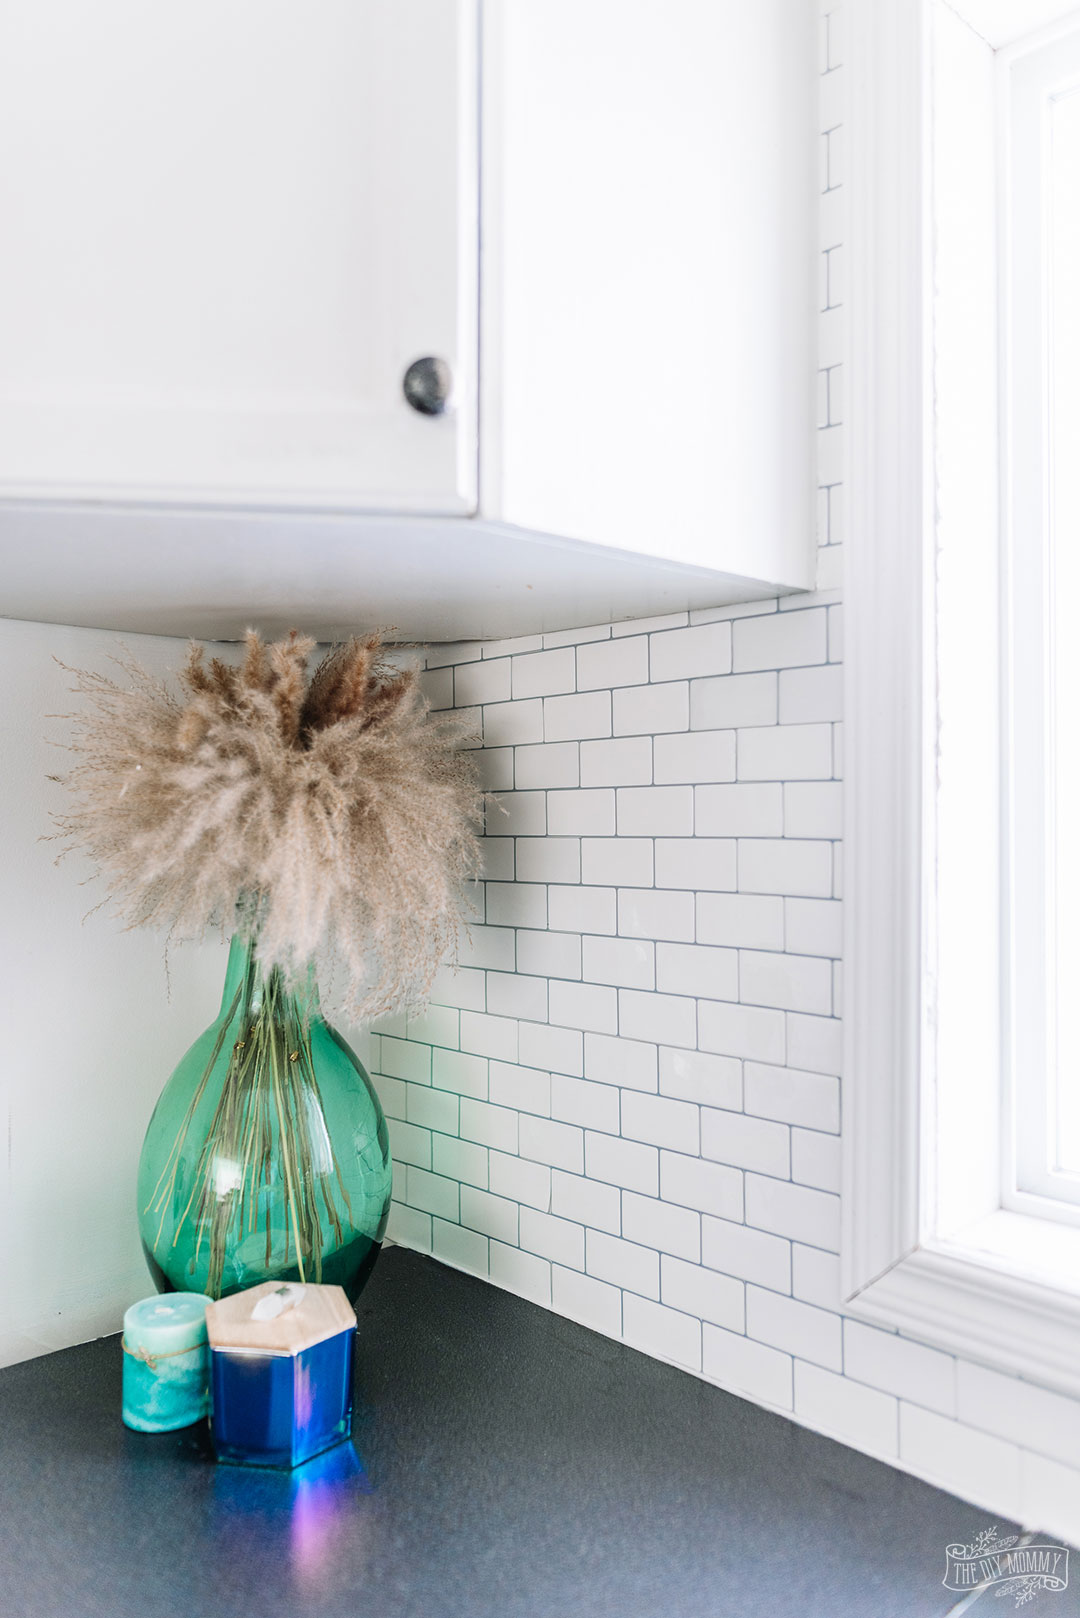
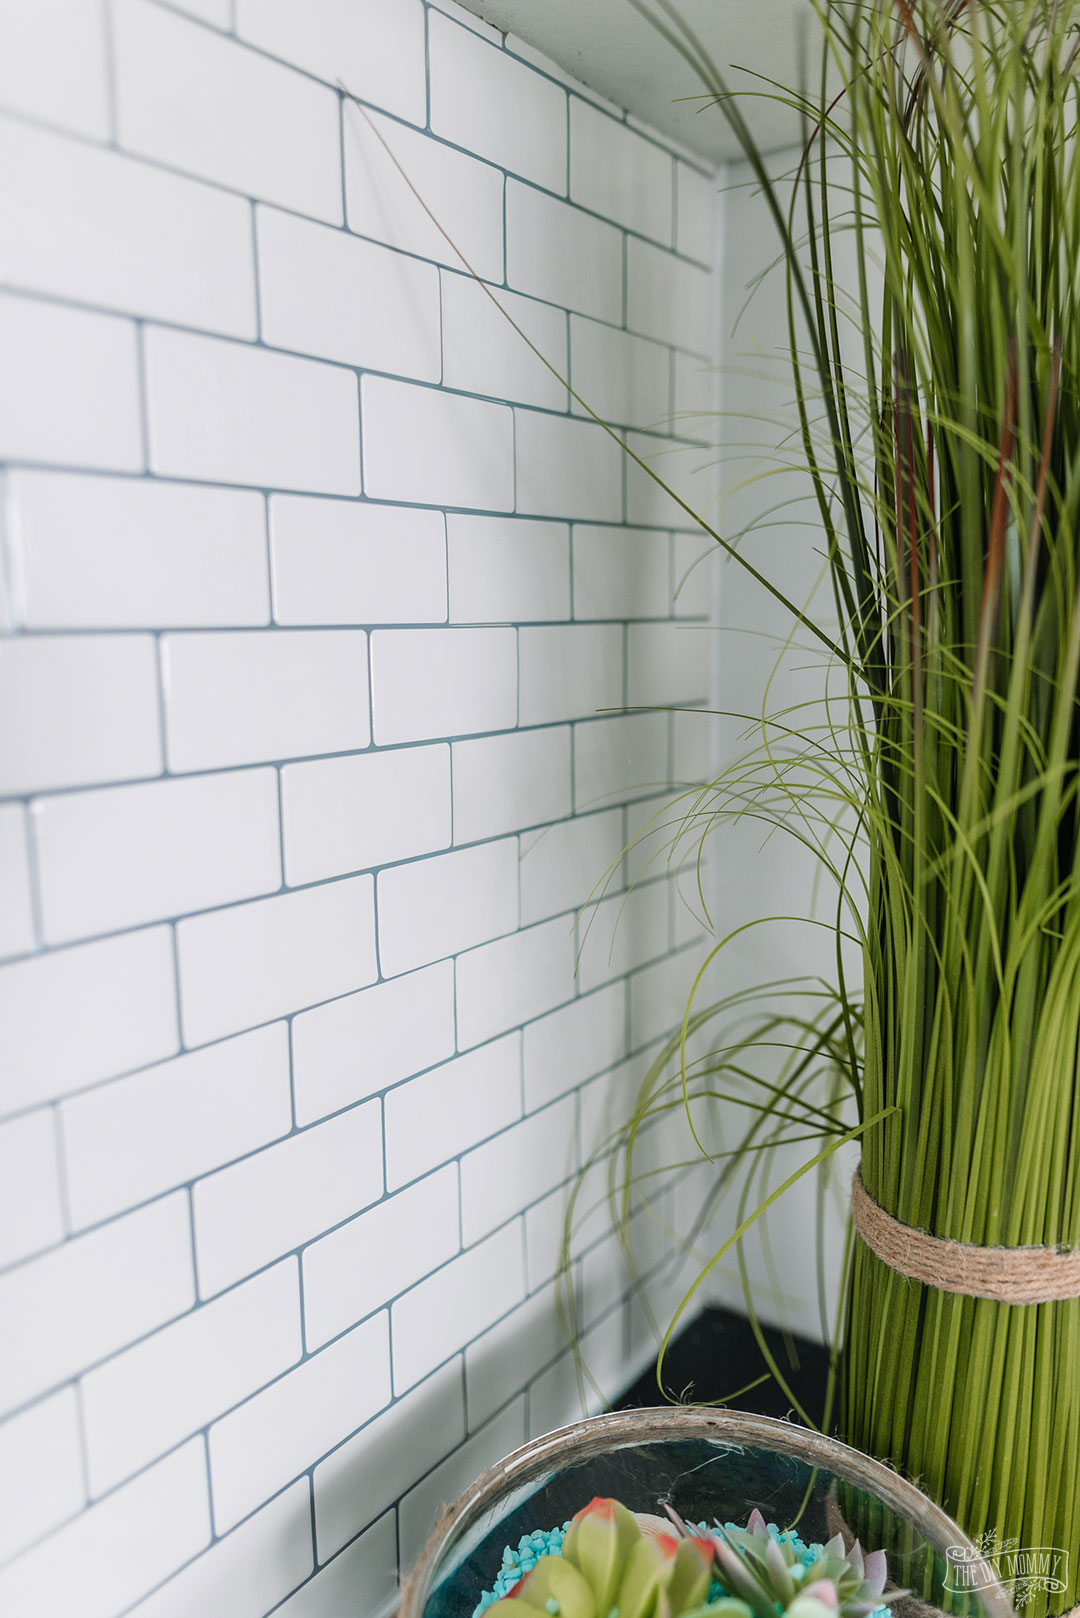
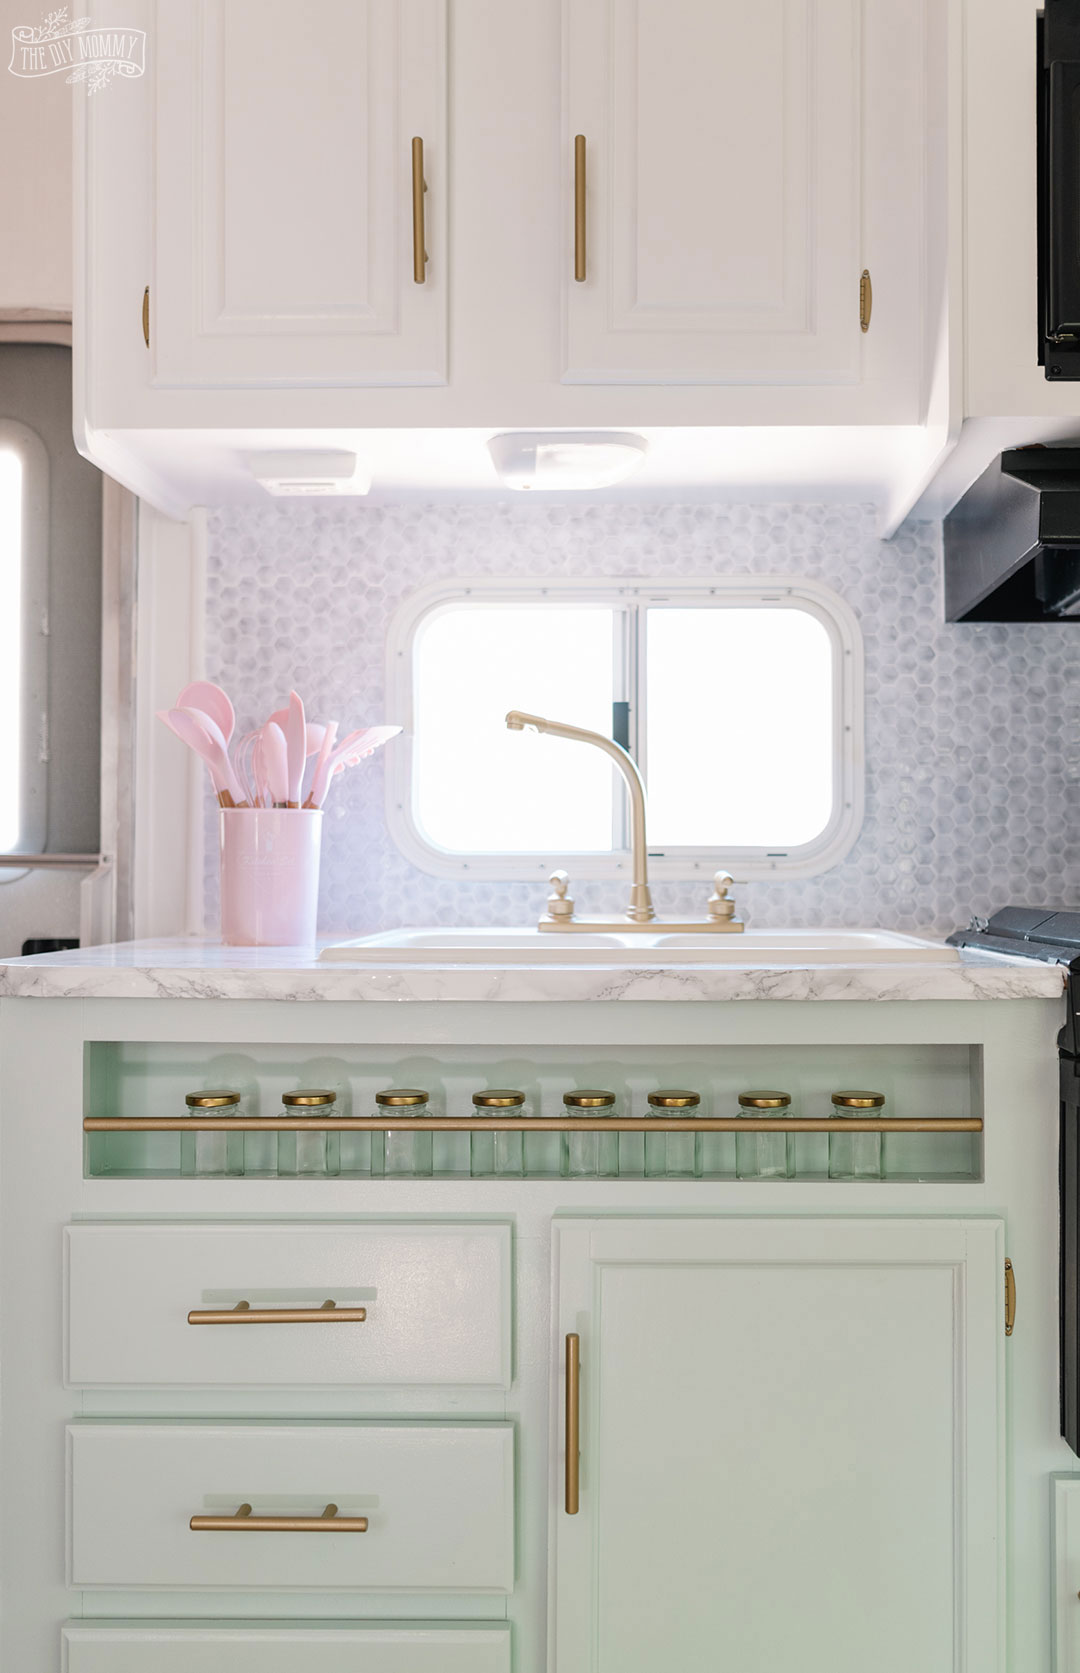
It comes in many shapes and styles, just like regular tile! The product I used in my studio kitchen as a backsplash was a subway tile. I really like the the look of the warm white colour with grey-looking grout lines. It looks similar to high-shine glass, and for the price I paid (Dollarama!) I was quite pleased with it initially.
I prefer to use larger scale peel and stick backsplash tiles on a kitchen wall rather than stick mosaic tiles. It’s easier to line up the pieces in a straight line. There’s so many different peel and stick tiles, you just have to find a style that works for you! You can find them in many shapes and colours, just like regular tiles.
This product is a great way to achieve an easy makeover in many spaces where ceramic tiles would normally be used, for a fraction of the price of a regular tiling job. We all like finding budget-friendly ways to create a fresh look of sophistication, and these tiles are a great way to do just that!
In case you’re thinking peel and stick tile lacks variety and your only option is white subway tile backsplash, think again! Peel and stick tile is incredibly varied and versatile. It comes in all kinds of patterns. From clean simple lines with a classic look to hexagonal or geometric design patterns, and more. If you are looking for a clean white look, great! If you want a pop of color or a beautiful patterned tile, that’s great too! It mimics a wide variety of materials usually available for tiling, helping you achieve any look. Whether you’re looking to add a finishing touch on anything from vintage to farmhouse styles, you can find what you’re looking for in peel and stick tile.
Does peel and stick tile work?
I’ve installed peel and stick tile three times, and have been happy with the results. It was easy to install, and durable enough that it hasn’t even come off the wall in our camper that sits outside in extreme temperature changes (three years later). I’ve tried Smart Tiles, Amazon products, and peel and stick tile from Dollarama.
How long will peel and stick backsplash last?
Depending on the quality of tile used, you may notice a bit of lifting at the corners over time. Which of course would give away that you did not use real tile. This has only happened to me with the very cheapest of tiles. I found it could be fixed with a dab of hot glue here and there if you really wanted. This would make the eventual removal of the tile more difficult. So definitely keep that in mind when choosing your product! They are often used in areas where you have a tight budget and want a temporary solution. So if you are renting, gluing cheap peel and stick tiles might not be the best option.
Generally speaking though, if you invest in quality adhesive tiles you will be surprised at how well they work over time. I believe these more expensive tiles can actually work for a long term tiling solution and replace traditional tile if you prefer. I have found that some of my own projects have held up for years!
Where to buy the best peel and stick tiles
I have installed peel and stick a few times now and have used three different products: tiles from Dollarama, Smart Tiles, and Amazon tiles. While all three added a realistic look of tile to my project areas, they didn’t all work exactly the same.
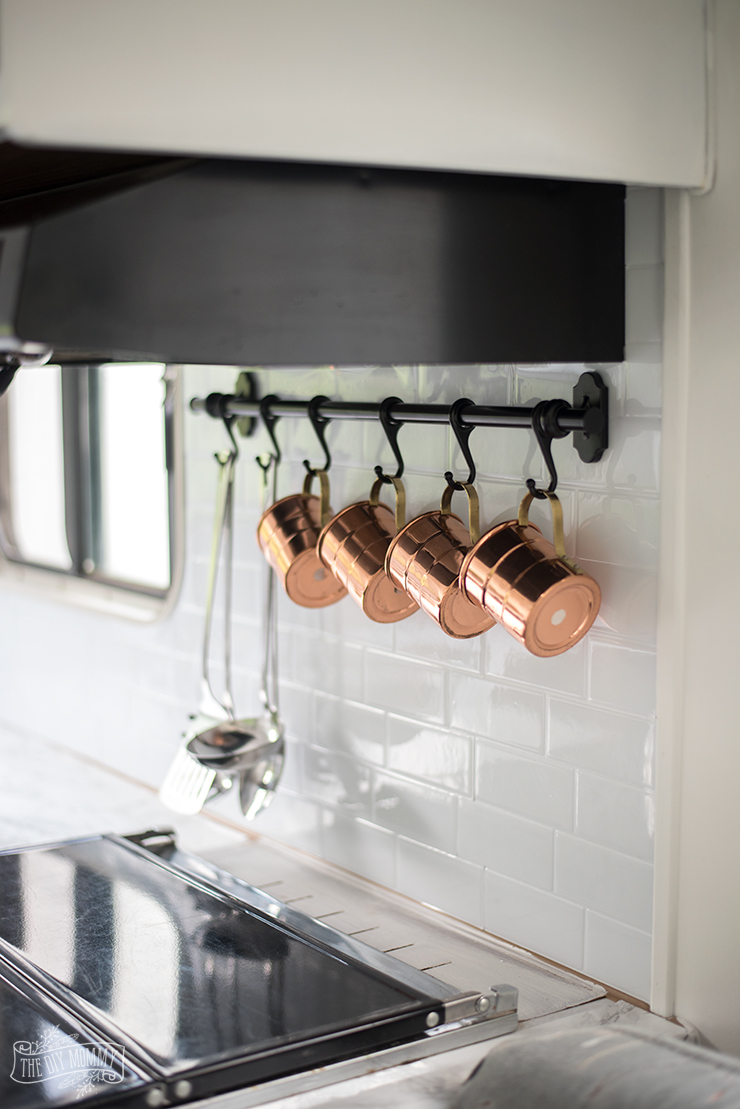
The Dollarama tiles are what I put in my studio kitchen to achieve a classic subway tile look for the backsplash area. They were only $3.50 per sheet! I really liked how they looked initially. But after a few months I’ve noticed some lifting of the corners of the tile here and there, which of course messes with the new tile backsplash look I was going for! I’ve also noticed that there are some colour variations between the stick panels. While they should all be classic white, some are a bit more grey. I wouldn’t recommend these for a large scale DIY project, although I think they would be great for small crafts or spaces.
I checked on the Amazon tile sheets five months after I installed them in my DIY Camper 2.0 and they still look quite nice. There’s a little lifting where I made a mistake in the installation process and had to reposition them two or three times. This was definitely my mistake! But overall these tiles were pretty forgiving and still sticky after moving them a couple of times. I found these particular mosaic style Amazon tiles the most challenging to install.
So, the verdict is in! The best performing tile is the brand name tile, SmartTile. They are more expensive, but they’re going to last the longest according to my experience. This tile has been in my first DIY camper for three years where we get temperatures ranging from -40 to +30 degrees Celsius, and they still look great. This is a classic case of getting what you pay for. These are definitely my recommendation for larger DIY projects like your kitchen or laundry room.
Watch the full review: Peel & Stick Tile: Dollar store vs Amazon vs Brand Name… Which is BEST?!
Can peel and stick tile go over existing tile? Over a stove? In a shower?
Most peel and stick tile backsplash will stick to existing tile as long as it is a relatively smooth surface and very clean. I’ve used peel and stick tile over an electric stove, but I wouldn’t use it over a gas stove because of the heat. And I wouldn’t use it on a shower wall because of the extreme moisture.
I did install them over the sink in our camper bathroom because we really don’t use that sink all that much. So, I didn’t think moisture would be an issue there. They are water resistant, but I would never consider them waterproof.
How to Install a Peel & Stick Tile Backsplash
Peel and stick backsplashes are so easy to install compared to the real thing! You don’t need to worry about a tile cutter, wet saw, grout float, or any of the other tools necessary to install real tile. All you need is your peel and stick tiles, some scissors or other cutting tool, a ruler, tape measure, level, and a clean flat surface to put your tiles on. This really is the easy way to get a brand new look.
How do you prepare a wall for peel-and-stick backsplash?
Make sure the surface you are putting the tile on is clean. Use a degreaser and clean the entire surface, because the tiles will stick best to a clean, dry surface. And don’t do this too far in advance! Walls will get dusty again fairly quickly. As previously mentioned, you don’t necessarily need to use a bare wall for this. Peel and stick tiles should stick to a variety of surfaces, as long as they are clean and flat. Take the time to make sure your surface is truly clean and completely dry and you will be much happier with the end results.
What is the best way to install peel-and-stick backsplash?
In my opinion, the best way is to just do it! You don’t have to plan too much. Your tiles all look the same and you don’t need to worry about a pattern like you would if you were doing hardwood flooring.
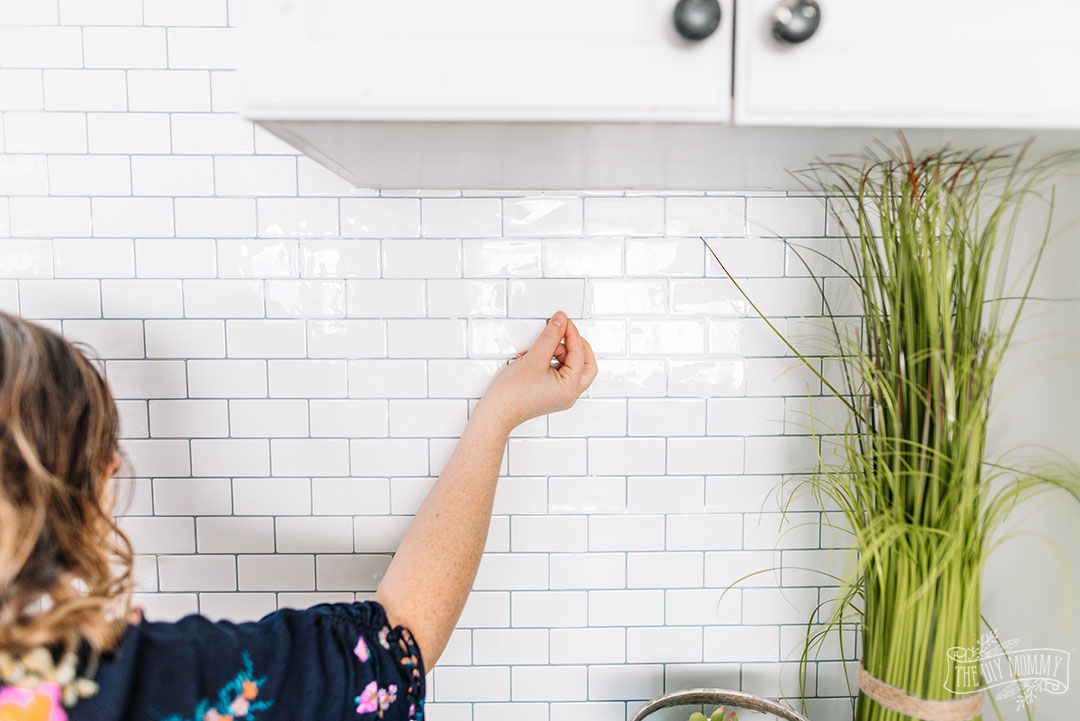
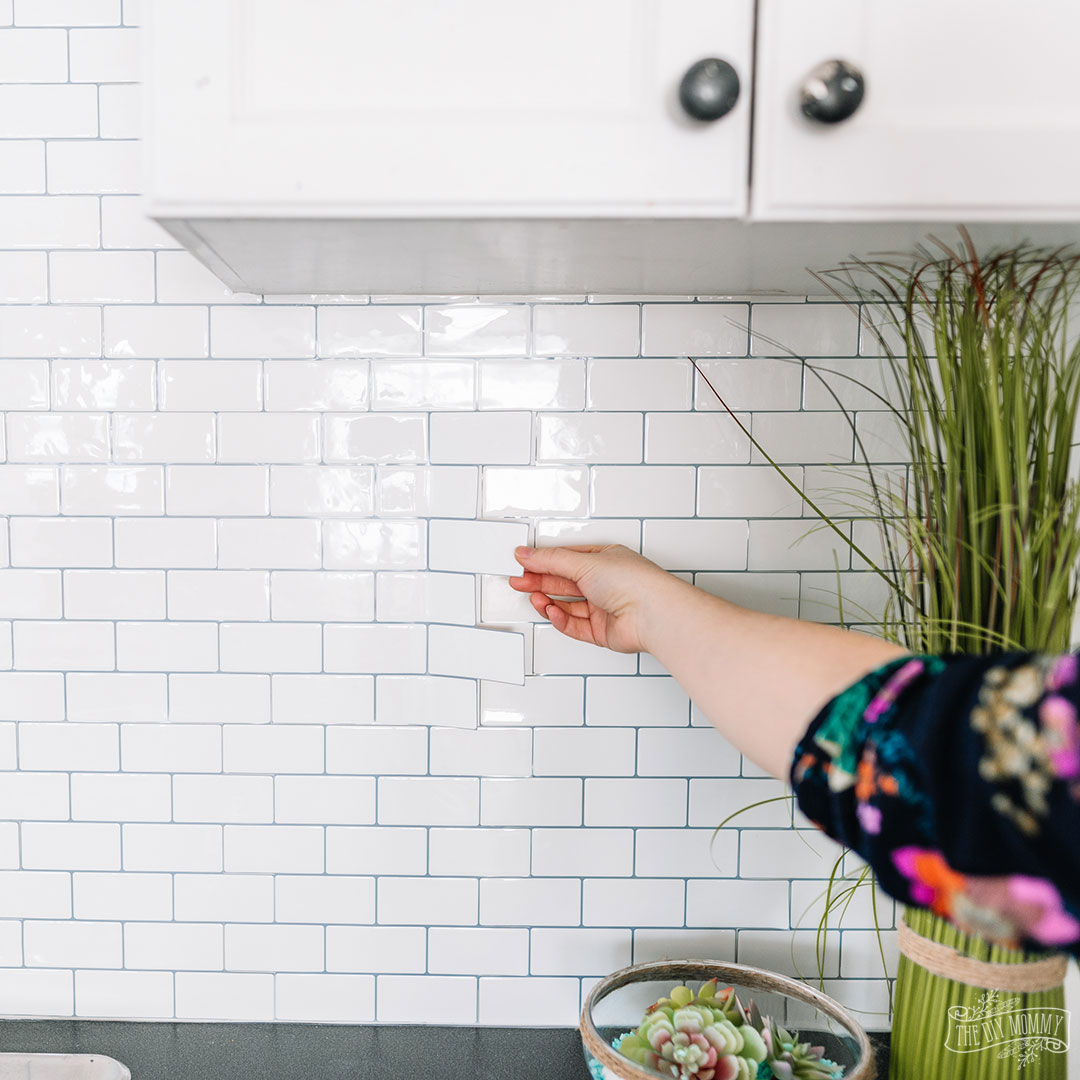
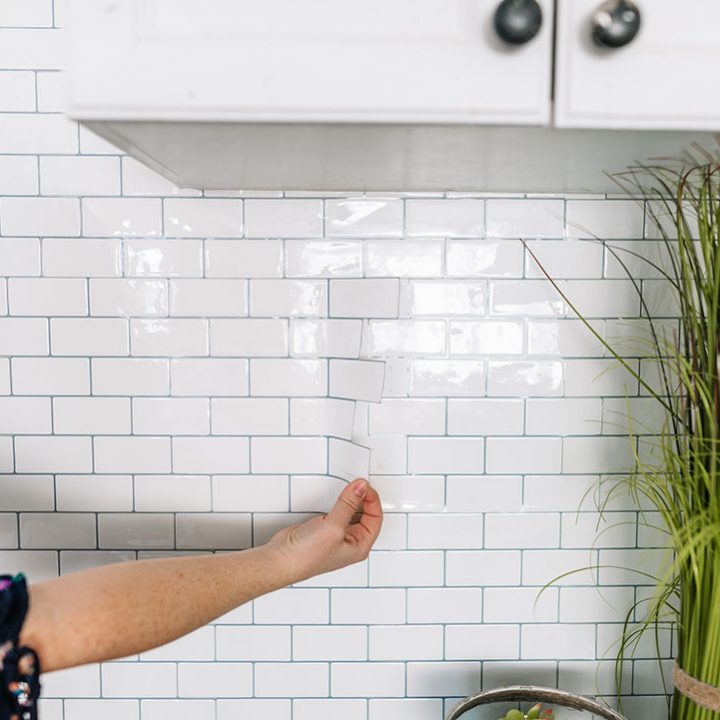
The most important thing is to make sure your first line of tiles is straight. I recommend using painter’s tape to mark a straight line using your level and tape measure. Then take your first tile sheet, remove the backing, and line it up with the painter’s tape. Then you can get started!
Eventually, you are going to run into a space where you need to cut your tiles to go around something or where you meet a corner. Fortunately, they are easy to cut! I like to use a ruler, a pencil, and regular scissors for this operation to get a nice straight edge. You could use a utility knife or a box cutter style knife, but I actually prefer to use scissors because I have a little more control this way.
In my experience, you can reposition tiles once. Twice is too many and takes away the stickiness of the back of the tile, especially if you’re using cheaper tiles. Make sure your tile sheet is in the correct position before you smooth it to the wall.
Do a dry check before you peel the backing paper off the tile!
I recommend you watch the tutorial below before you start your installation. It can be tricky to go around outlet covers, cupboard corners, windows, and other edges. I’ll show you step by step how to install in these areas to reduce waste.
Install Peel & Stick Tile: Video Tutorial
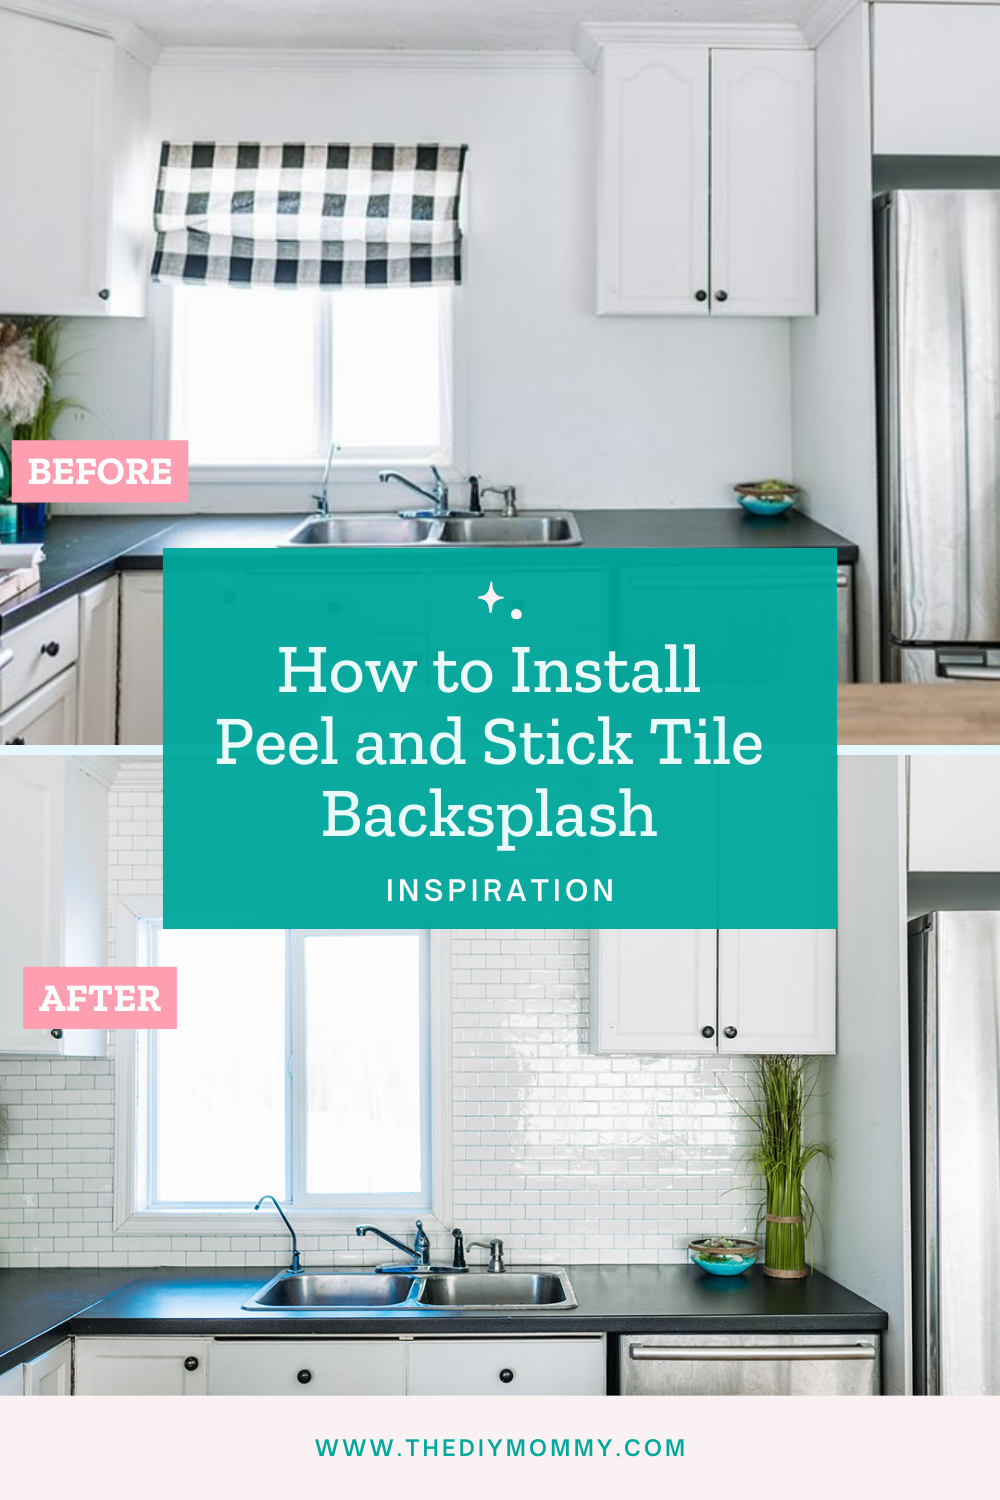
Peel & Stick Tile Before & After Photos
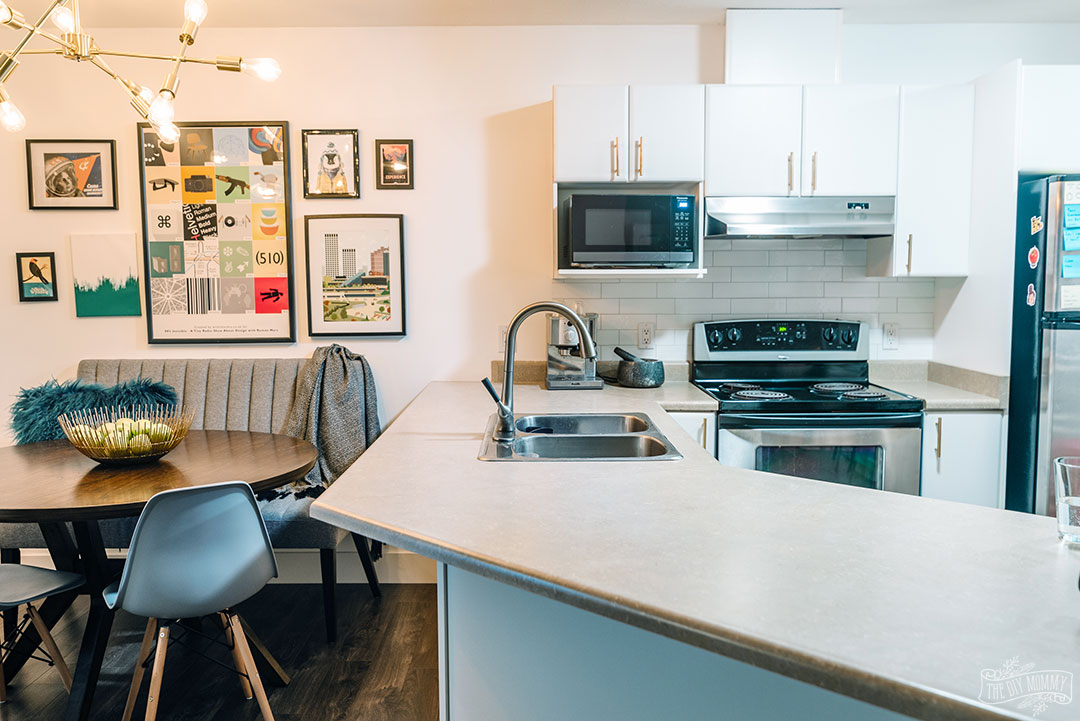
Here is my studio kitchen before:
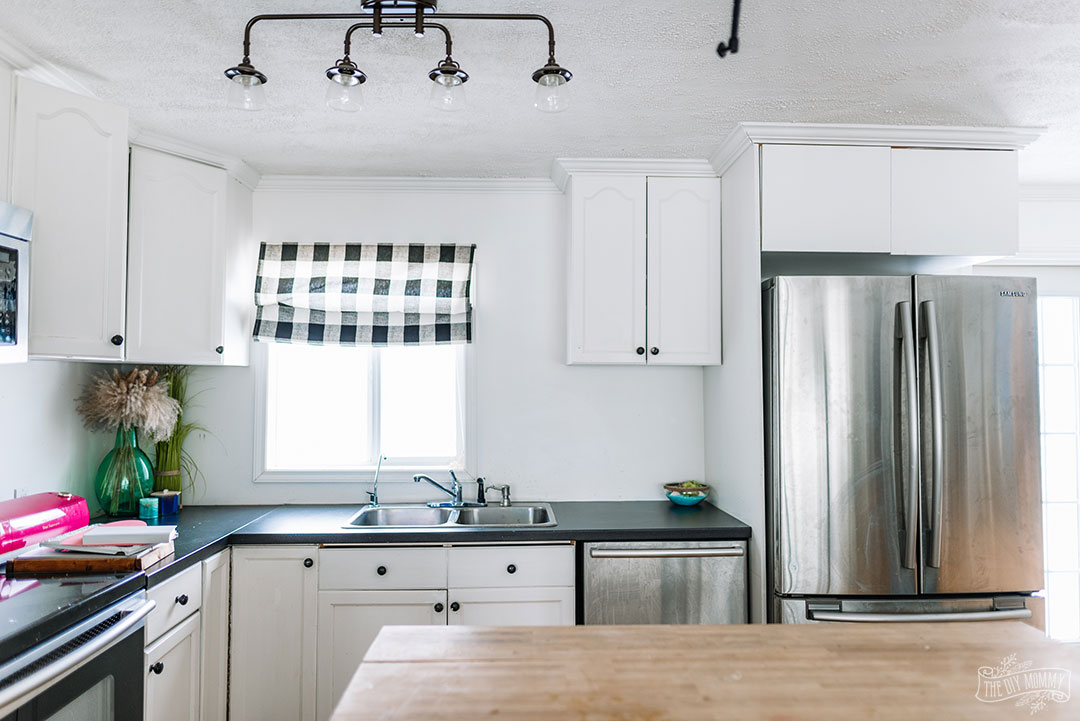
And here it is now!

I love the texture and pattern the tiles bring to the kitchen while still keeping it light and bright for my photos and videos.
Are peel and stick backsplash tiles a good idea?
So, after all this, you tell me the answer to this question! I personally believe that they are a great idea, especially if you live in a rental where a permanent change is not feasible, if you just need something to tide you over until you can do a proper renovation of your space, or for a camper where you don’t want to spend a lot of money renovating. If you buy good quality tiles, they will pass the test of time and give you a beautiful, clean, bright space for very little cost or effort!
How to Install Peel and Stick Tile Backsplash
Learn how to install peel and stick tile backsplash for an inexpensive and easy kitchen update.
Materials
- peel and stick tile
- latex caulk
- cleaner / de-greaser
- paper towel
Tools
- hard ruler
- measuring tape
- sharp scissors or craft knife
- pencil
- marking pen
- kraft paper for making templates (optional)
Instructions
- Clean your wall surface thoroughly with a de-greasing cleaner and paper towel. Remove any outlet covers.
- Once it's dry, you are ready to install the tile.
- Cut the jagged edges of the first piece of tile off with scissors. You can mark a straight line with pencil and a hard ruler before cutting.
- Peel off the tile backing, and press it onto the starting corner of the wall. I like to start in the lower right corner of a backsplash.
- Once the tile is in position, press it firmly in place by smoothing it with your hand.
- Peel the backing off the next piece of tile, and place it beside the first piece making sure to align all the corners.
- Once the tile is in position, press it firmly in place by smoothing it with your hand.
- Continue in this way until you finish the backsplash.
- If you need to cut around any windows, cupboards or outlets, make a template with kraft paper or measure and mark the piece of tile & cut it to size.
Have you done a peel and stick tile transformation in one of your spaces? Tag me @thediymommy, I would love to see it!
Pin Me:
How is it for cleaning grease off behind the stove?
No I have never tried peel and stick tile. Can you put it over wallpaper
I absolutely love this and have been searching for something to do in my entry. So I am headed to Ikea. wish me luck! Oh yea You are the best!!!!! Thank you for sharing!!!!
Can I put this over wallpaper, or do I have to remove the wallpaper first?
If your wallpaper is in good shape, we think you could tile right over top of it.
Love this idea for a quick easy flip. I was wondering, can you put it on a textured wall? Or does it need to be smooth?
It would depend on the style of it is as to whether or not the tile would adhere properly – perhaps you can try to sand down a test area with one tile to see how it goes!
I installed the peel and stick tile that I got from Lowe’s when it first came out. Don’t remember the brand name. It was the rectangular glass type tiles in earth tones. Enough to cover a medium sized L-shaped kitchen cost about $200. but to purchase and install the real thing would have been at least 3X the cost and I was on a tight budget. I simply cleaned the walls really well, followed the instructions, had the entire project finished in half a day. I can’t tell you how great it looked and what a huge difference it made in my kitchen. My son-in-law came over the next day – prepared to find a cheap looking mess – he had to touch it to prove that it was peel and stick. After that, every time he came over, he would run his hands across it and talk about how real it looked. LOL It wipes down easily, stays beautiful for many years. I’m actually getting ready to install the white subway tiles in my new kitchen…the peel and stick kind.
Hi! We bought TicTac tiles to use as a backsplash in our laundry room in our basement. After only a few days they started peeling off the wall and they are now just hanging miserably halfway down. Would you happen to know if these tiles have to be installed on a flat paint? My husband cleaned the walls before installing. The paint is white and has a shiny finish. Do you think it’s the reason the tiles are peeling off? I wouldn’t say the area has a high humidity.
Im really nervous about the cutting part. Im afraid it wont be a clean line. Whats the best tool?
Christina has used both a craft knife and just sharp scissors – both worked well!
You inspired me to do peel and stick for my kitchen! I LOVE this look and can’t wait to get started. Also, where did you purchase your rose gold cups?! I’m obsessed with them!!
Looks great. What did you use for trim piece on the ends where the backsplash does not run into a corner? Thanks very much.
Hi! We bought Smart tiles from amazon to use as a kitchen backsplash. We bought this brand because we though that higher price would come higher quality products. However, after only two weeks they started peeling off the wall, I then tried spray adhesive as they suggested and it didn’t work. Finally I asked for return and looked for new substitutes. After read a lot of reviews I decided to buy Art3d brand, and install them as the way you suggested, it work great so far! I will come back to update here if something unexpected happened.