How to make a Dried Flower Wreath
This post may contain affiliate links · This blog generates income via ads
A dried floral wreath is such a beautiful, organic decor element for Spring, and you can make one yourself to save money. Here’s how to make a dried flower wreath in a few easy steps!

Today’s blog post is in collaboration with some of my favourite blogging friends. After you check out my wreath idea, make sure to visit their DIY wreaths linked at the bottom of this post!
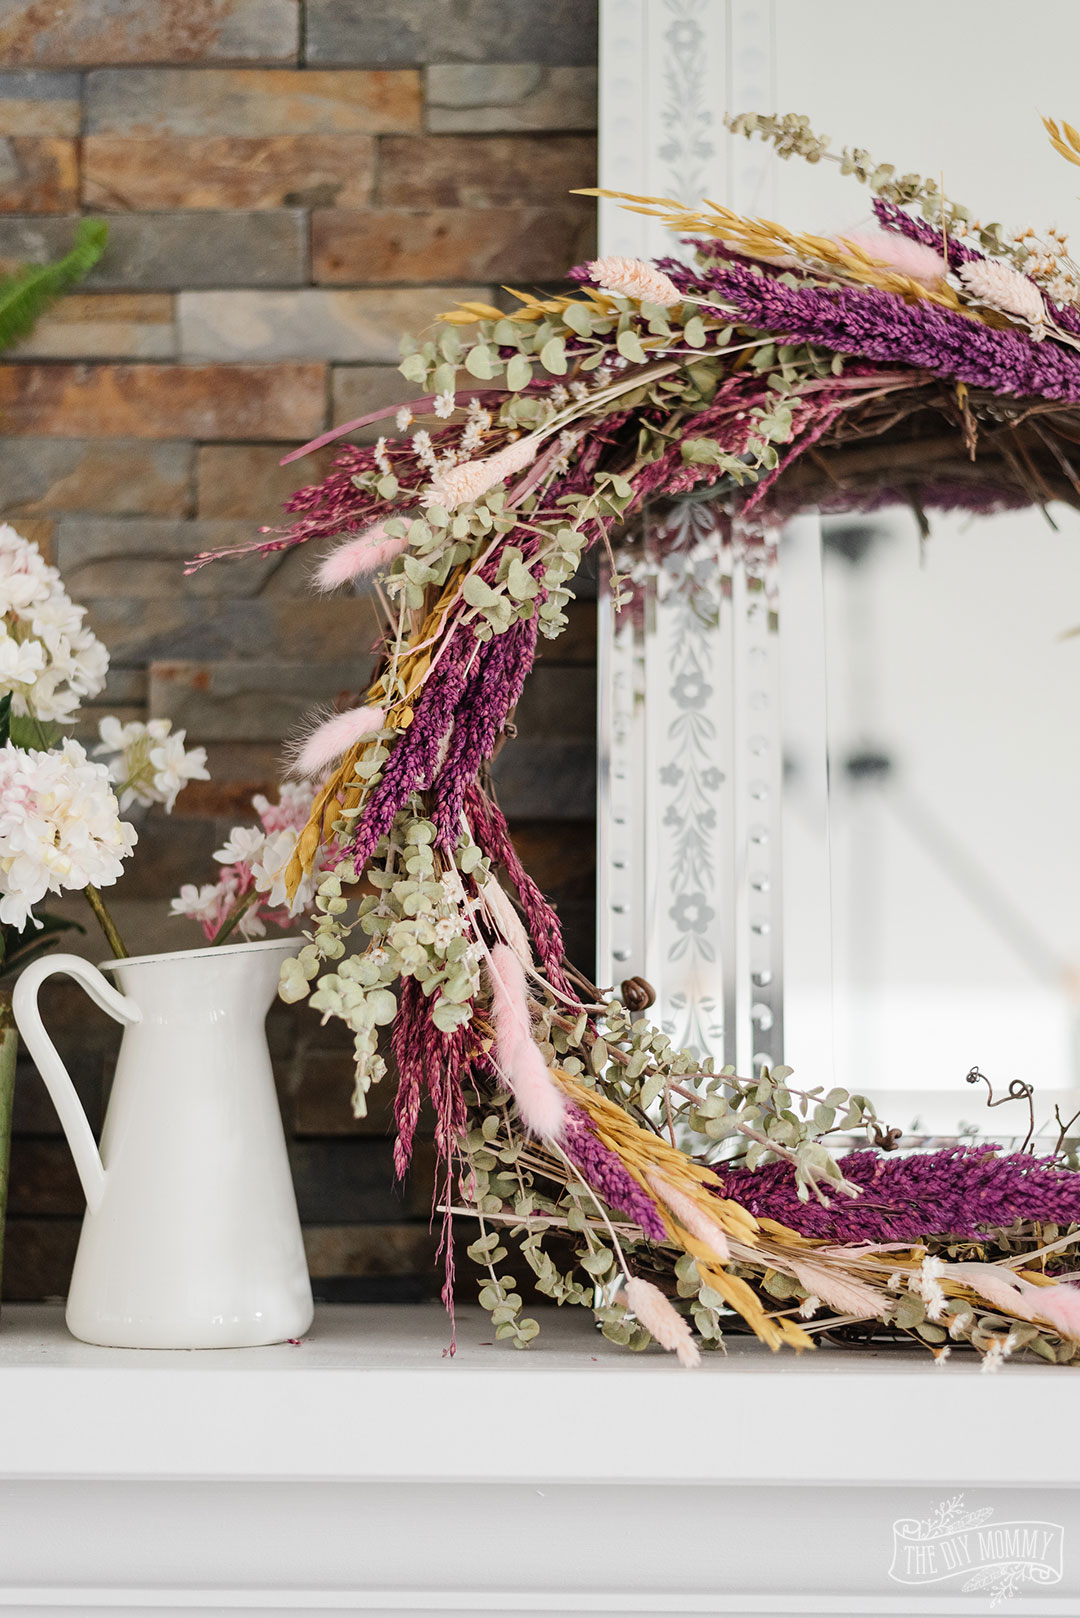
This year, I’m loving the idea of using simple, natural elements in my Spring and Easter decor. I’ve always loved dried florals, and this DIY dried flower wreath turned out so beautifully!

Making this Spring wreath is easy. Here’s how!
How to make a dried flower wreath
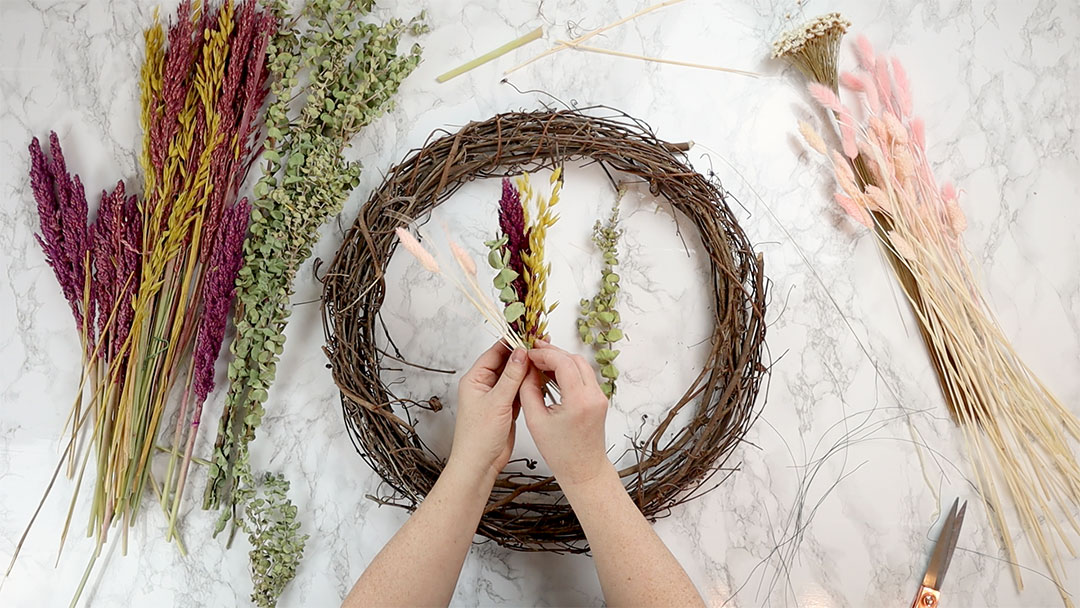
Materials:
- round grapevine wreath form
- a variety of dried flowers (I’m using a bundle I found at HomeSense, and some star flowers and bunny tails that Luxe B Pampas Grass gifted me)
- scissors
- floral wire
(P.S. Use the code THEDIYMOMMY to get 20% off your Luxe B order from their website or Etsy Shop!)
First create a bundle of dried flowers that’s about 6-8 inches tall. Use a variety of florals and stagger their heights for interest. I’m using about 5 different dried florals in my bundle including dried eucalyptus.
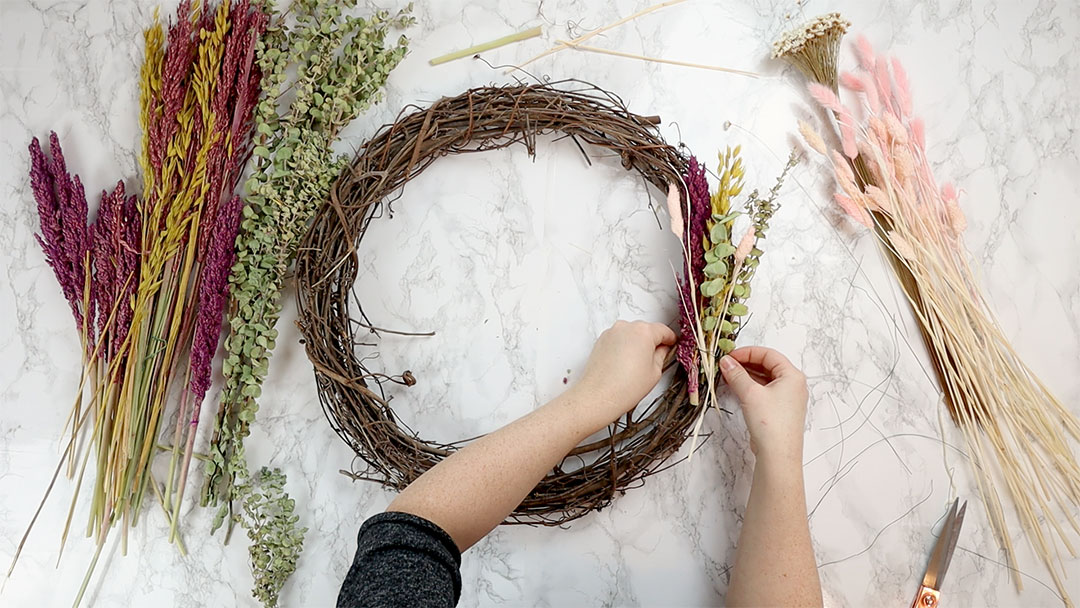
Next, attach the bundle to the grapevine wreath by wrapping a piece of floral wire around the bundle and the wreath. Twist the wire tightly to secure it, and tuck in any loose ends.
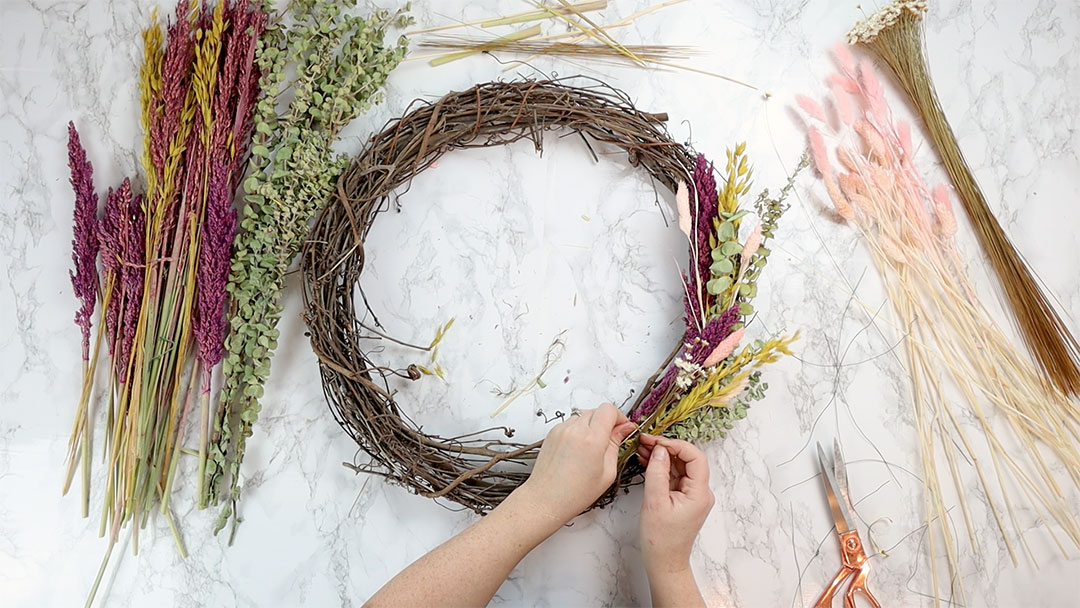
Now, create another bundle of florals that’s slightly different than your first bundle for interest. For my second bundle (and every other bundle after this), I’m adding in some dried star flowers and changing the order of the florals. Place this next bundle on the wreath, overlapping the first bundle by a few inches to cover any wire or stems. Attach this bundle to the wreath form just like you did the first one.
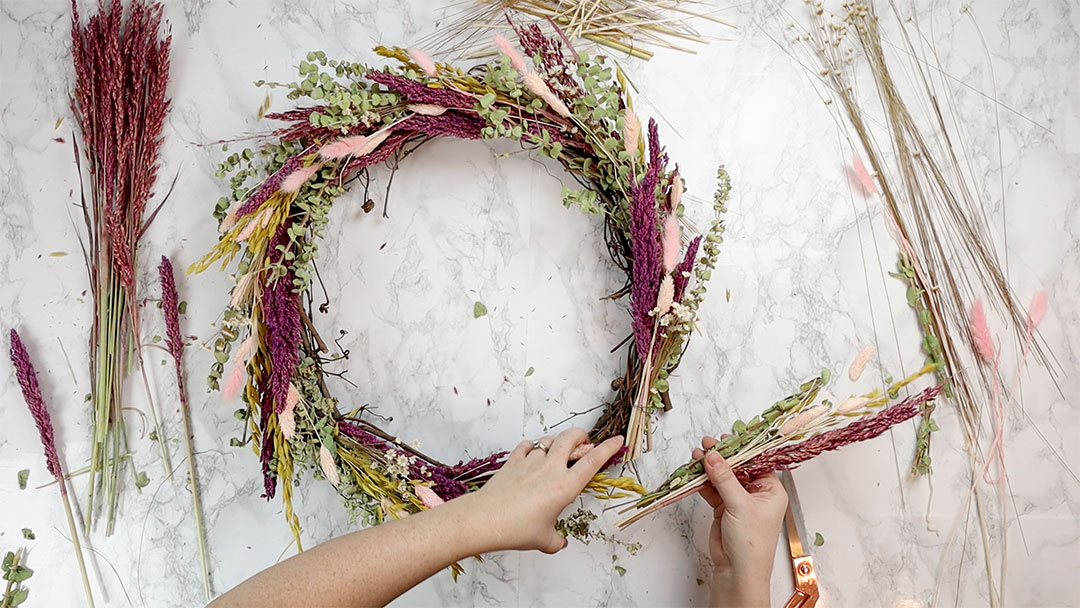
Continue in this way until you have space on your wreath form for one last bundle. Create it, and then place it on your wreath so that it overlaps the previous bundle and is tucked under the first bundle. Secure it to the form with wire.

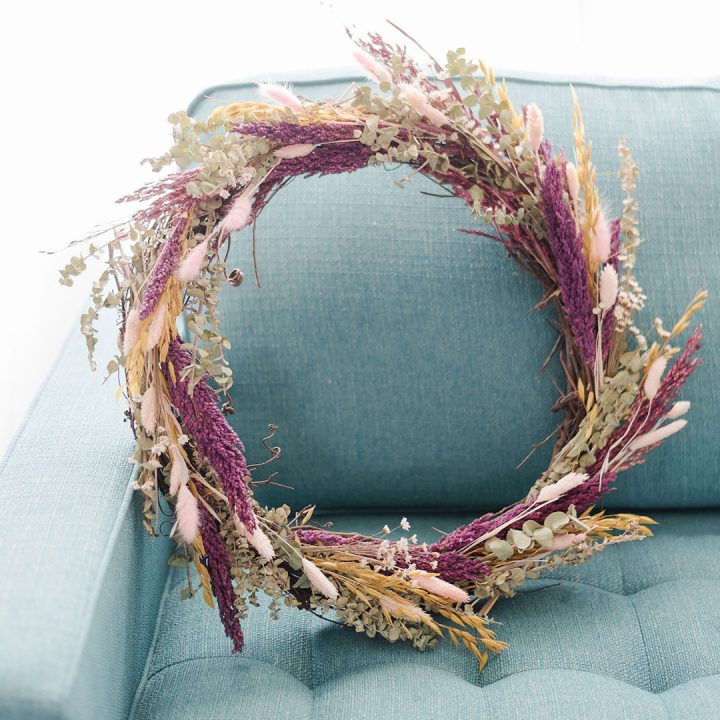
You’re all done! Isn’t that a simple DIY and oh-so-beautiful?! I can picture leaving this up on my mantel until Fall.
How to make a Dried Flower Wreath
Create a natural, gorgeous wreath for the season with beautiful dried flowers on a simple grapevine base.
Materials
- round grapevine wreath form
- a variety of dried flowers (I'm using a bundle I found at HomeSense, and some star flowers and bunny tails that Luxe B Pampas Grass gifted me)
- scissors
- floral wire
Instructions
- First create a bundle of dried flowers that's about 6-8 inches tall. Use a variety of florals and stagger their heights for interest. I'm using about 5 different dried florals in my bundle including dried eucalyptus.
- Next, attach the bundle to the grapevine wreath by wrapping a piece of floral wire around the bundle and the wreath. Twist the wire tightly to secure it, and tuck in any loose ends.
- Now, create another bundle of florals that's slightly different than your first bundle for interest. For my second bundle (and every other bundle after this), I'm adding in some dried star flowers and changing the order of the florals. Place this next bundle on the wreath, overlapping the first bundle by a few inches to cover any wire or stems. Attach this bundle to the wreath form just like you did the first one.
- Continue in this way until you have space on your wreath form for one last bundle. Create it, and then place it on your wreath so that it overlaps the previous bundle and is tucked under the first bundle. Secure it to the form with wire.
Notes
Once the wreath is complete, you can fill in any bare spots with leftover florals.
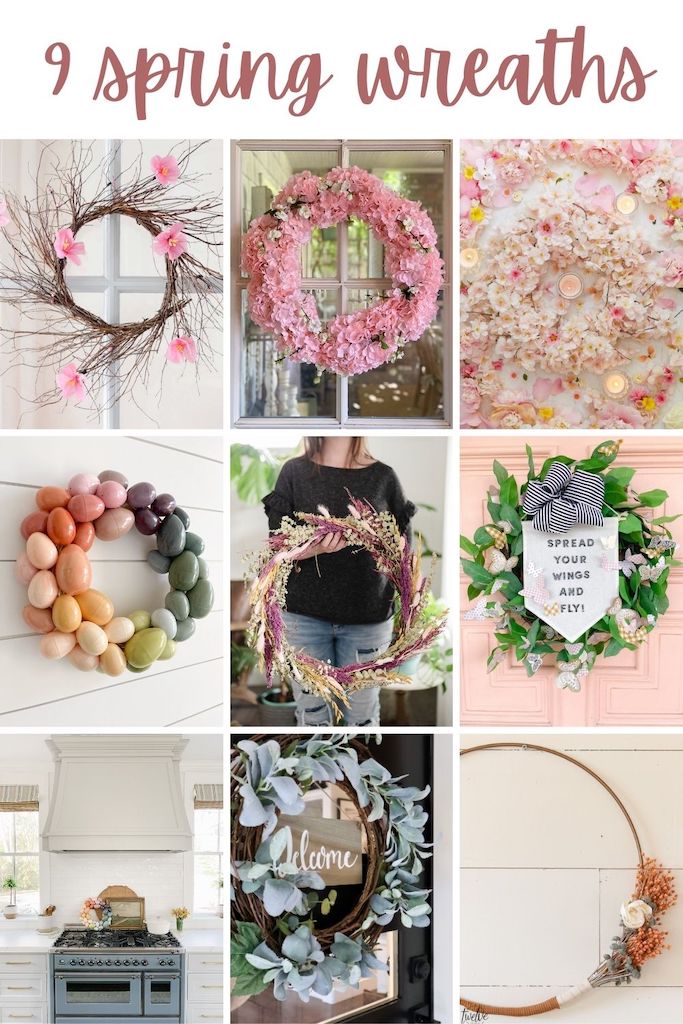
Now it’s time for more DIY Spring wreath ideas from my blogging friends! Click on the links to visit the blog posts.
Spring Butterfly Pennant Wreath // Tatertots & Jello
DIY Spring Wreath // Happy Happy Nester
A Spring Easter Egg Wreath // Finding Lovely
Metal Hoop Spring Wreath // Twelve on Main
Spring Flowers Monarch Butterfly Wreath // Craftberry Bush

Spring Garden Wreath // My 100 Year Old Home
How to make a Dried Flower Wreath // The DIY Mommy
Whimsical Spring Wreath // Modern Glam
How To Turn A Fall Wreath Into A Spring Wreath // My Sweet Savannah
PIN ME:
This turned out so pretty! Dried flowers are very popular right now and I love the idea of making a wreath with them.
What pretty colors in this dried flower wreath!
Beautiful!!! Love that its dried flowers too, so cool!