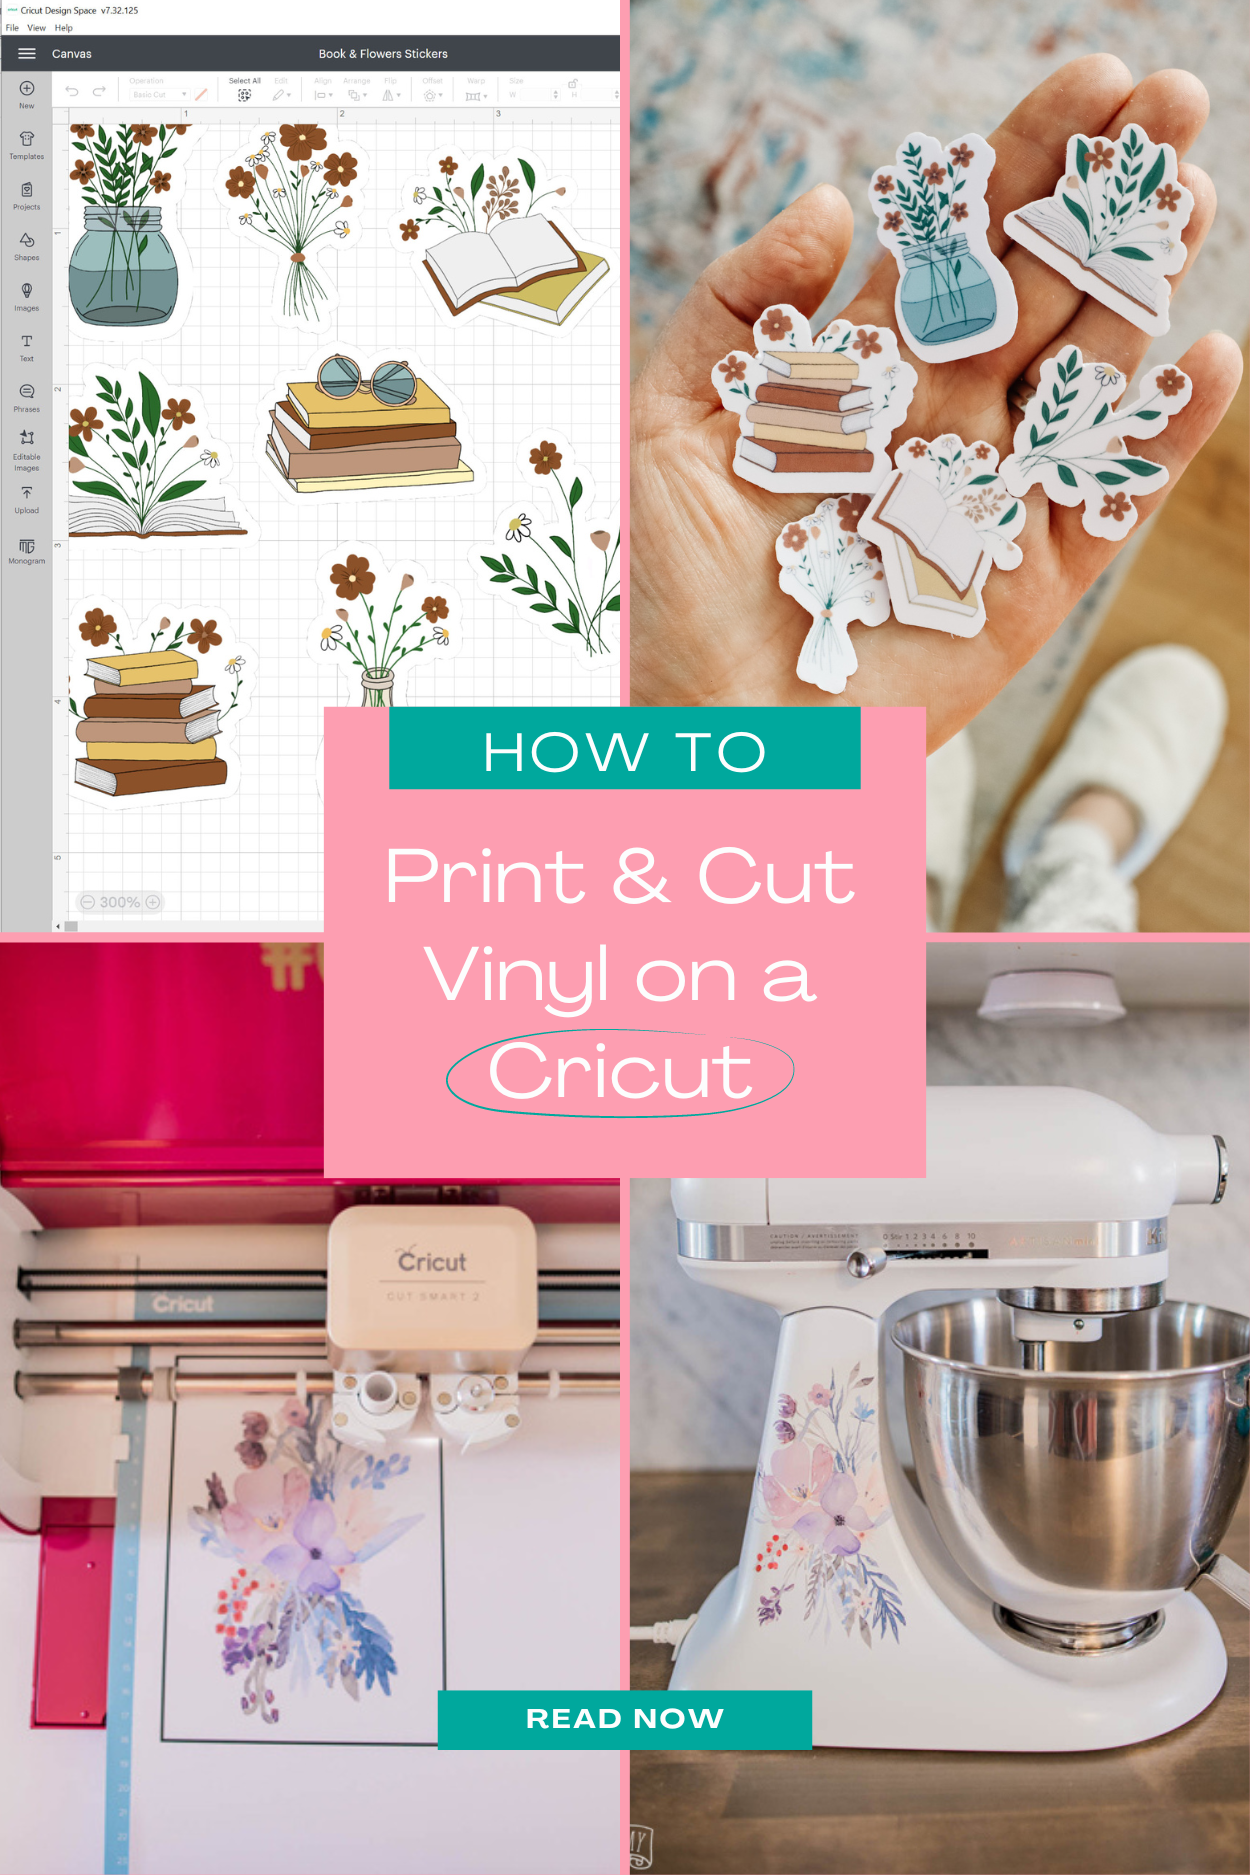
How to Print and Cut Vinyl on a Cricut (Ultimate Guide!)
This post may contain affiliate links · This blog generates income via ads
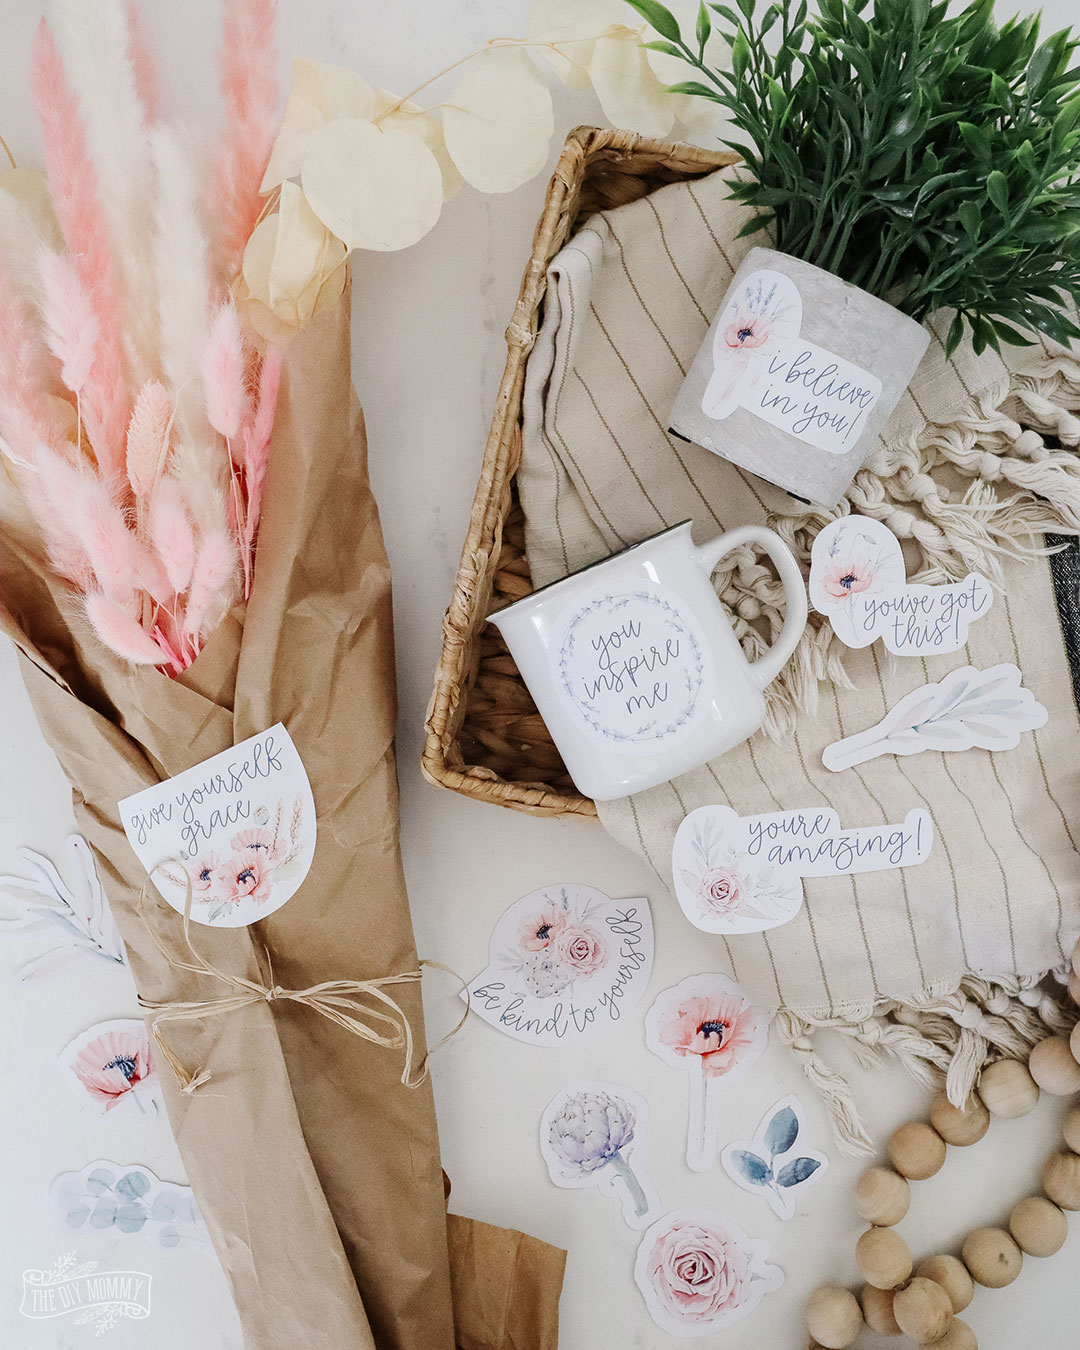
Have you ever wanted to create custom stickers or cut custom printed images with your Cricut machine? You’re in the right place. In this step-by-step guide, I’ll show you the materials you’ll need and walk you through the process of how to print and cut vinyl on a Cricut.
I love using my Cricut machines to make custom home decor, gifts and labels. Don’t know what a Cricut cutting machine is and how to use it yet? Click right here to learn all about the Cricut! There are so many crafts you can make with this machine, and it’s a fantastic addition to your crafty arsenal.
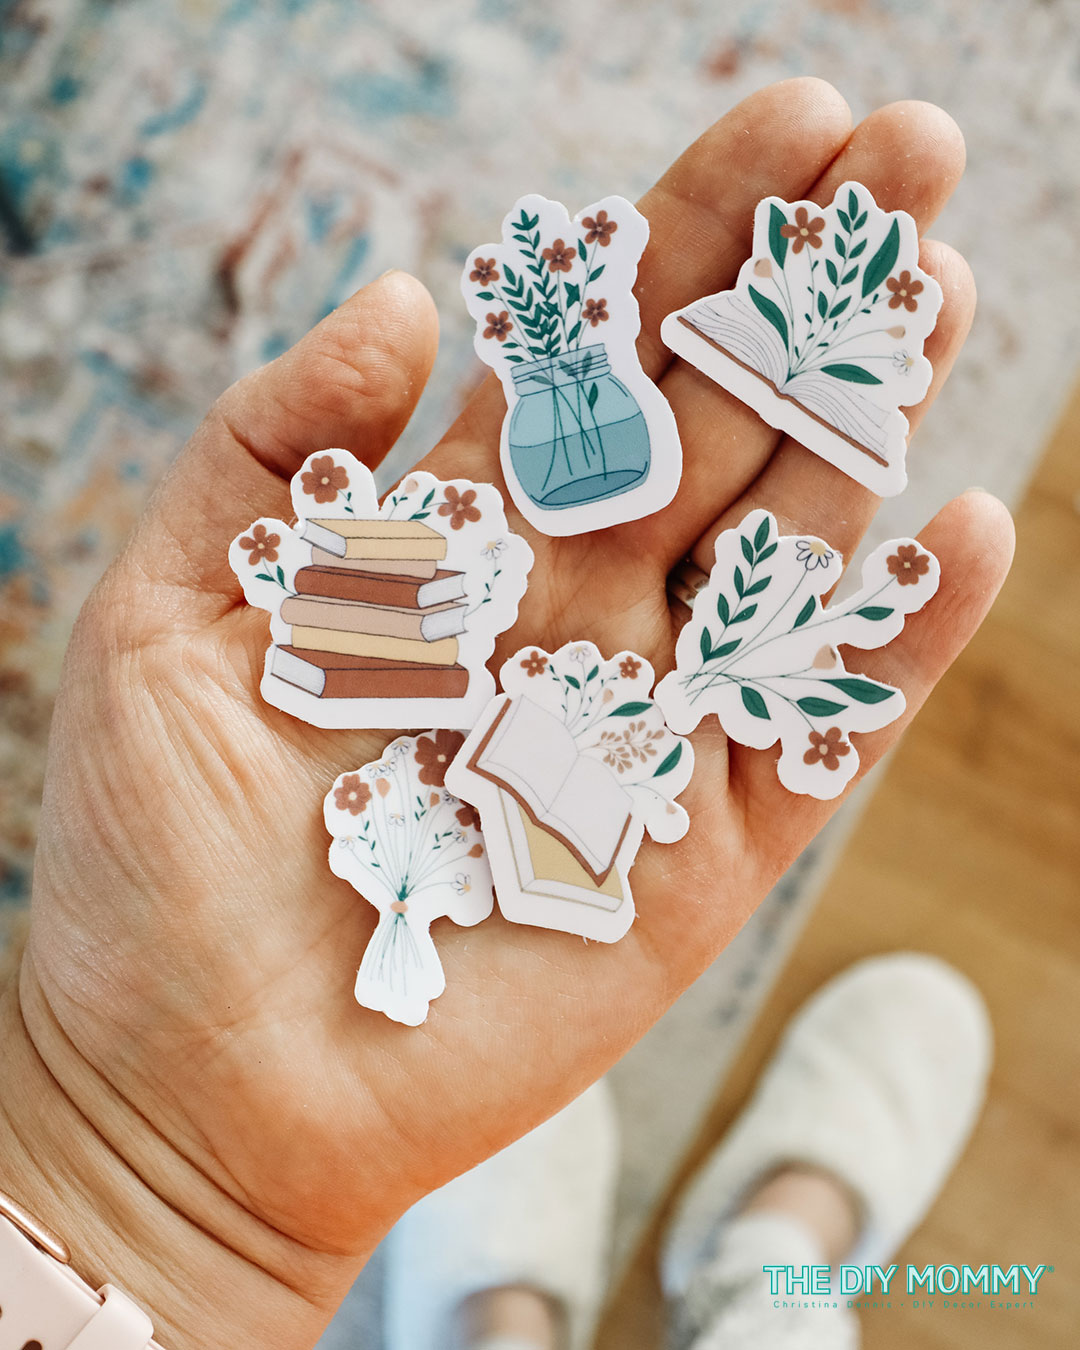
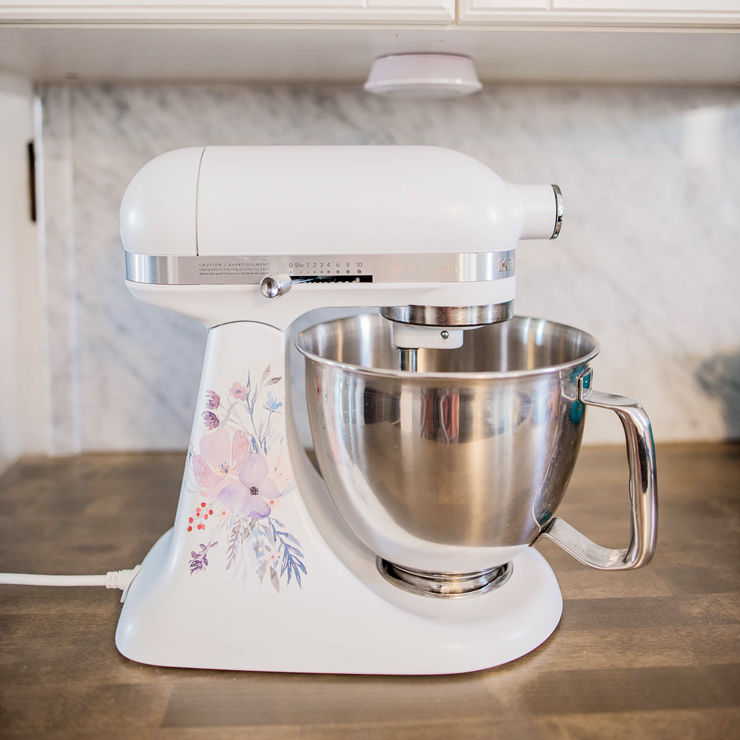
Cricut’s Print Then Cut feature is a fun option to play with. Essentially, this feature allows you to print a custom image on printable vinyl, and then cut around that image. With this feature, you can create items like custom stickers for scrapbooking or mugs, custom decals with multiple colours and images, and even print photos and cut intricate borders around them.
Contrary to what some believe, the Cricut does NOT print images it only cuts them. You’ll need a separate home printer (InkJet is recommended) to first print your design and then cut it with the Cricut. However, Cricut’s program (Design Space) will walk you through how to do this in one session.
My favourite home printer is the Canon PIXMA TS9521C wireless printer. You can print pages up to 12×12 inches, so it’s perfect for crafting projects and printing things at home.
Materials You’ll Need
- A Cricut machine (you can use the Cricut Explore Air 2, Explore 3, Cricut Maker, or Maker 3 to use the Print Then Cut feature; you CANNOT use the Cricut Joy)
- Cricut Printable Vinyl or Printable Sticker Paper
- Standard Grip Machine Mat
- Transfer Tape
- Basic Tool Set
- A computer with Cricut Design Space (this will not work on the Cricut Design Space mobile app)
- InkJet Printer
- Weeding tool
Step-by-Step Tutorial
Step 1: Create Your Design
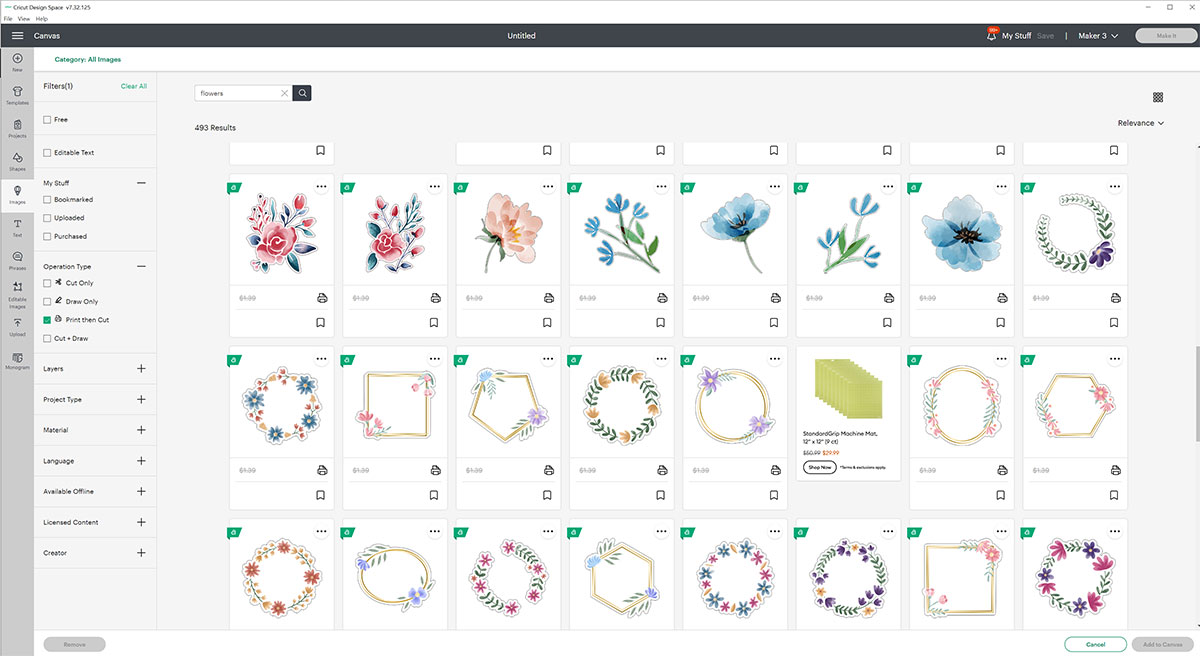
Using Design Space Print Then Cut Images:
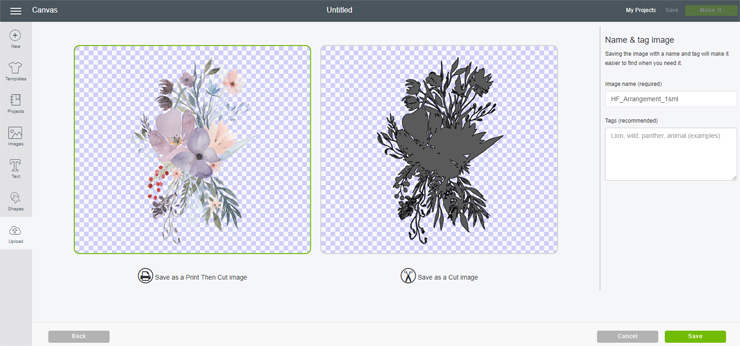
Start by opening Cricut Design Space on your desktop computer. Create a new project and click the “Images” button. Select “Filters > Operation Type > Print Then Cut”. This will show you the Design Space Images you can import into your project that will use the Print Then Cut Feature. Click on the images you want to bring into your project, and then adjust the sizes as needed using the sizing tool.
Uploading your own images:
Alternatively, you can upload your own images to print and cut on vinyl. First, find an image in a JPG or PNG format. SVG files can also be used, but vector files like this aren’t necessary for the Print Then Cut feature. You can illustrate your own, or one of my favourite places to purchase images to use in my Cricut designs is Creative Market. (Here’s the watercolour floral art I used to create my printed mixer decal, and here are the book & flower images I used to create my stickers.) I recommend finding images with relatively simple borders for the easiest cutting experience.
Important: Make sure you’ve purchased the appropriate rights to any images you wish to use for products you want to sell.
Create a new project in Design Space. Select “Upload” and then navigate to & click on your image file. Next, choose whether your image is simple, moderately complex, or complex based on the descriptions found on the screen. Click “Continue”. You can now choose the cut lines you want for your image. Select “Continue”, and now you can name your image so it’s easily found later. Save your image as a “Print Then Cut Image”. You’ll return to the “Upload” screen, and from here you can select the image you just imported and choose “Insert Images” to bring it into your project. Adjust the size as needed using the sizing tool.

Top Tip: Keep in mind the the maximum printing size for the Cricut Print Then Cut feature is 9.25″ x 6.75″. If your design is larger, Design Space will display a warning message to reduce the image size before you proceed.
Step 2: Print Your Design
When your design is ready, click “Make It”. Cricut Design Space will walk you through how to first print the design on your printer, and then how to cut the design with the Cricut machine.
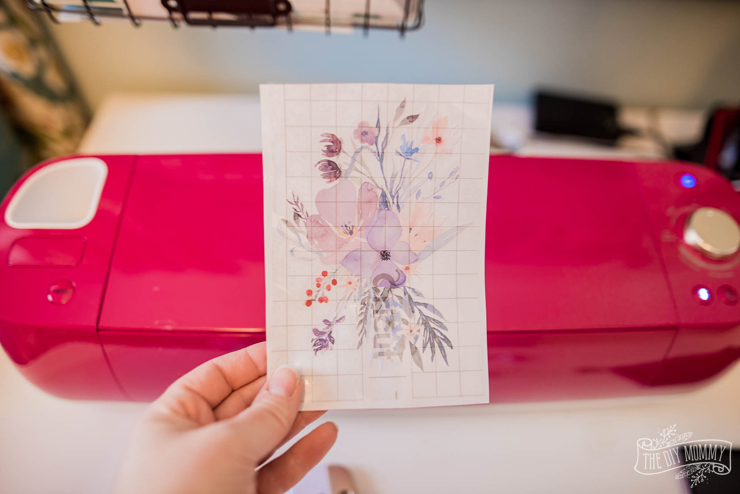
Load your printer with Printable Vinyl or Printable Sticker Paper and follow Design Space’s prompts to print the design. If you’re not sure which side to print on, check the instructions on the packaging. Make sure to print the design in high resolution for the best results.
In this step, Cricut will also give you an option to add a “bleed” to your images. Bleed is a small border of color added around each image. When the image is cut, it’s cut within the border making the colour go all the way to the edge of the cut. This is a good option for some stickers and decals depending on the look you want.

Step 3: Load the Vinyl into the Cricut Machine
Once the design has printed, Cricut will prompt you to load your printed vinyl into the Cricut machine. Carefully smooth your printed vinyl onto a Cricut cutting mat aligning it to the top left corner of the grid on the mat, and then load the mat with the vinyl into your Cricut. Follow the prompts on the Design Space to start cutting your design. Cricut will tell you which setting to move your smart set dial to (for the older machines), or which material setting to click on Design Space (for the new machines). Your Cricut will find the printed guide box, and it will start calibrating the cut.
Step 4: Cut the Vinyl
Once the machine is calibrated, it will cut the vinyl according to your design. Remove your vinyl from the Cricut mat. Use a weeding tool to remove any excess vinyl from around your design.
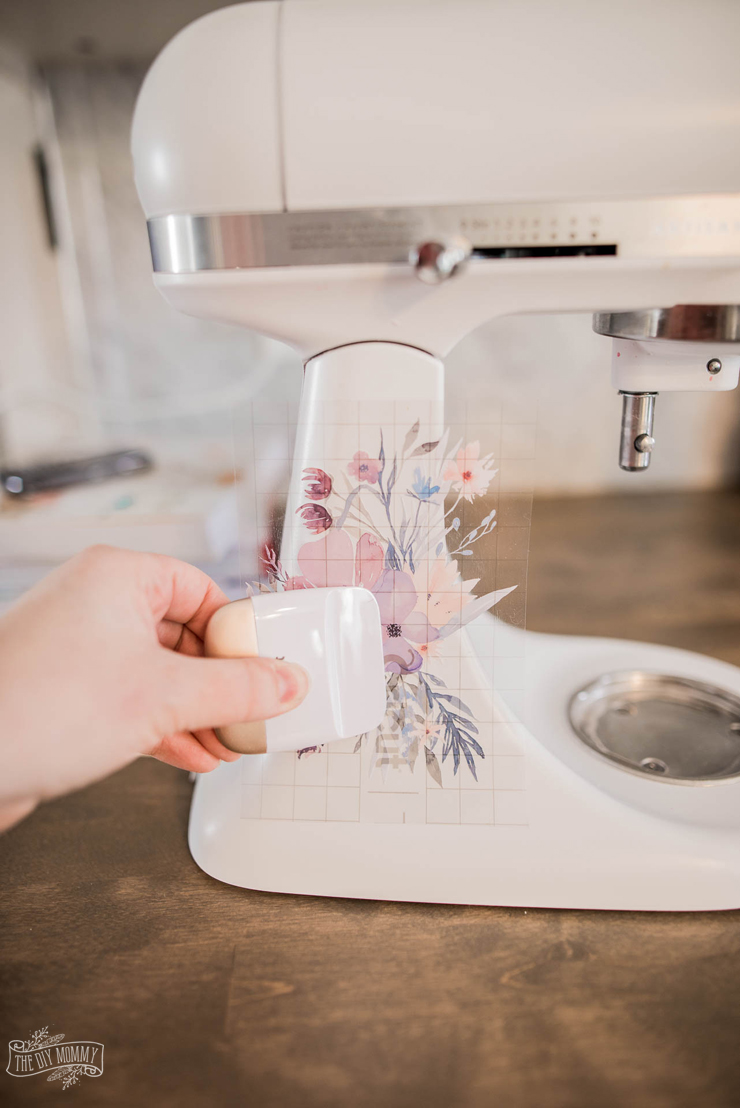
Step 5: Add Transfer Tape
After removing the excess vinyl, add transfer tape to the top of your design. This will allow you to transfer the design onto your desired surface and keep everything aligned properly.
Step 6: Transfer Your Vinyl
Now you’re ready to transfer your vinyl design onto your desired surface. Simply place the transfer tape with the vinyl onto your desired surface and use a scraper tool to make sure it’s aligned and adhered properly.
Tips and Tricks
- For the best results, make sure your vinyl is flat and smooth when printing.
- When adding transfer tape, use a scraper tool to avoid air bubbles.
- If your printable vinyl sheets don’t cut cleanly, check if the blade needs replacing or sharpening.
- Experiment with different vinyl types and colors to create unique designs.
- The default Cricut Print Then Cut settings will create a “kiss cut” (where just the sticker layer of the vinyl is cut but not the backing; like a sticker sheet). If you want your Cricut to cut all the way through the top layer and the backing, choose a cutting material setting on your Cricut with more pressure. Usually the “Cardstock” setting works for me, but you might need to experiment.
Troubleshooting
- If the vinyl is not printing properly, check that your printer has enough ink and that the settings are correct. An inkjet printer is generally preferred over a laser printer for Print Then Cut images.
- If the vinyl is not cutting properly, adjust the blade pressure or try cleaning the blade. You may also have to play with the cutting settings and choose a setting with more pressure (like the cardstock setting).
- If the transfer tape is not sticking to the vinyl, try applying more pressure when scraping and make sure the vinyl is completely dry before applying.
With these simple steps, you can easily print and cut vinyl with your Cricut machine. Use your creativity and make custom stickers from your own artwork to sell, or print photos and cut them into whimsical shapes for scrapbooking. The possibilities are endless! Have fun crafting!
PIN ME: