How to Sew a DIY Duvet Cover
This post may contain affiliate links · This blog generates income via ads
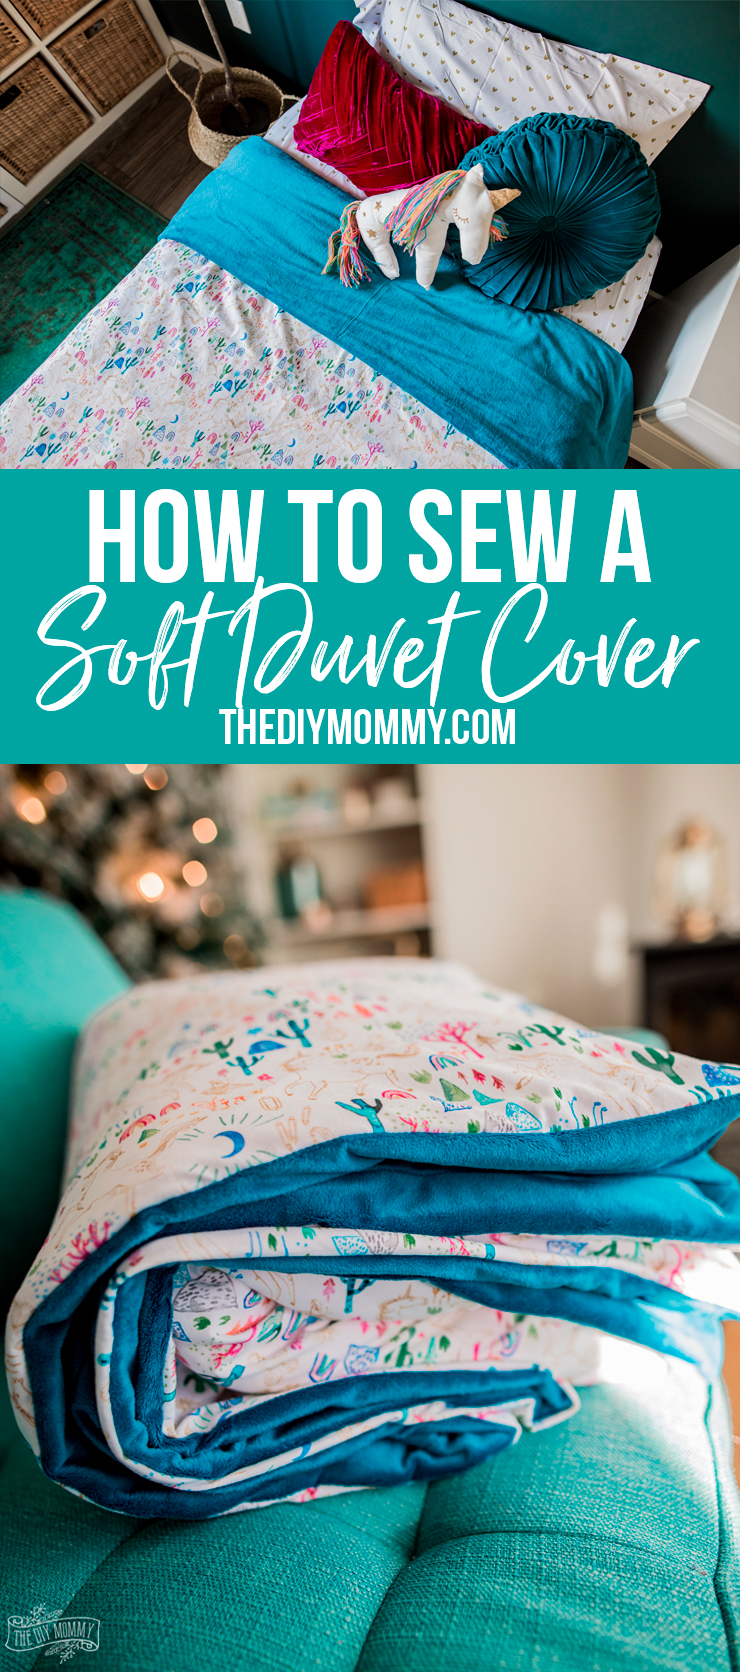
Learn how to sew a simple DIY duvet cover with cozy fabrics and a button closure with this video tutorial.

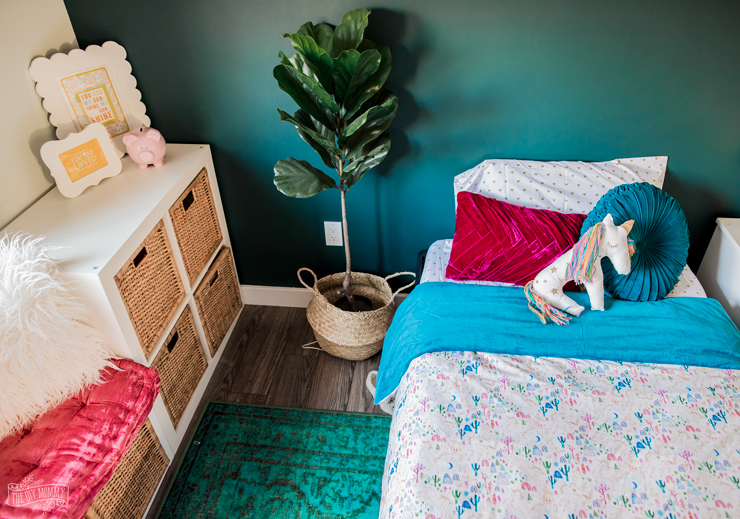
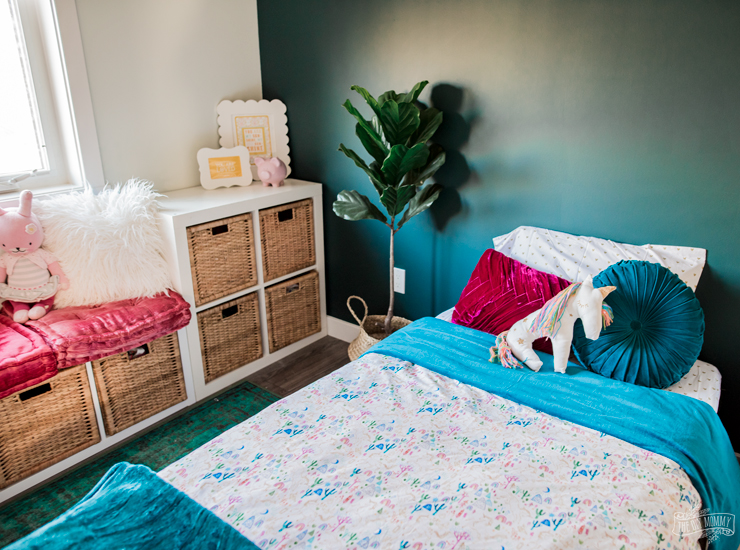
I’m plugging along on Little A’s rich & magical bedroom makeover for the One Room Challenge, and this week I made a cozy and sweet DIY duvet cover for her bed.
In case you’ve never heard of it, the One Room Challenge is a challenge hosted by Calling It Home where several interior designers and dozens of guest participants (usually home decor bloggers like myself) makeover one room in their home over the course of 6 weeks. I’ve done 4 previous ORCs before, so this one will be my 5th!
Check out all of the previous makeover’s I’ve done for this challenge right here.
This season, I’m making over my middle daughter’s bedroom into a Rich and Magical Girl’s Bedroom. You can see my mood board & design plans right here.

For this duvet cover, I used this adorable fabric from Spoonflower (I got it in the knit), and some extra-soft teal minkee fabric from my local fabric store. The only other supplies I needed for this sewing project were some buttons, thread and an inexpensive duvet I found at Ikea.
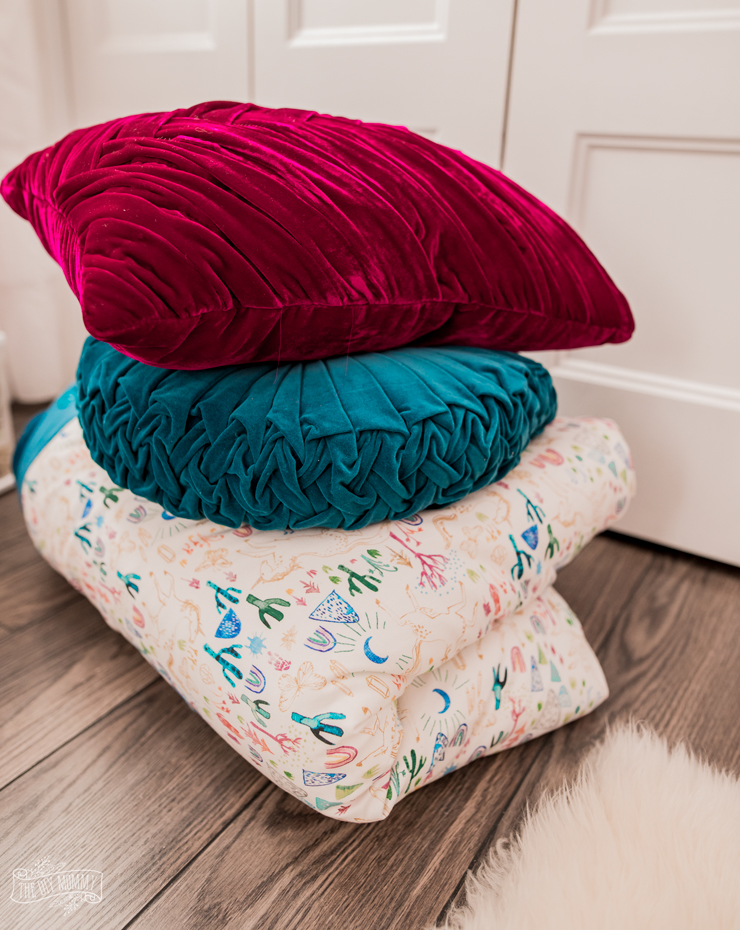
I love how soft and cozy this duvet cover turned out and how it looks with these pretty coloured velvet pillows I found at Target online!
I made a twin sized duvet cover and managed to make it out of 60″ wide stretchy fabric, but here are other common duvet cover sizes:
Common duvet cover sizes:
TWIN 64″ x 86″ (I was able to use 60″ wide stretchy fabric and still make this work!)
FULL/QUEEN 86″ x 86″ (you’ll have to sew some fabric together or use a flat sheet as your base)
KING 102″ x 86″ (you’ll have to sew some fabric together or use a flat sheet as your base)
Want to sew your own easy duvet cover? Watch my video below and reference the written directions beneath the video:
DIY Duvet Cover Instructions
Materials:
- 2.5 yards of top 60″ wide fabric (or a flat sheet) (I used a knit jersey)
- 2.5 yards of bottom 60″ wide fabric (or a flat sheet) (I used soft minkee)
- 6-10 buttons
- sewing machine
- thread
- Lay your top duvet cover material (I used a knit fabric) and your bottom duvet cover material (I used a minkee fabric) right sides together. For a twin duvet cover, you’ll need to use material that’s at least 2.5 yards long and 57″ wide.
- Lay your duvet on top of the fabrics and use it as a guide to cut your fabrics’ length to size. I like to cut my duvet covers to the same width and length as my duvet so that when sewn, the duvet cover is slightly smaller than the duvet. This helps avoid the look of excess fabric if the duvet cover stretches out.
- Use a ruler and hard edge to mark out a straight line where you’re cutting your fabric. Cut, and then pin the two pieces together along the sides and top.
- Sew the two pieces together using a 1/2″ seam allowance along the sides and top, leaving a 5″ opening on the bottoms of the two sides to leave room to create a button placket.
- Cut a piece of your bottom duvet fabric that’s as wide as the other pieces and 5″ high. This will be your button placket for the bottom of the duvet.
- Fold one long edge of the placket under 1/2″ and press. Fold it over again 1.5″ inches and press and pin in place. Sew close to the folded edge to create a wide hem.
- Repeat step 6 on the raw edge of the bottom of the duvet underside to create the opposite side of the button placket.
- Place the button placket strip over the bottom of the duvet, overlapping the hems, and pin the strip in place to the duvet’s top side – right sides together.
- Sew the button placket in place, sewing along the bottom sides and bottom edge of the duvet.
- Mark out where you want to make your button holes on the button placket (I used 6 buttons, but you could use 8 or even 10).
- Sew button holes with a sewing machine.
- Using the holes as a guide, mark out where you want to sew your buttons on the opposite side of the button placket.
- Sew the buttons on.
- You’re all done! Stuff your duvet inside its cover, close the buttons, and enjoy your cozy new bedding!
PIN ME:

This makeover is part of the Fall 2018 One Room Challenge – a 6 week long challenge where I’m making over one room in my home along with dozens of other designers and guest participants.
DISCLOSURE: This post contains affiliate links. When you purchase an item via these links, I receive a small commission at no extra cost to you.
Minkee is soft and cuddly! Kids love it!
The room is coming together nicely! But is that a Christmas tree in the background?
Haha it is, Heather