Installing a Shiplap Ceiling | One Room Challenge Week 5
This post may contain affiliate links · This blog generates income via ads
It’s Wednesday, so that means it’s time for another Tiny Lake House kitchen renovation update for the One Room Challenge! Today I’m sharing how we installed our shiplap ceiling in our cabin.

For this season of the ORC (a collaborative online event where folks share a room makeover done in 8 weeks), I’m sharing the weekly progress of our Tiny Lake House Kitchen. In case you missed it, we’re renovating a 476 square foot cabin by a lake and turning it into our second Airbnb + a place for our family to enjoy. We’ve completely gutted the cabin to re-insulate it and alter the floor plan. You can see that here.
I jumped in a couple weeks late for the Fall 2022 One Room Challenge, and here’s what I’ve shared of our kitchen makeover so far:
Here’s what our Tiny Lake House kitchen looks like on Week 5:
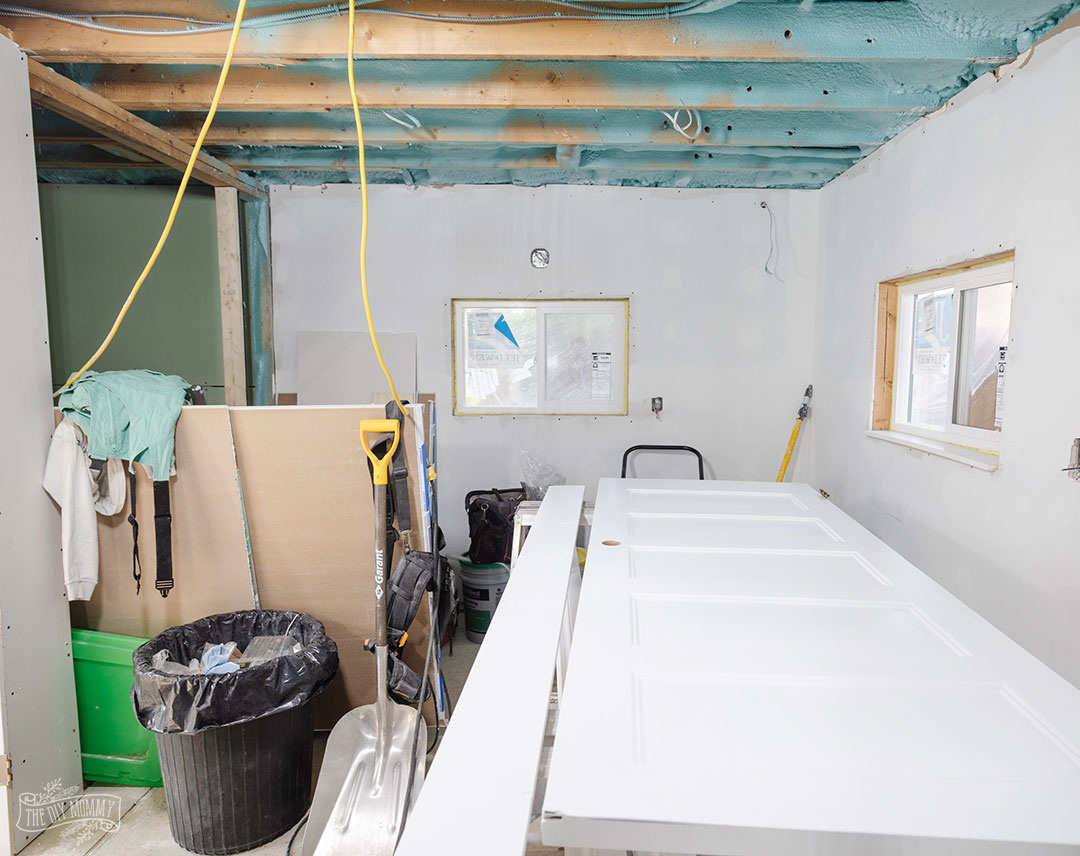
YES. It looks exactly the same as LAST WEEK. YIKES! I have a good excuse for this, though. We spent last week finishing up the bedroom in the Tiny Lake House, and you can see it in all its glory right here.
There are some finishes that we’re going to replicate exactly between the bedroom and the kitchen, and installing a shiplap ceiling is one of them:
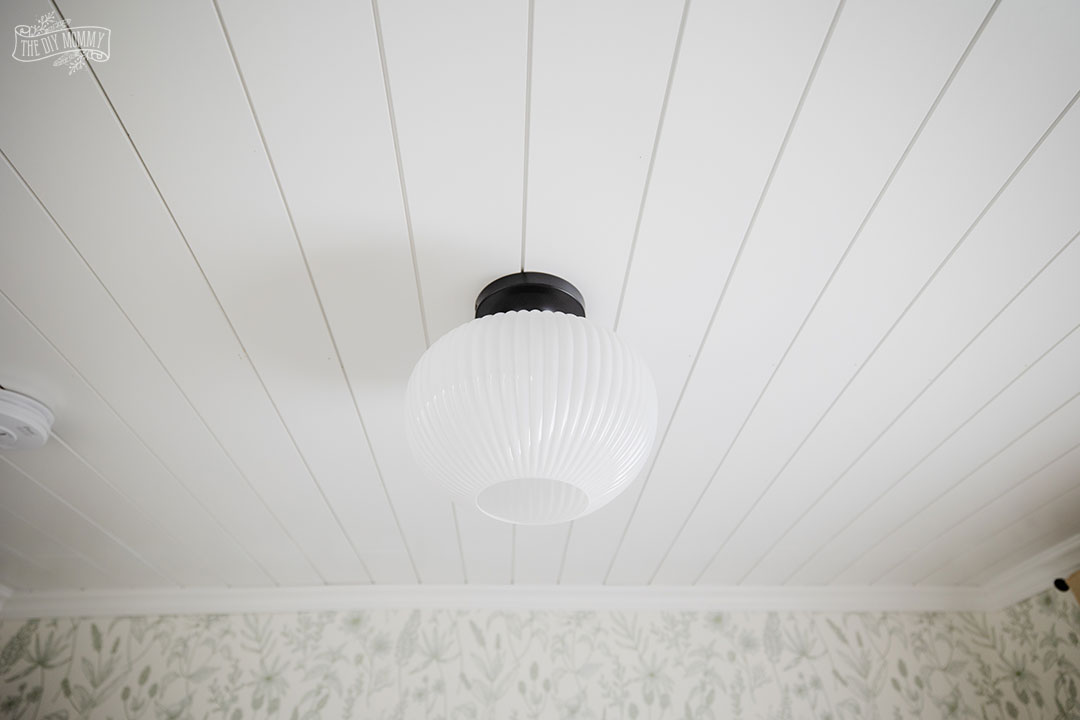
(We’re also using the pendant version of this lovely semi-flush mount light fixture in the kitchen!)
I love the look of a shiplap ceiling, and I think it especially suits a cottage or cabin. It has that old-fashioned country look that I enjoy.

Installing a shiplap ceiling
For our cabin ceiling, we’re using this pre-painted shiplap by Metrie. Metrie also has a wider version that’s primed only, and we used that in our first Little Lake House. We chose this pre-painted, narrower version because it was easier to source this time, and it was much less work to install. Painting ceilings is not for the faint of heart!
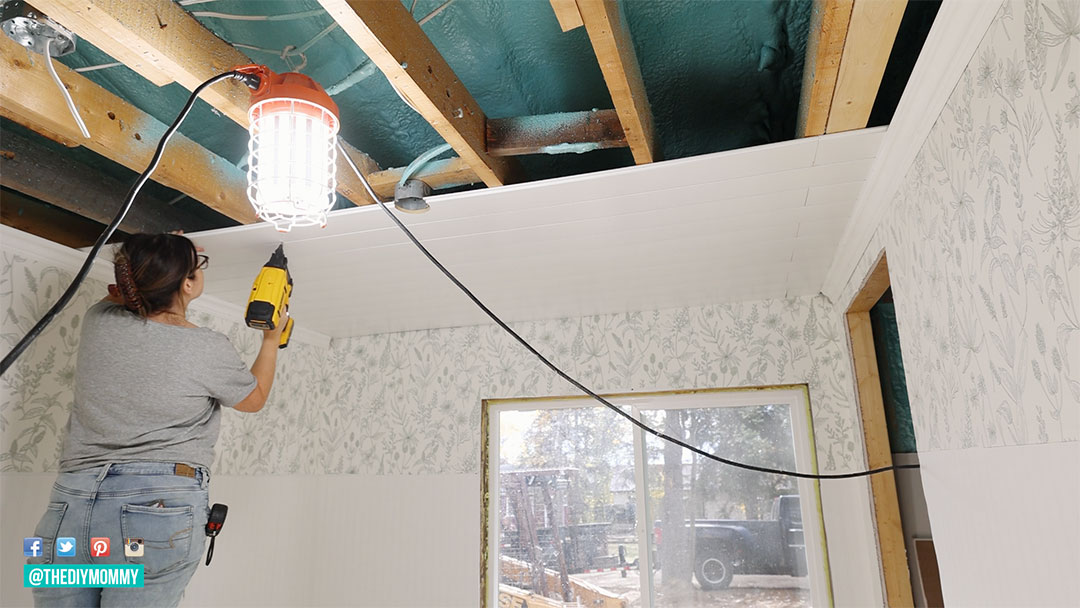
We began by installing some crown moulding on two opposite walls so that it would act as brackets to help hold the shiplap. Then, I used a finishing nailer to nail the shiplap to the ceiling joists. I cut smaller pieces of shiplap with a miter saw to fill in any holes.
Once I reached the light fixture and smoke/CO2 alarm areas, Sean used a hole saw to cut holes in the shiplap boards to go around the fixtures.
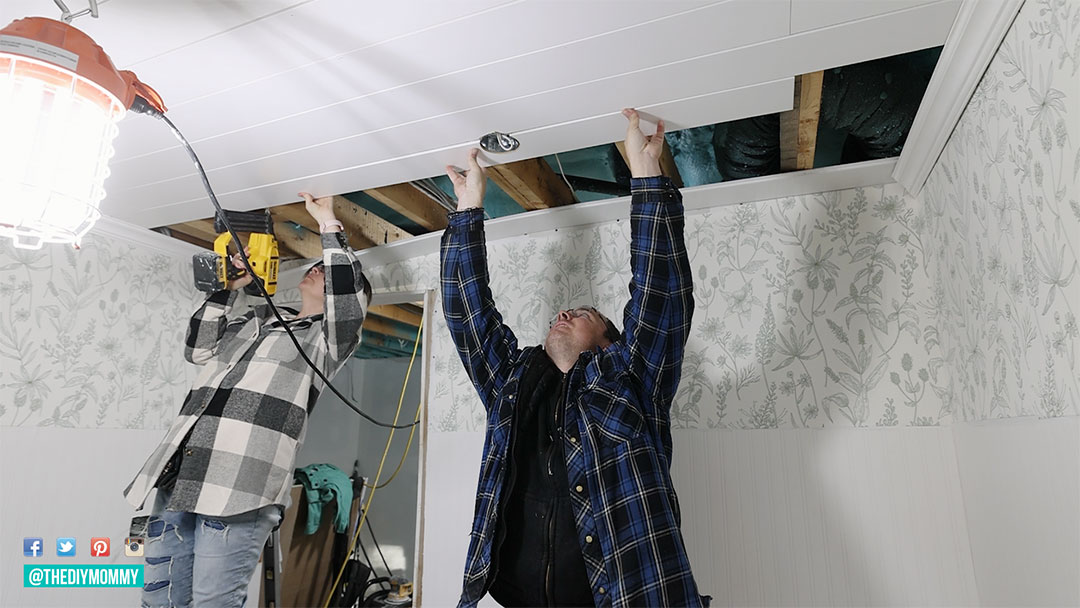
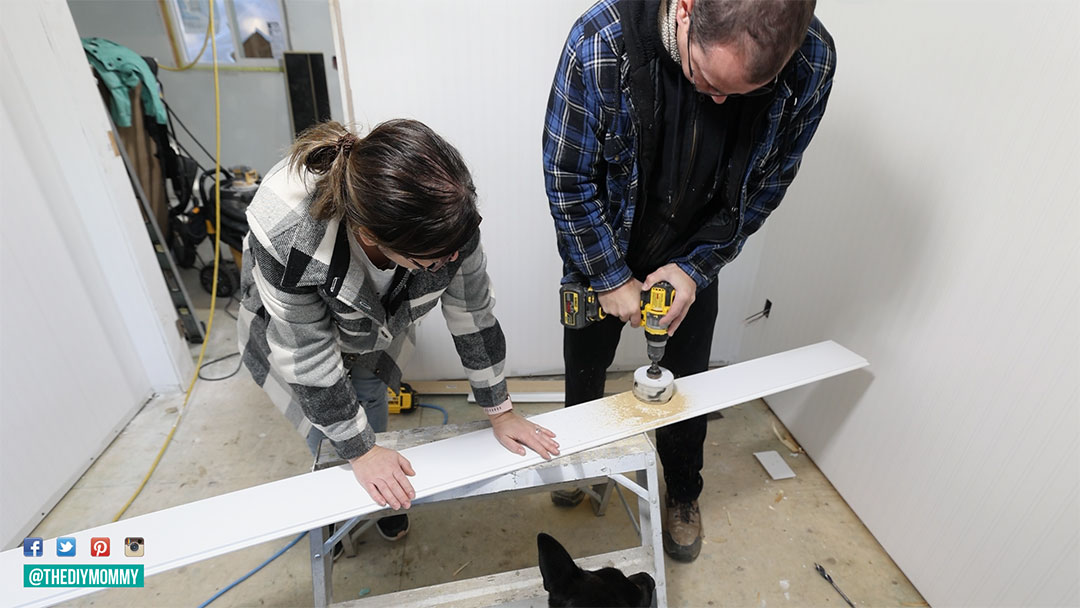
This can be a one person job, but it does go faster with two people – one to hold up the board and one to nail! We installed the entire bedroom ceiling in less than a day. Once we finished, I touched up any holes and seams with extra caulking and paint I had on hand. Metrie does also have this finishing kit for their pre-painted shiplap which makes the process even easier.

I ADORE how this shiplap ceiling looks in the cabin bedroom, and I know I’ll love it in the rest of the house too. The cabin is so tiny, I know we’ll be able to install both the shiplap ceiling and LVP quickly in the kitchen (and the rest of the cabin)!
The To-Do List
Here’s how we’re doing on our to-do list for this kitchen renovation:
insulate the cabindrywall & prime the wallsinstall shiplap ceiling(I mean… we did it in the bedroom and we’re inching our way to the kitchen…)install luxury vinyl plank flooring(see above remark, HA!)- assemble and install IKEA kitchen cabinets
- customize IKEA cabinets with bead board to create peninsula
- cut & install butcherblock countertops
- install light fixtures
- install appliances, sink & faucet
- add floating shelving over peninsula
- install cabinet hardware
- add table, chairs, kitchen basics & decor
Make sure to visit the Fall 2022 One Room Challenge link-up to see what all of the other participants are working on this season! I can’t wait to see all of the other ORC room makeovers as they progress.
Tell me: What do you think of our shiplap ceiling?