Make a Giant Reclaimed Wood Clock from an Electrical Reel #12MonthsofDIY
This post may contain affiliate links · This blog generates income via ads
Building a giant wooden clock has been on my DIY wish list for a long time. When I knew “wood” month for our #12MonthsofDIY challenge was coming up, I had the motivation to finally tackle this project! Today I want to share with you how to make a large reclaimed wooden clock from an electrical reel, and make sure to check out the bottom of this post for 11 more wood DIYs from 11 other Canadian bloggers.
This project took me a couple of days to complete, and I used one of my hubby’s electrical wire spools that he had sitting outside. I’m pretty lucky that he’s an electrician and that he knows to save these sorts of things for me!
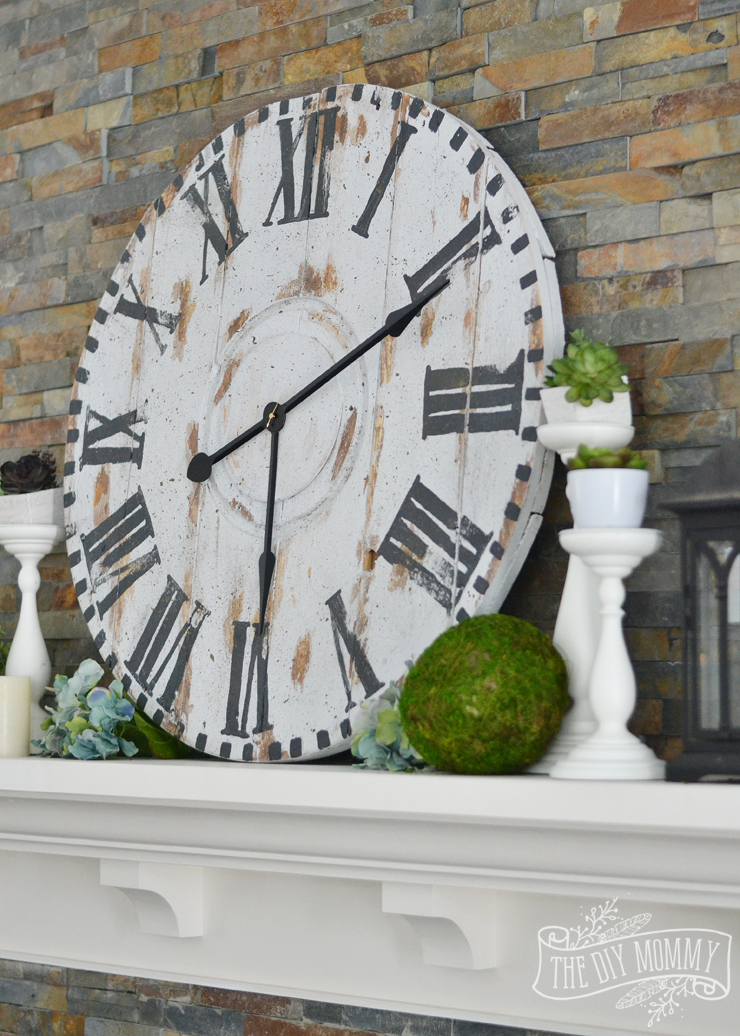
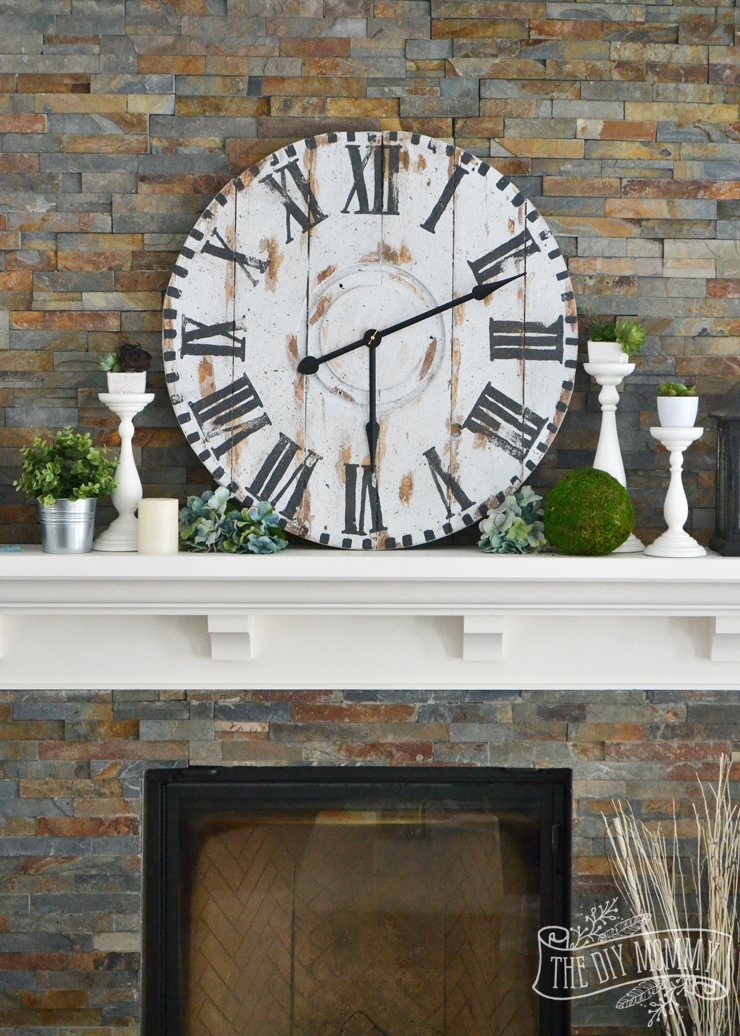
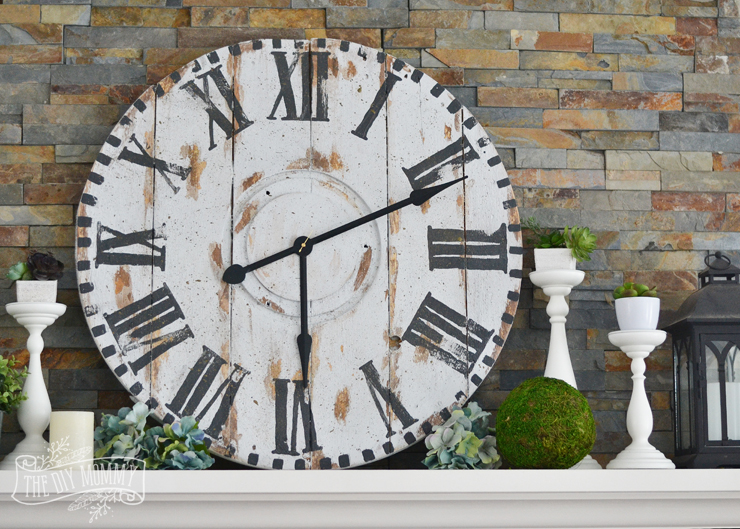
Using Fusion Mineral Paint and some DIY, I transformed the top of the reel into a gorgeous, vintage-look clock for our mantel.

Doesn’t it look right at home here? (Make sure to click here to see today’s Spring home tour post too!)
Here’s how to make this giant, industrial reclaimed wood clock.
Materials:
- electrical wire reel (a heavy, wooden one)
- crescent wrench and/or pliers
- 1/4″ thick wooden circle that’s at least 6″ in diameter (I found mine at Michaels)
- wood glue
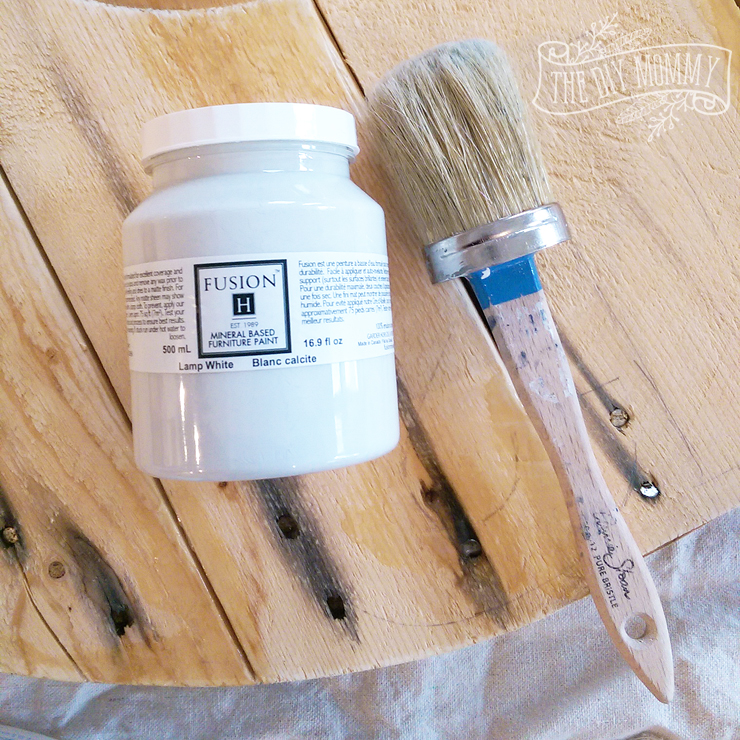
- white mineral paint (I used Fusion Mineral Paint in Lamp White)
- charcoal mineral paint (I used Fusion Mineral Paint in Ash)
- bronze metallic paint (I used Fusion Matthew Mead Studio Metallics in Bronze)
- orbital sander
- drill
- paint brushes
- dark wood stain
- petroleum jelly (or similar)
- printer
- carbon transfer paper
- pen
- clock kit (with large hands)
Directions:
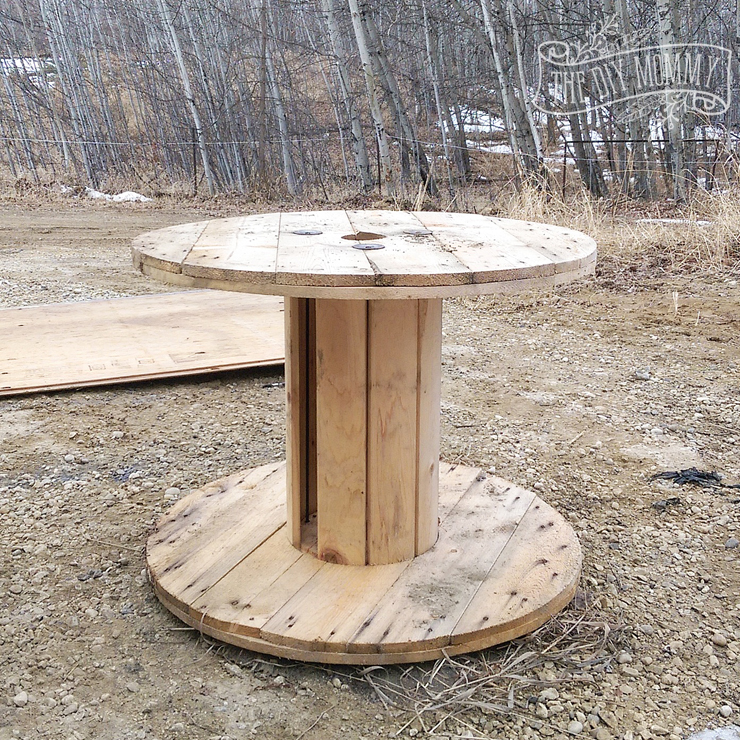
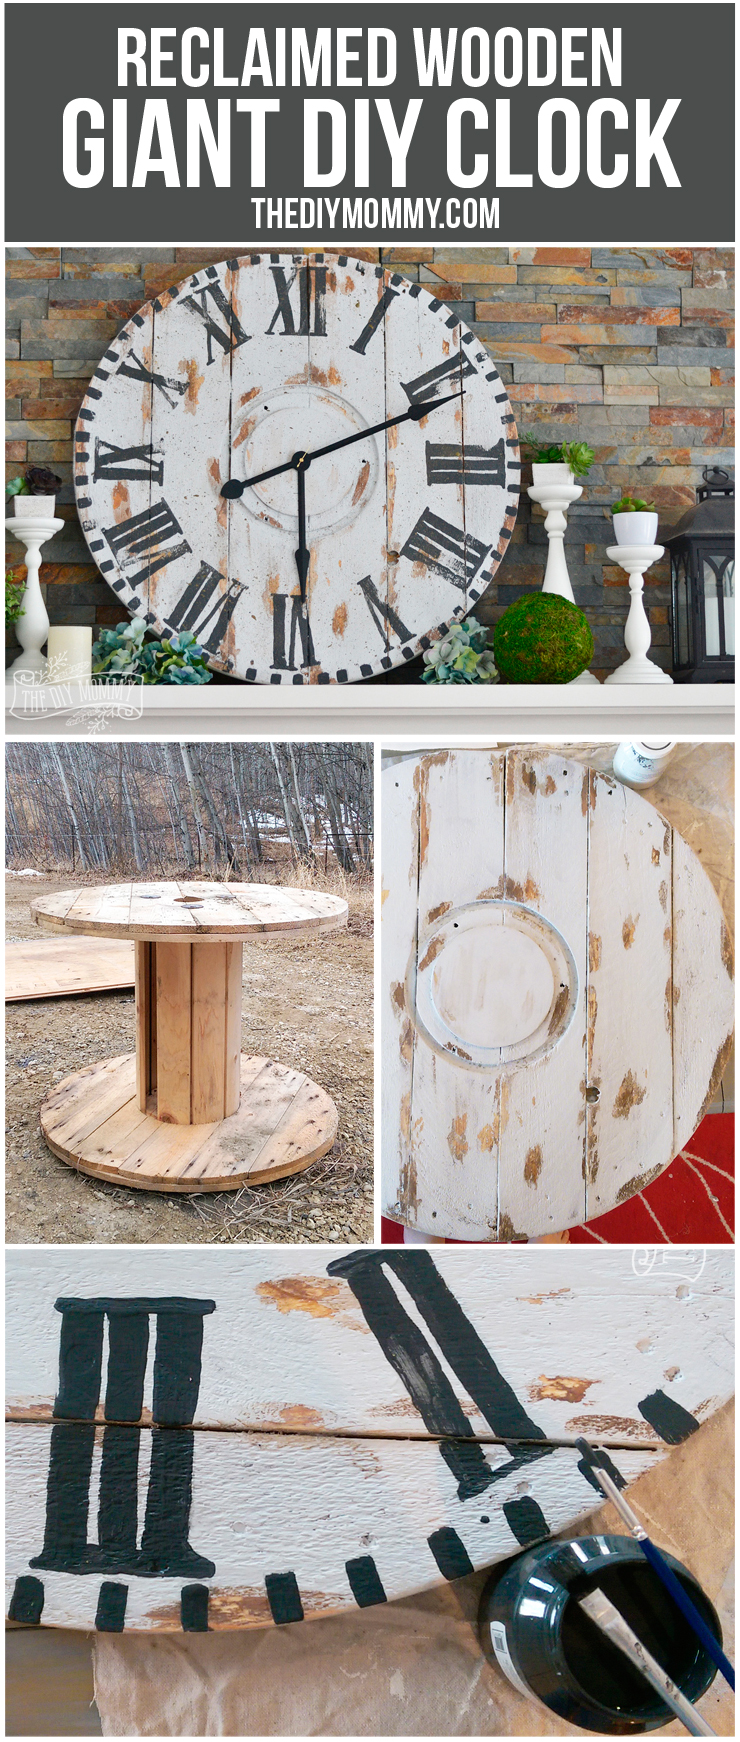
Use pliers or a crescent wrench to remove the top off of the electrical reel.

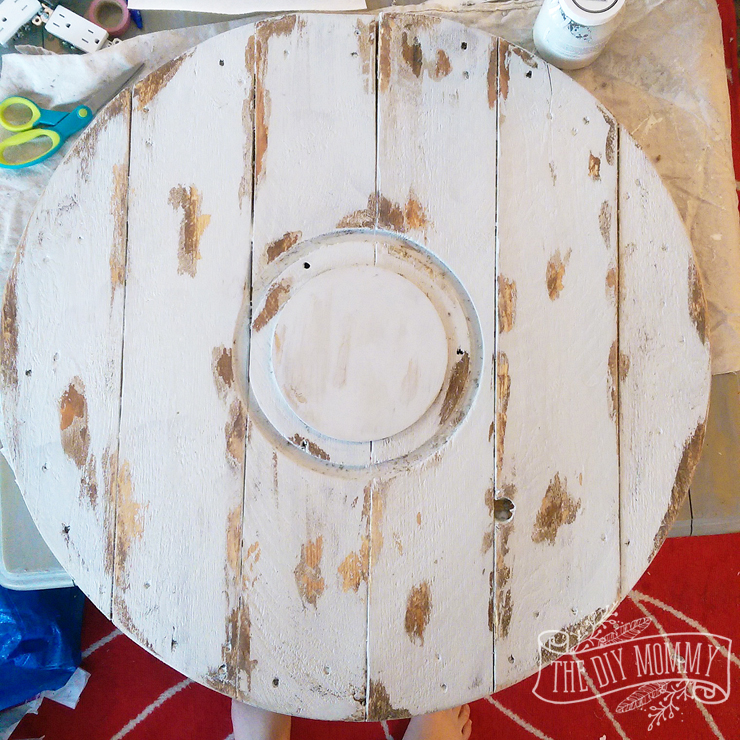
Sand both sides of the round piece with an orbital sander. I decided to use the underside of my reel piece because it lacked the bolt holes. I didn’t sand too much because I wanted the clock to still look rustic.
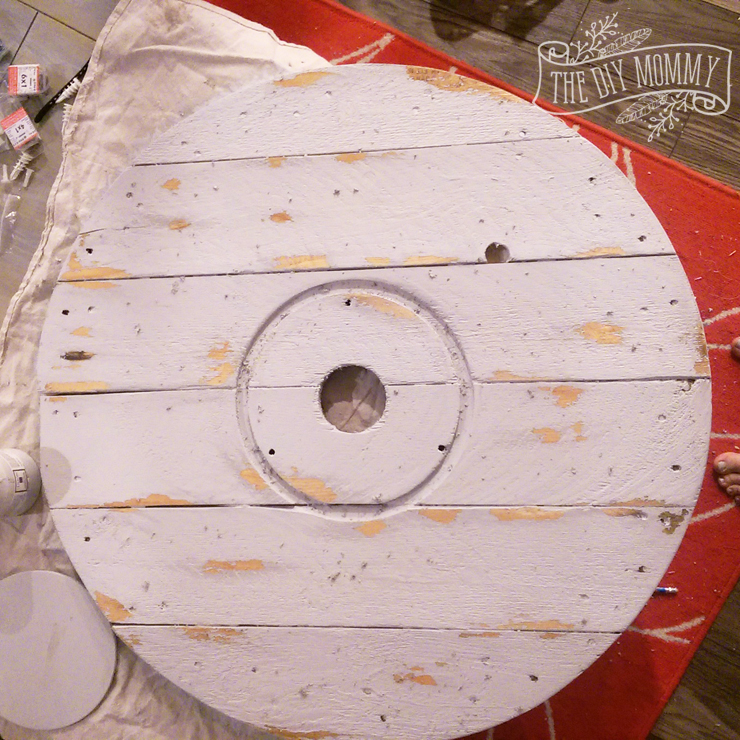
Glue a round piece of wood to the center of your clock to cover the middle hole. I used regular wood glue.
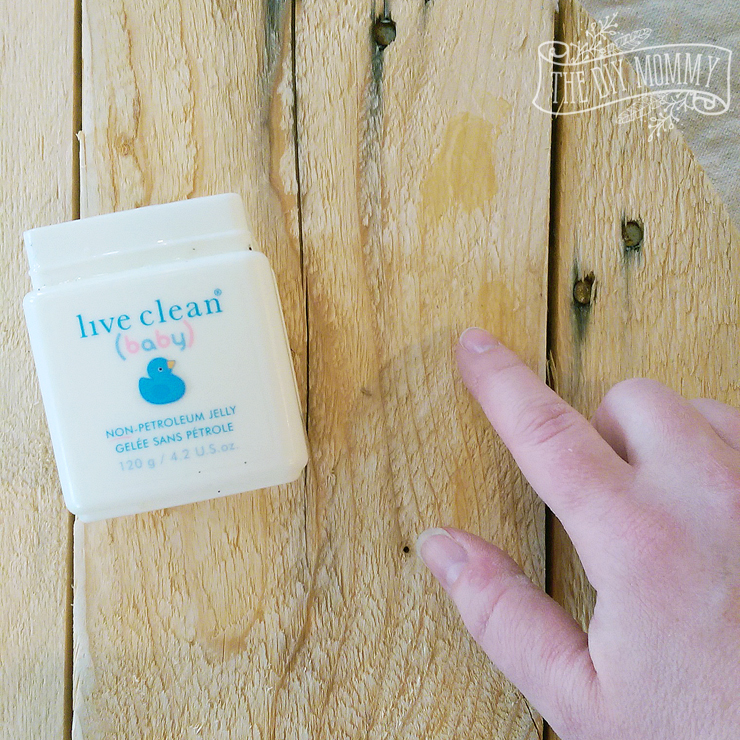
Apply petroleum jelly (or something similar) to random spots on the face of your clock where you want some distressing to occur. This was my first time trying out this method of distressing and I was so happy with the results!
Paint the entire face of your clock with white mineral paint.
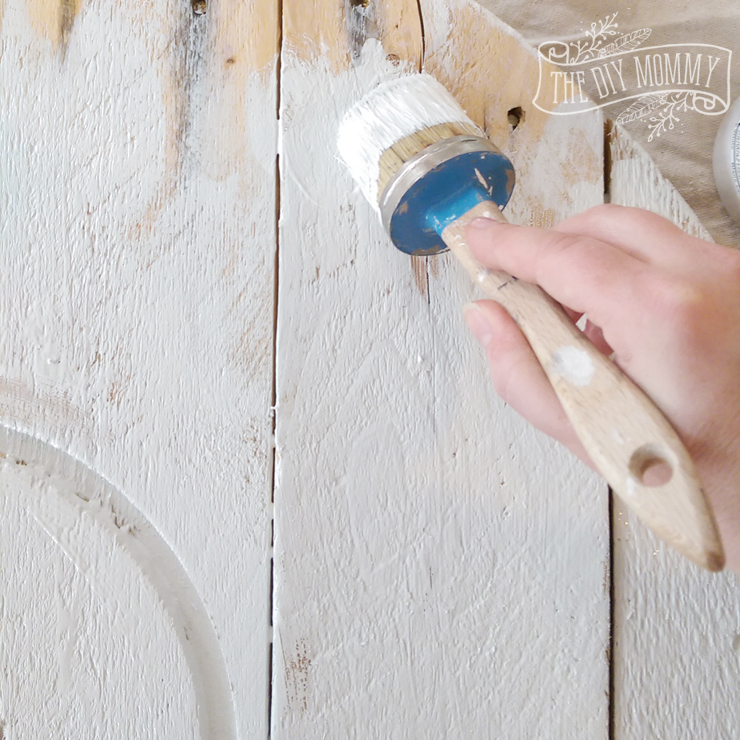
If you’re going for a rustic look like mine, don’t worry about a perfect application.
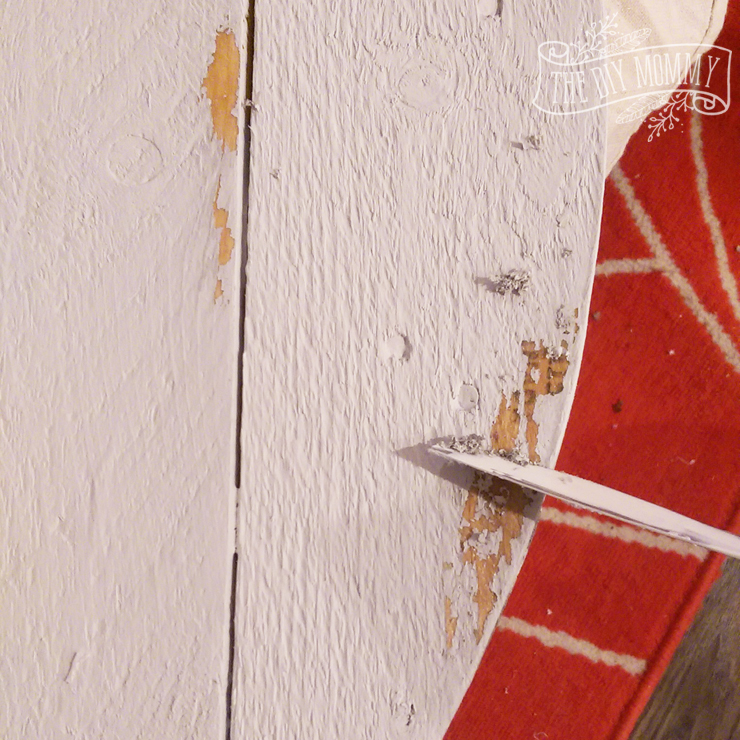
Once the paint has dried completely, scrape off the spots that were treated with the Vaseline with a knife. Where the Vaseline was applied, you’ll see the paint crackle a little.
This Fusion Mineral Paint hardly took an hour to dry completely!
Give the clock a good cleaning and sanding after this step.
If you want the wood peeking through the paint to be darker in colour, apply a thin layer of wood stain on the clock, and then quickly wipe it off.
If your white paint becomes too muddy or dark after this step, you can do what I did and repeat the Vaseline application and another layer of white paint for a better contrast.
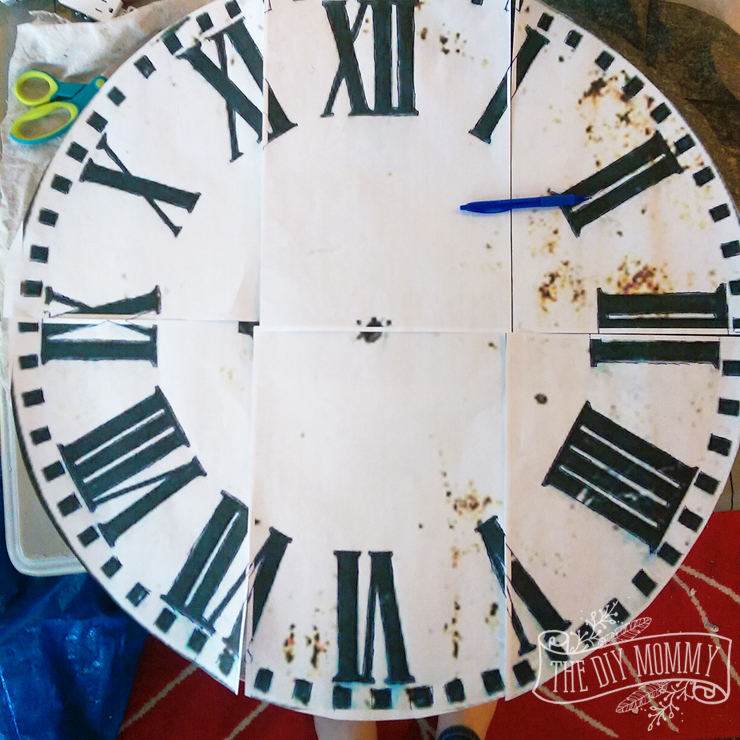
Next, find a photo of a clock face that you love. I found this one, and scaled it in Photoshop to be the same size as my clock (32 3/4″). Then, tile the clock face if needed and print it out.
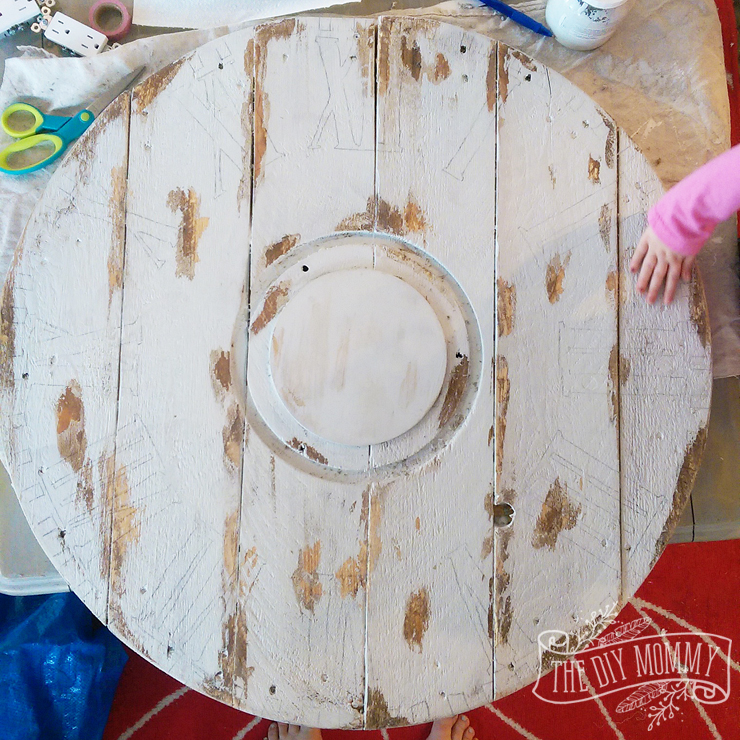
Lay the tiled pages with the design on your wooden clock and use carbon transfer paper and a pen to transfer the design onto your wooden circle.
If you want the numbers to look highly distressed like mine do, apply Vaseline to some parts of the numbers.
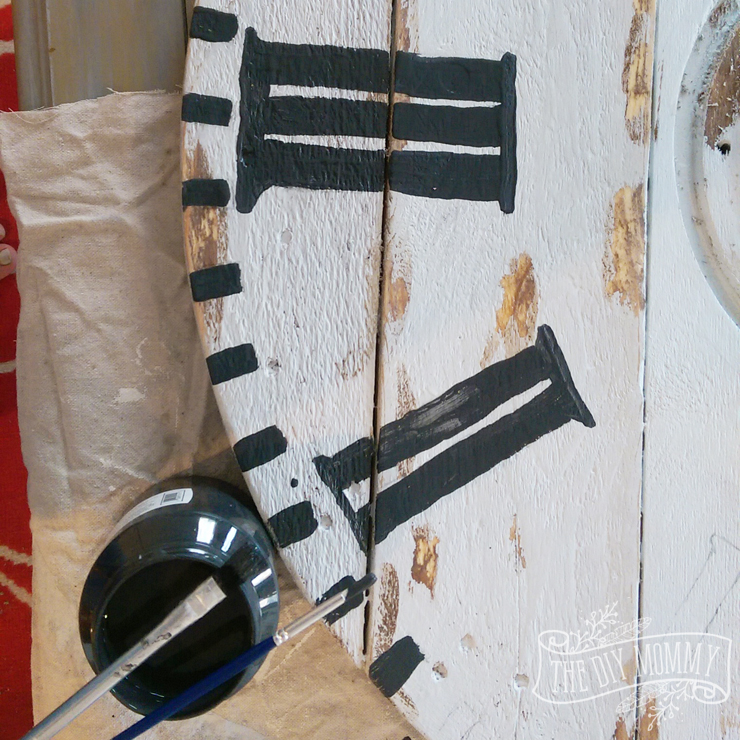
Then, using the black paint, hand paint the design onto the clock. I used a wide, flat brush for the main parts of the roman numerals and a smaller detail brush for the details.
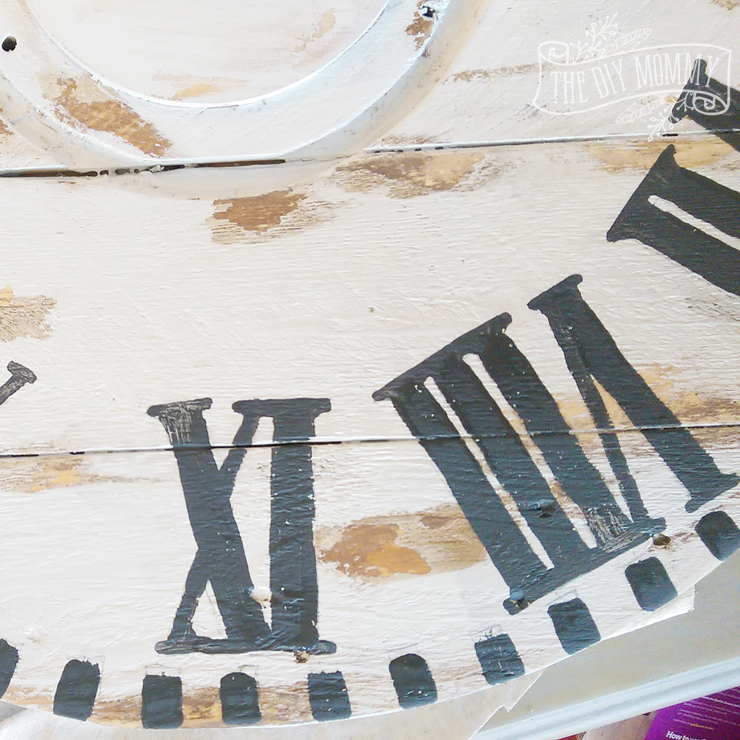
If you’re using the Vaseline distressing method on your numbers, scrape of those sections with a knife once your design has dried. You can see the parts of my numbers here that need to be scraped off – they’re the crackling bits.
I liked this highly distressed technique because I didn’t have to worry about painting my numbers perfectly. I think the hand painted, imperfect look really matches the rustic industrial feel I wanted for this clock!
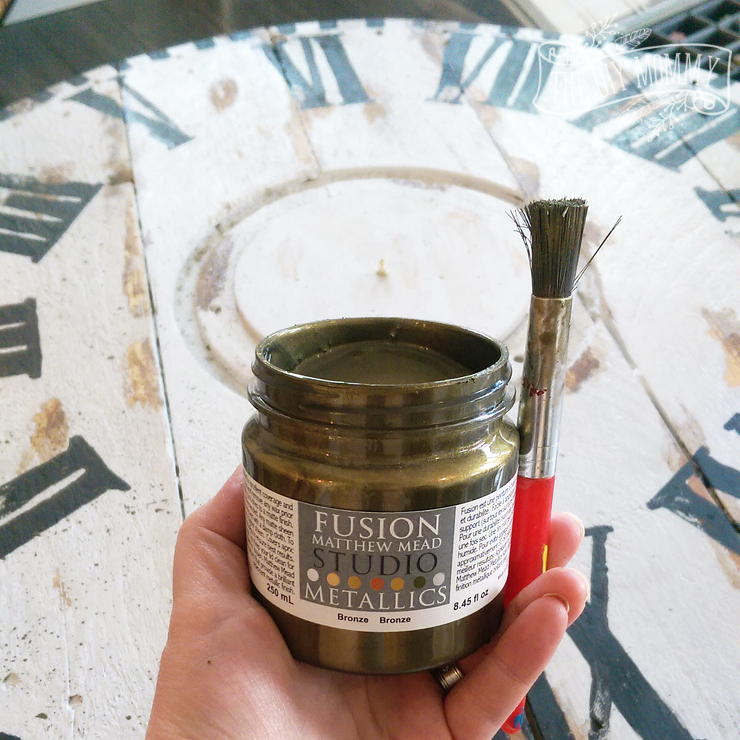
Once your numbers are dry and distressed, take your metallic paint and dip a small, stiff brush into it.
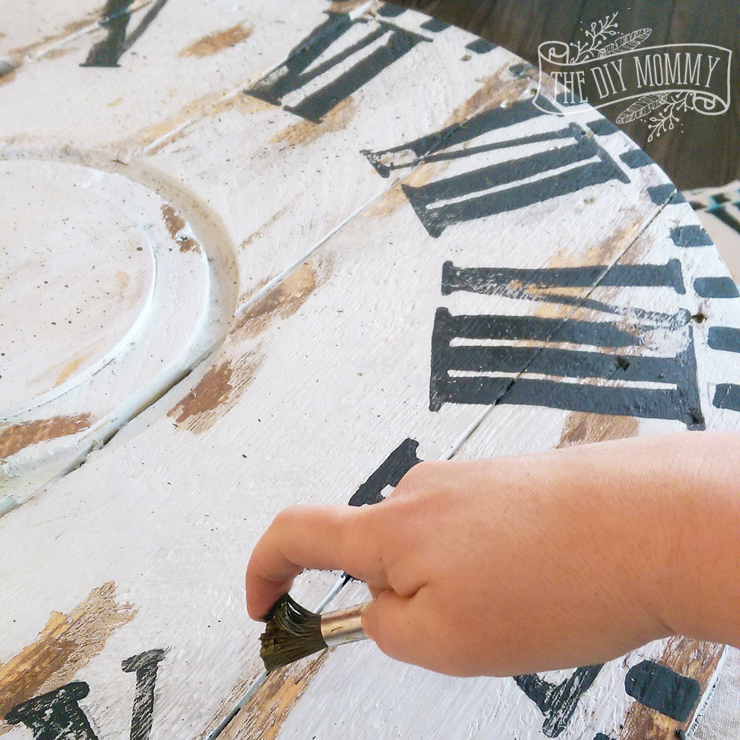
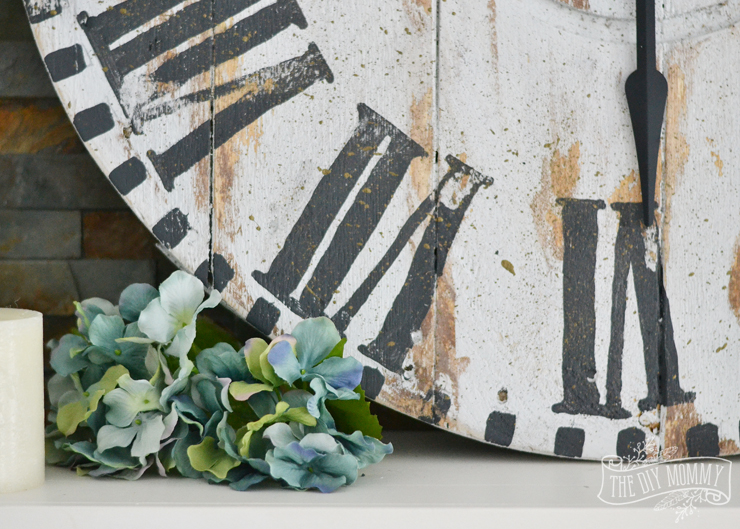
Use your pointer finger to flick the paint off of the brush onto the face of your clock. This distresses the piece even more and helps tie the dark and light colours together. I love the look!
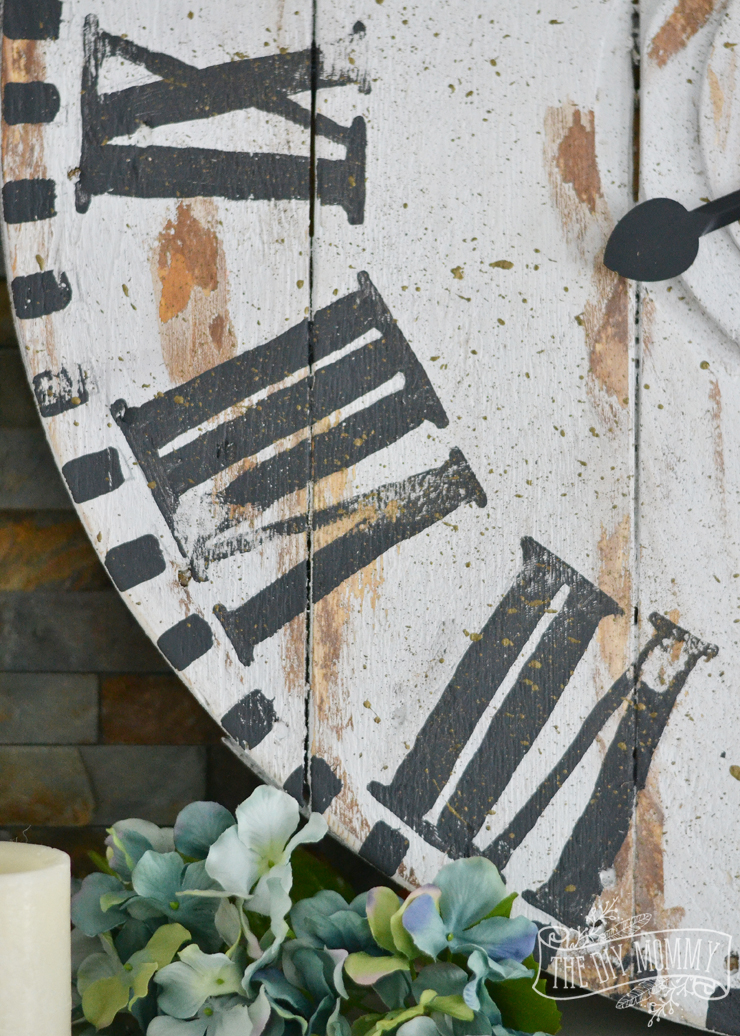
The spots of metallic paint over both the black and the white elements soften and distress everything to such a beautiful point.
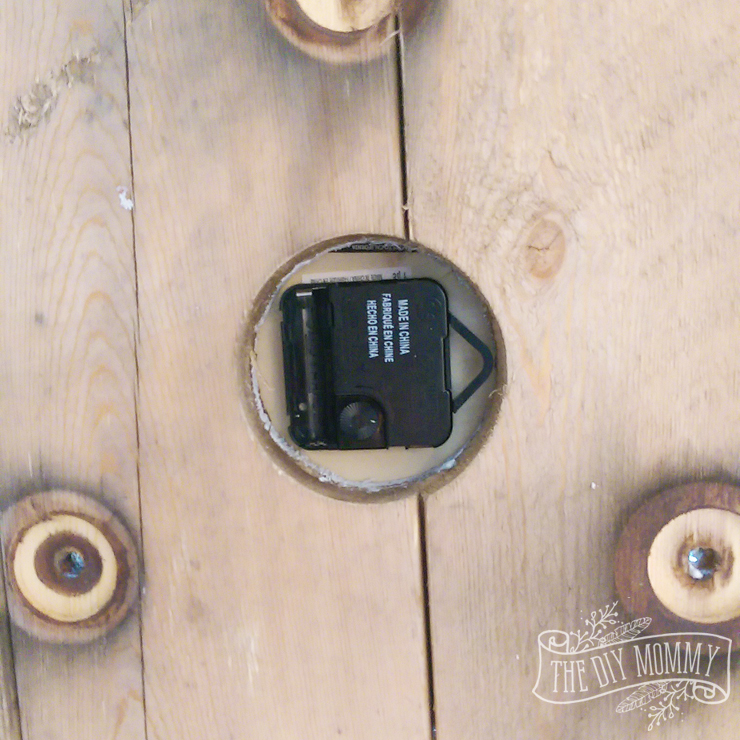
Finally, drill a hole in the center of the clock that’s the same size as what you need to place your clock mechanism through. There should be instructions with your clock mechanism that will explain how to secure the mechanism and fasten the hands.

Pop some batteries in the clock mechanism, set the time, and enjoy your gorgeous piece of art!
Pin Me:
Now it’s time to see the rest of the DIY fabric project ideas from my Canadian blogging friends.

From the top left, they are:
Wood Slice Art from Vin’yet Etc.
Ikea Bedside Table Revamp from PMQ for Two
Painting Wood Furniture from Fresh Crush
Easy Wooden Table Makeover from Woman in Real Life
Wooden Rocking Horse Upcycle from Mommyzoid
Metallic Painted Nightstand from New House New Home
Industrial Side Table from Love Create Celebrate
Wood Coffee Table Tray Gets New Makeover from Time with Thea
Paint Dipped Frame from Brooklyn Berry Designs
Giant Reclaimed Wooden Clock from an Electrical Reel from The DIY Mommy
Beach Inspired Farmhouse Dresser Upcycle from Sustain My Craft Habit
Twig Houses from Life is a Party
Disclaimer: This post is sponsored by Fusion Mineral Paint. As always, all of the opinions here are my own. I only recommend companies that I use and love myself.
What a great idea! I may have to try this out!
This looks beautiful on your mantle! Now off to find me an electrician friend… Lol.
You are so, so clever! Looks fabulous! What did hubby say when he got home and saw you tore apart his reel? lol
Would like to know where you got clock works and the size
I would also like to know please!!
You can get them from Amazon 🙂 there are a few different styles
AMAZING!!!! Where oh where can I find a wood spool? Maybe my electrician neighbour has one!!!
Wow, wow and wow! I absolutely love this! I especially love the splatter of metallic paint, it made this piece of art perfect! Where did you find those huge hands for your clock!? Amazing job!
I so appreciate your very detailed tutorial and how the clock face turned out. It really is brilliant and it looks fabulous on your mantel. I have to admit adding the bronze metallic paint finished it beautifully! I wish my husband was an electrician!
It’s so beautiful! Hard to believe it’s an upcycled electrical reel. And thank you for the distressing tips…I MUST give that a try.
This is incredible!!! Great tips for distressing too. Well done! Jo
Wow, this clock turned out so great. It looks amazing on your mantel. Great job!
Where did u buy the fusion paint? I am in Edmonton and looking to buy. Thanks.
I had it shipped to me, but I believe Raggs to Riches in Stony Plain and Spruce Grove carries it!
I love these clock hands, where did you get the clock kit?
Thank you!
I used them from another clock, but you can find lots of large clock hands on Etsy!
Hi there, busy making mine now and I’m definitely going to do the distressed look. I almost copied your clock face template and then realized the roman numbers 4 is incorrect. Just for info. lol.
Thank you Tammy for the feedback 🙂
Saw this clock and saw some other blogs do similar ones, have to say this is my favourite one for sure. Finished product looks excellent. Well done!
You are so sweet Anastasia! Christina, is so flattered.
Getting ready to do a clock based on your tutorial. How large do you think your numerals are (3 inches?).
Great job.
Thank you, L. The numerals Christina scaled are closer to 4-5″ 🙂
Did you have any trouble with your clock mechanism? I made one and I can’t get the clock mechanism to stay in place and not catch on each other. Also, they don’t show the right time as they move? What an I missing or doing wrong ? Any ideas ? Thanks
Hello Kara, awe that’s no good at all that your clock is not working as you would like it to. Christina, hasn’t had any trouble with her clock. We don’t really think you are missing anything. Amazon carries clock mechanisms that have worked really well for Christina. You can try searching there 🙂
Hey Christina,
Excellent job! Would love to try something similar with this too. Thanks a lot for sharing this. Awesome!
Cheers,
Oliver
Thank you, Oliver. Christina is so happy you enjoyed it.
Thanks for stopping by 🙂
Can you give me the specific link for the hands to your large clock? Thanks
Hey Jenna,
Sorry this is not the exact one as Christina used but has large hands and is still beautiful 🙂
https://www.amazon.ca/Reliable-E-Aluminum-Clock-Hands-Movement/dp/B01KV228S8/ref=sr_1_1?ie=UTF8&qid=1494432014&sr=8-1&keywords=clock+kit+large
What is the diameter of the electrical wheel? Thanks!
Hello Renee.
Christina’s clock measures at 32 3/4″
I would like to know where you found the mechanisms to fit this size clock. Thanks!
Christina got them from Amazon 🙂
It would be nice to know precisely what you put in the center circle. Its a huge step in keeping the clock in position. Its clearly some added material. Unsure why you omitted that explanation. TIA
i love this but was wondering the same thing… to cover the center hole of the spool, did you use a prefab wood circle? How and what did you use to anchor it there? It looks almost like you used a router to make a groove around it. Thanks!
OMG this is soo chic! I recently bought a cuckoo clock for the house after reading this guide (https://www.cuckooforest.com/pages/cuckoo-clocks-buying-guide) but it looks a bit outdated for my modern space. When I came across your post, I knew I had to paint my clock white just like yours. Do you have any suggestions how I can achieve the same rugged finish on varnished wood?
Hey Caroline,
Try using chalk paint. It’s awesome to distress and sticks very well to pretty much everything. So that means no sanding or priming prior to painting. Yay!
Thanks Lindsay. I’m new to chalk paint and watched a few tutorial videos 🙂 It seems pretty easy to use and I might actually just need one coat because it’s a bit on the thick side. One video mentioned using wax for finishing. Is this a better choice over typical polyurethane?
Where did you get the large arms for your clock?
Christina bought a clock kit for this project and the arms and everything came with it. Here’s a link to the full post: https://thediymommy.com/make-a-giant-reclaimed-wood-clock-from-an-electrical-reel-12monthsofdiy/