Make Fabric Feather Wall Art
This post may contain affiliate links · This blog generates income via ads
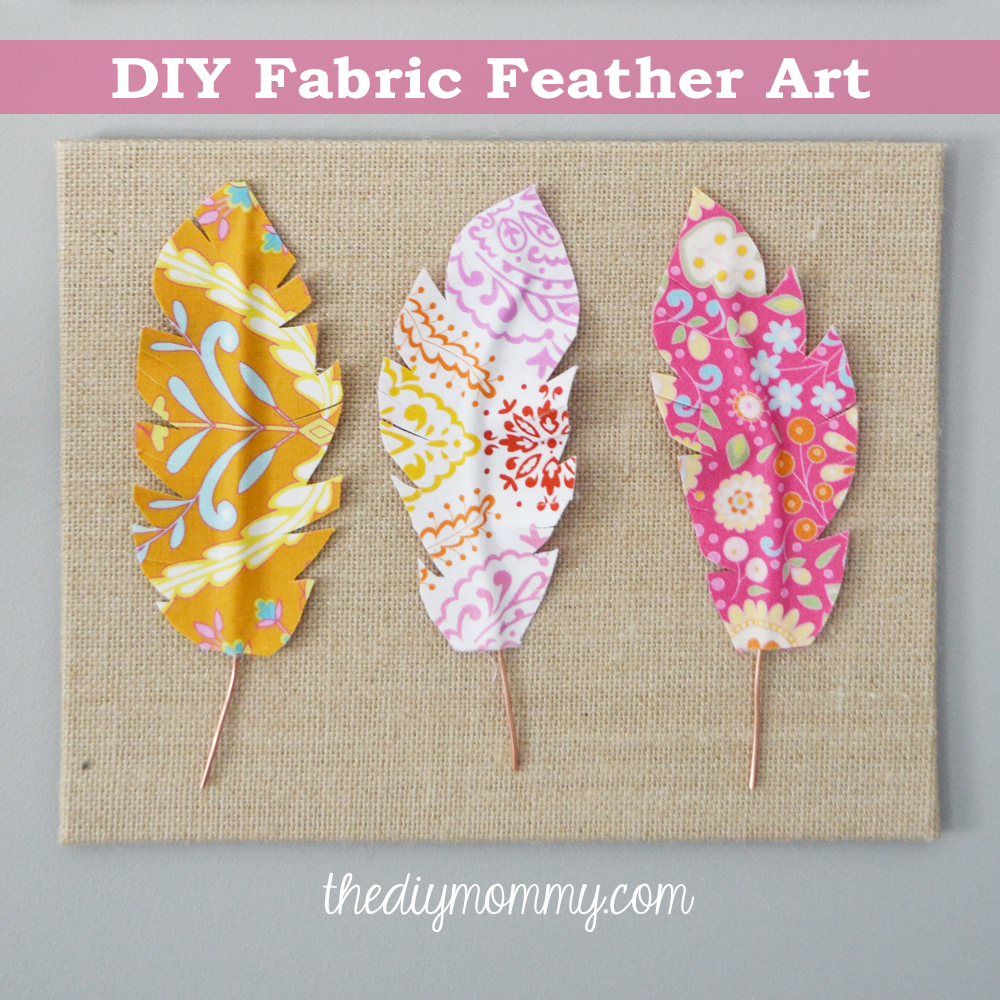
Baby B’s nursery is almost done! I’m just working on the finishing touches this week, and then I can proudly say that ALL of my girls’ rooms are completely decorated. (I cannot claim that they are ever tidy, however, so I’m kind of glad that I’m immortalizing clean versions of them in photos on this blog.) Something I love to make is custom, DIY wall art. It’s fun to create something unique and something that’s a potential conversation piece! For Baby B’s room, I highlighted the “soft boho” theme of her decor with this fun fabric feather DIY artwork.
Materials:
- cotton fabric scraps
- Heat N’ Bond (adhesive sheets you iron to fabric)
- medium gauge wire (I used 14 gauge scrap electrical wire – good thing my hubby’s an electrician!)
- glue gun
- small, pointed fabric scissors
- burlap wrapped cardboard or a canvas
Directions:
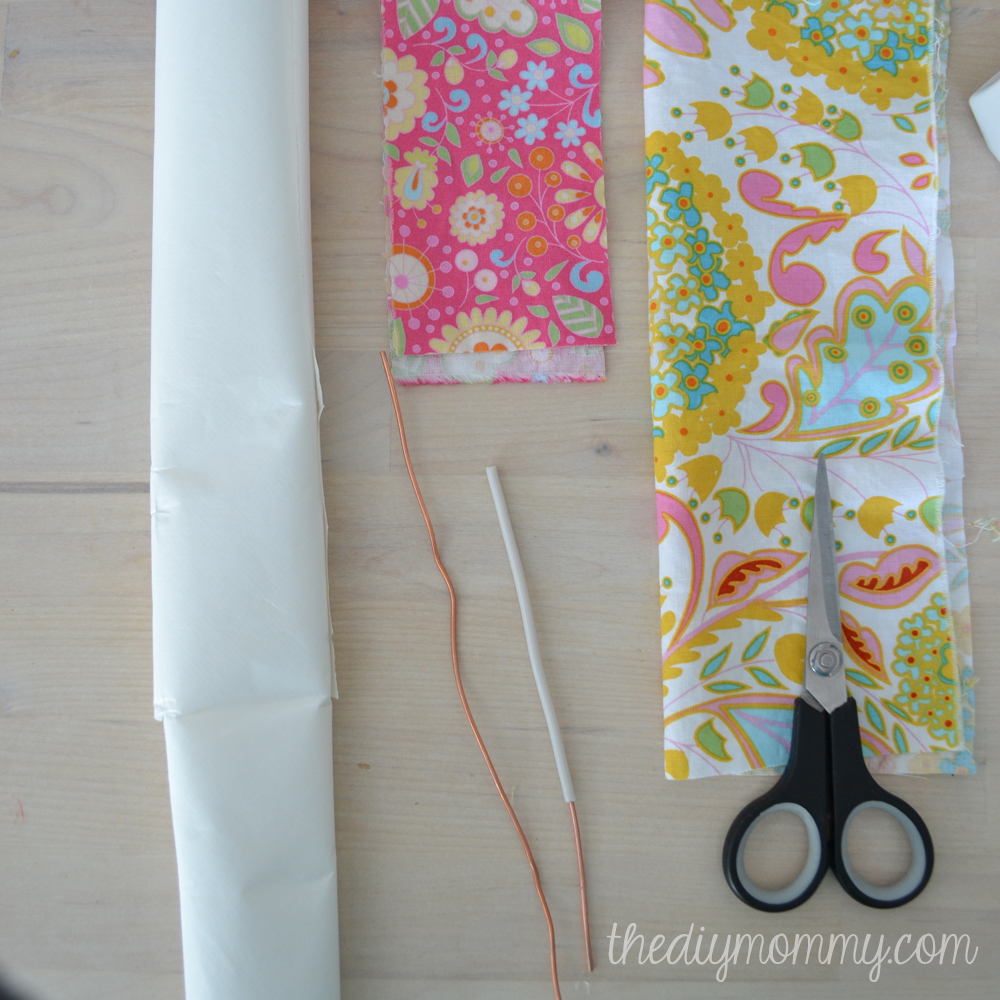
Cut your scraps to the width you want your feathers to be and two times longer (my small feathers were about 2″ x 6″, so I cut fabric pieces that were about 2″ x 12″). The cuts don’t have to be straight. Cut the wire to your desired length – I cut mine so that about 1 1/2″ of wire would stick out of the bottom of each feather.
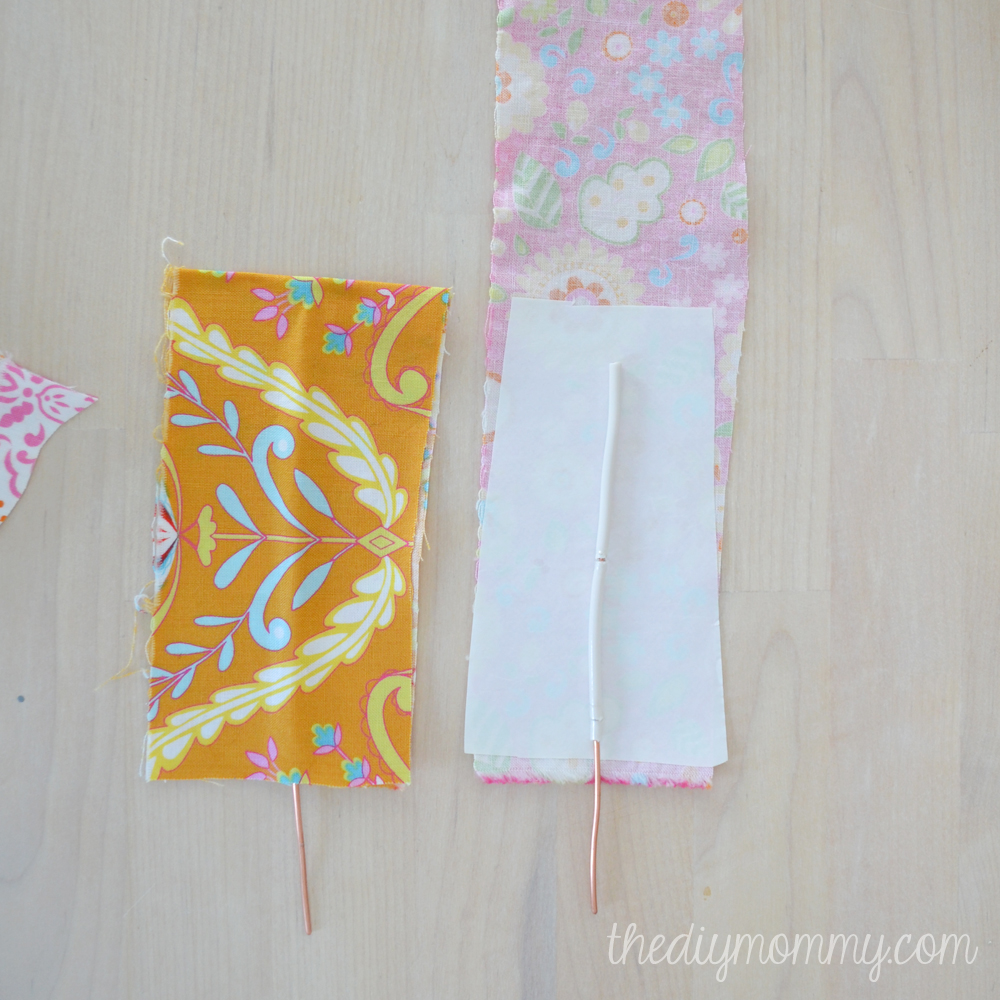
Cut pieces of Heat N’ Bond to be the same size as half you piece of fabric (as shown above) and iron it onto the wrong side of one half of the fabric. Peel off the backing, and then place a piece of wire in the center of the fabric. Fold the fabric over, and iron it all together so that the fabric is sealed around the wire and all around its raw edges.
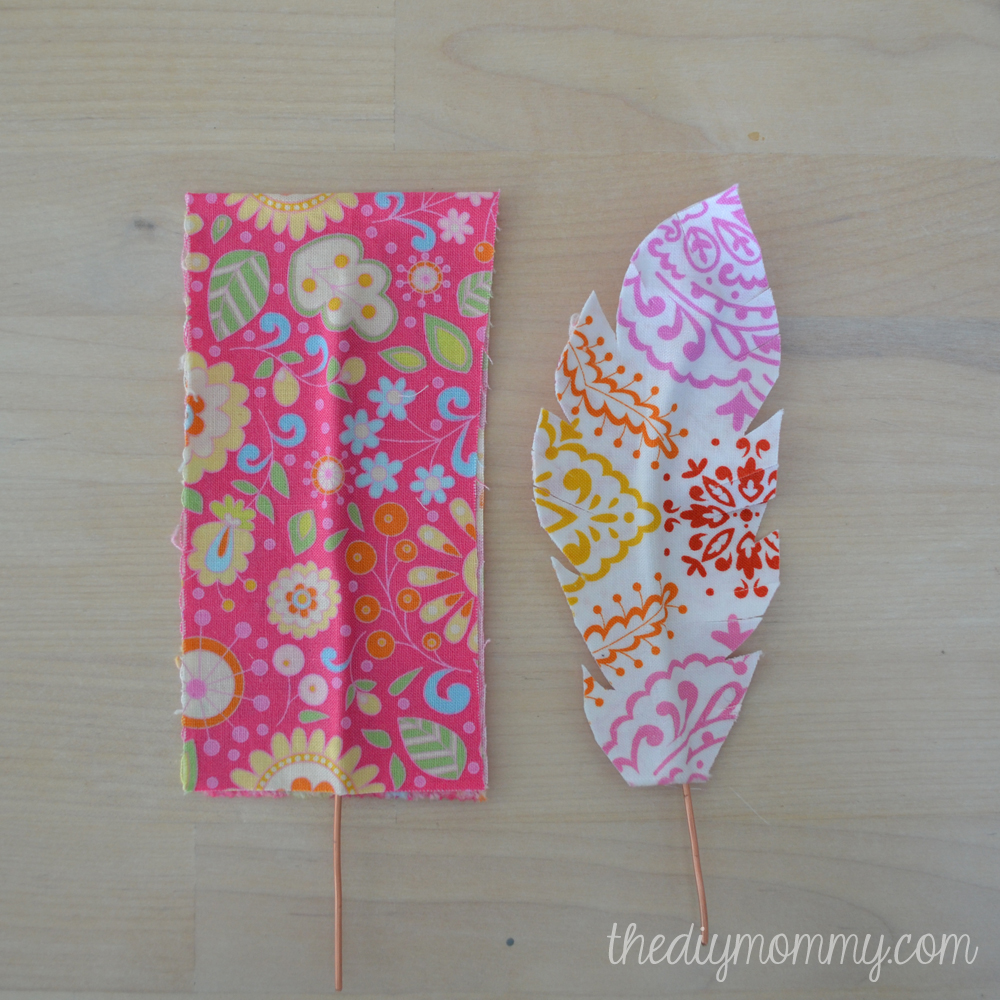
Using the small, pointed scissors, cut the fabric into a feather shape and add notches and slits around the edges.
I found some illustrations of feathers that I liked and free-handed my feather shapes, but you could also print out the illustrations and use them as a pattern if you don’t care to free-hand your feathers. I found that big notches all around the feather looked better than just slits – the notches added some pretty definition. I also found that bending the wire slightly to the right or left added character to my fabric feathers.
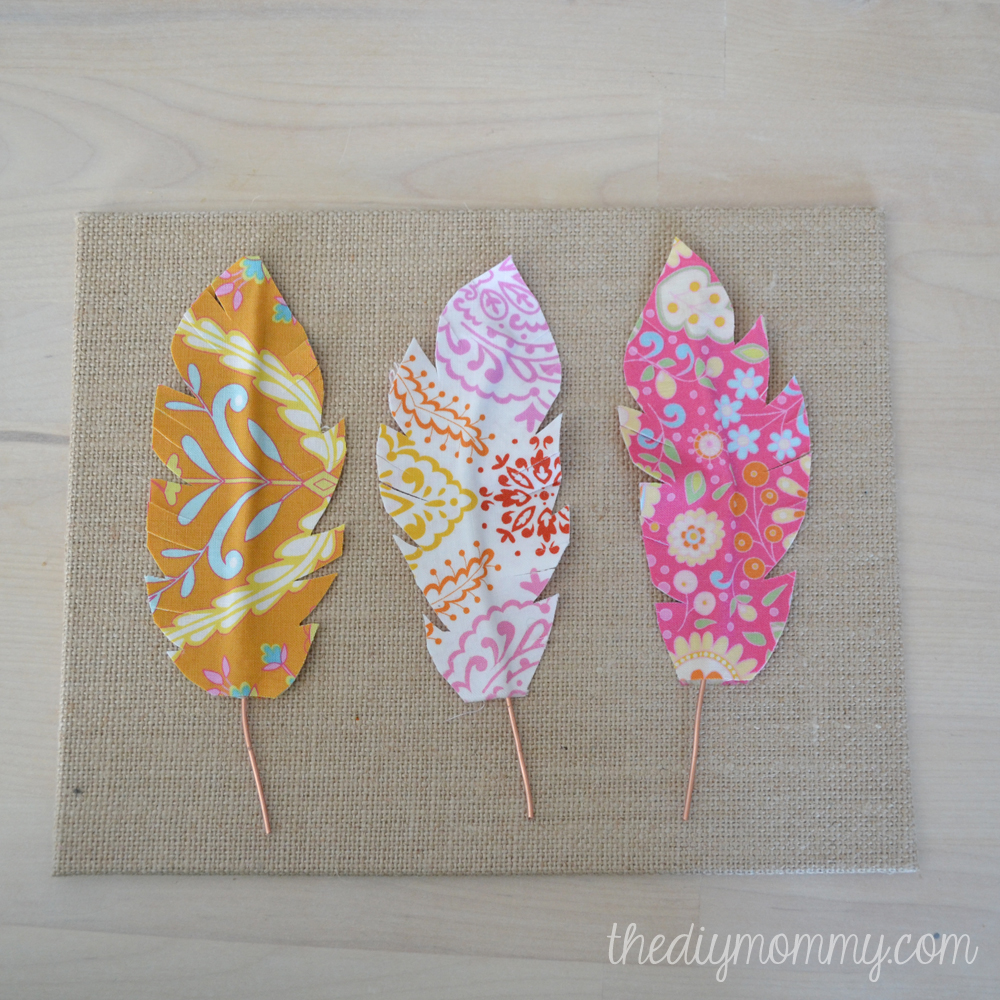
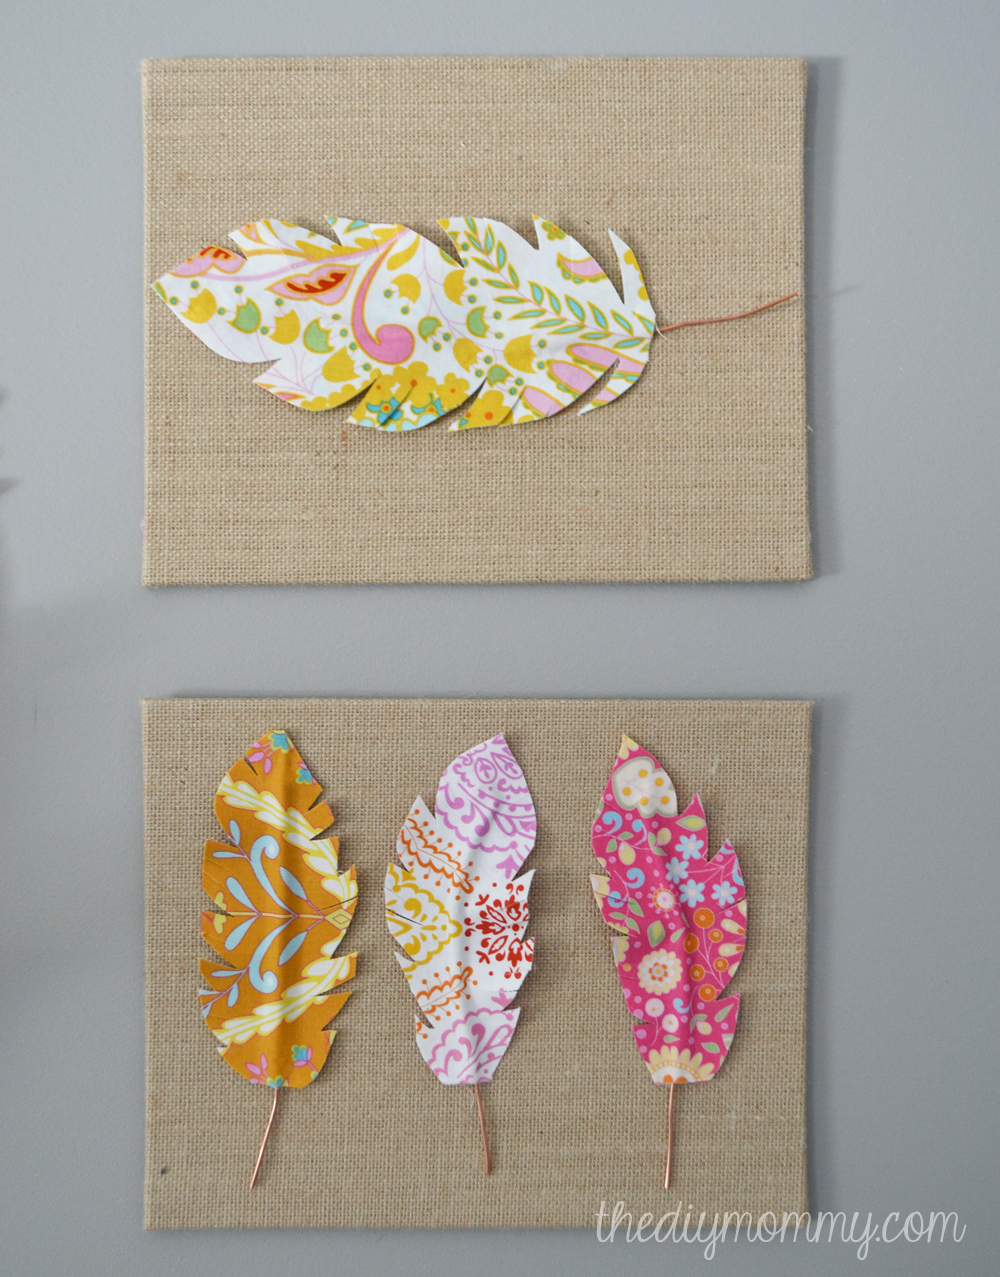
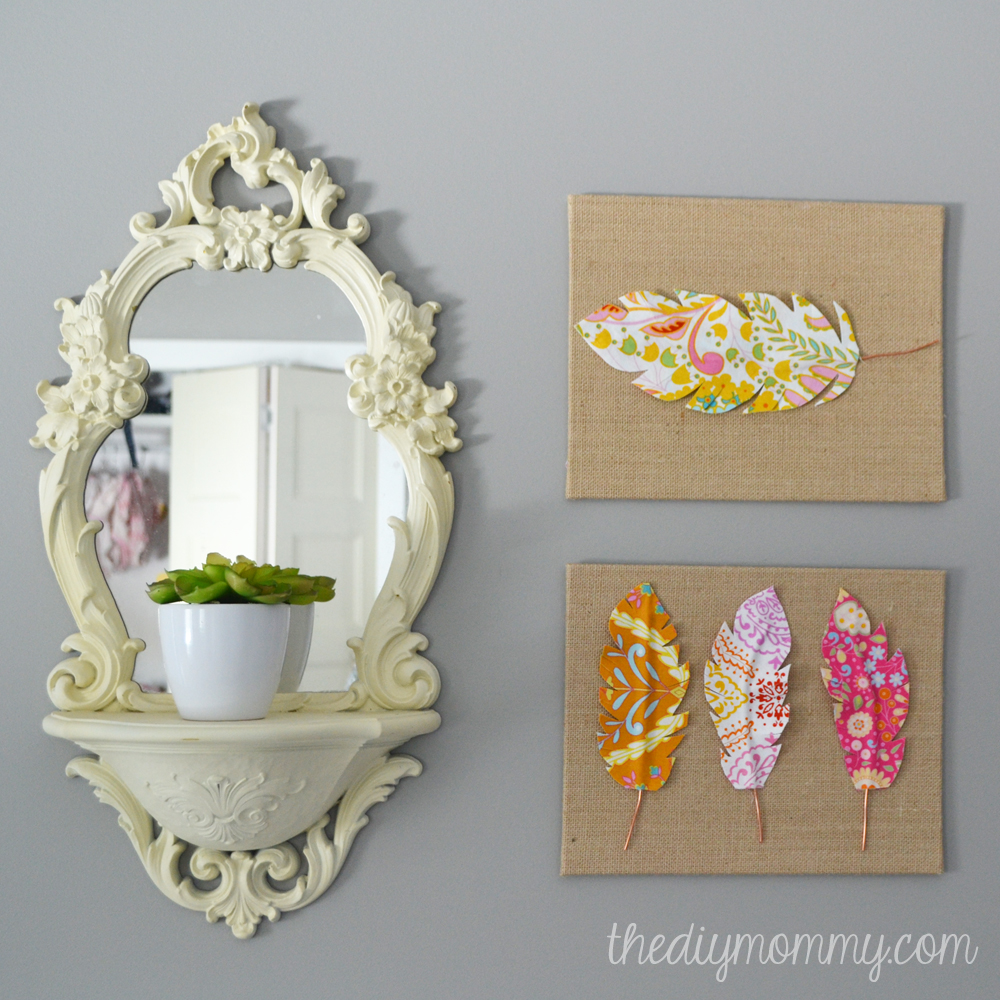
With a hot glue gun, glue your feather(s) to your burlap wrapped cardboard or canvas. I made one piece with three smaller feathers, and then a second piece with one larger feather.
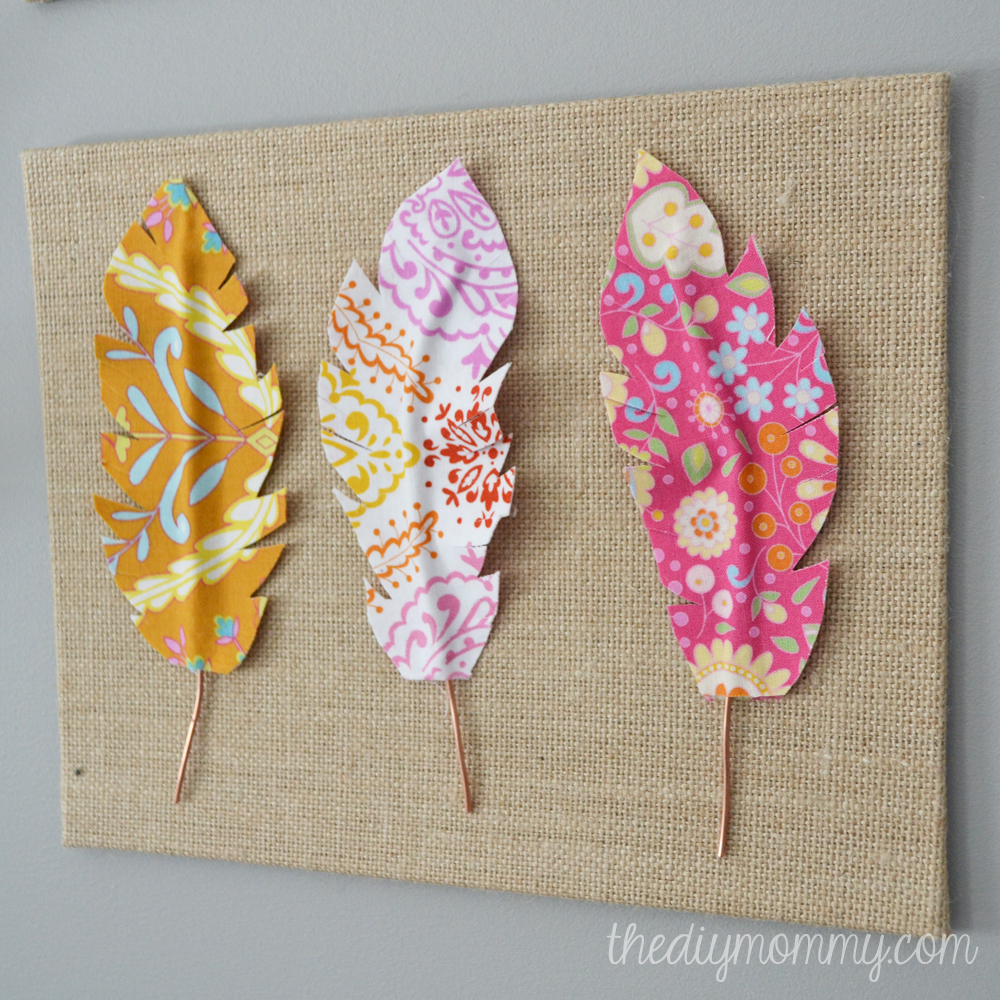
Hang your pretty pieces of art on a wall (I used Command hanging strips) and you’re ready to stand back and admire it!
I’m hoping to do Baby B’s room reveal this week or early next, so stay tuned! It’s a fun little space and perfect for baby cuddles (which I’ve been doing a lot of lately). Happy DIYing!
What a great DIY project! Fast, easy, and a great way to use up some of those beautiful fabric scraps that we always seem to have too many of. . . but can’t seem to throw away! LOL
Looking forward to the reveal of Baby B’s room!
Thanks for sharing, the feathers looks amazing.
Thank you! In our industry, we know that you only get a few crucial seconds to make a good impression and engage potential customers. We aim to help you make the best of it!