• Crafts
  • Home Decor
  • Sewing
  • Recipes
  • Mommy Fashion
  • Biz & Blogging
  • Free Printables
  • Giveaways

The DIY Mommy

  • About
    • Terms of Service
    • Privacy Policy
    • Disclosure Policy
    • Link Parties
  • Shop Our Home
  • Home Tour
  • Contact
  • Privacy & Cookie Policy

Sew the Easiest Shirred Summer Dress Ever

May 14, 2014 By Christina Dennis 10 Comments

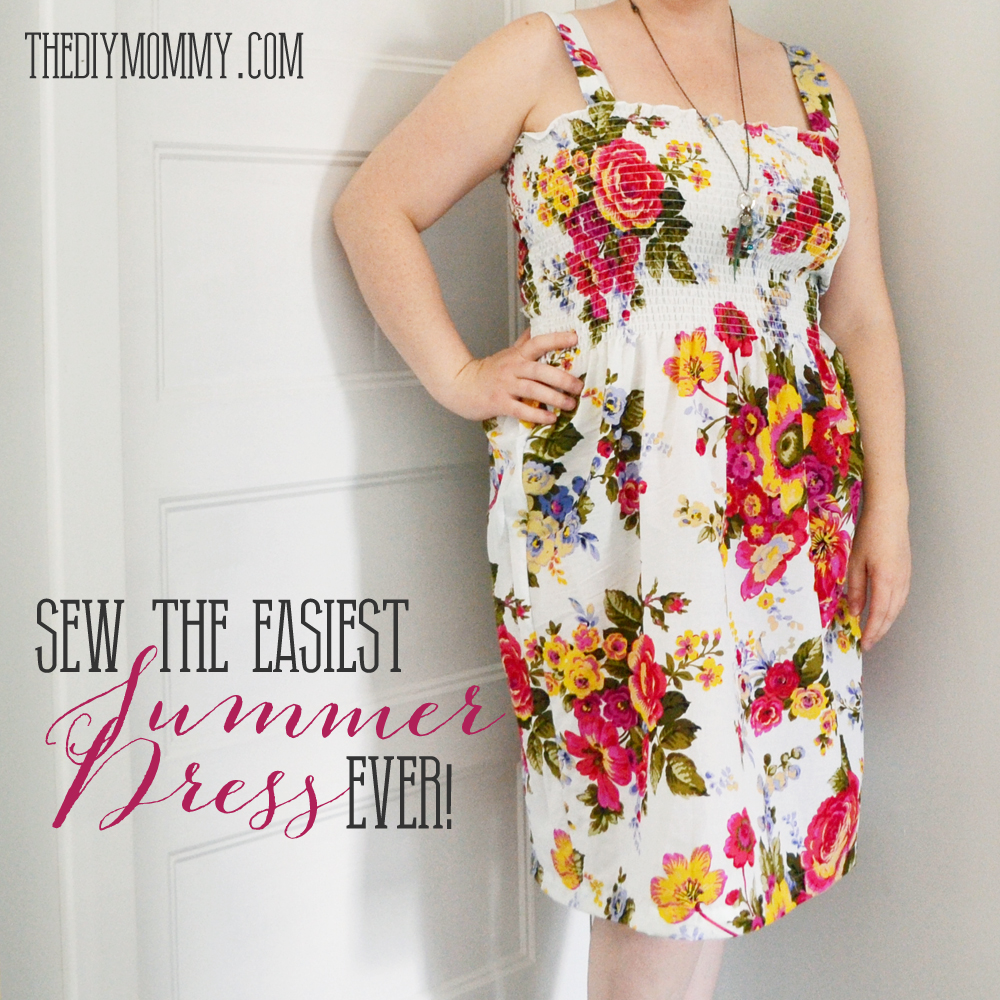
In the spring and summer, I like to wear dresses. I like to wear them A LOT. There’s something to be said about throwing on something that’s just one piece and lightweight and breezy… ahhhh. Plus, if I find just the right dress I can even wear it when I’m nursing Baby B! I made this sweet, floral shirred dress in less than 20 minutes. No joke! There’s a secret, though: I used pre-shirred fabric. It was such an incredibly fast and fulfilling project – perfect for a busy mom.

Sew an easy summer dress with pre-shirred fabric.

Where can you buy pre-shirred or shirred fabric?

I found mine at Fabricland in Edmonton. They usually bring it out in the late Spring and have it in a variety of patterns and widths (some suited to adults and some for children).

I’ve also seen it online at Jo-Ann Fabric & Craft Stores, and my American friends have confirmed that they’ve seen it in-store as well.

If you simply can’t find pre-shirred fabric anywhere near you, why not buy your favourite cotton lawn or cotton voile fabric from Fabric.com and use this fantastic tutorial to shirr your own?

Sew an easy summer dress with pre-shirred fabric.

Here’s how I made my flowery summer dress in under 20 minutes:

Supplies:

  • pre-shirred cotton fabric (buy enough to wrap around your hips + about 4 inches for seam allowances and ease – it’s measured along the un-shirred side)
  • a sewing machine or serger
  • a hard ruler, cutting mat and rotary cutter

If the fabric isn’t wide enough to cut about 8″ from the bottom to make straps, grab a 1/4 yard of coordinating fabric to make straps.

Directions:

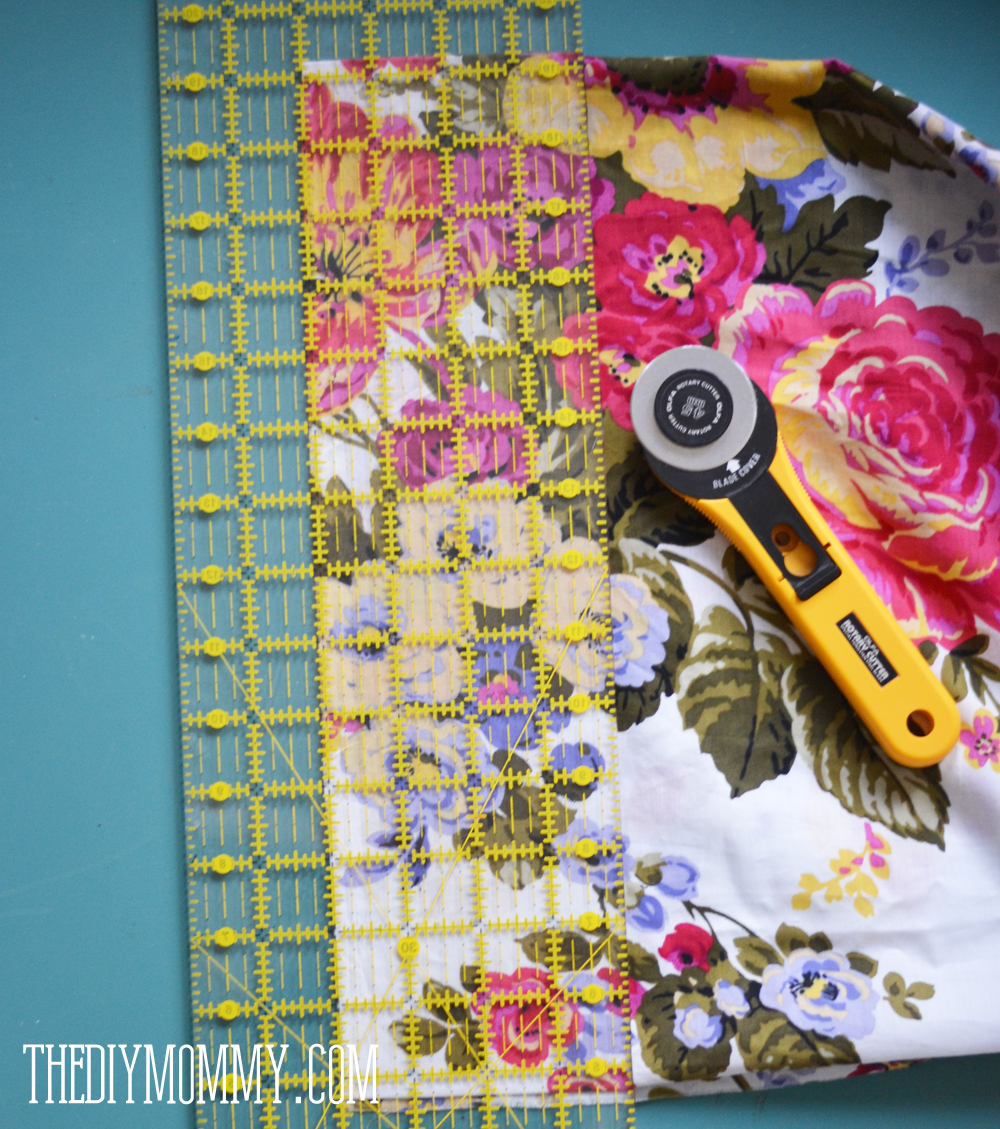
If you’re making straps from the shirred fabric too, cut two 4″ strips of fabric off of the un-shirred side.

Sew an easy summer dress with pre-shirred fabric.

Fold one of the strips in half lengthwise, right sides together, and stitch using a 1/2″ seam allowance. Repeat with the other strip. Turn the straps right side out and press:

Sew an easy summer dress with pre-shirred fabric.

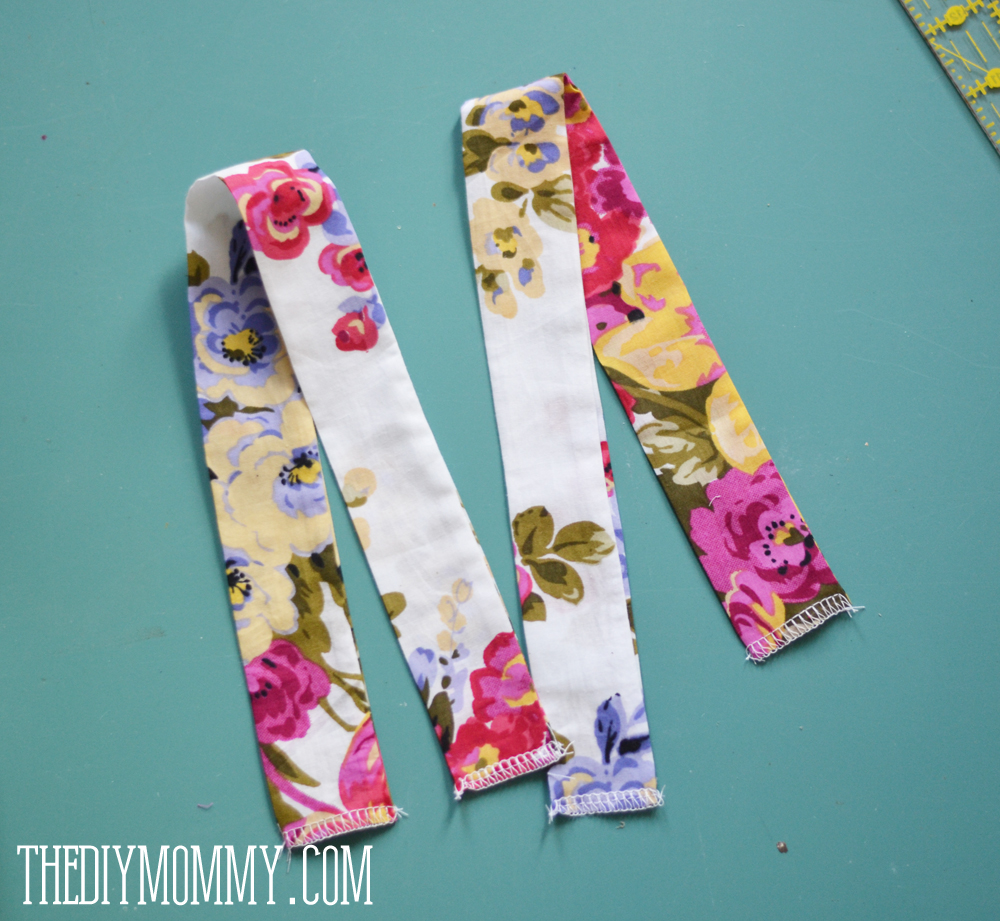
You’ll cut the straps to size and finish them later (disregard that in the photo above)!

Sew an easy summer dress with pre-shirred fabric.

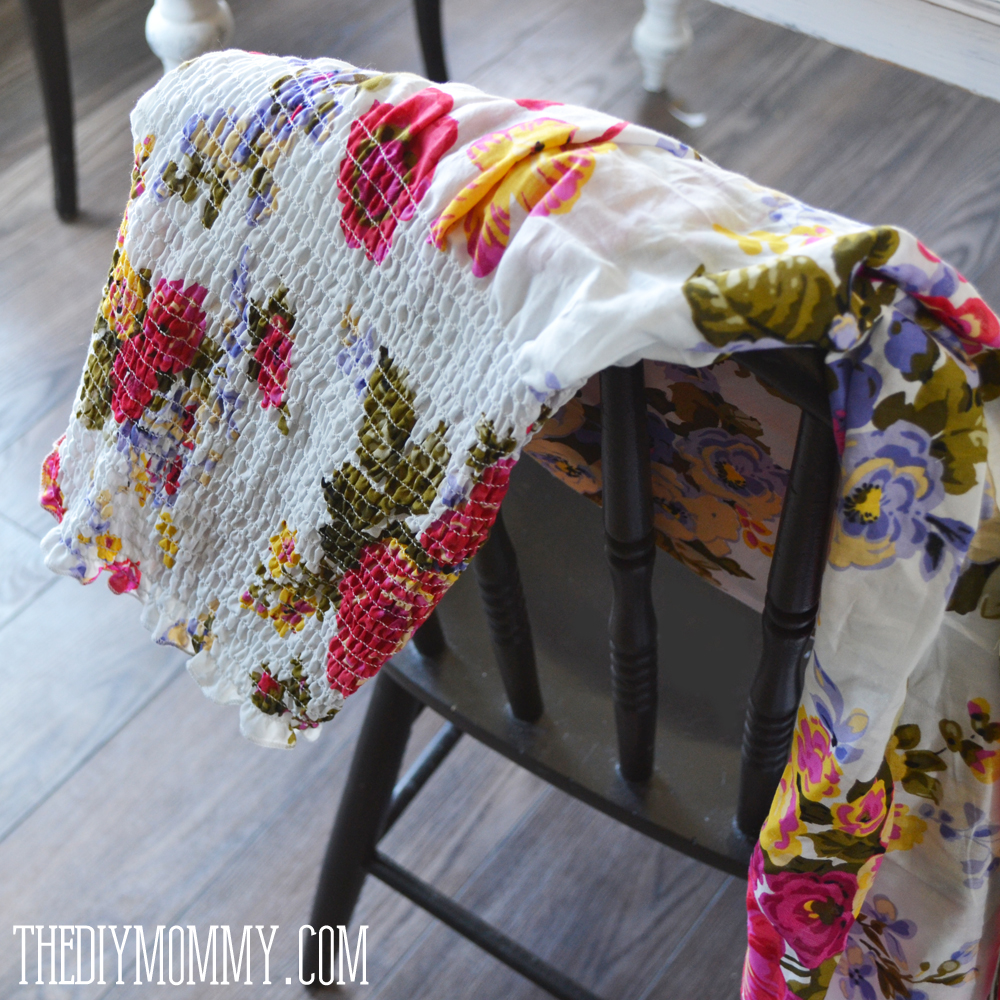
Fold your shirred fabric in half lengthwise, right sides together. Cut along one side so that you have a front and back piece. I suppose you could just skip this step and sew one seam, but I think a garment needs to have two side seams to sit right!

Sew an easy summer dress with pre-shirred fabric.

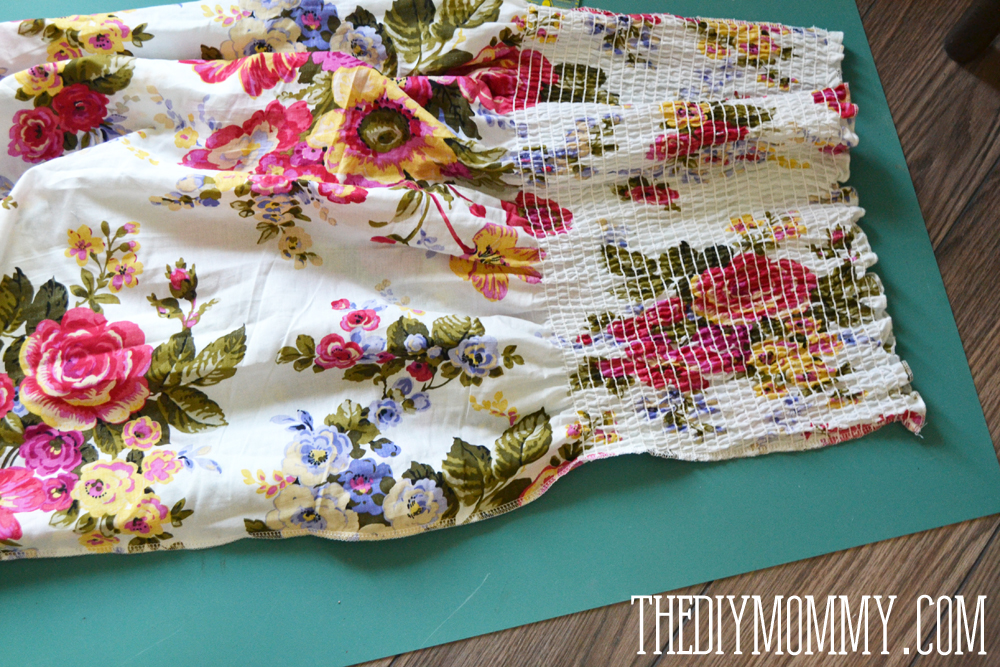
Pin your pieces together (right sides together still), and sew along each side using a 1/2″ seam allowance. I used a serger to make it nice and quick, but you could also use a straight stitch on a sewing machine and then finish the seam with a zig-zag stitch.

Sew an easy summer dress with pre-shirred fabric.

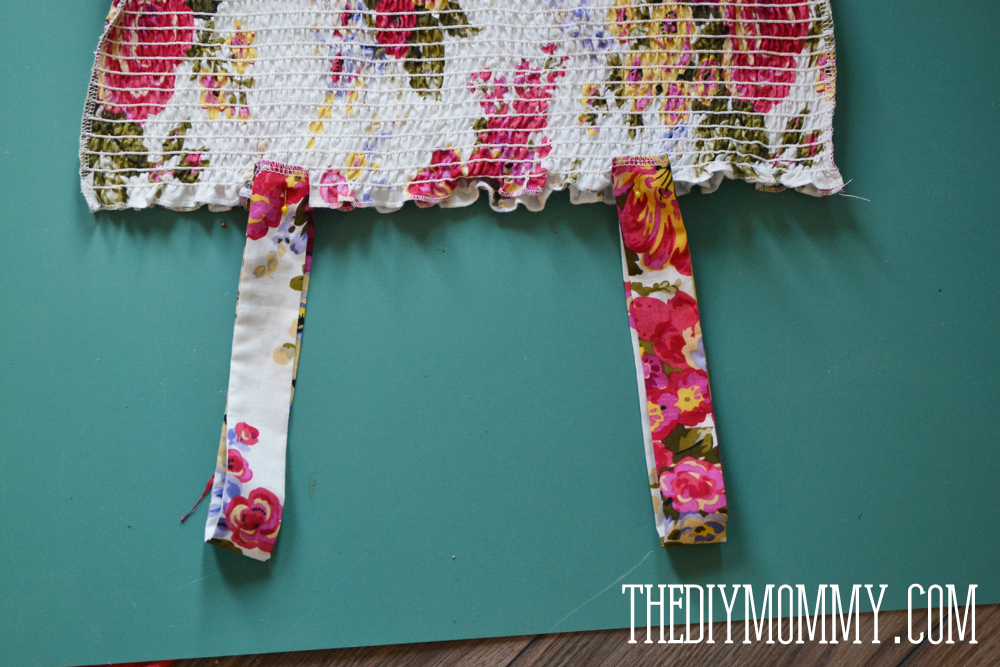
Now, try the dress on and measure how long you’d like your straps to be. Add 2″ to this measurment, and cut the strap pieces to this size. Finish the raw edges of the straps with a serged seam or zig-zag. Pin the straps to the wrong side of the top of your dress, 1″ from the top edge. I place mine about 4″ in from each side seam. Sew them in place.

Sew an easy summer dress with pre-shirred fabric.

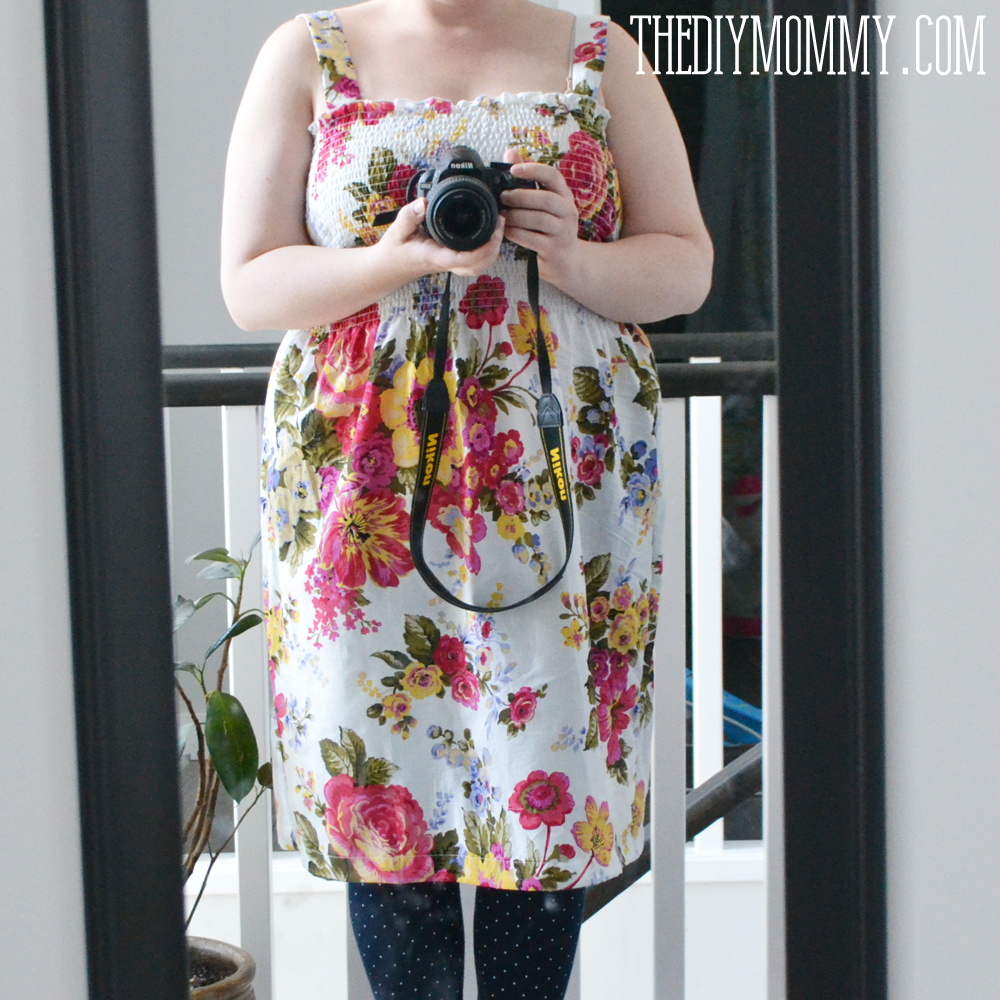
Hem the bottom of your dress (I pressed mine up 1/2″, then 2″ and stitched) and you’re ready to go!

(It was a bad hair and – let’s face it, haha – face day, so I just chopped off my head in these photos. Problem solved!)

Sew an easy summer dress with pre-shirred fabric.

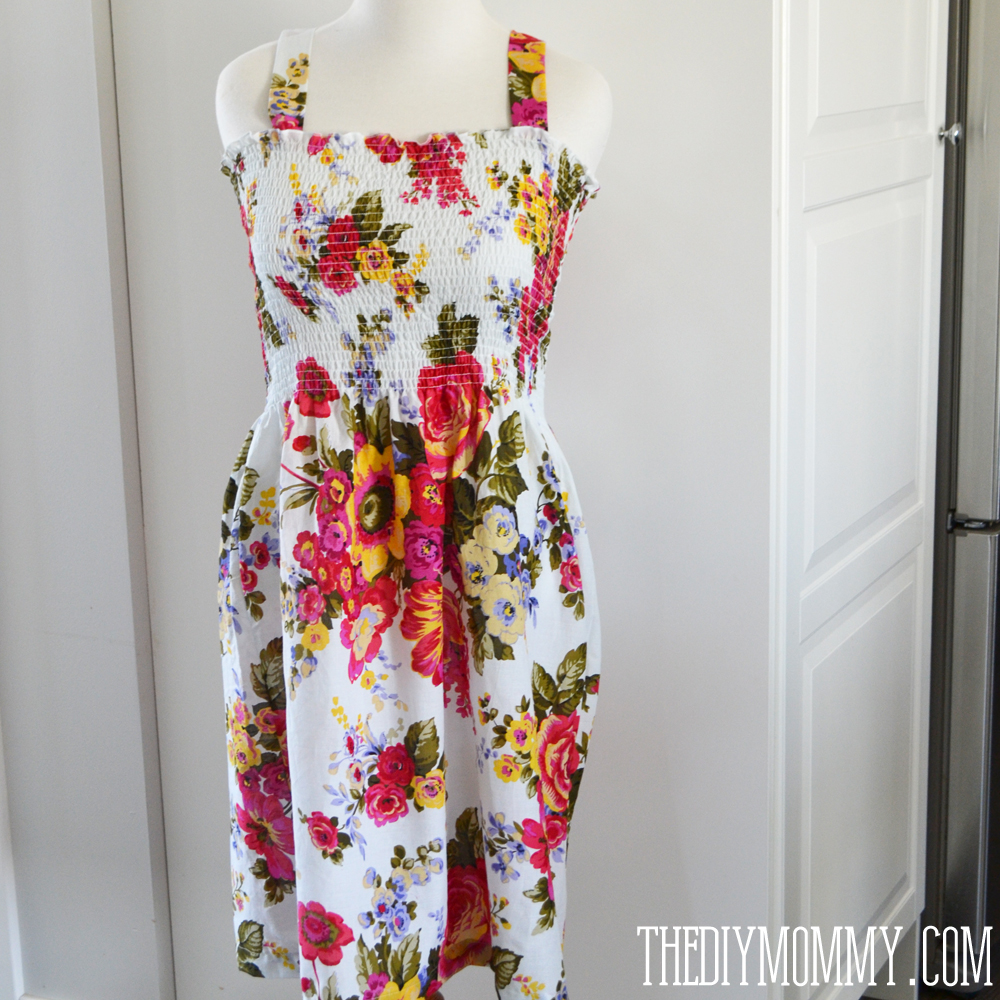
This dress makes a fabulous maternity, post-partum and/or nursing dress because the top is so stretchy and the straps can easily slide of the shoulders if you want them to.

You could also make this dress without straps, but I like to cover my bra straps for more flexibility – I don’t always want to feel like I need to wear a sweater or jacket.

Have you ever sewn with pre-shirred fabric? What did you think?

(Disclosure: This post contains affiliate links. If you decide to purchase products via these links, a small percentage of the sale will be given to me at no extra cost to you. It’s a win-win – thanks for helping support thediymommy.com!)

Filed Under: DIY Fashion & Mom Life, DIY Pregnancy, DIY Sewing Tagged With: dress, flowers, nursing, petite curvy mom style, postpartum, Spring, summer

Never miss a post from The DIY Mommy again!

Subscribe to our email list to get your free e-book and weekly DIY inspiration! SUBSCRIBE

About Christina

Christina is a crafty mommy to three little girls, a wife to one handsome hubby, and they all live in a home they built themselves in rural Alberta, Canada. Read More…

« Sew Fabric Peonies and Cabbage Roses
What’s In My Diaper Bag (+ Stylish Baby Wipes) #HuggiesMomStyle »

Comments

  1. Sara Gibson says

    May 15, 2014 at 8:02 pm

    “Bad face day” LOL I’ve definitely had those! And I just LOVE how cute that dress is! Definitely have to head over to Fabricland and check out that fabric!

    Reply
    • Christina Dennis says

      May 21, 2014 at 10:54 pm

      Thanks, Sara. Yes – they still had quite a lot of different pre-shirred fabrics at Fabricland! Yep, “bad face” days seem to be quite popular around here with a new baby in the house. 🙂

      Reply
      • Sara Gibson says

        May 22, 2014 at 10:18 am

        I totally got some fabric! It was 50% off, too! Gonna make matching maxi dresses for my girls. =)

        Reply
        • Christina Dennis says

          May 24, 2014 at 10:53 pm

          Oh, perfect! I’m glad you got such a great deal on it.

          Reply
  2. Barbara says

    May 31, 2014 at 10:52 am

    I love it, so adorable! I can’t wait to make one for myself. I had some good face days when I was about 2 years old, but it’s been pretty much downhill from there. I am busty so I think I need to make the front a bit wider than the back so the side seams actually go down the sides. My other thought would be just having one seam run down the center of the back. Any thoughts?

    Reply
    • Christina Dennis says

      June 1, 2014 at 11:19 pm

      Hi Barbara! Thanks! I like how a dress hangs better when the seams are on the sides, so I’d probably just make the front piece larger if I were you. However, if the shirring is stretchy enough, you might not find that necessary. I’d wrap the fabric around yourself first and see what it does. Happy sewing!

      Reply
  3. Barbara says

    June 2, 2014 at 1:11 pm

    Thanks Christina. I think I’ll sew up one side seam, position that seam where it should be on my body, then wrap and pin the other side. That should take the guess work out of it. =0)

    Reply
  4. Wesentliche says

    December 8, 2015 at 3:01 am

    Alles ist möglich.

    Reply

Trackbacks

  1. 32 Creatively Cool Dresses to Sew for Summer - DIY Joy says:
    May 2, 2017 at 10:22 am

    […] thediymommy […]

    Reply
  2. 32 Creatively Cool Dresses to Sew for Summer - stylishbuzz says:
    May 2, 2017 at 12:04 pm

    […] thediymommy […]

    Reply

Leave a Reply Cancel reply

Your email address will not be published. Required fields are marked *

CommentLuv badgeShow more posts

This site uses Akismet to reduce spam. Learn how your comment data is processed.

Hello, there!

My name is Christina and I'm a mom of 3 girls, designer, crafter & country dweller. 🌾 I'm blogging from our DIY house on the prairies. Read More…

  • Bloglovin
  • Facebook
  • Instagram
  • Pinterest
  • RSS
  • Twitter
  • YouTube

Free E-Book!

Subscribe to our email list to get your free e-book and weekly DIY inspiration!

SUBSCRIBE

Categories

  • DIY Baby Clothes & Accessories
  • DIY Pregnancy
  • DIY Kids Activities
  • DIY Parties & Holidays
  • DIY Home Decor
  • DIY Fashion & Mom Life
  • DIY Family Food
  • Free Printables
  • Reviews & Giveaways
  • Mommy Health & Beauty
  • Randoms
  • Technology
  • Tip Tuesday Videos
  • DIY Garden

Trending Now

  • DIY Fabric Peonies or Cabbage Roses Tutorial by The DIY Mommy Sew Fabric Peonies and Cabbage Roses
  • DIY Teepee Play Tent Tutorial by The DIY Mommy Sew a DIY Teepee Play Tent
  • How to sew the softest DIY baby blanket with two layers of minky fabric and satin binding Sew a Double Minky Satin Bound Baby Blanket
  • Simple and cute baby sleep sack tutorial with a free pattern. Sew an Easy Baby Sleep Sack
  • 2 Ingredient Bagels - delicious, full of protein and Weight Watchers friendly 2 Ingredient Bagels (Weight Watchers Friendly)
  • How to sew super absorbent DIY nursing pads that actually work! There's a special fabric inner layer. Sew Super Absorbent Nursing Pads
  • DIY No-Sew Fabric Covered Blackout Roller Blinds by The DIY Mommy. Just use spray adhesive, fabric and ribbon for an exciting update to your roller blinds! Make a No-Sew Fabric Covered Roller Shade

Archives

Home Tour

Videos

1/166
Next»
Subscribe to My Channel

Latest Insta

  • Are you all longing for Spring like I am? I'm trying to embrace the session, seize the day and all that lovely stuff... but meanwhile I'm sprinkling Springy decor and making Springy DIYs with all the hope I can muster. 🤣 I don't know if it's the weather or another flu coming on, but every muscle in my body is just aching and it's sure not helping me enjoy the cold! (This DIY dollar store floral arrangement looks great on all my tables - I keep moving it around! 🙌 You can get the tutorial to make it on my #YouTube channel or here in #IGTV.)
.
.
.
#thediymommy #springdecor #dollarstore #dollarama #diningroom #farmhouse #frenchcountry #floralarrangement #abmlifeisbeautiful #abmlifeiscolorful #SODomino #mytradhome #myhomevibe #myhousebeautiful #countryliving #cottagestyle

Follow Me!

My Videos

1/328
Next»

Subscribe!

Subscribe to our email list to get your free e-book and weekly DIY inspiration!

SUBSCRIBE

"The DIY Mommy" is a registered trademark belonging to Christina Dennis.

Copyright © 2019 · The DIY Mommy

Disclaimer: While every effort has been made to ensure the accuracy & effectiveness of the information displayed on this website, The DIY Mommy makes no guarantee as to the procedures & information contained here. The publisher will not be liable for direct, indirect, incidental, or consequential damages in connection with or arising from the use of the information displayed on thediymommy.com. This website is not intented to substitute the advice of a professional. Note: Posts may contain affiliate links or sponsored content. For more of our disclosure policy, click here.

We use cookies to ensure that we give you the best experience on our website. If you continue to use this site we will assume that you are happy with it.OkRead more