Our DIY Camper: RV Bathroom Makeover on a Budget
This post may contain affiliate links · This blog generates income via ads
Today I’m thrilled to share our DIY camper’s bathroom transformation journey. Join me as we dive into a fun project where creativity and resourcefulness reign supreme, and good ol’ fashioned DIY brings new life into this little space. Prepare for the before & after of our RV bathroom makeover—a project filled with tons of paint and lots of determination! I’m sharing all the secrets behind this budget-friendly renovation, turning our little camper into a stylish and functional retreat. Get ready to feel inspired and motivated, and let’s dive into some DIY!
When we renovated our first camper in 2017 (take the full renovated tour from last summer right here), we’ve had so much fun camping in it. This little camper is one of the best purchases we’ve ever made and most impactful renovations we’ve ever done! I did leave one area undone to tackle the following year, and that was the RV’s tiny bathroom. I knew it would be a ton of work even though it’s so small, and I was right!
This post was first published in 2018 and has since been updated.
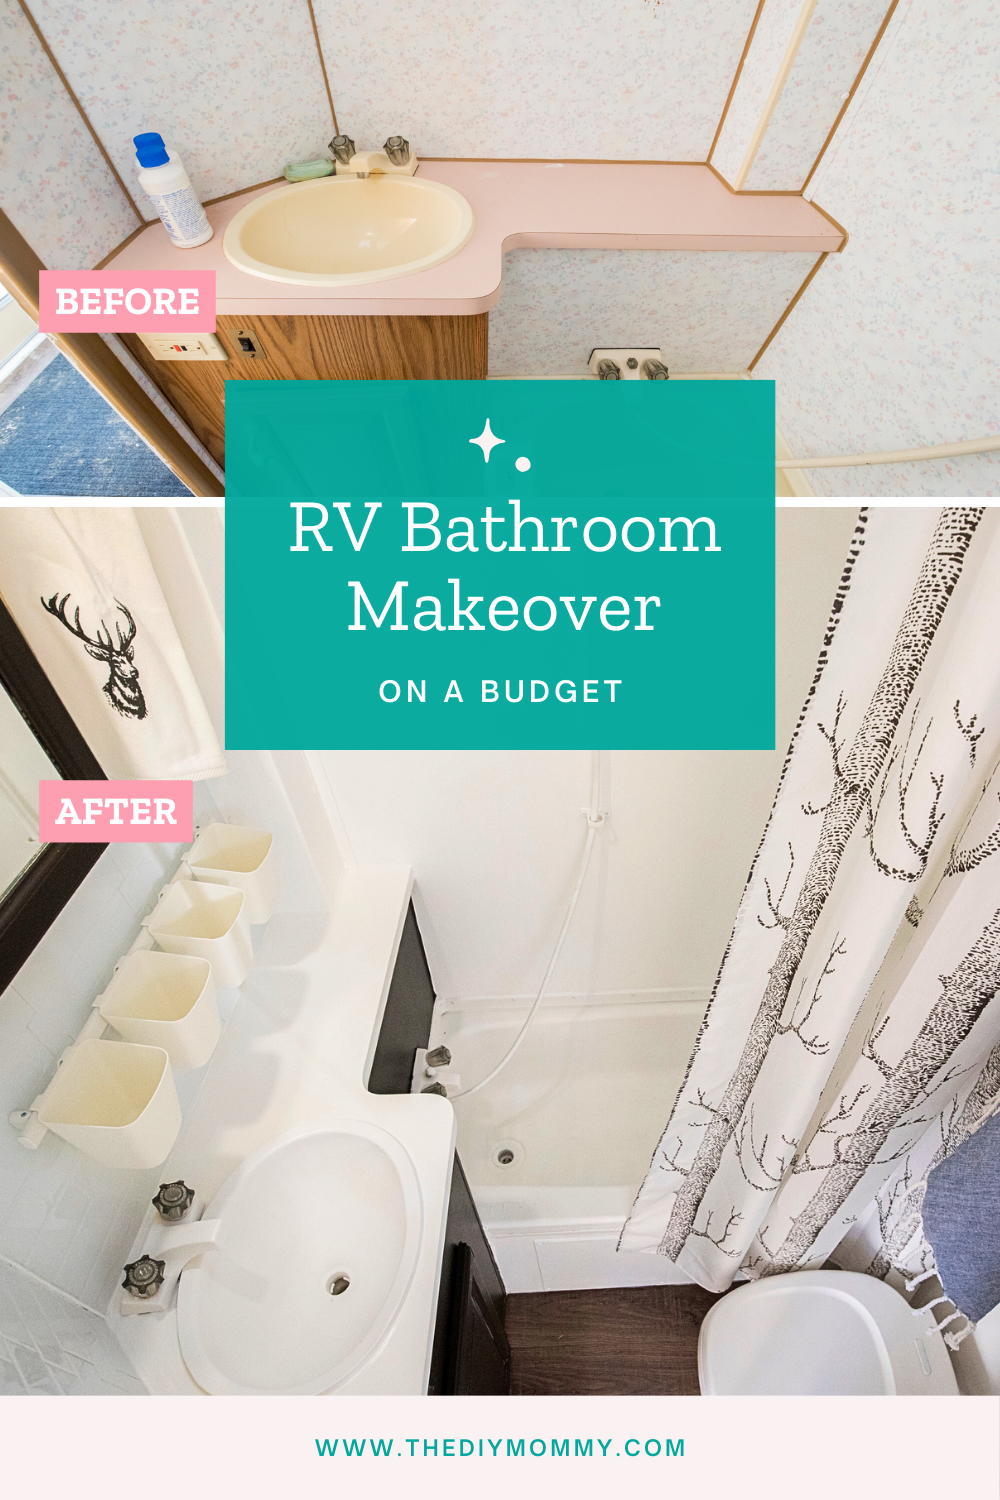
Here’s how Our DIY Camper’s bathroom looked BEFORE:
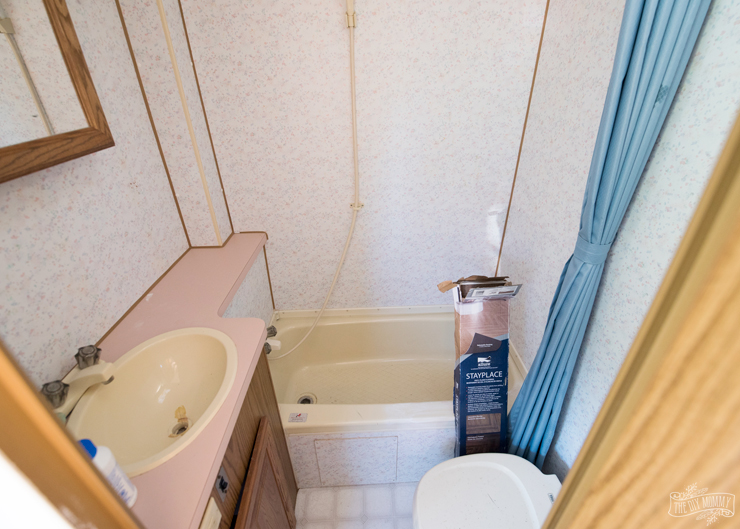
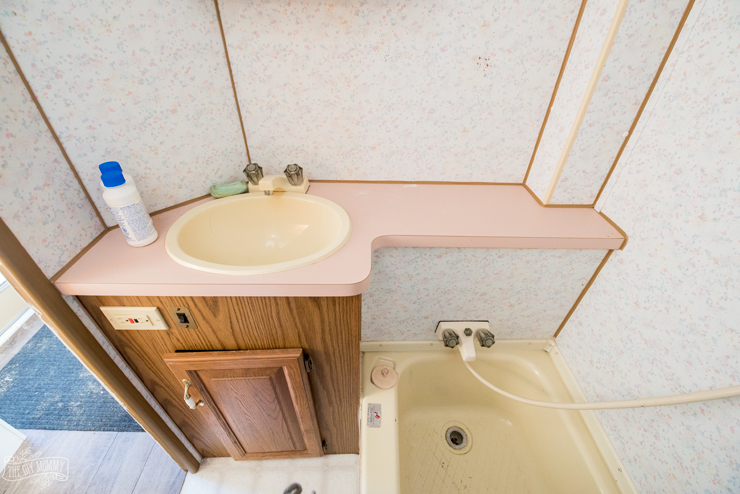
It was a 1992 special with honey oak cabinetry, a blush pink countertop, floral wallpapered walls, and a yellowing sink & bathtub.
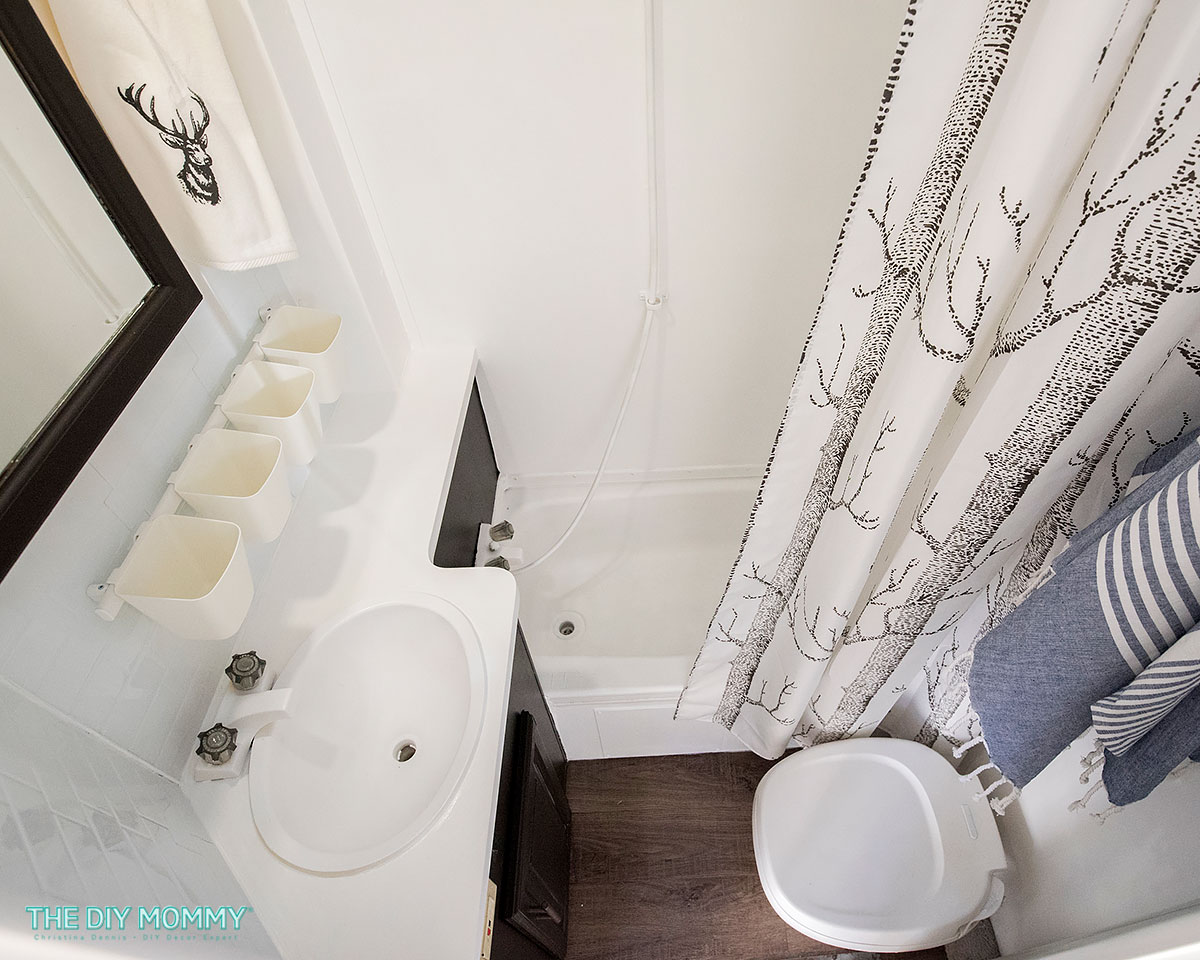
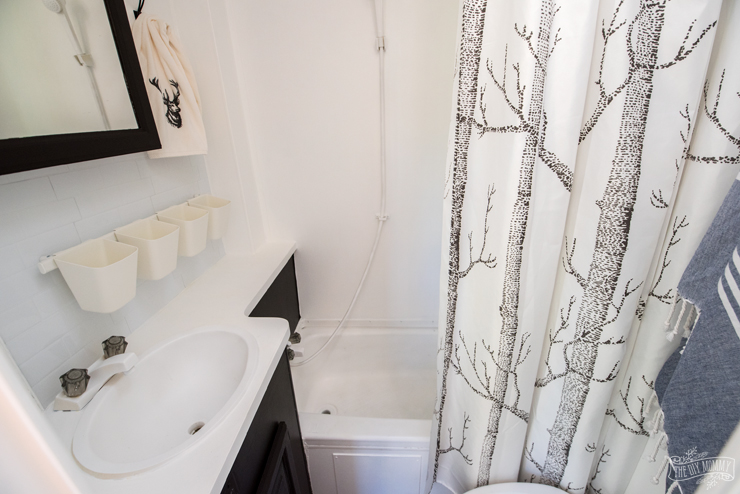
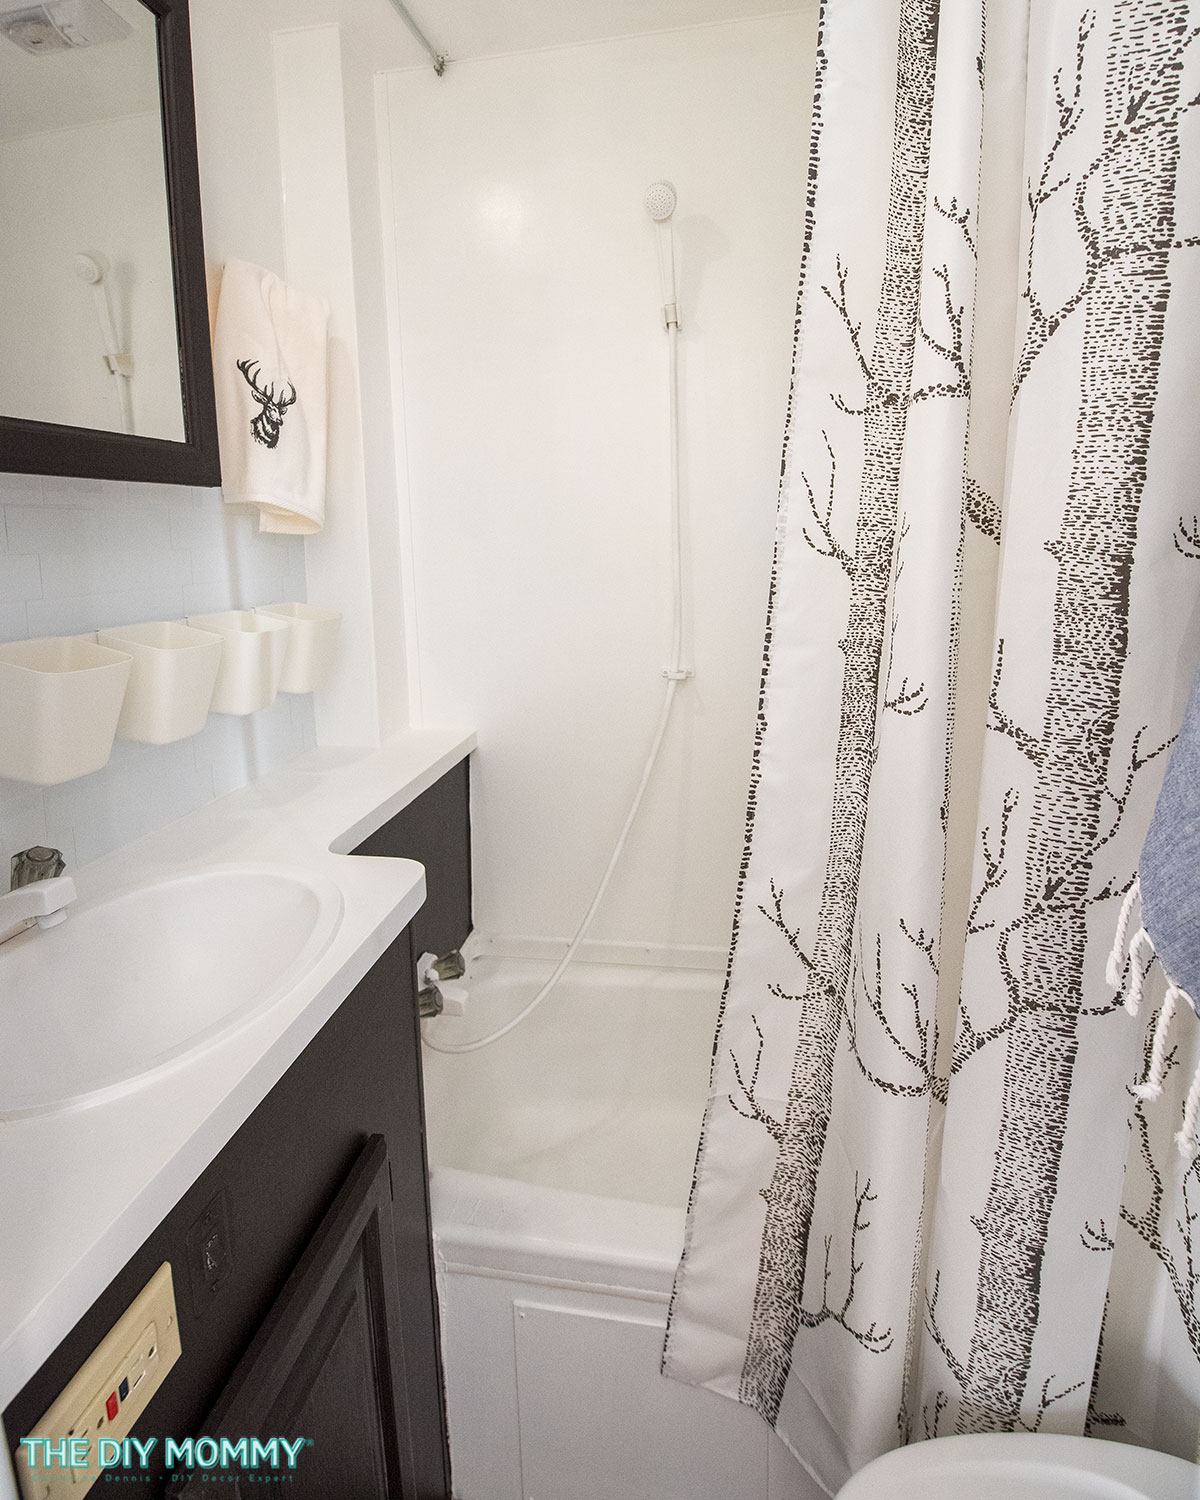
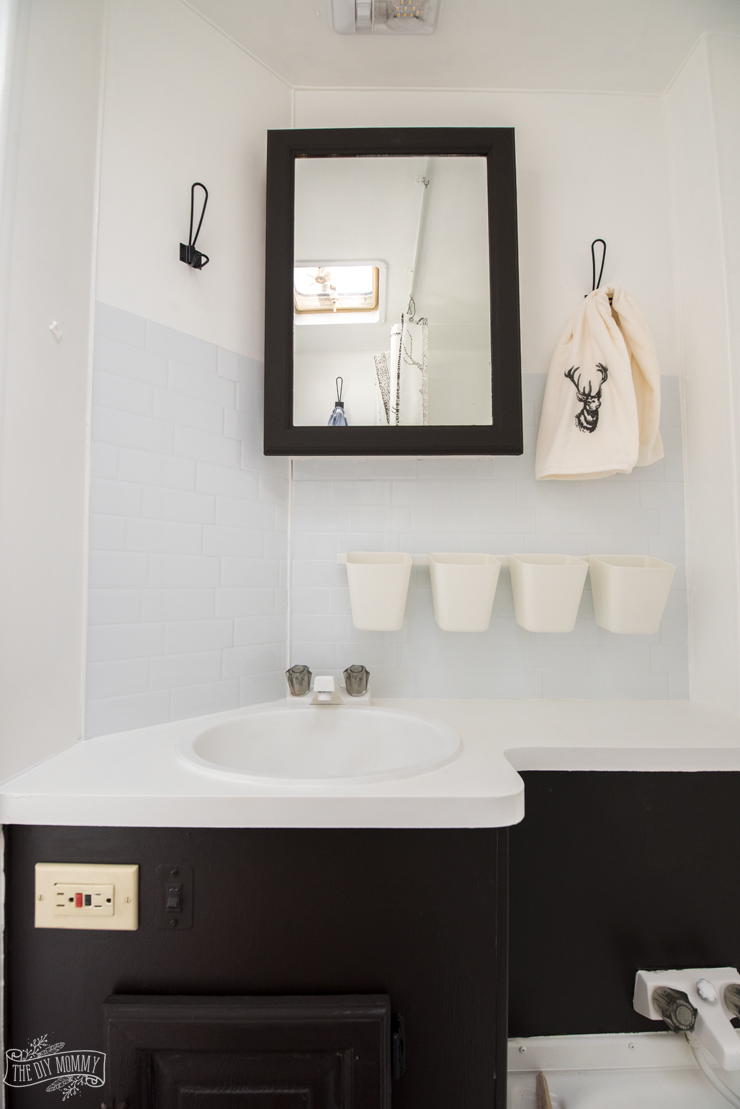
And here’s our RV bathroom makeover finished look:
For a small amount of money, I updated the bathroom this summer so that we could enjoy it in all it’s renovated glory for this year’s camping season. I used lots of items I had on hand – mostly paint! – to give our camper’s bathroom a major makeover on a budget.
Watch my YouTube video to see the whole process, and then you can read the steps below to learn how I did the RV bathroom makeover
RV Bathroom Renovation Steps
Here are the steps I took for this RV bathroom remodel.
Cleaning the Bathroom
First, I cleaned the bathroom thoroughly including all the fixtures with a degreasing cleaner.
Painting the Fixtures & Hardware
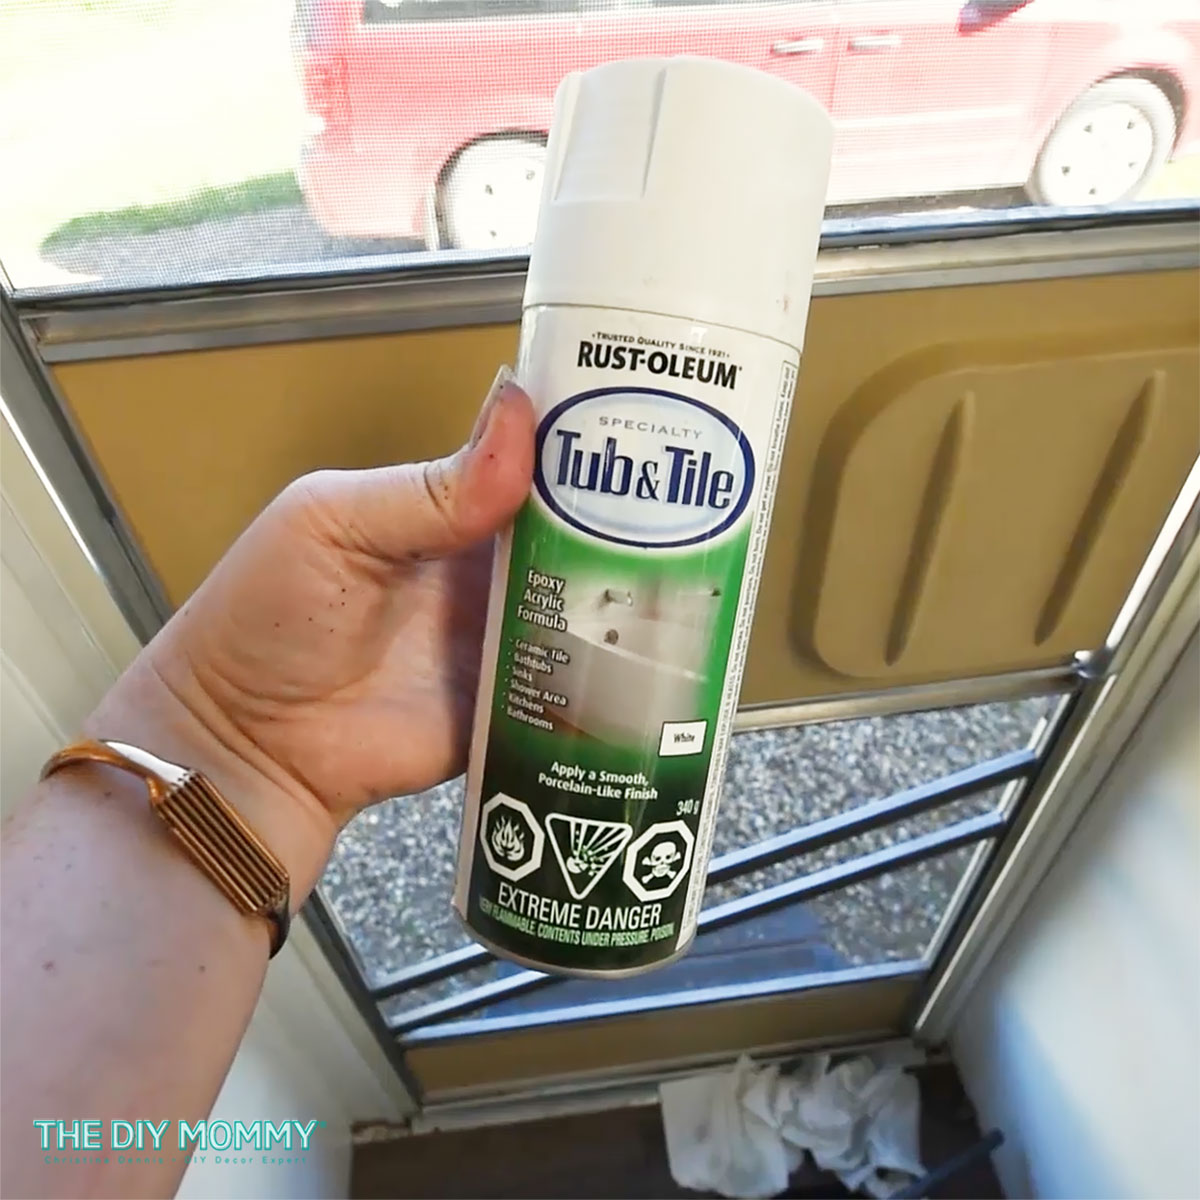
Next, I sprayed the tub, toilet, sink, and faucets (even the shower head!!) with Rustoleum Tub & Tile Epoxy. I used 3 coats and 5 cans. This product is very toxic, so use a respirator when applying. I’m really happy with the smooth, washable finish and how it’s wearing so far.
I then spray painted the towel bar and doorknob with Rustoleum Metallics Oil Rubbed Bronze spray paint.
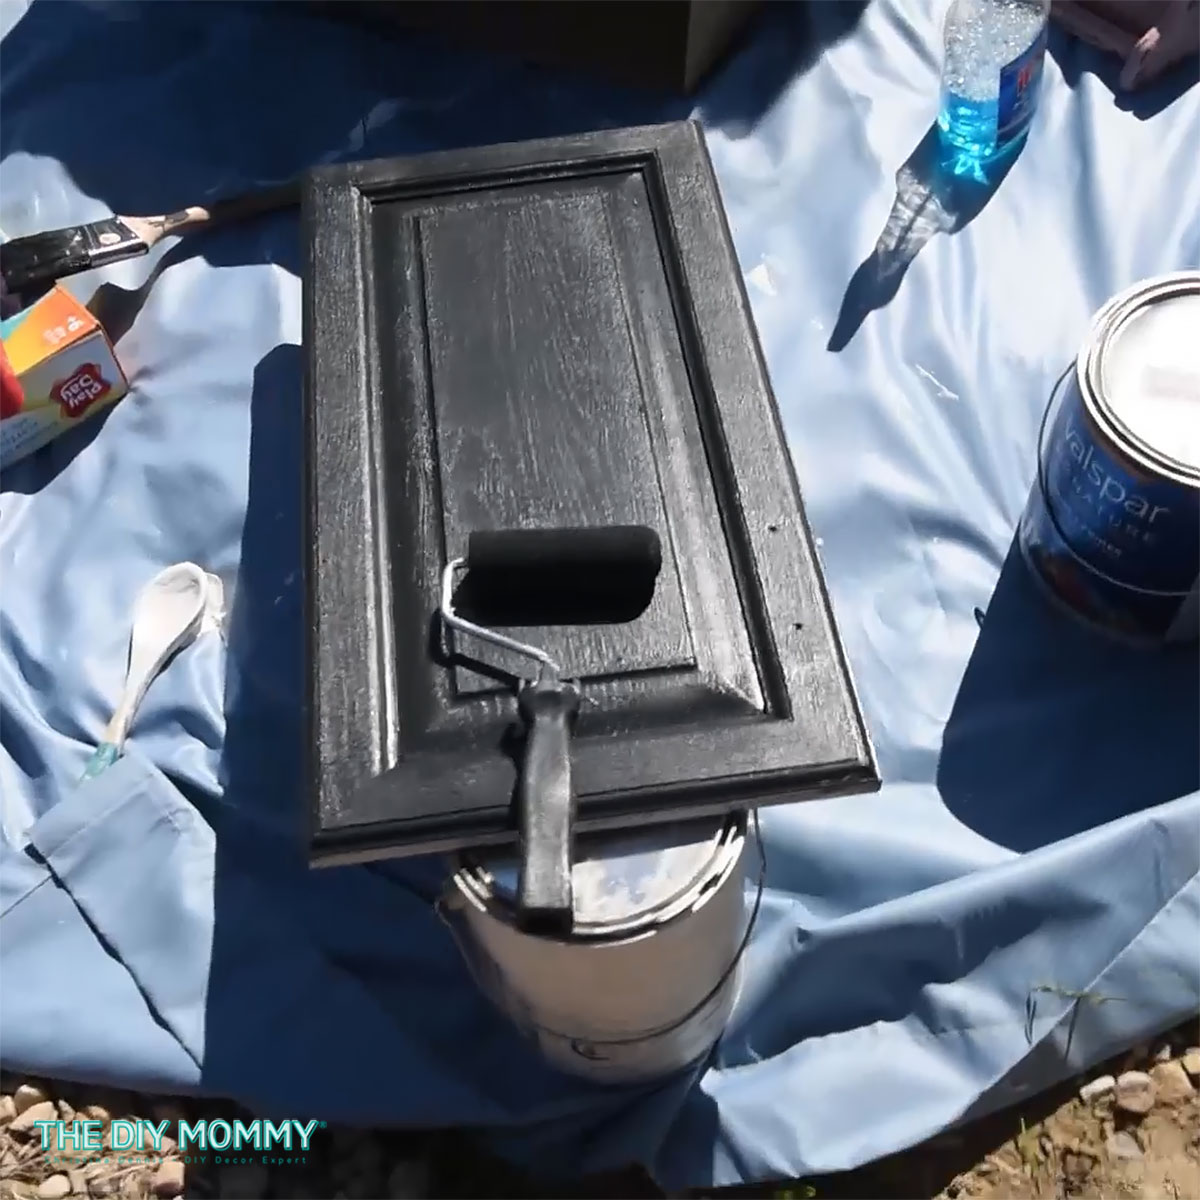
Painting the Cabinetry
Next, I wiped down the door, vanity cupboard and cupboard door with Gloss-Off to roughen up the surface for painting. I like to call this “liquid sanding”!
I painted the door, cupboard, cupboard door, medicine cabinet, walls, ceiling & counter with Killz oil based primer. This helps the latex paint to stick, and priming is an essential step when repainting any kind of cabinetry.
Then, I painted the door, cupboard, cupboard door, medicine cabinet, walls, ceiling & counter with black and white semi-gloss latex paint I had on hand. I used a brush and a foam roller for a smooth finish.
Next, I sealed the cupboard, cupboard door & countertop with Varathane Triple Thick Polyurethane. I love how this repels water and keeps the paint from scratching or flaking off. You could also use this to seal your shower walls – we don’t really use our camper’s shower, so I didn’t seal the walls.
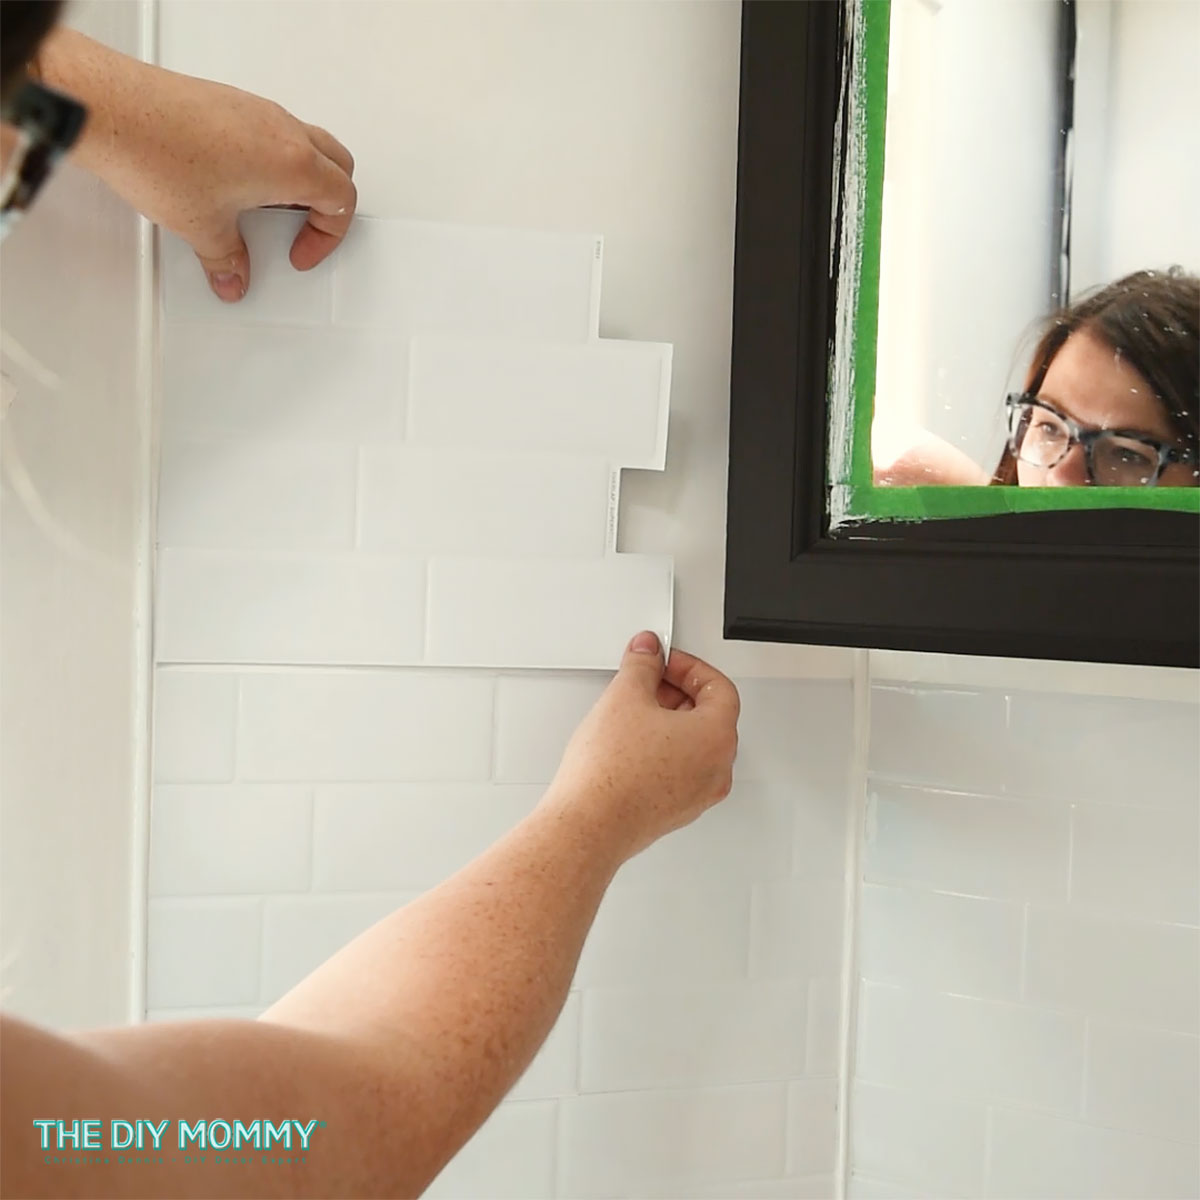
Adding the Finishes & Flooring
I used some leftover peel & stick tile (SmartTiles) I had on hand from the camper’s kitchen makeover and applied them as a backsplash that goes up a few feet above the countertop.
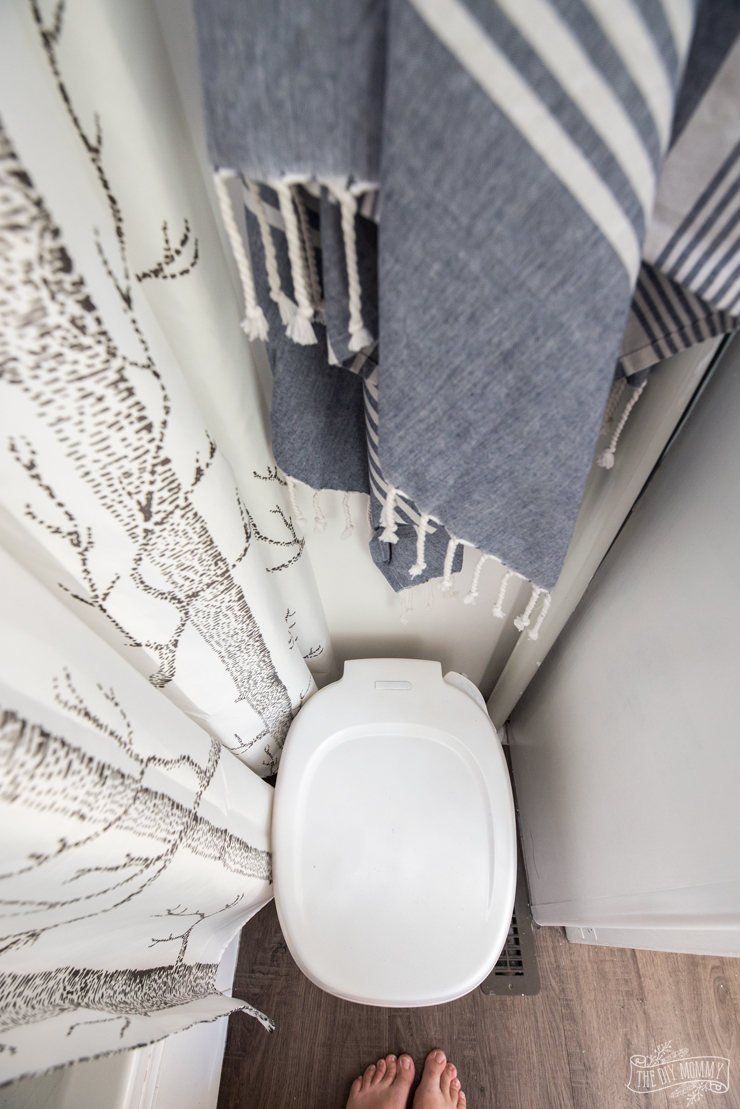
To the vanity cabinet door, I added new black hardware. A black & white simple shower curtain with a tree design ties the whole look together.
Because there’s not much cabinet space, I then hung new black hooks on the walls and a rail with cups I found at Ikea over the counter to use as baskets to store toothbrushes, hair brushes etc. I kept the decor accents in this space minimal because it’s so tiny! Everything had to have a practical purpose.
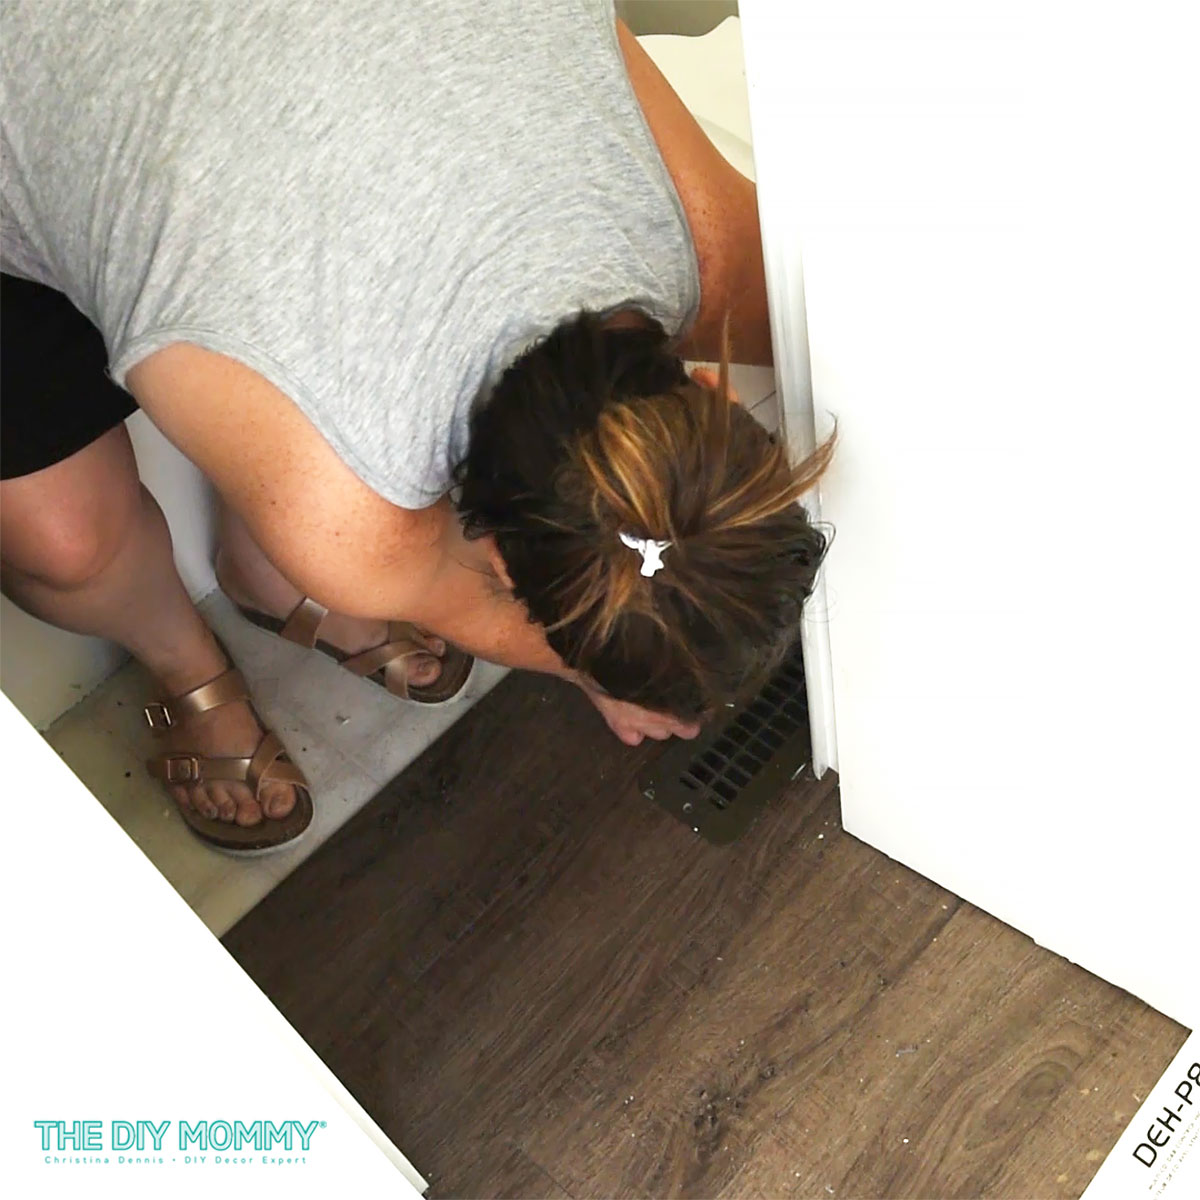
Finally, I used a vinyl plank flooring called Allure Stayplace Quincy Oak, cut it with a ruler and utility knife, and stuck it in place to cover the old vinyl flooring.
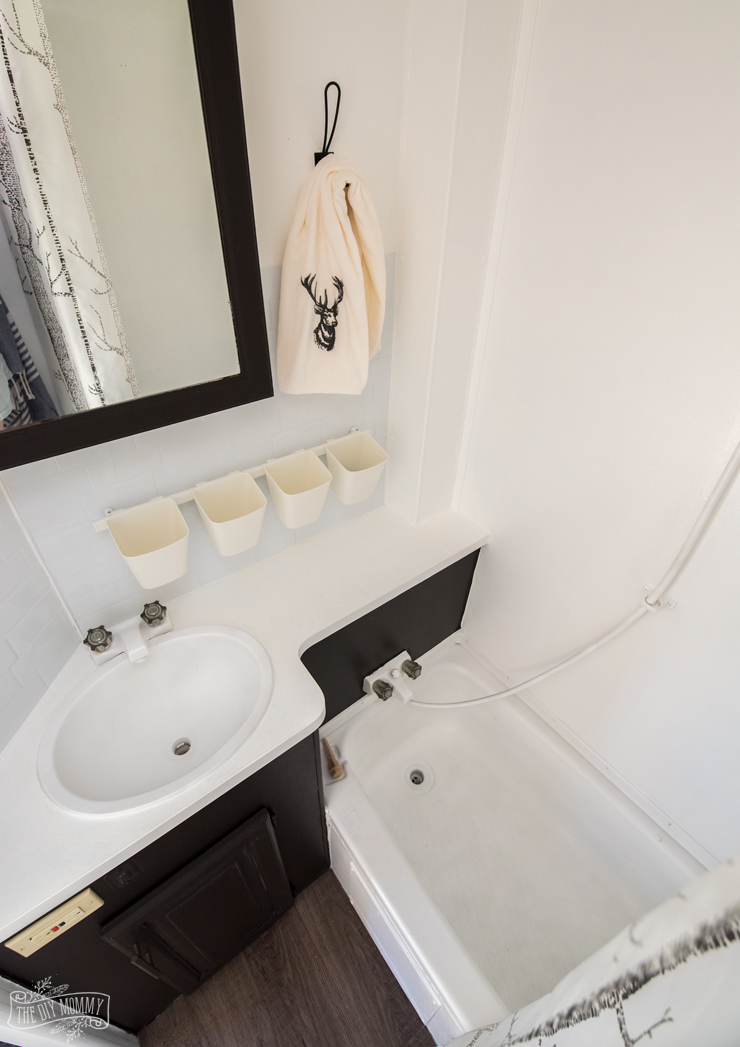
I’m absolutely thrilled with how our camper’s bathroom makeover turned out, and I can’t wait to keep taking our RV out to enjoy the summer together! This makeover truly goes to show how you don’t have to spend a ton of money to completely makeover a space. Paint makes a huge difference! I love the modern look of this little bathroom, and the white paint truly makes it feel larger.
How did our RV bathroom makeover hold up?
Update: Many of you wanted to know how this bathroom held up over the years. We ended up selling this camper to buy a larger RV in 2020, and at the time of the sale this bathroom still looked PERFECT.
I attribute the longevity of the painted finishes to the good products I used, and also to the fact that RV showers aren’t used all that much. I mean, we only used the shower a few times over the course of the few years we had this rig. Usually, we use the showers at the campgrounds we stay at so that we don’t have to use our own water tank! However, because I have such faith in the longevity of the Rustoleum Epoxy product I used, I think this would also last in a full-time RV situation.
You can see the rest of the RV makeover here!
Now tell me: What do you think of Our DIY Camper’s bathroom makeover?

More RV Renovation Inspiration
If you love RV remodel ideas, click here for all of my camper renovation posts for both of our rigs!
PIN ME:
What a transformation! We just bought a trailer and, although it’s new, the style of it (mostly the oatmeal walls and strange upholstery) is a bit dated. Your trailer makeover has really inspired me to tackle some updates on my own!
Thank you 🙂
This is awesome. A true testament to the power of paint and hard work… and a few accessories. (I have that shower curtain too and looooove the pattern.) So happy to hear that you’re enjoying your RV so much.
Yes so very true!!
What an incredible makeover! Looks so much better, I love it.
Thanks so much!!
Where did you get the deer towel?
Is the bathtub the original tub and surround? I’m not sure what to do about ours!
Where did you get those shower curtains? I need them?
Hi, it takes so long so there’s so much progress already! Its really helpful to me. Cause I am going to remodel my bathroom next month. Thanks for the sharing this at the right time. Keep up with good work.
Thanks so exciting!!
Love the outcome..but…the shower curtain hooks would look better in black
Thanks, Ronnie
You have totally transformed your bathroom. It looks beautiful.
When you are dealing with home renovations, the choices are eventually all yours. You are the person who needs to cherish the outcomes you end up with. The sky’s the breaking point when it comes to renovations. You can accomplish something standards like updating your kitchen or bathroom, or you can accomplish something progressively unique like adding a stage for storage to a room.
Do you mind sharing where you got your shower curtain from? I just love it!
It’s from Simons Canada 🙂
What a great tutorial, thank you for the links.
We have a 93 Travel trailer that we are updating, your remodel gave us lot of ideas.
I have a question about durability, how has it held up so far?.
This is the second year for the bathroom and it’s holding up great! Third year for the rest of our trailer and again, holding up fantastic!
Thanks for sharing so many beautiful pictures. Excited to implement these ideas in my house! ?
Great transformation. The Crud Cutter was abrasive enough that you didn’t have to do any sanding? We will be updating our whole camper and if I could just use this product instead of actually sanding, I will be pretty happy!
What a great reno! Thanks for the inspiration.
If I used stick and peel on the shower walls could I seal it with the varathane you recommened?
Thanks
Lucy
We’ve never tried it so we’re not sure! Sorry!
LOVE your renovation. I’m just getting started. What did you use to hang the towel hook and ikea cup thingy?
You said you painted the toilet, all of it? seat, lid, outside and inside? How was it holding up?
The paint has held up great.
Hi, can you show how the shower curtain is hung?
The shower curtain is hung on the original track that was in the bathroom.
What color black and what type of paint?
It was a semi gloss latex paint that was leftover from another project.