• Skip to primary navigation
  • Skip to main content
  • Skip to primary sidebar
The DIY Mommy
  • Decor
  • DIY
  • Clean + Organize
  • Printables
  • Recipes
  • Life
  • The Academy
  • Shop My Home
  • About
  • Contact
    • Facebook
    • Instagram
    • Pinterest
    • Twitter
    • YouTube
menu icon
go to homepage
search icon
Homepage link
  • Decor
  • DIY
  • Clean + Organize
  • Printables
  • Recipes
  • Life
  • The Academy
  • Shop My Home
  • About
  • Contact
    • Facebook
    • Instagram
    • Pinterest
    • Twitter
    • YouTube
  • ×

    Home » DIY Crafts » Sewing

    Sew a Fitted Crib Sheet

    Published: May 17, 2011 · Modified: Sep 22, 2011 by Christina Dennis · This post may contain affiliate links · This blog generates income via ads · 12 Comments

    by Christina Dennis

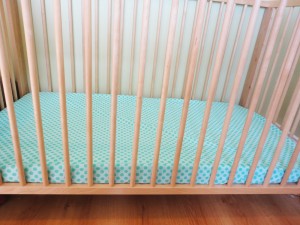
    A crib sheet is a baby nursery essential that is quick and easy to make! Elastic added around the entire perimeter of this sheet design helps this sheet fits most depths of mattresses snuggly and securely. Make at least a couple of each fabric - you'll want to wash them often!

    Materials:

    • 2 yards of cotton fabric (45" wide)
    • 2 yards of ¼" elastic
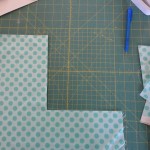
    1. Cut a rectangular piece out of your fabric that measures 45" wide and 69" long. Cut out 8" x 8" squares from each corner of the rectangle.
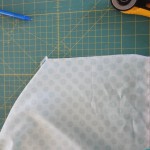
    2. To create the mitered corners, bring one edge of one corner square to the other edge of the same square (right sides together!) and sew a seam. Use a serger or a straight stitch, then a zigzag to finish the seam (since this seam will be exposed on the inside of the sheet).
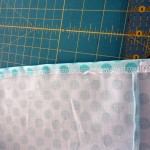
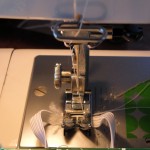
    3. If you have a serger, serge around the entire edge of the sheet. If not, fold the edge of the sheet over ¼" and iron. Fold the entire edge just over ¼" inch (for a second time, if using a regular machine) to make a casing for the elastic. Sew ¼" away from the folded edge. Leave a hole of about ½" to thread the elastic.
    4. Thread the entire length of ¼" elastic through the casing. (Put a safety pin on one end for threading and a stick pin on the other so you don't lose the elastic.) Sew both ends of the elastic together using a strong zig-zag stitch.
    5. Optional: sew a second line of stitching directly over the elastic (stretching the elastic tightly as you go and smoothing the fabric) to secure the elastic so that it does not flip inside the casing. You're all done!

    Christina Dennis is the creator and designer behind Golly Gee Baby, a collection of unique and colourful baby clothing and accessories that are ethically manufactured.

    More Inspiration

    • How to Sew Curtains (Easy-to-Follow Steps)
    • Make DIY Cat Slippers - for only a few dollars!
    • How to Sew Simple DIY Chair Pads
    • 9 DIY Throw Pillows - Sew and No-Sew Options!

    Reader Interactions

    Comments

    1. Angela Vullo

      July 04, 2011 at 2:22 am

      It seems a lot easier said then done. I always have trouble pushing elastic through a casing. It's such a pain in the butt. This is a great tutorial though. I would really like to try it some day. I would like to make my son a whole bed set. 🙂

      Reply
      • steppa

        June 28, 2014 at 8:11 pm

        i just sewed the elastic directly onto the fabric! no pushing elastic through a casing! use a zigzag stitch and pull the elastic taut as you geaux!

        Reply
        • Christina Dennis

          June 29, 2014 at 9:24 pm

          That's a great method too! Thanks for sharing!

          Reply
      • Ellen

        April 26, 2015 at 3:04 pm

        A handy little tool for threading elastic is called a bodin. You can find them in most sewing centers

        Reply
        • Ellen

          April 26, 2015 at 3:09 pm

          oops...I meant BODKIN

          Reply
    2. Drop Side Cribs

      August 10, 2011 at 4:08 am

      Nice project! I think sewing is so therapeutic

      Reply
    3. Mom

      November 07, 2011 at 3:15 am

      More baby sewing!

      Reply
    4. Cyn

      January 02, 2012 at 10:19 pm

      I just googled "How to make a fitted crib sheet"...and found your site! Our baby girl is due in May, now that the morning sickness has gone, I'm starting to plan her nursery. I ordered some Night Fairies fabric online, and wanted to make the crib sheets to match the blanket, curtains, etc.

      Reply
    5. sfilly255

      June 25, 2012 at 2:58 pm

      I'm a novice sewer and I made this easily enough in an afternoon. My MIL made cute yellow monkey bumpers for our son, but I could not find any yellow crib sheets. So I turned a yellow queen size top/flat sheet into two crib sheets and a changing pad cover! One Queen flat on clearance: $8 & two lengths of 1/4in elastic ($3) vs. Two crib sheets at $9 each, and a bonus changing pad cover($13) out of the 'scraps', what a steal! Thanks for the tutorial & inspiration!

      Reply
      • Christina

        June 27, 2012 at 11:42 pm

        That's so perfect, sfilly255! I love the idea of repurposing larger sheets. Thanks for sharing!

        Reply
    6. sheryl lake

      October 01, 2014 at 1:35 pm

      Hi,

      Love your site! Could you please tell me how much fabric I would need for a crib mattress that is 51 5/8"L x 27 1/4"W x 6"D ?
      And how much elastic

      Also how much fabric for 2 different size bassinet pads
      and how much elastic

      1. 26"L x 12.5" W x 2.75"D
      2. 30"L x 15" W x 2.75"D

      Thank you, Sheryl

      Reply

    Trackbacks

    1. Baby | Pearltrees says:
      April 26, 2012 at 4:10 pm

      [...] A crib sheet is a baby nursery essential that is quick and easy to make! Elastic added around the entire perimeter of this sheet design helps this sheet fits most depths of mattresses snuggly and securely. Make at least a couple of each fabric – you’ll want to wash them often! Materials: by Christina Dennis 2 yards of cotton fabric (45″ wide) Sew a Fitted Crib Sheet | The DIY Mommy [...]
      Reply

    What do you think? Cancel reply

    Your email address will not be published. Required fields are marked *

    This site uses Akismet to reduce spam. Learn how your comment data is processed.

    Primary Sidebar

    Welcome!

    Christina Dennis, The DIY Mommy

    I'm Christina and I'm sharing budget-friendly DIY & decor ideas to create a cozy home and life you love!

    Read more about me

    Latest Posts

    • DIY Pillow from IKEA SORTSO Rug
      Turn an IKEA SORTSO rug into a gorgeous pillow
    • 10 Places to Find Cheap Home Decor and Accessories
    • Easter menu ideas
      Easter Menu Ideas, No Ham or Turkey Required

    What's my home decor style?

    Discover the home decor style that best fits your personality and lifestyle. This two-minute quiz is going to give you the direction you need to start the big, bold room makeovers that you've always wanted to try!

    Find out now!

    Archives

    Footer

    ↑ back to top

    About

    • About The DIY Mommy
    • Privacy Policy
    • Disclosure Policy
    • Terms of Service

    Newsletter

    • Sign Up! for emails and updates

    Contact

    • Contact

    As an Amazon Associate I earn from qualifying purchases.

    Copyright © 2009 - 2023 The DIY Mommy. "The DIY Mommy" is a registered trademark.