• Skip to primary navigation
  • Skip to main content
  • Skip to primary sidebar
The DIY Mommy
  • Home Decor
  • DIY Crafts
  • Organize
  • Printables
  • Recipes
  • Life
  • Shop My Home
  • Lake House
  • About
  • Contact
    • Facebook
    • Instagram
    • Pinterest
    • Twitter
    • YouTube
menu icon
go to homepage
search icon
Homepage link
  • Home Decor
  • DIY Crafts
  • Clean & Organize
  • Recipes
  • Free Printables
  • Life
  • Our Little Lake House
  • Shop Our Home
  • About
  • Contact
    • Facebook
    • Instagram
    • Pinterest
    • Twitter
    • YouTube
  • ×

    Home » DIY Crafts » Sewing

    Sew a Throw Pillow Cover - The Easy Way!

    Published: Oct 31, 2012 by Christina Dennis · This post may contain affiliate links · This blog generates income via ads · 18 Comments
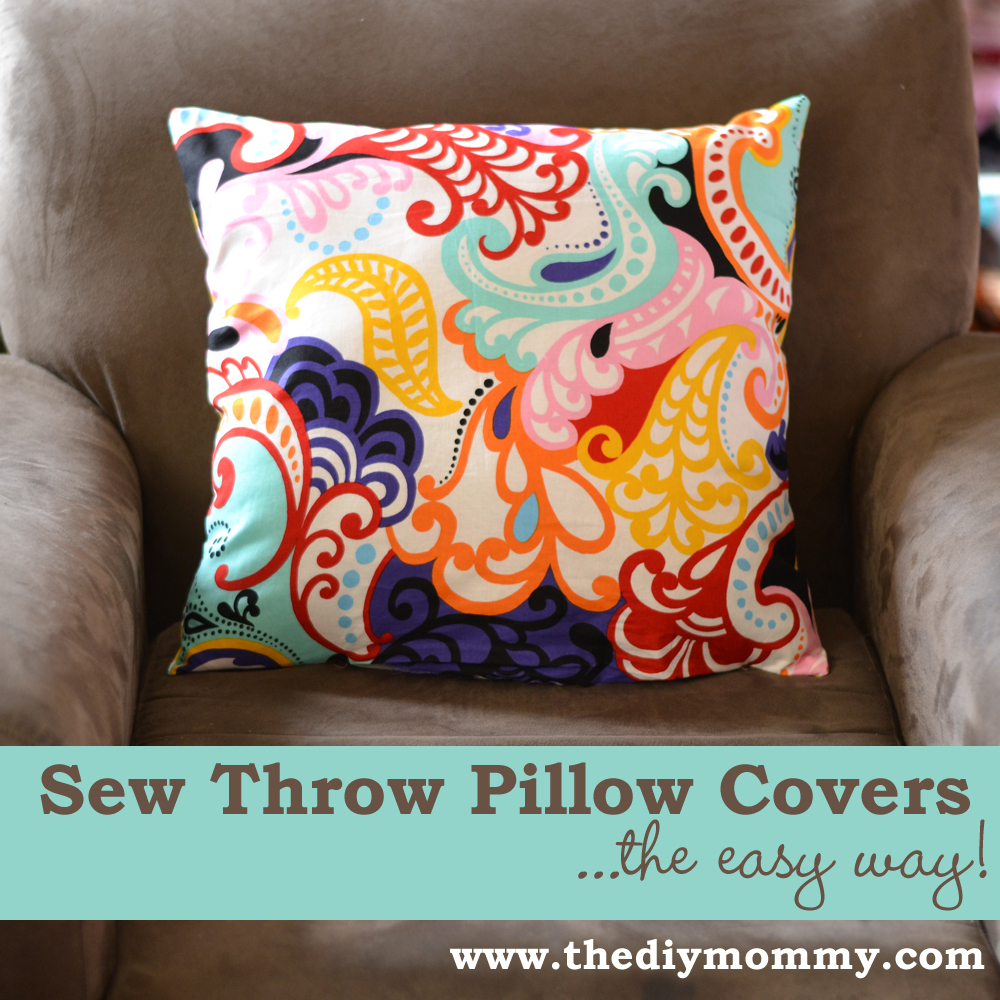
    by Christina Dennis

    Sew Throw Pillow Covers the Easy Way by The DIY Mommy

    When I'm in need of a very quick decor change in my home, I buy a little bit of new fabric and whip up a couple of throw pillow covers. Basic throw pillow covers are so easy to sew, and let me tell you - they can change the look of a room completely! My mom even has seasonal throw pillows - aqua blue for summer and deep red for winter.

    This method of sewing pillows is a great beginner's project. It only requires sewing straight lines and there's a little bit of hand stitching at the end. Since there is no zipper or buttons, the case is stitched shut after the pillow form is inserted. Most pillows can be thrown into the wash all together (pillow form and all). Here's how to make these easy cases:

    Materials:

    • 18 x 18 Indoor/Outdoor Poly Fill Pillow Form
    • 1 yard cotton decor fabric (or try some more decorative fabric if you're more of an experienced seamstress) - this will cover two cushions up to 18" wide each (here I used Premier Prints ZigZag Slub Yellow/White and Papillon Paisley Brite)
    • sewing machine
    • hand sewing needle & thread

    For the pictured pillow, I used ½ yard each of two different fabrics to make two pillows - one fabric for the front and one for the back. It was my friend's idea and I thought it was great! You could flip the pillows over dependent on what sort of mood you are in.

    Directions:
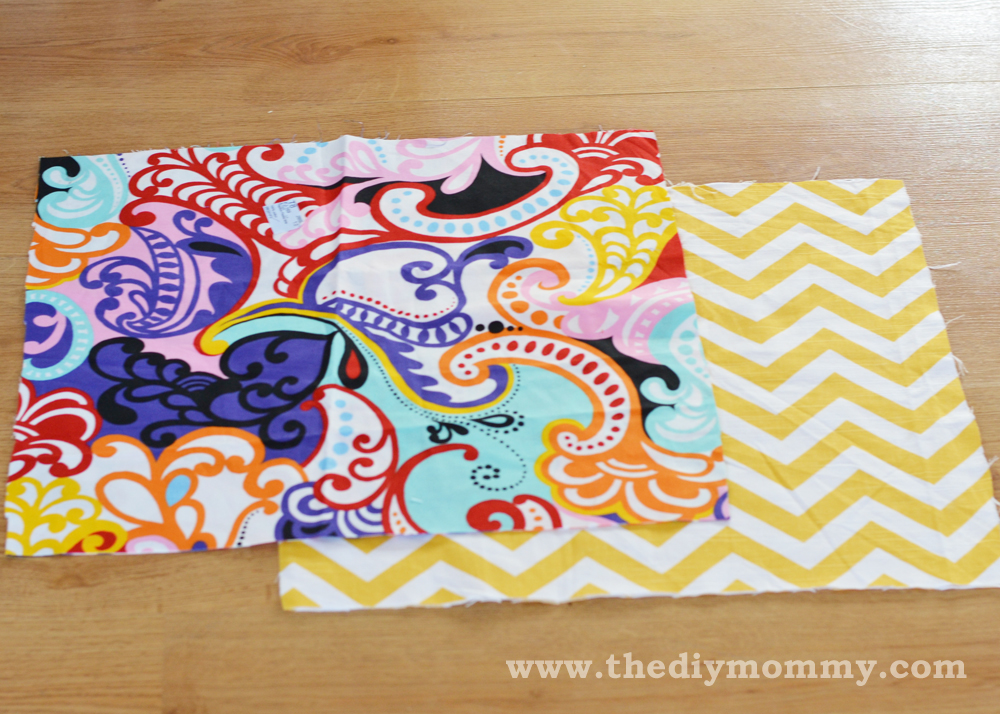
    Sew Throw Pillow Covers the Easy Way by The DIY Mommy

    For an 18" wide pillow, cut two squares of fabric measuring 18 x 18 inches. I don't cut them larger for a seam allowance. I find making the pillow covers slightly smaller than the pillow forms makes the pillows nice and full looking.
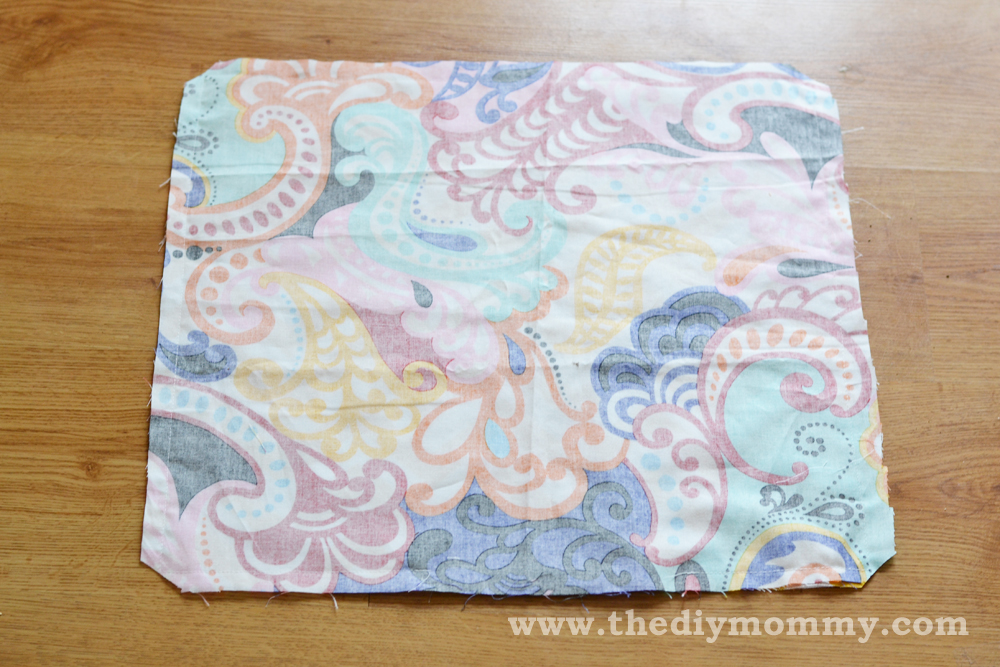
    Sew Throw Pillows the Easy Way by The DIY Mommy

    Lay one piece over the other piece, right sides together & pin. Machine stitch around the edge, leaving a ½" seam allowance and an opening on one side of at least 10 inches (don't make it too small - I've made that mistake so many times). Trim the corners as above (so that there isn't excess fabric in the corners when the cover is flipped to the right side).

    Sew Throw Pillows the Easy Way by The DIY Mommy

    Flip the cover to the right side. Stuff the pillow form in. Stitch the opening closed by hand.
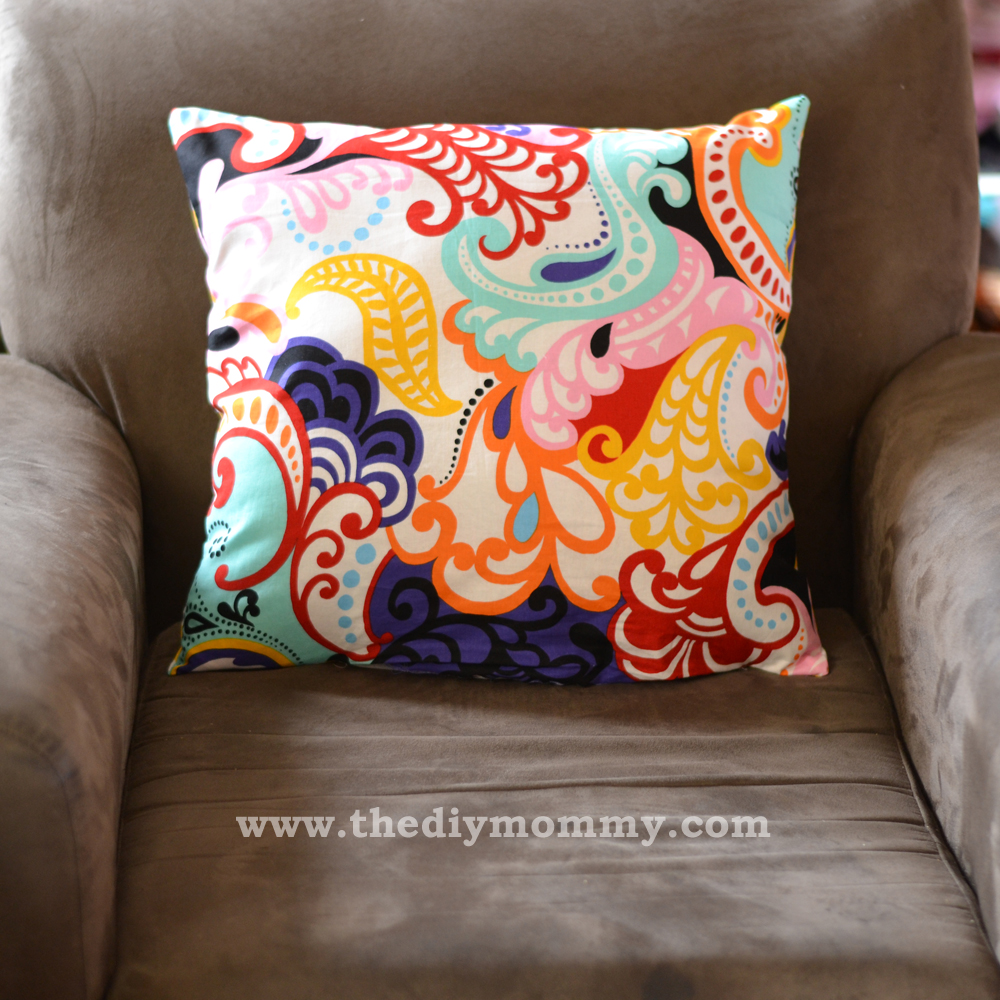
    Sew Throw Pillows the Easy Way by The DIY Mommy

    That's it! Seriously! It's such a simple method and this little project can pack a huge punch in your home decor scheme.
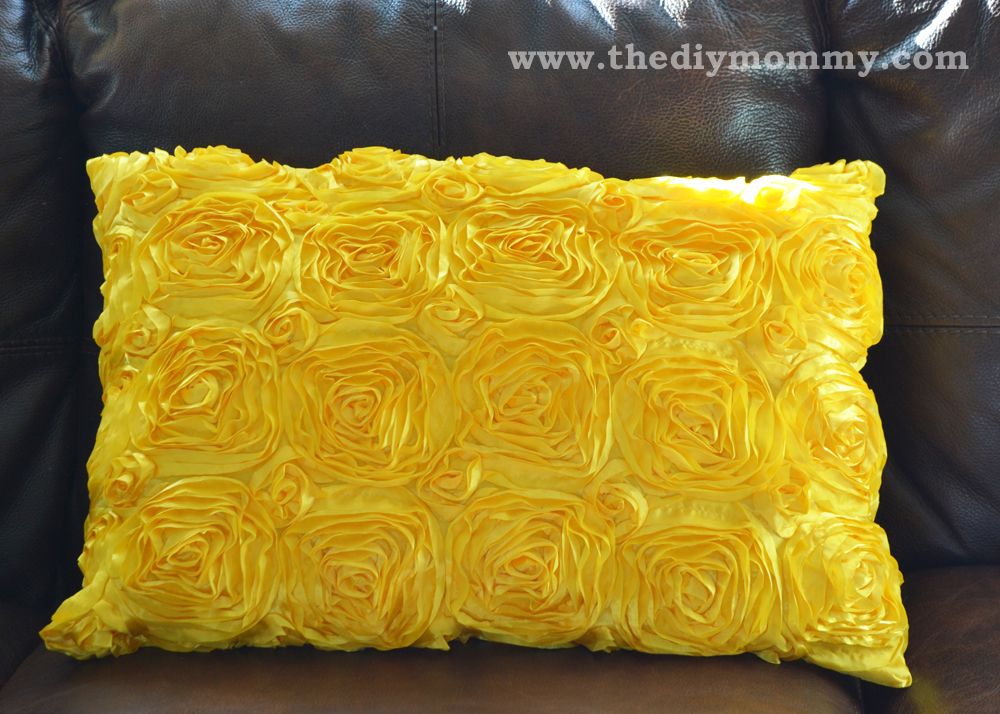
    Sew Throw Pillows the Easy Way by The DIY Mommy

    Here's one of my current favourite throw pillows made using this method. It looks extra fancy because I used some of this impressive-looking rosette fabric instead of regular cotton decor fabric: Splenda Satin Ribbon Rosette Yellow. Isn't it neat how different a pillow can look with a change in colour, pattern or texture?

    If you could make some new throw pillows in a jiffy for your home, what fabric is on your "must use" list? (Check out my favourite place to buy fabric online, fabric.com, if you need some inspiration!)

    More Inspiration

    • Introducing my NEW Canva Mood Board Templates & Mini Course!
    • We built a small bathroom wet room from scratch!
    • DIY Dollar Tree Heart Shaped Wreath
    • 10 Best IKEA Organization Products under $20

    Reader Interactions

    Comments

    1. Erin

      October 31, 2012 at 2:37 pm

      Love the color combo you used with the chevron pattern on the back! I love shopping in the quilting section for fabric as they always have so many great colors and patterns to mix - the fabric isn't ideal as it's a little thin but a good solution for a quick update.
      (good tip with leaving out the seam allowance - I always do the same with mine and I also round the corners otherwise my pillows always look like they have dog ears 😉

      Reply
    2. Christina Dennis

      October 31, 2012 at 4:27 pm

      Thanks, Erin! The fabric choices were my good friend's and I really love them too. I think sewing cushion covers with quilting cotton totally works (especially if they're more seasonal/decorative)! Thanks for the rounded corners tip - good idea.

      Reply
    3. Anna

      April 25, 2014 at 3:19 pm

      So, would 1/2 a yard of fabric cover for one 18" cushion cover? I want to make two cushion covers with two different fabric colors so I thought maybe 1/2 yard of each fabric might be enough...I wasnt sure weather in this tutorial you said that you made two whole covers out of 1 full yard, or just the one shown... Id like to know how much exacly I would need:)

      Thanks!

      Reply
      • Christina Dennis

        April 25, 2014 at 10:28 pm

        Yes, 1/2 yard of fabric would work for one 18" pillow. I did make two whole 18" pillow covers out of 1 yard. 🙂 Since a yard is 36" long, exactly half (18") is perfect for one pillow. Thanks for visiting my blog!

        Reply
        • Anna

          April 26, 2014 at 12:02 pm

          Ok thanks! 😉

          Reply
    4. Cotton Pillow

      December 07, 2017 at 5:49 am

      Hi, You did a great work on this article. I will definitely apply your suggestions that will suit us

      Reply
      • Lindsay - The DIY Mommy

        December 07, 2017 at 10:02 am

        Thank you!

        Reply
    5. Kelly Zachgo

      September 26, 2019 at 7:45 pm

      Checkout Goodwill or other thrift store for pillows. I found several! They were clean and did not smell. All measured 18 x 18. I plan to recover over the existing material and will add another inch of fabric at 19 x 19, plus add some decorative fringe. Inexpensive and easy!

      Reply

    Trackbacks

    1. Sewing Couch Pillow Covers says:
      November 27, 2012 at 1:29 pm

      [...] Sew a Throw Pillow Cover – The Easy Way! | The DIY Mommy by Christina Dennis When I'm in need of a very quick decor change in my home, I buy a little bit of new fabric and whip up a couple of throw pillow. [...]

      Reply
    2. 116 Homemade Pillows DIY | Rilane - We Aspire to Inspire says:
      February 13, 2014 at 5:17 pm

      […] 29.SIMPLE PILLOW WITH SLIP STITCH TUTORIAL | 30.SCREEN PRINT PAINT AND TAPE GORGEOUS PILLOWS! 31.Sew a Throw Pillow Cover – The Easy Way | 32.BUTTERFLY PILLOW COVER 33.DIY: Napkin Pillows | 34.How To Make Basket Weave Pillows […]

      Reply
    3. Reader Mood Board: Fresh Coastal Living Room | The DIY Mommy says:
      October 8, 2014 at 8:53 pm

      […] of that main window. This will make the ceiling seem taller and add some more texture and colour. Sew some cushions in complementary patterns to match the […]

      Reply
    4. Sew a Piped & Zippered Pillow Cover (Video Tutorial) | The DIY Mommy says:
      June 5, 2015 at 7:00 am

      […] These are more of an intermediate sewing project, but I promise that the results are worth it! You’ll need a special zipper/piping foot for your sewing machine to get the best finished product. (If you’d rather try a simpler pillow design to start, check out this pillow tutorial!) […]

      Reply
    5. How to Decorate a Home You Love on a Budget | The DIY Mommy says:
      September 21, 2015 at 2:10 pm

      […] inexpensive. As for fabric, you can find it from as little as $5 a meter, and it’s easy to sew throw pillow covers or simple drapes to make your room look completely different. You can also […]

      Reply
    6. 2016 Home Decor Trends: How You Can Make Them Family-Friendly & Affordable | The DIY Mommy says:
      January 15, 2016 at 7:00 am

      […] one wall of a small room like a powder room. To add geometric print through textiles, DIY some throw pillow covers or a blanket in a fun geometric […]

      Reply
    7. Best Easy Cushion Cover Pattern Gallery | Cushions Cover Ideas says:
      August 10, 2017 at 9:09 pm

      […] sew a throw pillow cover the easy way the diy mommy Easy Cushion Cover Pattern Size: 1000 X 714 | Source: thediymommy.com […]

      Reply
    8. Gorgeous Cushion Cover Making | Cushions Cover Ideas says:
      August 10, 2017 at 10:00 pm

      […] sew a throw pillow cover the easy way the diy mommy Cushion Cover Making Size: 1000 X 714 | Source: thediymommy.com […]

      Reply
    9. Best Easy Cushion Covers To Make | Cushions Cover Ideas says:
      August 29, 2017 at 2:35 am

      […] sew a throw pillow cover the easy way the diy mommy Easy Cushion Covers To Make Size: 1000 X 714 | Source: thediymommy.com […]

      Reply
    10. home cash work says:
      January 30, 2021 at 10:10 pm

      Trackback

      [...]The total glance of your site is great, let smartly as the content![...]

      Reply

    What do you think? Cancel reply

    Your email address will not be published. Required fields are marked *

    This site uses Akismet to reduce spam. Learn how your comment data is processed.

    Primary Sidebar

    Welcome!

    Christina Dennis, The DIY Mommy

    I'm Christina and I'm sharing budget-friendly DIY & decor ideas to create a cozy home and life you love!

    Read more about me

    Latest Posts

    • Introducing my NEW Canva Mood Board Templates & Mini Course!
    • We built a small bathroom wet room from scratch!
    • Creative And Unique DIY Wall Art Ideas

    What's my home decor style?

    Discover the home decor style that best fits your personality and lifestyle. This two-minute quiz is going to give you the direction you need to start the big, bold room makeovers that you've always wanted to try!

    Find out now!

    Archives

    Footer

    ↑ back to top

    About

    • About The DIY Mommy
    • Privacy Policy
    • Disclosure Policy
    • Terms of Service

    Newsletter

    • Sign Up! for emails and updates

    Contact

    • Contact

    As an Amazon Associate I earn from qualifying purchases.

    Copyright © 2009 - 2023 The DIY Mommy. "The DIY Mommy" is a registered trademark.