by Christina Dennis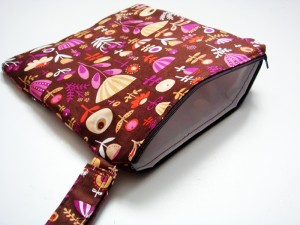
I’ve always thought that wet bags were only handy for cloth diapering mommies (which they are), but now I’ve gained an entirely new appreciation for them! They’re a great addition to Baby’s diaper bag. I put food, dirty clothes, wet clothes, spoons, bibs…. you name it – in my wet bag.
Here’s a tutorial on how to sew your very own wet bag. My design includes a handle on the side that closes with velcro so that you could attach the bag to a stroller or to a strap on your diaper bag. This method involves a bit of hand sewing, but there are no seams visible on the inside of the bag, giving it a professional-looking finish. It measures a compact 9″ by 9″, but you could make wet bags in larger or smaller sizes too, just buy more fabric and get a larger zipper.
Materials:
- 1/3 yard printed cotton fabric
- 1/3 yard nylon, PUL or another waterproof fabric, OR a shower curtain
- 9″ zipper
- 1/2″ piece of velcro
Directions:
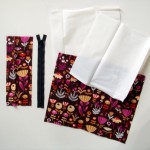 |
- Cut two 9″ by 9″ squares out of the printed cotton fabric and two 9″ by 9″ squares out of the waterproof fabric.
- Cut one 9″ by 4″ rectangle out of the printed cotton fabric for the strap.
|
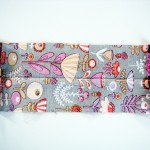 |
- Fold both short ends of strap piece over 1/4″ inch to wrong side, iron. Fold strap in half lengthwise, iron.
|
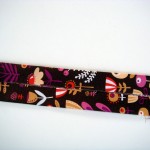 |
- Fold one long end of the strap to meet the crease line in the middle, iron. Do the same with opposite long end. Then fold the strap in half again, using your crease as the guide.
|
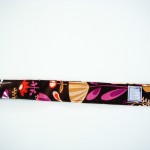 |
- Topstich around entire edge of strap about 1/8″ from the edge. Attach on side of velcro to one short end, about 1/8″ from edge. Attach opposite side of velcro to other side of strap about 1 1/2″ from edge.
|
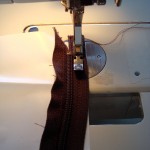 |
- Align one long side of the zipper to one side of the waterproof fabric. The wrong side of the zipper should face the right side of the fabric. Using a zipper foot, sew them together using approximately a 1/4″ seam. (It’s easier to sew from the zipper side, since vinyl is difficult to sew).
|
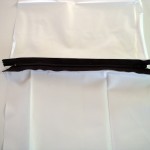 |
- Do the same with the other piece of waterproof fabric, attaching & sewing it in the same manner to the other side of the zipper.
|
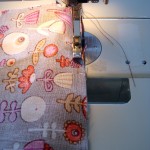 |
- Now, align the right side of one side of the printed cotton fabric to the right side of the zipper. Sew together in the same manner as you did the vinyl pieces.
- Sew other piece of printed fabric on to other side of zipper in same manner.
|
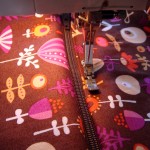 |
- Open & spread fabric pieces so right sides are facing and zipper is seen in the center. Do same with vinyl layers underneath, making sure to pull vinyl pieces tight to either side. (If you don’t, the vinyl will bunch and fold and prevent the zipper from gliding freely).
- Topstitch fabric on either side of the zipper through all layers approx. 1/8″ from zipper seam.
|
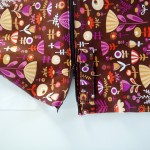 |
- Pin strap approximately 1″ down from zipper head to the printed cotton fabric. Open zipper slightly (this makes sewing easier).
|
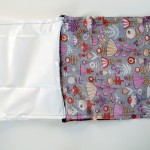 |
- Open, pull and fold pieces so that the right sides of the waterproof fabric are together, the right sides of the printed fabric are together, and the zipper is in the middle. Pin and sew around entire edge using a 1/4″ seam allowance and leaving a 2″ gap at the bottom of the cotton piece of fabric so that you can turn the bag right-side out.
- Sewing vinyl is tricky. Here are some great tips to make it easier for you: http://sewmamasew.com/blog2/?p=5
|
 |
- Now turn the printed fabric to the right side by pulling it through the hole you left.
- Hand-stitch the opening closed.
|
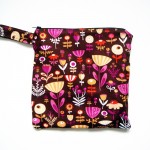 |
|


Sweet!
Love this, made one for all my friends with babies!!
i usually choose diaper bags which are made of recyclabe materials to help the environment not just your babies.-:*
Of the water proof fabric you suggested to use, which do you recommend? Or which works best, lasts longest?
Hi Marcie! The PUL fabric is higher quality and will last longer, though it is much more expensive than a shower curtain.
Do you have to have a cloth liner, or can you just use PUL and zip it up? I have some colored PUL that I would like to turn into a bag.
I’ve used just the PUL fabric without a liner. It worked just fine..
Thanks! This makes it fast and easy. My daughter is now potty trained but still uses cloth at night and when we’re out over night I’d like to to have a cute bag(and at the pool this summer!). Super easy instructions and great pics. 🙂
Love the idea of using a shower curtain …
Thanks! I like it because it’s an inexpensive and easy to find option.
Hi, just wondering about the safety of using a shower curtain next to food? The one Iv got is made from ployester..is this safe next to my little ones sandwiches?
Thanks
“Sew a Wet Bag | The DIY Mommy” was indeed a great post.
If merely there was way more sites like this excellent one in the world wide web.
Anyways, thank you for ur precious time, Salvatore
It appears u truly know a lot with regards to this issue and it all
exhibits via this unique blog, labeled “Sew a
Wet Bag | The DIY Mommy”. Thanks ,Melissa
I made one of these today, and it was SUPER easy! Thank you for the wonderful tutorial!!
That’s great, Amber! I’m glad it was easy for you. Thanks for visiting!
Do u I need a special needle to sew this material?
I didn’t use anything special. Just a needle on the smaller side!
I’m new sewing. If I’m using A thicker Canvas and PUL do you have a recommendation for my topstitch tension? I can’t seem to get it right and I’ve tried all sort of combinations. Looking to make one of these for my little one on the way. Thanks!
Hi Gini! I would use a longer stitch length and a looser stitch tension if I were sewing with those fabrics. You could also try using a different presser foot – there are some that slide better on thick/sticky fabrics. I hope that helps!
Is there a way to sew the liner and fabric together so the liner would stay put in side the bag? And thanks for the easy to do zipper! I was a bit intimidated by a zipper option because I don’t sew much.
Hi, Debbie! I’d probably just handstitch the two together at the bottom seam. If you sewed them as one piece, you’d have to deal with an inside seam.