Sew an Easy DIY Ironing Board Cover
This post may contain affiliate links · This blog generates income via ads
This project has got to be one of my favourite because it’s just SO simple and easy, but it is just so satisfying. There’s just something about taking something utilitarian and a wee bit blah and turning it into something cute and pretty in a few simple steps and without spending a ton of money. This DIY ironing board cover (made from one of my FAVE fabrics right now) was so much fun! Here’s how a made a pretty, floral ironing board cover in an afternoon.

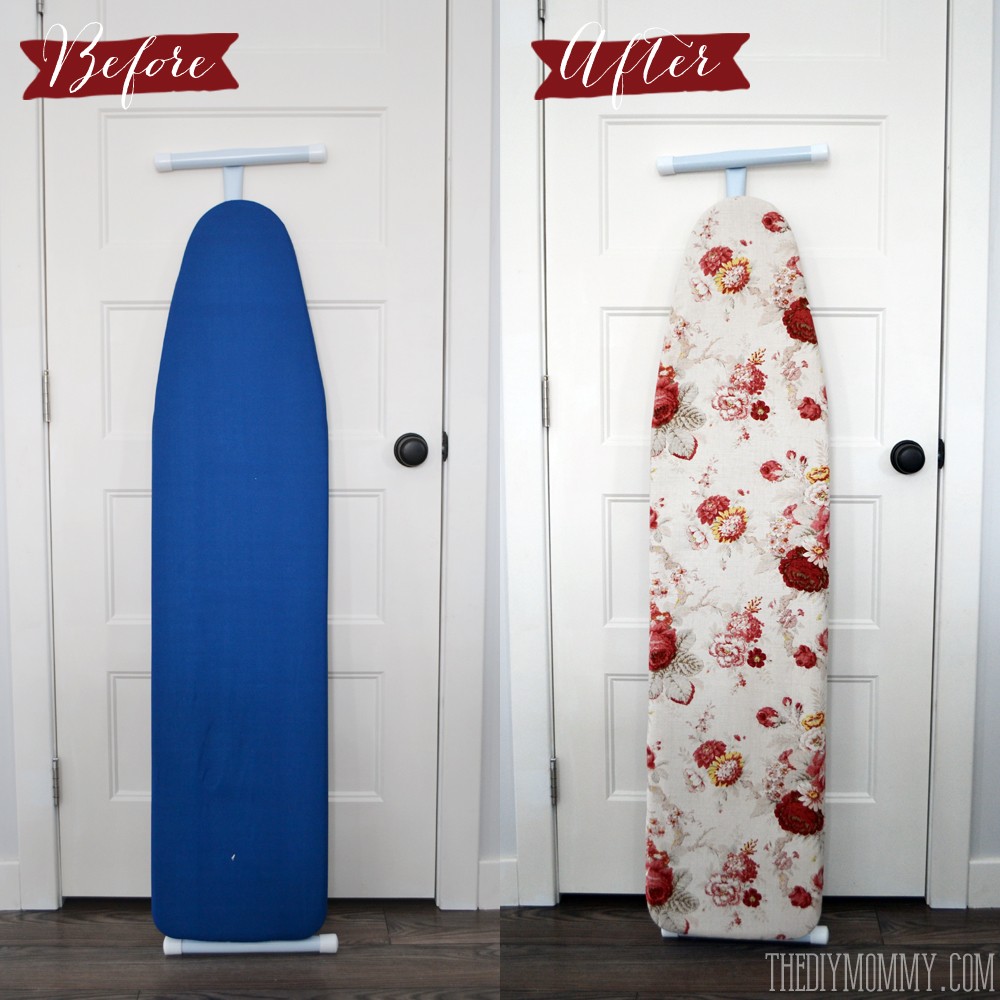
Isn’t it the cutest? I’ve taken this boring, inexpensive ironing board and made it super-duper adorable and ready to hang up for all to see in the laundry room. Will I iron on it? Maybe every few months or so. *Grin.*
Materials:
- 1 1/2 yards cotton fabric (I used Waverly Norfolk Rose from OnlineFabricStore.net)
- 1 1/2 yards 1/4″ elastic
- sewing machine
- iron
- safety pin + stick pin
Directions:

- Lay your fabric right-side-down onto the floor and lay your ironing board on it with it’s top down. Trace around the board leaving a 3″ allowance for the elastic casing.
- Cut the piece out of the fabric and fold it in half lengthwise and trim any unevenness.
- Fold the edge of the cover piece inward about 1/2″ and press. You will have to pleat/gather the corners a little. Fold the edge over again 1/2″ and press, gathering or pleating the corners as needed.
- Sew the casing down, about 1/8″ from the folded edge. Leave a 2″ opening for the elastic.
- Cut a piece of elastic that measures about half of your ironing board’s circumference. Secure a safety pin on one end (secure it well, or you’ll be mad when it pops off!) and a stick pin on the other.
- Thread the elastic through the casing you’ve sewn using the safety pin as a lead. This is the most tedious part, so pour yourself a cup of coffee and watch an episode of Mickey Mouse Clubhouse with the kids while you do this. Once you’ve pulled the elastic through the casing, sew it together by machine or hand and then sew the opening shut.
Pull your new, pretty cover over your icky old one and admire your newest friend.
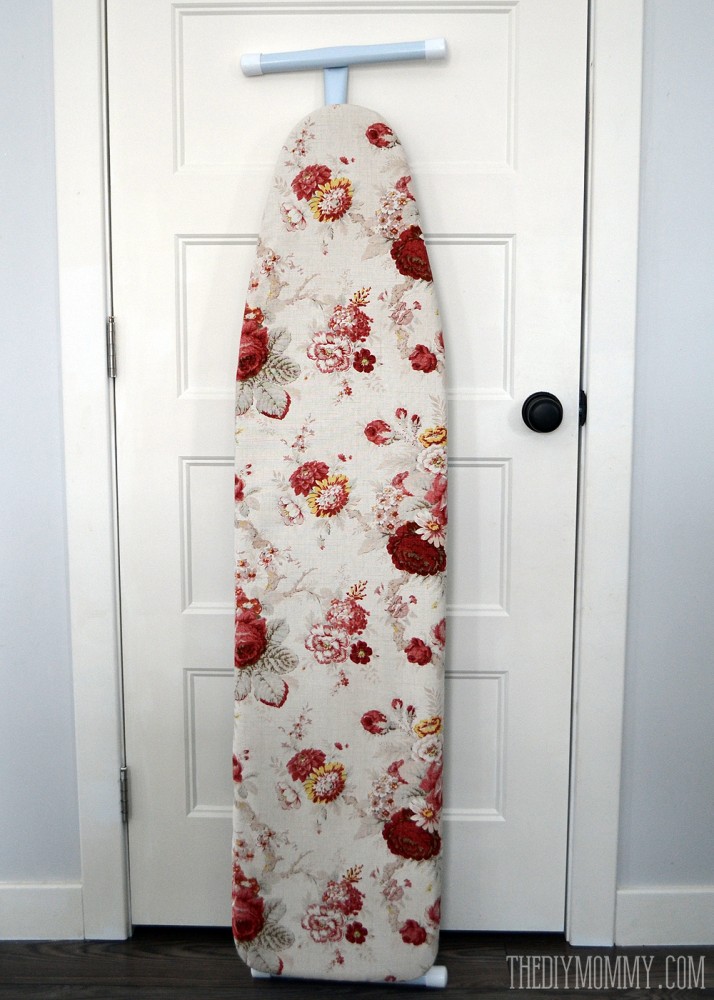
It may even entice you to iron more. Maybe.
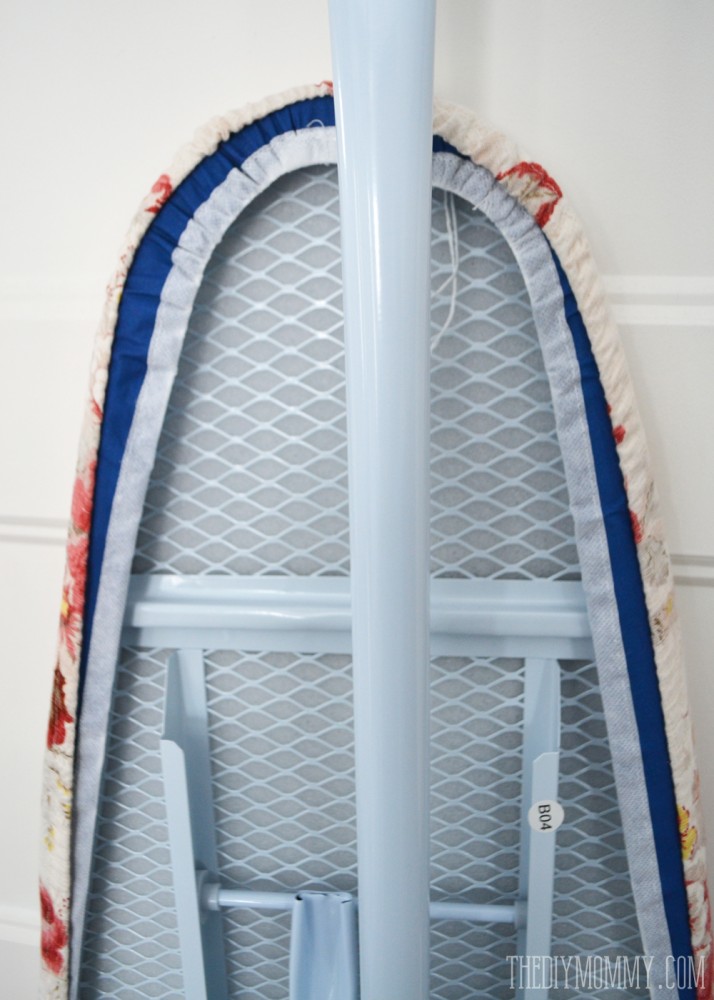
Here’s what the back looks like:
Thanks so much to OnlineFabricStore.net for supplying me with this gorgeous fabric to make my ironing board cover with! I can’t wait to share with you what I have planned next for this fabric in my laundry room.
Have a wonderful Valentine’s weekend, friends! Don’t forget to print out this card for your loved ones and make these easy brownies.
I’ve been wanting to do this, thanks for sharing the tutorial!!
Thanks for visiting, Carrie! You totally should do this – such a fun, quick project.
This looks incredible! I’m loving it. Pinned and tweeted. Thank you for taking the time to party with us. We hope to see you tonight at 7 pm. It wouldn’t be a party without you! Lou Lou Girls
Niiicee. You are one creative person 🙂
Very informative & enthusiastic post. I’m going to make one myself. Good luck to me people!!!
I think I inherited my mom’s dislike of ironing. I do it as little as possible, and when I do, I do it hurriedly. I think it’s a patience thing….lol.
For most recent news you have to go to see world-wide-web and on web I found this site as a best web site for most up-to-date updates.
Thanks designed for sharing such a good opinion, paragraph
is nice, thats why i have read it fully
I got this site from my pal who told me regarding this
website and at the moment this time I am visiting this web
site and reading very informative articles at this
place.
Amazing things here. I am very satisfied to peer your article.
Thanks so much and I’m having a look ahead to contact you.
Will you please drop me a e-mail?
Howdy very nice website!! Man .. Excellent .. Superb .. I will bookmark your site and take the feeds
additionally? I’m satisfied to find numerous useful info right here in the submit,
we’d like work out extra strategies in this regard, thank you for sharing.
. . . . .
Wow! At last I got a weblog from where I be capable of actually get valuable
facts concerning my study and knowledge.
Hi to all, it’s truly a good for me to pay a visit this website, it includes helpful Information.
Oh my goodness! Impressive article dude! Many thanks, However
I am experiencing difficulties with your RSS. I don’t understand
why I am unable to join it. Is there anyone else having
similar RSS problems? Anyone that knows the
solution will you kindly respond? Thanks!!
May I simply say what a relief to discover somebody who really understands what they
are discussing online. You definitely know how to bring a problem to light and make it important.
A lot more people need to check this out and understand this
side of your story. I can’t believe you are not more popular since you certainly have the gift.
This info is worth everyone’s attention.
Everything is very open with a clear explanation of the issues.
It was truly informative. Your site is extremely helpful.
Thanks for sharing!
This text is worth everyone’s attention. When can I
find out more?
Quality articles or reviews is the important to invite the
people to go to see the web page, that’s what this site is
providing.
Thanks for finally writing about > Sew an Easy DIY Ironing Board Cover | The DIY Mommy
< Liked it!
Good info once again. I am looking forward for your next post!