Thank You Gift Basket Idea for Fall with Cricut
This post may contain affiliate links · This blog generates income via ads
This is a sponsored post written by me on behalf of Cricut. All opinions are 100% mine.
With Canadian Thanksgiving coming up in a couple of weeks, I’ve been thinking about all of the people I’m thankful for. These simple “thank you” gift baskets would be a great way to show special people in your life how much you appreciate them. They’re extra special with the addition of sparkling foil details using Cricut’s new Foil Transfer System! Let me show you how to put a Fall thank you gift basket together.
Cricut has just come out with their NEW Foil Transfer System, and I’ve had a blast testing it out! I think it’s the perfect tool addition heading into gifting season to add shimmer and shine to DIY gifts.
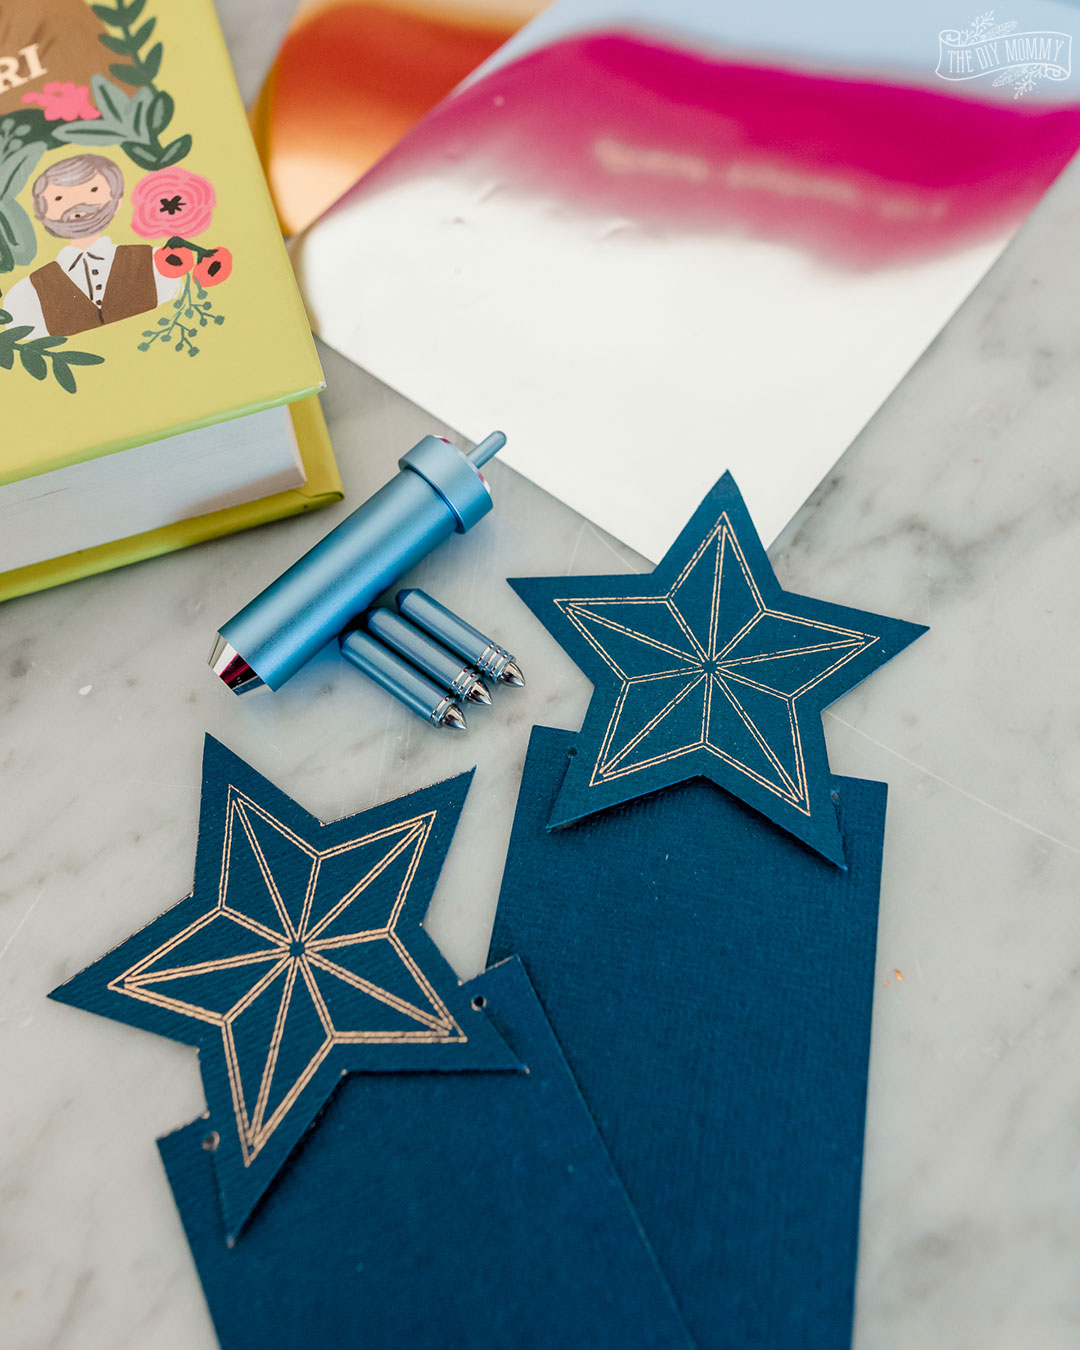
You can create gorgeous foil effects on your creations that are perfect for cards, art and more. I made these shining star bookmarks for my girls using the new pressure-activated tool, the gold coloured Cricut Foil Transfer Sheet (there are more colours, too!), and Cricut Design Space images. In Design Space, you can indicate which lines in your project will be foiled, and the prompts will tell you exactly when to put the foil transfer sheet on your project, when to remove it, and when to change your tool.
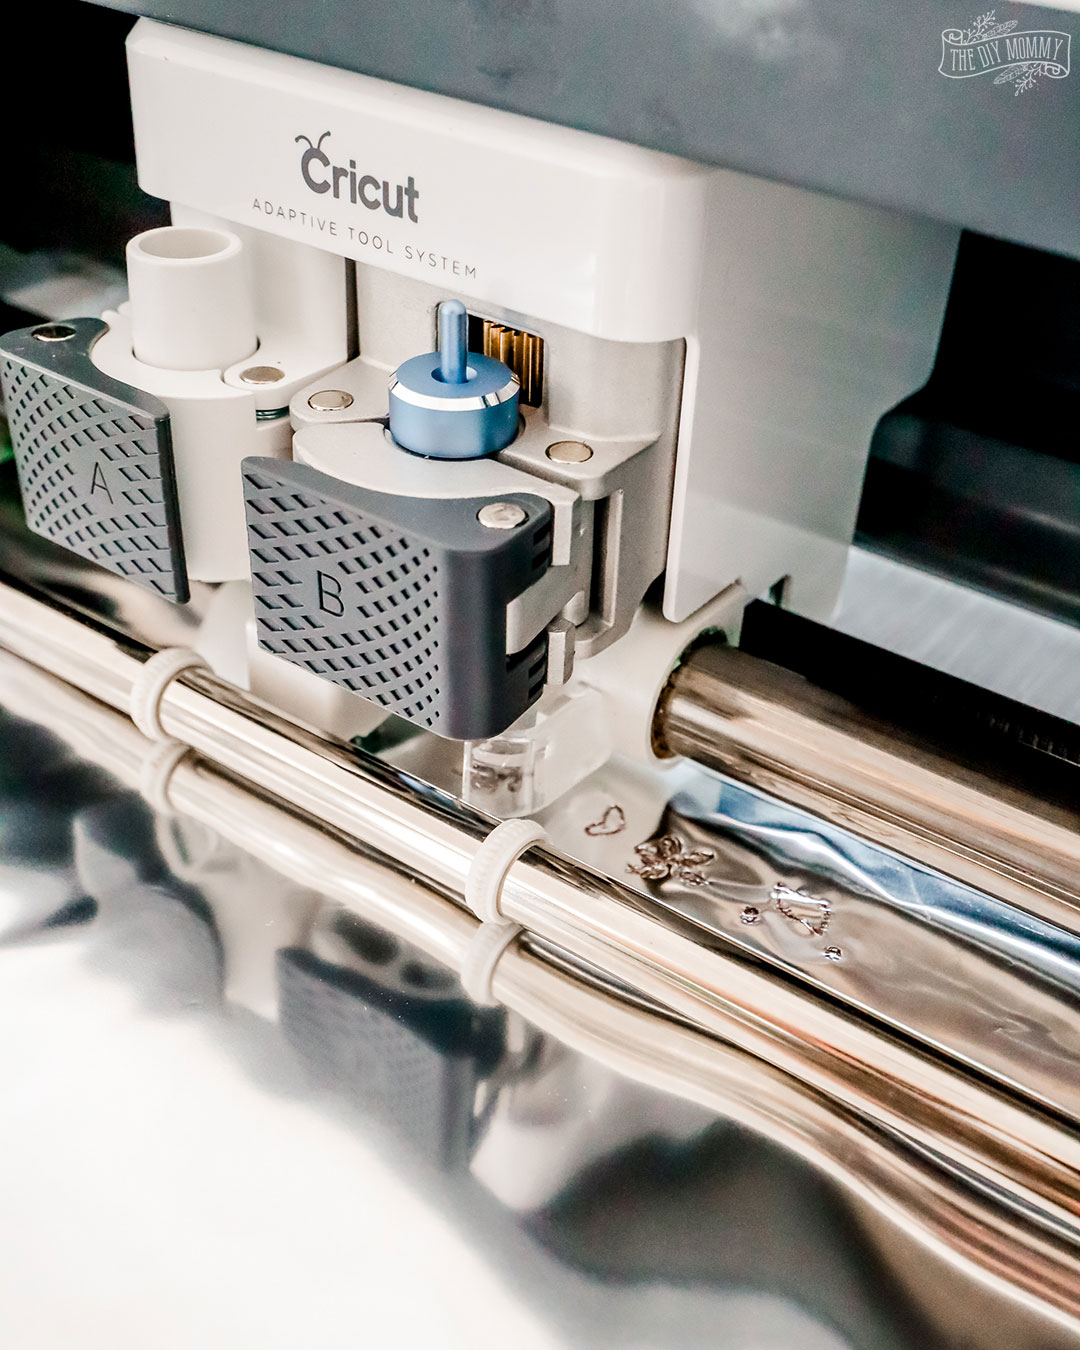
The Foil Transfer System works with Cricut Maker and Cricut Explore models, and you can swap the interior part of the tool for different line thicknesses: fine medium and bold. There’s not heat required, and the system is completely integrated with Design Space making it simple to create a stunning design.
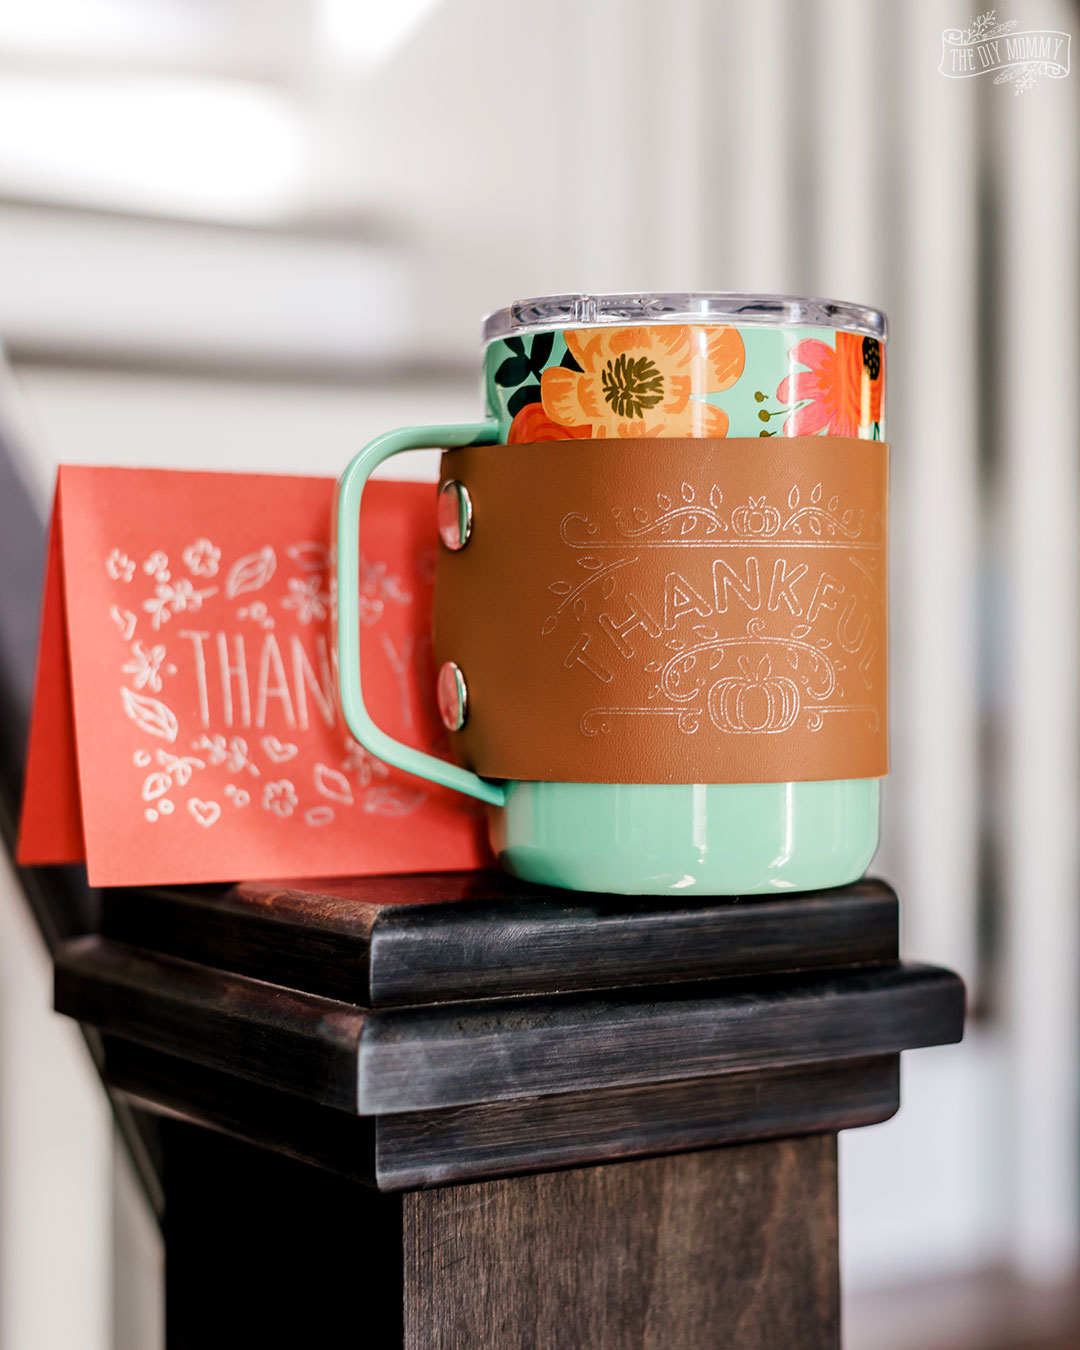
For this Fall-themed Thank You gift basket, let’s start by creating a foiled thank you card.

Access the Design Space project for this card by clicking right here. I thought this “thank you” image from Design Space was perfect for Fall with its flowers and leaves! I’ve made this with my Cricut Maker, but you could make it with an Explore model, and skip the scoring step.
Next, place a piece of cardstock in Dark Orange onto a Cricut mat and insert the scoring wheel into your Cricut Maker. Design Space will prompt you to do everything as you create this card, so it’s really easy to follow along.
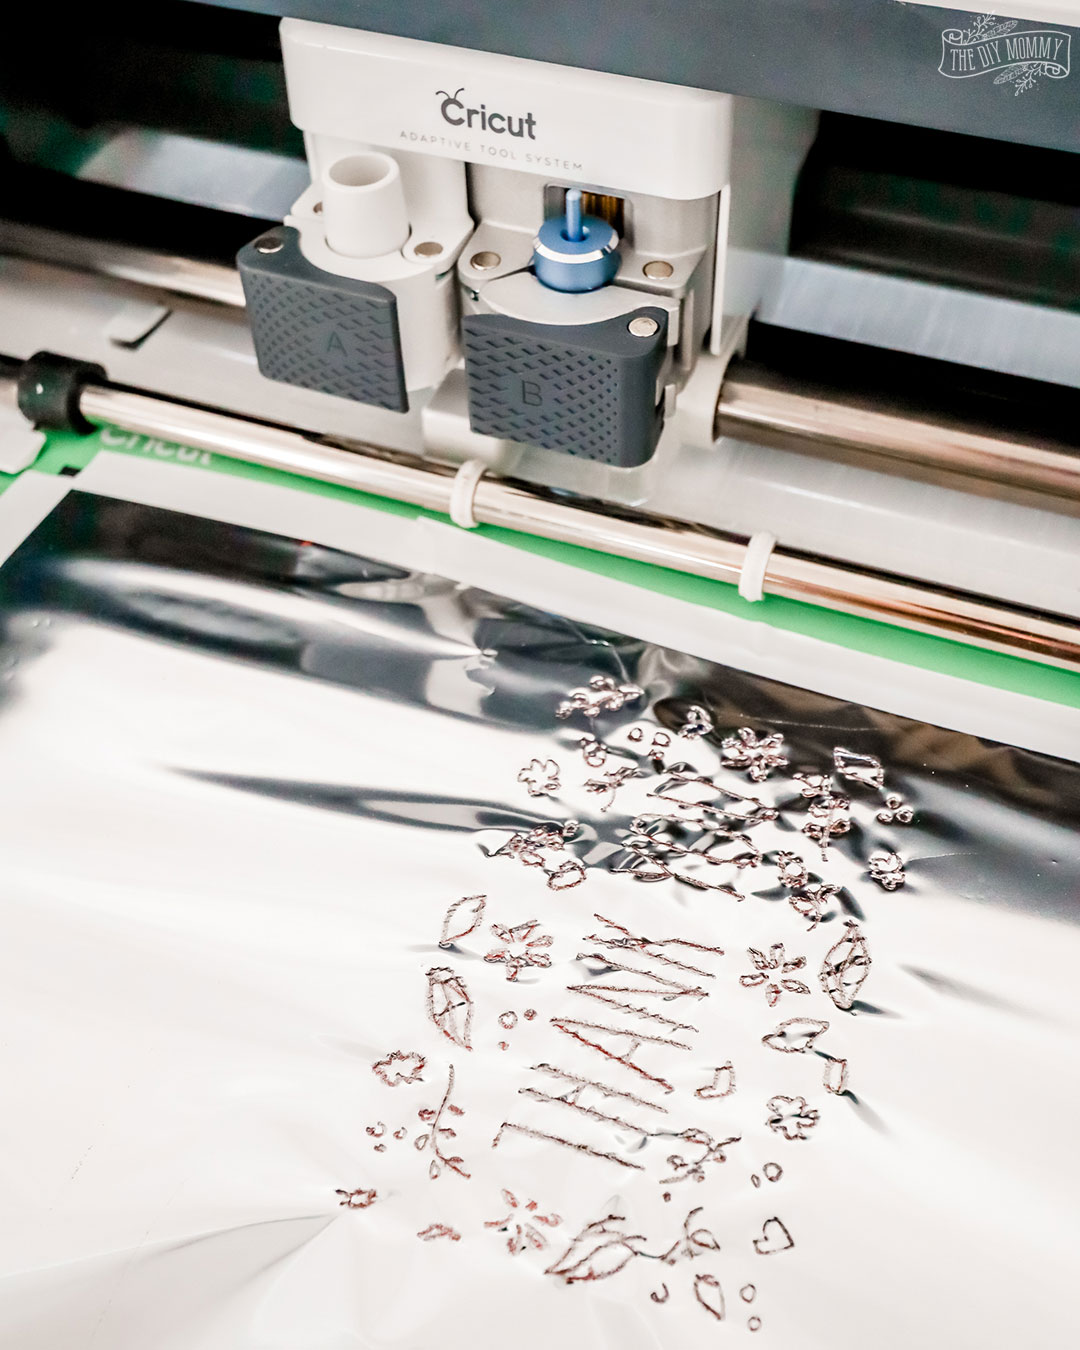
Once the card is scored, tape a Foil Transfer Sheet in Silver onto a piece of cardstock in Dark Orange without removing the mat. (It’s important to use a generous amount of the tape that’s provided with the sheets, I’ve found!) I’ve set up this project so that the artwork will be foiled. Follow the Design Space prompts to ensure you have the Foil Transfer Tool with the medium tip loaded into your Cricut Machine. I’m using my Cricut Maker here, but this tool is also compatible with the Explore models!

Design Space will prompt you to remove the foil sheet and change the tool to the Fine Point Blade. Tap the “Go” button, and you’re ready to roll! Finally, remove the paper from the mat, pop out your card, fold it, and it’s all done.
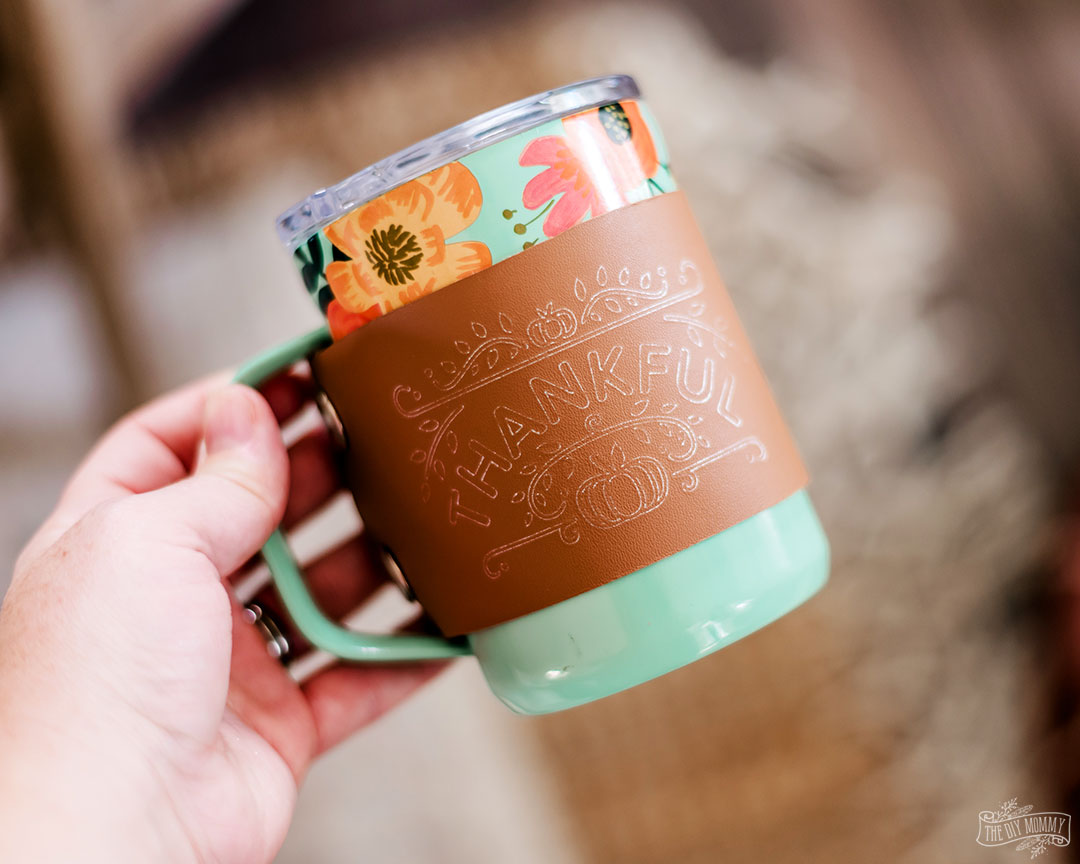
Now, let’s make a leather coffee mug cozy!
For starters, grab the Design Space project file to make this right here. Double check the circumference of your mug and adjust the width of the design as needed; you’ll want it to be at least an inch larger than your mug.
I experimented with using real leather and faux leather for this mug cozy and both seem to work! The only thing is you’ll have to finish cutting the real leather cozy by hand as the knife blade (with the Maker) might not work in the same project as the foil transfer tool.
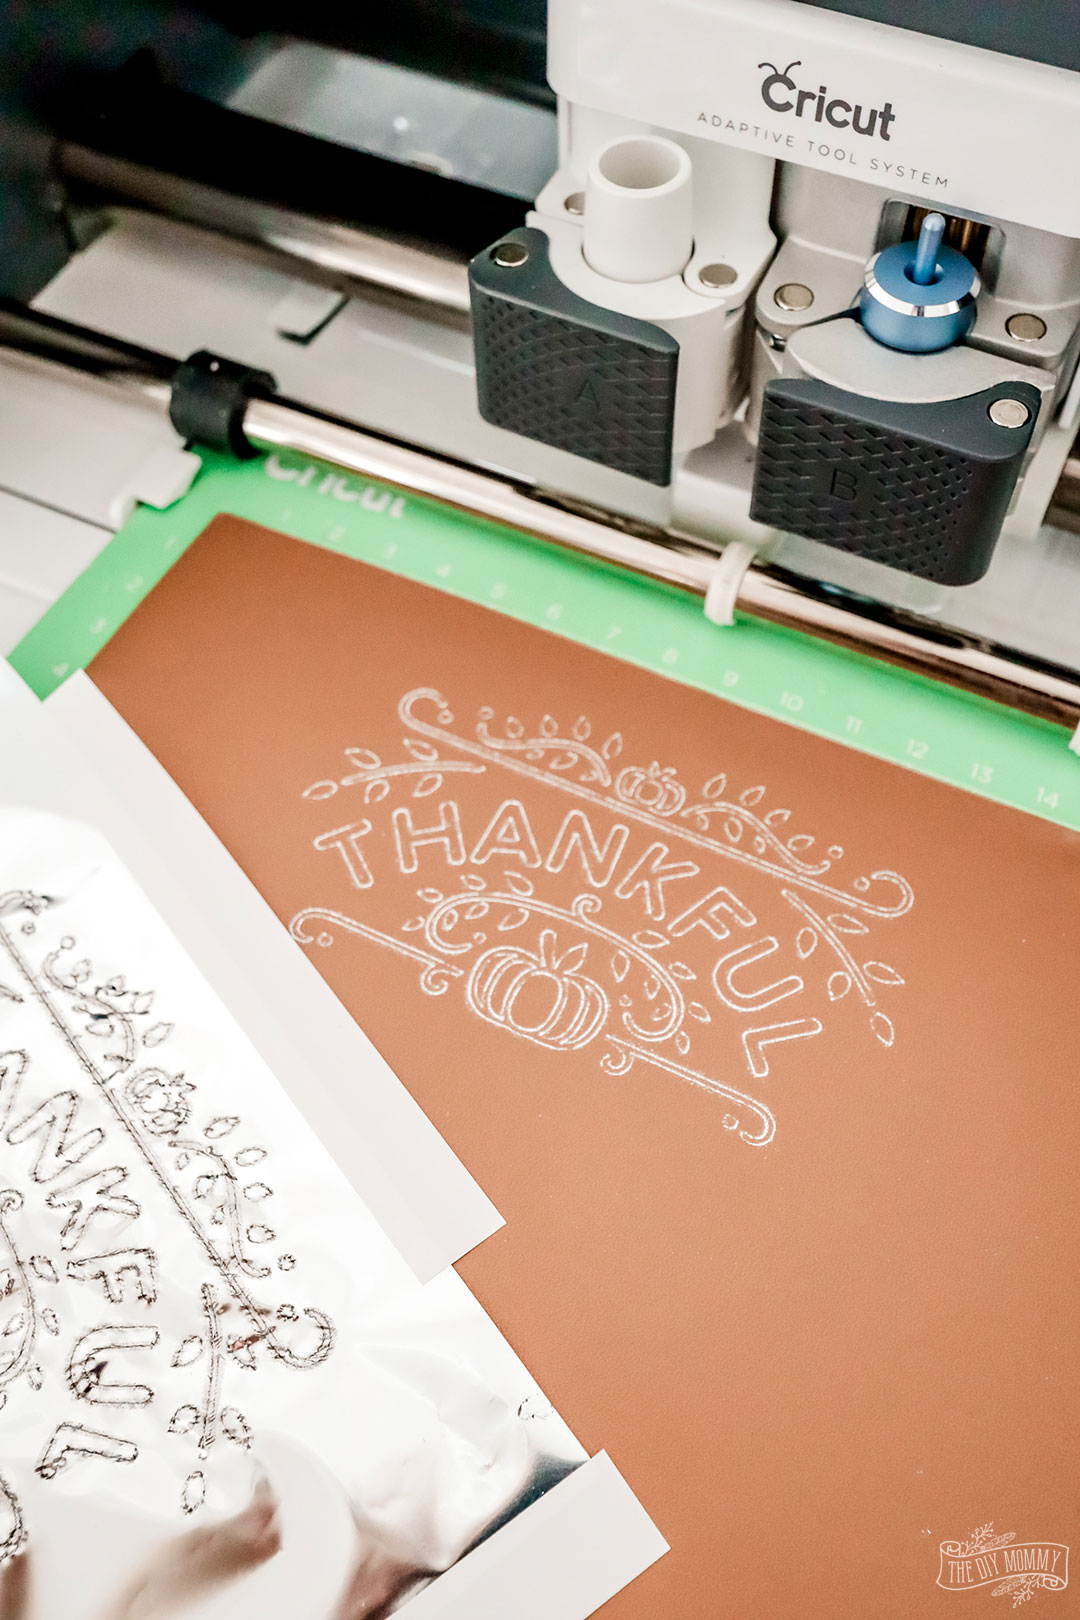
Again, Design Space will prompt you through all of the exact steps making this nice and easy. Tape a Foil Transfer Sheet in Silver to your leather piece on a Cricut mat. Ensure the Foil Transfer Tool with the medium tip is loaded in your machine and hit that “Go!” button!
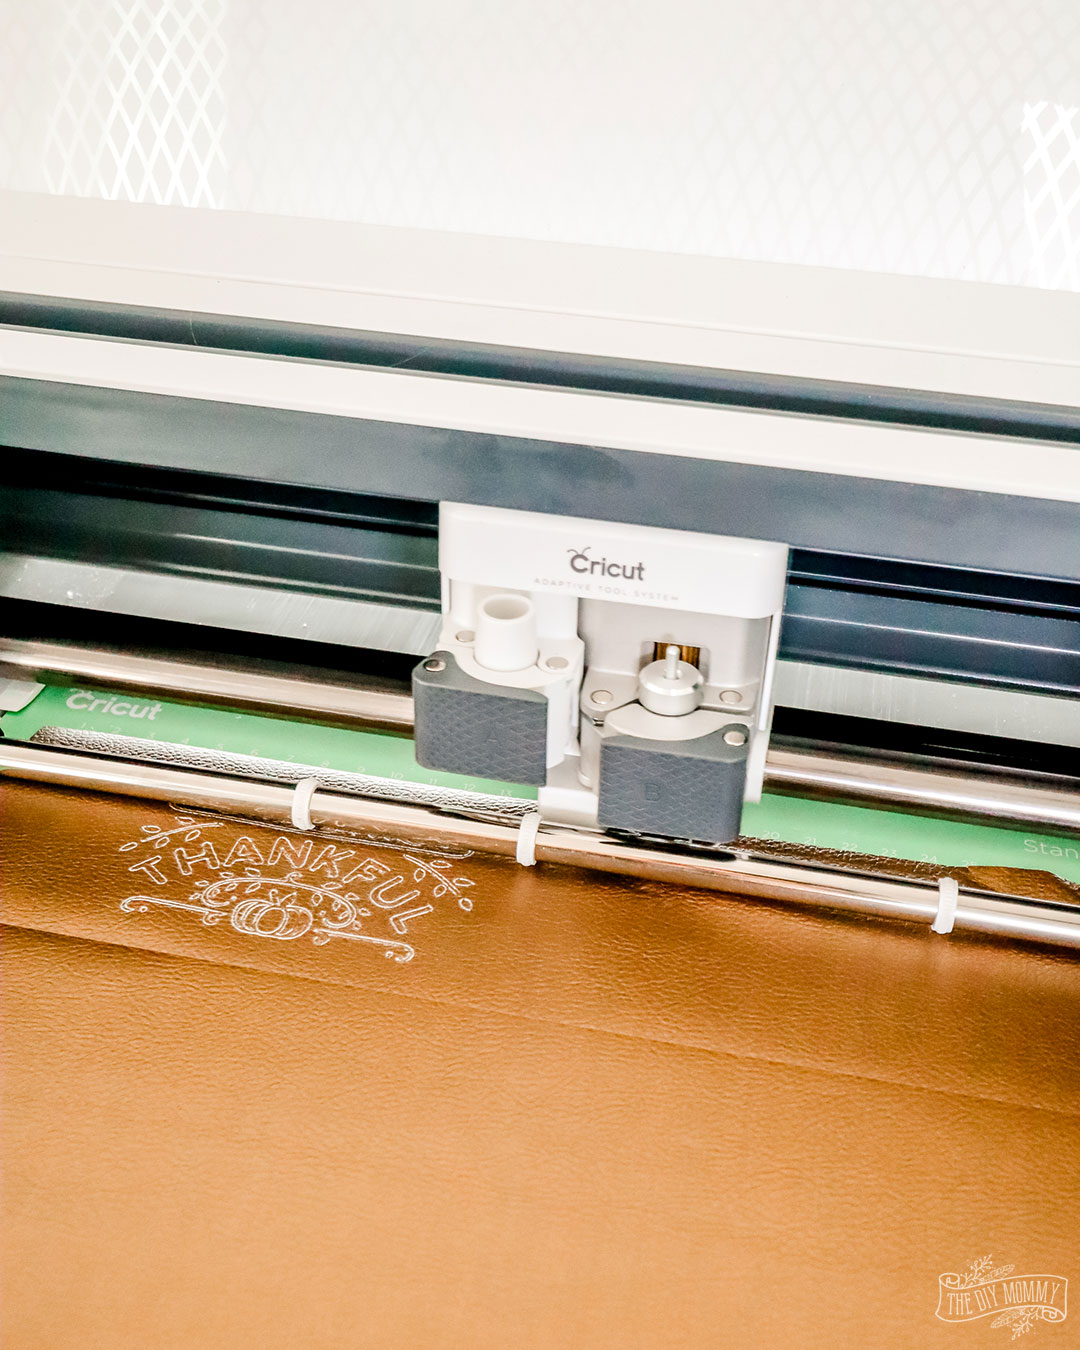
The next step is removing the foil transfer sheet without removing the Cricut mat from the machine and swapping out the tool to the Fine Point Blade. The Cricut will cut your cozy, and if you’re using faux leather you’re done! The photo below shows a cozy being made with the Cricut Pebbled Faux Leather. If you’re using real leather, you’ll have to take some sharp scissors and finish the cut.
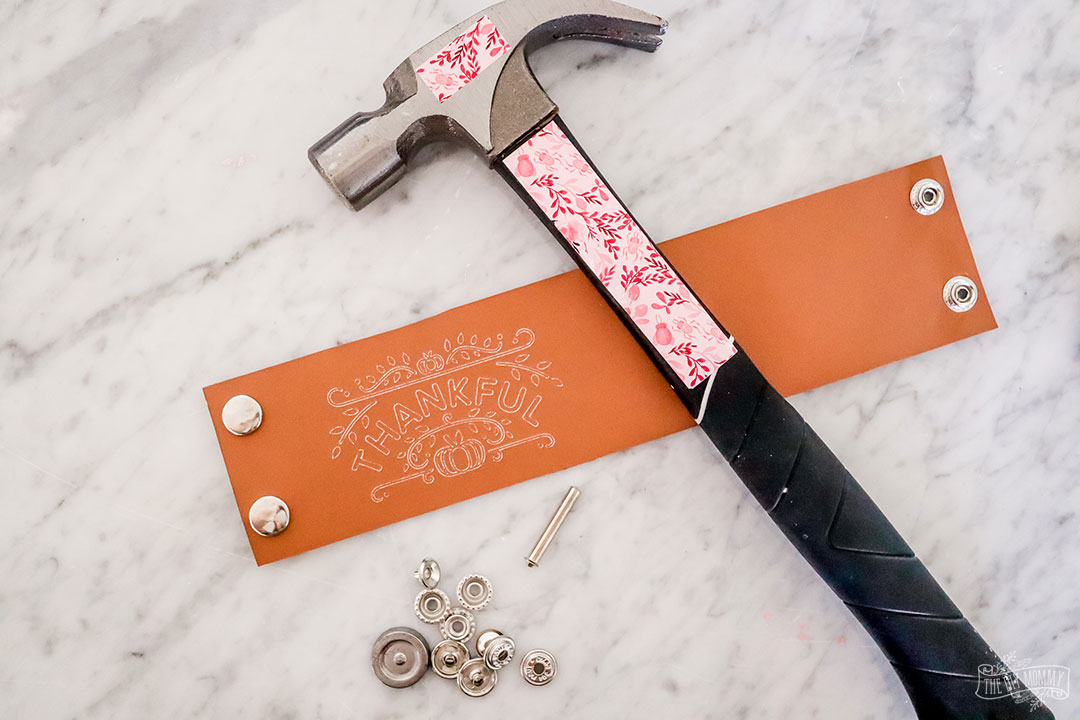
Next, grab a pack of snaps and follow the instructions on the package to install your snaps onto either side of your coffee mug cozy. (The real leather version is pictured above.)
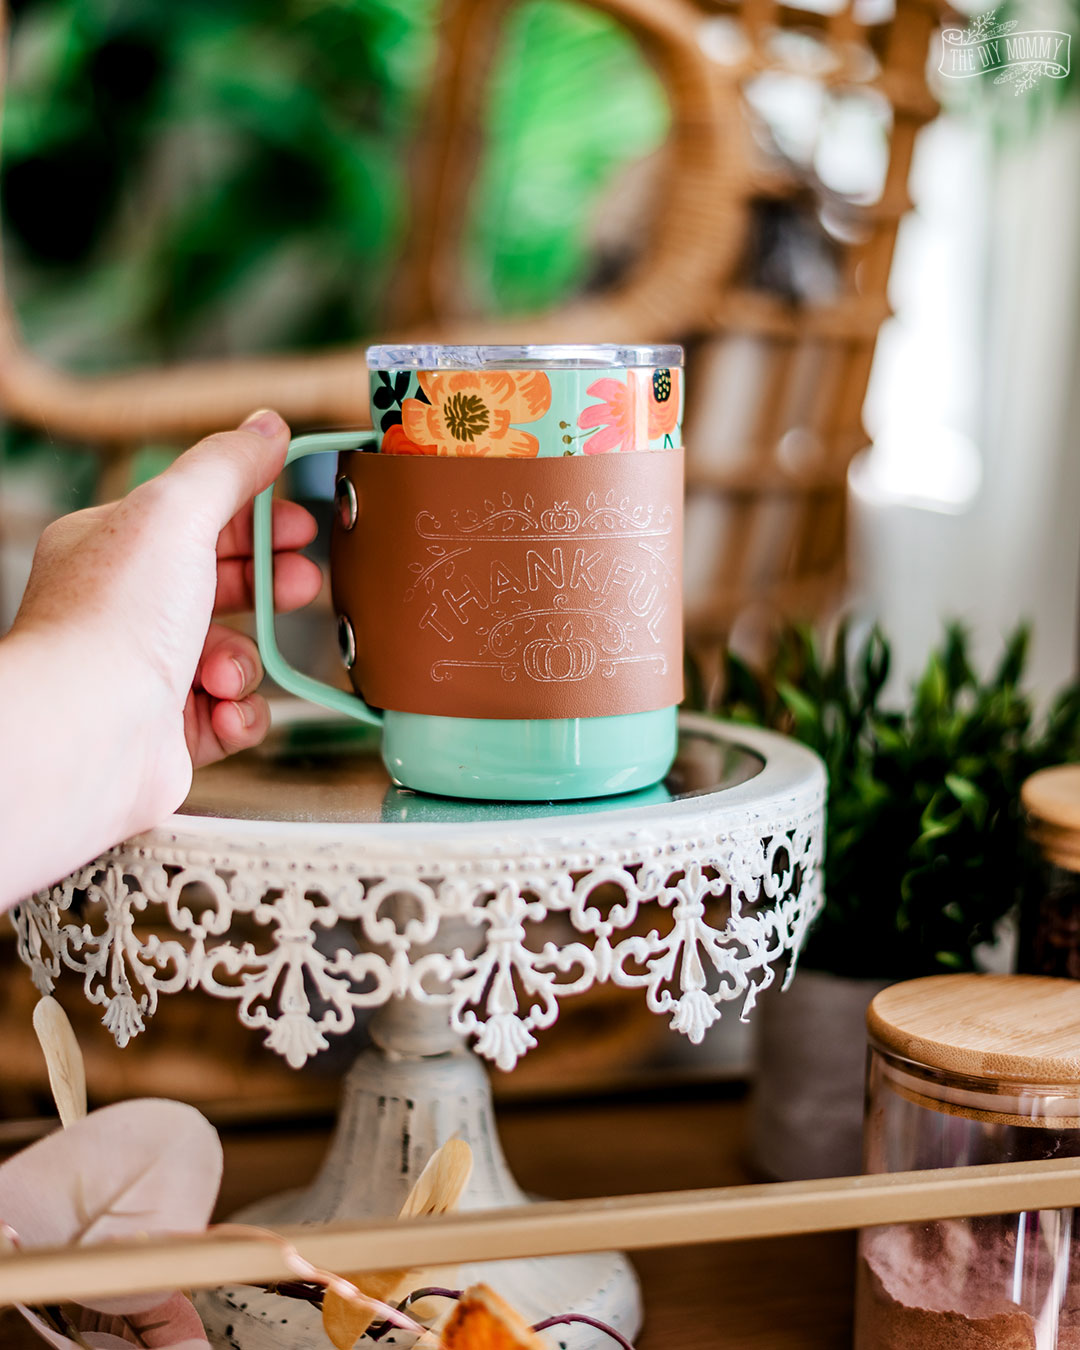
You can snap the cozy around a lovely mug as an addition to your Fall gift basket.
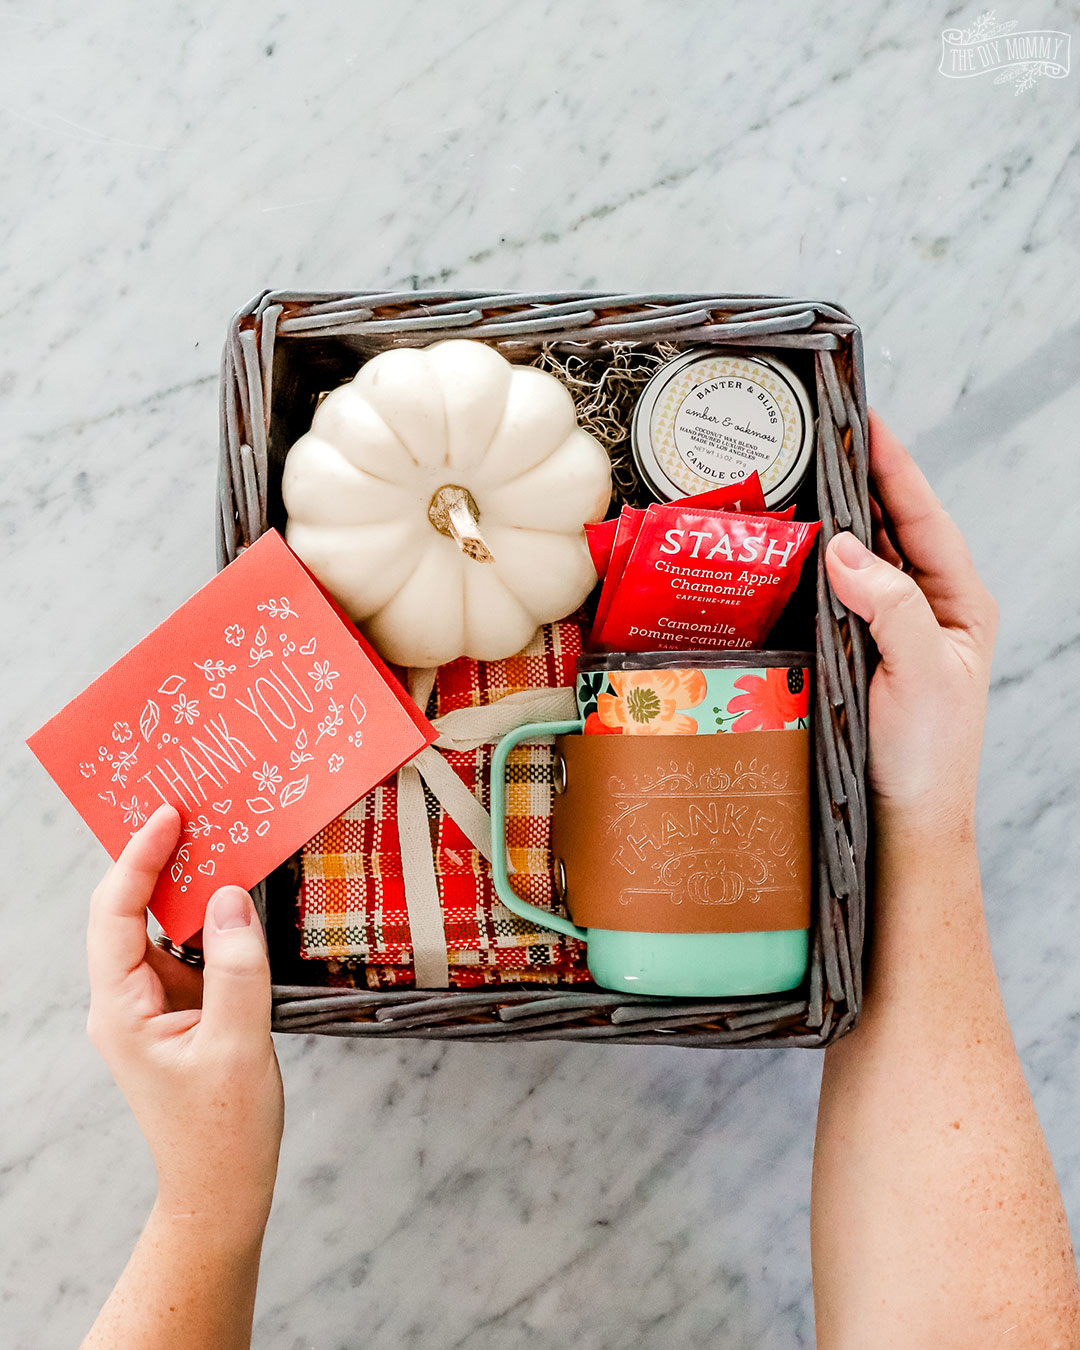
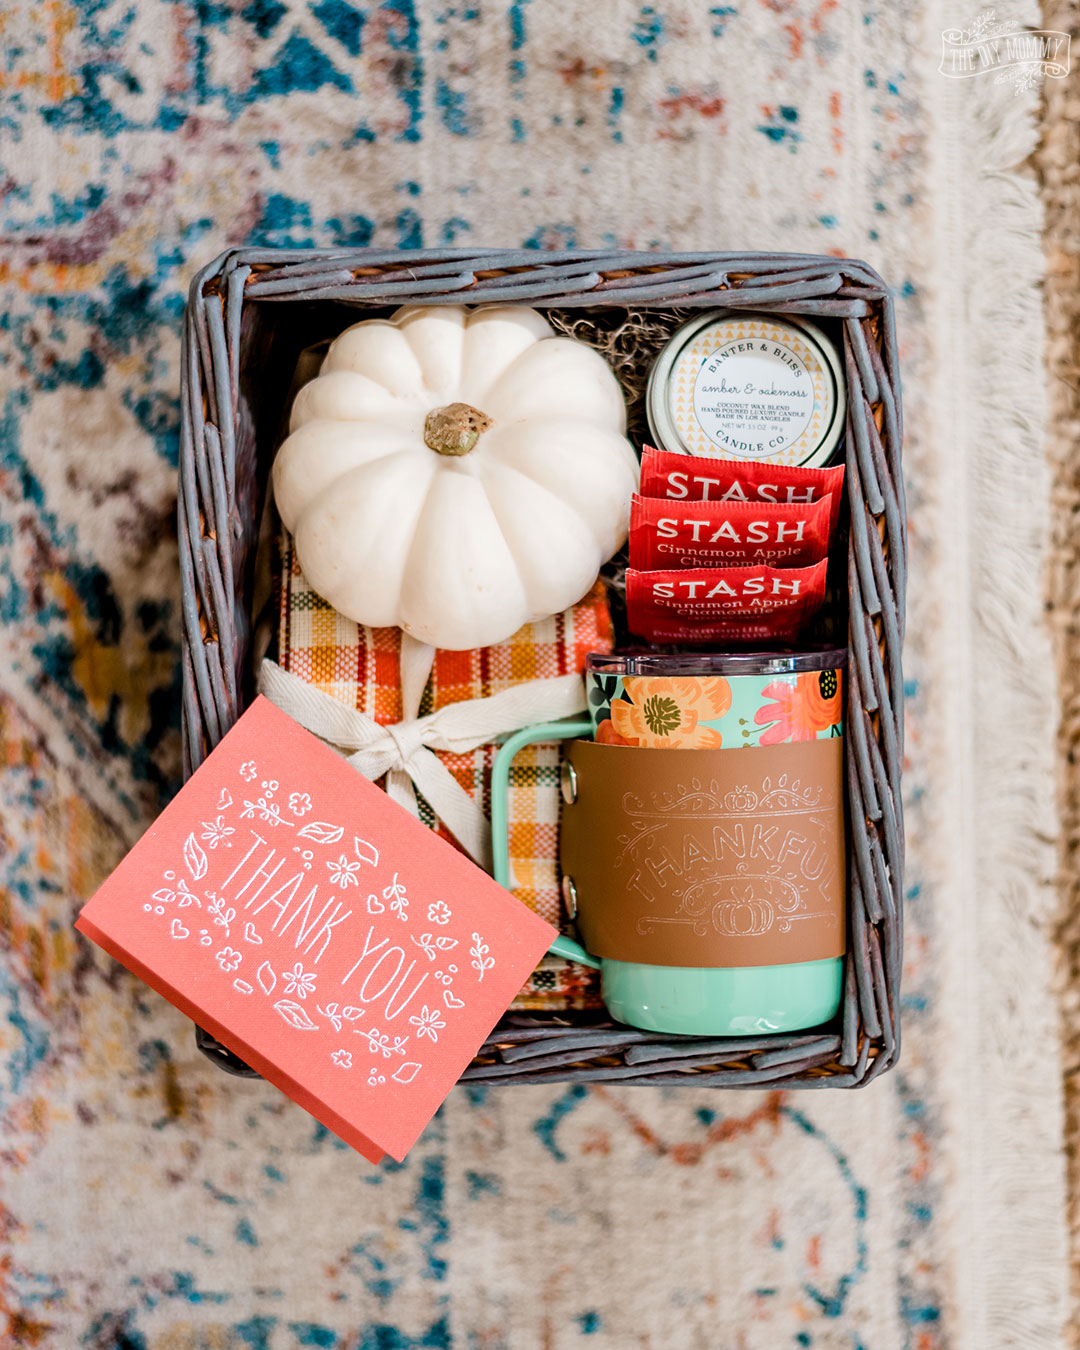
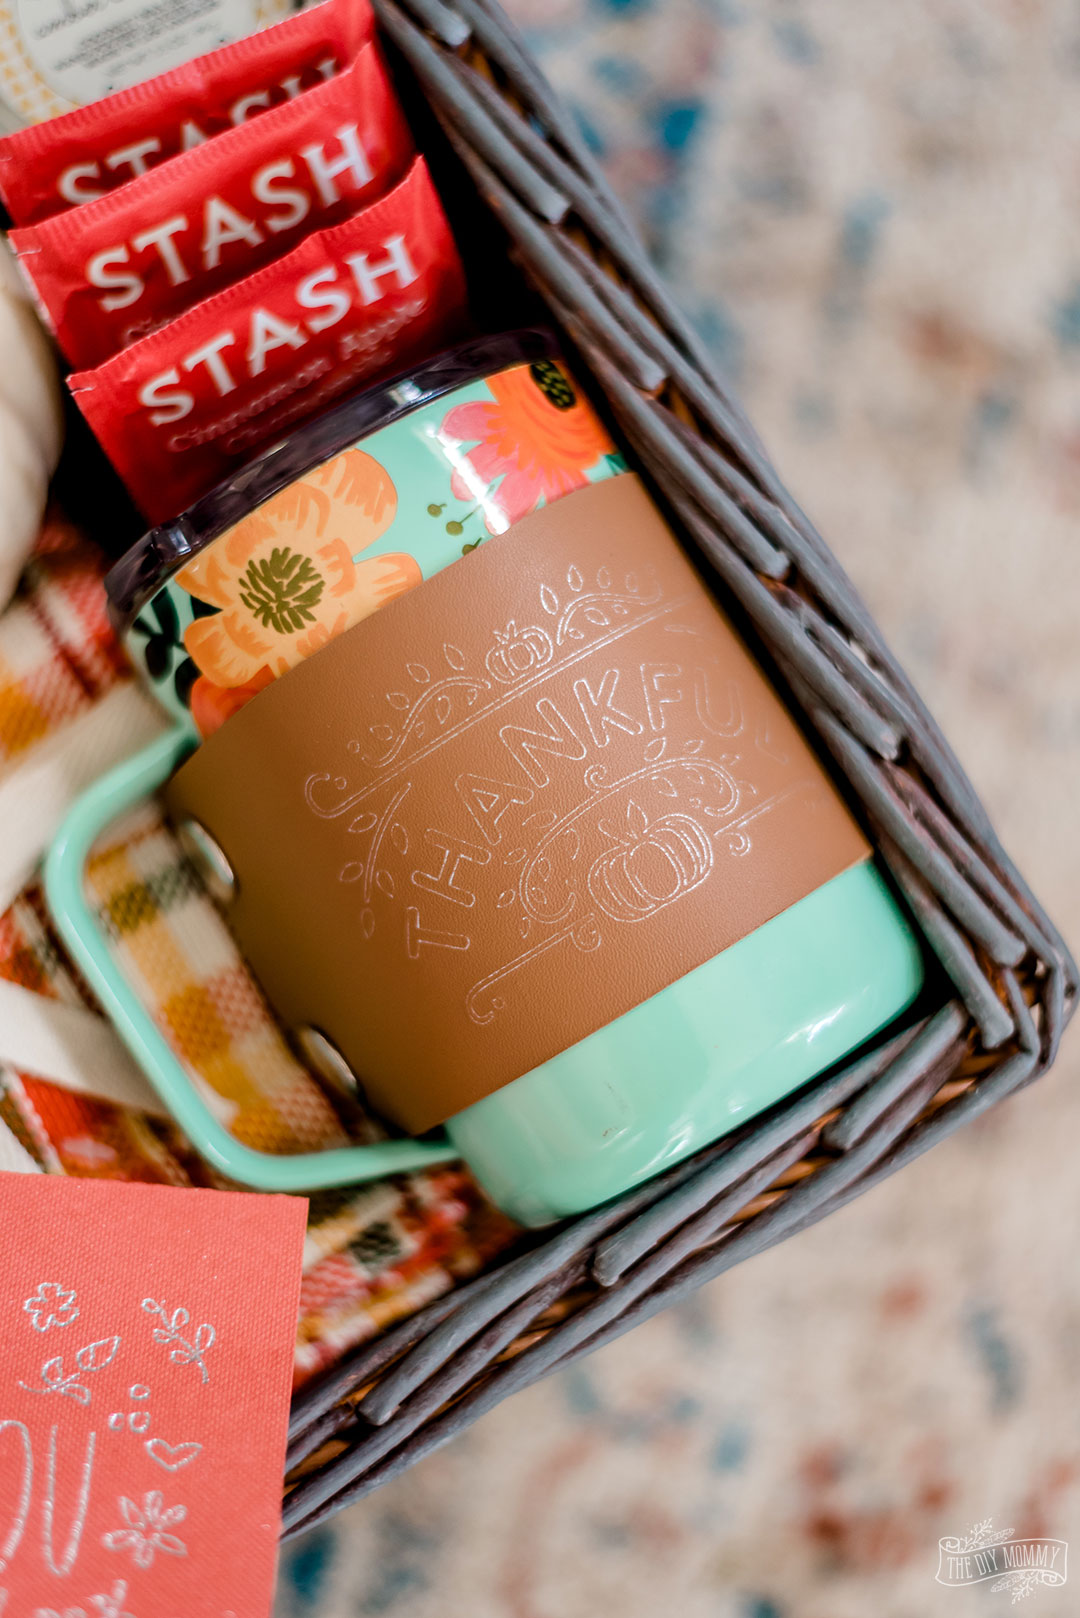
To create the basket, fill a wicker basket with reindeer moss or shredded kraft paper. Add the DIY card, and the DIY mug cozy wrapped around a pretty mug. You can finish the basket off with the addition of festive tea towels, teas, a pumpkin and a scented candle.
I can’t wait to give this gift basket to someone special this Fall!
What would YOU create with the new Cricut Foil Transfer System? Get more Cricut project ideas by clicking here.
If you want to try the absolute BEST most delicious spicy tea, Stash’s Ginger Fire Chai is unbelievably delicious. A foiled thank-you card and bc a box of that tea sounds like the best way to thank a chai fan I’ve ever thought of.
I thnk I really need to get myself a Cricut machine – is there any you would recommend over another? I love this basket idea and the foil looks brilliant. Thanks for sharing at Fiesta Friday.
Good Question! Really depends on what you plan to make with it. If you’re planning to cut thicker materials and leather, the maker is the way to go. If you want to make labels and vinyl decals, the Air is wonderful. Here’s a video that explains all of the differences: https://youtu.be/kJB2-4jpIZM
I love that you showcase cute affordable things from dollarama and dollar tree!
What a perfectly sweet little gift basket! Thank you so much for sharing this with us at Farmhouse Friday!