IKEA Hack: Make a Brilliant DIY Jewelry Storage Tray
This post may contain affiliate links · This blog generates income via ads
Are you ready to add a touch of elegance and organization to your jewelry collection? Say goodbye to cluttered countertops and lost earrings with this brilliant IKEA hack! With just a few simple supplies and some creativity, you can transform an ordinary IKEA plate into a stylish and functional DIY jewelry storage tray. This will elevate any space and it’s also practical!
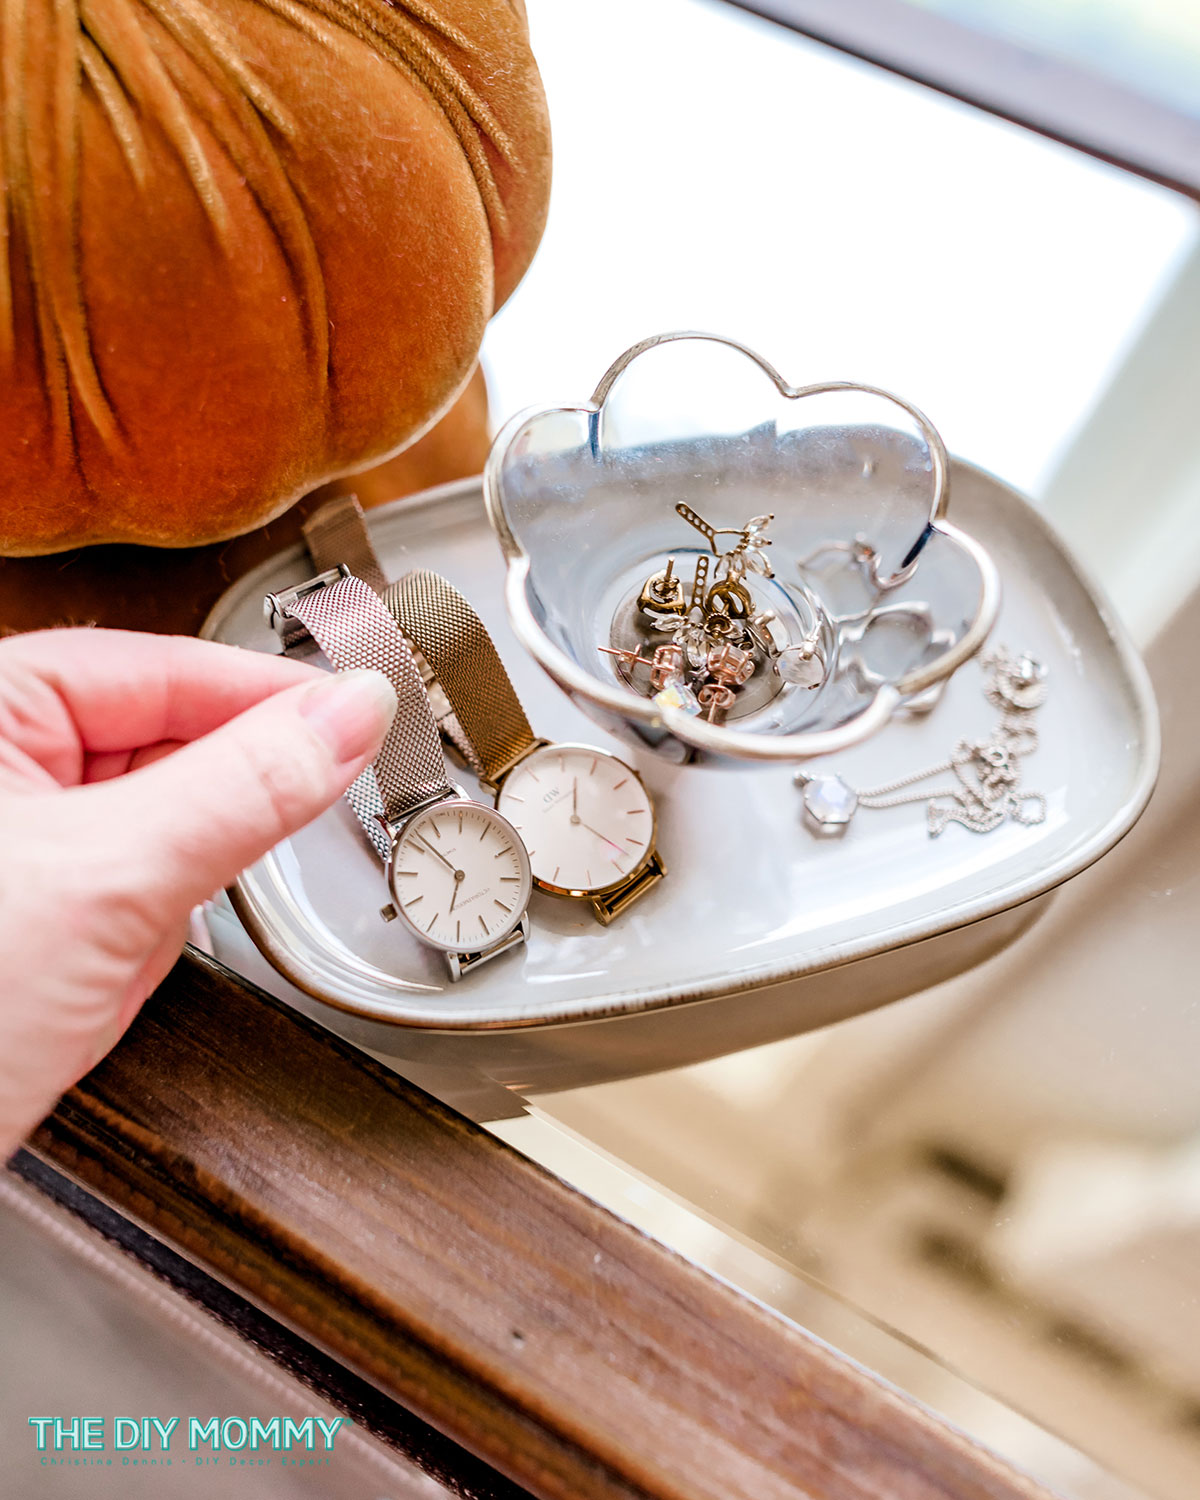
I wanted a simple and chic solution for my loose watches, earrings, bracelets, necklaces and rings that I like to keep on my nightstand. Enter this fun IKEA hack! It’s so easy to make, and you don’t have to be a skilled DIYer to create this pretty little DIY jewelry storage tray.
Materials You’ll Need:
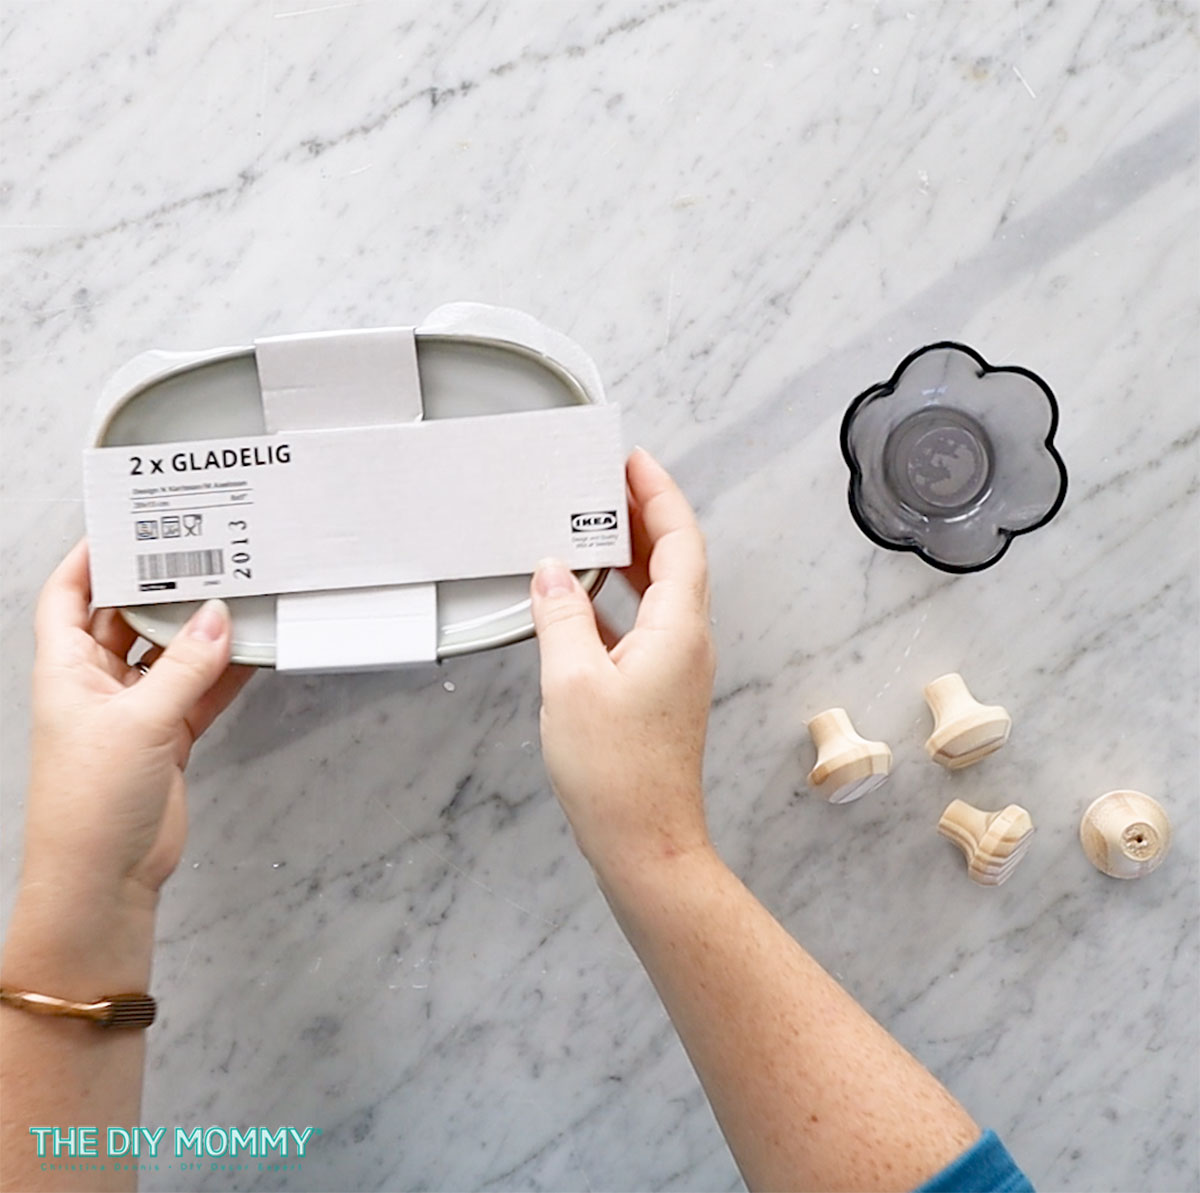
- IKEA GLADELIG plate
- Raw wood knob
- Small round tea light holder from IKEA (IKEA no longer has the one I used, but this candle holder is similar)
- Gorilla hot glue
- Optional: Champagne gold acrylic paint
Step 1: Gather Your Supplies
First things first, gather all your materials. Head over to your nearest IKEA store or hop online to snag a GLADELIG plate, a raw wood knob, and a small round tea light holder. Don’t forget to grab some Gorilla hot glue—it’s going to be your best friend for this project. If you’re feeling extra creative, pick up some champagne gold coloured acrylic paint. This will add a touch of glam to your tray.
Step 2: Assembly
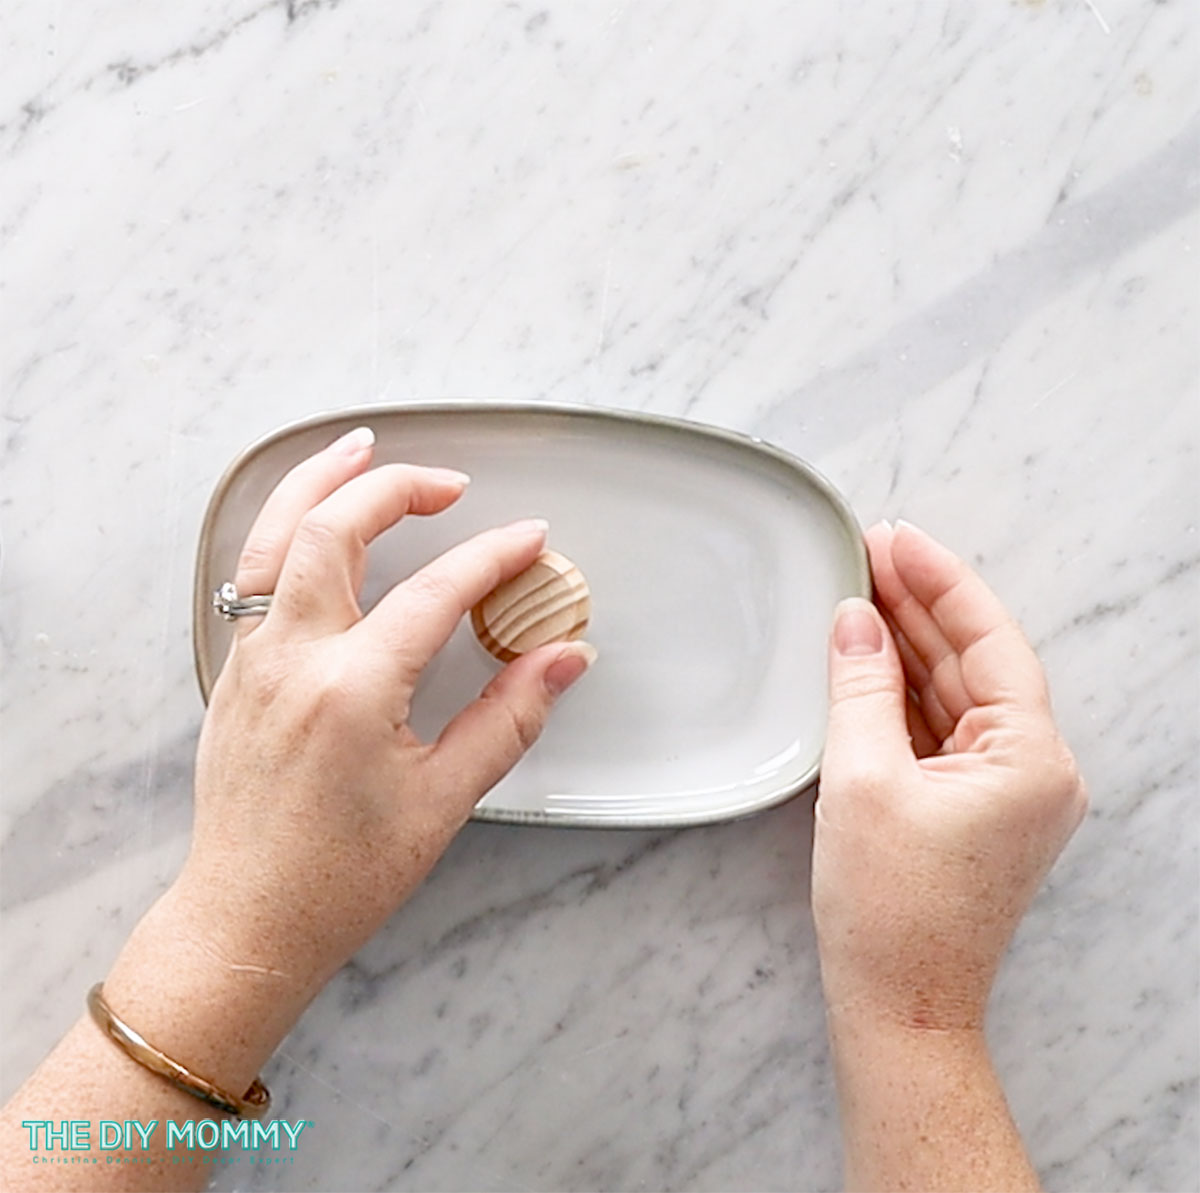
Now, let’s get down to business. Take your raw wood knob and apply a generous amount of Gorilla hot glue to the bottom. Carefully attach it to the top center of your GLADELIG plate. Make sure it’s nice and secure—you don’t want your knob wobbling around!
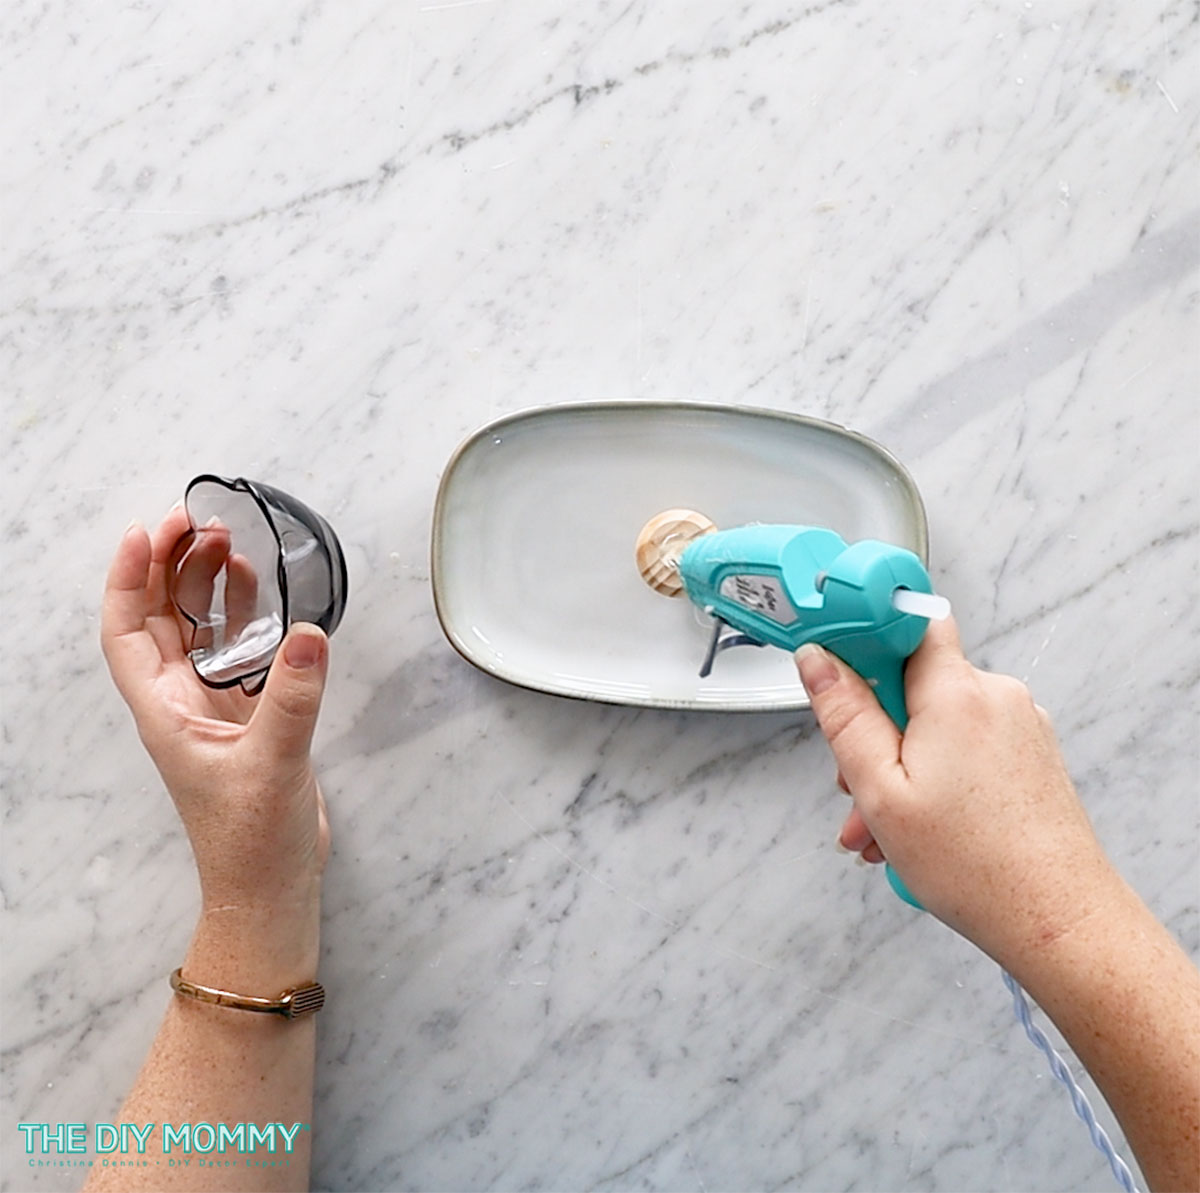
Once your knob is in place, it’s time to add some height to your tray. Apply another dollop of hot glue to the top of the knob and place your small tea light holder on top. Look for something with a vintage look, like this smoked glass scalloped candle holder!

Press down gently to ensure it sticks firmly to the knob.

Step 3: Optional Glam
Feeling fancy? Why not add a touch of champagne gold to your tray? Grab your champagne gold paint and a small paintbrush or foam brush, and carefully paint the top edge of the tea light holder. This simple step will instantly elevate the look of your tray and give it that extra oomph.
Step 4: Let It Dry
Patience is key! Allow your tray to dry completely before putting it to use. This will ensure that everything is nice and secure, so you can enjoy your DIY jewelry storage tray for years to come.
Step 5: Style and Organize
Now comes the fun part—styling and organizing your jewelry! Use your new tray to store earrings, watches, rings, and any other small accessories you want to keep within reach. The tiered design makes it easy to see all your pieces at a glance, so you can quickly find the perfect finishing touch for your outfit.

Who knew that a simple IKEA plate could be transformed into something so chic and functional? With just a few easy steps, you can create a DIY jewelry storage tray that will bring a touch of glamour to any room. Whether you’re a seasoned DIY pro or a complete beginner, this project is perfect for anyone looking to add a personal touch to their space. So go ahead and get crafty!
More DIY Jewelry Organizers
- Turn a thrift store spoon rack into a hanging DIY jewelry holder with paint and a drill. This is a great DIY wall jewelry organizer to get long necklaces off your dresser and prevent them from becoming a tangled mess.
- Use a cutlery tray from IKEA as a necklace holder with the addition of some pretty knobs, cup hooks, and paint. You could also use spray paint to make this one extra quick, and you can customize the colours to suit your style perfectly.
- You could also make a picture frame jewelry holder from an old picture frame, decorative metal sheet, paint sticks and hooks. I love this tutorial!
Want more IKEA DIY Ideas?
Click here to get more IKEA craft and decorating ideas; I have lots of simple projects here!