Make a Gorgeous DIY Wall Plant Shelf from IKEA Baskets
This post may contain affiliate links · This blog generates income via ads
Do you have a boring, blank wall you need to fill? Look no further than this DIY project that’s both easy and oh-so-pretty. I’m talking about creating a charming DIY wall plant shelf using inexpensive IKEA baskets and a touch of creativity. Not only does this project add visual appeal to any room, but it also requires minimal upkeep. Let me show you how to turn two grey wicker IKEA BYHOLMA baskets into eye-catching wall decor that showcases faux trailing plants in a unique and beautiful way!
We had an awkward blank wall between the barn door of our ensuite and the entry door to our primary bedroom. Rather than 2D art, I wanted to create some sort of 3D, textured feature that would breathe some life into the space. I love how greenery – real or faux – adds these elements, so I came up with this simple but impactful DIY wall plant shelf idea! Using supplies from IKEA makes this wall decor budget friendly.

You Will Need
First things first, let’s gather our supplies. You’ll need:
- 2 IKEA BYHOLMA baskets: The grey wicker will add a rustic yet contemporary vibe to your space.
- Gold picture hooks from Amazon: These will serve as the sturdy anchors for suspending your baskets securely. This pack comes with the nails you’ll also need.
- 2 IKEA FEJKA faux string of hearts trailing plants: Embrace the beauty of nature without the maintenance hassle with these lifelike artificial plants. These faux small plants are lightweight, so they’re perfect for this project.
- 2 IKEA DAIDAI plant pots in the Brass Colour: Complement your baskets with these chic plant pots to elevate the overall aesthetic.
Crafting Your DIY Wall Plant Shelf

Measure Twice, Hang Once
Before diving into any drilling or hammering, grab your trusty level. This handy tool ensures that your shelves will hang straight and true. Determine the desired placement for your baskets on the wall and mark the spots lightly with a pencil.

Anchor Points
Time to bring out those gold picture hooks! Install two hooks onto the wall for each basket, positioning them at the top corners. Make sure they align perfectly with your marked spots.
Note: You don’t need to install these into studs if you’re using these lightweight baskets and faux plants. However, you may need to use drywall anchors, screws, and/or a wall stud if you’re going to be hanging heavier items or need to support the weight of multiple plants.

Basket Beautification
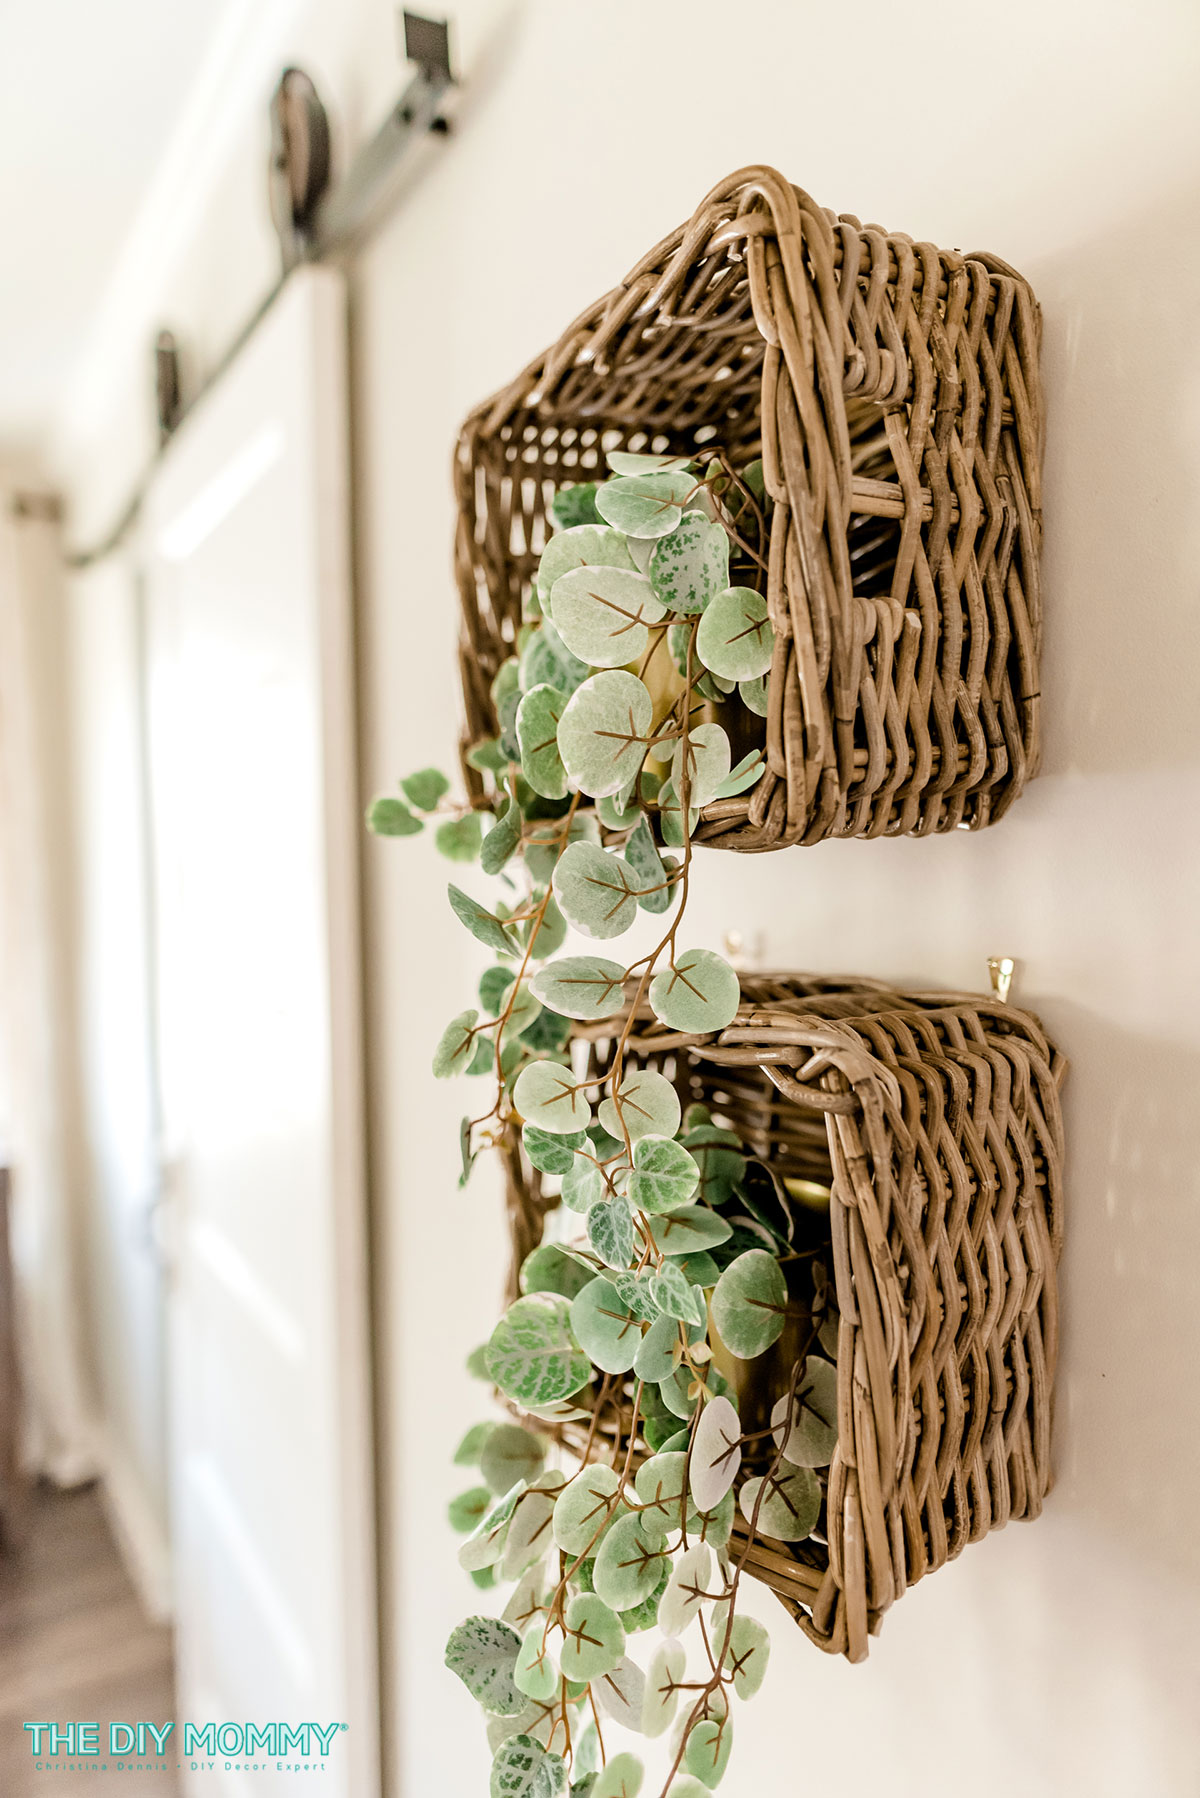
With your hooks securely in place, it’s time to adorn your baskets. Carefully hang each basket on its designated hooks, ensuring they sit snugly against the wall. I found pieces of the basket wicker to hook over the wall hooks. Step back and admire your handiwork—it’s already starting to take shape!

Faux Foliage Finale
Now for the pièce de résistance—adding the faux trailing plants. Take your IKEA FEJKA plants and place each one in its brass-coloured IKEA DAIDAI plant pot. Slide the pots into the baskets, distributing them evenly for a balanced look. Voila! Your DIY wall plant shelf is now complete, exuding charm and sophistication.

Revel in the Results
Sit back and revel in the beauty of your handcrafted creation. Not only does your new wall plant shelf serve as a stunning focal point, but it also brings the outdoors inside, creating a refreshing ambiance. Plus, with faux plants, you can enjoy the greenery without worrying about watering, pruning, or sunlight—all the perks of nature with none of the upkeep!

Customization Ideas
Feeling inspired to put your own spin on this project? Here are a few ideas to personalize your DIY wall plant shelf:
- Splash of Colour: Experiment with different basket and pot colours to match your existing decor or add a pop of contrast to this simple plant shelf. Painted wooden crates with terra cotta pots would be lovely, too!
- Mix and Match: Combine various faux plants for a dynamic display. Mix in some ivy, small succulents, ferns, or even flowers for added visual interest.
- Get Real: Rather than faux plants, you could add real houseplants to these basket shelves. Pothos would be perfect! Simply ensure that you have enough light for the type of live plants you want to use. Taller plants like a snake plant could look cute on top of a basket – just make sure that the pot is secured somehow.
- Accessorize: Get creative with additional decor elements such as fairy lights, macrame accents, or even lace trim to infuse even more personality into your design.
- More is More: Rather than two baskets, when not fill an entire wall with them? I’d love to create a whole wall of DIY plant shelves from baskets one day. It would be fun to do along a fence outside, too!

Creating a DIY wall plant shelf from IKEA baskets is not only a budget-friendly project but also a rewarding one. With just a few simple steps, I transformed a blank wall into a beautiful plant display with these new plant shelves that add so much texture to my primary bedroom. Let me know if you want to give this simple DIY a try in the comments below. Happy crafting!
Want More IKEA DIY Ideas?
Click here for all of my DIY & decorating ideas using budget-friendly IKEA finds!
Oh my gosh, I love this! Thanks for sharing.