Sew a Scalloped Bunting Banner
This post may contain affiliate links · This blog generates income via ads
We’re in the midst of building our new home, and I’m attempting to work on the girls’ room decor now so that it will be ready to pop in their new rooms when our house is done. I’m slowly working on it, so depending on how quickly our house finishing goes (which, in my estimate, won’t be as quick as I’d like it to be), I should be successful!
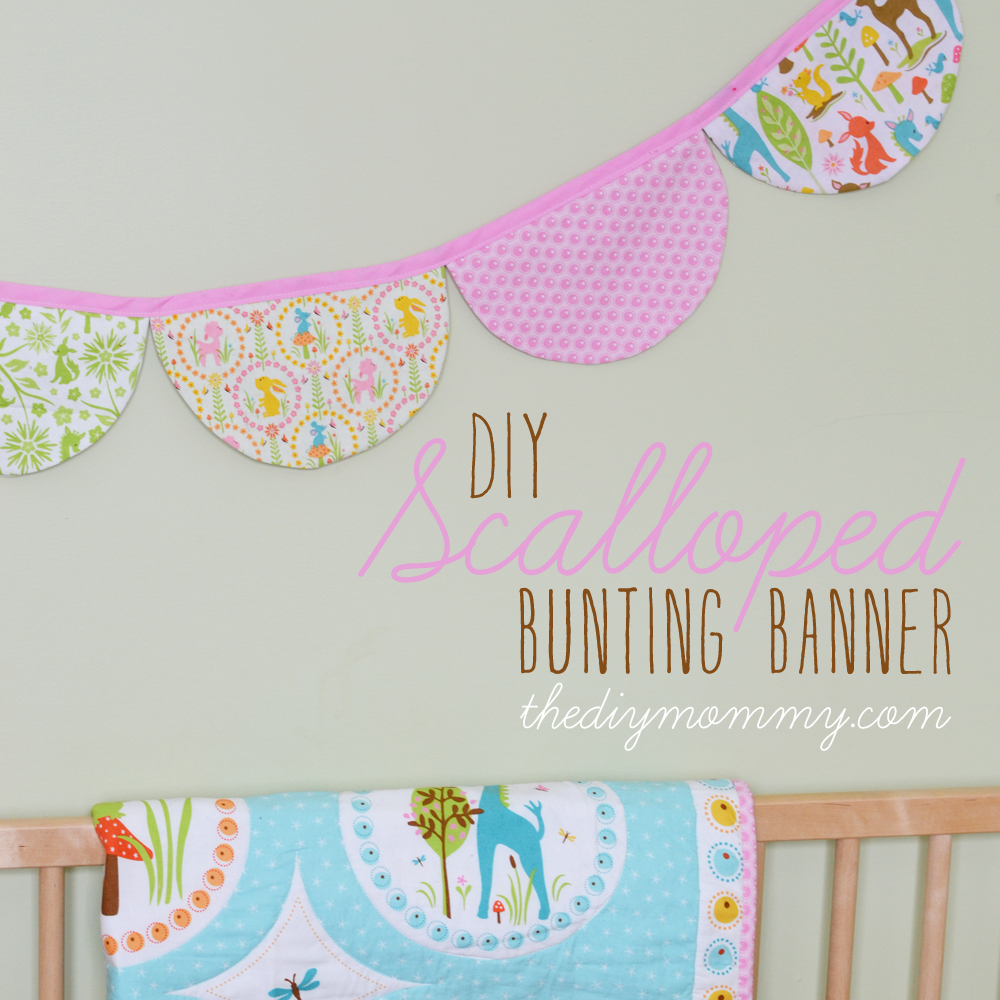
For Baby A’s room, I’m basing her decor colour scheme and style around this quilt I made for her late last year. Her room will be full of retro woodland animals, soft hues of mint, turquoise, coral, pink and yellow, and I think I’ll top it all off with a sweet chandelier. I thought a cute addition to Baby A’s nursery decor would be a retro-styled bunting banner to hang above her crib (or over a reading corner – we’ll see) and I managed to sew one this week out of fabrics that match her quilt.
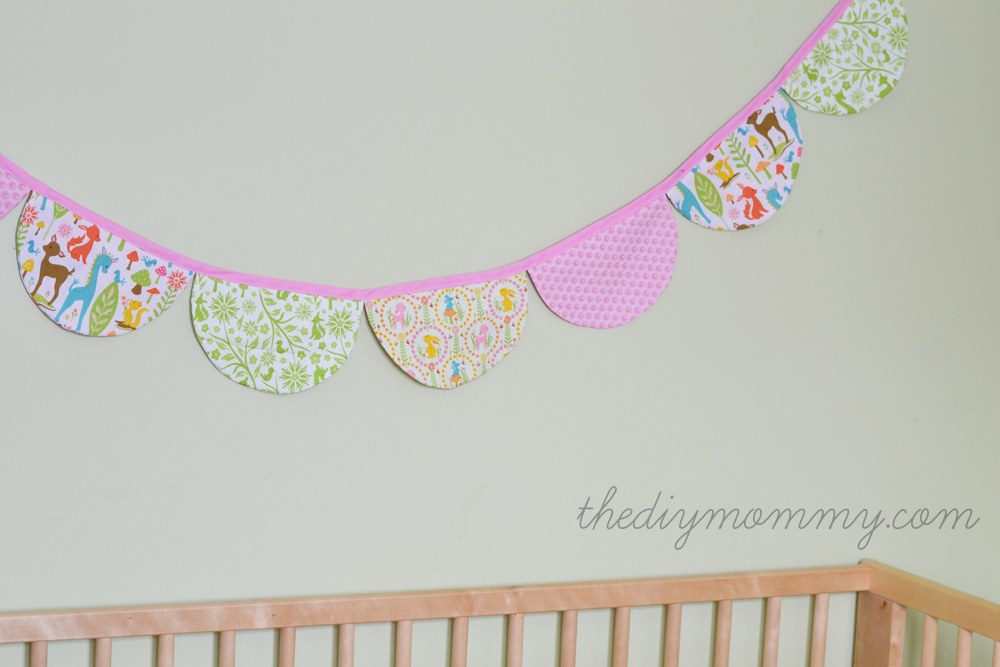
This DIY scalloped bunting banner is very easy and inexpensive to make and it would be a great addition to any nursery decor. It would also be cute in a playroom, as a unique photo prop or as a party decoration.
Materials (for a banner approximately 60″ long):
- 1/2 yard each of 4 different fabrics
- a roll of bias tape (or make your own from 1/4 yard of fabric)
- an ice cream pail lid
Directions:
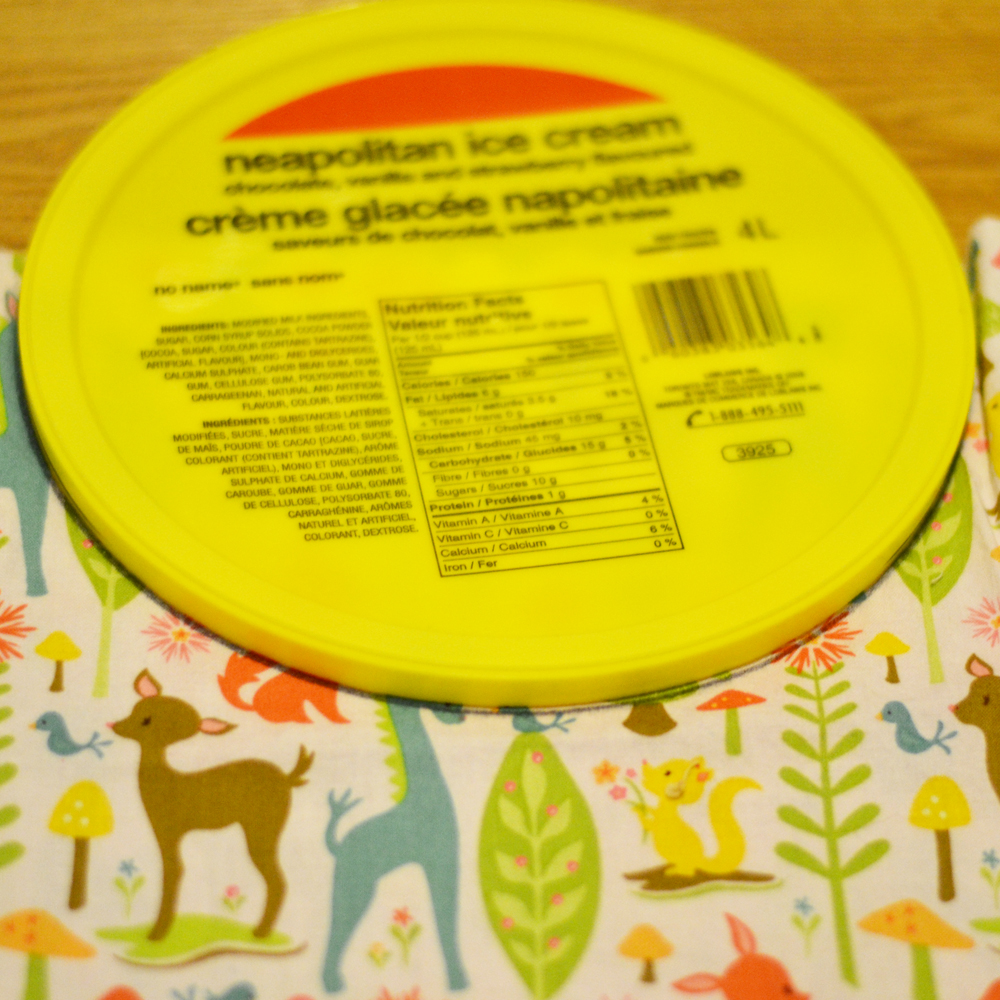
To cut out the flag pieces, fold a piece of fabric in half and lay the ice cream pail lid on it with just less than half of it off of the fabric (as pictured above). Trace around it to make your scallop shape.
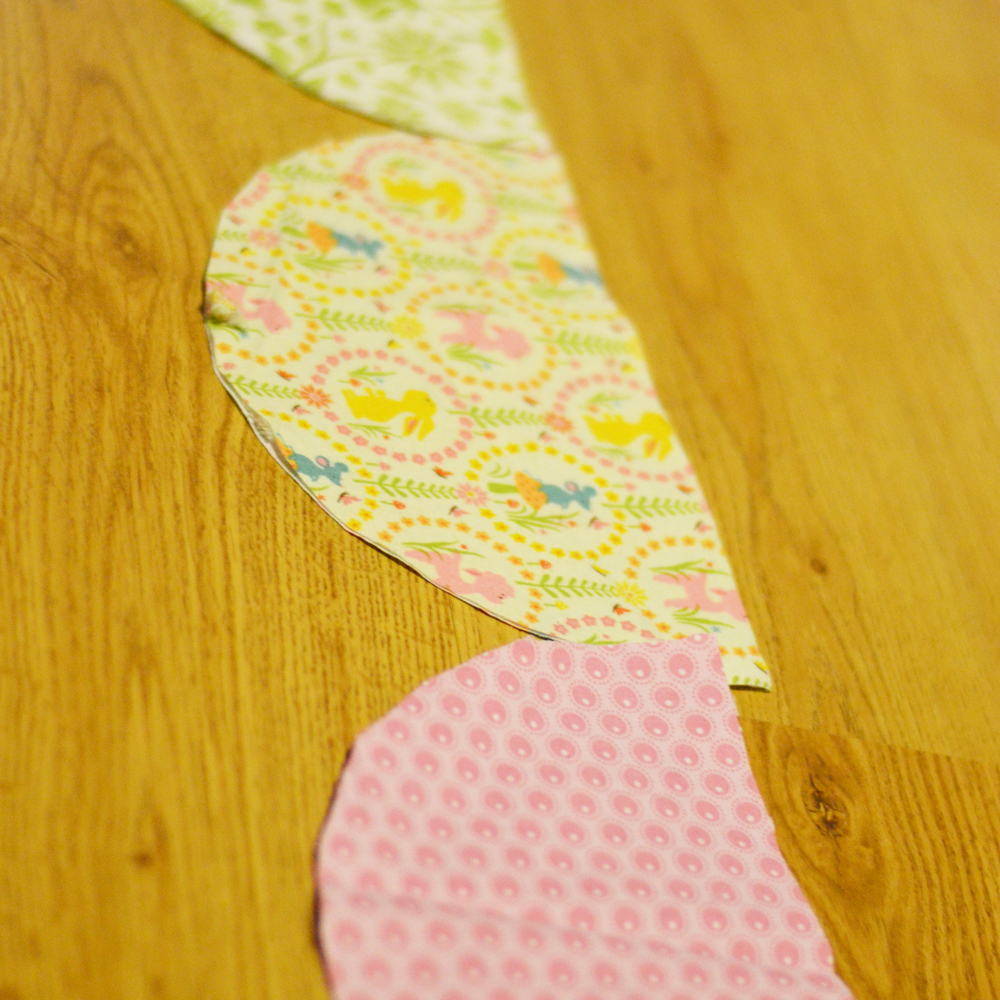
Cut this piece out and use it as a template to cut 14 more pieces out. You will cut out 4 pieces in each fabric.
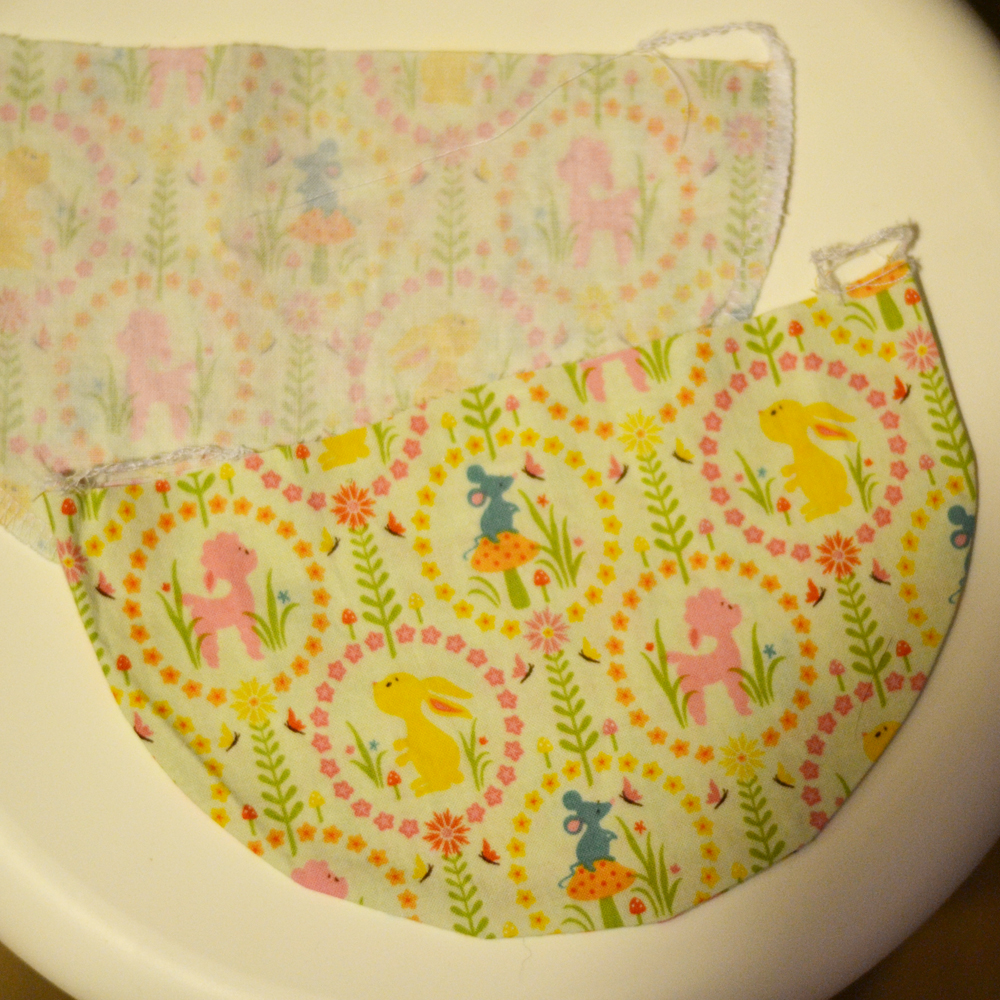
With two right sides together, sew around the curved edge of the pieces using a 1/4″ seam. I used a serger (because it’s fast), but a regular sewing machine would work just as well. Repeat with all of the pieces until you have 8 flags sewn. Turn them right side out and press them flat.
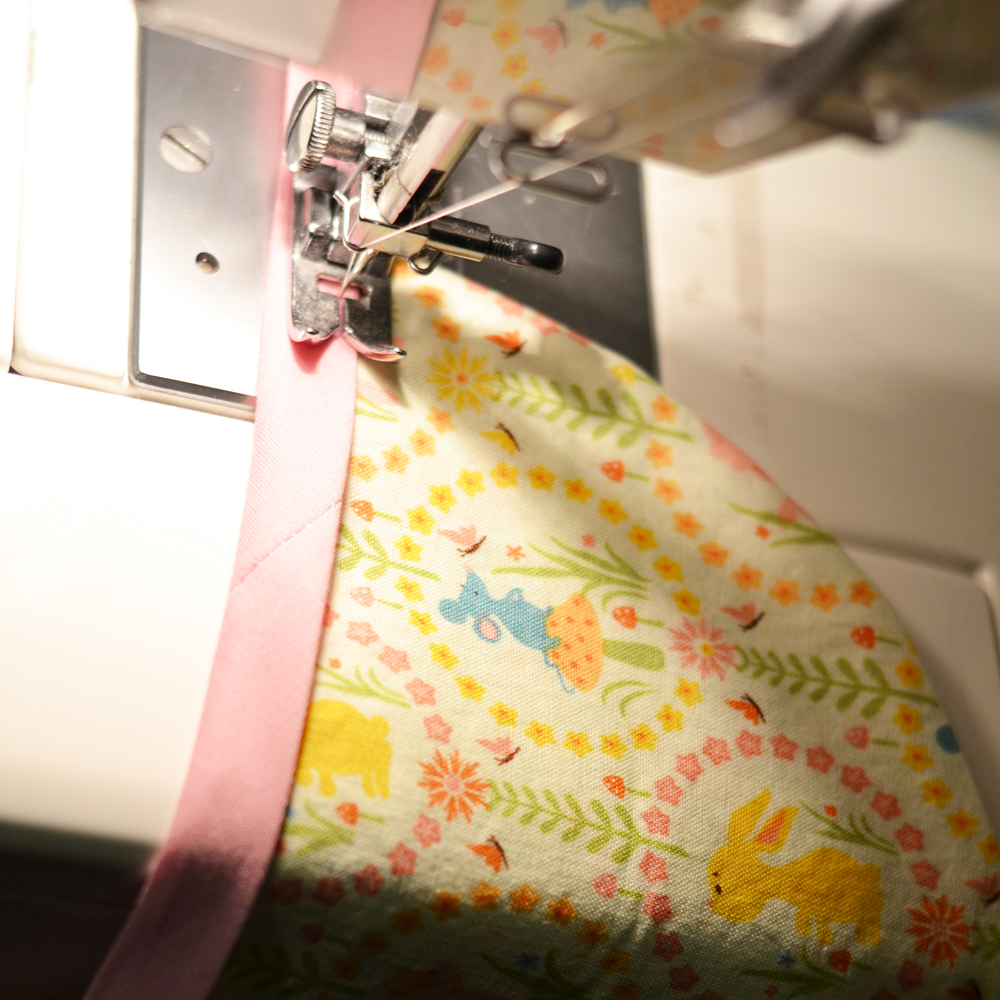
Cut a 70″ piece of bias tape, and then sew its short end and about 6″ of its long end shut (sewing about 1/4″ from the open edges). Slip your first flag into the open edges of the bias tape, and sew the tape around the raw edge of the flag. Repeat with the rest of the flags, placing them right next to each other as you sew. You could pin them in place first if you prefer!
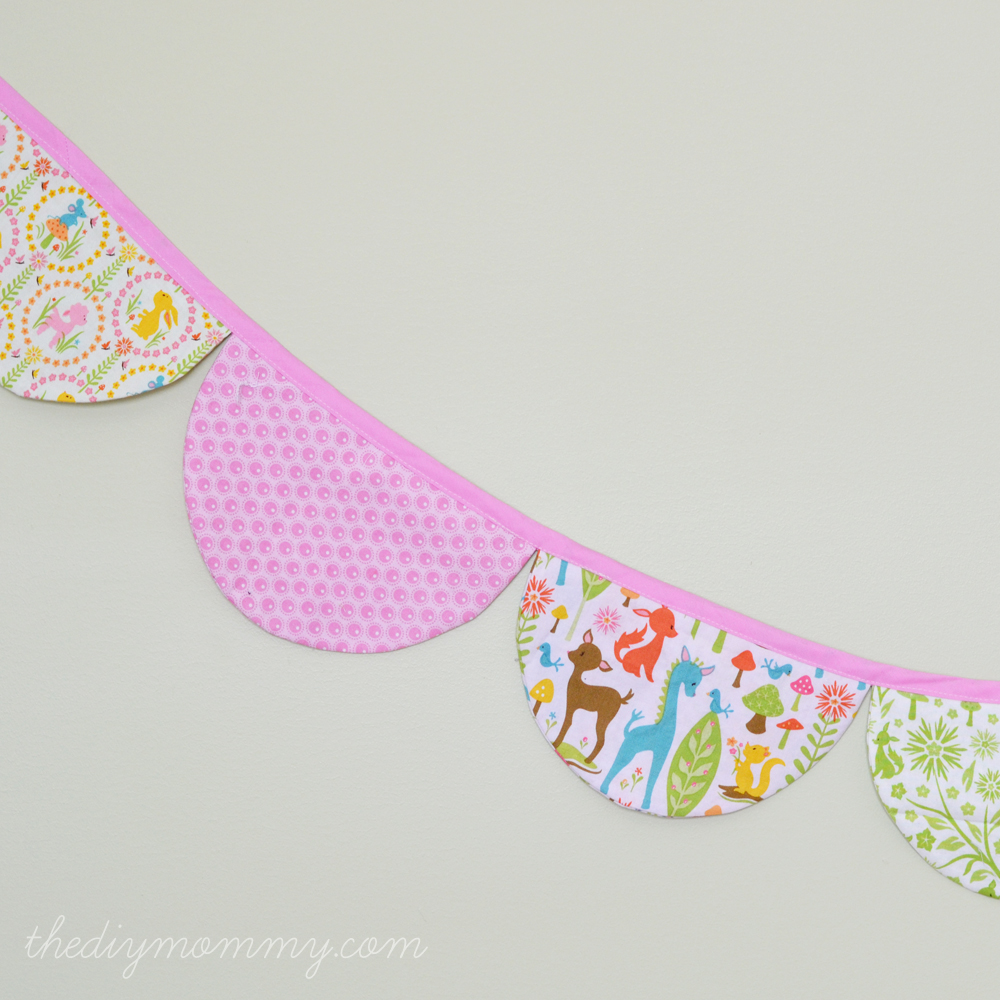
Sew the rest of the bias tape closed along the long and short end, and you’re ready to hang your adorable scalloped bunting banner!

So pretty! Thanks for sharing!