• Crafts
  • Home Decor
  • Sewing
  • Recipes
  • Mommy Fashion
  • Biz & Blogging
  • Free Printables
  • Giveaways

The DIY Mommy

  • About
    • Terms of Service
    • Privacy Policy
    • Disclosure Policy
    • Link Parties
  • Shop Our Home
  • Home Tour
  • Contact
  • Privacy & Cookie Policy

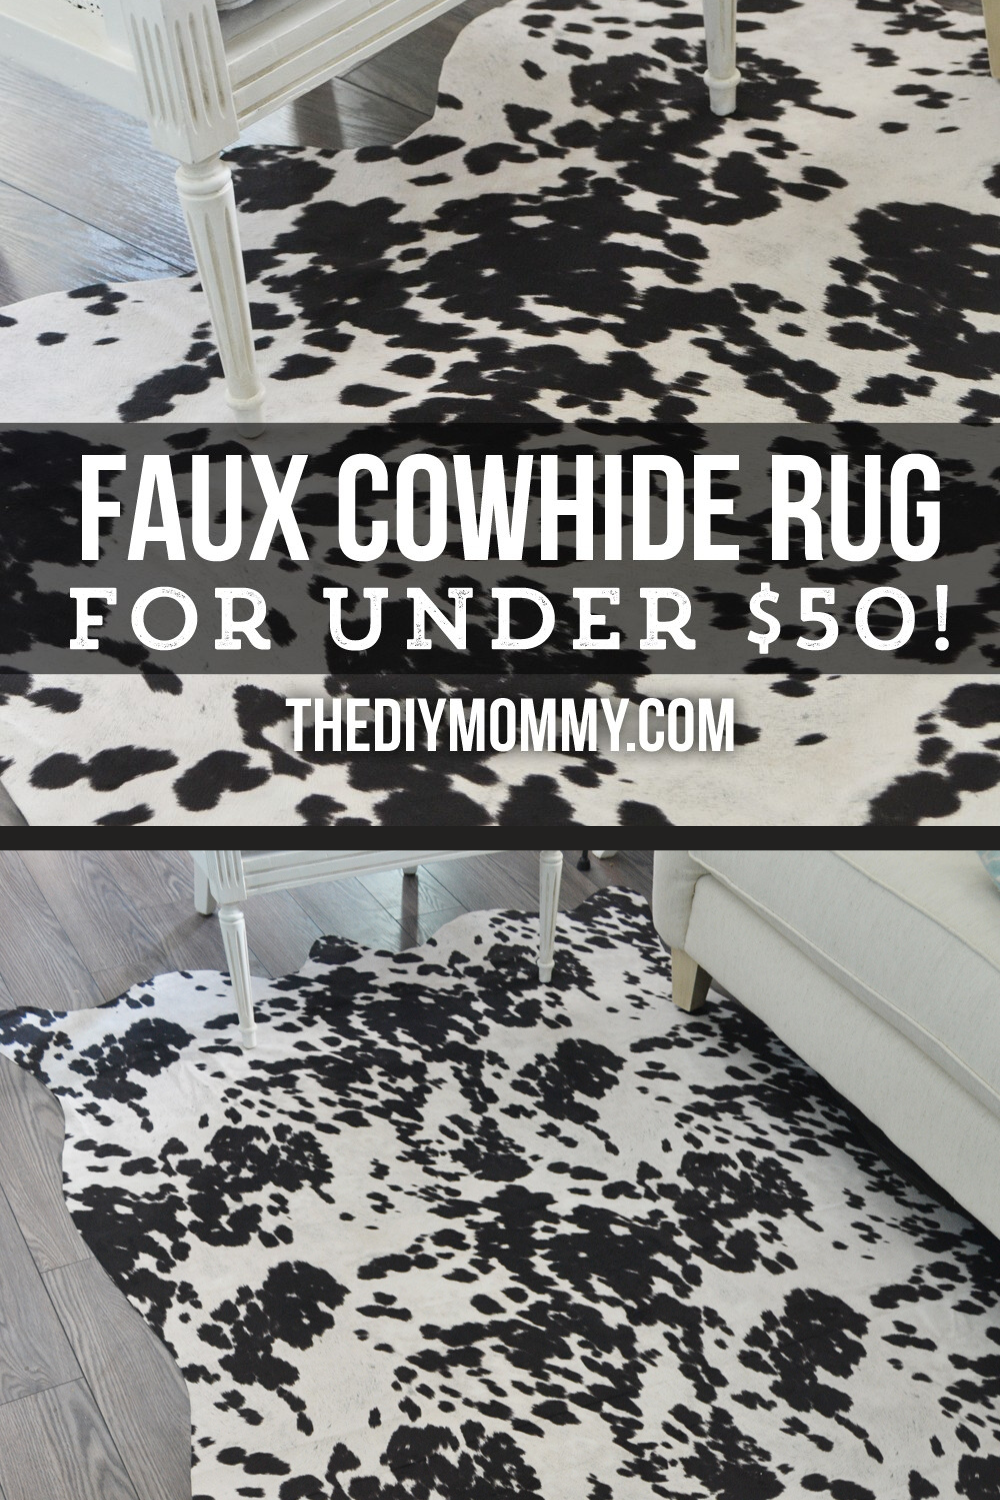
Make a Faux Cowhide Rug for Under $50

April 8, 2015 By Christina Dennis 24 Comments

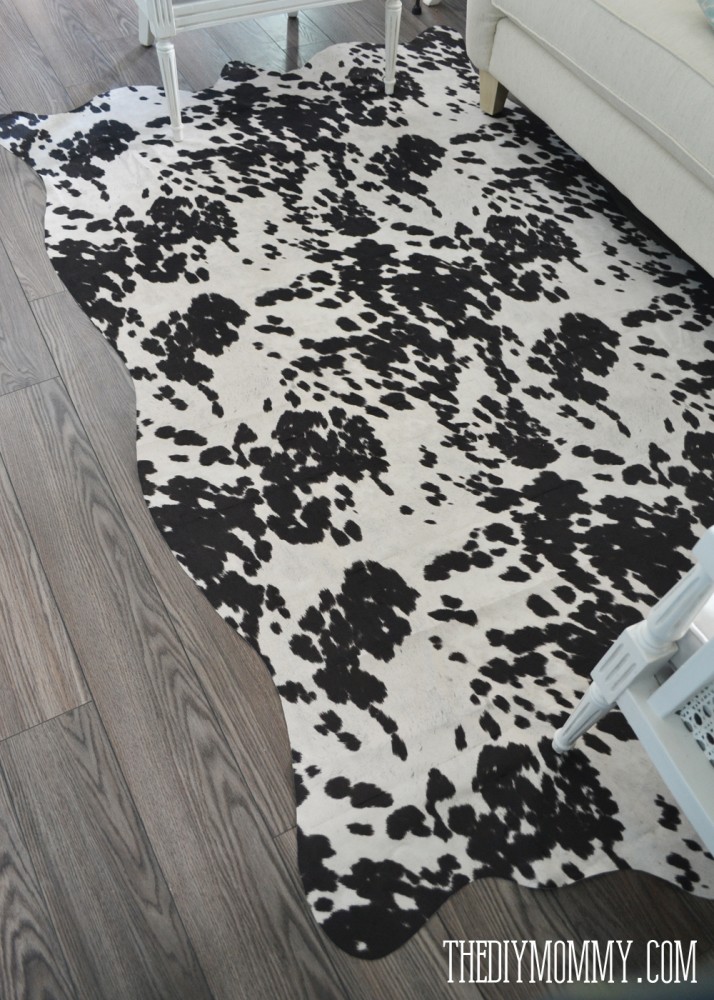
I seriously used to DESPISE cowhide rugs, but somehow they slowly knocked at my brain until I started liking them just a little bit. Then, I kept seeing them in home decor spaces that I loved, and my like for them grew into love. Now, I simply couldn’t wait to have one for our sitting room that I’m working on! I don’t know – there’s just something about throwing in a modern & unexpected element into a room that I just think is so very fun. A cowhide rug in a formal sitting room says “this room isn’t as serious as it looks“!

As much as I would have loved to run to the store and buy a real cowhide rug, our “dual-self-employed income” doesn’t justify that right now. I’ve got to be super thrifty and creative these days to get the looks that I’m dreaming about enter our current reality. When I saw some realistic looking cow fabric online and read some reviews on it, I had an idea to make a fake cowhide rug just for kicks and see how it turned out. I did just that, and I totally love the result! This fabric is fantastic, and the rug looks really cute. Let me share with you how I made a faux cowhide rug for our sitting room for less than 50 dollars and in under an hour.

DIY faux cowhide rug for under $50!

Materials:

  • 2 1/2 yards “Udder Madness” fabric (I purchased the black version from Fabric.com. They don’t have that colour in stock right now, but you can also purchase it from Amazon right here.)
  • fabric scissors
  • a lighter
  • a photo of a cowhide rug with a shape you like printed on a piece of letter sized paper
  • a pencil

DIY faux cowhide rug for under $50!

Directions:

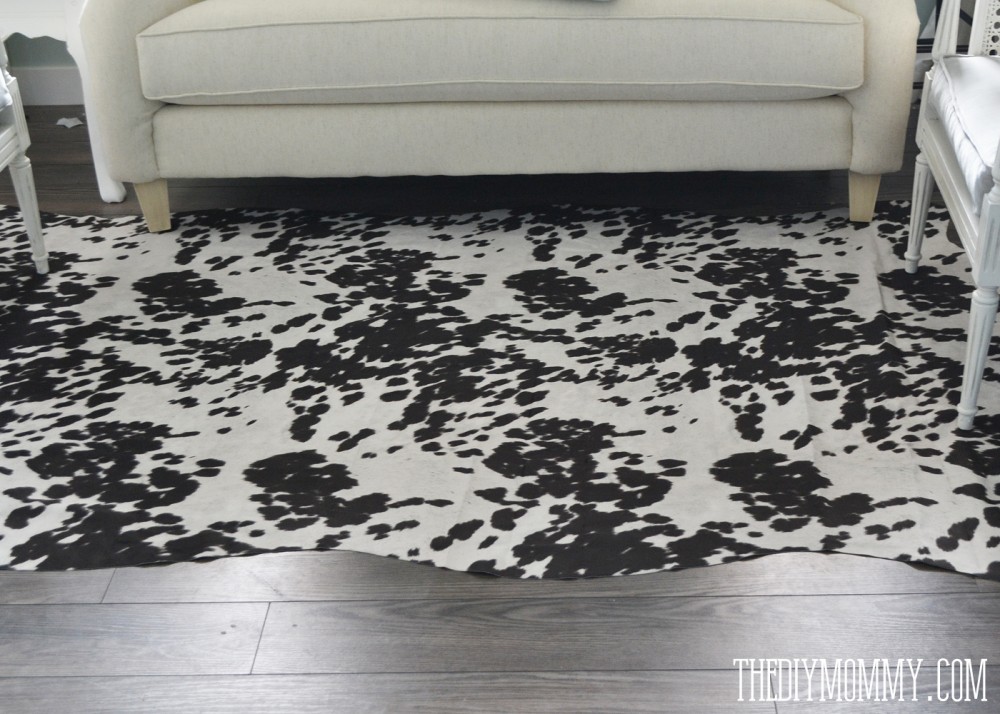
This fabric is a heavy-weight upholstery fabric that has a velvety texture to it. It also has some ridging stamped in it, which makes it look and feel quite realistic. 2 1/2 yards of this fabric makes a rug that’s about 5 x 7 feet in size. The above photo is the 2 1/2 yards of fabric in its original state.

DIY faux cowhide rug for under $50!

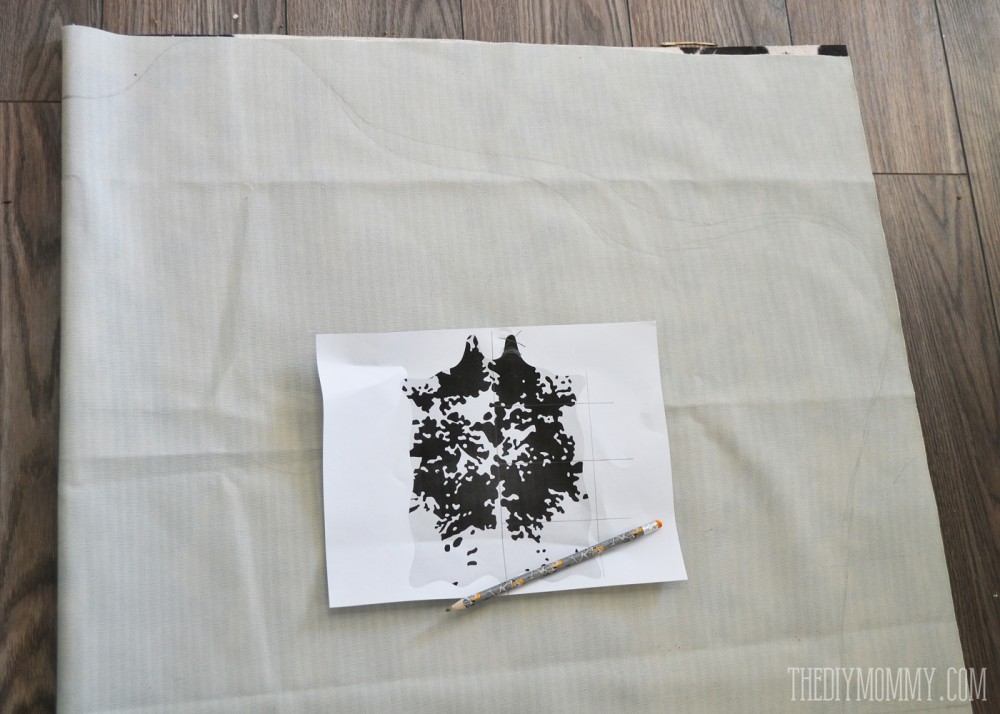
Draw a grid on one half of your printed cowhide photo as shown above. I just divided the half of my photo into quarters, but you could make your grid smaller if you want your faux cowhide to be a more accurate shape.

DIY faux cowhide rug for under $50!

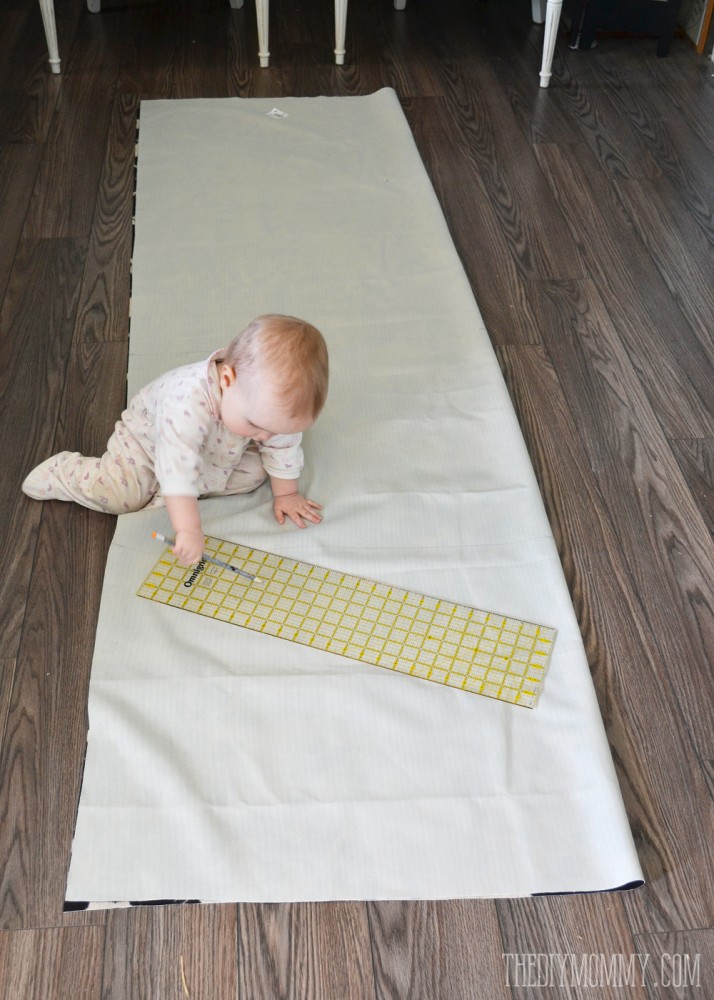
Turn your fabric in half vertically, right sides together, and divide it up the same as you’ve divided the paper. Draw grid lines. In my case, I drew a line at the halfway mark, and then two more at the quarter marks.

Baby B was a good little helper and drew some marks on the fabric for me.

DIY faux cowhide rug for under $50!

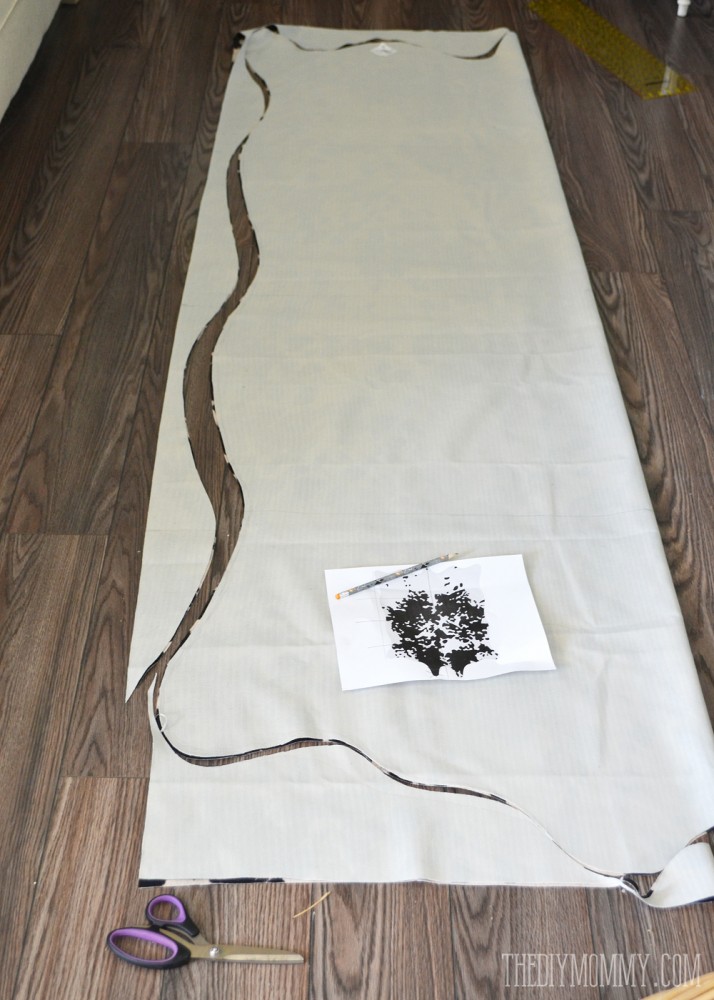
Using your photo + gridlines as a guide, draw the cowhide shape on the wrong side of your fabric. Then, cut along your marked line with sharp fabric scissors, cutting through both layers.

DIY faux cowhide rug for under $50!

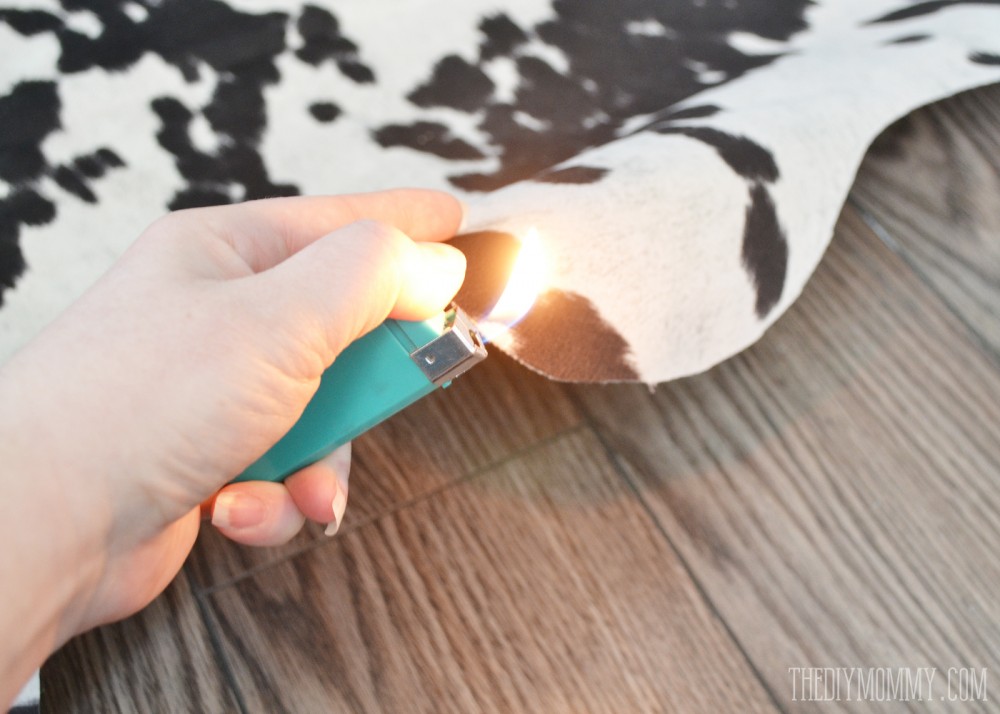
Open up the fabric, and then to finish the raw edges you can sear them with a lighter. This was my mom’s idea, and it worked just perfectly! (I used this technique to sear the edges on my fabric flowers.)

In a safe place with good ventilation, hold a lit lighter close to the edge of the fabric and move it around the perimeter of your rug to seal the edges so that they don’t fray. The edges will melt slightly and harden a little. Please be careful as you do this!

DIY faux cowhide rug for under $50!

Now, you’re already done! Can you believe it?!

DIY faux cowhide rug for under $50!

You could throw an underlay beneath the rug to give it some cushion, or an anti-slip mat, but I’ve left mine as-is right now and it works well.

DIY faux cowhide rug for under $50!

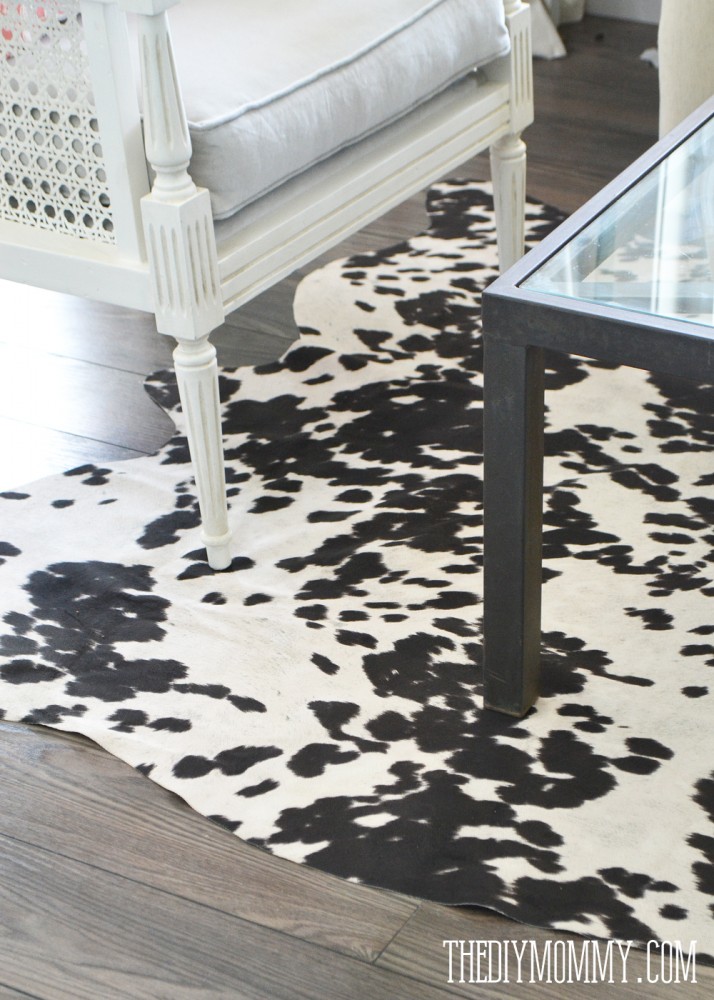
You can also see a sneak peek here of some vintage chairs that my mom reupholstered for me. I can’t wait to share them with you soon!

Disclaimer: This post contains affiliate links.

Filed Under: DIY Crafts, DIY Home Decor Tagged With: cheap, easy, sitting room

Never miss a post from The DIY Mommy again!

Subscribe to our email list to get your free e-book and weekly DIY inspiration! SUBSCRIBE

About Christina

Christina is a crafty mommy to three little girls, a wife to one handsome hubby, and they all live in a home they built themselves in rural Alberta, Canada. Read More…

« A Vintage Inspired Red & Aqua Laundry Room (+ Video Tour!)
Whole Wheat Biscuits + How I Substitute Whole Wheat Flour for White Flour »

Comments

  1. Rebecca says

    April 8, 2015 at 8:06 pm

    Love it!
    Such a great idea. It looks great and it’s washable!
    Double Love!

    Reply
    • Rosie Morgan says

      July 10, 2016 at 10:56 am

      Just signed up, I love everything I see, and this will get me enthused enough to get back to sewing/crafting/painting etc. I am so young at heart but now a senior. So happy I found you!!
      Rosie Morgan, Nixburg, Alabama; formerly from Great Britain. Please keep my e-mail address sacred, I get so much junk already. Thanks so much.

      Reply
  2. Gilly @ Colour Saturated Life says

    April 12, 2015 at 12:43 am

    This is such a great idea! Looks so realistic on the photos!
    Gilly @ Colour Saturated Life recently posted..Furniture with PersonalityMy Profile

    Reply
    • Christina Dennis says

      April 15, 2015 at 9:29 pm

      Thanks, Gilly! I’m loving it so far. The girls think it’s fun too!

      Reply
      • Rhonda says

        January 29, 2018 at 8:38 am

        What color is on yur wall? That is the color I am looking for. Thanks

        Reply
        • Lindsay - The DIY Mommy says

          January 30, 2018 at 7:15 am

          Hello Rhonda,
          I have attached below Christina’s paint colours of her house. 😀
          http://thediymommy.com/choosing-the-paint-how-to-pick-paint-colours-for-an-entire-house-our-diy-house/

          Reply
  3. Sara says

    April 21, 2015 at 7:15 pm

    I can attest to the fact that this rug looks good in person, too, not just in the photos! It really is very realistic, and I never would’ve guessed that it wasn’t a genuine cow hide if I hadn’t already known.

    Great job, Christina!
    Sara recently posted..Surfer Girl/Luau Birthday PartyMy Profile

    Reply
  4. Denise says

    June 24, 2015 at 8:32 am

    This is brilliant! Love it!

    Reply
  5. Susan says

    June 26, 2015 at 6:26 am

    This is SO smart! I love. The way it looks–I never could have thought up something this clever and thrifty. Great job!
    I also love your logo.

    Reply
  6. Eileen Wenger says

    June 26, 2015 at 7:30 am

    This is awesome! Definitely doing this for my living room, thank you so much for posting this!!! 🙂

    Reply
  7. Lynne Evans says

    July 2, 2015 at 11:28 am

    Lady, you are a stinking genius! Thank you for sharing!

    Reply
  8. bryan flake says

    July 28, 2015 at 4:21 pm

    That is a really gorgeous looking cowhide rug. My dad used to have one of those when I was growing up. His was from a brownish red Holstein cow. I’d love to find another one just like his.

    Reply
  9. Pamela Thielen says

    May 20, 2016 at 5:08 pm

    That is a fabulous idea. Thanks so much for sharing. I just found your blog. I am looking forward to reading more from you.

    Reply
  10. Theresa says

    June 10, 2016 at 9:55 pm

    Looks great but I’m confused about what you used to draw the spots on the fabric.

    Reply
    • Christina Dennis says

      June 13, 2016 at 9:00 am

      The fabric already has spots on it.

      Reply
  11. Lindsay says

    December 3, 2016 at 4:24 pm

    Omg! So glad I found this. I was cruising fabric.com and saw this same fabric and wondered if there was anyone who had already tried it as a rug!! Question — how does it hold up? It looks like it is in a well trafficked area what with the living room furniture…my husband is skeptical of the durability, and I really want to make it so I gotta know haha Thank you!

    Reply
    • Lindsay - The DIY Mommy says

      December 5, 2016 at 12:24 pm

      Hello Lindsay, Christina’s faux cow rug has held up very well. It looks good as new! However, she would recommend putting a non slip pad underneath to prevent slipping.
      Have a great rest of your day!

      Reply
  12. Nikita winkler says

    January 5, 2017 at 1:02 pm

    Did this come as one large piece or did you have to see them together after buying multiple yards?

    Reply
    • Lindsay - The DIY Mommy says

      January 5, 2017 at 1:17 pm

      Hello Nikita,
      Christina purchased the 2 1/2 yards of fabric as one piece 🙂

      Reply

Trackbacks

  1. 7 Budget Ways to Make Your Living Room Look Expensive | Ira Colley's Blog says:
    August 26, 2015 at 6:25 am

    […] Project via Christina @The DIY Mommy […]

    Reply
  2. 13 Awesome DIY Rugs You Could Be Making Right Now | Industry Standard Design says:
    May 20, 2016 at 4:11 am

    […] Tutorial: thediymommy.com […]

    Reply
  3. DIY Black & White Home Decor Projects | Decorating Your Small Space says:
    February 2, 2017 at 1:56 pm

    […] the pretty home decor catalogs? Well ‘The DIY Mommy’ has figured out a way to make a DIY faux cowhide rug for less than $50! This could literally take you an hour to make, and no sewing […]

    Reply
  4. 20 Cute DIY Rugs to Make for Your Home - Sparkles of Sunshine says:
    April 20, 2017 at 10:01 pm

    […] Faux Cowhide Rug for Under $50 via The DIY Mommy […]

    Reply
  5. Nothing Says Contrast Like Black & White Decor - I Love Doing Projects says:
    July 3, 2017 at 11:21 am

    […] see in all the pretty home decor catalogs? Well ‘The DIY Mommy’ has figured out a way to make a DIY faux cowhide rug for less than $50! This could literally take you an hour to make, and no sewing […]

    Reply

Leave a Reply Cancel reply

Your email address will not be published. Required fields are marked *

CommentLuv badgeShow more posts

This site uses Akismet to reduce spam. Learn how your comment data is processed.

Hello, there!

My name is Christina and I'm a mom of 3 girls, designer, crafter & country dweller. 🌾 I'm blogging from our DIY house on the prairies. Read More…

  • Bloglovin
  • Facebook
  • Instagram
  • Pinterest
  • RSS
  • Twitter
  • YouTube

Free E-Book!

Subscribe to our email list to get your free e-book and weekly DIY inspiration!

SUBSCRIBE

Categories

  • DIY Baby Clothes & Accessories
  • DIY Pregnancy
  • DIY Kids Activities
  • DIY Parties & Holidays
  • DIY Home Decor
  • DIY Fashion & Mom Life
  • DIY Family Food
  • Free Printables
  • Reviews & Giveaways
  • Mommy Health & Beauty
  • Randoms
  • Technology
  • Tip Tuesday Videos
  • DIY Garden

Trending Now

  • How to make a beautiful arm knit blanket in less than an hour! How to Make an Arm Knit Blanket in Less Than an Hour (Video)
  • How to make an Anthropologie inspired macrame table runner (video tutorial) Make a Macrame Table Runner (Video Tutorial)
  • How to sew super absorbent DIY nursing pads that actually work! There's a special fabric inner layer. Sew Super Absorbent Nursing Pads
  • 102 Blog & Video Topic Ideas for DIY & LIfestyle Creators 102 Monthly Blog & Video Topic Ideas for 2019
  • Modern French Country Master Bedroom Mood Board Design Mood Board: A Modern French Country Master Bedroom (My One Room Challenge Project)
  • Easy DIY Felt Succulents Make Faux Succulents out of Felt
  • Valentine's Day Waffle Bar - it's such a sweet idea! Make heart shaped waffles and serve with a variety of sweet and savory toppings. Valentine’s Day DIY Waffle Bar

Archives

Home Tour

Videos

1/98
Next»
Subscribe to My Channel

Latest Insta

  • Happy Family Day to my fellow mamas celebrating! 📷 @hobbs_photoandfilm .
.
.
#thediymommy #momlife #cdnblogsquad #yegmom #yegblogger #countryliving #momentsinmotherhood #itsthelittlethings #abmlifeisbeautiful #hobbsphotography #momofgirls

Follow Me!

My Videos

1/195
Next»

Subscribe!

Subscribe to our email list to get your free e-book and weekly DIY inspiration!

SUBSCRIBE

"The DIY Mommy" is a registered trademark belonging to Christina Dennis.

Copyright © 2019 · The DIY Mommy

Disclaimer: While every effort has been made to ensure the accuracy & effectiveness of the information displayed on this website, The DIY Mommy makes no guarantee as to the procedures & information contained here. The publisher will not be liable for direct, indirect, incidental, or consequential damages in connection with or arising from the use of the information displayed on thediymommy.com. This website is not intented to substitute the advice of a professional. Note: Posts may contain affiliate links or sponsored content. For more of our disclosure policy, click here.

We use cookies to ensure that we give you the best experience on our website. If you continue to use this site we will assume that you are happy with it.OkRead more