How to Make DIY Slipcovers for Chairs
This post may contain affiliate links · This blog generates income via ads
Making DIY slipcovers for your arm chairs is a wonderful way to completely change their look without buying a whole new set of chairs. Learn how to create your own custom slipcover pattern, cut your fabric pieces, and sew your own beautiful chair slipcovers with these step by step instructions.

Disclosure: This post is sponsored by The Brick. As always, all of the opinions here are my own.
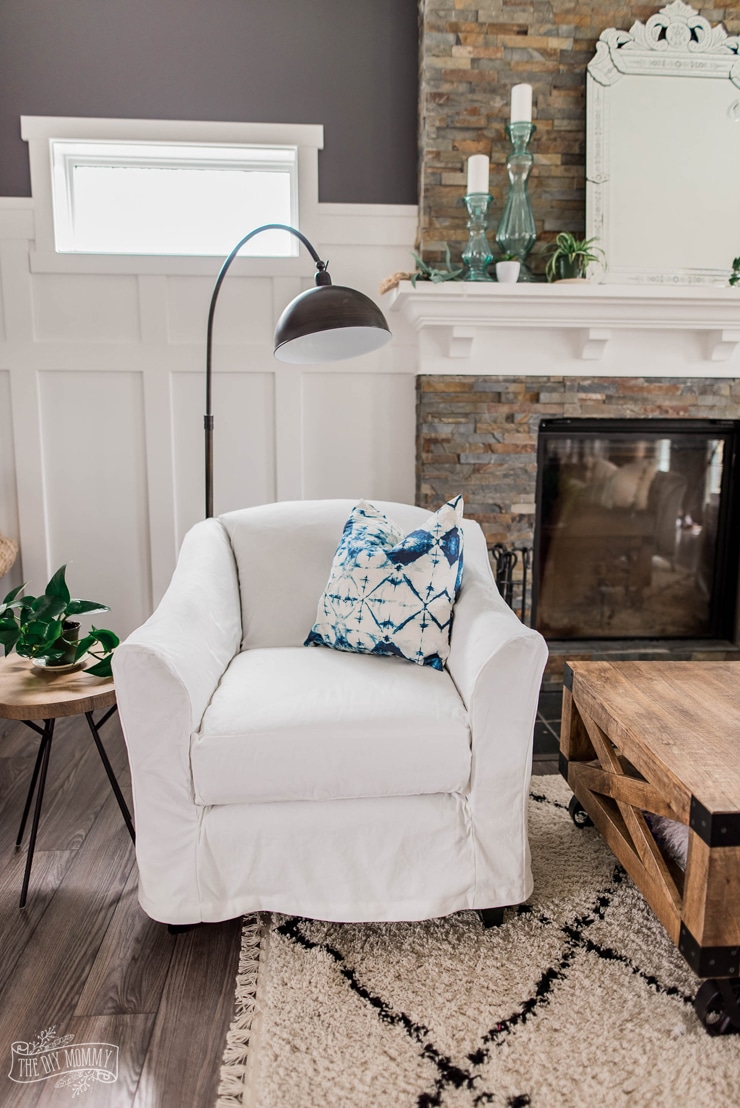
If you own a chair or a pair of chairs that are good quality and that you love, sewing slipcovers for them is a wonderful way to give them a new look on a budget. I adore my pair of Wynn Accent Chairs from The Brick because they have gorgeous, classic lines and I think their quality is amazing! They’re firm but comfortable with their high-density foam cushions, and the chairs are nice and deep so that you can sink back and relax.
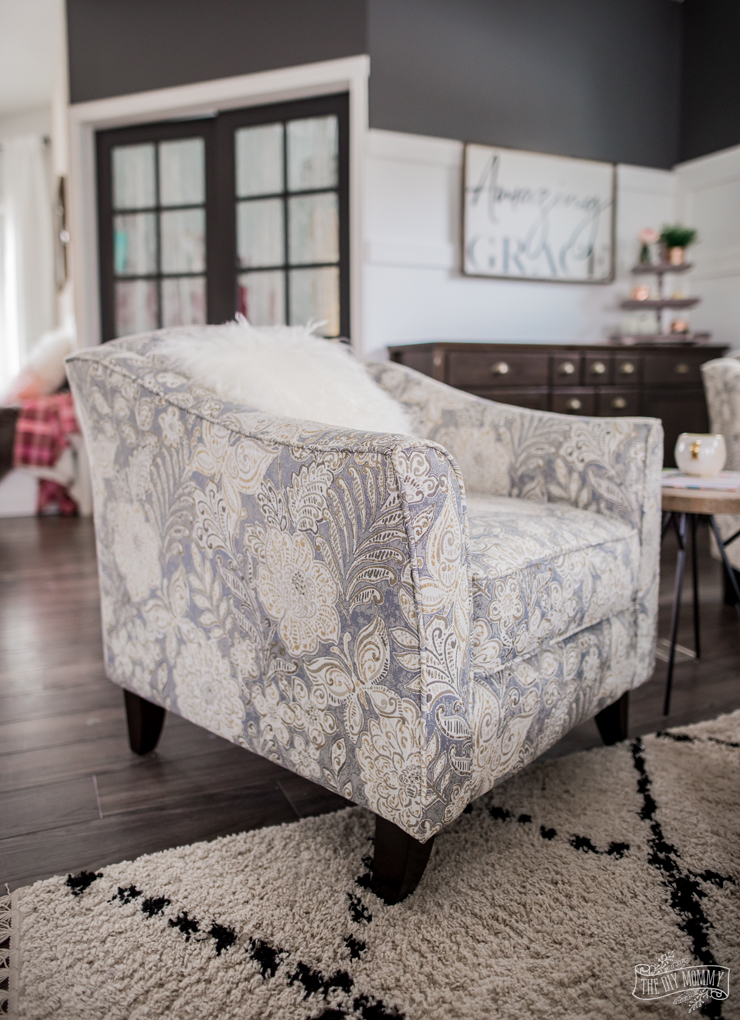
While I love this beautiful, neutral paisley print the chairs come in, I thought they’d be the perfect candidates to sew slipcovers for. This pattern limits the other patterns I can add to our living room, and I’ve always enjoyed the look of white slipcovers for the summer months. It’s so fresh and airy! So, I enlisted my mom to help me get started on some DIY slipcovers for these gorgeous chairs. She’s sewn dozens of slipcovers over the years, and she helped me get started so that I could make these and share them here with you today.
Ready to get sewing? Here’s how to make your own DIY slipcovers.
Watch my YouTube video below for the step-by-step instructions, or follow the written directions below:
Step 1: Choose & Pre-Wash the Fabric
- You can use all sorts of fabric types for slipcovers, but picking something that’s washable is a great idea. You might also want to find an old sheet or some inexpensive muslin to create your initial pattern if you don’t want to gamble with your actual slipcover fabric when you create your pattern.
- Make sure to pre-wash your fabric if you’re planning to wash the final slipcover. My mom recommends washing it at the hottest setting so that you shrink it thoroughly first before creating your slipcover. I chose a white cotton decor fabric for my slipcovers.
Step 2: Create the Slipcover Pattern
- Remove the chair cushion. We’ll get to that later.
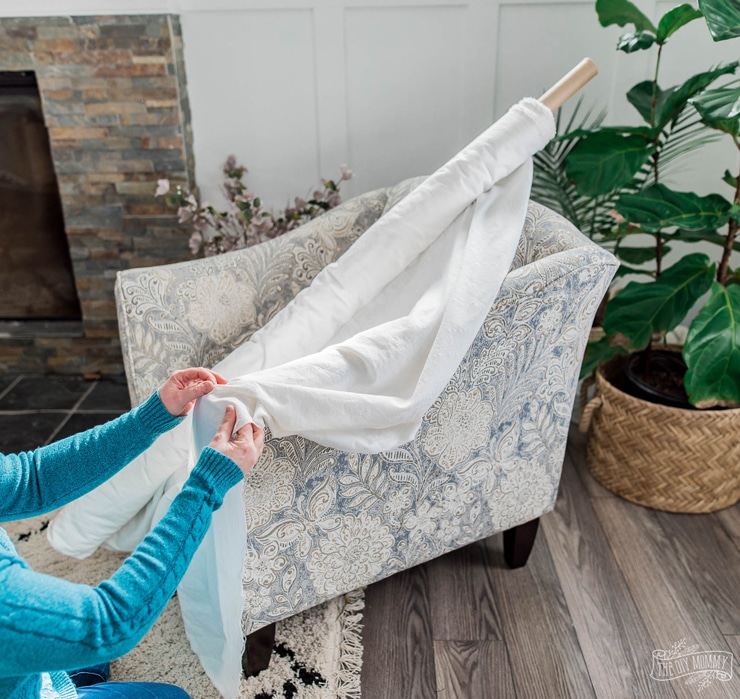
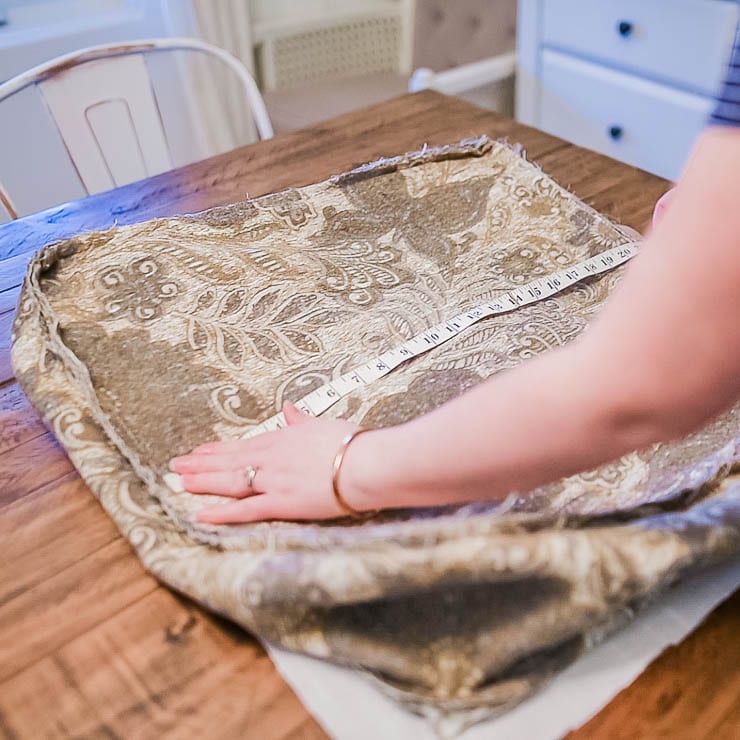
- Use your old sheet or muslin fabric (or your actual slipcover fabric if you’re feeling bold!) and start laying it over sections of your chair – the arms, the back, the seat etc.
- Measure and cut rectangles that are a few inches larger than each piece. It’s always better to cut the rough pieces out larger – you can make them smaller later, but you can’t make smaller pieces larger!
- NOTE: You may have to divide the back piece in half and add a zipper or ties in order for the slipcover to fit onto your chair. In my case, I made sure my slipcover was wide enough to slip over the entire chair without a closure.
- For my chairs, we cut pieces that were large enough to graze the floor so that I’d have flexibility with the hem length of the slipcovers.
- NOTE: Add some extra length to your fabric where your chair has deep crevices. My Mom recommends having your fabric at least 2 inches longer at these points so that your finished slipcover can be tucked deep into these crevices to create a more fitted look in the end.
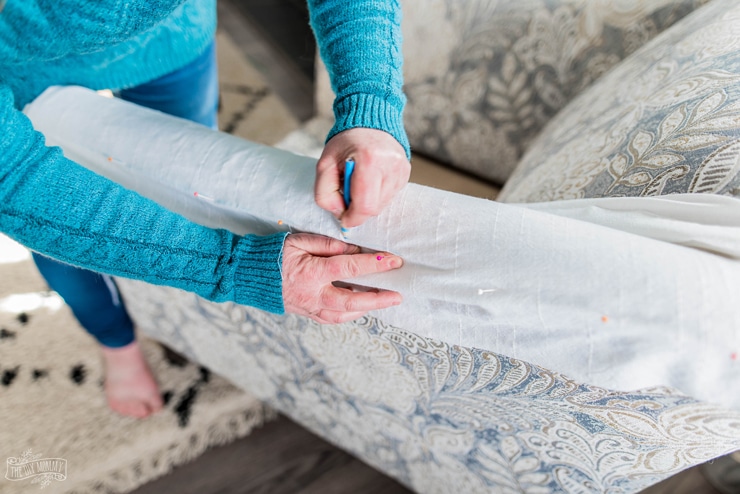
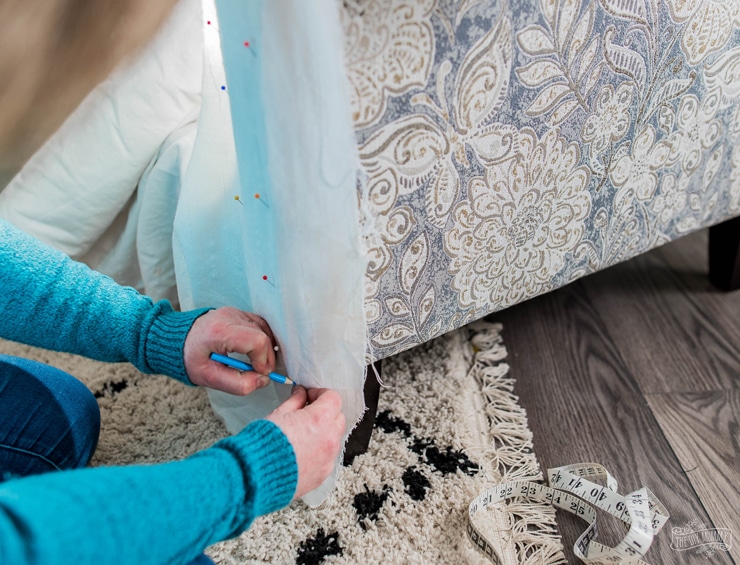
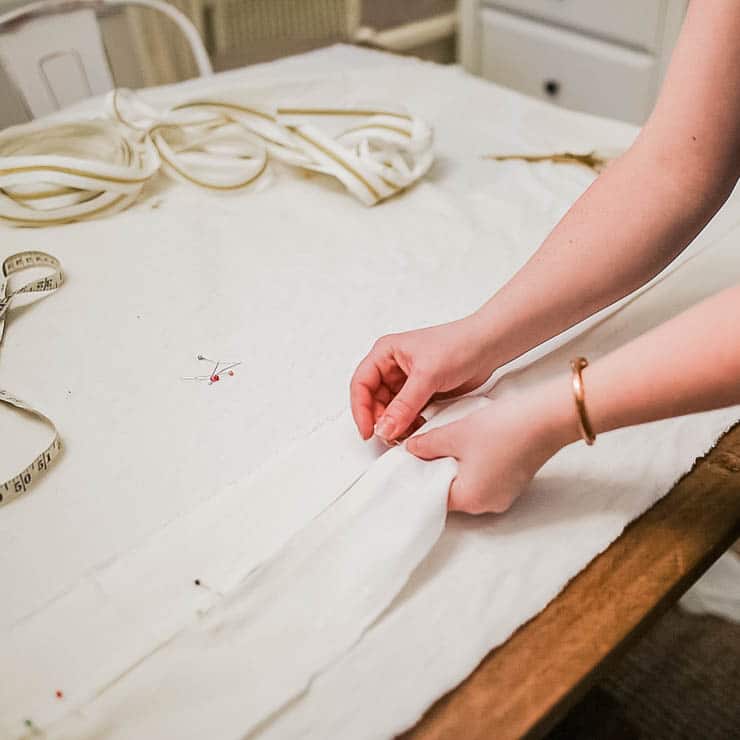
- Next, put each fabric piece in place one at a time, pin it to the corners of your chair with stick pins and mark the seams with a washable pencil. This will help you create a pattern piece that matches the curves of your chair perfectly.

- Now it’s time to cut your fabric pieces! Before you cut, make sure to add a 3/4″ seam allowance all the way around the pieces that you’ve traced. You can use a 1/2″ seam allowance to sew your slipcover, but this extra 1/4″ will help the slipcover fit nicely over your chair. Don’t forget that your chair is symmetrical, so you can cut out one set of arm pieces and then mirror them and use them as patterns for the other arm pieces.
- NOTE: If you’re using a cheap sheet or muslin to create your slipcover pattern, now it’s time to use it to cut your good fabric! If you’ve been working directly with your finished fabric, STOP and trace all of your pieces onto paper before you sew your slipcover. You’ll be so happy you made a copy of your pattern if and when you want to sew new slipcovers for your favourite chairs in the future!
Step 3: Sew the Slipcover
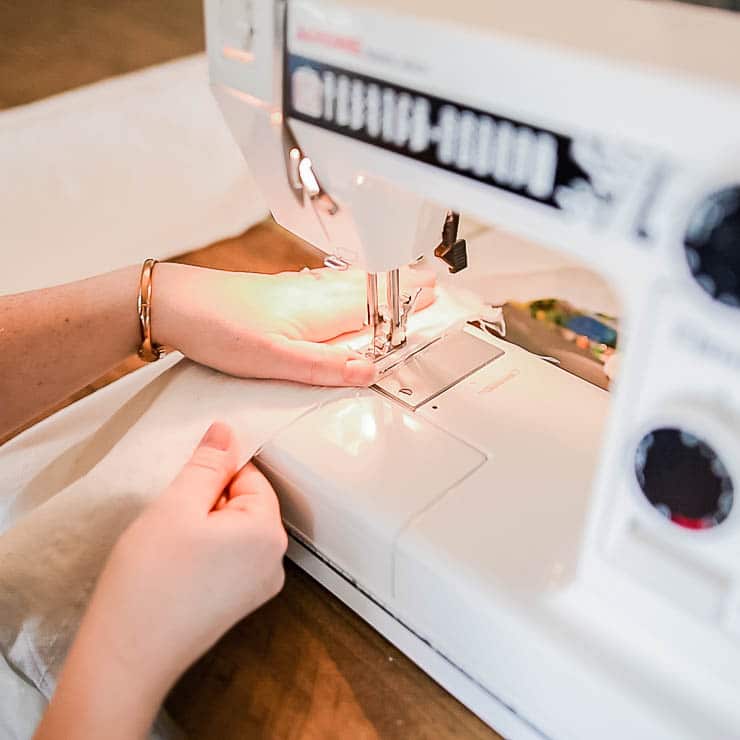
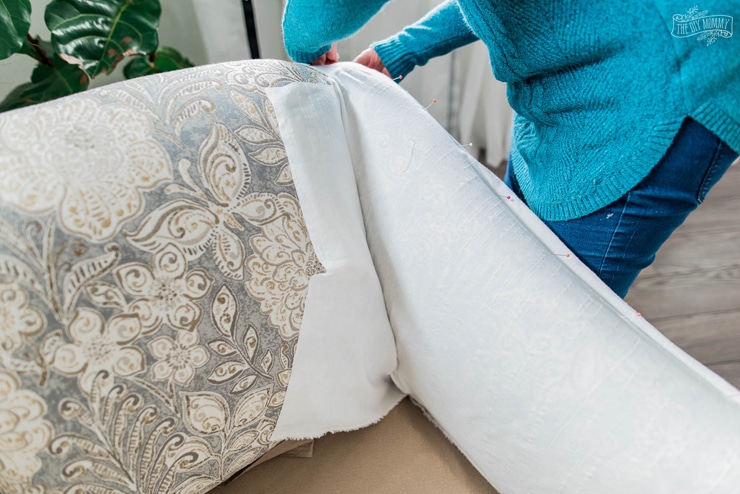
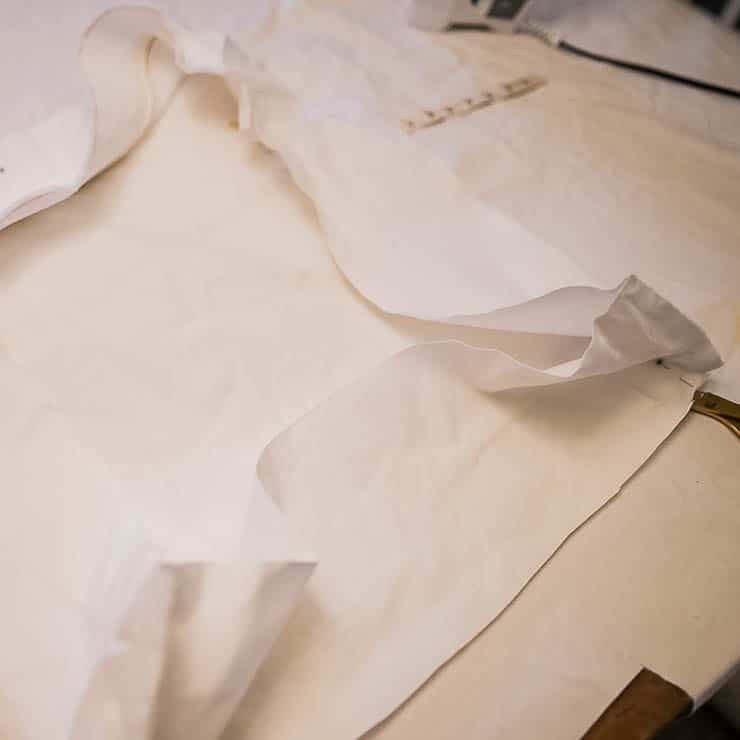
- Using a standard sewing machine and a 1/2″ seam allowance, start sewing your slipcover together piece by piece. It truly depends on your chair, but I started sewing my seat piece onto the bottom fronts of the arms and went from there.
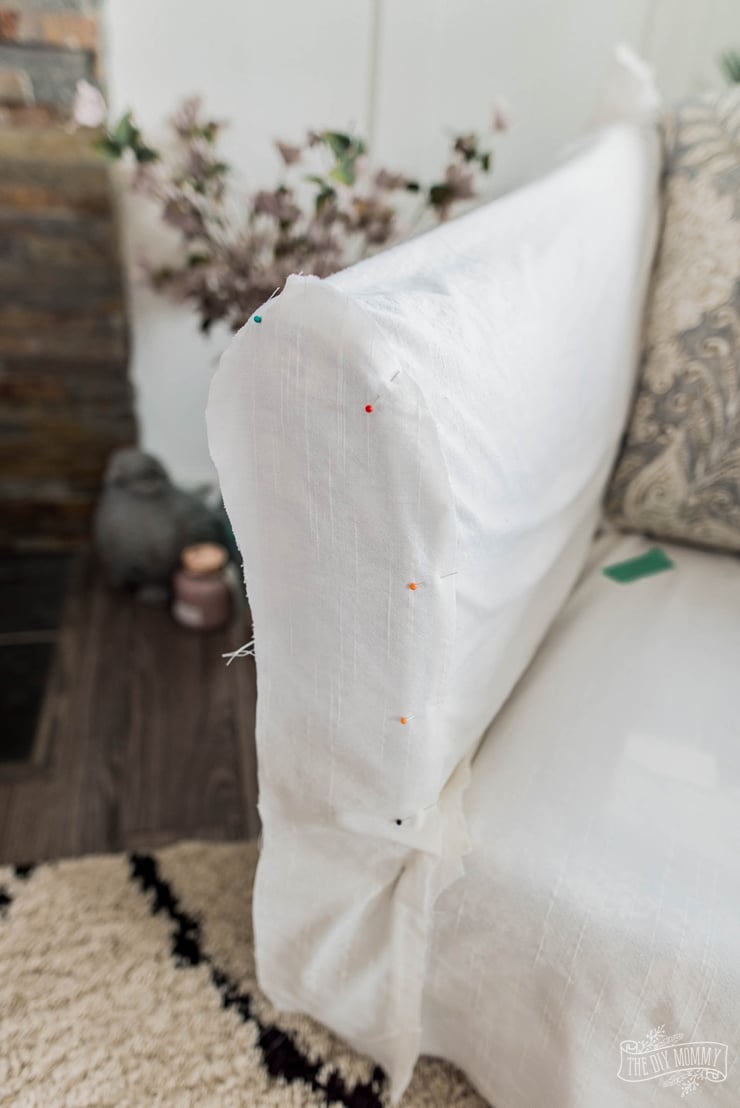
- After sewing each piece, place the slipcover on your chair inside out (this will work in the end because of the chair’s symmetry) and make any adjustments by pinning things in place with stick pins and making marks with a pencil.
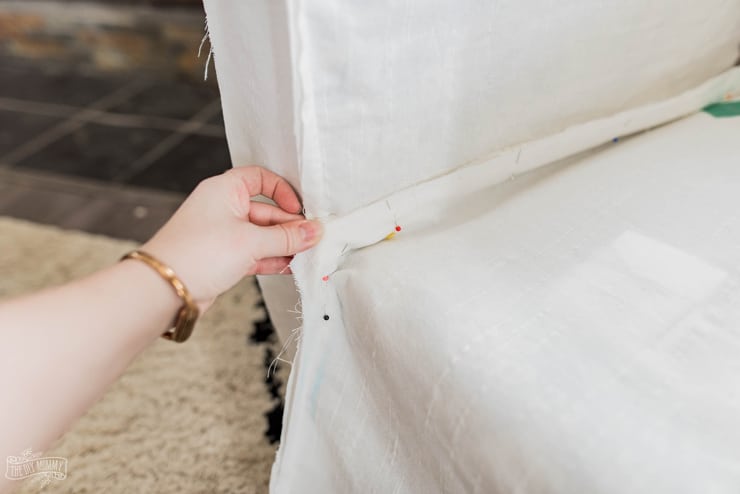
- NOTE: You’ll be doing a lot of putting the slipcover off and on again, but it will be worth it in the end to achieve a nice fit.
- If you make any alterations to your pattern as you sew, make a note of those so that you can adjust your pattern for the next time.
- Finish your seams with a zig-zag or serger (interlock) stitch. This will help prolong the life of your slipcover as you wash it.
- Hem the bottom of the slipcover by pressing it under twice at the length you desire and stitching the hem in place.
- NOTE: I didn’t add any piping or top-stitching to my slipcovers to make them simple to sew, but you could add those details for a more traditional look.
Step 4: Sew the Cushion Cover
- Use your original seat cushion cover as a pattern to create a new one to match your slipcover. Measure it, and/or trace it onto your fabric remembering to add the 3/4″ seam allowance.
- Create a zipper opening by pressing a 3/4″ seam allowance on one side of the two strips of your cushion’s side piece, and then pinning and sewing a zipper in the middle.
- Pin the cushion side pieces to the cushion top & bottom pieces and sew them all together. Turn everything right side out.
- Put the original foam from the cushion inside your new cushion cover.
Now it’s time to put your new slipcover on your chair!
Turn your new slipcover right side out and pull it over your arm chair. Line up the seams of the slipcover with the seams of your chair, and smooth and tuck and excess fabric into the chair’s crevices to create a fitted look.
Pop on your newly covered cushion, and you’re all set! You have a chair that looks brand new!
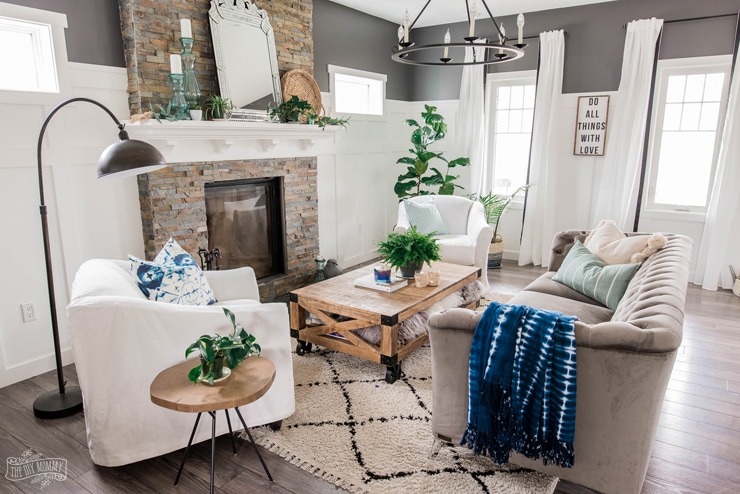
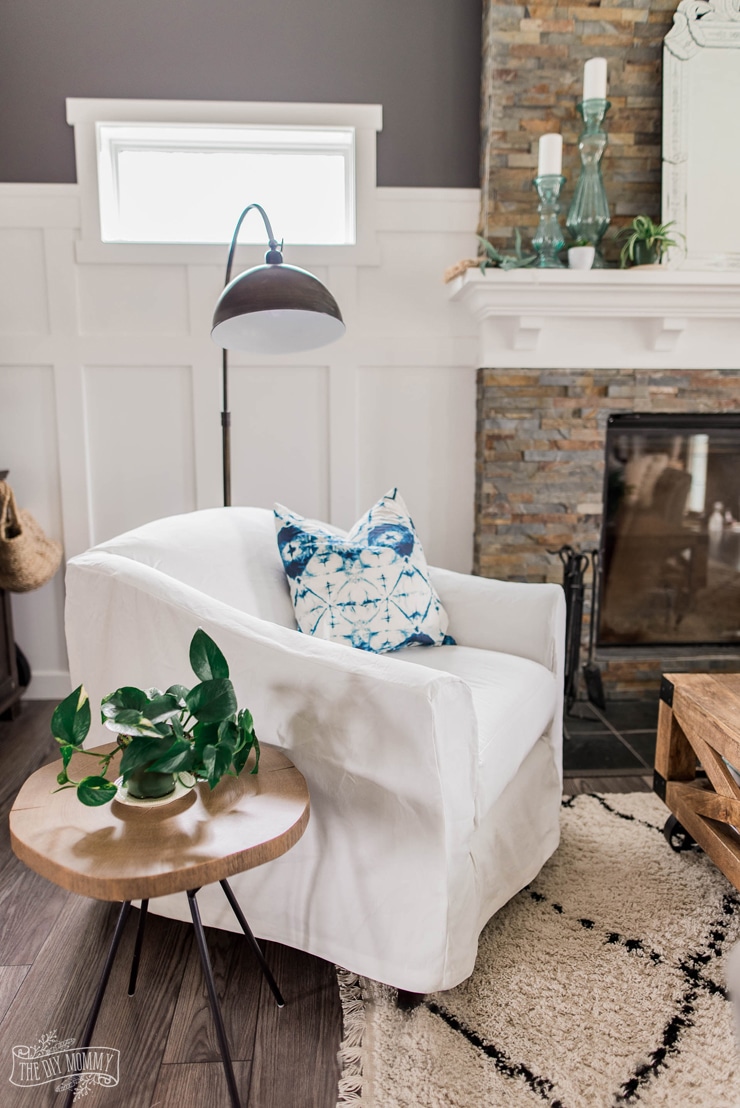
I think our living room looks completely different with the slipcovers on our beloved & comfy Wynn Chairs! I really like the casual, relaxed look of the softly draping white covers, and the fact that I can pull them off and wash them is a huge bonus.
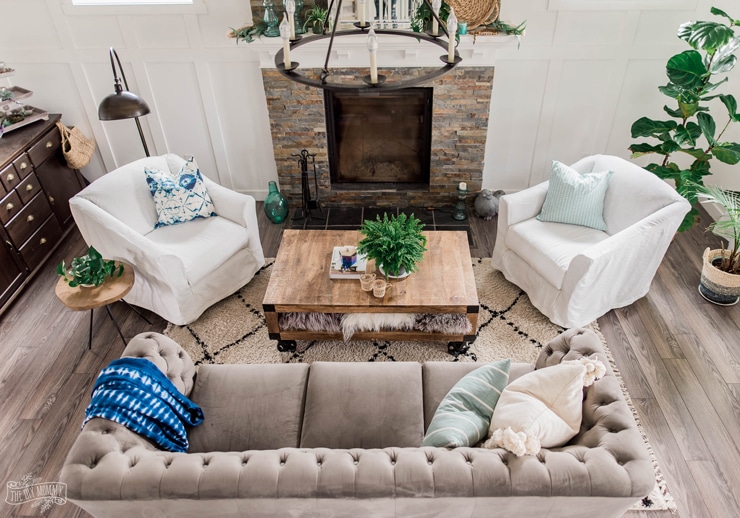
The slipcovers also allow me to play with adding different patterns in my accessories. I love how our living room is transformed into a more relaxed, boho look for summer with some DIY shibori throw pillows, lots of greenery, and sea glass accents.
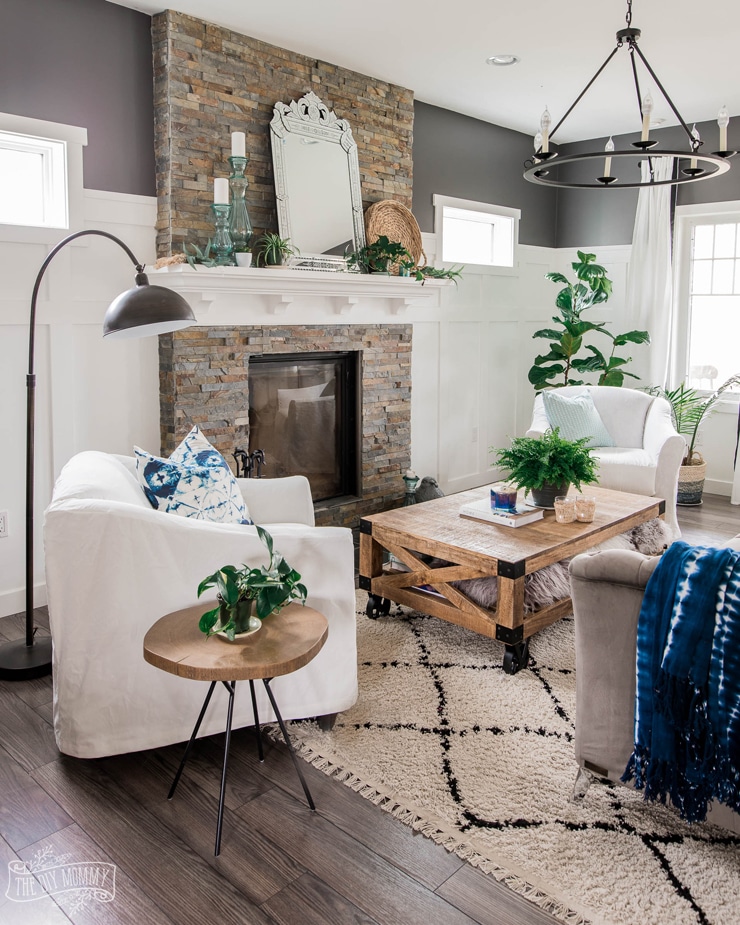
Also featured here in our living room: the Luda Accent Table, Ahmar Area Rug, Meredith Velvet Sofa, Keir Coffee Table & the sea glass candle sticks on the mantel are from The Brick in store. I think it’s so neat how all of these pieces can work with both a French Country style (like in my Spring home tour) or this more Boho look for summer.

I love that I was able to give these comfy and classic chairs a whole new look with a little fabric and a whole lot of DIY!
Now tell me: Would you ever sew custom slipcovers?
I would definitely do this… It’s like giving life back to an old chair. Beats buying a new one too!
Very beautifully done, thanks for sharing!
Quite an efficient and easy way to drastically change your living room without spending a ton of money, I love it.
Makes me happy to see others DIYing as well, keep up the good work!
thanks so much for sharing how you did this update…i definitely want to do this to two chairs that I got for a bargain…they are the same chairs but with different fabrics…and slipcovers are just the thing to make them a matching pair…
That’s great! Let us know how it turns out of tag Christina on Instagram and Facebook, @thediymommy
Well explained! This shows how easily one can make desired slipcovers for chairs and save some money.
Thanks for the write up!
Love this. Thanks. Being trying to figure how to do this and you have it explained it perfectly.