• Skip to primary navigation
  • Skip to main content
  • Skip to primary sidebar
The DIY Mommy
  • Home Decor
  • DIY Crafts
  • Organize
  • Printables
  • Recipes
  • Life
  • Shop My Home
  • Lake House
  • About
  • Contact
    • Facebook
    • Instagram
    • Pinterest
    • Twitter
    • YouTube
menu icon
go to homepage
search icon
Homepage link
  • Home Decor
  • DIY Crafts
  • Clean & Organize
  • Recipes
  • Free Printables
  • Life
  • Our Little Lake House
  • Shop Our Home
  • About
  • Contact
    • Facebook
    • Instagram
    • Pinterest
    • Twitter
    • YouTube
  • ×

    Home » DIY Crafts » Sewing

    Sew a Quick & Easy Bib

    Published: Jun 5, 2009 · Modified: Jun 18, 2009 by Christina Dennis · This post may contain affiliate links · This blog generates income via ads · 2 Comments

    By Christina Dennis

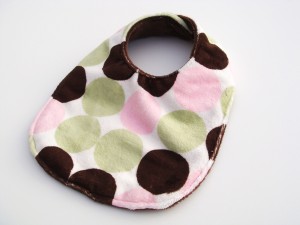
    bib-pink-dotSewing a custom bib for your baby, or as a gift for a baby shower, is fun & easy! You can use scraps of fabric you have leftover from other projects, or purchase some special fabric, like laminated cotton, that works especially well for bibs.

    You will need:

    • a pre-made bib (to use as a template)
    • fabric (flannel, minkee, or laminated cotton)
    • contrasting fabric (optional - for reverse side of bib)
    • thread
    • sewing machine
    • velcro or snap (use velcro if you want the bib to be reversible)

    To make the bib:

    1. Fold the store-bought bib in half lengthwise. Each half should be identicle. Lay the bib on a piece of paper and trace around. Remove the bib, and draw an additional a ½" seam allowance to the traced shape.
    2. Cut out the paper pattern, place on fold of fabric. If you want a bib with the same fabric on both sides, cut 2 bib pieces out of one fabric. For a bib with a contrasting reverse side, cut one bib piece from one fabric, and one bib piece from a contrasting fabric.
    3. Unfold pieces and place right sides together. Pin.
    4. Sew around the bib using a ½" seam allowance and leaving a 2" opening at the bottom of the bib.
    5. Turn the bib right-side out using 2" opening.
    6. Top-stitch around the bib and doing so, close opening.
    7. Attach velcro pieces to bib tops, or attach snaps.

    More Inspiration

    • How to Sew Curtains (Easy-to-Follow Steps)
    • Make DIY Cat Slippers - for only a few dollars!
    • How to Sew Simple DIY Chair Pads
    • 9 DIY Throw Pillows - Sew and No-Sew Options!

    Reader Interactions

    Comments

    1. Jill J

      October 05, 2019 at 7:58 pm

      So cute. I'm gonna be needing a few of these with a baby on the way!

      Reply

    Trackbacks

    1. Best Rated Sewing Machines says:
      April 14, 2012 at 8:47 am

      Best Rated Sewing Machines...

      [...]Sew a Quick & Easy Bib | The DIY Mommy[...]...

      Reply

    What do you think? Cancel reply

    Your email address will not be published. Required fields are marked *

    This site uses Akismet to reduce spam. Learn how your comment data is processed.

    Primary Sidebar

    Welcome!

    Christina Dennis, The DIY Mommy

    I'm Christina and I'm sharing budget-friendly DIY & decor ideas to create a cozy home and life you love!

    Read more about me

    Latest Posts

    • Creative And Unique DIY Wall Art Ideas
    • DIY Dollar Tree Heart Shaped Wreath
    • 10 Best IKEA Organization Products under $20

    What's my home decor style?

    Discover the home decor style that best fits your personality and lifestyle. This two-minute quiz is going to give you the direction you need to start the big, bold room makeovers that you've always wanted to try!

    Find out now!

    Archives

    Footer

    ↑ back to top

    About

    • About The DIY Mommy
    • Privacy Policy
    • Disclosure Policy
    • Terms of Service

    Newsletter

    • Sign Up! for emails and updates

    Contact

    • Contact

    As an Amazon Associate I earn from qualifying purchases.

    Copyright © 2009 - 2023 The DIY Mommy. "The DIY Mommy" is a registered trademark.