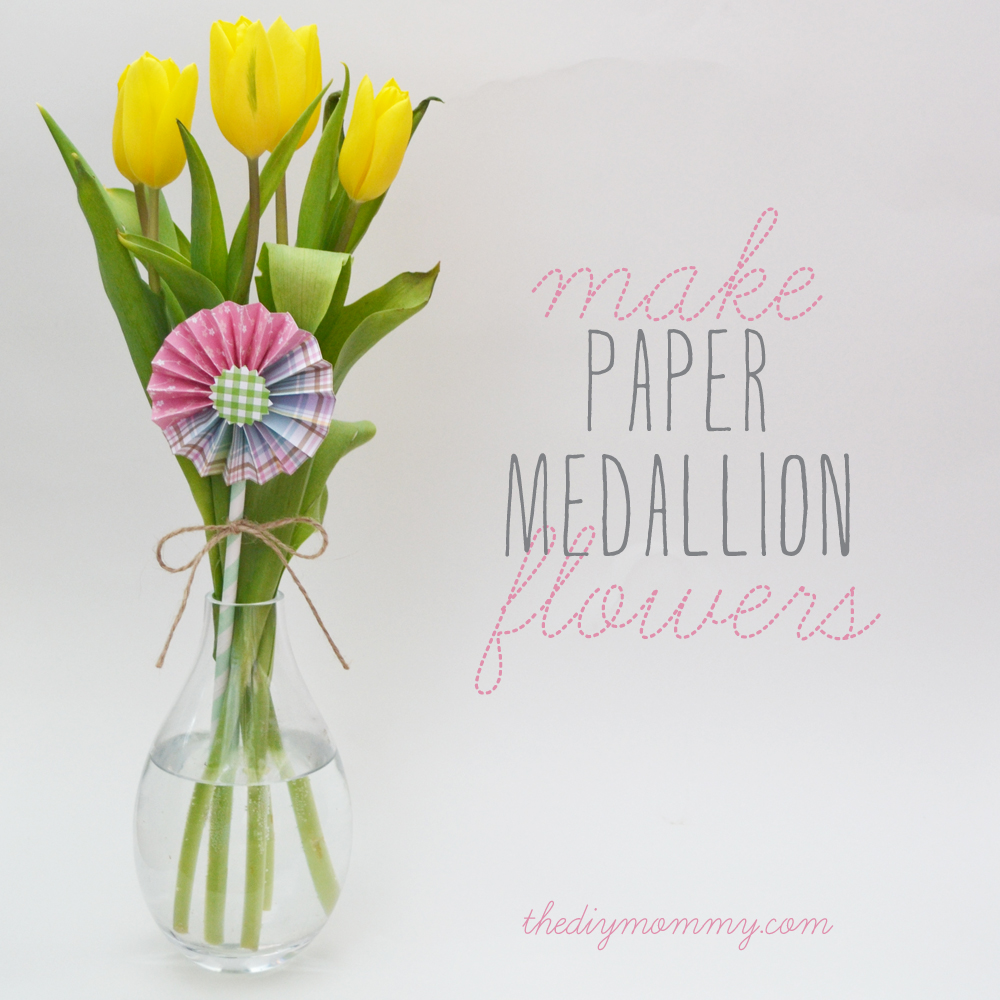
Make a Spring Flower Arrangement with Tulips and a Paper Medallion
This post may contain affiliate links · This blog generates income via ads
It’s technically Spring now, but meanwhile in Canada:
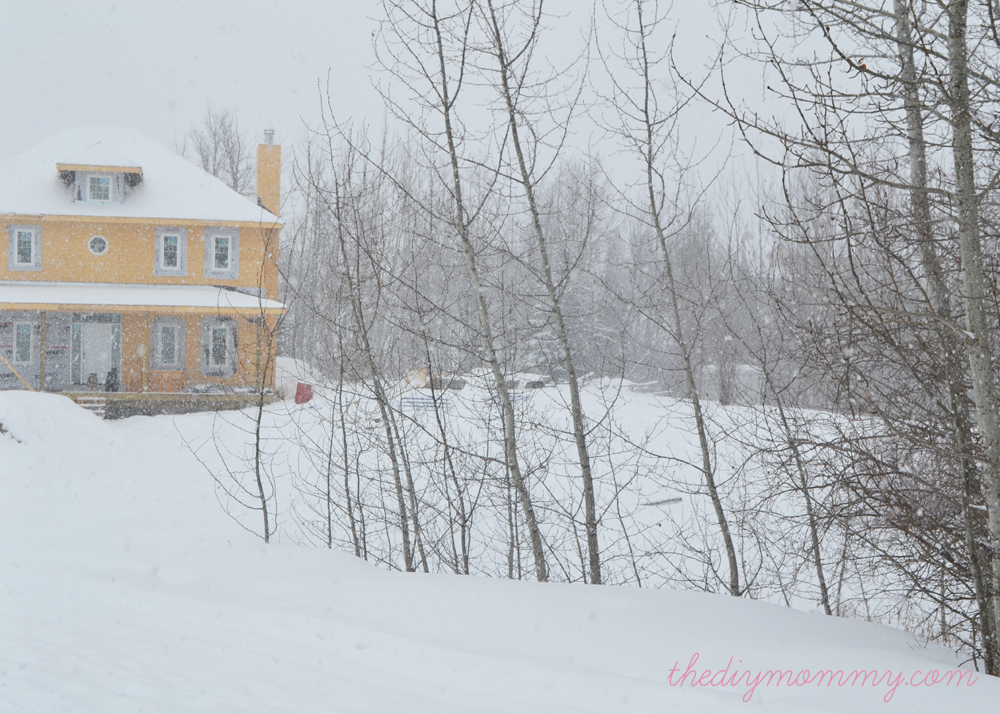
This is the lovely view out of my back door.
I decided to pretend the snow was gone today by making a springy flower arrangement with yellow tulips and a paper medallion flower. It turned out great, and it was easy and simple to do.
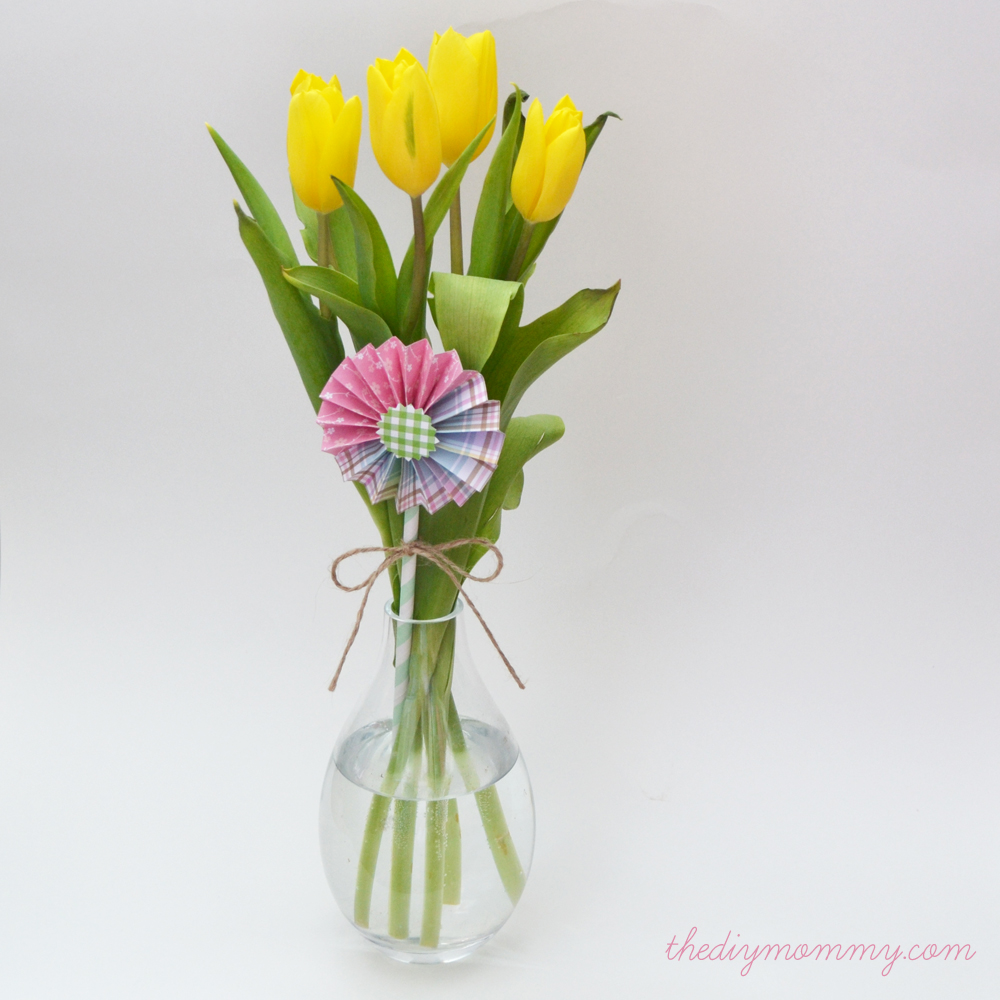
I bought a fresh bunch of tulips at the grocery store, and then added a fun little paper flower. Here’s how I made it:
Materials:
- scrapbook paper in a few coordinating colours
- self-healing cutting mat
- butter knife (for scoring)
- ruler
- glue gun
- fancy edge paper punch (if desired)
Directions:
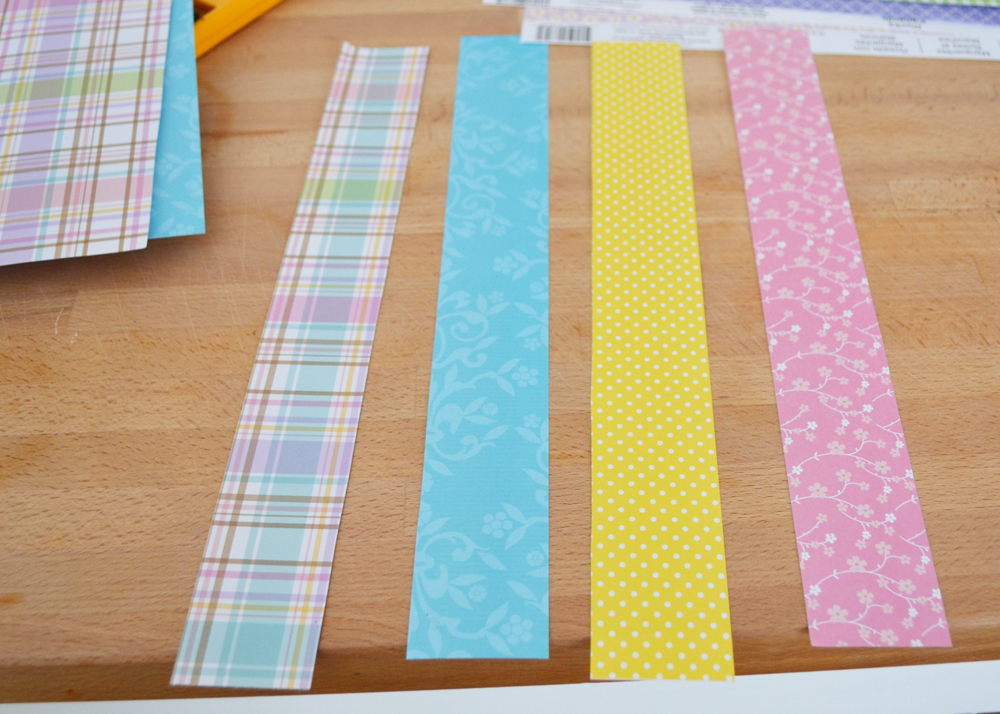
Cut the paper in 1 1/2″ x 12″ strips (I used two strips per flower). This will make a flower that’s 3″ in diameter. Adjust the width of the strips as necessary to make larger flower medallions.
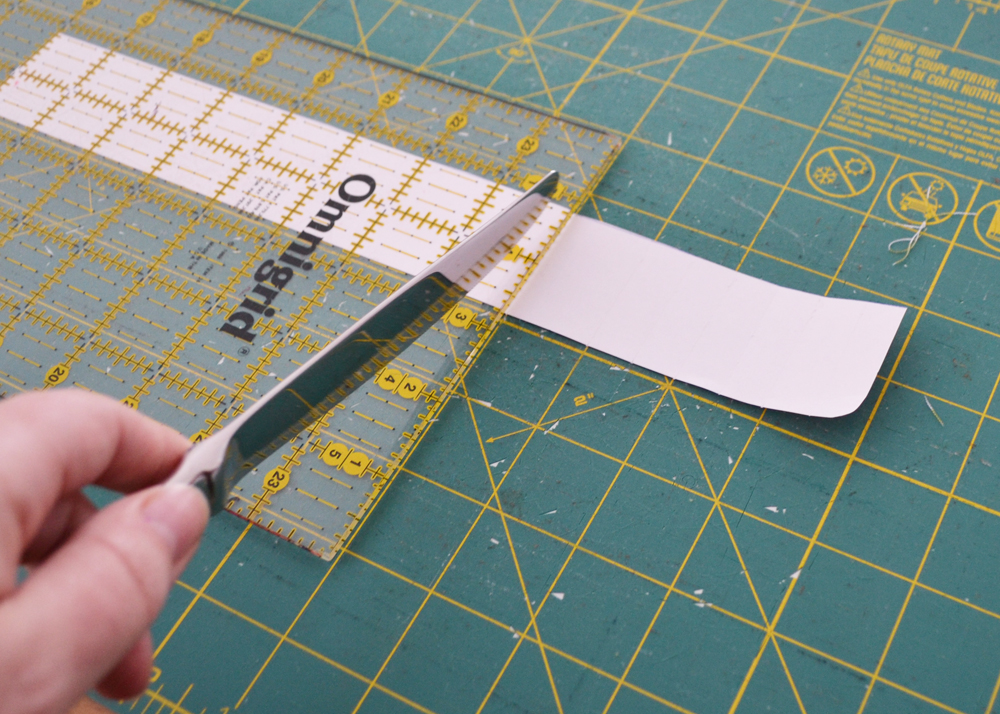
Using a butter knife and working on a self-healing mat, score the strips from the back side every 1/2″.
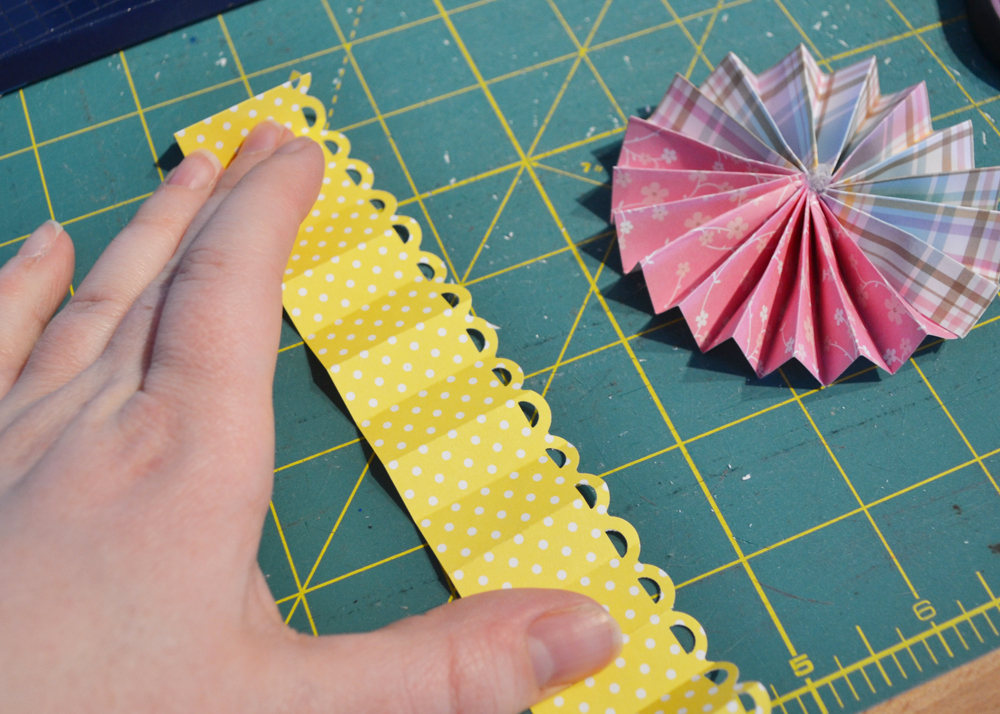
If you want your flower to have patterned edges, punch the edge of the strip at this point with a special paper punch.
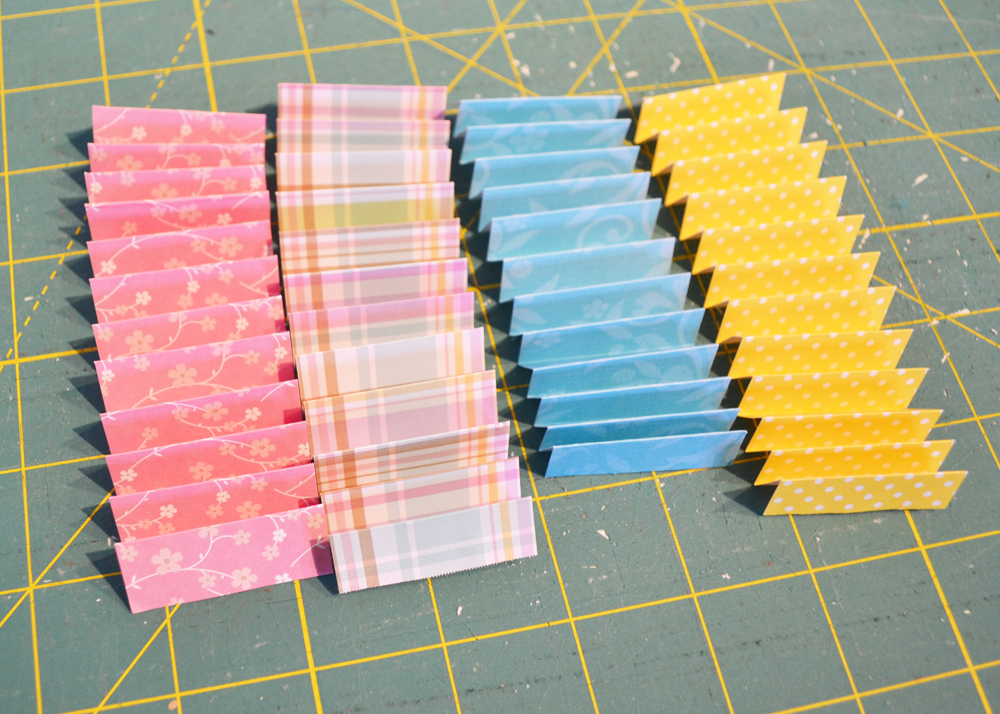
Fold the strips accordian-style. Start with a downwards fold, and you should end with a downwards fold.
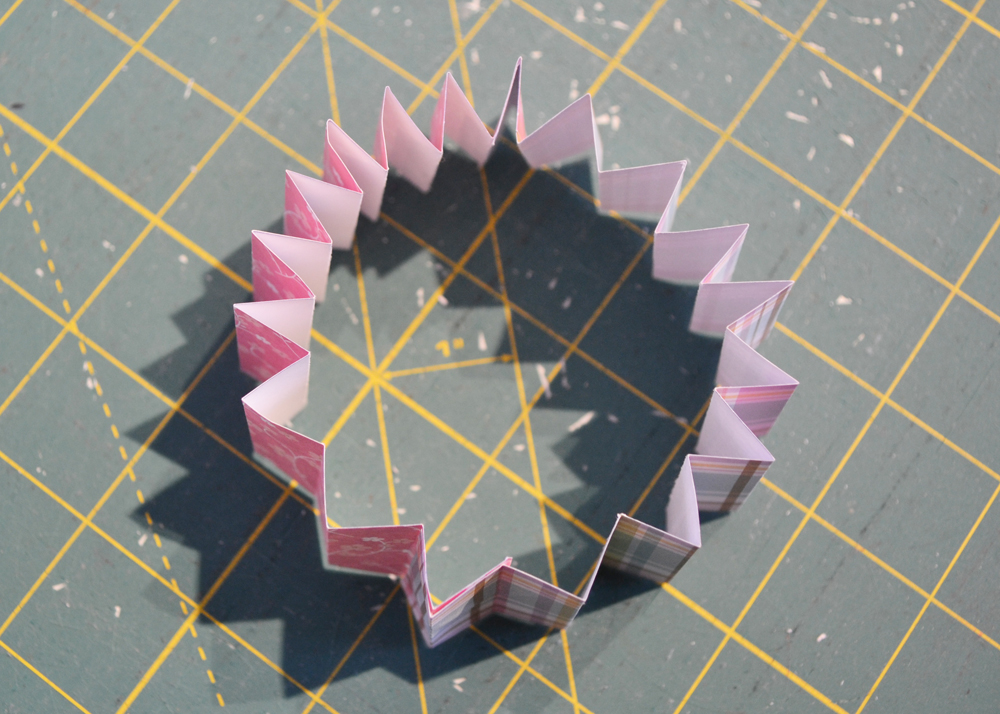
Glue the ends of two strips together with a glue gun to form a circle.
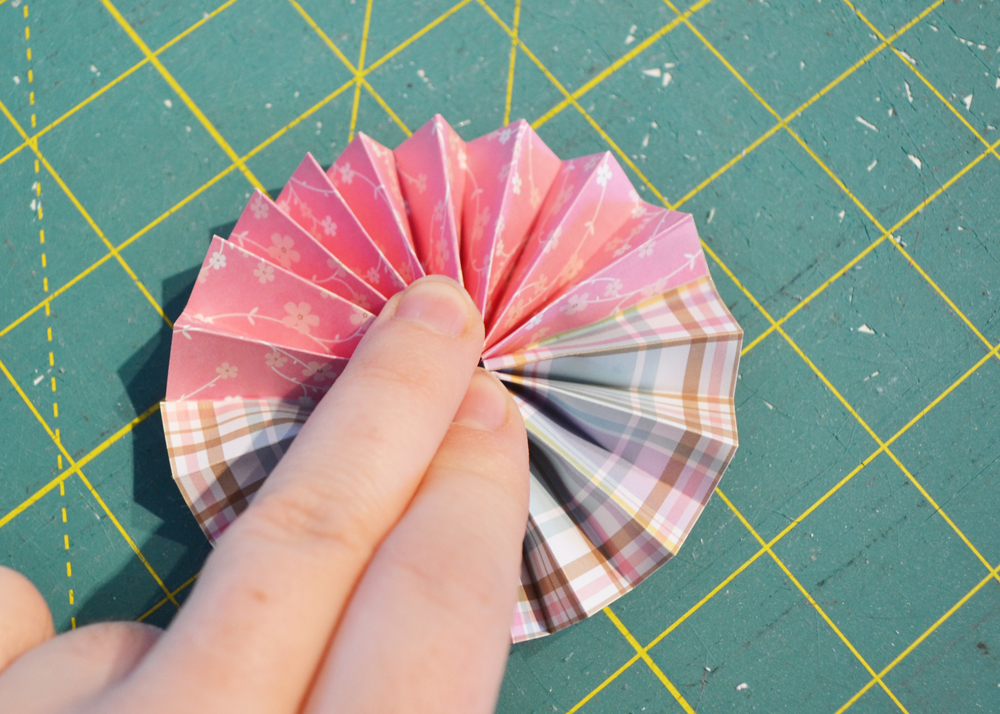
Keeping your glue gun ready and nearby, smush the center of the circle down and bring the middles together. Holding the flower tightly in place, put a dab of glue into the center with the glue gun. Keep holding the flower together until the glue cools and hardens. Repeat with the back side of the flower for extra strength.
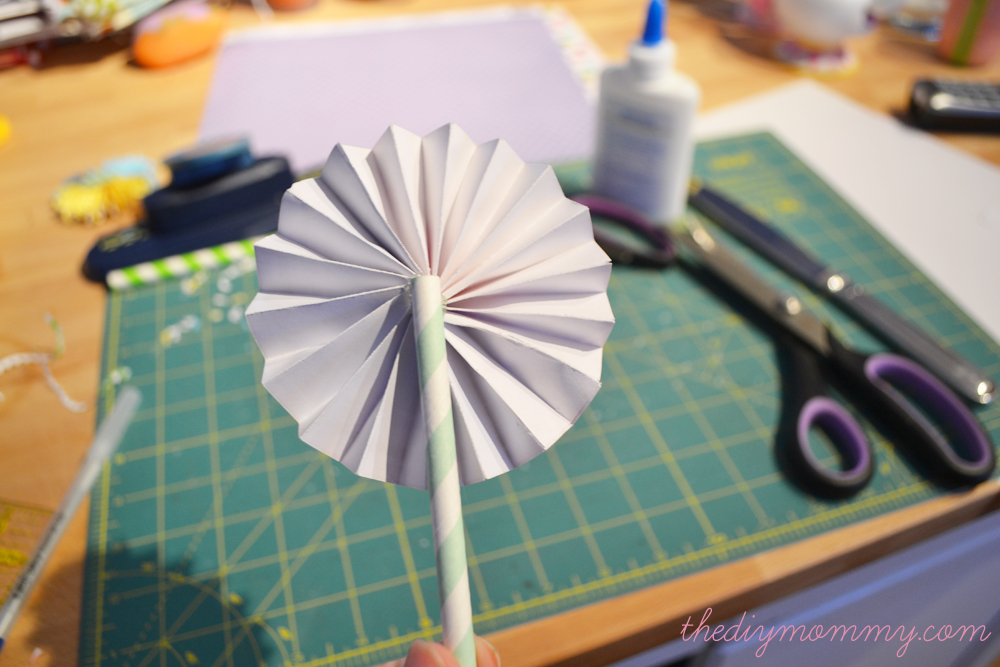
Attach a straw to the back of the flower if you want it use it in a floral arrangement. Glue a paper circle to the front center.
You can also leave them stemless for use on other projects. I’m considering making a spring banner with these. Aren’t they pretty?
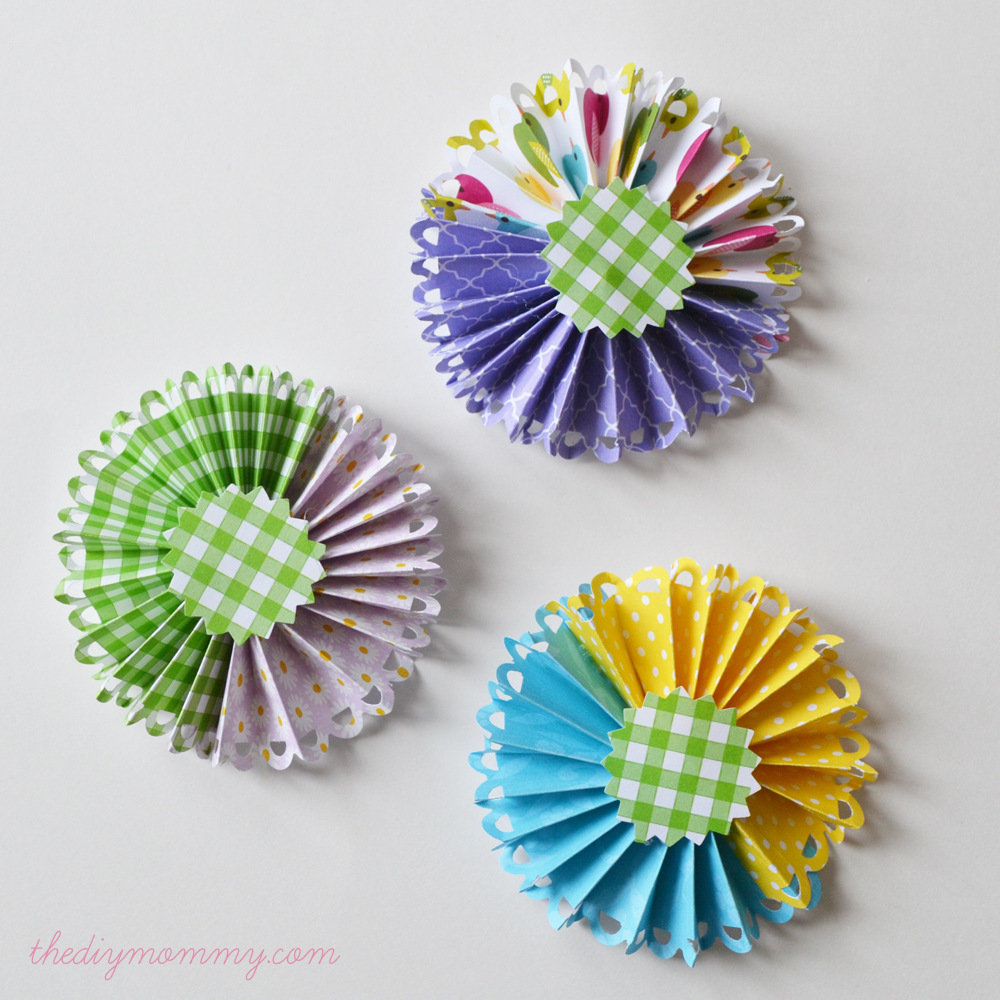
Paper medallions are my newest crafty obsession, I think.
It doesn’t matter if it’s blizzarding outside – I’ve got a houseful of paper flowers and real live tulips in here!

Splendide post, pour ne pas changer
Your little spring arrangement of tulips put a smile on my face! So simple, so happy, and so thrifty! I, too, am living in Canada at present, so can completely relate to how uplifting a joyful little bouquet can be. Thank you for the excellent tutorial on making the medallion flowers!
That’s so wonderful!
It’s nice to get a new and fresh art craft idea combined with flowers! Thanks for sharing!