• Skip to primary navigation
  • Skip to main content
  • Skip to primary sidebar
The DIY Mommy
  • Decor
  • DIY
  • Clean + Organize
  • Printables
  • Recipes
  • Life
  • The Academy
  • Shop My Home
  • About
  • Contact
    • Facebook
    • Instagram
    • Pinterest
    • Twitter
    • YouTube
menu icon
go to homepage
search icon
Homepage link
  • Decor
  • DIY
  • Clean + Organize
  • Printables
  • Recipes
  • Life
  • The Academy
  • Shop My Home
  • About
  • Contact
    • Facebook
    • Instagram
    • Pinterest
    • Twitter
    • YouTube
  • ×

    Home » DIY Crafts » Thrift Store Crafts

    Make Lace Decoupaged Garden Containers #12MonthsofDIY

    Published: May 25, 2016 · Modified: Apr 26, 2020 by Christina Dennis · This post may contain affiliate links · This blog generates income via ads · 16 Comments

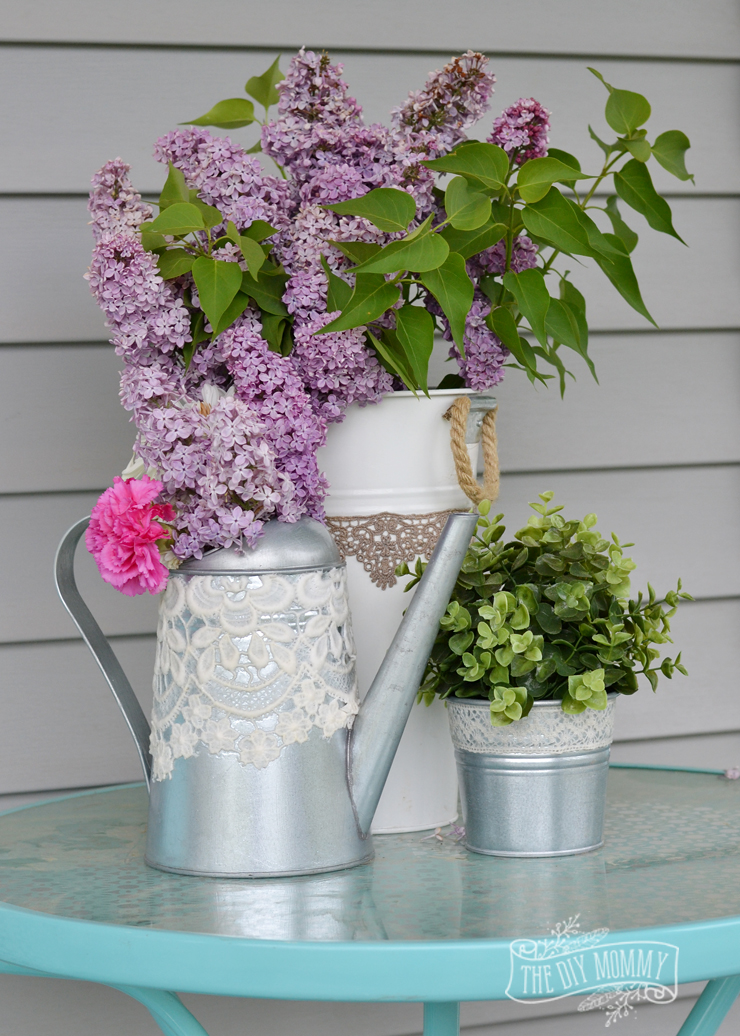
    Mod Podge is such a fun craft medium to work with. Have you ever tried it? My favourite use for Mod Podge is to attach trim or fabric to objects to give them a unique look. Let me show you how to embellish simple garden containers - like a bucket, vase and watering can - with Mod Podge and lace trim. The little addition of lace makes these containers look so beautiful and unique! Also, make sure to scroll down to the bottom of this post to see how some other bloggers used Mod Podge in this month's 12 Months of DIY challenge.

    Embellish garden planters and watering cans with lace and Mod Podge

    Embellish garden planters and watering cans with lace and Mod Podge

    To decoupage lace trim onto metal containers, first ensure that your container is clean and grease-free. I just used some cleaning spray and a paper towel to wipe down my tin watering can.

    Embellish garden planters and watering cans with lace and Mod Podge

    Embellish garden planters and watering cans with lace and Mod Podge

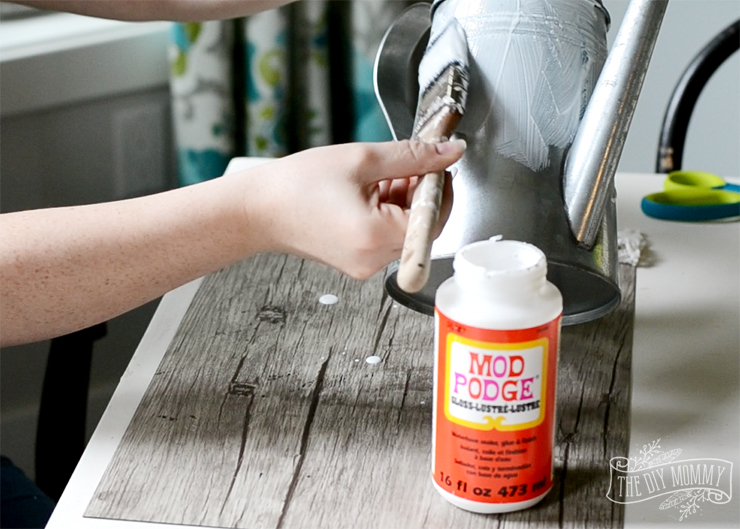
    Next, apply some Mod Podge liberally with a regular brush or a foam brush onto the part of your container where your lace trim will go. I used Mod Podge Gloss for this project.

    Embellish garden planters and watering cans with lace and Mod Podge

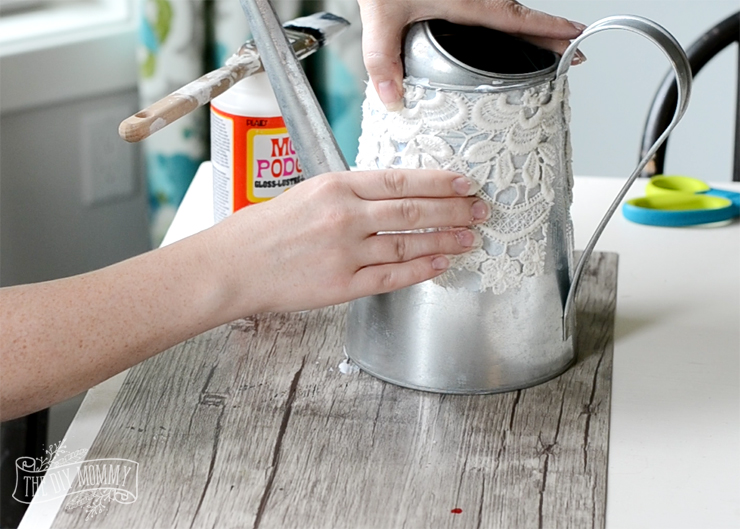
    After that, place your lace trim over the Mod Podge and press it down firmly. I used this gorgeous of vintage lace I found at a thrift store to liven up my watering can.

    Embellish garden planters and watering cans with lace and Mod Podge

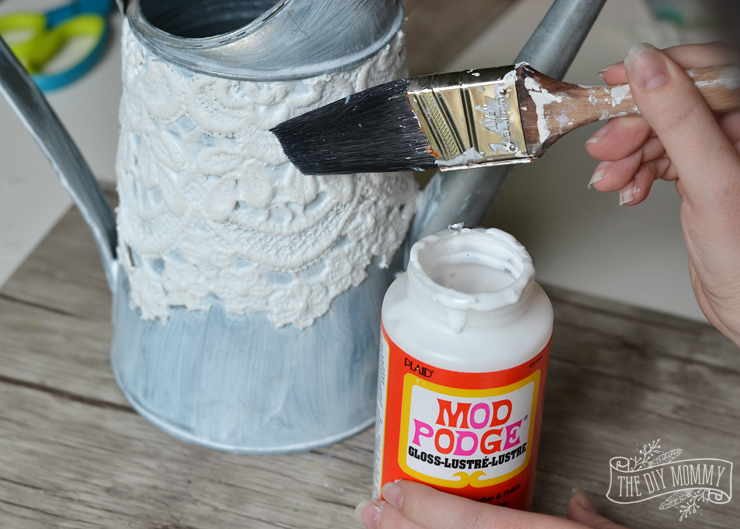
    Finally, gently paint a coat of Mod Podge over the lace and the rest of the item's surface. By painting over the entire surface of the container, the final finish will be consistent. In my case, the Mod Podge made my watering can have a lovely glossy finish.
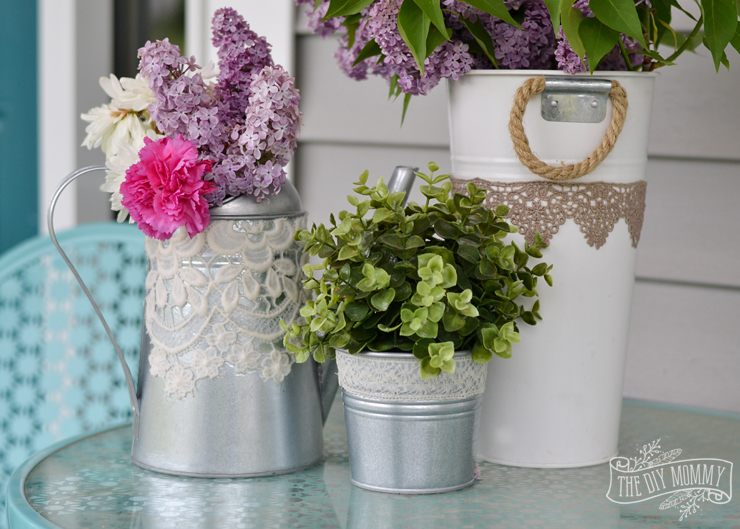
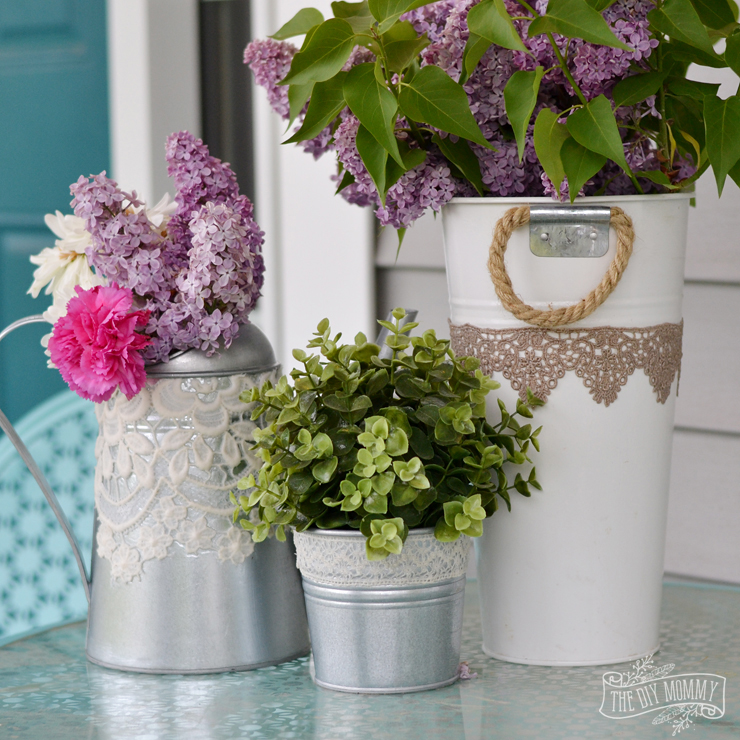
    Embellish garden planters and watering cans with lace and Mod Podge

    Isn't it such a pretty look? I also put a little bit of lace trim with Mod Podge around a tin planter and a metal vase. It's such a delicate addition to all of my garden containers!

    Now it's time to see the rest of the DIY Mod Podge project ideas from my Canadian blogging friends!

    12 Crafts to do with Mod Podge

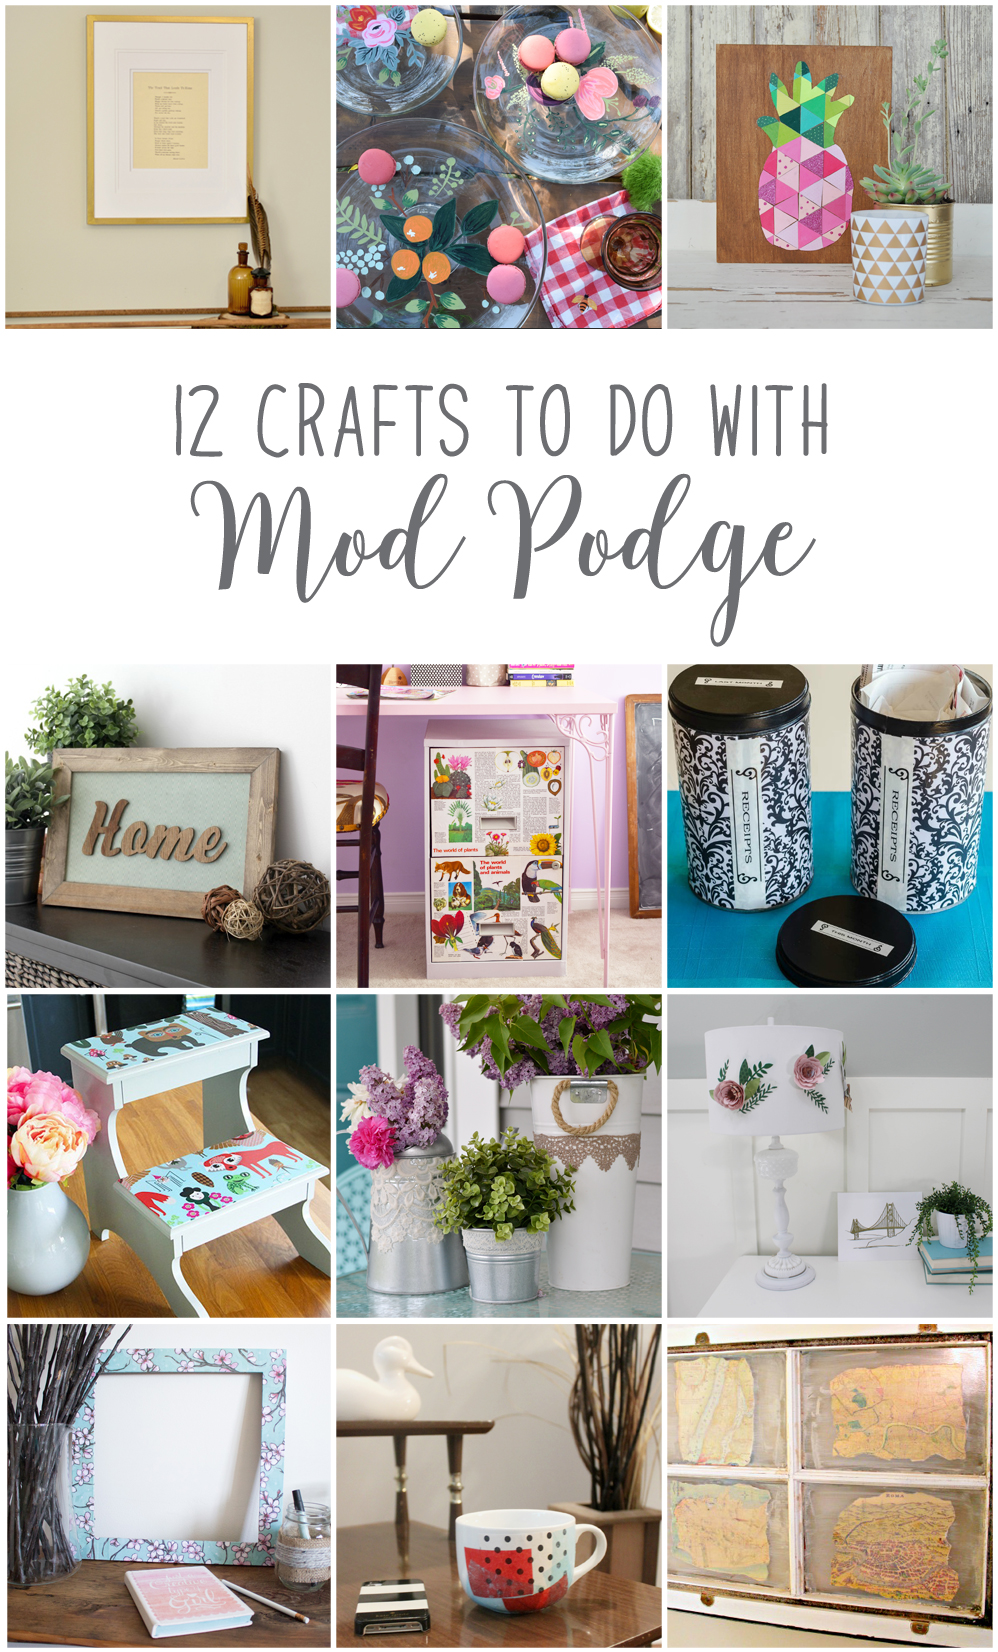
    From the top left, they are:

    How To Use Mod Podge - A Beginner's Story from Vin'yet Etc.

    Painted Florals on Glassware from PMQ for Two

    Geometric Pineapple Art from Life Is A Party

    DIY "Home" Wood Sign from Love Create Celebrate

    DIY Filing Cabinet Makeover Using Vintage Book Pages from Woman in Real Life

    Handy DIY Two Month Receipt Organizer from Time with Thea

    Decoupage Foot Stool from Fresh Crush

    Make Lace Decoupaged Garden Containers from The DIY Mommy

    Paper Flower Lamp Shade from Brooklyn Berry Designs

    Easily Upcycled Photo Frames from Sustain My Craft Habit

    Kate Spade-Inspired Mug from Mommyzoid

    Window Map Art from New House New Home

    Disclaimer: This post is sponsored by Plaid. As always, all of the opinions here are my own. I only recommend companies that I use and love myself.

    More Inspiration

    • Turn an IKEA SORTSO rug into a gorgeous pillow
    • How to Make Money with your Cricut in 2023
    • DIY Dollar Tree Heart Shaped Wreath
    • How to Set Up a Cricut for the First Time (Step by Step!)

    Reader Interactions

    Comments

    1. Brooke

      May 25, 2016 at 8:18 am

      I love the idea of lace on a watering can. So simple and so pretty. Great project!

      Reply
    2. Ariel

      May 25, 2016 at 9:13 am

      This looks perfect for your front porch! Beautiful lace too!

      Reply
    3. Laurie @ Vin'yet Etc.

      May 25, 2016 at 6:15 pm

      The perfect touch for your front porch, this mod podge is limitless, isn't it!? I absolutely love how your project turned out, what an simple way to dress up some tins for your pretty flowers!

      Reply
    4. Thea

      May 26, 2016 at 8:11 pm

      so, So, SO pretty! I love your talent for making something even more gorgeous with such simple ideas! Gosh you are creative!

      Reply
    5. Joann @ Woman In Real Life

      May 27, 2016 at 6:46 am

      That is so beautiful! I would have never thought to dress up my watering can. Great idea.

      Reply
    6. Dannyelle @ www.lifeisaparty.ca

      May 27, 2016 at 2:19 pm

      What a great idea, and such a pretty project. Perfect for spring blooms!

      Reply
    7. Sonja @ SustainMyCraftHabit

      May 30, 2016 at 7:41 pm

      So lovely, Christina! Such a nice touch to add the lace. The containers look so pretty now.

      Reply
      • Christina Dennis

        May 30, 2016 at 9:09 pm

        Thanks, Sonja!

        Reply
    8. Jen @ Fresh Crush

      June 04, 2016 at 9:27 pm

      These are so pretty Christina! Such a great idea -- I never would of thought of using lace!

      Reply

    Trackbacks

    1. DIY Geometric Pineapple Art says:
      May 25, 2016 at 4:01 am

      […] Make Lace Decoupaged Garden Containers from The DIY Mommy […]

      Reply
    2. Painted Florals on Glassware • A PMQ for two (and three pets) says:
      May 25, 2016 at 4:08 am

      […] Make Lace Decoupaged Garden Containers from The DIY Mommy […]

      Reply
    3. Vintage Window Map Art - New House New Home says:
      May 25, 2016 at 6:56 am

      […] Make Lace Decoupaged Garden Containers from The DIY Mommy […]

      Reply
    4. Decoupage a Foot Stool - Fresh Crush says:
      May 25, 2016 at 8:09 am

      […] Make Lace Decoupaged Garden Containers from The DIY Mommy […]

      Reply
    5. Semper-viva Succulent Wreath + The Creative Corner #99: DIY, Craft & Home Decor Link Party | The DIY Mommy says:
      May 29, 2016 at 7:01 pm

      […] Make Lace Decoupaged Garden Containers from The DIY Mommy. […]

      Reply
    6. Orange Chia Smoothie + The Creative Corner Link Up says:
      May 29, 2016 at 7:05 pm

      […] Make Lace Decoupaged Garden Containers from The DIY Mommy. […]

      Reply
    7. How to Make Your Own Wood Sign - Love Create Celebrate says:
      January 19, 2018 at 10:33 am

      […] Handy DIY Two Month Receipt Organizer from Time with Thea Decoupage Foot Stool from Fresh Crush Make Lace Decoupaged Garden Containers from The DIY Mommy Paper Flower Lamp Shade from Brooklyn Berry Designs Easily Upcycled Photo Frames […]

      Reply

    What do you think? Cancel reply

    Your email address will not be published. Required fields are marked *

    This site uses Akismet to reduce spam. Learn how your comment data is processed.

    Primary Sidebar

    Welcome!

    Christina Dennis, The DIY Mommy

    I'm Christina and I'm sharing budget-friendly DIY & decor ideas to create a cozy home and life you love!

    Read more about me

    Latest Posts

    • DIY Pillow from IKEA SORTSO Rug
      Turn an IKEA SORTSO rug into a gorgeous pillow
    • 10 Places to Find Cheap Home Decor and Accessories
    • Easter menu ideas
      Easter Menu Ideas, No Ham or Turkey Required

    What's my home decor style?

    Discover the home decor style that best fits your personality and lifestyle. This two-minute quiz is going to give you the direction you need to start the big, bold room makeovers that you've always wanted to try!

    Find out now!

    Archives

    Footer

    ↑ back to top

    About

    • About The DIY Mommy
    • Privacy Policy
    • Disclosure Policy
    • Terms of Service

    Newsletter

    • Sign Up! for emails and updates

    Contact

    • Contact

    As an Amazon Associate I earn from qualifying purchases.

    Copyright © 2009 - 2023 The DIY Mommy. "The DIY Mommy" is a registered trademark.