• Skip to primary navigation
  • Skip to main content
  • Skip to primary sidebar
The DIY Mommy
  • Home Decor
  • DIY Crafts
  • Organize
  • Printables
  • Recipes
  • Life
  • Shop My Home
  • Lake House
  • About
  • Contact
    • Facebook
    • Instagram
    • Pinterest
    • Twitter
    • YouTube
menu icon
go to homepage
search icon
Homepage link
  • Home Decor
  • DIY Crafts
  • Clean & Organize
  • Recipes
  • Free Printables
  • Life
  • Our Little Lake House
  • Shop Our Home
  • About
  • Contact
    • Facebook
    • Instagram
    • Pinterest
    • Twitter
    • YouTube
  • ×

    Home » Life » DIY Kids Activities

    Sew a Tinkerbell Skirt & Top

    Published: Sep 17, 2012 · Modified: Oct 9, 2018 by Christina Dennis · This post may contain affiliate links · This blog generates income via ads · 18 Comments

    by Christina Dennis

    Sew a Tinkerbell Skirt & Top by The DIY Mommy

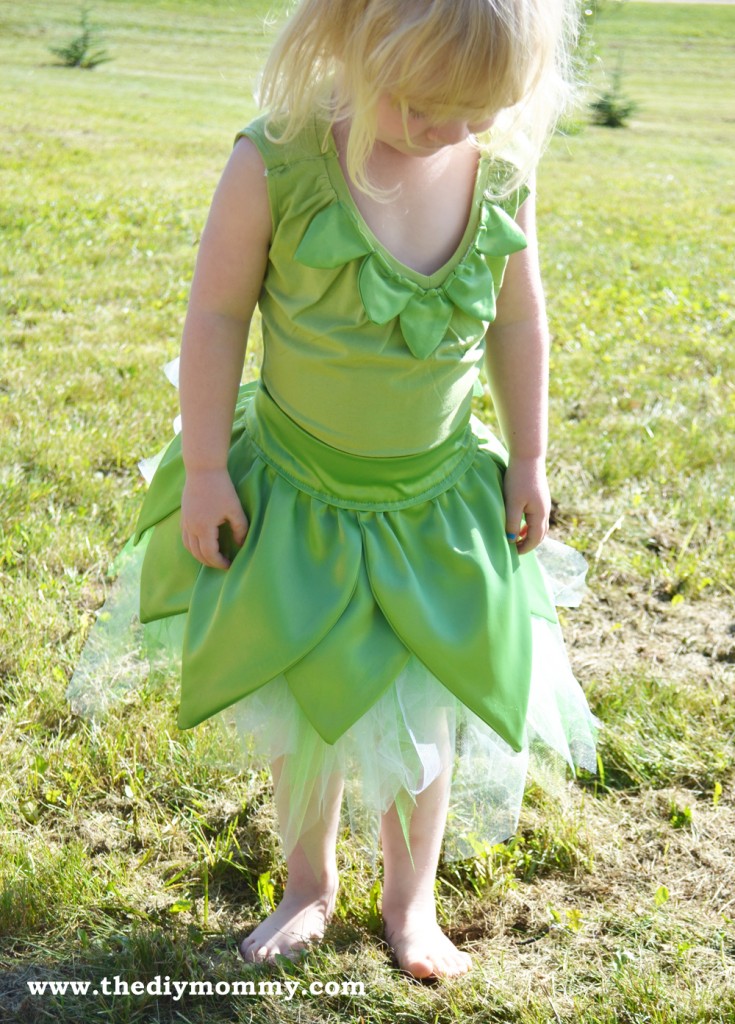
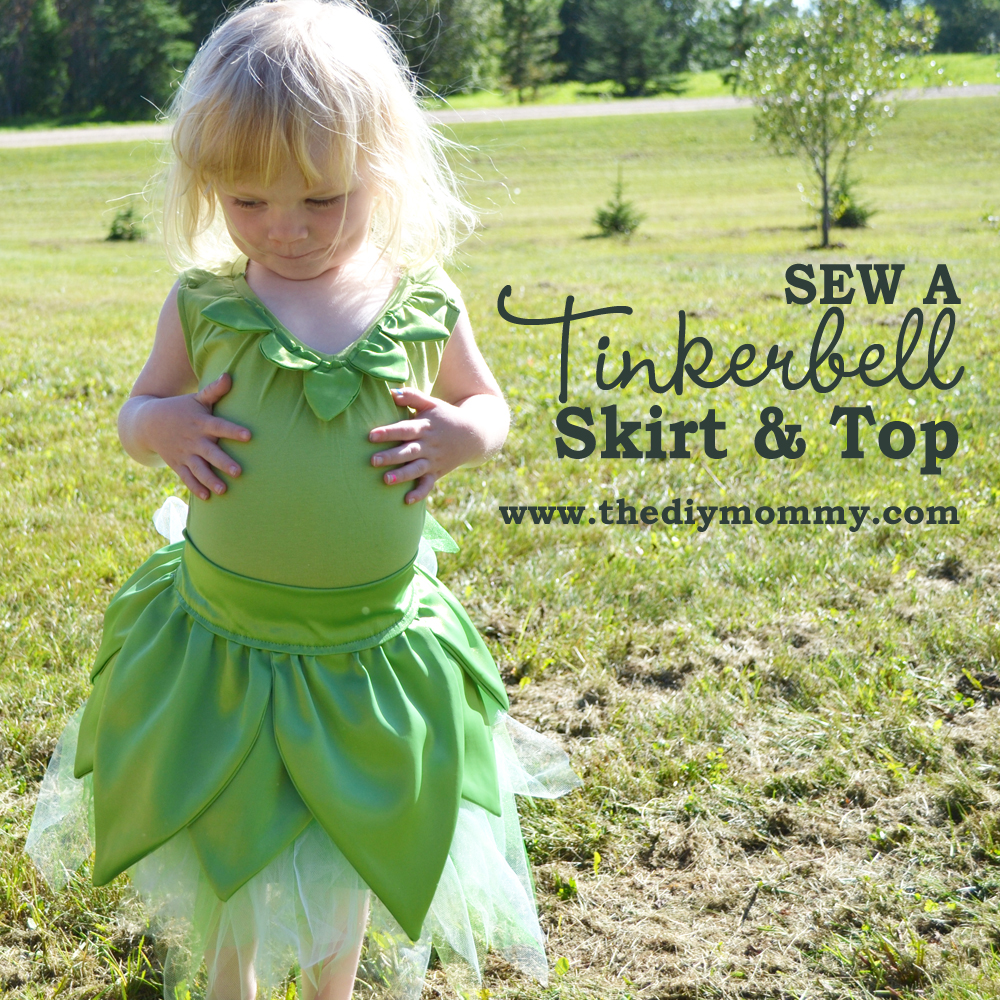
    My good friend asked me to help her make a Tinkerbell fairy costume for her little girl's fourth birthday. We started with a gorgeous little green tutu made by Whimsical Elements, picked up some bright green satin from a local fabric shop, and she also snagged a $6 extra small women's tank top in green. I ended up altering the top and making a little leaf apron skirt to tie over the tutu. I was happy with the results, and my little girlie was more than happy to model the outfit! Here's how I did it and how you can too:

    Materials:

    • 1 yard satin (for leaves on top and for leaf apron skirt)
    • tutu
    • child's or women's small tank top

    Directions:

    Sew a Tinkerbell Skirt & Top by The DIY Mommy

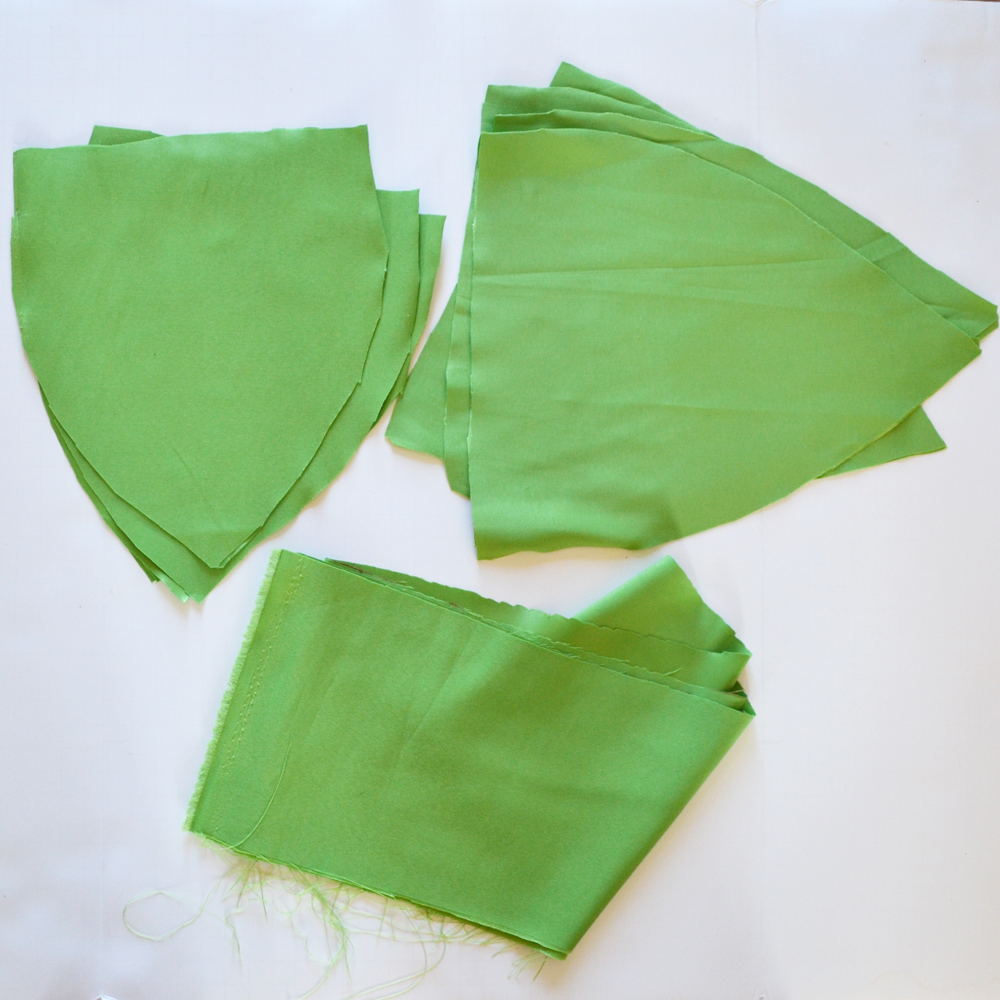
    From the satin, cut out a front and back for 4 large petal shapes (mine were 8" by 7" and I eyeballed the shape) and 3 smaller petal shapes (mine were 8" by 7"). Cut out a 6" wide strip across the entire width of the fabric (your fabric will probably be 54" to 60" wide) for the sash.

    Sew a Tinkerbell Skirt & Top by The DIY Mommy

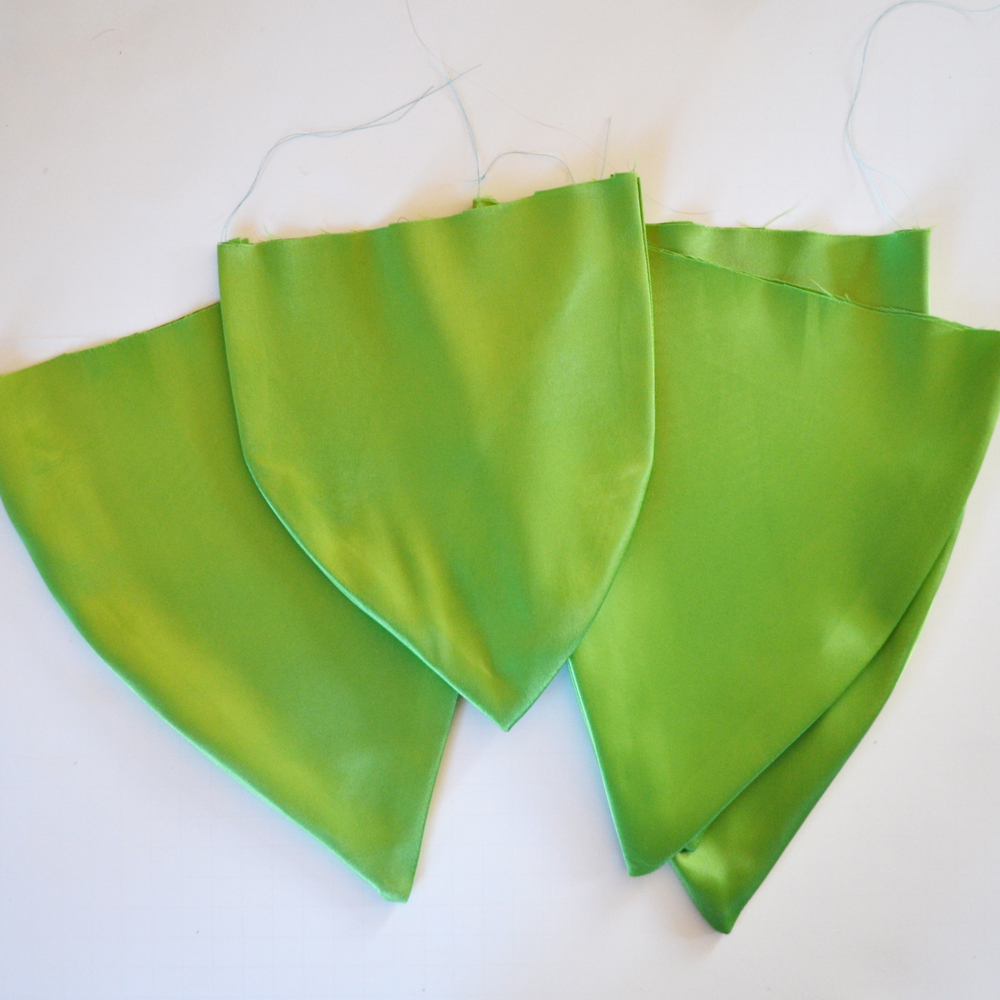
    Put the petal pieces right sides together, and sew around the two sides. Turn over & press.

    Sew a Tinkerbell Skirt & Top by The DIY Mommy

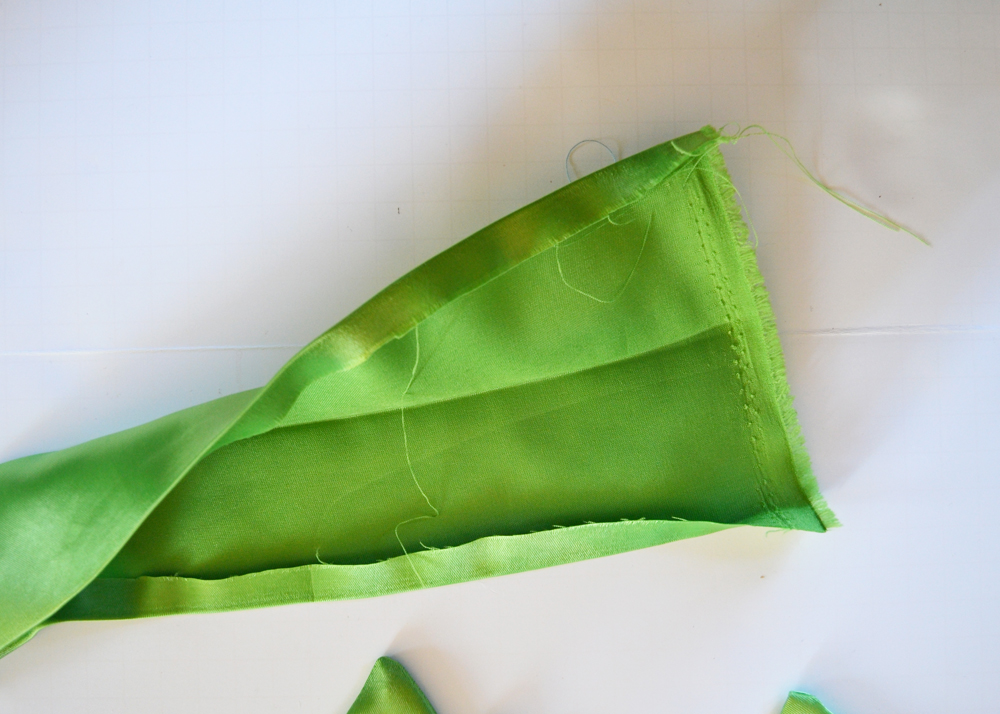
    Press the 6" wide strip in half lengthwise wrong sides together, and then press the two raw, long edges in ½".

    Sew a Tinkerbell Skirt & Top by The DIY Mommy

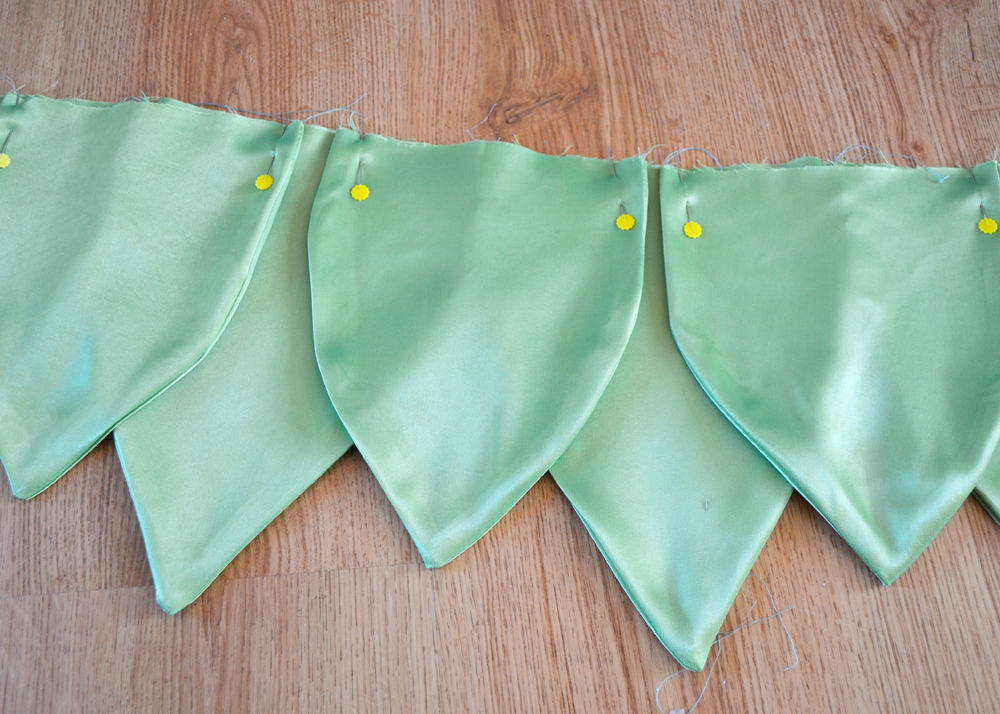
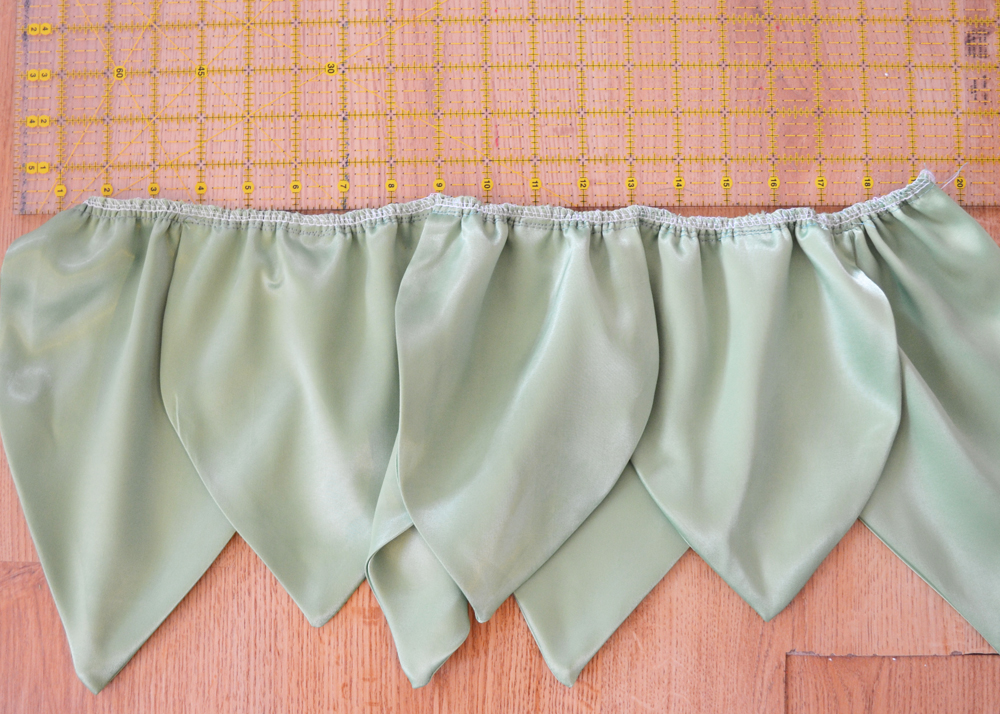
    Arrange the larger leaves side-by-side with the top raw edges aligned. Place the smaller leaves on top, over where the larger leaves meet, as pictured above. Pin in place and sew together about ¼" from the raw edge.

    Sew a Tinkerbell Skirt & Top by The DIY Mommy

    Measure your child's waist to find out how long you want the waistband of the leaf apron to be, and then gather the tops of the leaves to fit. In this case, I wanted the skirt to measure 21" long.

    Sew a Tinkerbell Skirt & Top by The DIY Mommy

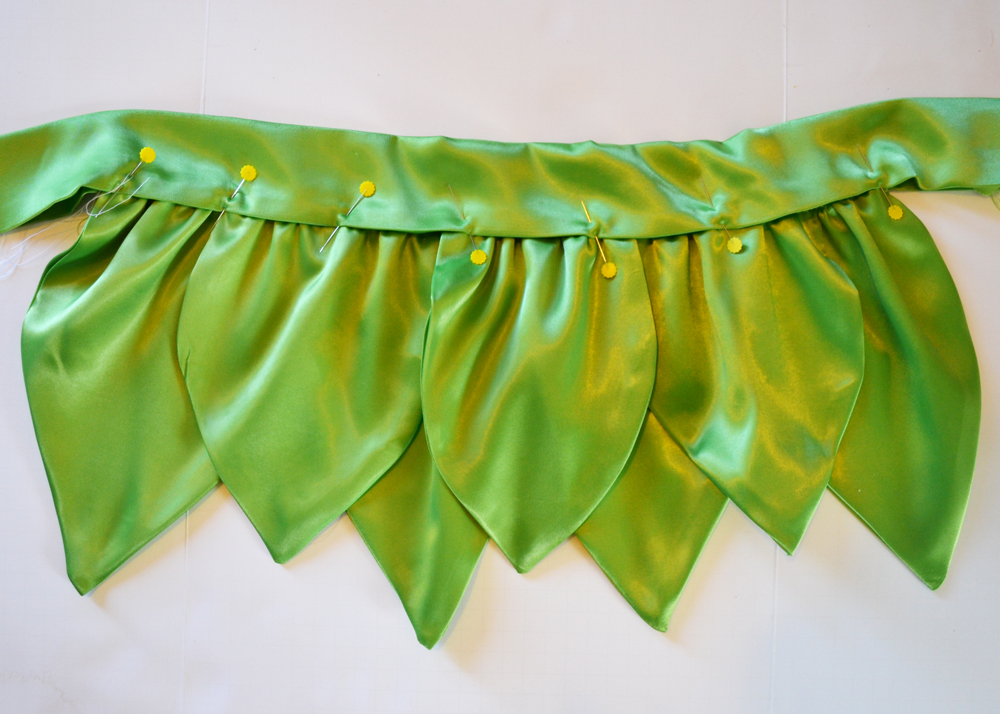
    Tuck the leaves about ½" into the waistband you've previously folded and pressed. Pin (a lot) because satin is slippery!

    Sew a Tinkerbell Skirt & Top by The DIY Mommy

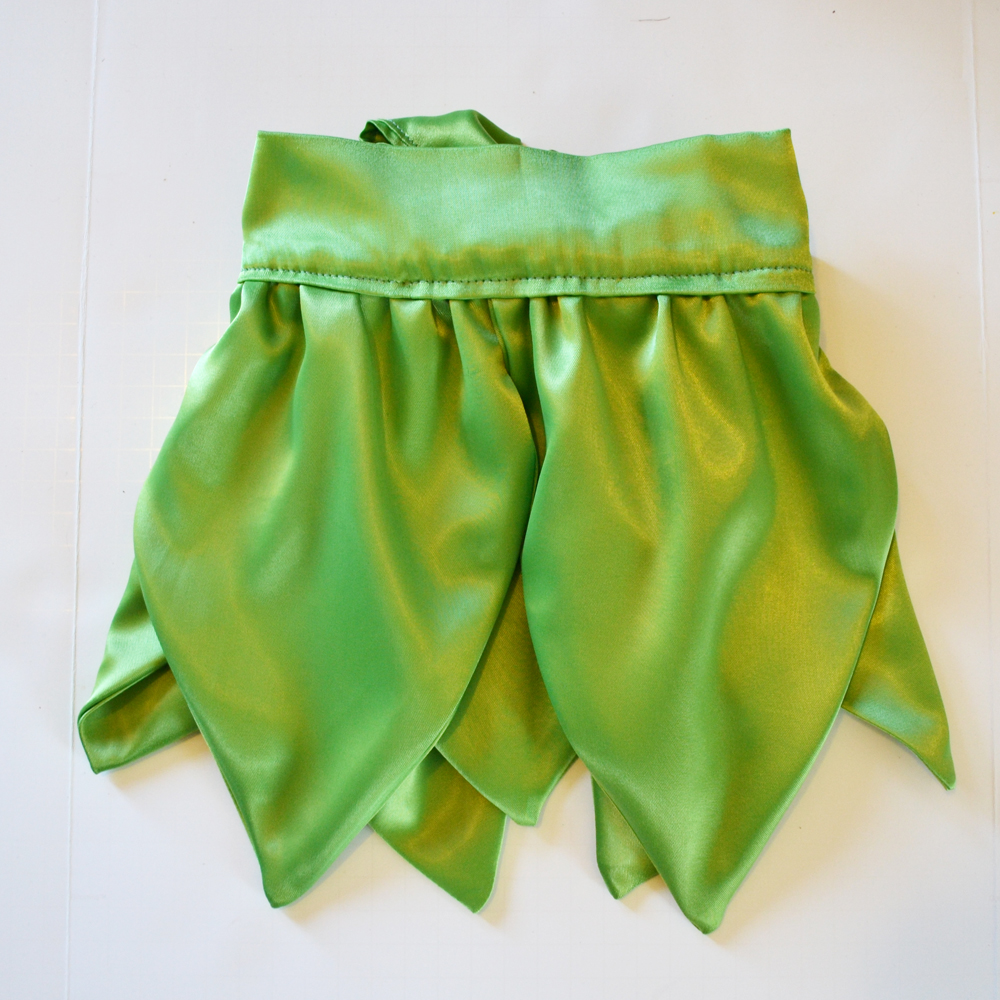
    Press the short ends of the waistband inwards and press (so there are no raw edges showing on the ends of what will be the tie). Sew the layers together with a topstitch about ¼" from the open fold of the waistband, sew the tie ends shut at the same time (as shown below).

    Sew a Tinkerbell Skirt & Top by The DIY Mommy

    Sew a Tinkerbell Skirt & Top by The DIY Mommy

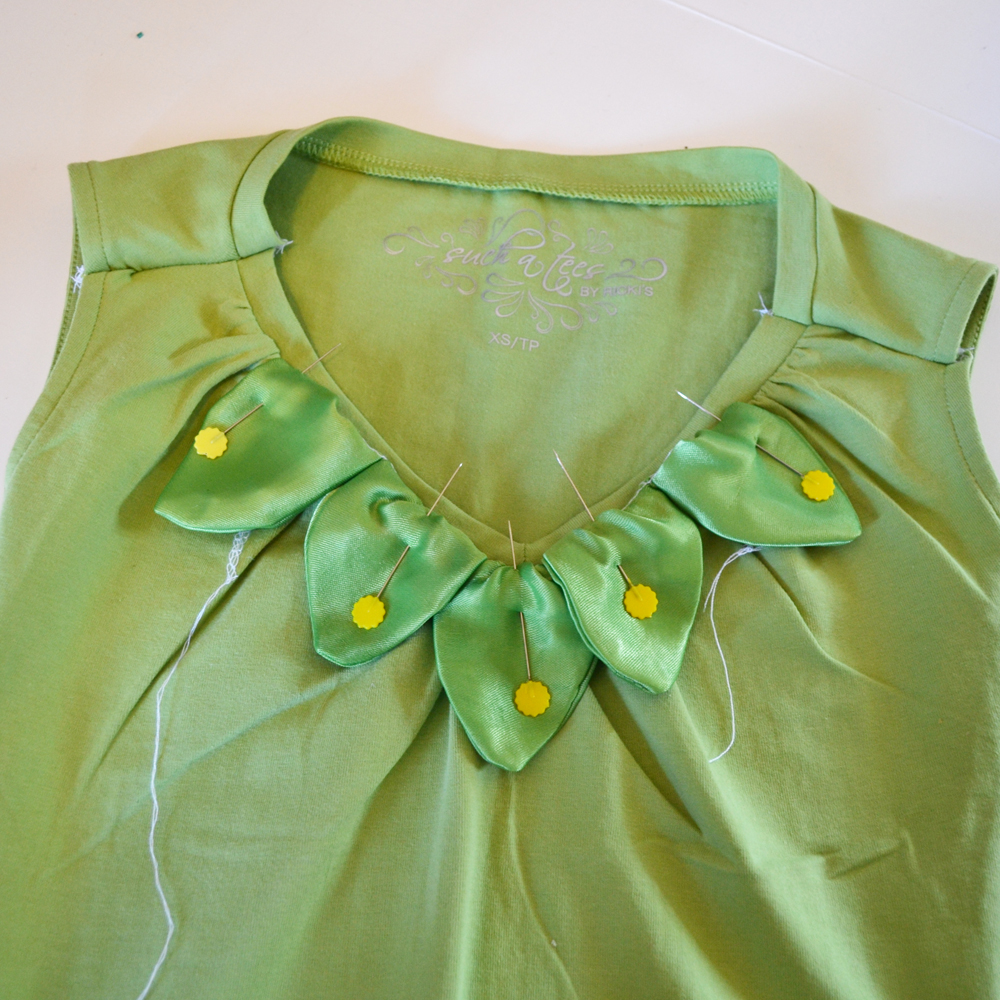
    For a matching top, find a green tank top that's your child's size (if not, you can do what I did and alter a women's small tank top by taking in the shoulders and sides). Make small leaves in the same manner as the large leaves made for the skirt (mine measured about 2" by 3"). Pin them together side-by-side, gather them, and then turn the raw edges in, pin, and stitch to the neckline as pictured above.

    Sew a Tinkerbell Skirt & Top by The DIY Mommy

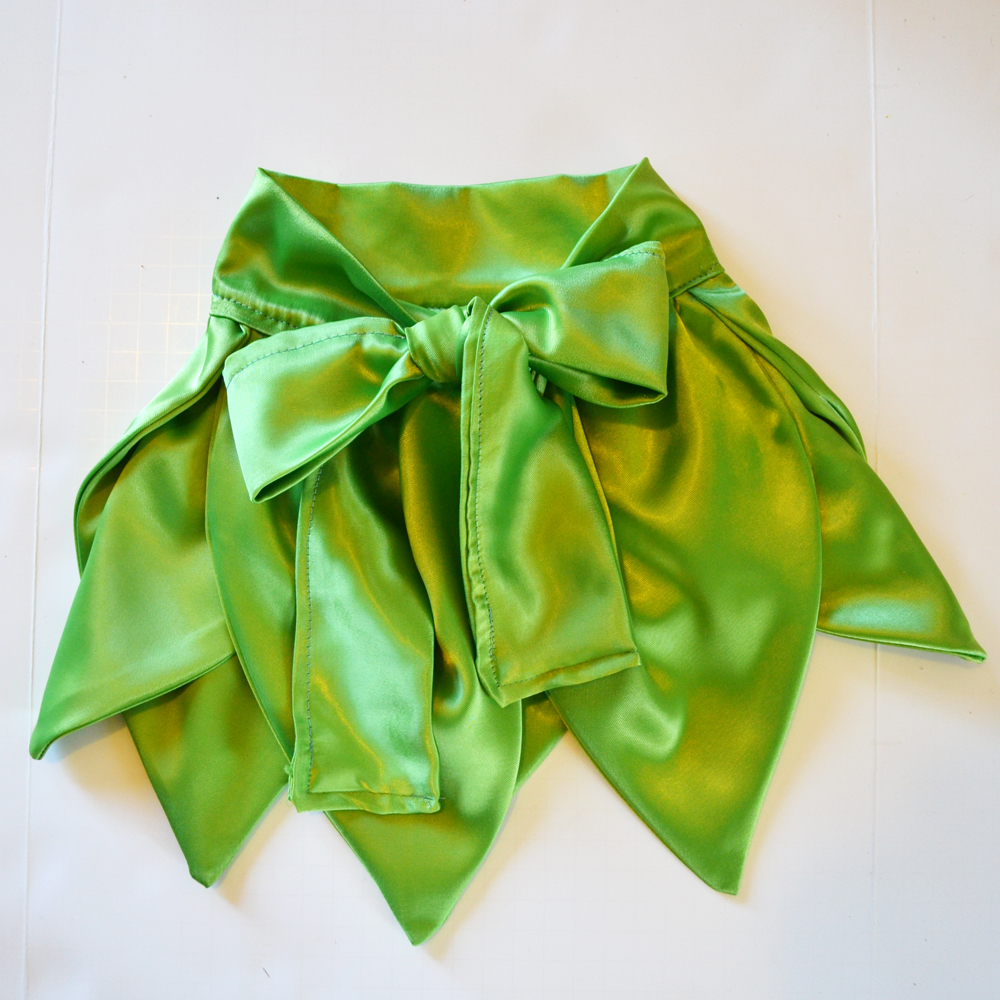
    To wear, simply have your girlie slip on the tank top and a tutu and tie the leaf apron over top. Cuteness!

    More Inspiration

    • Free Printable Christmas Coupon Book for Kids
    • Our Pacific Coast RV Trip: Canada Down to Disneyland
    • Create an Easy DIY Advent Calendar - with crystals inside!
    • Fuzzy Crochet Chain DIY Easter Eggs

    Reader Interactions

    Comments

    1. Julia1982

      January 23, 2013 at 10:26 am

      best regards from germany

      Reply
    2. Rebecca

      April 08, 2013 at 9:34 pm

      I love this costume! When cutting the shapes for the petals you've written 8 x 6 for both the large and small, and I was wondering what the actual sizes are. You're very creative, I really enjoy your site
      Thanks, Bec

      Reply
      • Christina Dennis

        April 11, 2013 at 12:18 am

        Hi, Rebecca! Thanks so much. Oops - the small leaves should be 6" x 4". Thanks for double checking that!

        Reply
    3. MITzi Henry

      October 25, 2013 at 8:51 pm

      Thank you SO much for this tutorial!! Love love and my daughter LoVES her new tink costume!

      Reply
      • Christina Dennis

        October 25, 2013 at 9:08 pm

        You're so welcome! I'm so happy that your daughter loves her costume. Do you have a photo you could share? I'd love to see! 🙂

        Reply
    4. Sara Gibson

      April 27, 2014 at 8:16 pm

      I never saw this post before! What an adorable Tinkerbelle costume! You did a great job, Christina.

      Reply
      • Christina Dennis

        May 01, 2014 at 11:31 pm

        Thanks, Sara. It was a fun little costume to sew! Cadence wanted one in a rainbow of colours, haha!

        Reply
    5. Sandra

      May 05, 2014 at 2:49 pm

      I made this one for my daughter for her friends Tinkerbell themed birthday party. I added an inch to all measurements (for a four year old) It properly could have done with some extra length but it was fine with Tutu underneath. I'm very pleased with the result and my daughter loves her new costume 🙂

      Reply
      • Christina Dennis

        May 05, 2014 at 10:29 pm

        That's wonderful, Sandra! I'm glad she loves it and I'm so happy you're pleased with it. Thanks for visiting my blog and using this tutorial!

        Reply
    6. MB

      February 12, 2016 at 11:58 am

      Thank you so so sooo much. I'm doing the tinkerbell run this year and this will be the perfect pattern (adjusted for adult size)! I'll tag you with the finished product if it turns out well!

      Reply
    7. Glynis

      April 06, 2016 at 3:36 pm

      Just made this costume. So thrilled with it. Thank you so much. Will be the belle of ball at party next week. I'm in UK.

      Reply
      • Christina Dennis

        April 10, 2016 at 9:01 pm

        Wonderful! Thanks for sharing!

        Reply
    8. kaz

      April 21, 2016 at 9:12 am

      Making ROse and sunflor costumes for the carnival festivities here in brooklyn for a kids band and i needed this post in my life to get the leaves just right. This is exactly what i needed- Thank you Christina- COntinue being a blessing.

      Reply
    9. Julia

      October 11, 2020 at 12:14 pm

      Thank you. I used your pattern to make this skirt for my child's friend and a matching blue (water fairy) one for my daughter. Both girls love them. I added little bells onto the ties of Tink's one, and stitched the back of the belt onto the tutu to make it easier for the girls to put on themselves and keep it from slipping.

      Reply

    Trackbacks

    1. 13 DIY Tinkerbell Costume Ideas DIYReady.com | Easy DIY Crafts, Fun Projects, & DIY Craft Ideas For Kids & Adults says:
      October 3, 2015 at 1:01 am

      […] image via thediymommy […]

      Reply
    2. Adult Costume Pattern Tinkerbell says:
      September 6, 2016 at 11:20 am

      […] Sew a Tinkerbell Skirt & Top | The DIY Mommy – by Christina Dennis My good friend asked me to help her make a Tinkerbell fairy costume for her little girl’s fourth birthday. We started with a gorgeous […]

      Reply
    3. DIY Girls Halloween Costumes says:
      August 17, 2017 at 1:38 pm

      […] Tinkerbell from the DIY Mommy […]

      Reply
    4. The Ultimate Disney Princess Halloween Costume Guide for Your Little Princess says:
      August 17, 2018 at 6:04 am

      […] If you’re crafty, try out this tutorial! […]

      Reply

    What do you think? Cancel reply

    Your email address will not be published. Required fields are marked *

    This site uses Akismet to reduce spam. Learn how your comment data is processed.

    Primary Sidebar

    Welcome!

    Christina Dennis, The DIY Mommy

    I'm Christina and I'm sharing budget-friendly DIY & decor ideas to create a cozy home and life you love!

    Read more about me

    Latest Posts

    • We built a small bathroom wet room from scratch!
    • Creative And Unique DIY Wall Art Ideas
    • DIY Dollar Tree Heart Shaped Wreath

    What's my home decor style?

    Discover the home decor style that best fits your personality and lifestyle. This two-minute quiz is going to give you the direction you need to start the big, bold room makeovers that you've always wanted to try!

    Find out now!

    Archives

    Footer

    ↑ back to top

    About

    • About The DIY Mommy
    • Privacy Policy
    • Disclosure Policy
    • Terms of Service

    Newsletter

    • Sign Up! for emails and updates

    Contact

    • Contact

    As an Amazon Associate I earn from qualifying purchases.

    Copyright © 2009 - 2023 The DIY Mommy. "The DIY Mommy" is a registered trademark.