Upcycled Gold Dry-Brushed Table (+ How to Dry Brush Furniture)
This post may contain affiliate links · This blog generates income via ads
There is definitely such a thing as an addiction to painting furniture. And I certainly have it. Every sad looking table, dresser or chair I see on Kijiji or at a garage sale says, “Paint me! I can be re-made into something awesome!” This table, for example, was part of a trio of tables I bought off of Kijiji that was crying out for a new look. The side tables were done in white chalk paint and DIY dark silver wax, and I did something a little different with the coffee table. This was a very random, spur-of-the-moment transformation, but I really think it looks cool!
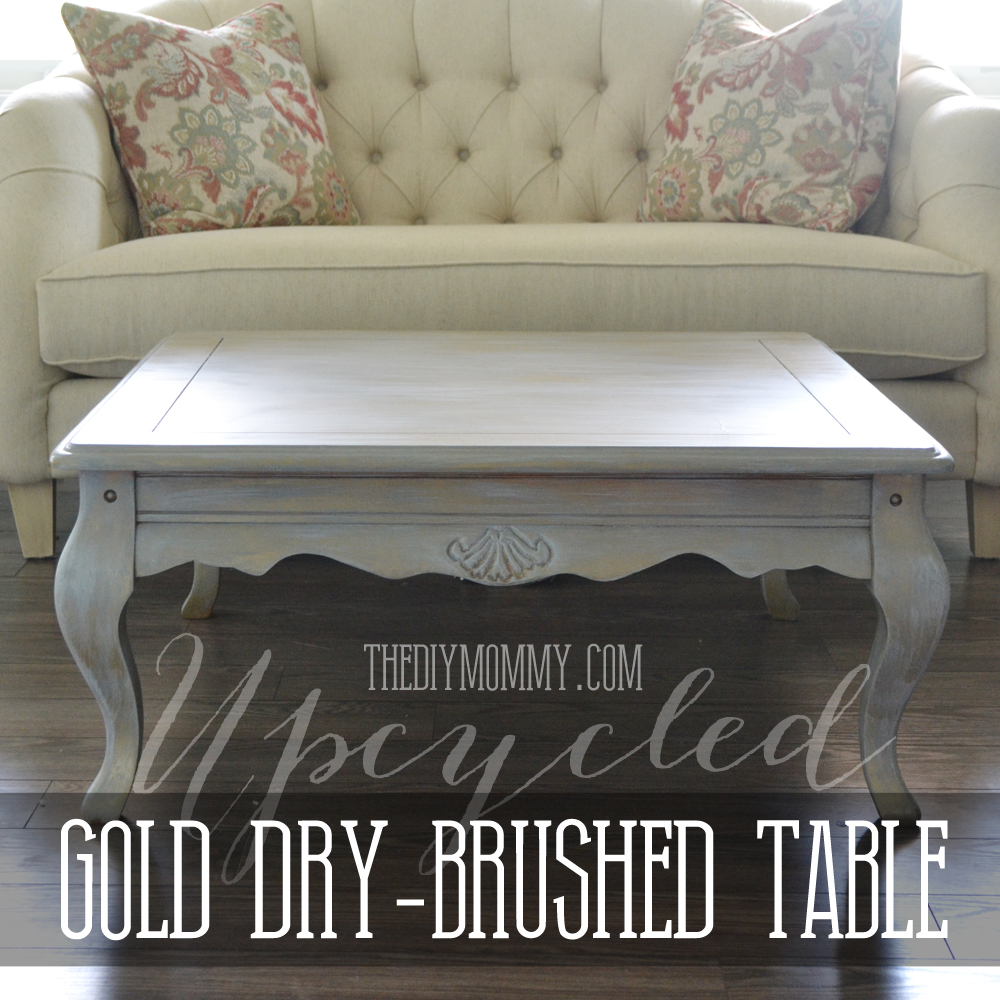
I call this look the “gold dry-brushed” effect. I think it looks almost Restoration Hardware inspired. Really, I had no idea this was what the table would look like when I started working on it. One day I woke up and decided that I really wanted to buy a couple of cans of gold spray paint, take the table out on the front deck, and spray it metallic gold.
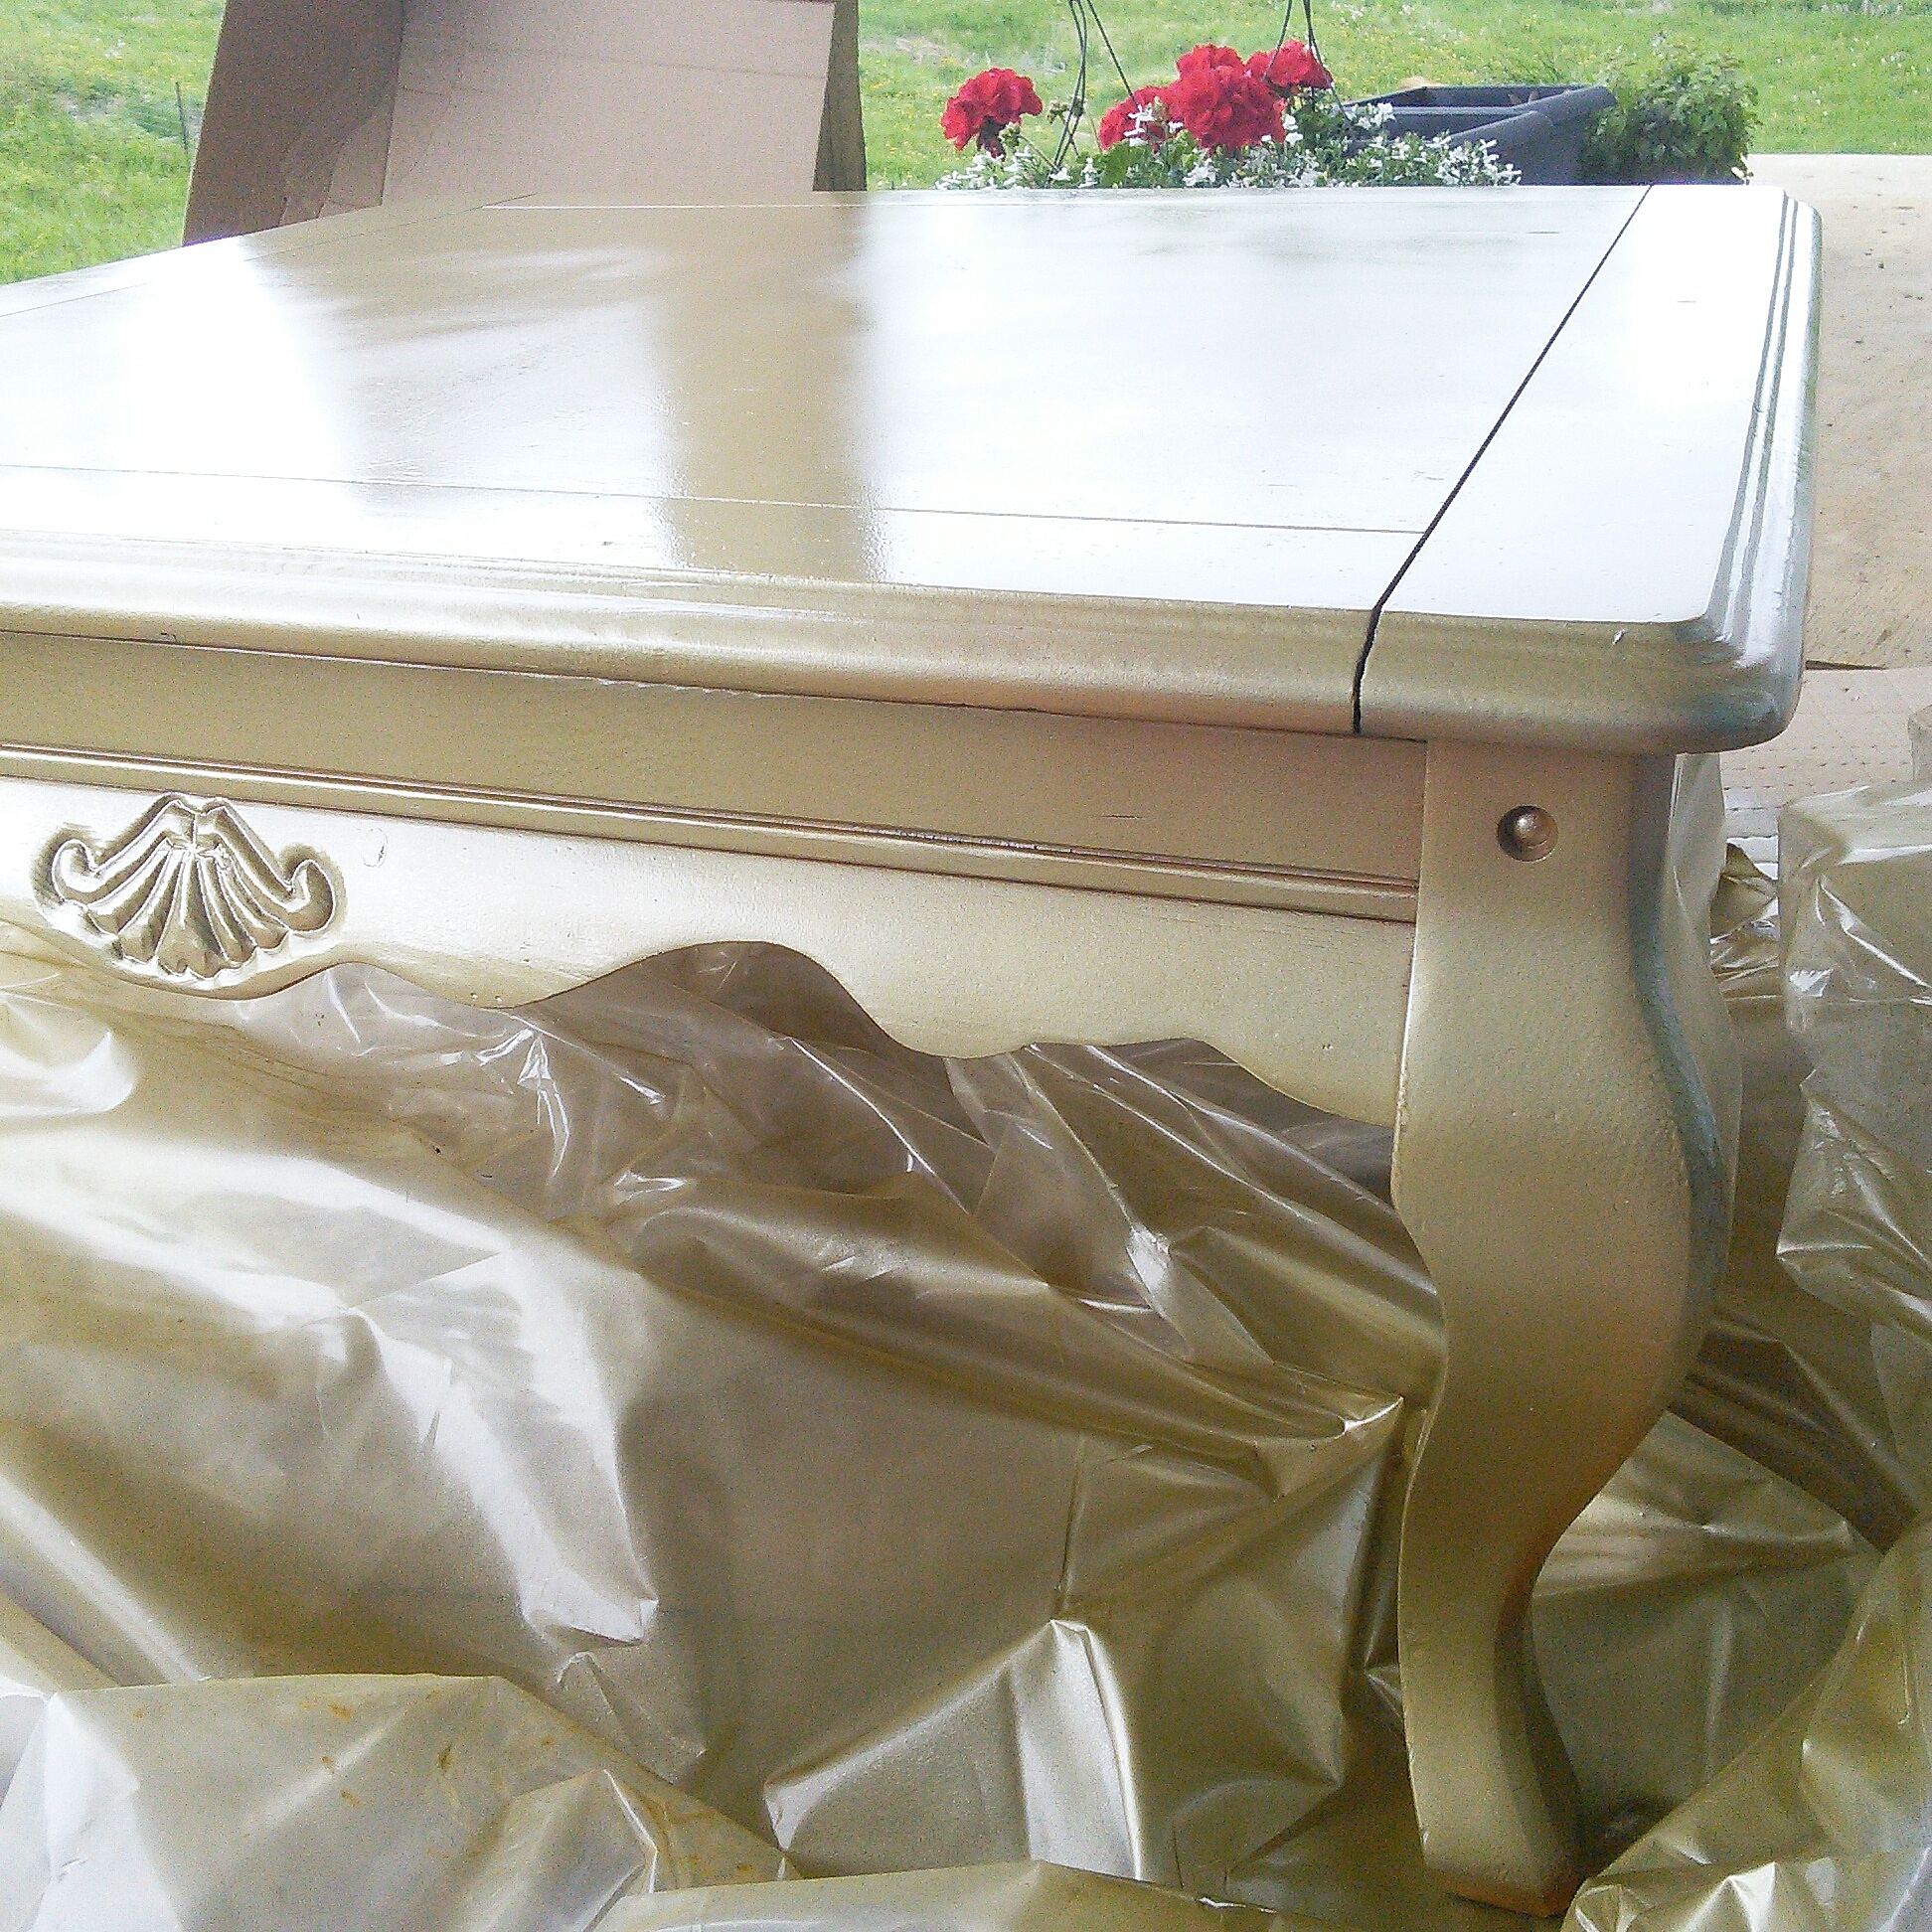
The solid metallic gold paint looked pretty neat, but I ultimately decided that the table looked too “plasticky” and it needed some more character and dimension.
That’s when I watched this video on dry-brushing, and decided to dry brush my table! The result was really fun.
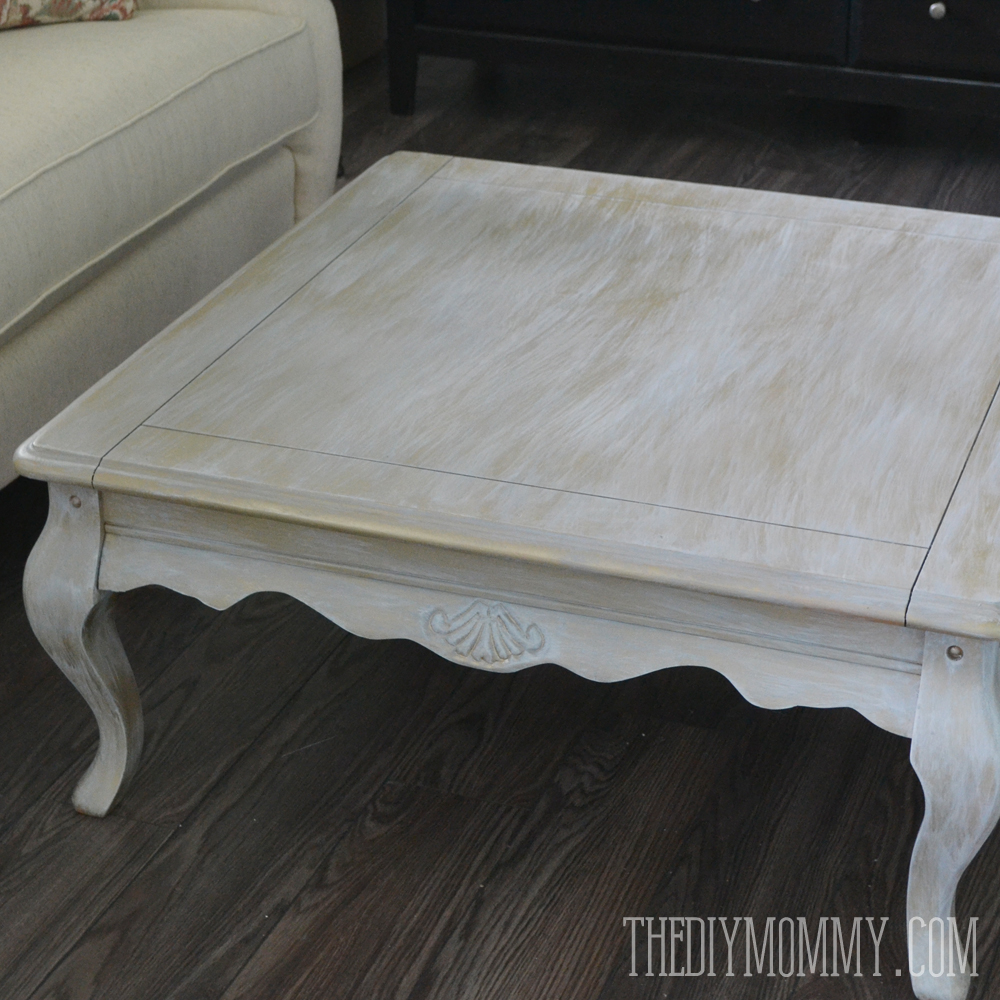
Dry-brushing is when you only put a very small amount of paint on the tips of your brush and quickly and lightly brush it onto your surface. The original colour of the piece will show through the dry brushing, and you can almost obtain a woodgrain effect. I thought the video was quite well done and I learned the technique really quickly by watching it!
I used homemade chalk paint, a tupperware lid, a piece of folded paper towel and an angled paint brush and went to work.
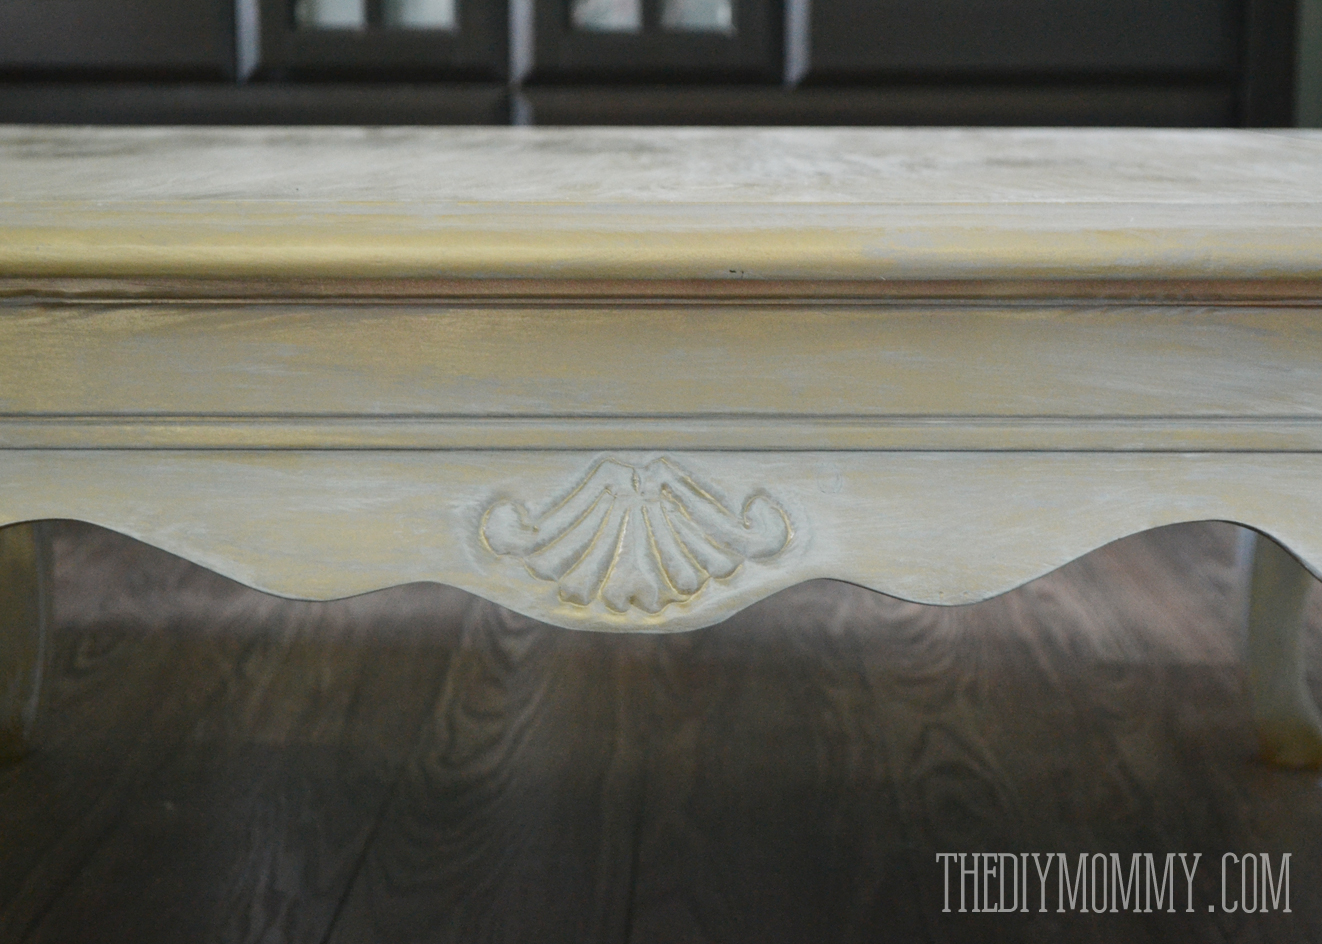
First, I dry-brushed with a medium grey paint. I put some paint in the lid, dabbed my brush in it, blotted my brush on the paper towel, and then went over my table with quick, light strokes. I started with the sides and legs first and I left the large surface of the table top until the end.
After I dry-brushed in grey, I did a second layer with white paint for even more dimension.
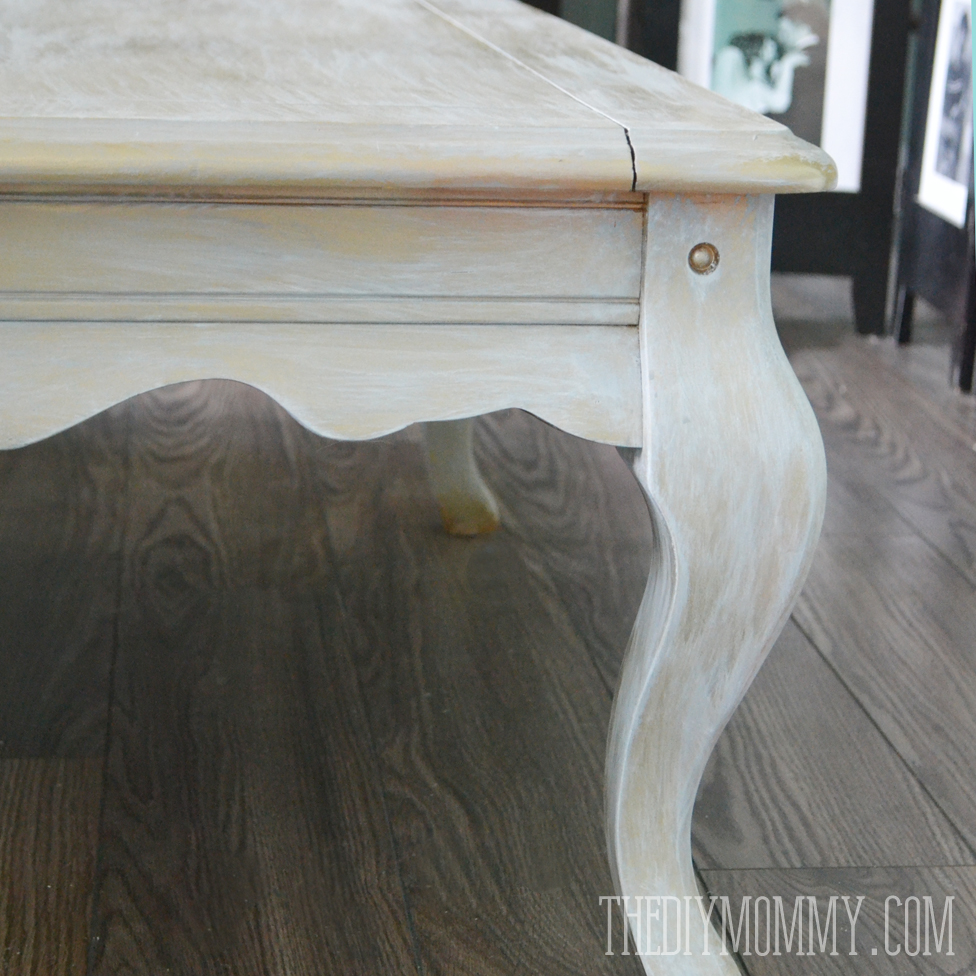
The top of the table was definitely the trickiest. I just used swift, long strokes and I am quite pleased with the result! It looks kind of wood-grain inspired.
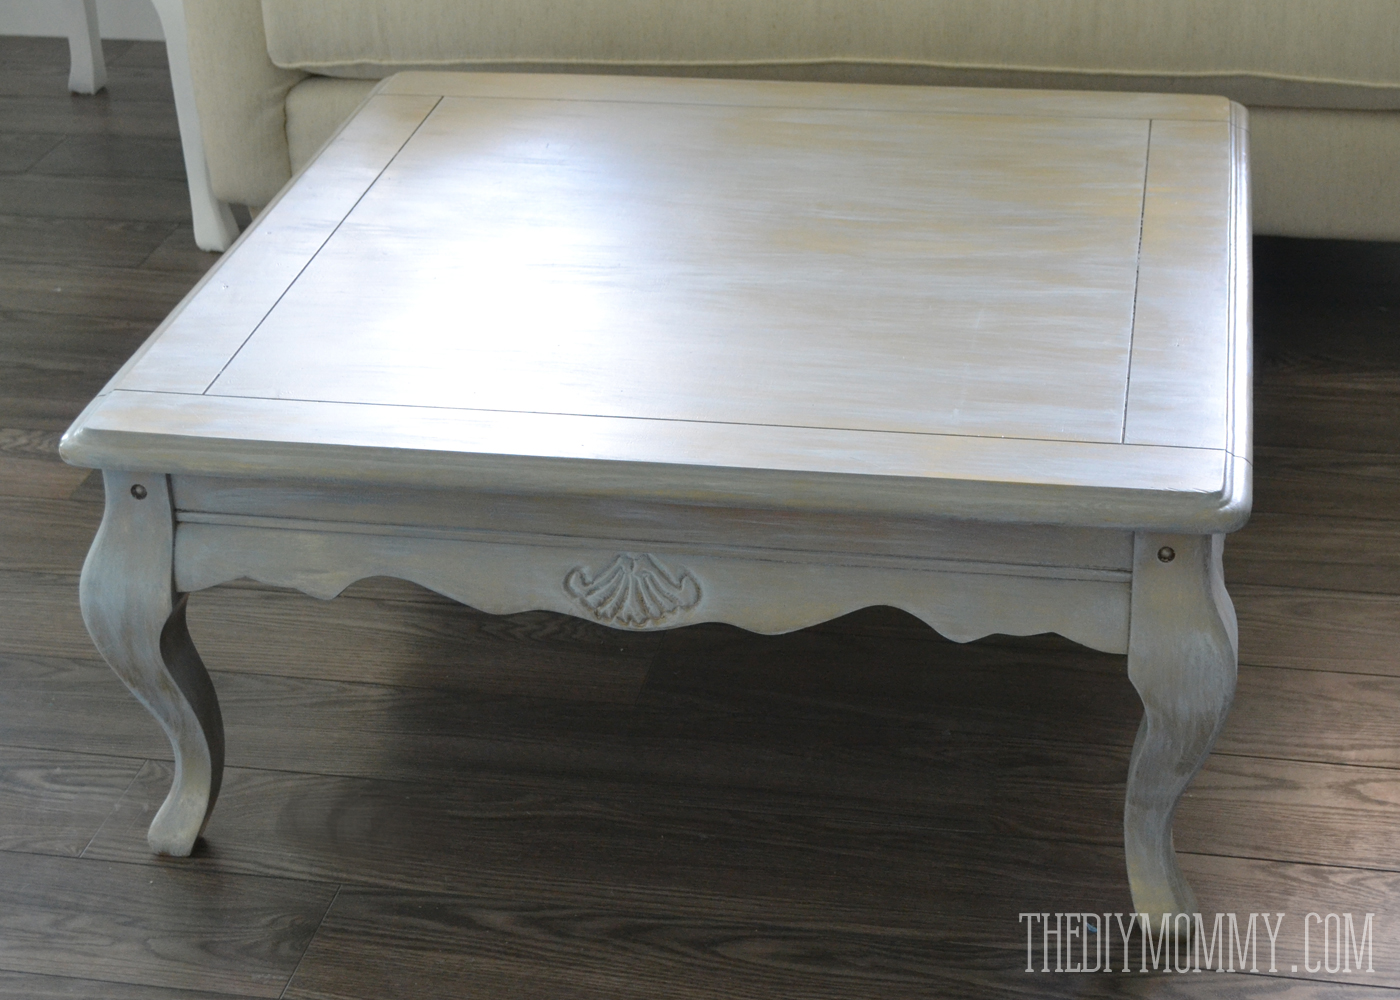
I love how the metallic gold still shines through the dry-brushed paint on top, and I also love that the details on the sides of the table are highlighted with the different colours of paint.
I haven’t done it yet, but one day when the kids are napping or playing (happily!) together, I’ll finish this guy off with a coat of clear wax.
Raise your hand if you’re a fellow furniture painting addict?!
You might also like my post on what I did to the matching side tables:
Linked to: From Dream to Reality at The DIY Dreamer, BeAwesome Linky Party at Fynes Designs, DIY Decorating at Tip Junkie, Made by You Monday at Skip To My Lou
Raising my hand – I’m a furniture painting addict too! I’ve had to stop looking at second hand furniture otherwise our garage would be all old furniture that I’ll get around to painting one day, and no room for the cars. I love this dry brushing technique, the table looks awesome 🙂
I have to stop looking at old furniture too. It’s so addicting! I’m glad I’m not the only one. 🙂 Thanks for visiting my blog, Krista!
This is beautiful; I may just have to try this technique. Thanks for linking up at the #BeAwesomeparty last week; I’m featuring you this week 🙂
I loved your Tip Me Tuesday link . {thanks girl!}
Would you like Tip Junkie to feature your blog post to over 200,000 creative women? If you upload this blog post into your Tip Junkie craft room using at least 2 images, 2 steps, and blog post URL then I can easily feature it in my RSS feed, home page, and all my social networks instantly. {squealing with delight} ~
Laurie {a.k.a. the Tip Junkie}
http://www.tipjunkie.com/post/how-to-add-a-craft-room-project-on-tip-junkie/
Hi, Laurie! Thanks for commenting! Cool; I will do that when I have a chance. Thanks so much!