14 Day Home Organization Challenge & Printable Declutter Checklist
This post may contain affiliate links · This blog generates income via ads
Welcome to The DIY Mommy’s 14-Day Home Organization Challenge! If you’re ready to declutter and transform your living spaces, you’re in the right place. In this comprehensive guide, I’ll tackle each trouble spot in your home, providing practical tips and tricks to create a more organized and visually appealing space. Plus, I’ve got a special treat for you – a Printable Declutter Checklist to guide you through the process. Let’s dive in!
I wouldn’t call myself the most naturally organized person in the world, that’s for sure! I’d much rather decorate my home than declutter and organize it. So for me, it takes concentrated challenges like this one to really get me tackling my home. When I do this 14 day home organization challenge, it only takes me a couple of weeks to make my house feel SO much more organized and free of junk! I hope this challenge helps you, too. I’ve included the biggest trouble spots in my home each day, and I know they’re problem areas for a lot of us!
Click here to get started by downloading my Free Printable Declutter Checklist!
Or click on the image below to open up my free printable decluttering checklist PDF. Print it out on your home computer, and use it as a guide as you go through the daily organization and decluttering process!
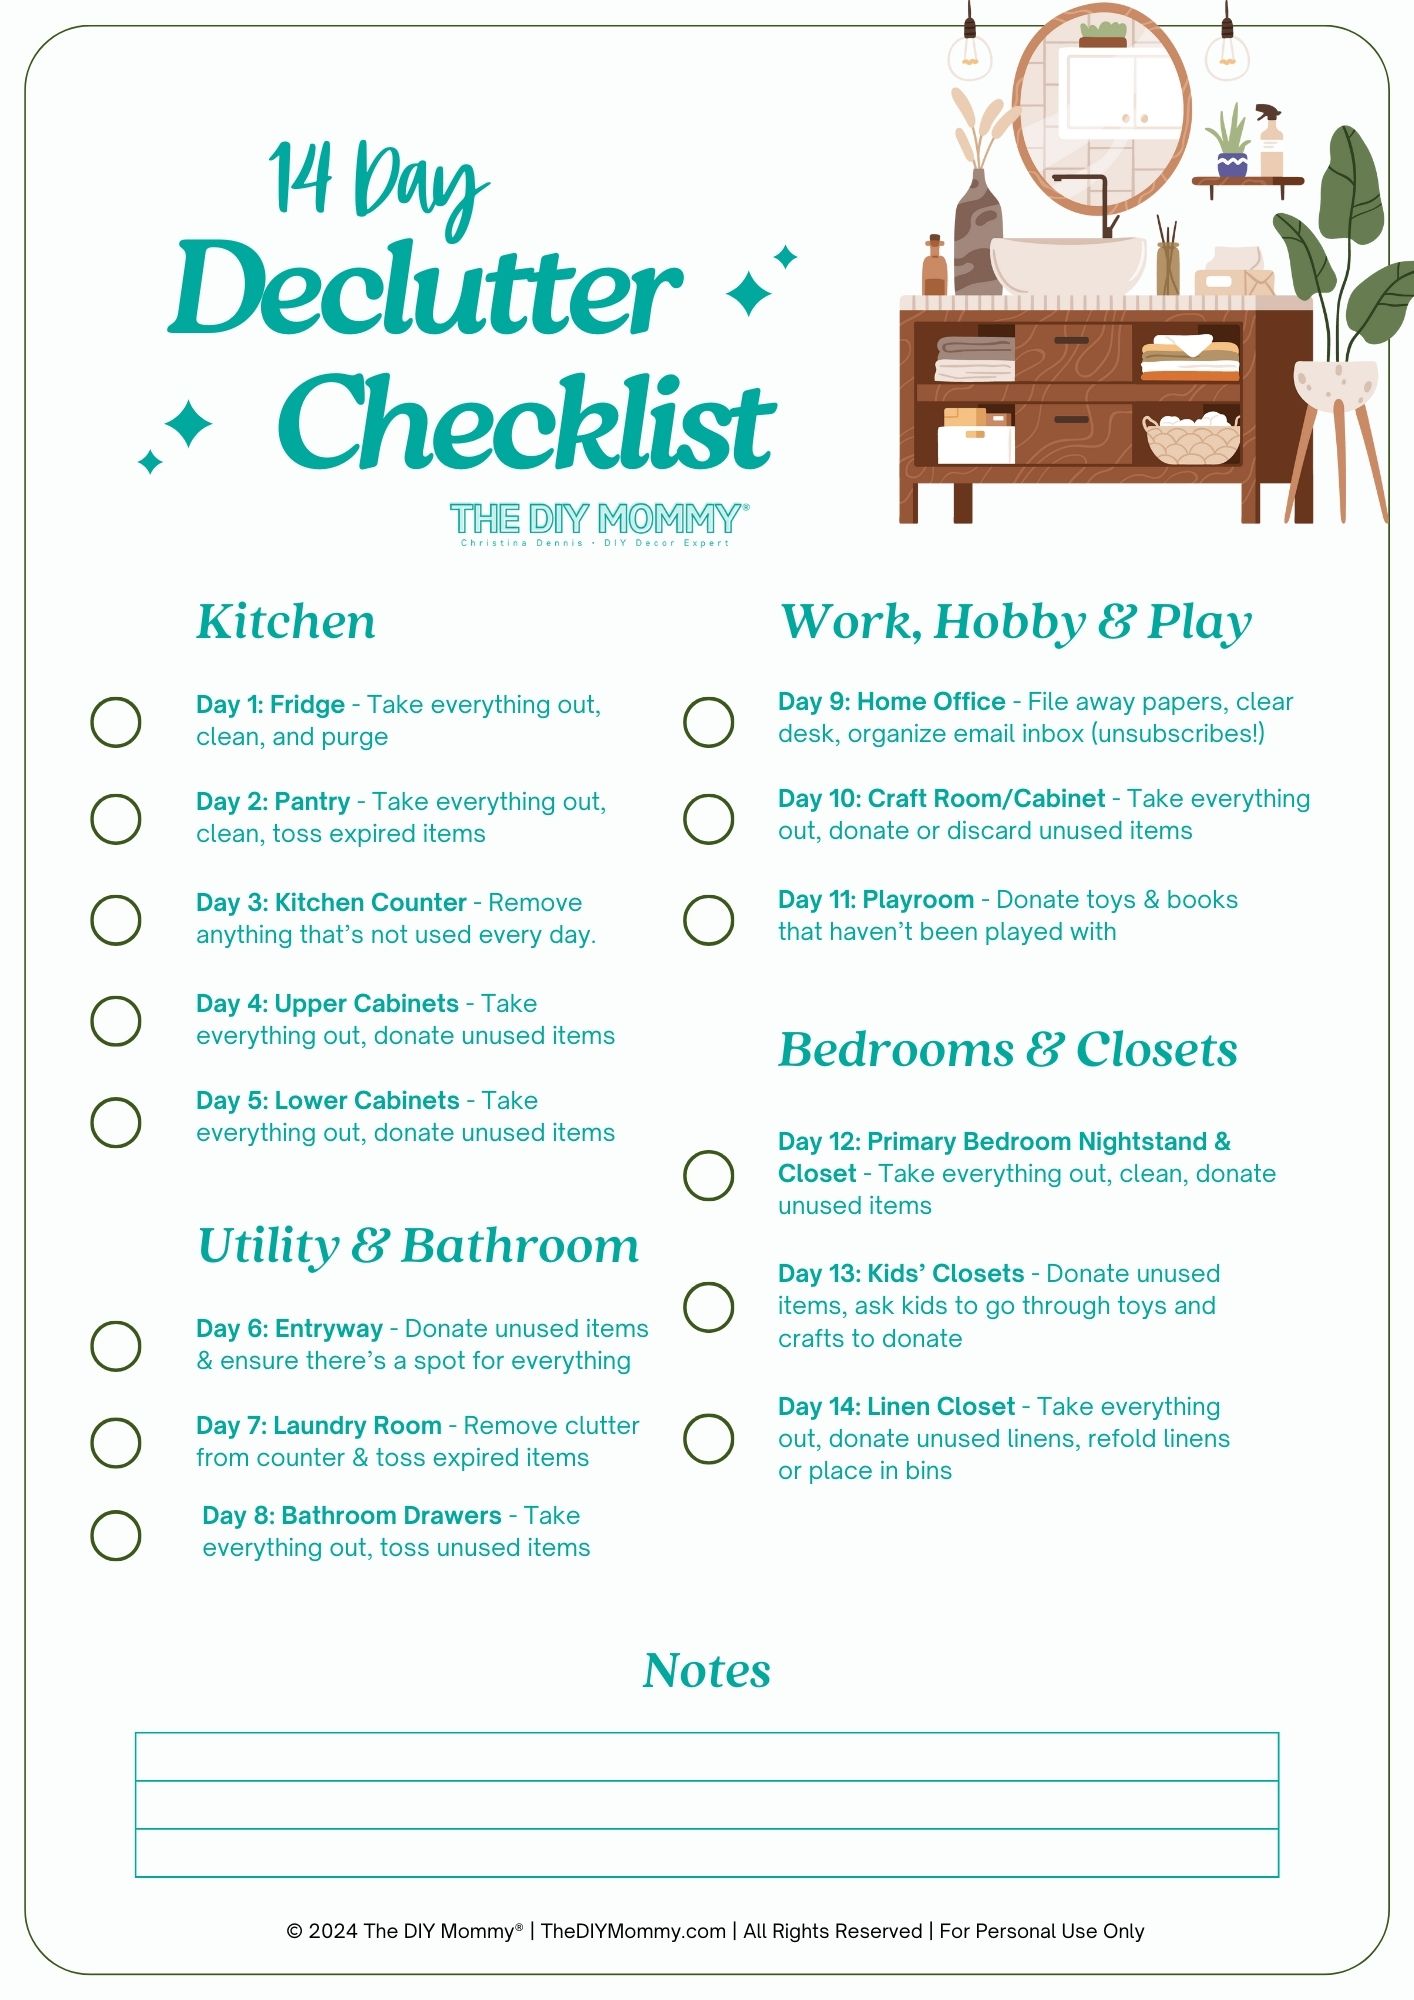
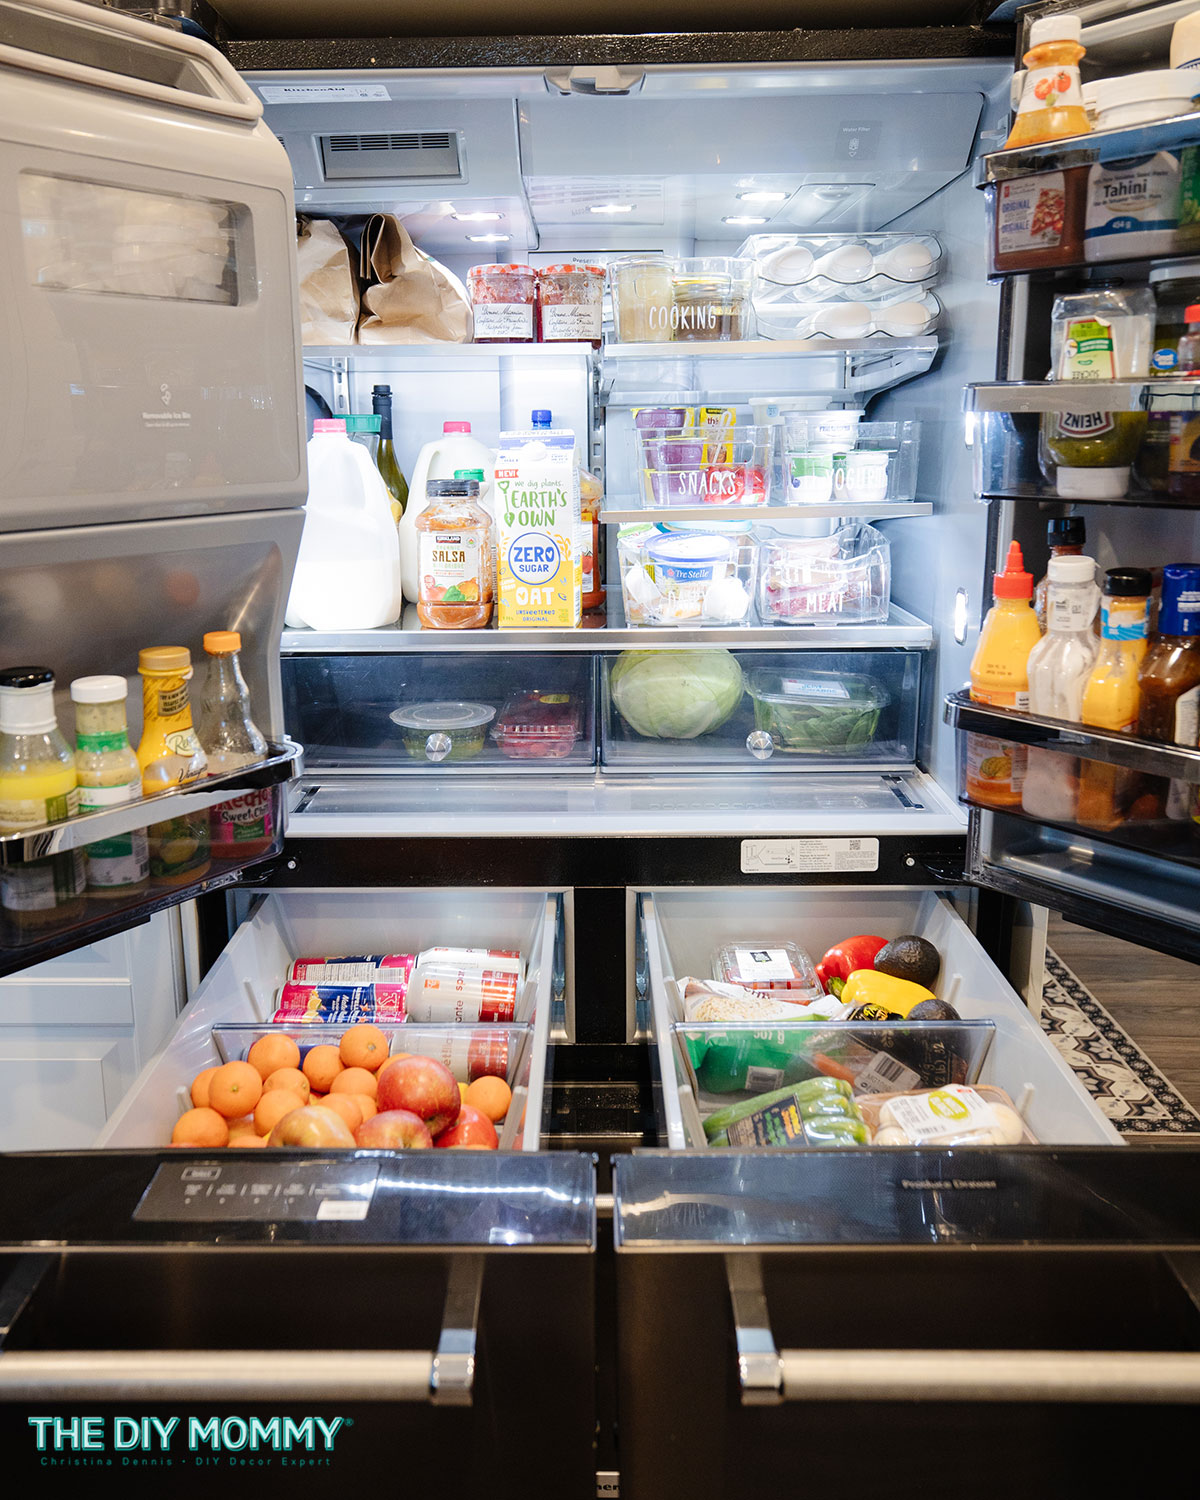
Day 1: Fridge & Freezer – The Heart of the Home
Kick off the challenge by focusing on the heart of your home – the fridge. Take everything out, give it a good cleaning, and embrace the power of clear, labeled bins for efficient organization. Make sure you get rid of any expired or rotten food, and keep things like sauces, dressings and other condiments in the fridge doors. They don’t require as much refrigeration.
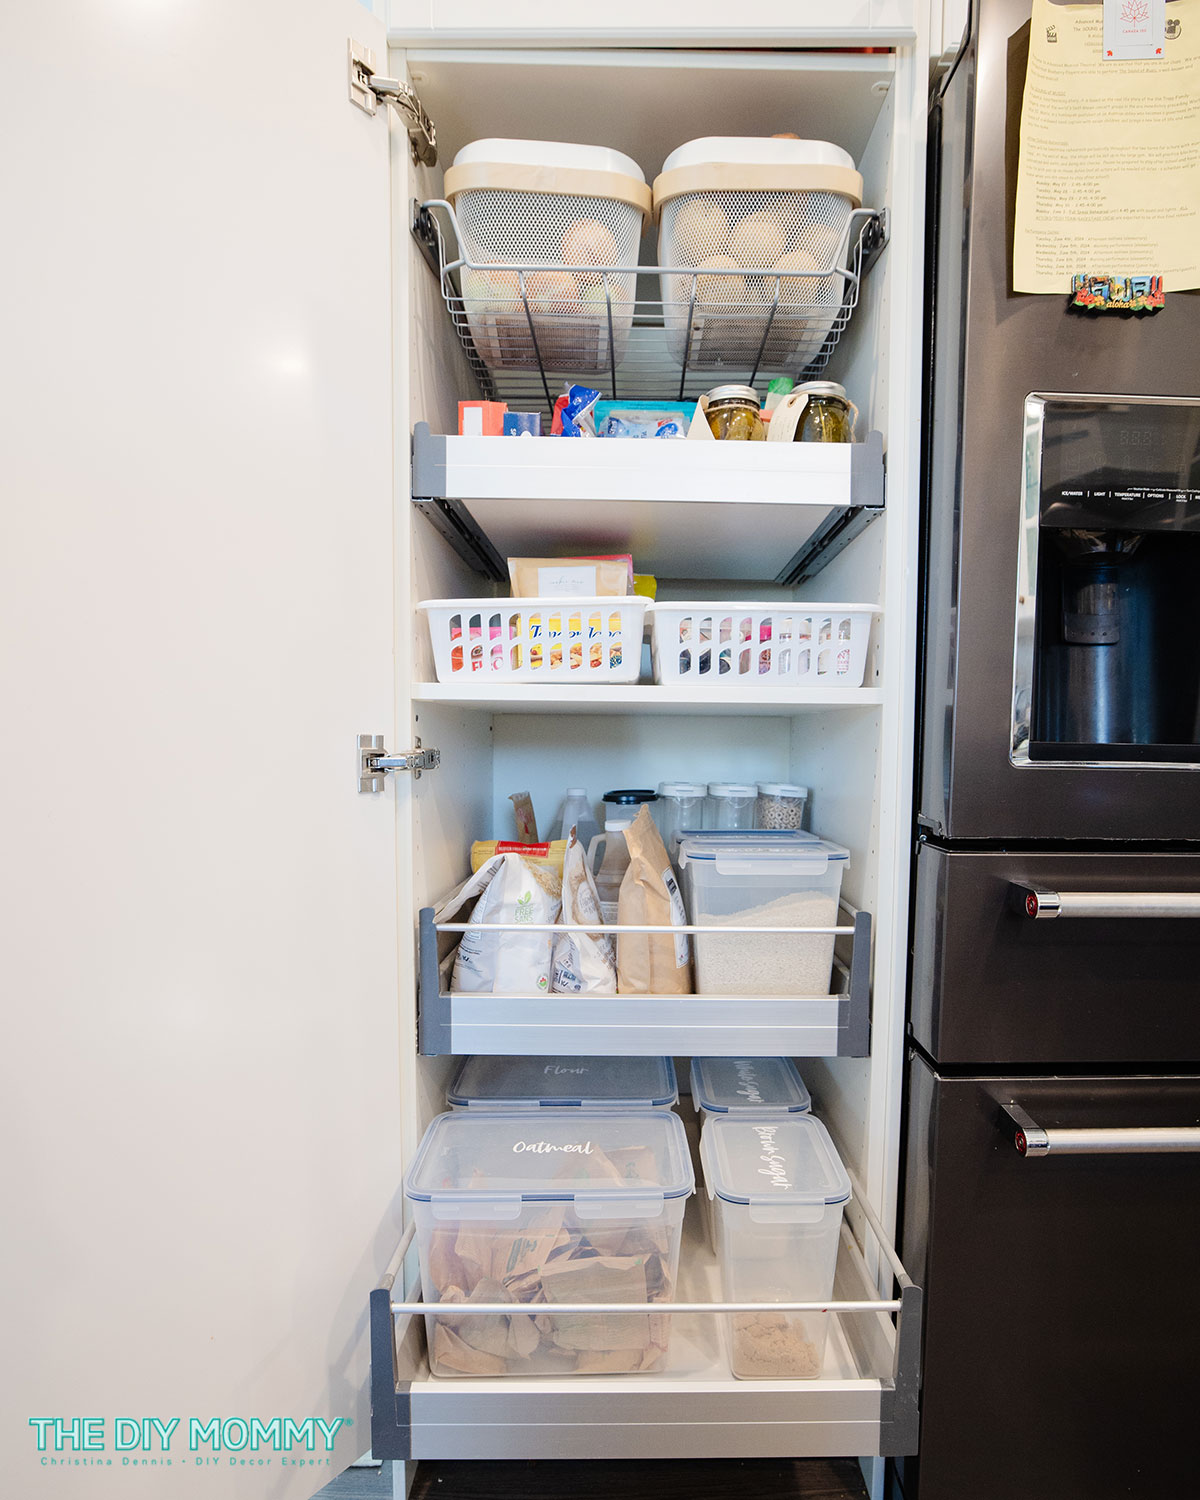
Day 2: Pantry – A Place for Everything
Next, let’s move on to the pantry, a space that tends to get disorganized quickly. Empty it out, check for expiry dates, and invest in square bins and pull-out drawers for easy access. Even though organizing your pantry can be a pain, this small time investment can make a big difference in your kitchen’s function.
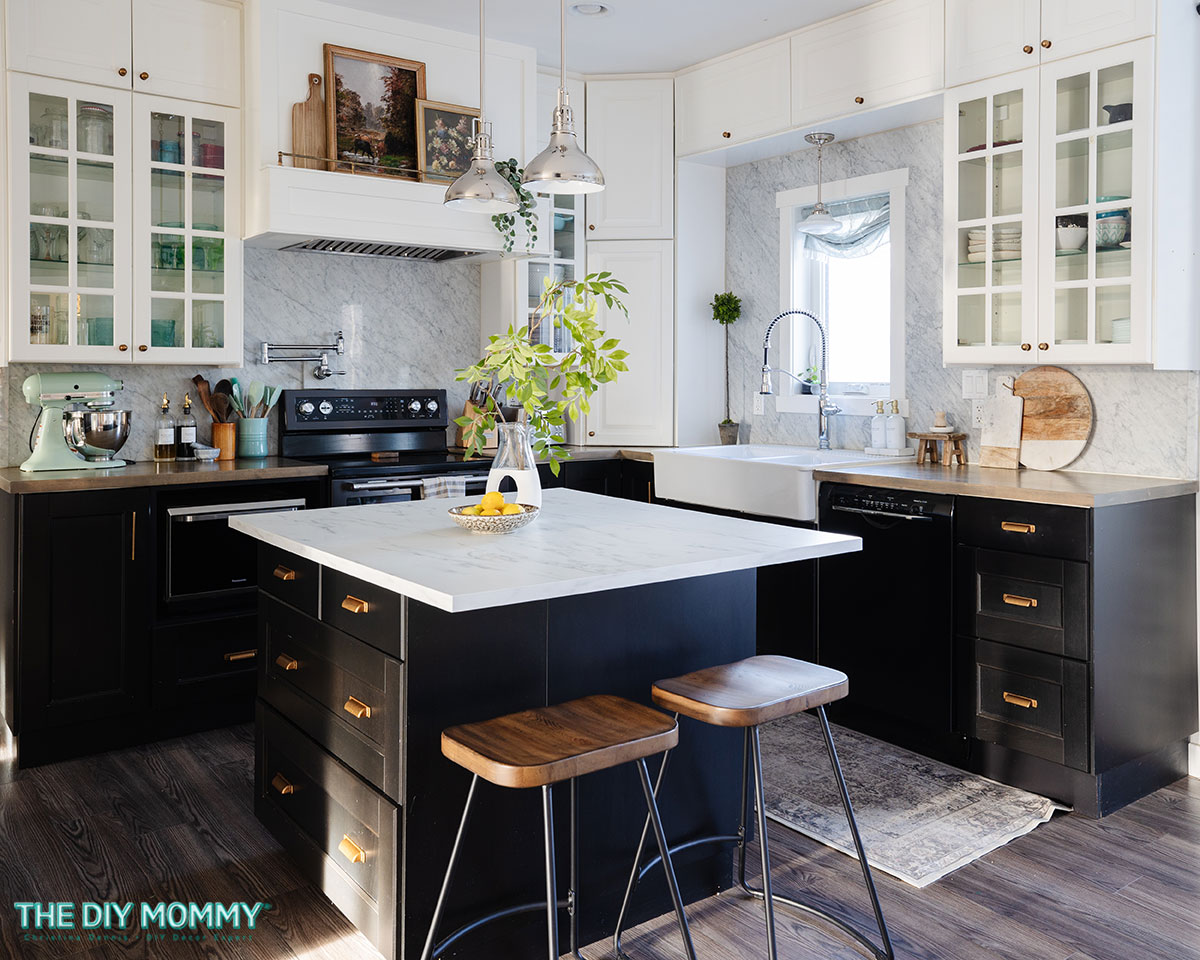
Day 3: Kitchen Counter – Declutter with Style
Let’s tackle kitchen counter clutter with a touch of style! Use pretty jars and matching kitchen accessories to create an aesthetically pleasing look. Learn how small containers can corral items, making your counters look less cluttered.
As much as I love decor, it’s best to keep it minimal on your kitchen countertops. Keep most things functional so that you can enjoy the working area that your counters provide.
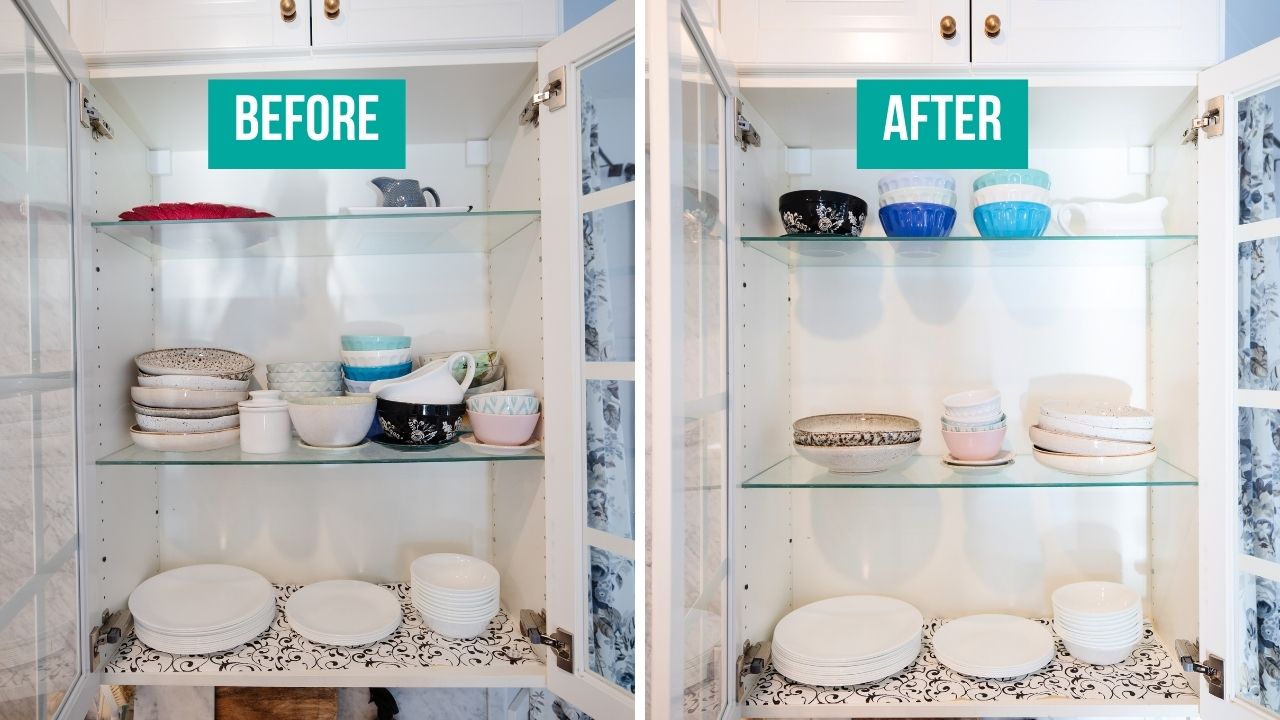
Day 4: Upper Kitchen Cabinets – Streamlined Storage
Now, let’s head up high to the upper kitchen cabinets. Declutter by assessing each item’s usefulness. Donate what you don’t need, and witness the transformation as your cabinets become more streamlined and organized. We tend to keep an excess amount of dishes, cups and mugs, so be ruthless in asking yourself if you and your family TRULY use them all in a week’s time!
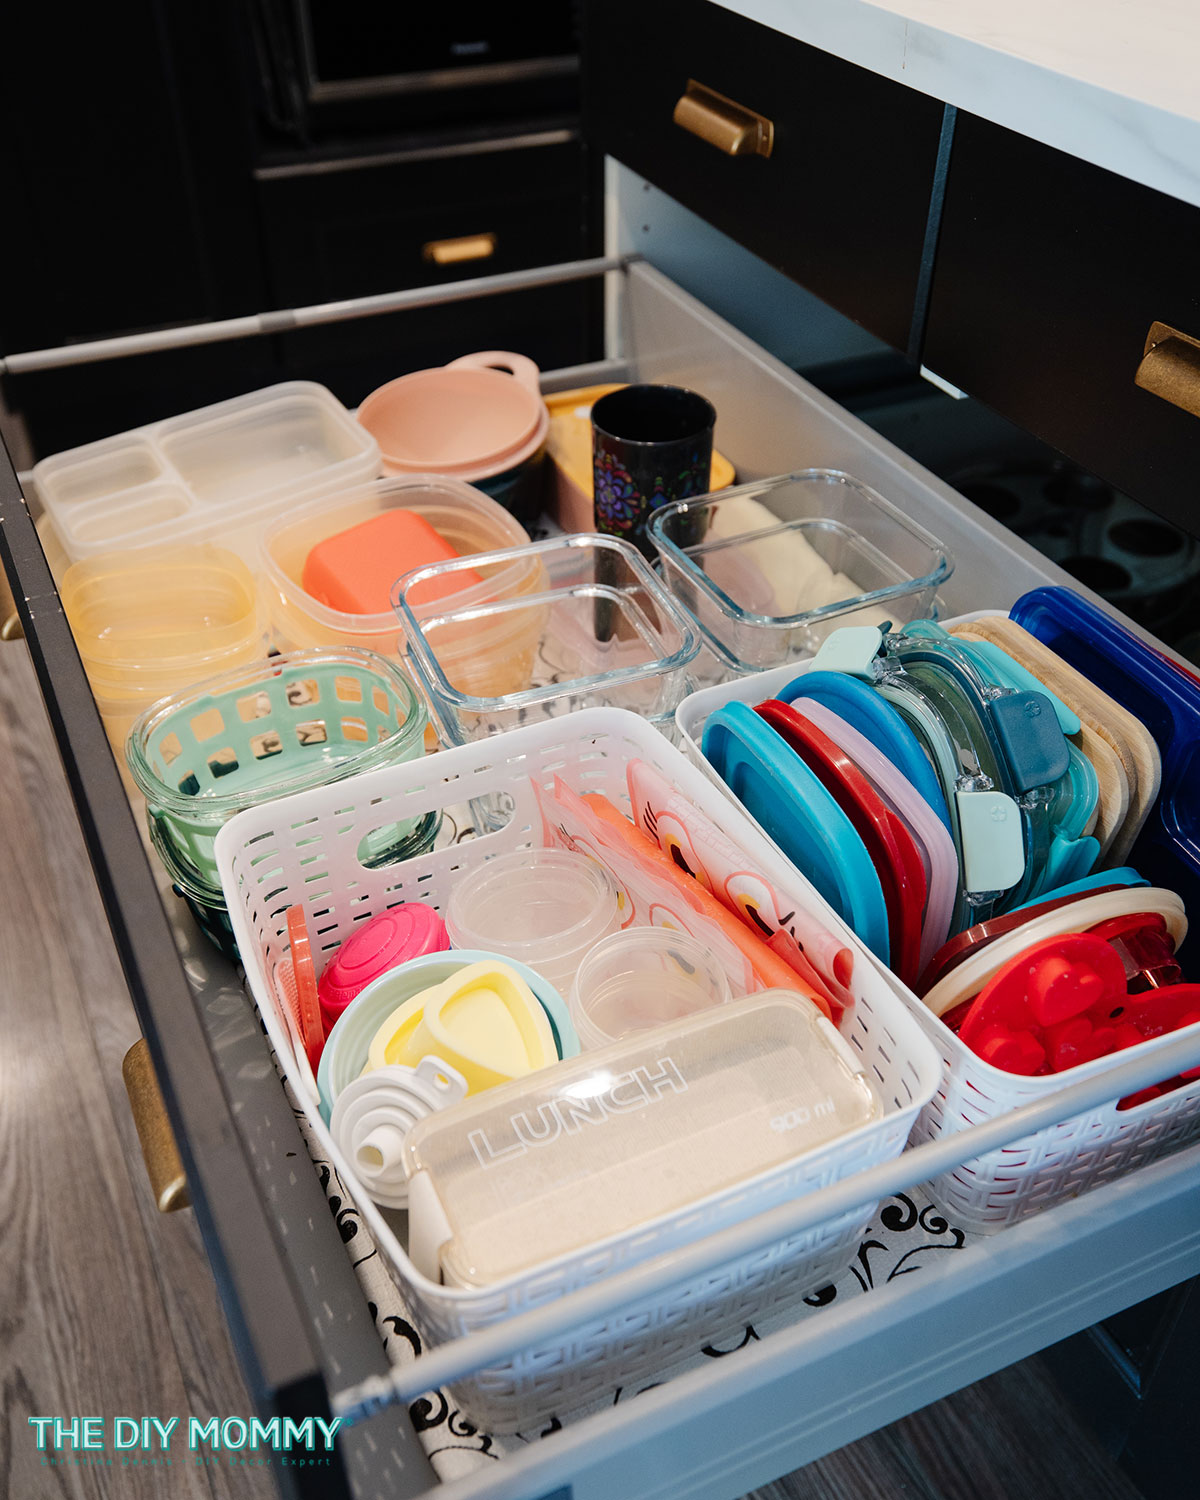
Day 5: Lower Kitchen Cabinets – Maximize Space
Focus on maximizing space in the lower cabinets. Purge unused items and use bins to store Tupperware container lids separately. Go through all of your storage containers, pots, pans, drink containers, utensils and discard or donate anything you haven’t used in the last 6 months. If containers have missing pieces, toss them.
Don’t forget that junk drawer! Take absolutely everything out, clean it, and discard items like dead batteries, pens that don’t work, expired coupons, and old electronics cords you don’t use. Consider using dollar store cutlery trays to reorganize everything in the drawer by theme and/or size.
The spice drawer can also get a little chaotic, so go through all of your spices and toss any expired ones or those that you don’t use often.
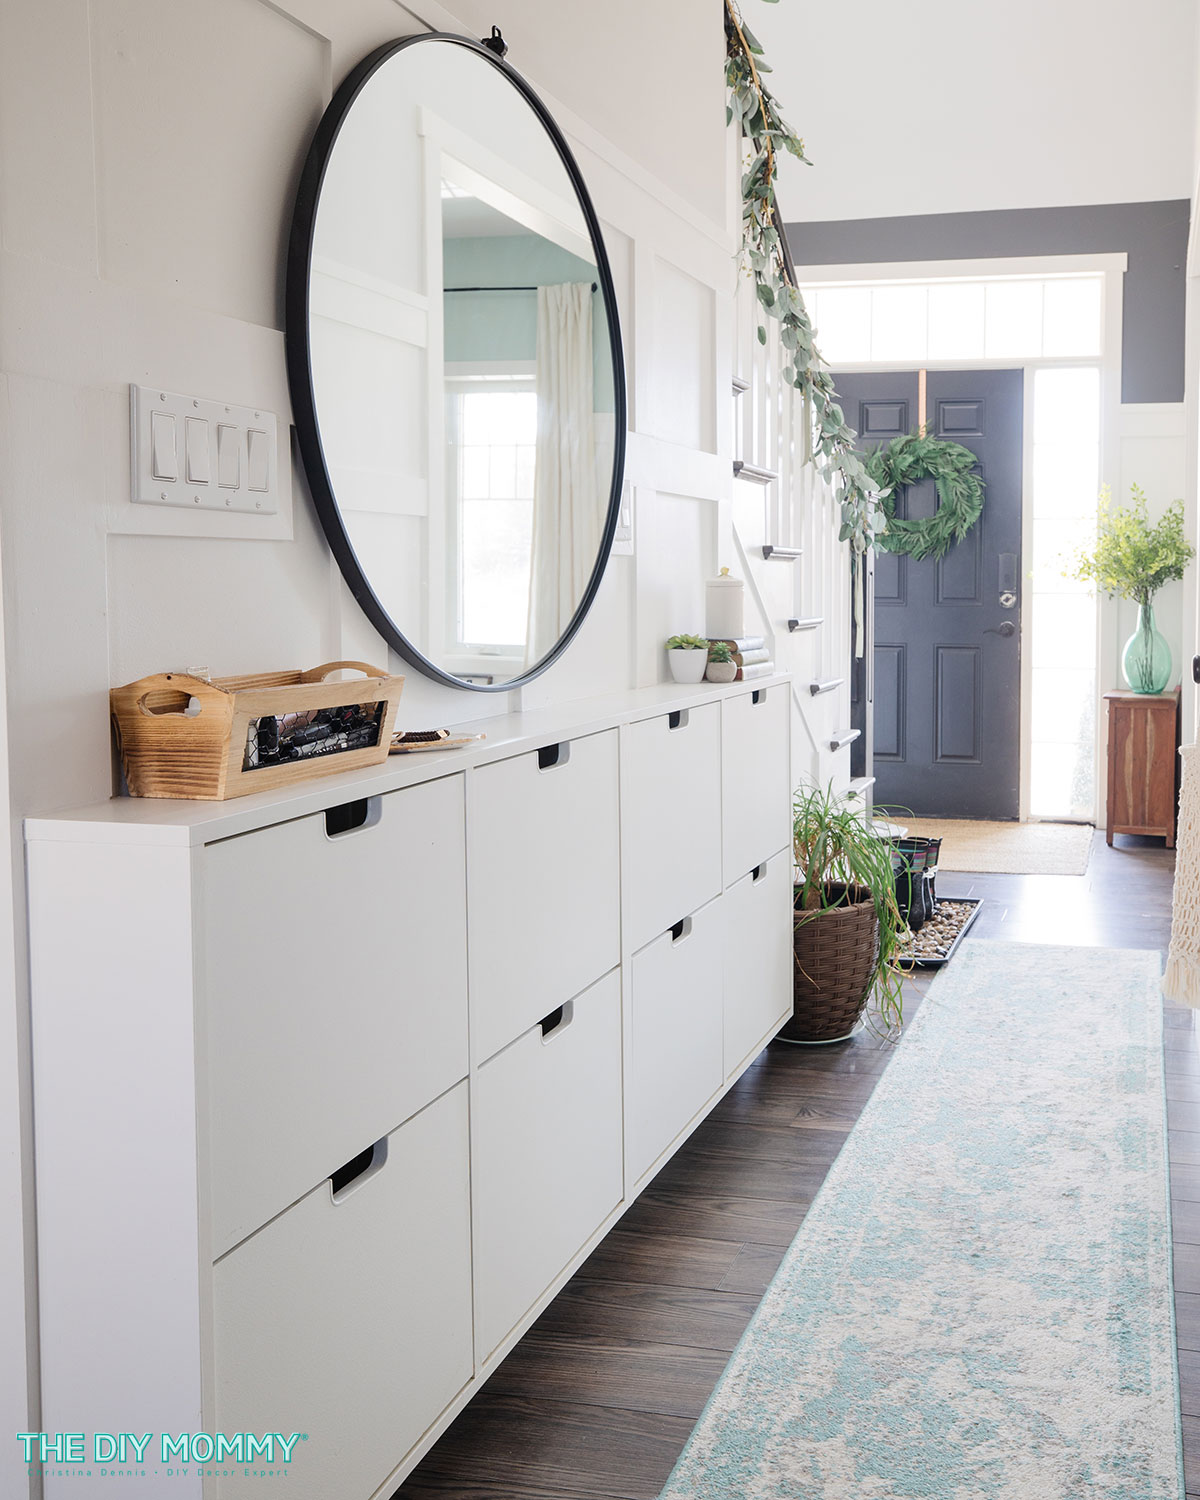
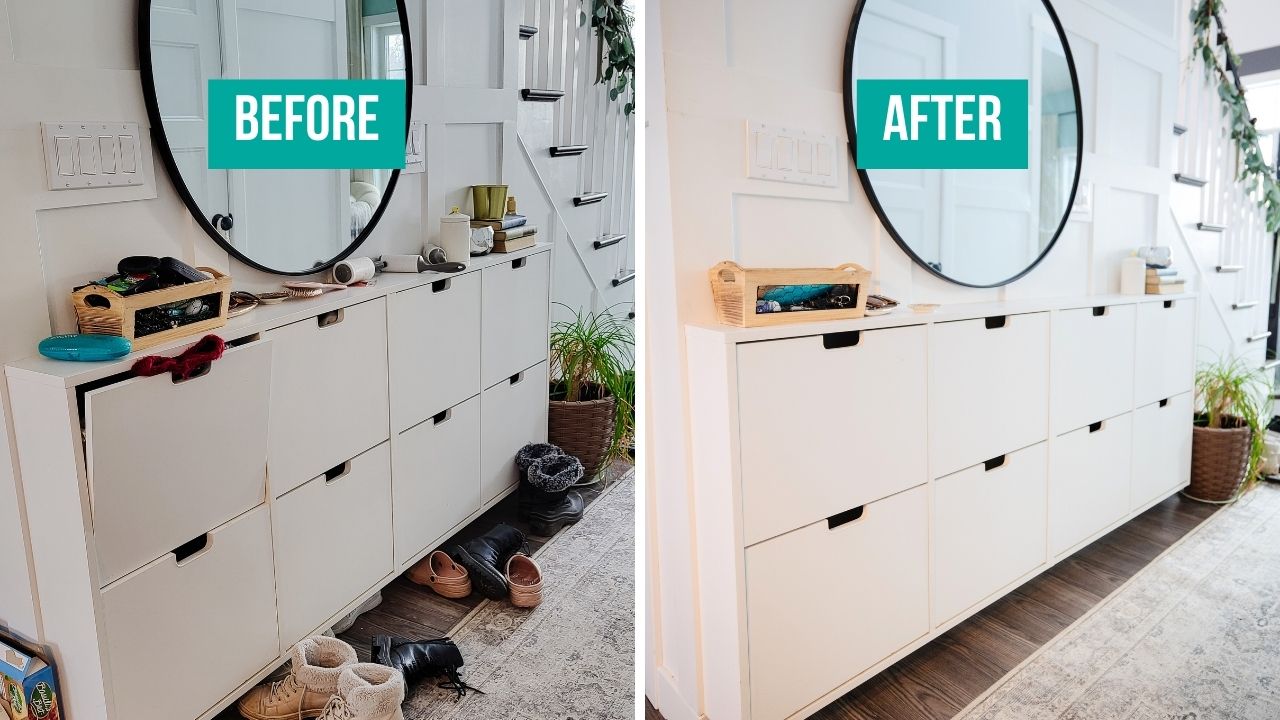
Day 6: Entryway – First Impressions Matter
Make a lasting first impression by decluttering and organizing the entryway. A DIY shoe storage solution like the IKEA hack I have here can enhance functionality while keeping the space tidy and inviting. A small container on your entry console table is a good idea to corral daily use items like keys, chapstick and sunglasses.
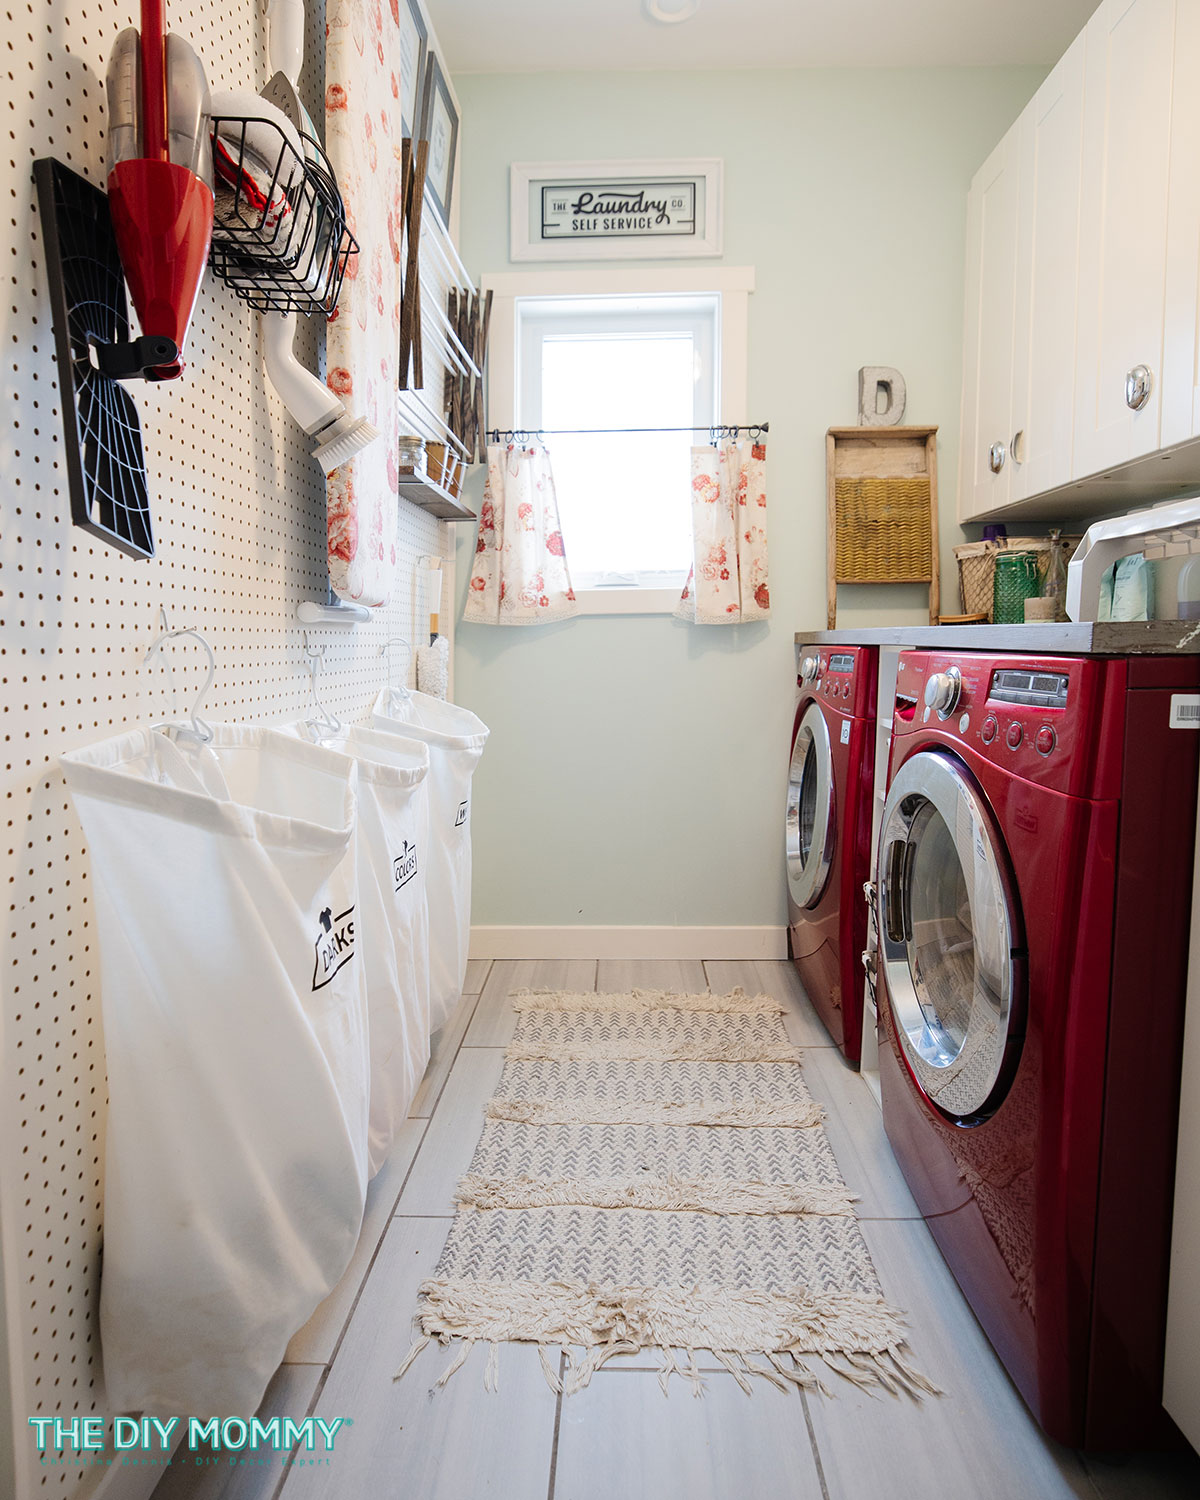
Day 7: Laundry Room – Functionality and Style
Don’t neglect the laundry room! Keep counters clutter-free with small, pretty bins and closed storage for detergents and cleaning supplies. I love incorporating a giant pegboard wall for organizing essentials in my laundry room like laundry hampers, cleaning tools, and a foldable drying rack.
Did you get it?
PSSSST! Did you download my free printable declutter checklist to help guide your organization journey? You can grab it here!
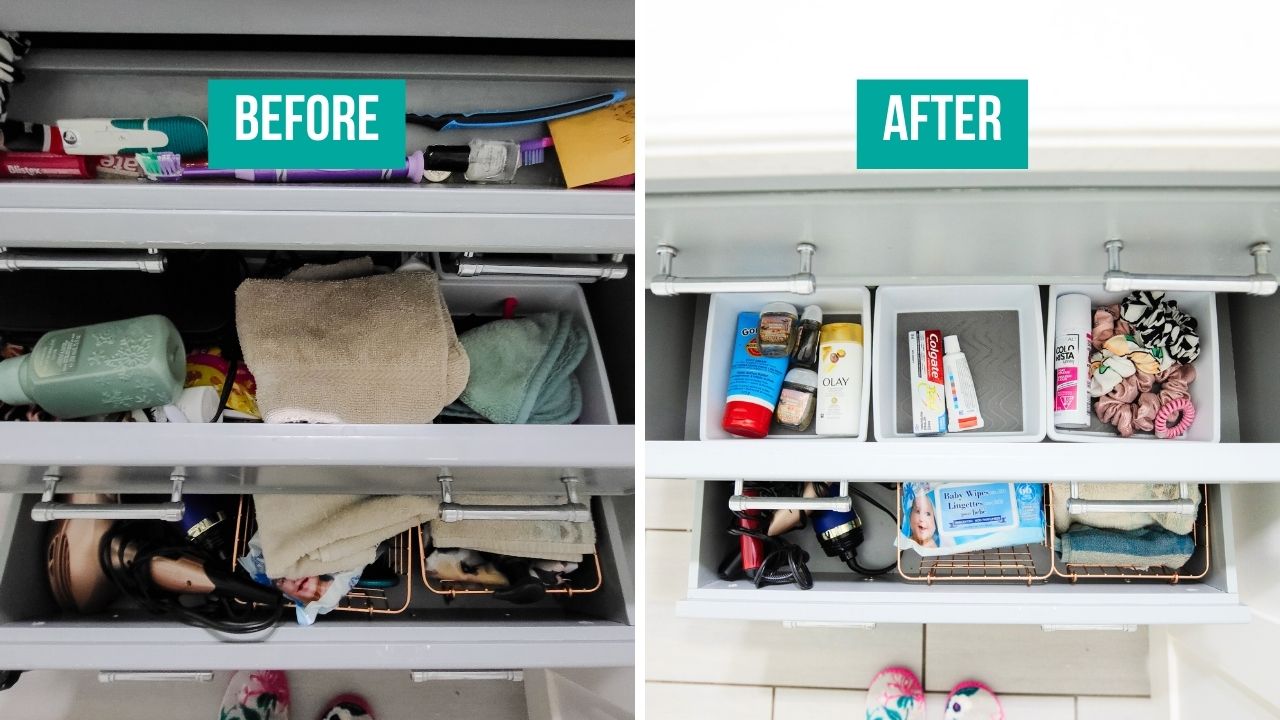
Day 8: Bathroom Drawers – Simple and Organized
Now let’s organize the often-forgotten space of bathroom drawers. Use dollar store desk containers as dividers and organize your toiletries by theme (hair care, tooth care, makeup, etc). Roll hand towels instead of folding them, and use compact baskets to keep everything organized within the drawers.
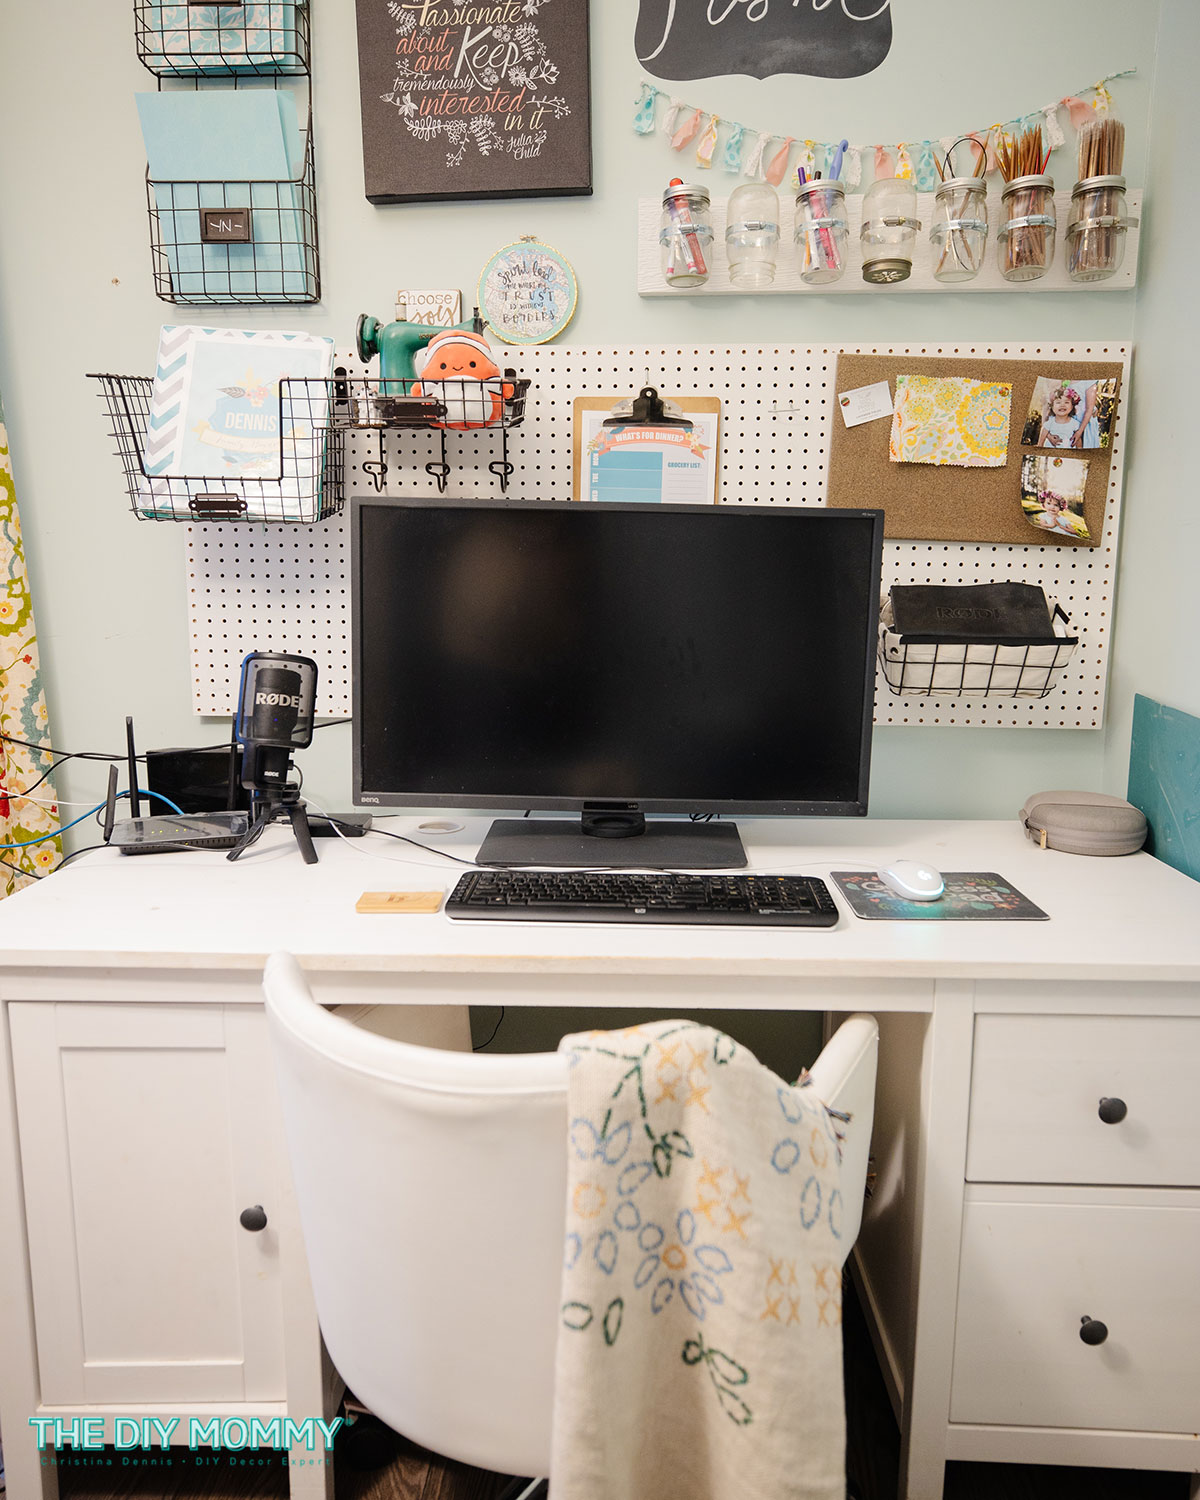
Day 9: Home Office – Conquer the Chaos
For those who work from home, it can be challenging to conquer the chaos in your home office. File away papers to get rid of that paper clutter and utilize a wall pegboard to keep things off your desk. You can even do a quick digital declutter by going through your email inbox and deleting any old messages, filing important ones, and unsubscribing from any emails that don’t serve you.
Day 10: Craft Cabinet – Unleash Creativity in an Organized Space
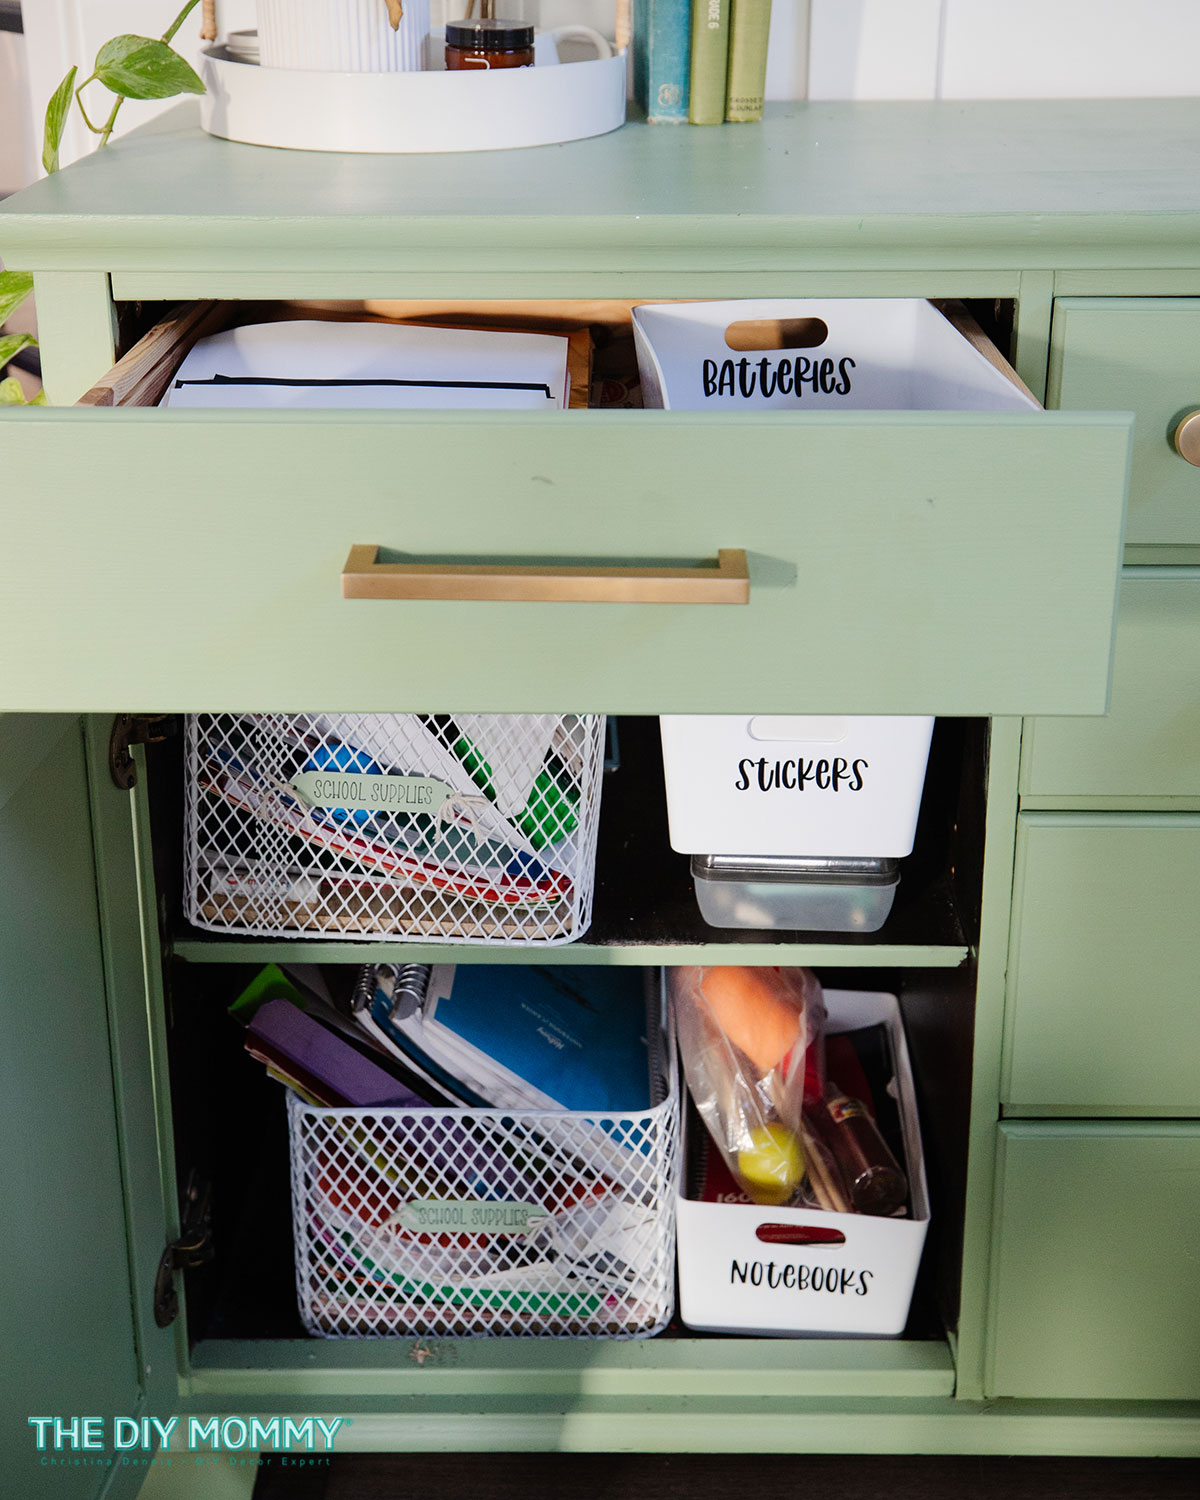
Let’s address the continual challenge of decluttering your kids’ craft cabinet in the living room or craft room. Implement simple labeled bins and assess your craft supplies, recycling or donating items that haven’t been used in a while. I like bins to categorize different items like school supplies, stickers, craft kits, and notebooks. You can use inexpensive bins from the dollar store or IKEA, or even upcycle shoe boxes to keep everything organized. A moveable tote is a great way to store items like markers, crayons, scissors and pencils so that your children can move it around to where they want to craft and/or do their homework.
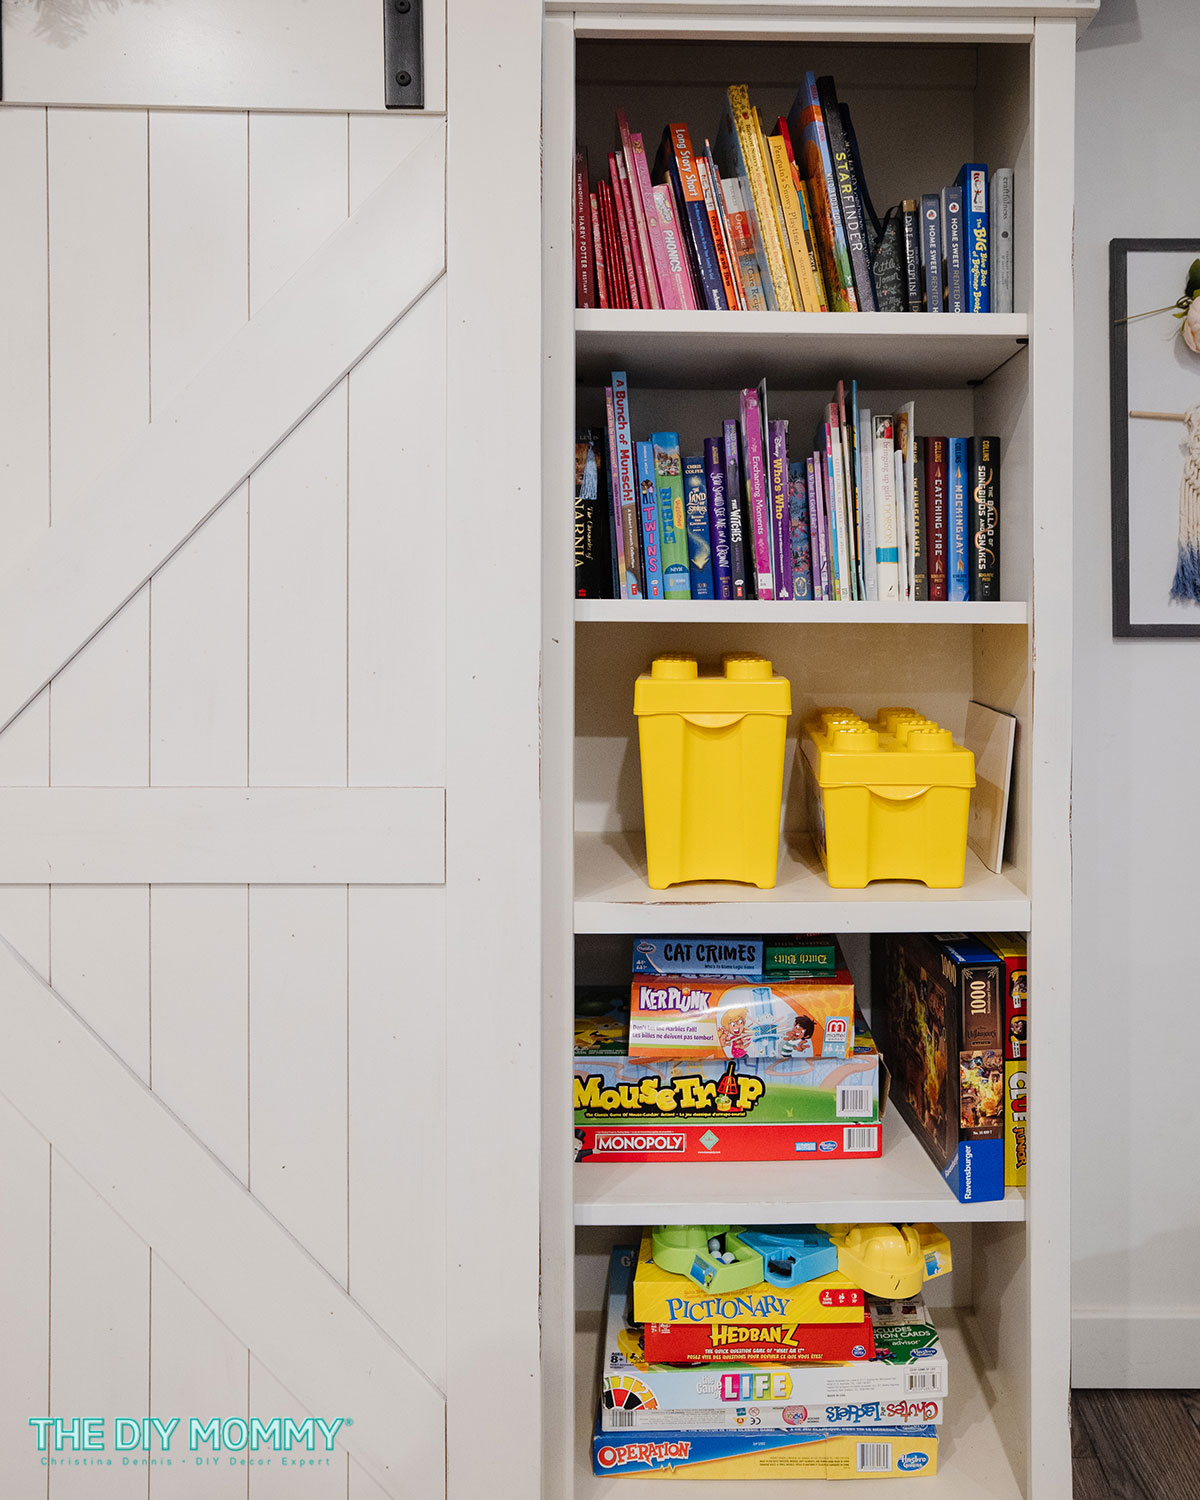
Day 11: Playroom Shelves – A Splash of Color and Order
Next, turn your attention to the playroom and tackle the clutter on the shelves. Enlist your kids to help you go through all of the toys and books and donate anything that they haven’t used in the last 6-12 months. Use building block bins and organize books in rainbow order for a creative and visually appealing playroom. Create a designated spot for everything like puzzles, games, and building blocks to help bring order to the space.
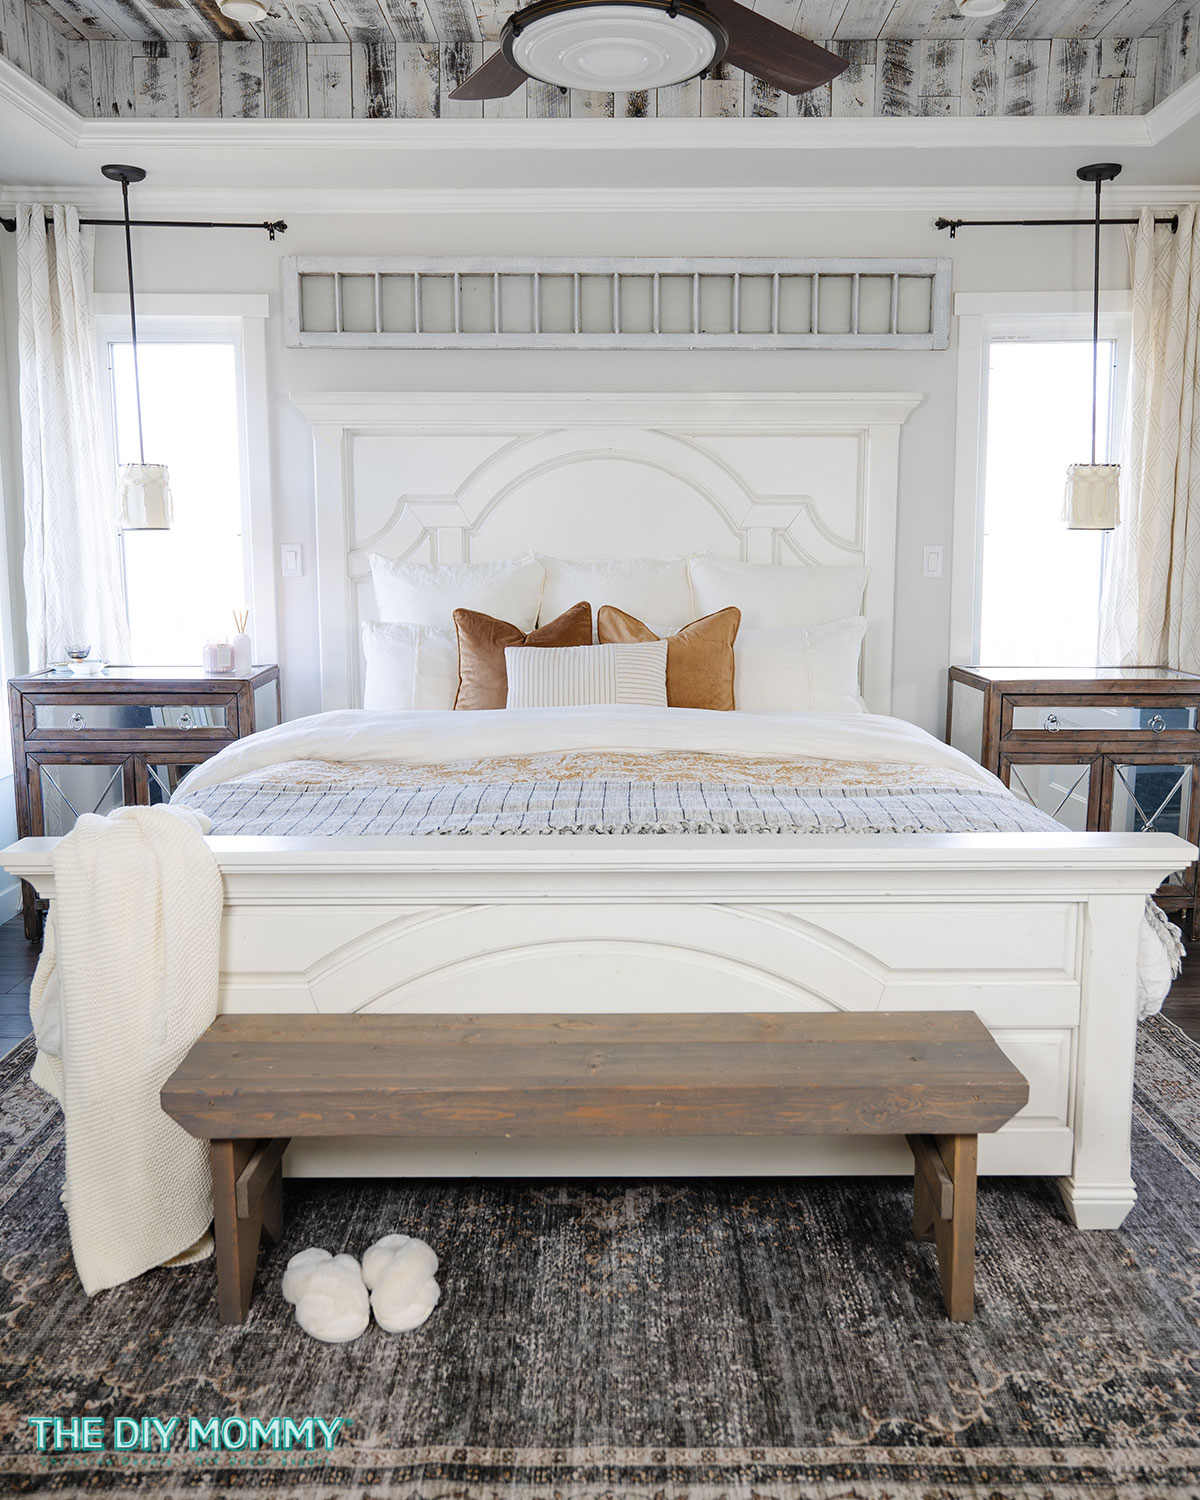
Day 12: Primary Bedroom Nightstand – Tranquility at Your Fingertips
Now, let’s shift to the primary bedroom and focus on the often troublesome area of the nightstand. Declutter and ensure everything has its designated spot. Leave your most-used items on top, such as books, and use pretty trays to corral smaller items like everyday jewelry. It’s such a treat to experience the tranquility of an organized bedside space.
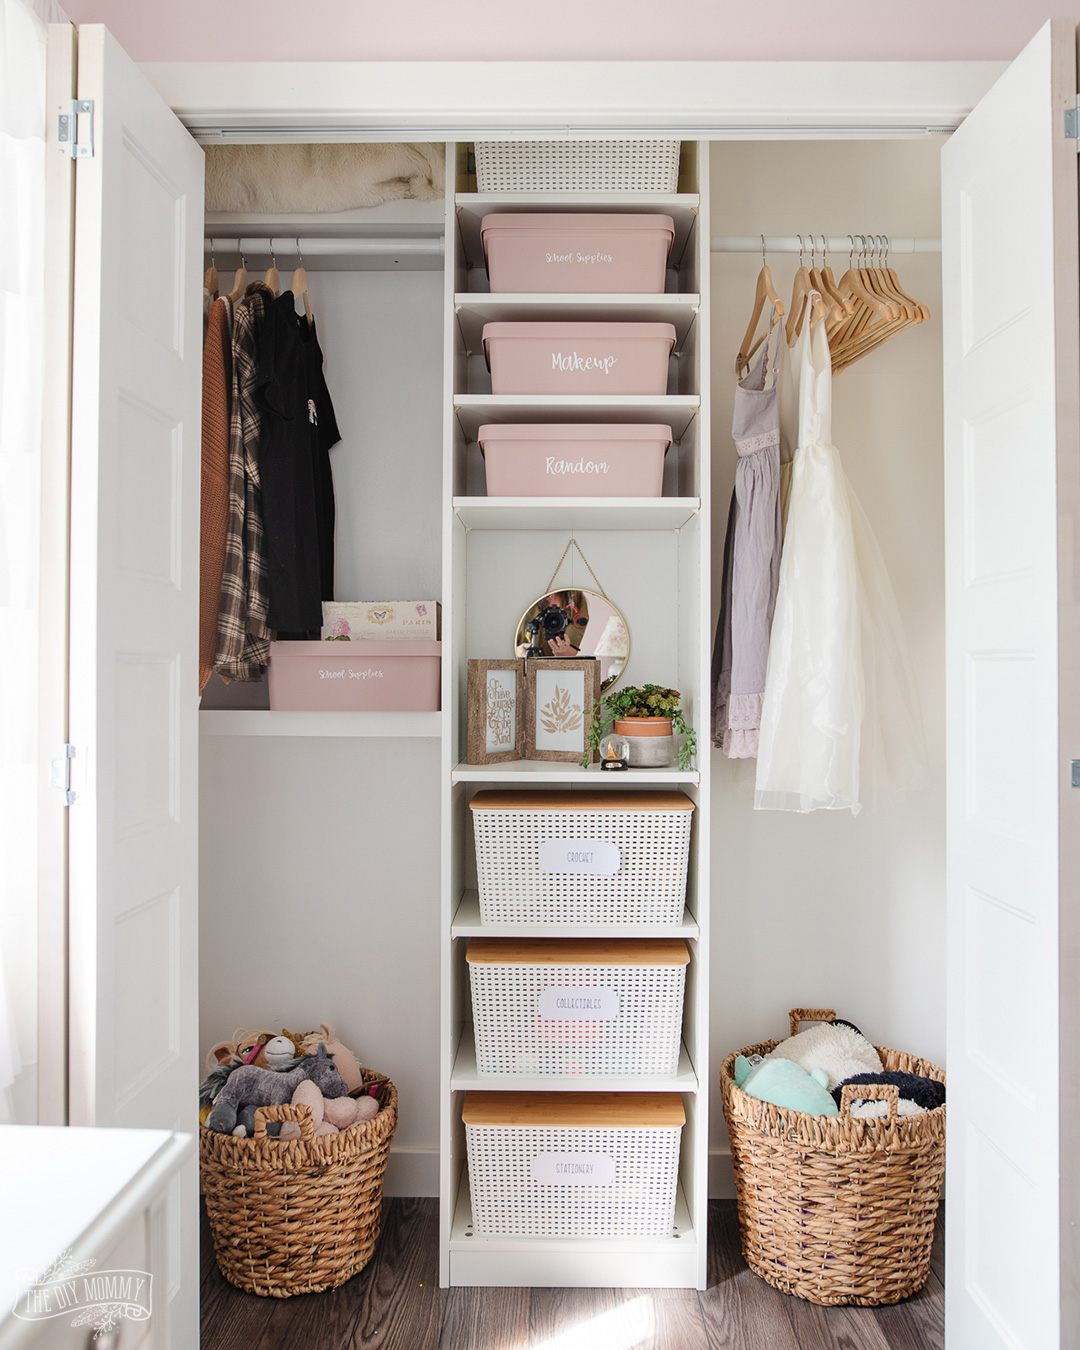
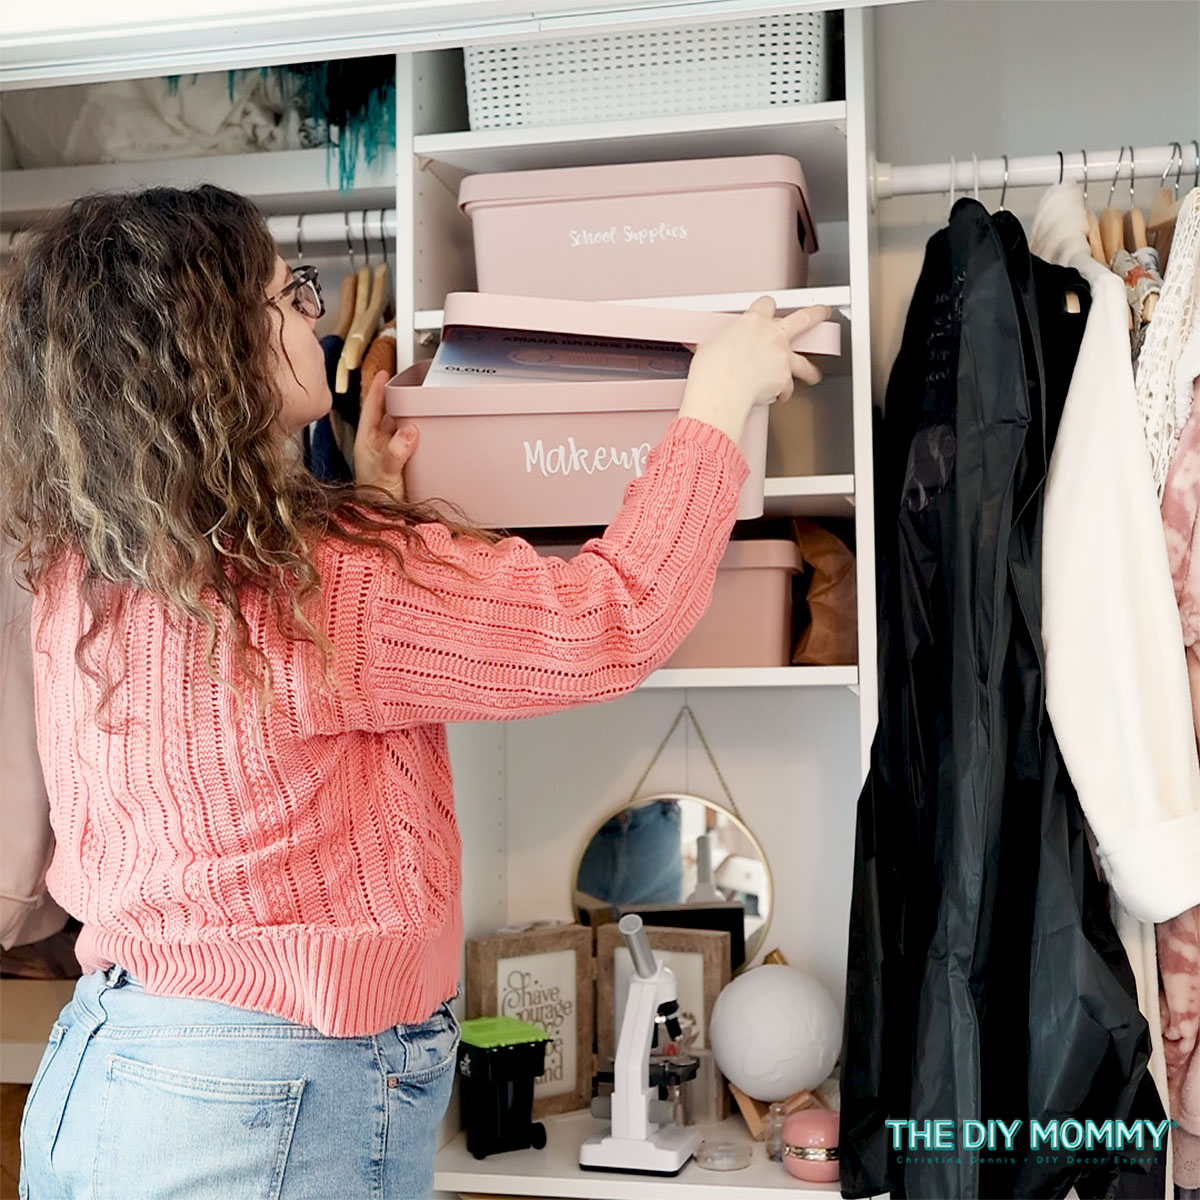
Day 13: Kids’ Bedroom Closet – Simplify Mornings with Order
Now, let’s navigate the challenge of kids’ bedroom closets by purging unnecessary items and returning everything to its designated place. Get your kids to help! Utilize a basic closet system with shelves and bins for efficient organization. Labeling the bins will help your child know where to put items back in place; you can use bins for categories like craft supplies, toys, makeup, and even socks & underwear.
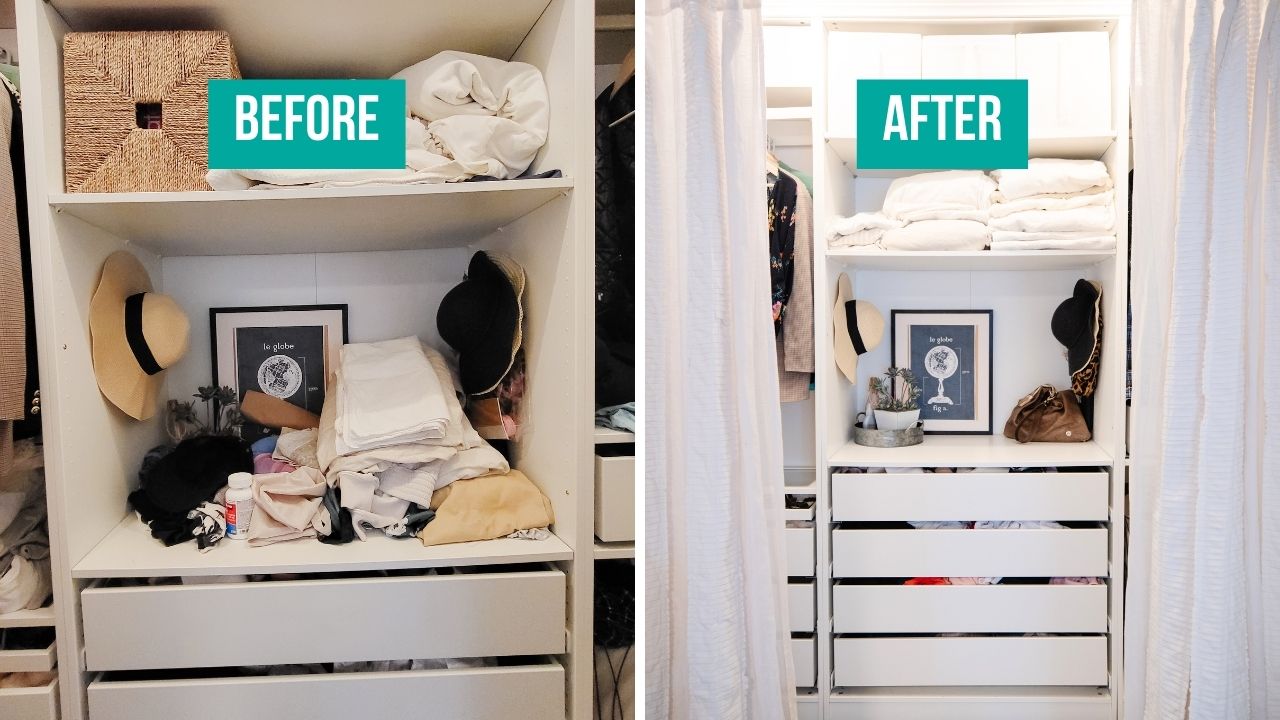
Day 14: Linen Closet – Neat and Tidy Sheets
Let’s conclude this 14-day decluttering list by conquering the linen closet. Reorganize and refold your sheets and linens, finding creative solutions for items like king-sized sheets (folding large sheets with the fold side out can make them look neat and tidy!). You could even use the Konmari Method to help fold your linens in a way that uses space effectively and looks neat & tidy. Marie Kondo has wonderful clothing and linen folding methods on her site.
Congratulations! You’ve now completed The DIY Mommy’s 14-Day Home Organization Challenge. Your efforts will not only result in a more organized home but will also inspire a sense of accomplishment. Don’t forget to download my 14 Day Declutter Your Home Checklist to guide your home organization. I hope you enjoyed this challenge and find my printable declutter checklist useful. Happy organizing!