Build a Bench Seat for the Kitchen Table – DIY IKEA Hack
This post may contain affiliate links · This blog generates income via ads
I gave my sister’s small breakfast nook a makeover complete with a built-in IKEA hack dining bench! So, if you’ve ever wondered how to build a bench seat for a kitchen table, I hope you enjoy today’s room transformation & DIY tutorial. Let’s get started!
Bench seats are one of my favourite room design additions for a small dining space. They can allow more people to fit into a tighter spot, plus they can add more storage. I built a simple dining bench from IKEA kitchen cabinets in our own breakfast nook a few years ago, and today I’m going to show you how I built yet another dining bench from different IKEA products in my sister’s home.
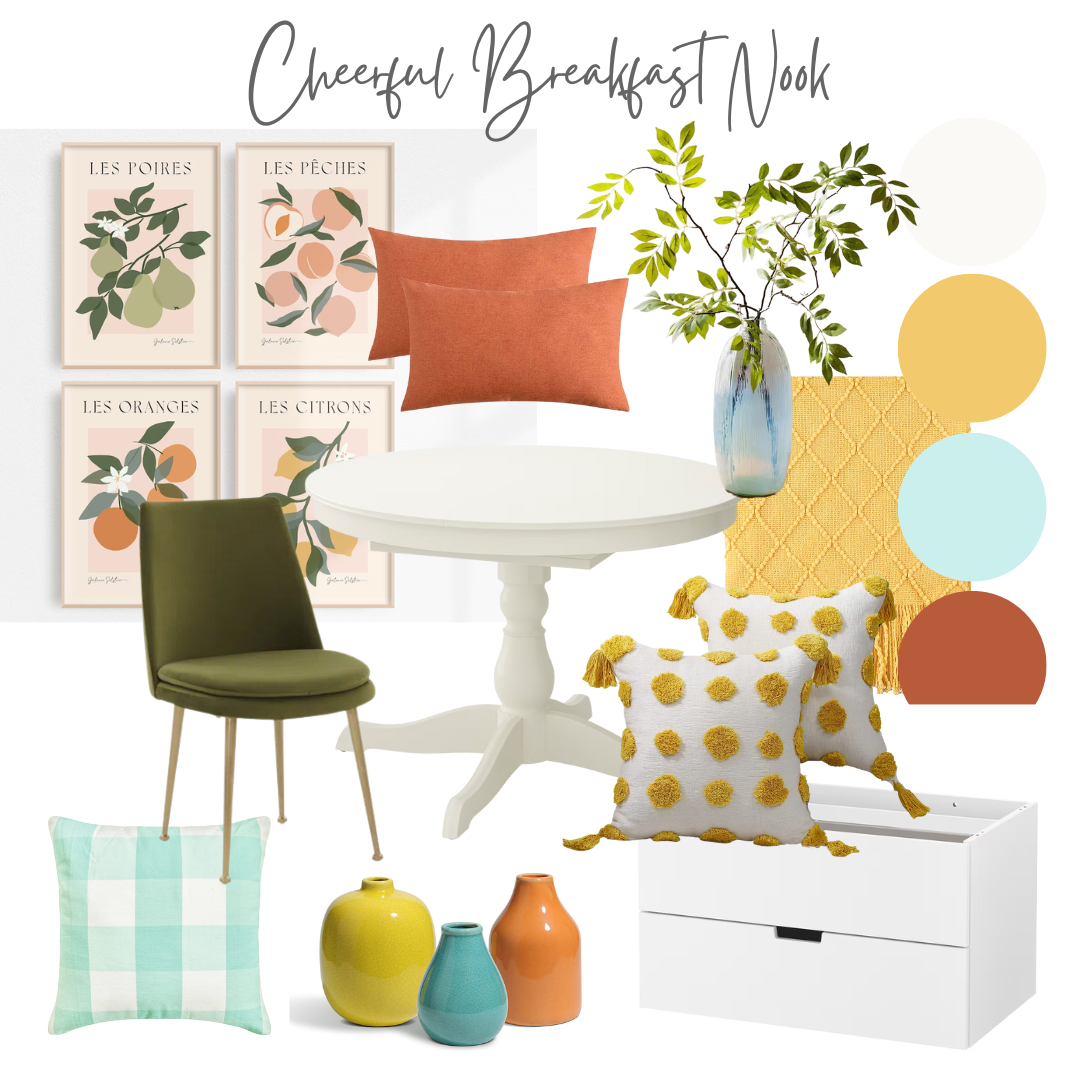
In this makeover, I transformed a tiny, neglected space in my sister’s home into a charming breakfast nook that’s perfect for enjoying morning coffee or working from home. We chose a fresh color scheme of white & blue, accented with pops of vibrant hues to give the space a fresh, inviting feel. And here’s the best part: we did it all on a budget! This high end looking nook cost us less than $1000 CDN.
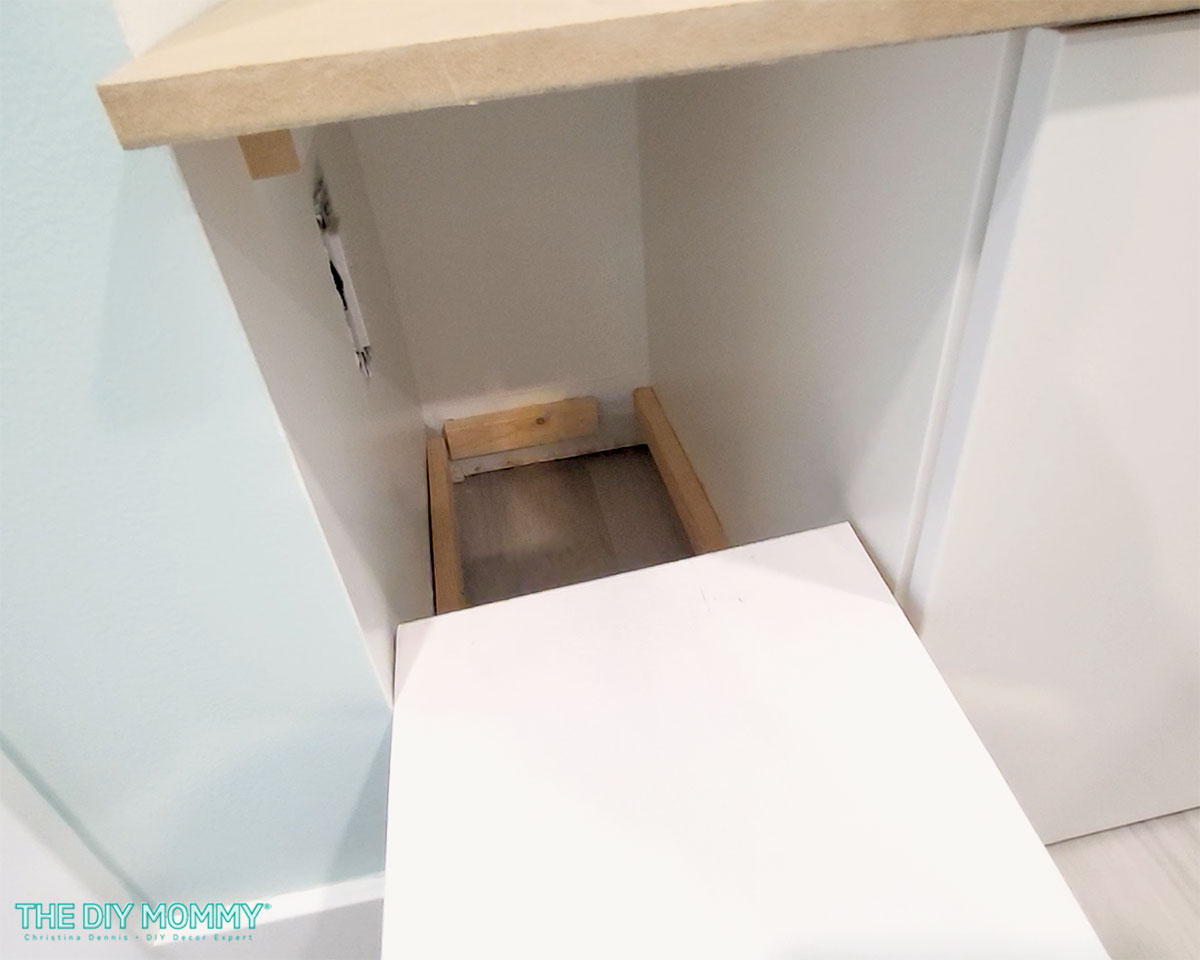
Here’s how my sister’s breakfast nook in her kitchen looked before:
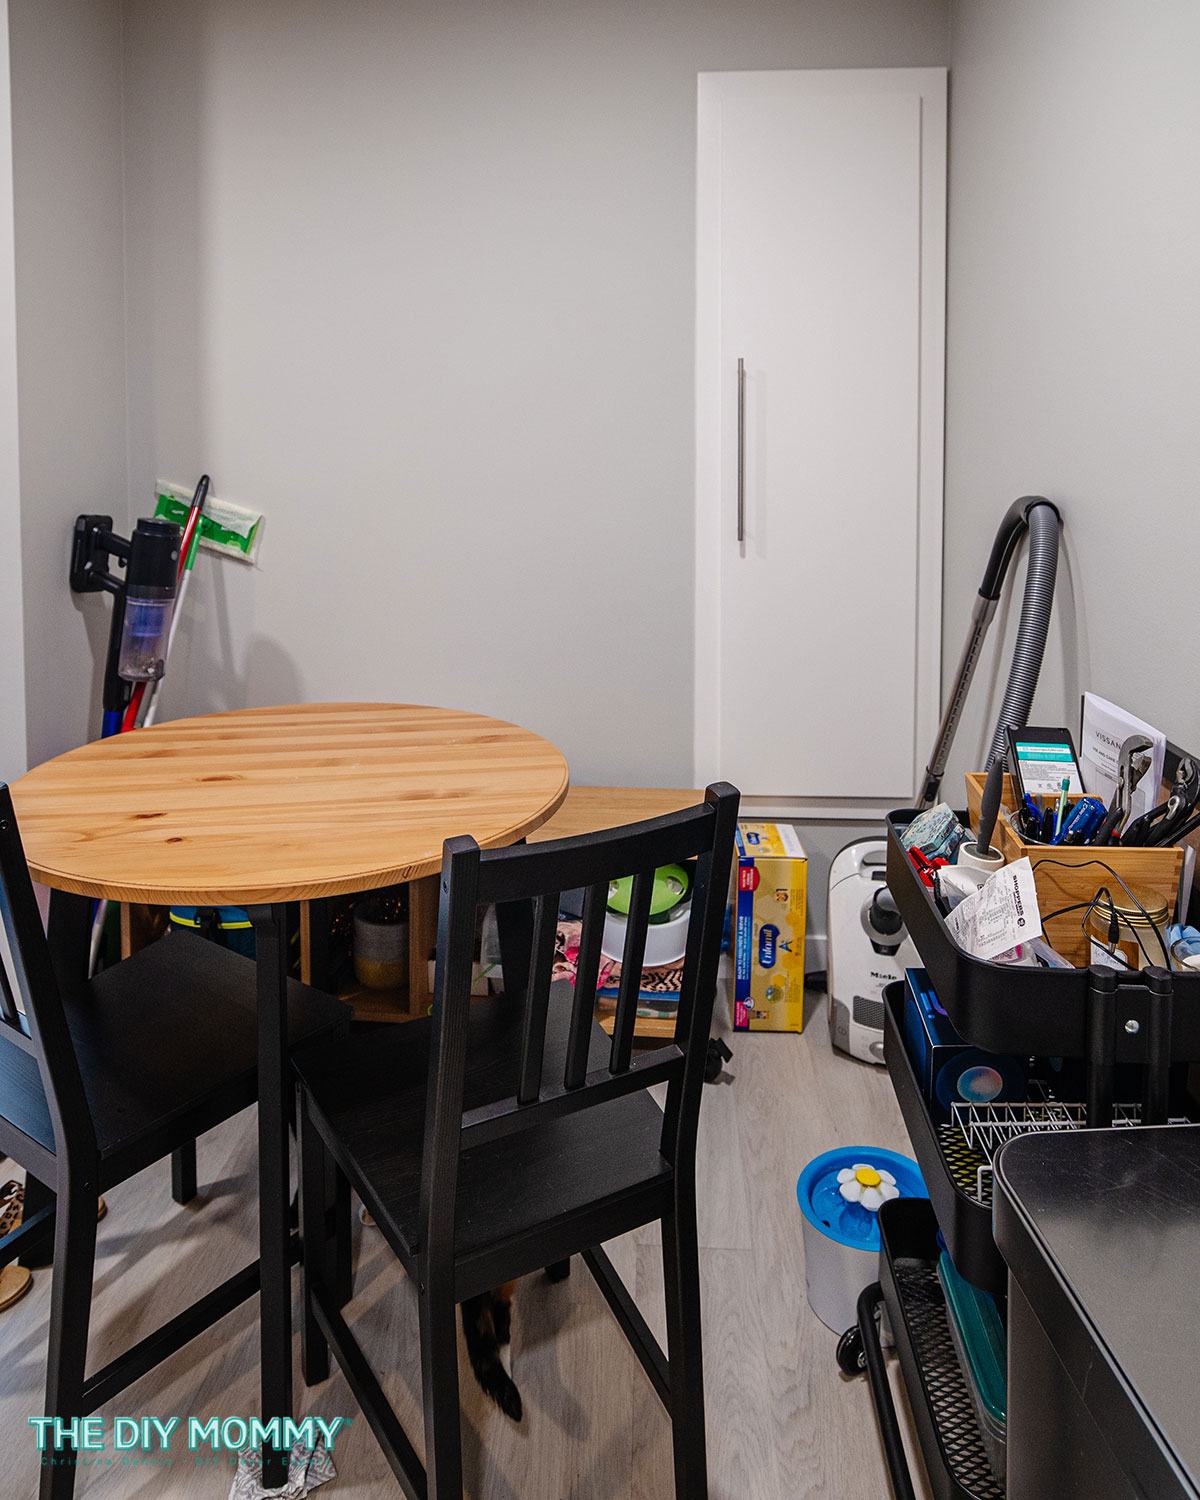
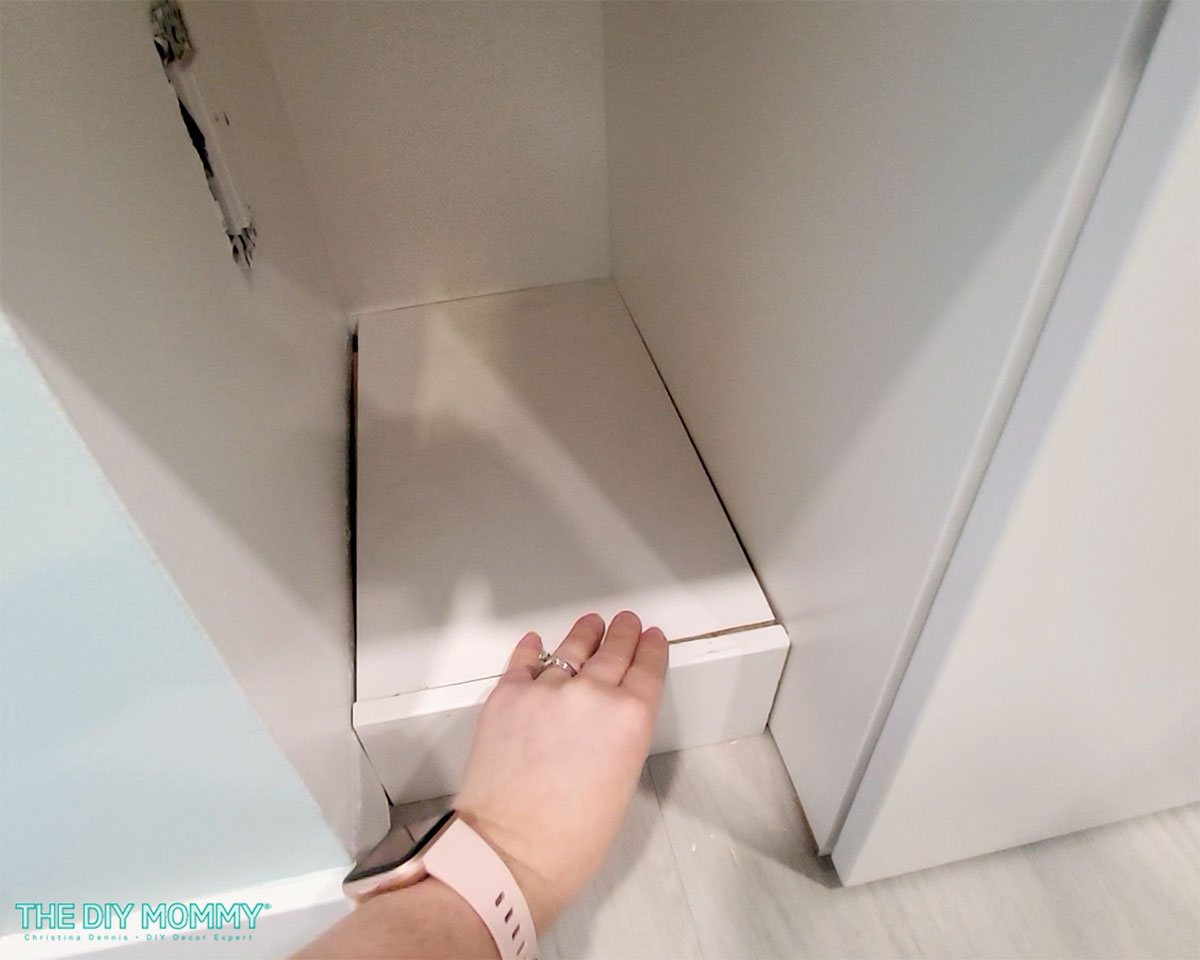
It’s a small corner in her kitchen that’s about 7 1/2′ square. There’s an awkward built-in pantry in the corner, plus not much room for a table and chairs. My sister wanted more storage in this breakfast nook area, plus a better configuration to fit a table. Adding a built-in bench seat to this corner will help add the storage & functionality she needs.
Here’s how to build a bench seat for kitchen table using IKEA NORDLI dresser units as your base…
Starting with IKEA NORDLI units
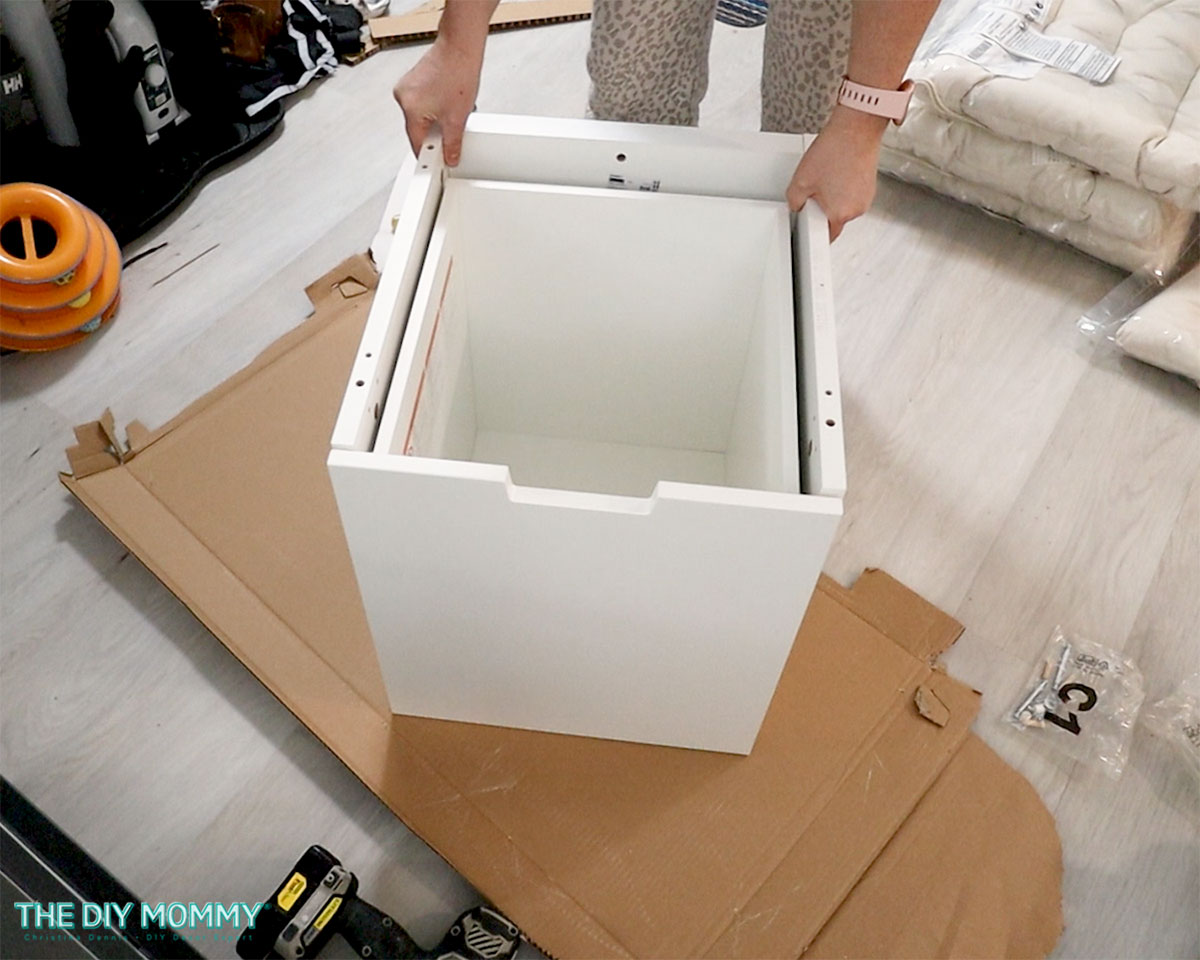
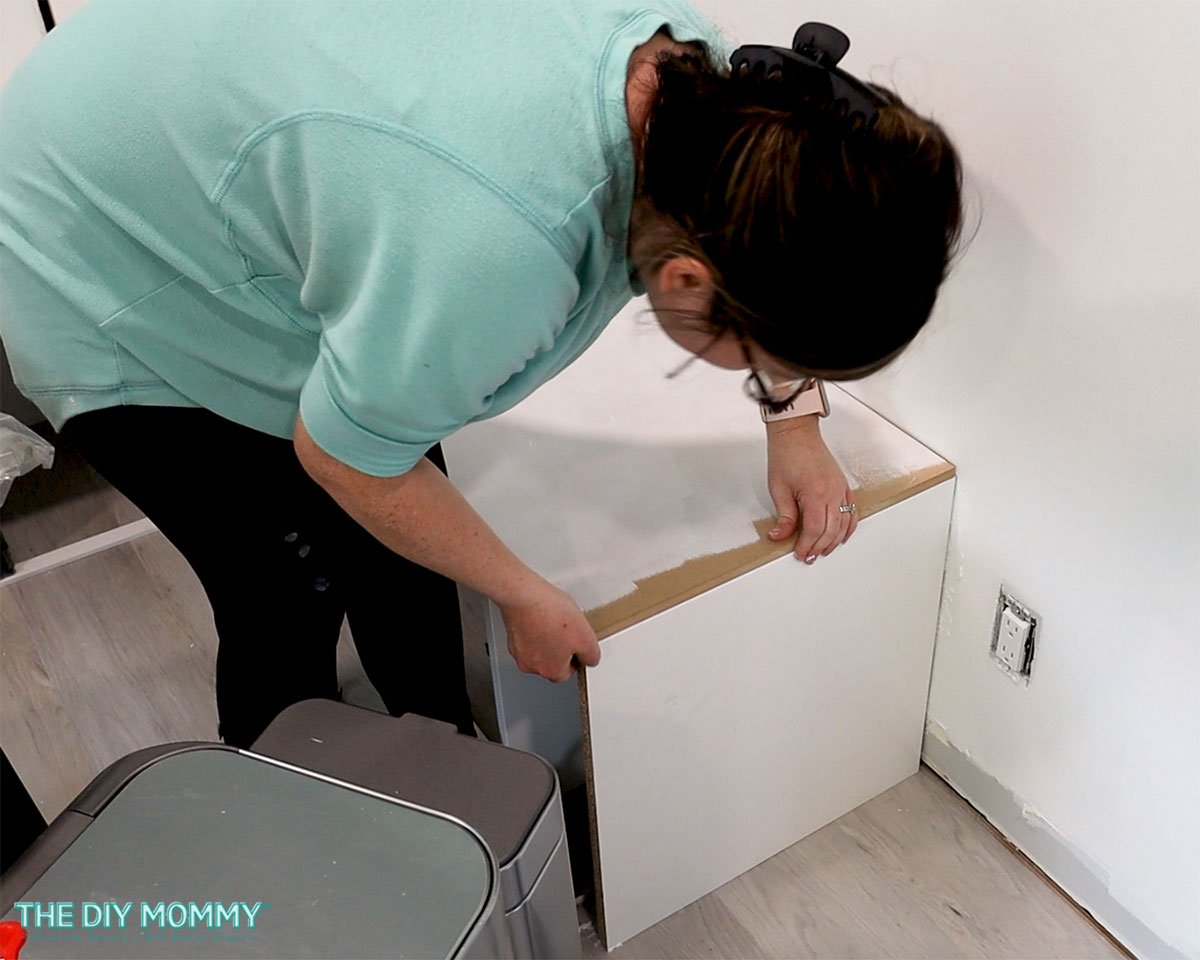
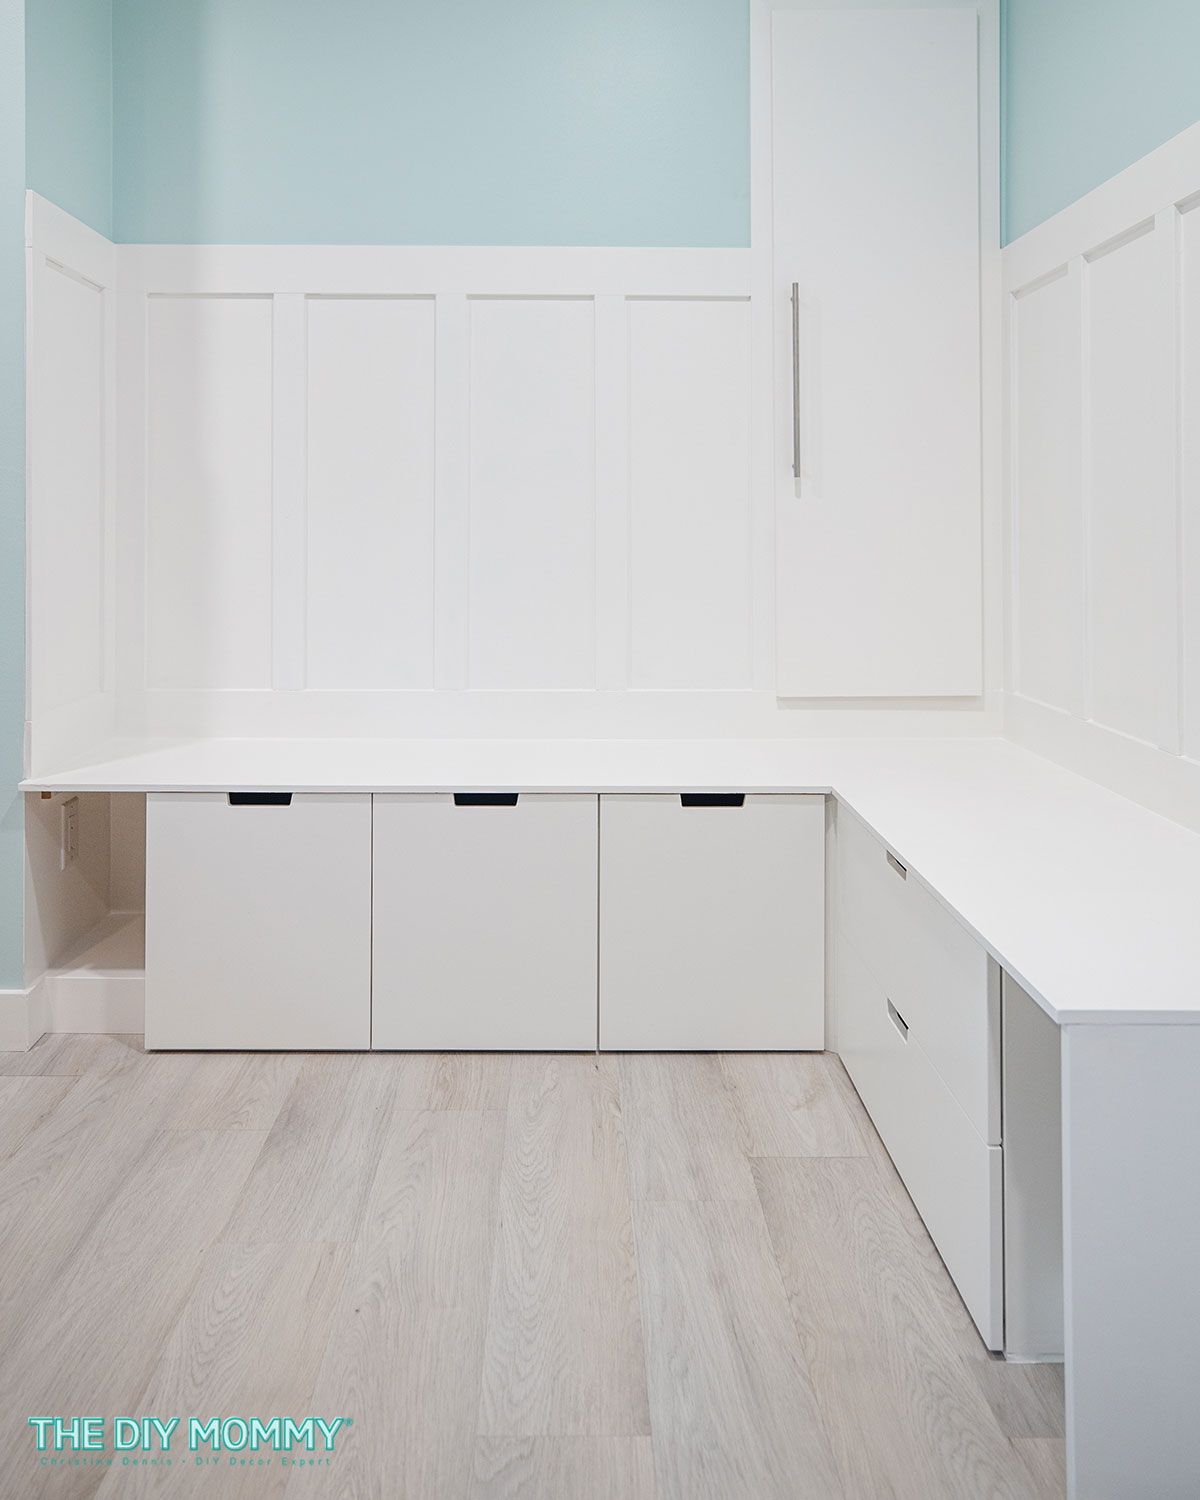
To begin this breakfast nook makeover & DIY bench seat build, I picked up 4 IKEA NORDLI units. I bought 3 one-drawer chests and 1 two-drawer chest. Why the NORDLI modular dresser units? When my sister and I were researching DIY bench builds, we found these to be the perfect height and depth for a bench seat (minus the tops and bottoms). Plus, the drawers in these IKEA pieces will add tons of extra storage in my sister’s nook, so they’re great starting points for this makeover.
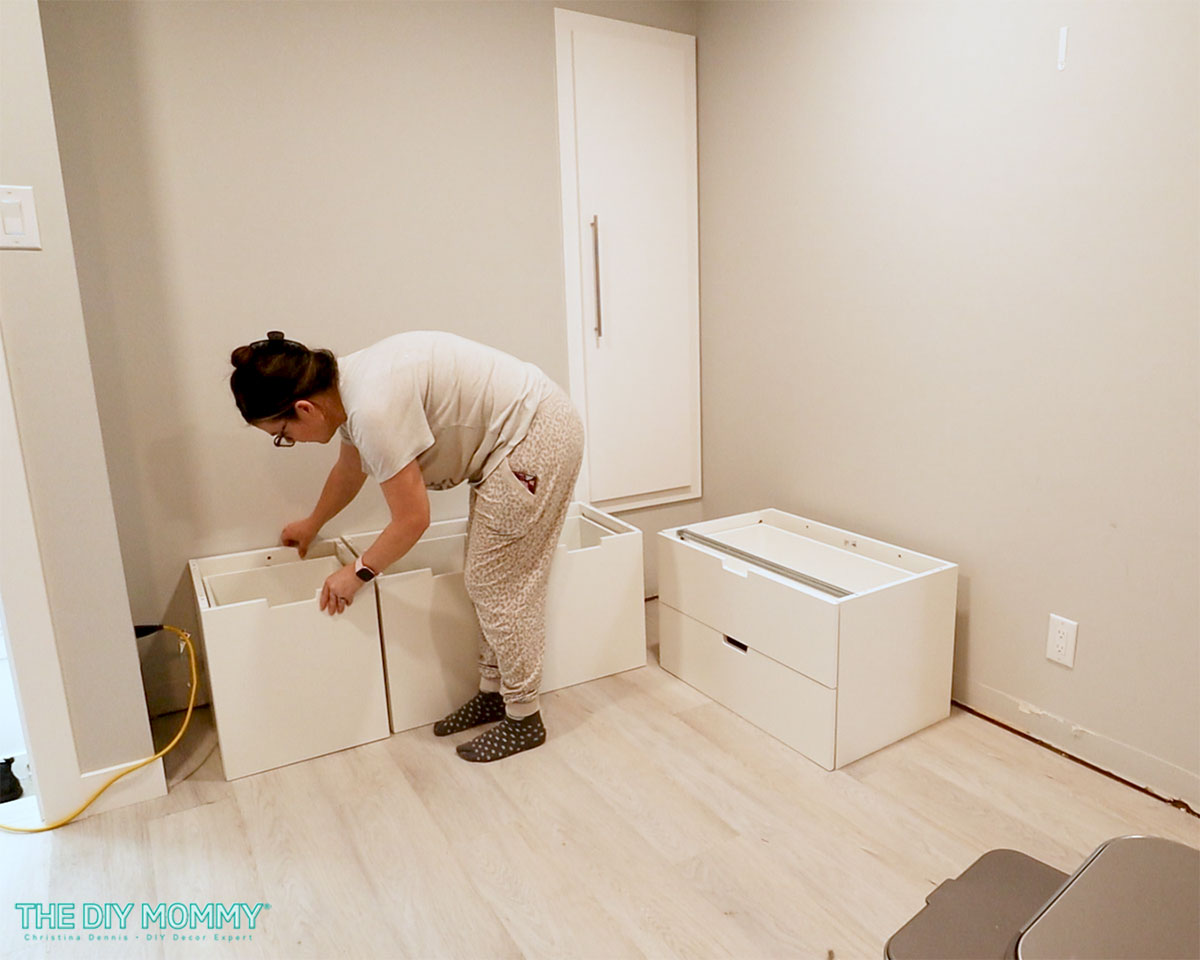
After assembling the IKEA units, I removed the baseboards in the nook. Then, I put the NORDLI pieces in place to see how they would fit. I left a small space in the corner so that the drawers could open up nicely, and there is also some space on the left and right side of this L-shaped bench. 3 of the one-drawer units are on one side of the corner while the two-drawer unit is on the other. We’ll take care of the spaces later – don’t worry!
Painting the breakfast nook
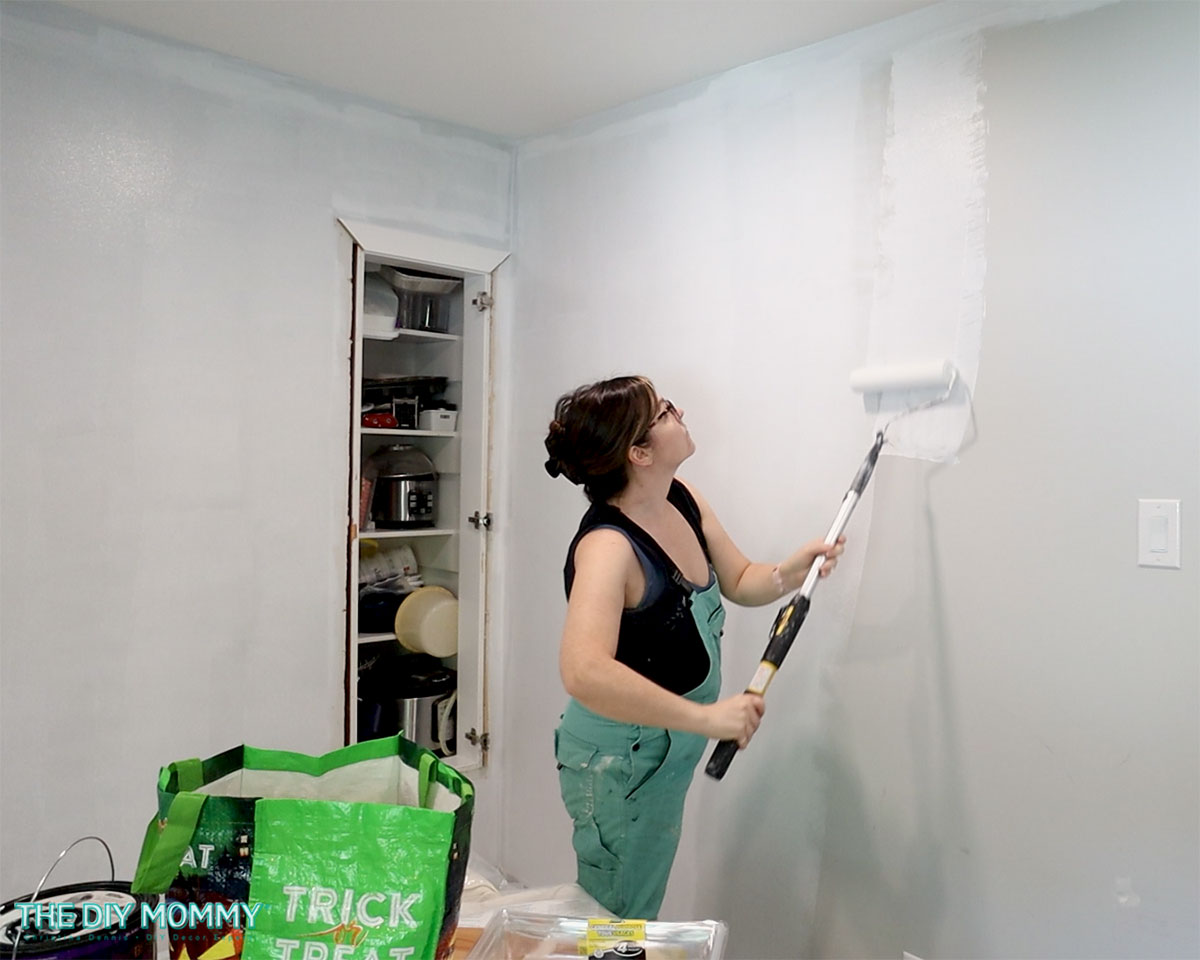
After I sorted out how I was going to configure the bench, I removed the casing around the pantry and primed and painted the entire nook… and the rest of the kitchen! My sister didn’t want any more grey in her kitchen. She loves bright colours, so that’s what we’re going to give her.
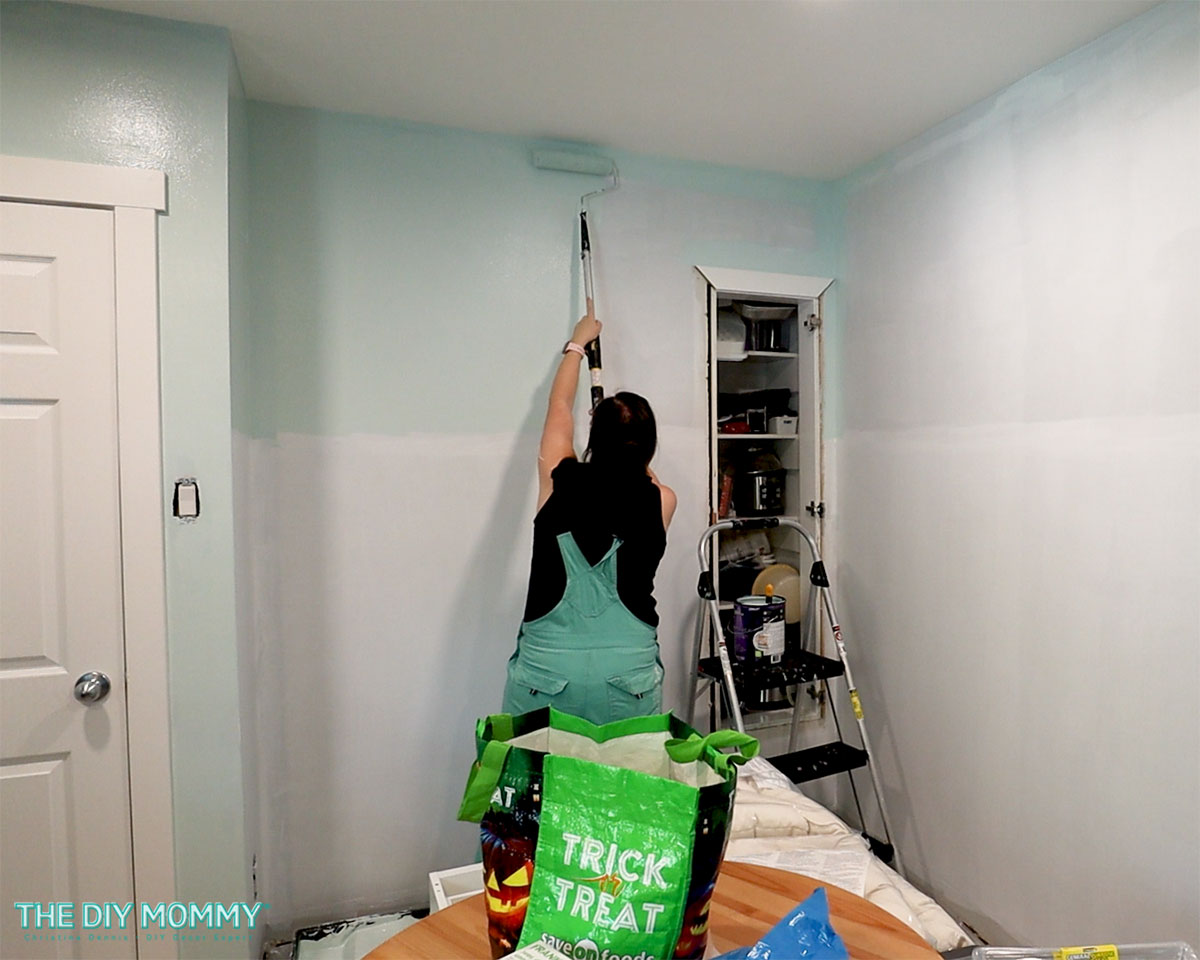
I painted the entire kitchen in a beautiful blue shade of paint called Ice Rink by Behr. Then, I painted the bottom 2/3rds of the breakfast nook in a white paint that’s colour matched to my sister’s existing trim.
Customizing the IKEA pieces into a bench frame
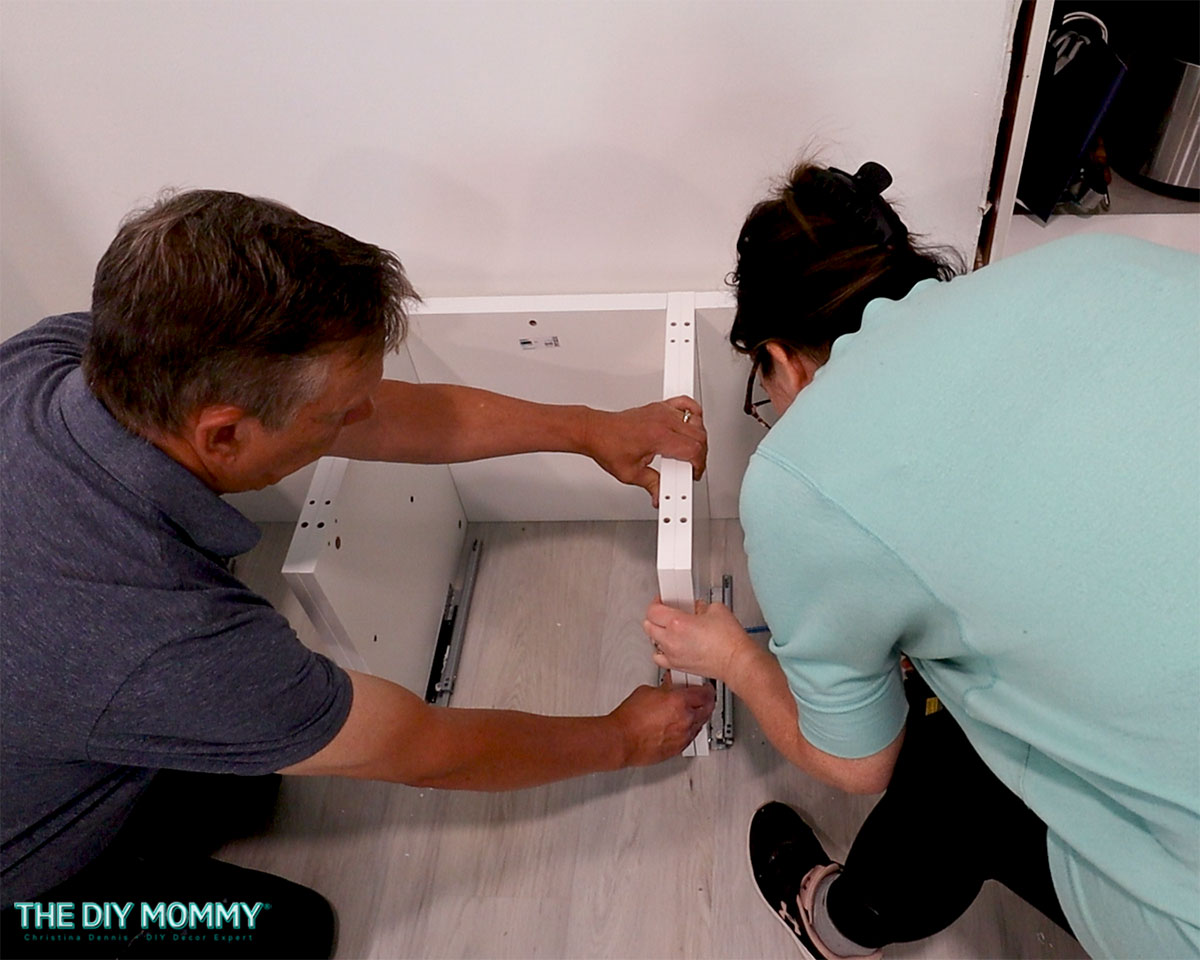
Next, my dad helped me start customizing the NORDLI units to function as a corner bench. We began by attaching the 3 units together with a drill and wood screws so that they were one solid unit.
Then, I flipped the unit upside-down and attached two pieces of 3/8″ thick MDF door stop trim to the front and back of the bottom of the pieces. Why? We were hoping that the drawers on the NORDLIs would open up well with the pieces flush on the floor. However, with the slight unevenness in the older floor, the bottom drawers scraped a little on the floor when fully opened. Adding these smalls strips to the bottom of the NORDLIs makes the drawers glide perfectly, and don’t add much height to the bench.
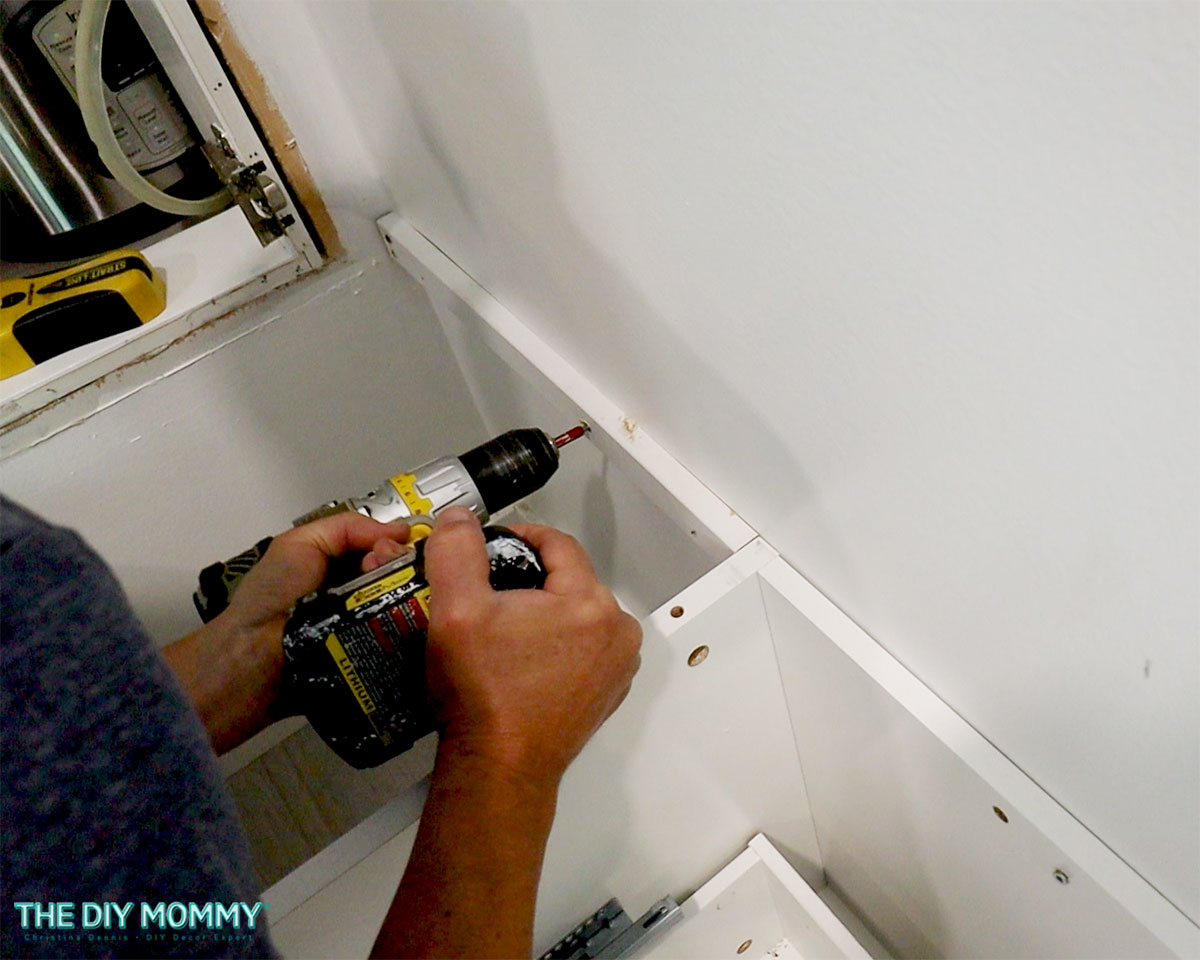
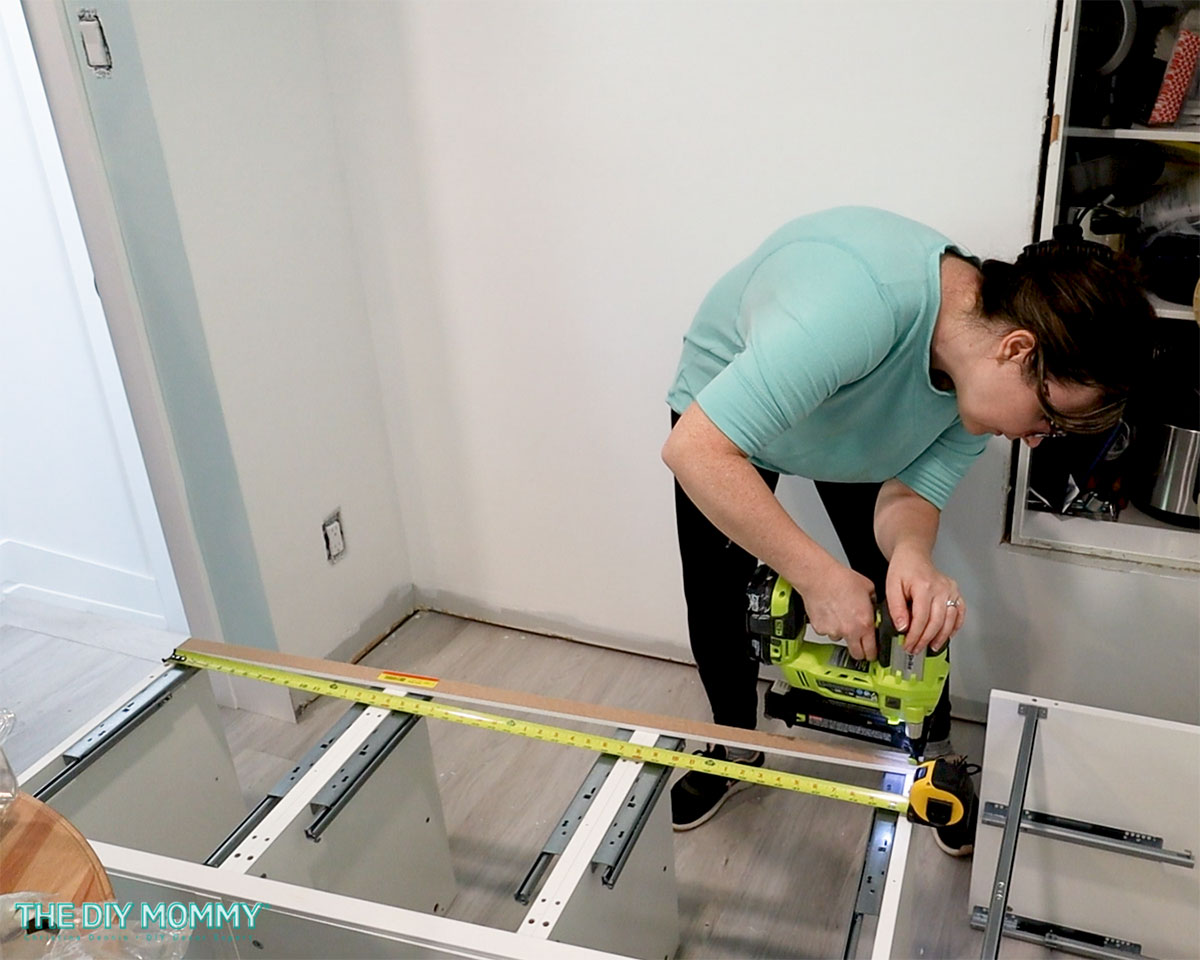
Next, we attached the NORDLI units to studs in the wall to keep them from shifting. I then cut some scrap pieces of lumber to fit the open corner, and we attached it to studs in the wall. The top of the trim lines up with the tops of the NORDLIs so that we can add a bench top securely over the whole thing. I also added a bracket piece like this to the left side of the bench where the opening was.
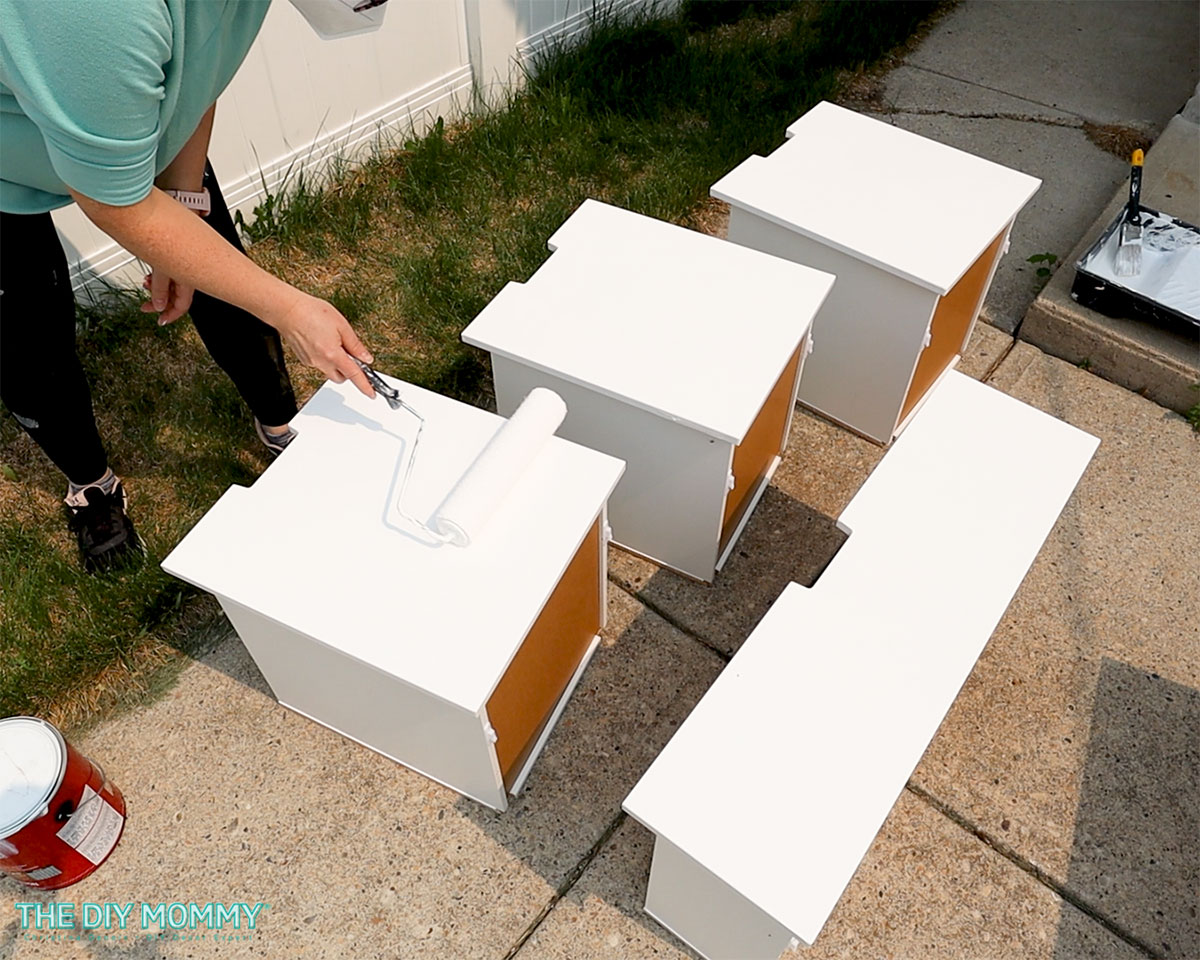
To make this bench look like a built-in piece, I primed and painted all of the drawer fronts to match the colour of the wall.
Adding the top & the niches to the bench seat
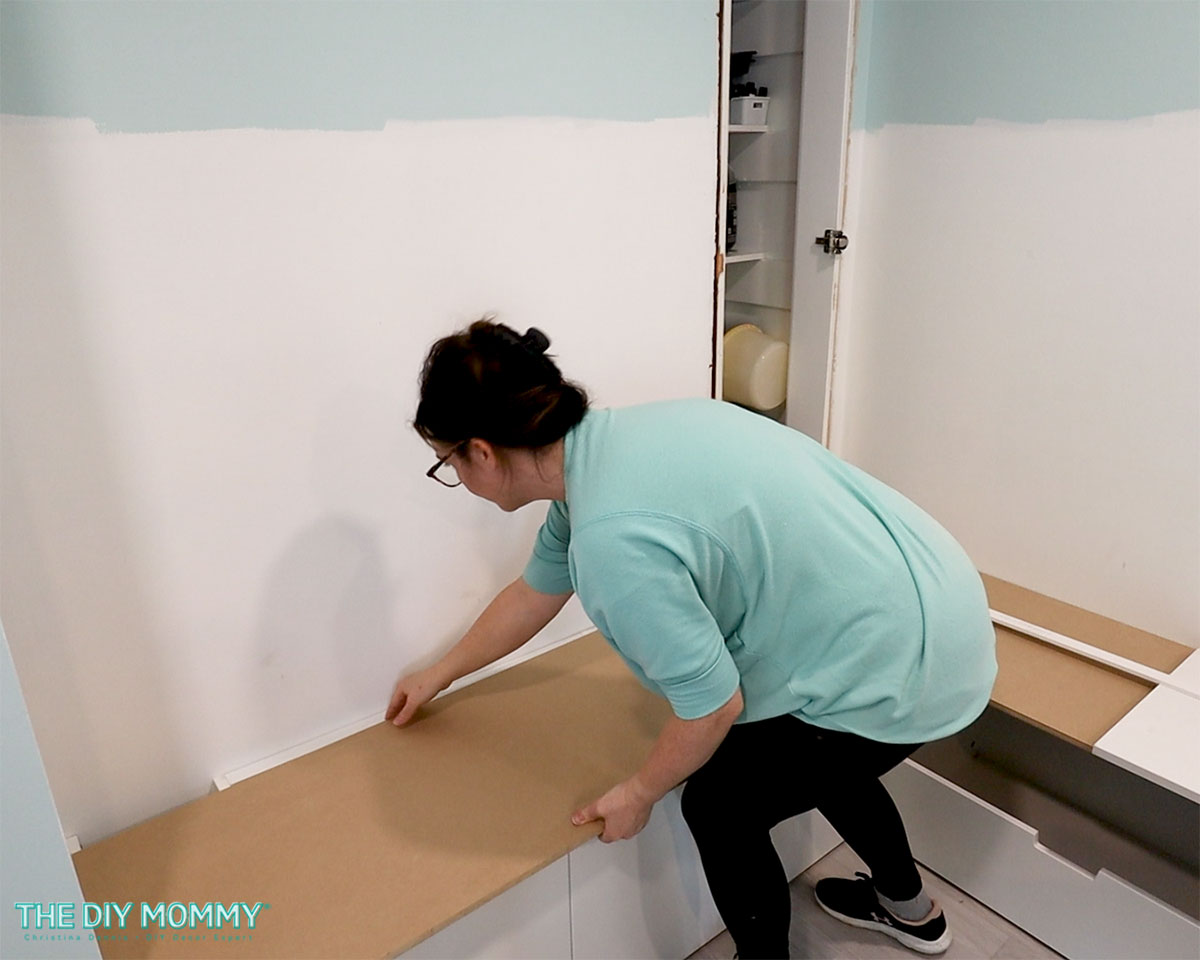
Now it was time to add the top of the seat. My dad helped me cut some 1/2″ MDF with a table saw into two pieces that fit perfectly over the base units. You could also use a circular saw for this step. We chose MDF so that it would look nice & smooth once painted. I gave the corners and edges of the top a good sand with 220 grit sandpaper so that they were slightly rounded.
For the open areas on the sides, I used some scrap pieces of wood to create brackets about 4″ from the floor. I attached them to the sides of the NORDLIs and the wall with nails and wood glue. Then, we cut a piece of MDF to sit on top of the brackets.
I finished the niches off with some baseboard trim on the bottom front, and caulked and painted the whole thing to make it look seamless.
The niche on the opposite side of the bench was created in the same way, but we capped it off with an old MDF shelf that was cut to size. I tacked it in place with silicone and finishing nails.
Creating DIY board & batten trim for the breakfast nook
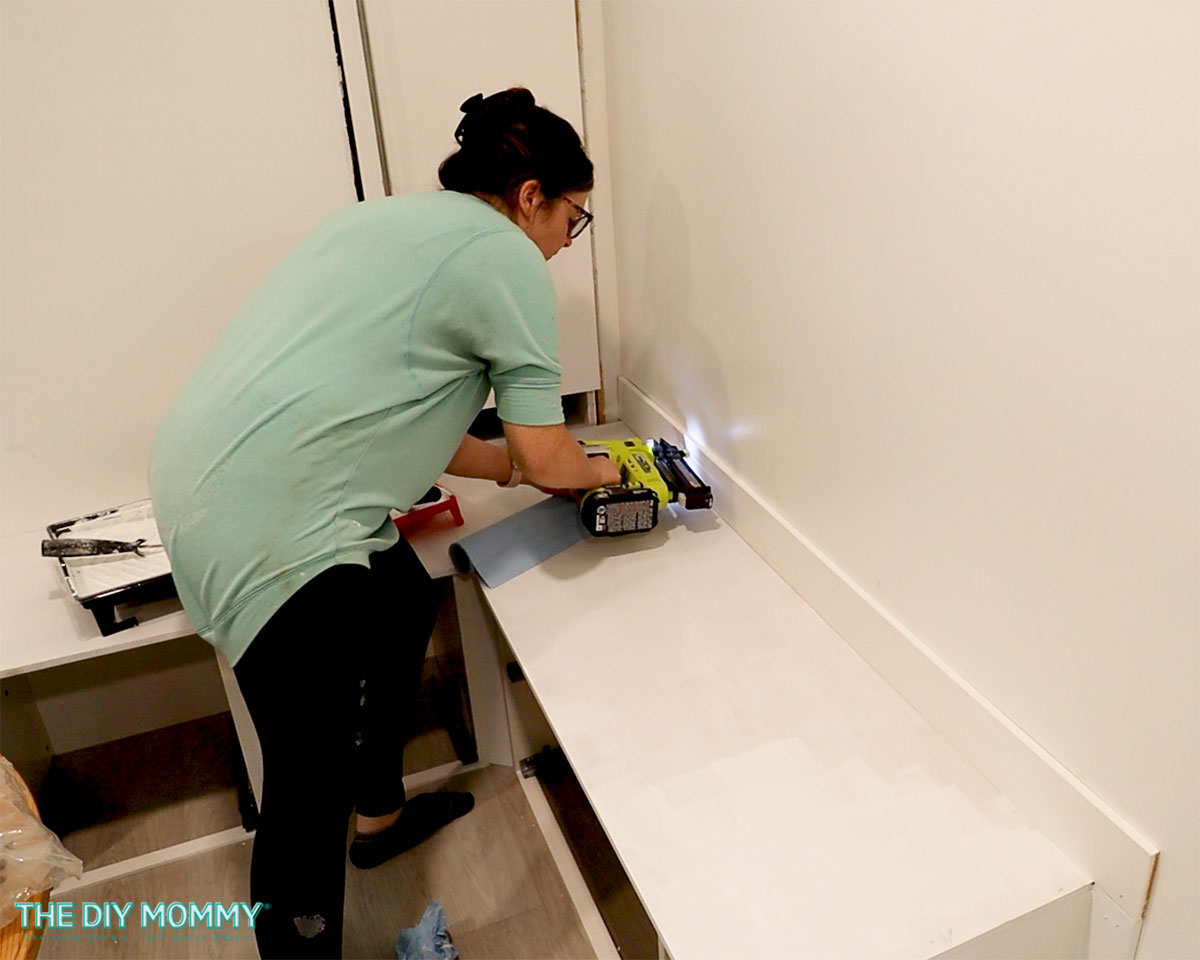
To add some timeless style to this nook, we wanted to add some board & batten trim work about 2/3rds up the wall over the bench seat. First, I installed some leftover MDF baseboard just over top of the bench using my finishing nailer. I used my trusty miter saw to cut all of the trim for this project.
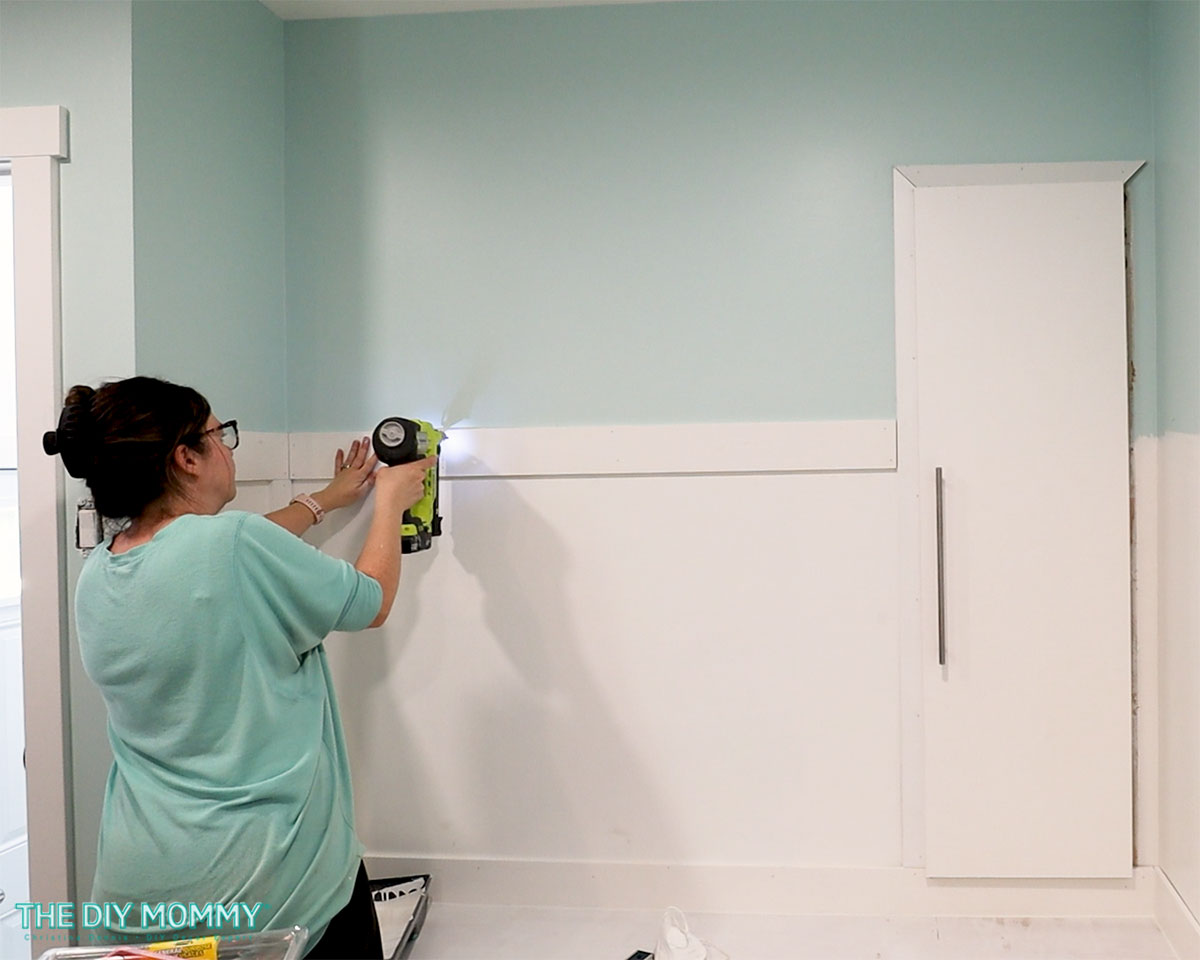
Then, I installed more baseboard 2/3rds up the wall using a tape measure and a level to make sure it was in the right spot. I also added some new casing around the pantry door and butted the baseboard trim up to it to make it look cohesive.
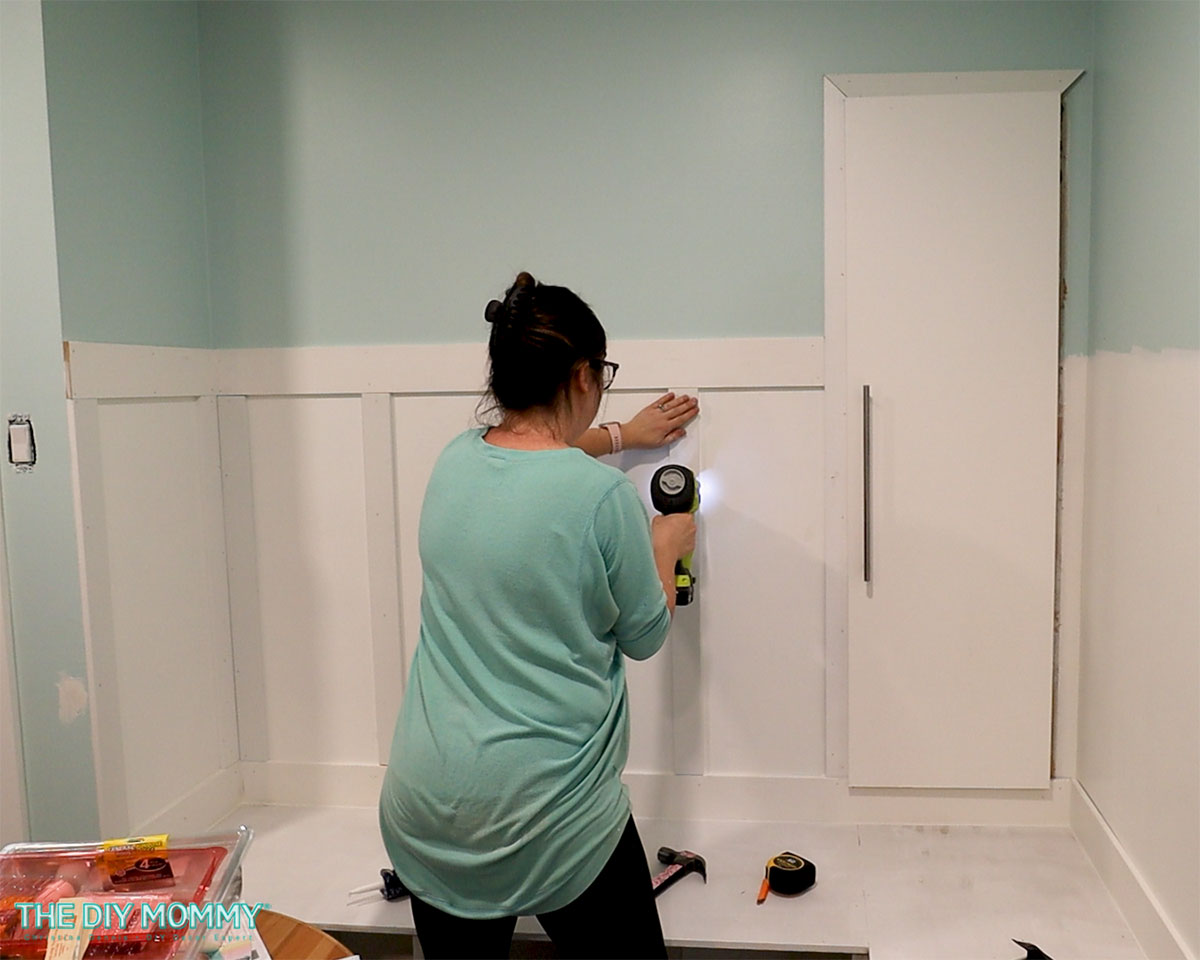
Next, I cut some 3 inch wide casing to size and installed it vertically between the two baseboard pieces. I used a measuring tape and some simple math to make sure the pieces were even along the wall and tacked them to the wall with my finishing nail gun.
Finishing the bench seat and kitchen breakfast nook
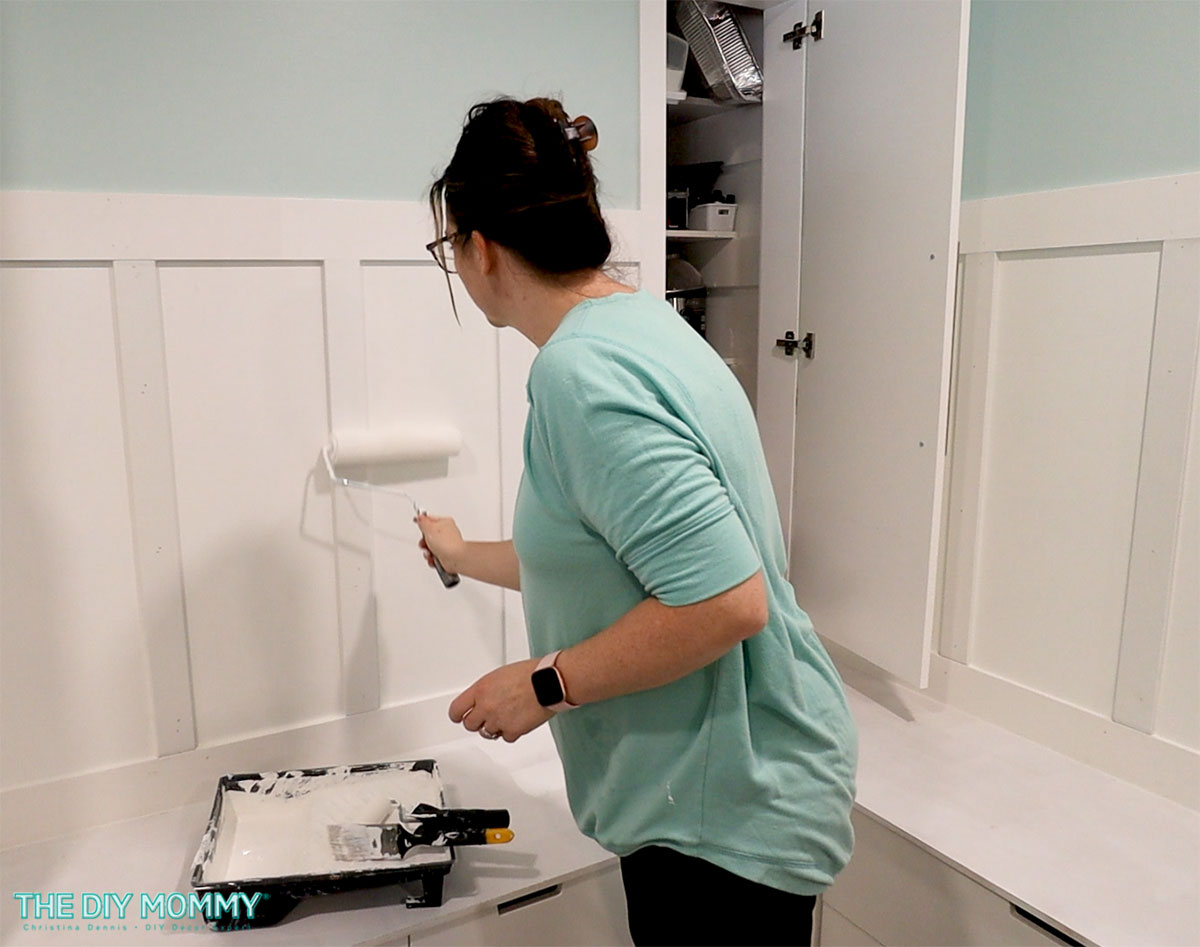
Finally, I caulked all the seams and joints with paintable latex caulk to give the whole bench a built-in, seamless look. Once that was dry, I painted all the trim with the colour-matched white paint.

Because I wanted the whole bench to look custom, I painted all the NORDLI drawer fronts with bonding primer. Then, I painted them with that same white latex paint. This little last step will make the whole corner look so cohesive! Once I the paint dried, I installed the drawers back into the NORDLI frames.
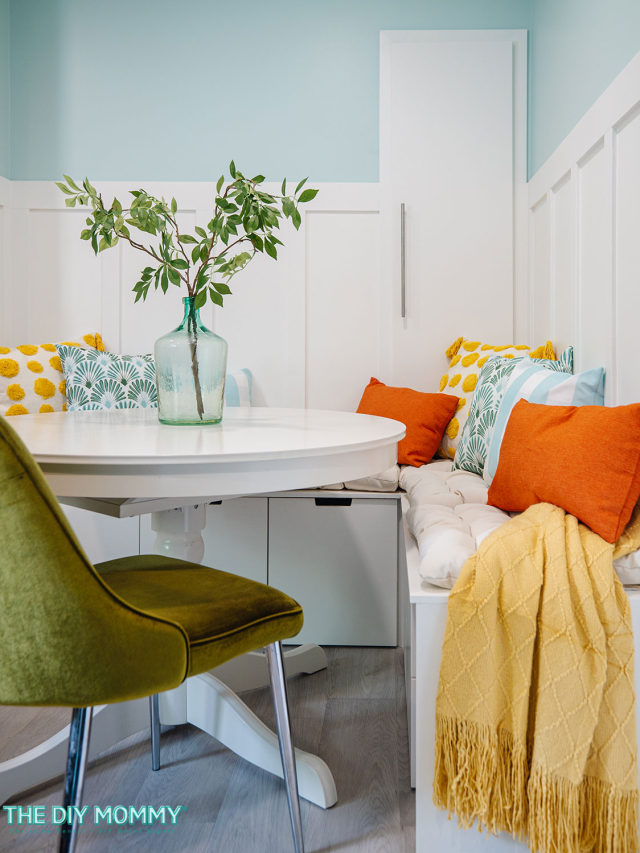
Here’s how the bench seat turned out:
I love how it looks… and that storage is fantastic! I’m so happy with how the NORDLI dresser units functioned as a base for this bench, and now I know how to build a bench seat for kitchen table with these units as the starting point.
Styling the breakfast nook
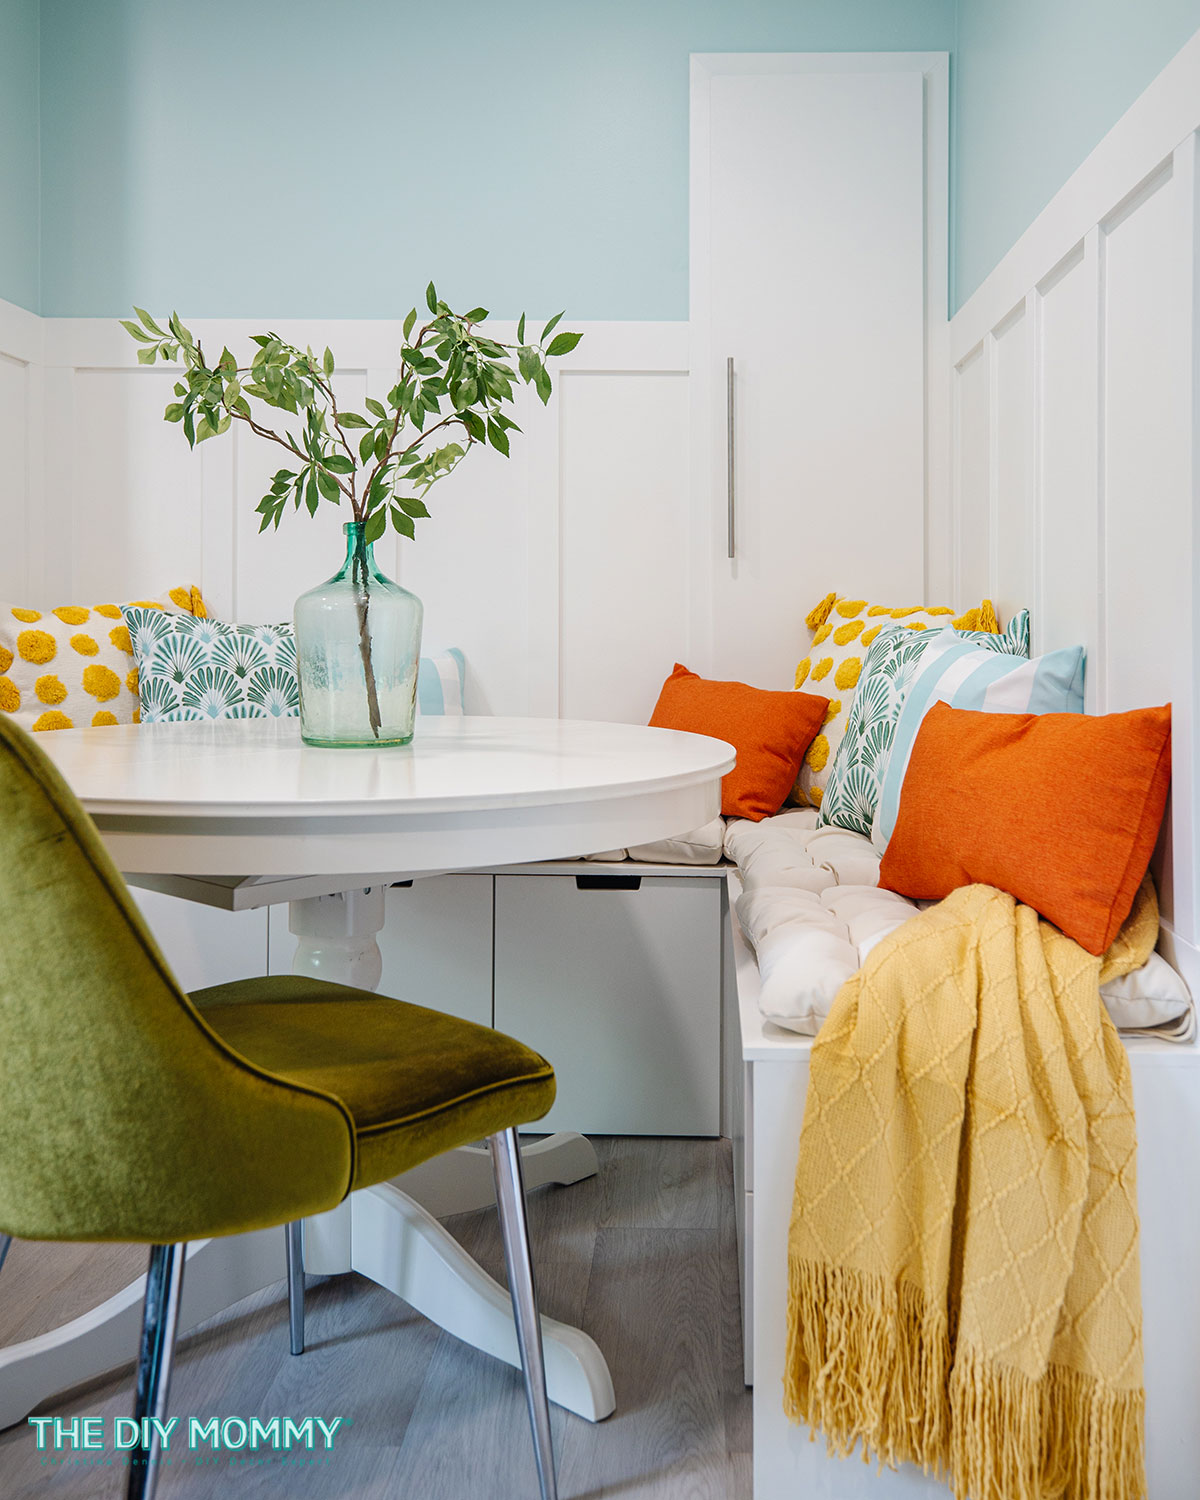
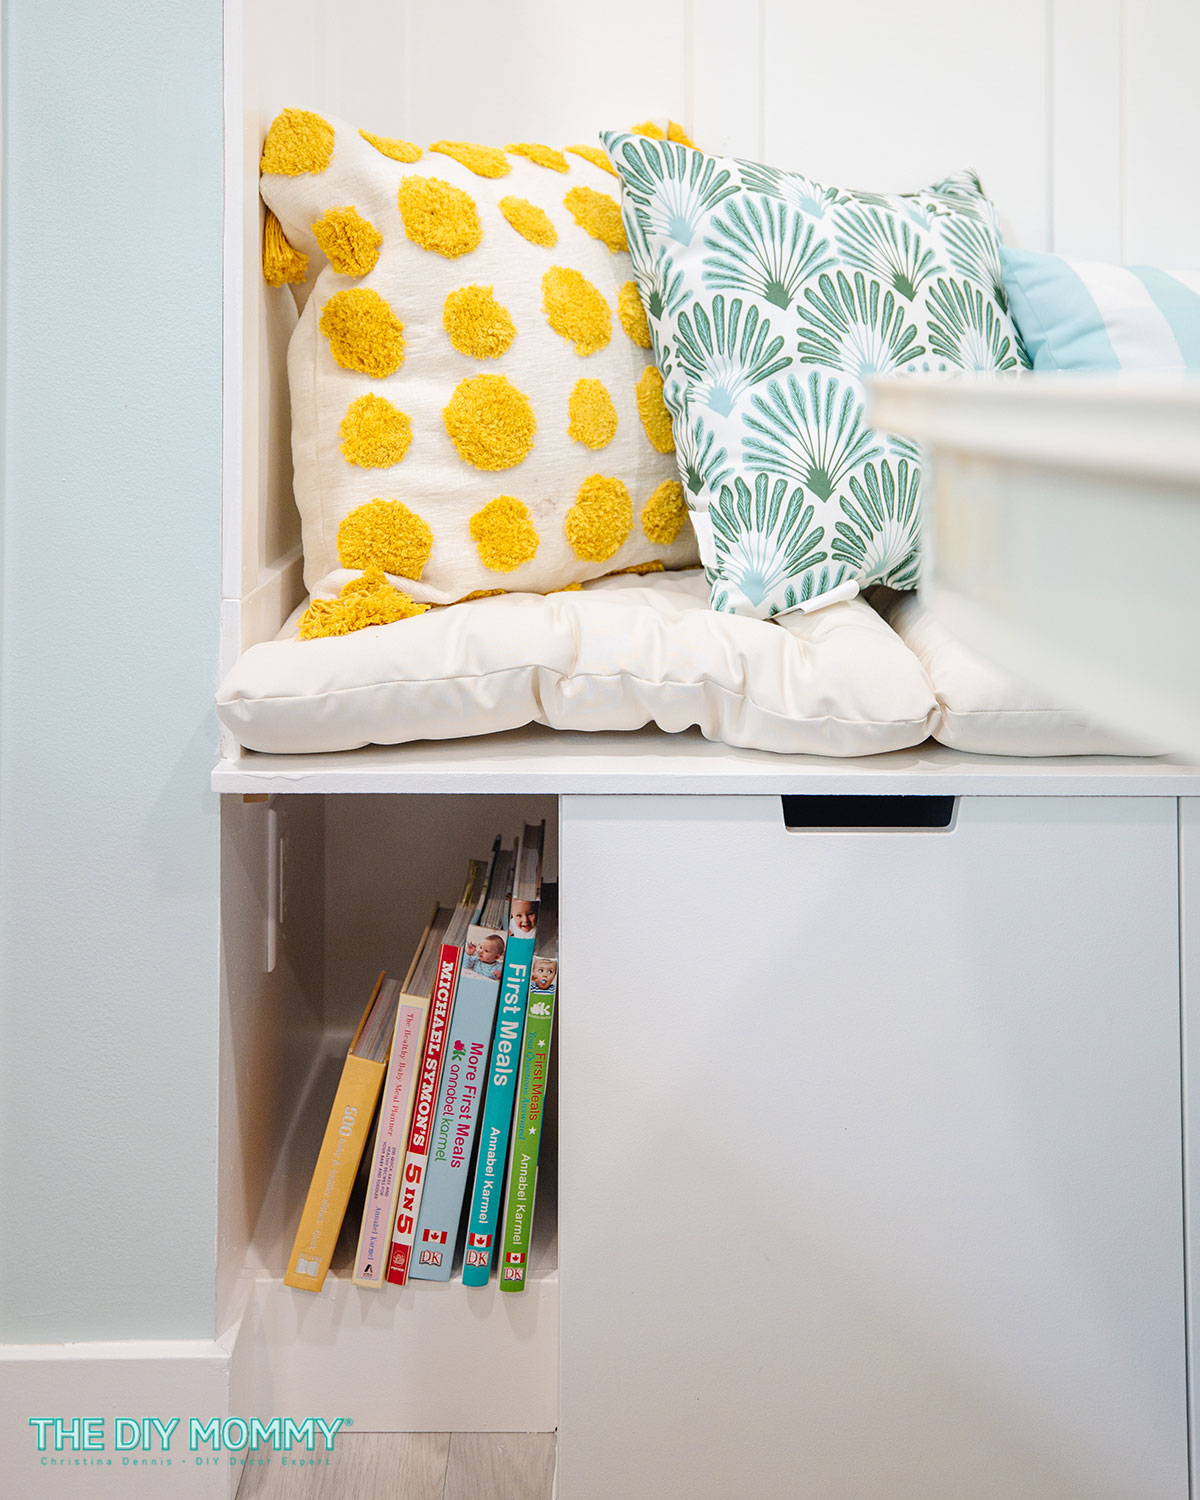
My sister loves bright colours, so I added lots of colourful cushions to the nook to give it a pop of brightness. I also added some IKEA outdoor chair pads to the top of the bench for comfort. We considered creating a custom bench cushion out of foam and upholstery fabric, however these cushions were much more budget friendly!
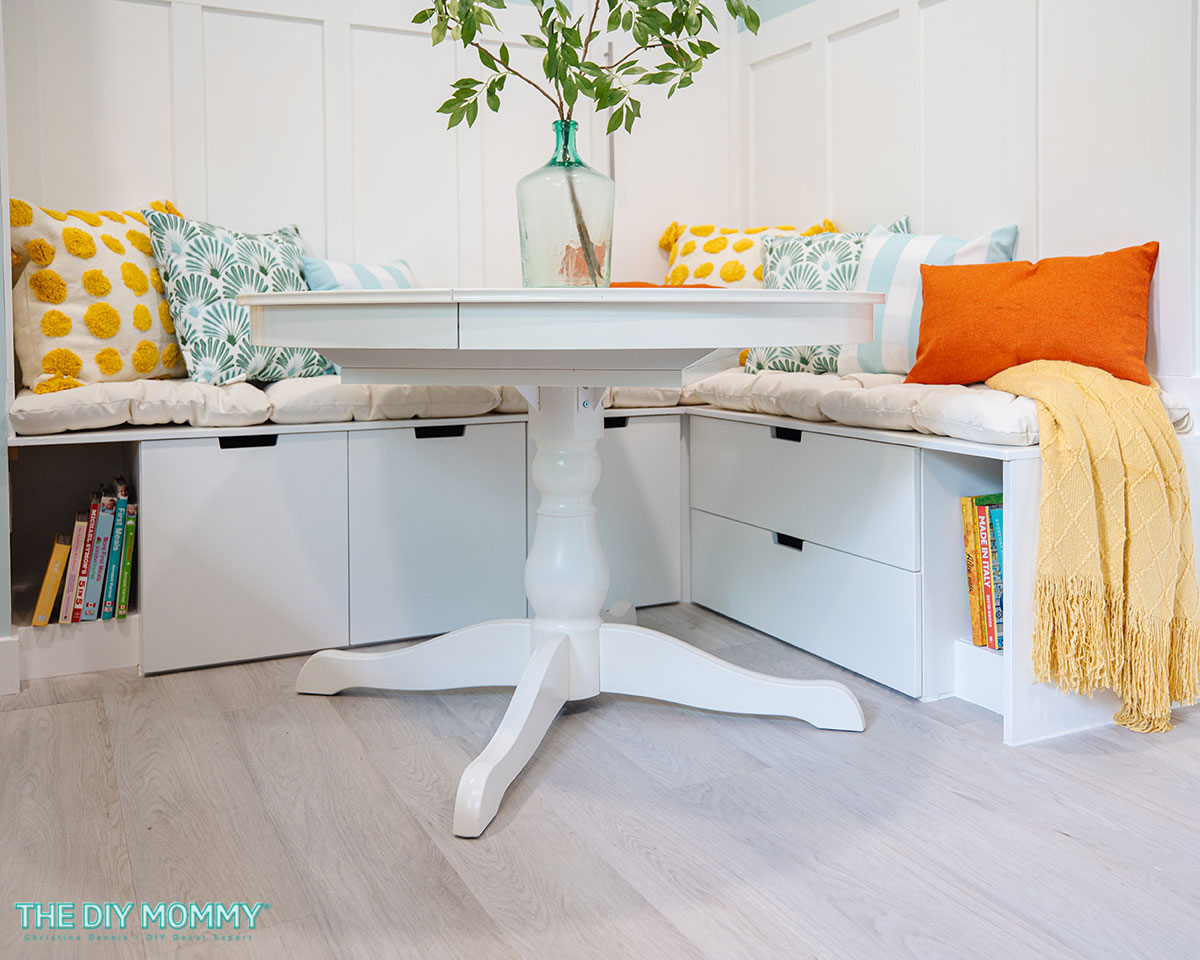
The round, white IKEA pedestal table I had in my own breakfast nook was actually the perfect size for this nook, so I played “musical tables”. I brought mine to my sister’s nook, and brought my old one back out for ours. This table is ideal for this breakfast nook because of its pedestal design. Traditional table legs can get in the way of drawers and bench seating.
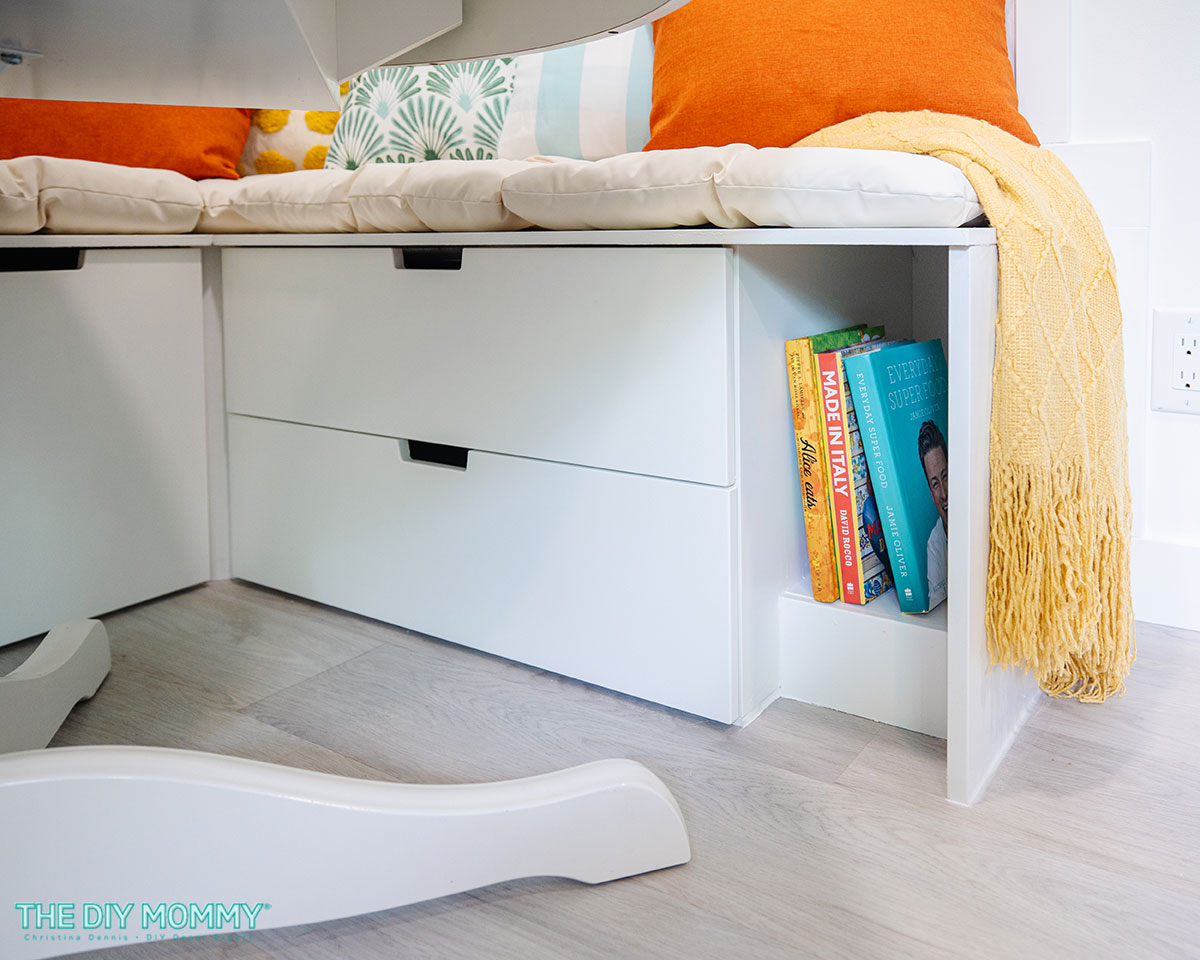
The niches on either side of this bench are the perfect size for recipe books! Creating these niches allowed me to make this dining table bench larger, and still gave access to the outlets on either side of the bench.
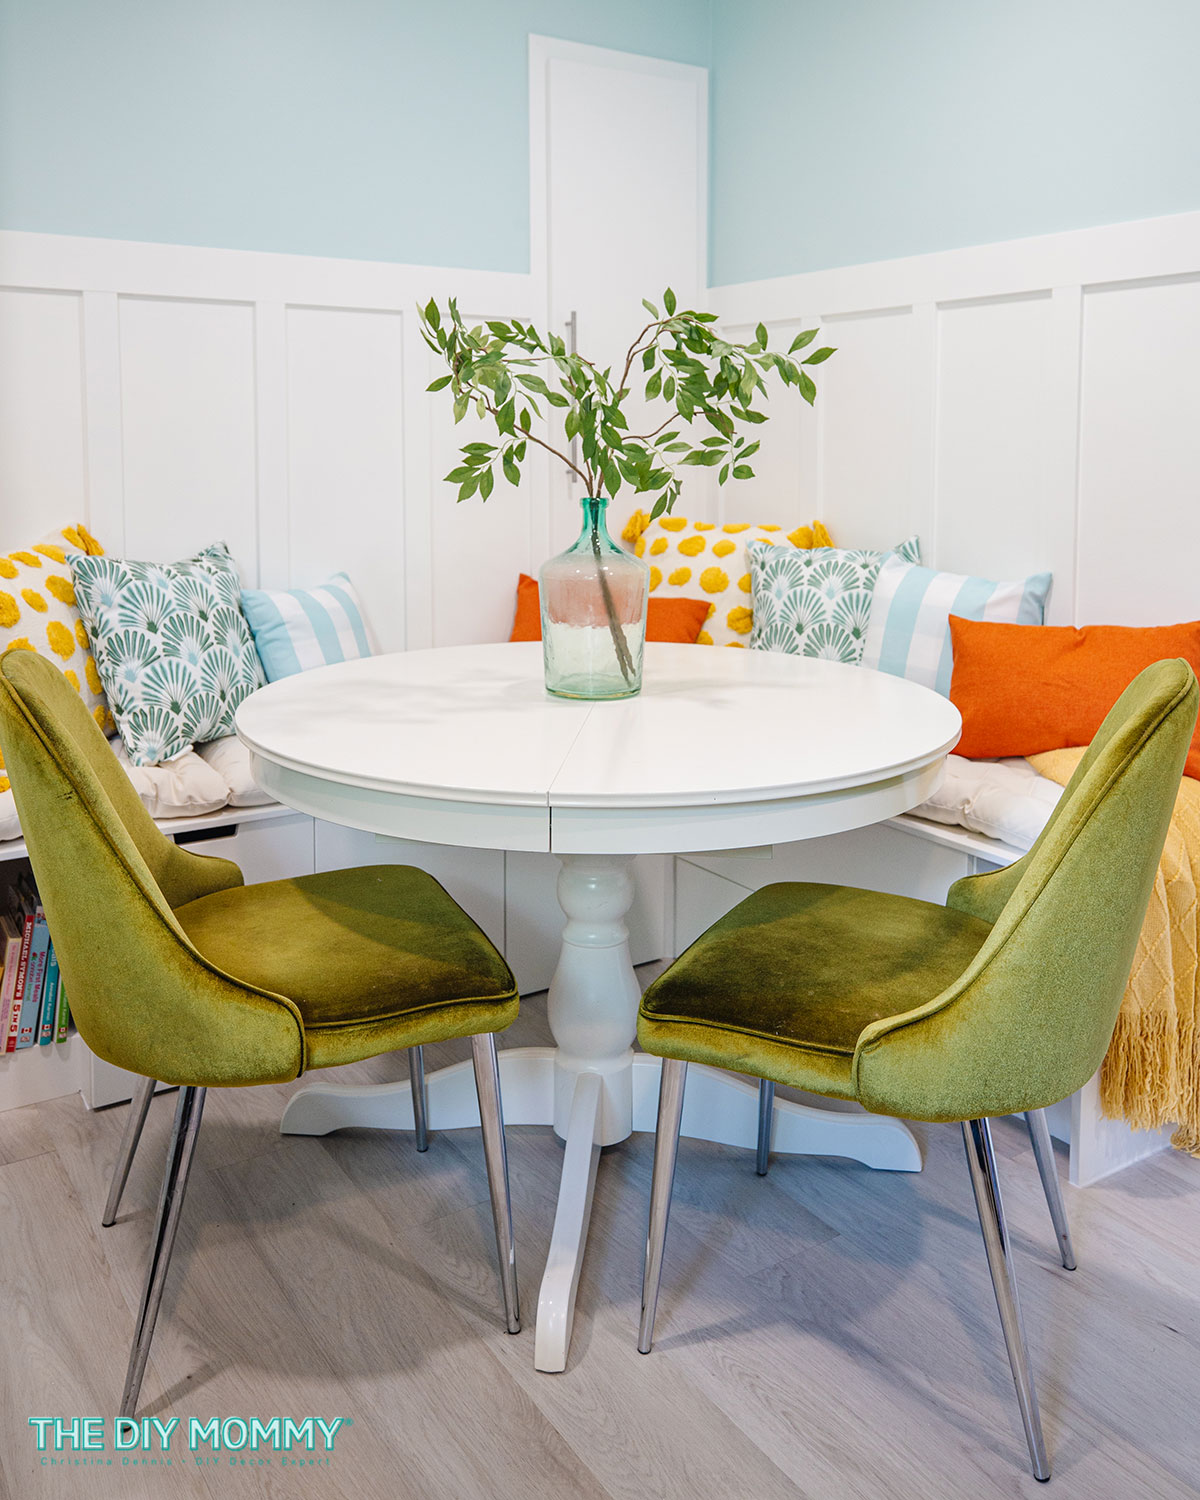
The green velvet dining chairs are also mine, but I thought they’d work so well in this space. Their midcentury modern shape is a nice contrast with the traditional feel of the board & batten walls. I love the marriage of traditional & midcentury style in my sister’s home!
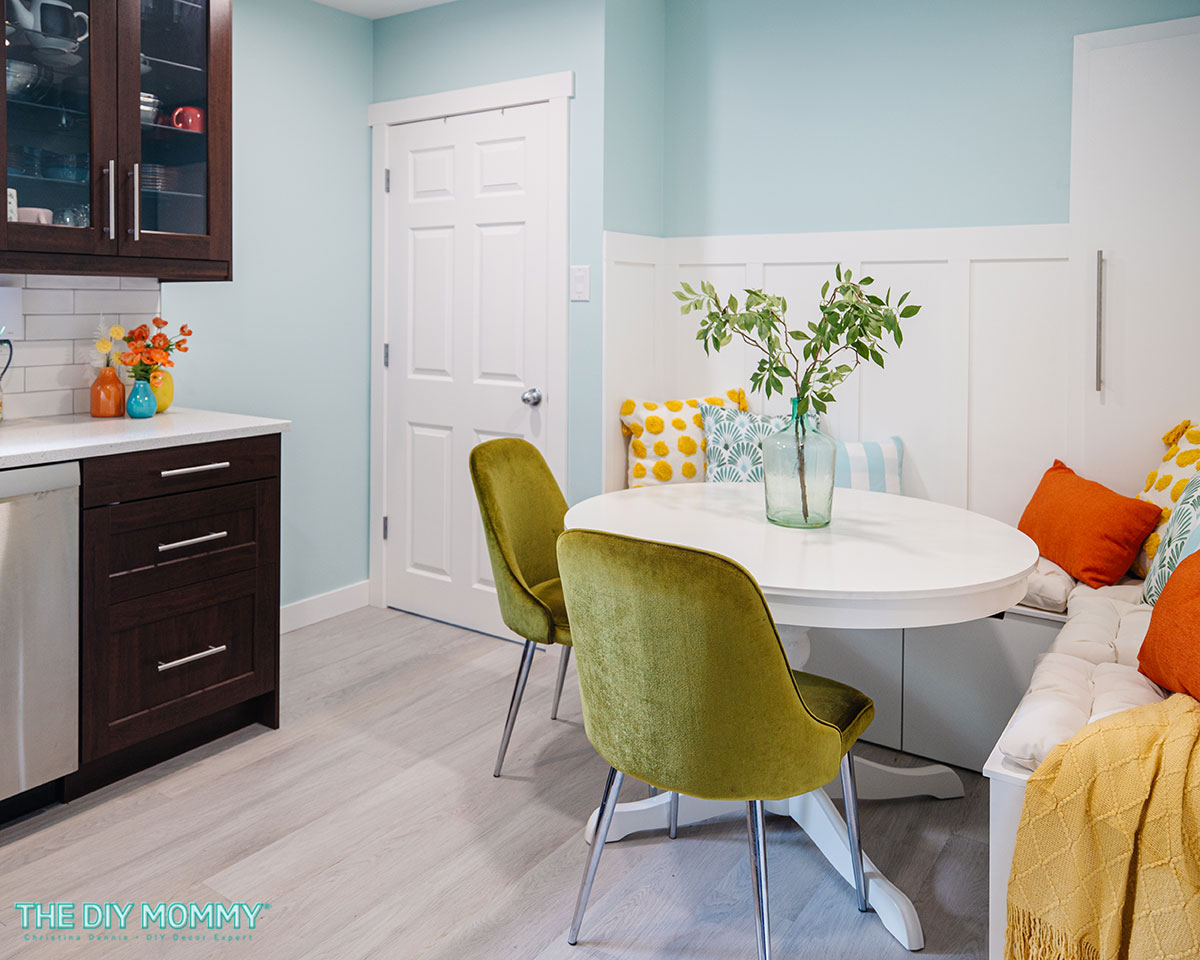
I also love how this new breakfast nook area contrasts so nicely with my sister’s dark kitchen cabinets. The white trim, blue walls, and bright accessories add a much needed lightness to this kitchen. Now instead of an awkward kitchen corner, my sister has a charming breakfast nook that’s perfect for enjoying morning coffee or working from home. It also provides much needed extra seating for guests to enjoy a dinner party or games night. I hope my sister and brother-in-law enjoy this cozy little space for many years to come!
Watch my video to see this entire breakfast nook transformation:
Cheerful Breakfast Nook Makeover Sources:
- small NORDLI dresser unit
- larger NORDLI dresser unit
- outdoor chair pads
- olive green velvet dining chair (similar)
- round white dining table
- yellow polka-dot cushions
- yellow knit throw blanket
- orange cushions
- aqua plaid cushion (similar)
- orange, blue & yellow vases
- faux wisteria branches
- vintage inspired fruit art (shown in mood board)
I hope you enjoyed this breakfast nook transformation and this tutorial on how to build a bench seat for kitchen table with IKEA NORDLIs! Let me know what you think of this room makeover down in the comments below.
I love how you created such a useful place from that empty corner.
Were you worried about weight capacity with using the Ikea modules? Getting Such inspo from this diy but looking for a little more info on the sturdiness!
2 adults were able to sit on the bench seat found here: https://thediymommy.com/build-a-dining-bench-from-kitchen-cabinets/.
Adding plywood can also make the cabinet bench more sturdy.
What is the name of the 3D program that you use for visualization of the space and dimensions as seen at the start of the video? thanks.
Sketchup
The transformation is really lovely. I didn’t notice the built-in pantry in the corner in the first ‘after’ photo that I saw. You did a wonderful job making it blend in. Were the throw pillows from IKEA as well? I’d like to create window seating with storage for my child’s room. Thanks for sharing this. It’s beautiful.
Thank you. The pillows are from Amazon and are linked above.