How To Build A Bench Seat From IKEA Cabinets
This post may contain affiliate links · This blog generates income via ads
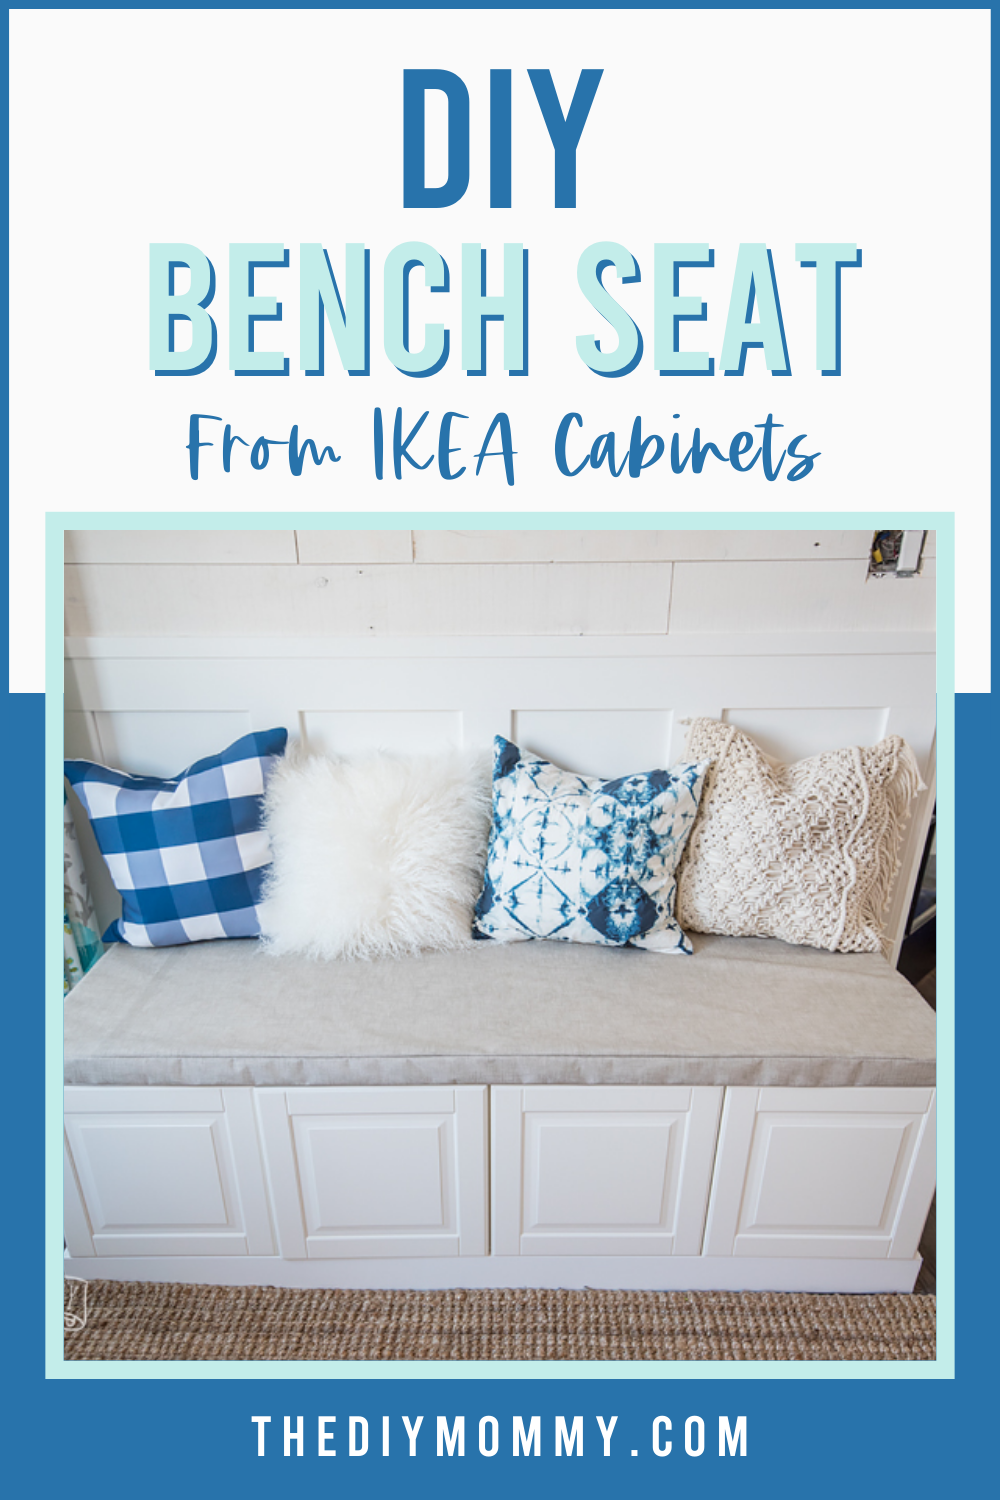
As part of our breakfast nook makeover, I wanted to create a built-in looking dining bench cabinet. Not only do dining benches look cute and cozy, but they’re a practical space-saver. I used IKEA cabinets to easily build a dining bench that looks built-in, but is actually movable. Let me show you how to DIY a simple dining bench seat from kitchen cabinets!
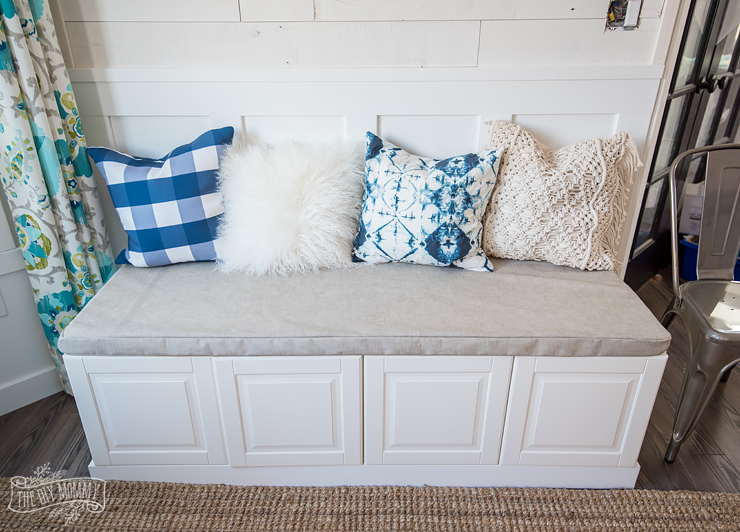
Isn’t this cute?! I’m so proud of this little build and especially how nice the top of the bench turned out, and it wasn’t hard at all. I made the whole thing myself, except I had hubby nail the base together with his giant nail gun.
The rest was so simple: To make this DIY bench seat, I used these IKEA refrigerator wall cabinets. I bought two 30″ wide by 15″ high cabinets. The width was perfect because they almost fill our breakfast nook wall. And 15″ is such a good height too, because after I set the cabinets on a base they were basically the same height as a standard bench or chair (18″).
How to make a DIY Bench Cabinet Using IKEA Kitchen Cabinetry
- I assembled them according to the directions
- Put on the cabinet doors
- Then, I created a cabinet base that was the same dimensions as the bottom of the cabinets (thank goodness for easy math!) using a miter saw and 2×4 lumber. I included some braces in the middle of the frame to make it extra sturdy
- Next, I set the cabinets on top of the base, used screws to attach them to each other in the middle so they wouldn’t shift around, and then I anchored them to the base with my finishing nail gun
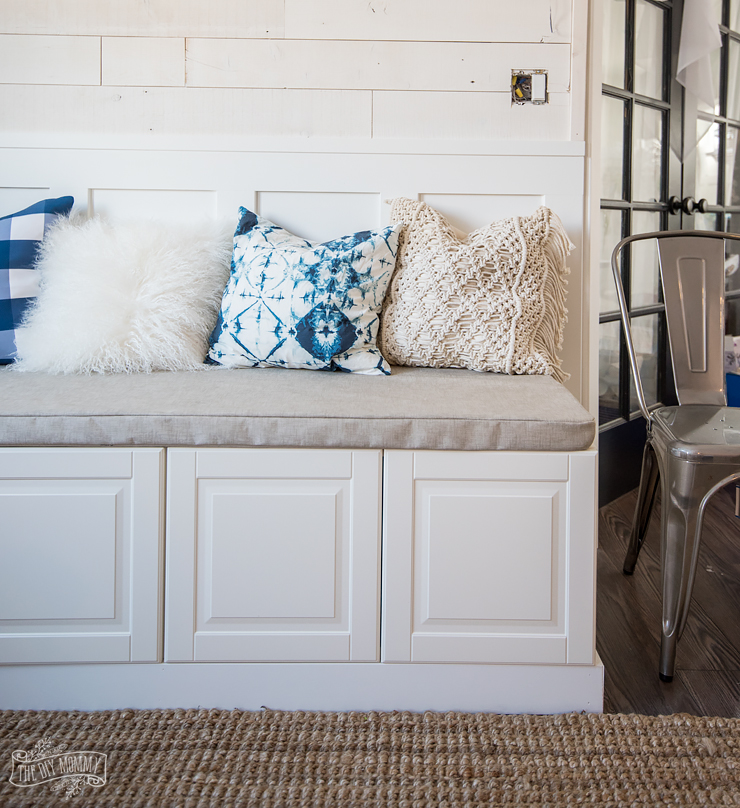
- Lastly, I covered the base with some baseboard trim that was the same height as the base. I used caulking as a filler for the nail holes, and properly caulked the seams. I painted the trim white, putting on two coats of paint with a foam brush, to match the cabinets. I’m really happy with the mitered edges and smooth texture of the trim. The finish work for this bench was actually very easy, and gives my bench a very professional look!
DIY Bench Cushion
I found some 2″ high foam on Amazon, cut it to size, and sewed a very simple bench cushion cover using some indoor-outdoor fabric to put on top of the cabinets so we could use it as a comfortable place to sit. This was easy to do by hand, and I didn’t include a zipper or anything because the fabric I used is durable and water resistant, and will protect the foam from spills. It is also very easily wiped clean.
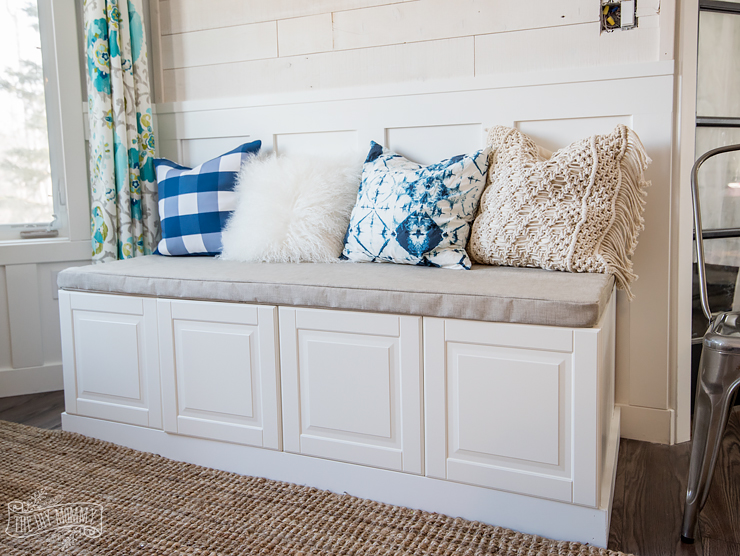
I love how this simple bench matches the look of our kitchen. It gives our kids somewhere comfy to sit and eat, and also doubles as a storage bench that we can use for extra dishware and other kitchen items that I used to store in my hutch. Because it is made out of actual kitchen cabinets with shelves and doors designed for use in a kitchen area, they are also the perfect depth to be useful! This extra storage space is so helpful.
I’m also really loving the neutral colour of the fabric I chose because we will be able to change up the look of this bench top with pillows whenever we want. I love easy finishing touches that make such a difference to the overall look of a room and project area!
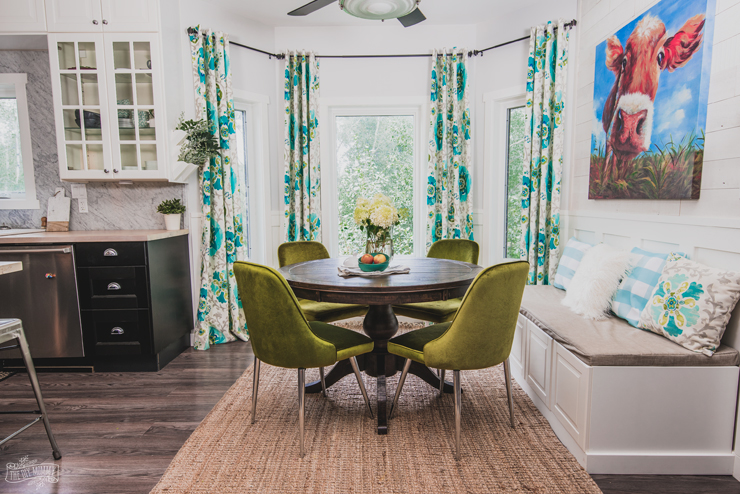
If you look closely, you can see that I made over the wall behind this bench to highlight it and add some interest to our new breakfast nook. To finish this space, I used board and batten and shiplap-look peel and stick (yes, you read that right) and I’m so happy with how it turned out! Check out this post where I do a full reveal and give tutorials and everything!
Watch my video below for a tutorial on how to make a built-in looking storage bench from IKEA kitchen cabinets:
This post was first published March, 2018 and has since been updated.
Pin Me:
Disclosure: This post contains affiliate links. If you purchase a product using these links, I’ll get a small commission at no extra cost to you.
you would probably spend more time finding the right sofa for your living room and the best mattress for your room, but when it comes to the kitchen, well most people just settle for anything that comes from their contractor or designer. kitchens are just as important as any other room in the house, so you might as well make sure you do the right research for it find the right people to do that job for you.
Do you think it would be possible to have the cabinets open on top?
I’m not sure… Christina made it this way so that she didn’t have to remove the bench cushions each time to access the storage space.
How deep were the cabinets for this project?
Hi Christina! Love this bench! Great job! I like that it works as a storage too! 🙂
Thanks! We love that part too!!
Hi Lindsay, Great job I mean no one can think even that how kitchen cabinets you can use this beautifully. I really appreciate your hard work to make and post it.
Yes, love what Christina did. Thank for stopping by
This is very smart.
Whether you’re designing your own outdoor kitchen or just want to get inspired for the future, we’ve got ideas to suit any decor style. Now add them to your dream house board, or call the contractor.
I liked that your bench was simple, but also matched your kitchen aesthetic. My husband and I have been thinking about redoing our kitchen with some granite countertops. We’d also like a bench for the kitchen so we’d probably go with a stone surface bench to go with it.
Thank you! For a stone surface, you may have to reinforce the base more as it would be quite a bit heavier 🙂
I was so inspired by your project and grateful for your step-by-step how-to instructions that I made my own window bench yesterday with the huge help of a carpenter who had all the power tools. I wanted to share three pictures (before, during and after) for you to see. We made a few adjustments to your instructions. 1) We added IKEA’s cheapest laminate countertop (LILLTRASK) to the top of four SEKTION cabinets. A salesperson at IKEA Brooklyn highly recommended that I add a countertop because she feared that the SEKTION cabinet tops weren’t strong enough to support a heavy person’s weight and would sag in over time. 2) We added extra 2×4 cross supports to the base where the two cabinets meet. So, instead of 2 cabinets sharing one 2×4 for support. Each end of each cabinet has its own 2×4 to rest upon. 3) To look more “built in” we purchased matching baseboard moulding at Home Depot and nailed that to the front of the 2×4 base. Because we were using 30″ and 36″ stock cabinets, we were a few inches short on the sides. On the left, we made a cookbook cubby. On the right, there is a small one inch gap, but it’s hard to fill because it’s not perfectly straight. . 4) For a small luxury touch, we used IKEA’s newer damper hinges on the cabinet doors. I like the clean look to the plain front cabinet doors (HAGGEBY) and will see if I can avoid adding knobs. They open easily if you grab the door from the bottom. Thank you again for the inspiration and helping us to save so much money!
Wow, Nice Kitchen surfaces
hi I have a question about which cabinets exactly you used for your bench when I click the link it doesn’t go to the cabinets just to ikeas home page. I love this idea and it will work awesome in my small space. Just trying to figure out which ones to use.
thank you
jen
Hi! You’ll want to use the refrigerator cabinet from IKEA as it’s the same dimensions of the one that Christina used – hers is from their old line of cabinets. It’s this one – just make sure you select the 30 x 15 one: https://www.ikea.com/ca/en/p/sektion-top-cab-f-fridge-freezer-w-2-doors-white-grimsloev-off-white-s19376673/
So it’s 24” deep? I’m wondering if 15” would be deep enough? Also I’m wondering if a piece of plywood across the top to distribute the weight would be a good idea? Have you noticed any sagging or creaking from sitting on the cabinets? We are a pretty large size family. Thank you so much for this! I’ve been trying to buy breakfast nook furniture and I can’t find anything that’s reasonably priced, sturdy, and available.
You can add plywood on top, Christina didn’t and two adults sit on it frequently without an issue. I’m not sure if 15″ would be deep enough. You could always check it out at IKEA and see what you think 🙂
How did you do the back wall for the breakfast nook.?
You can read more about the breakfast nook here: https://thediymommy.com/colorful-farmhouse-breakfast-nook-reveal/