7 Ways to Maximize Craft Room Wall Storage Like a Pro
This post may contain affiliate links · This blog generates income via ads
Welcome to the ultimate guide to craft room wall storage! If you’re a DIY enthusiast like me, then you know that finding space for all your beloved crafting supplies can sometimes feel like solving a puzzle. But fear not, because today we’re diving headfirst into the wonderful world of craft room storage ideas! From maximizing small spaces to exploring clever storage container solutions, we’ll uncover everything you need to transform your craft room into a functional and inspiring oasis. So, let’s go on this crafting adventure together!
We’ll explore a variety of craft storage ideas designed to make the most of your wall space. Whether you’re dealing with a cozy nook or a spacious studio, I’ve got tips and tricks to help you maximize every inch. Plus, I’ll walk you through simple steps to organize your craft room like a pro, ensuring that your supplies are not only neatly stored but also easily accessible whenever inspiration strikes. Get ready to create a craft room that’s both practical AND picturesque.
How do you store craft supplies on the wall?
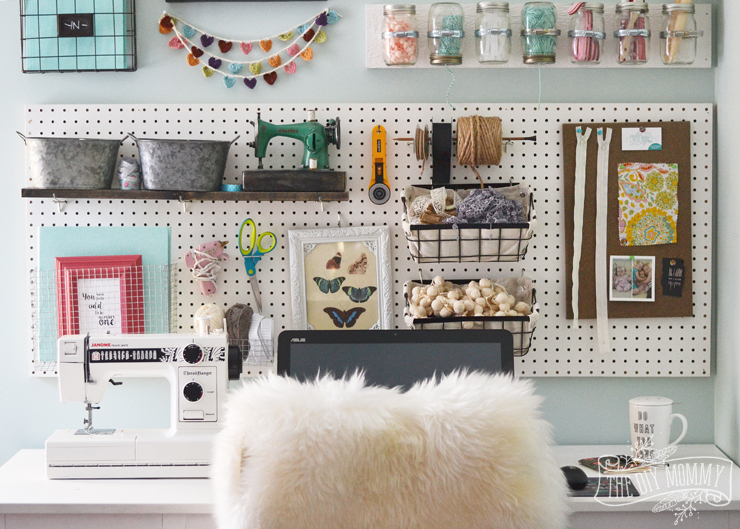
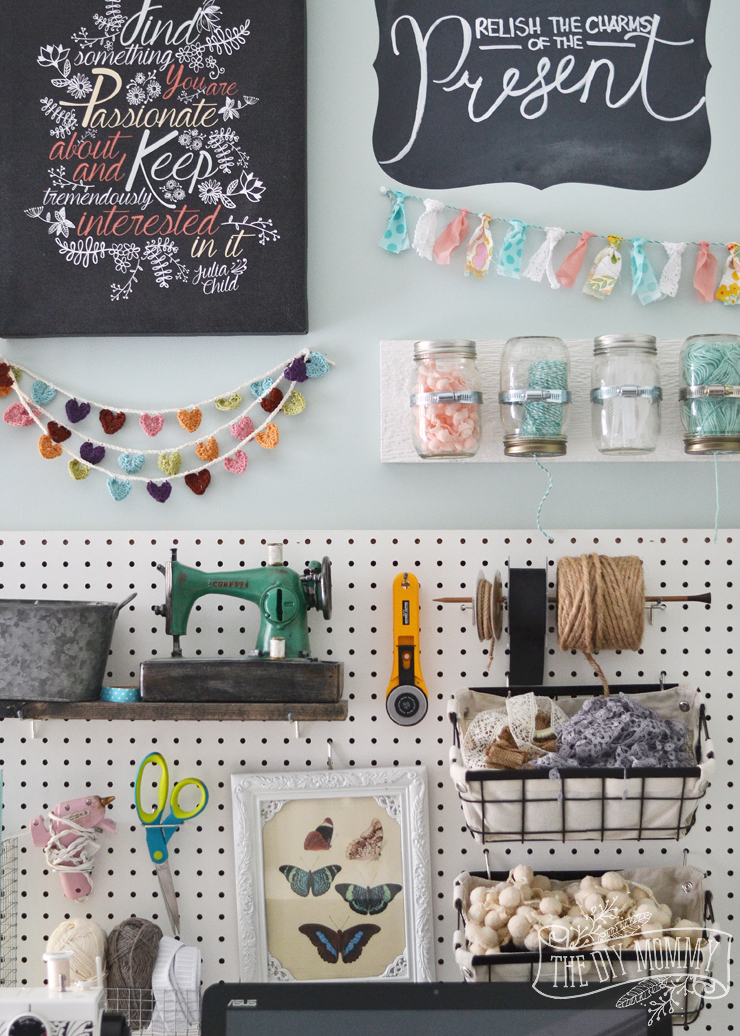
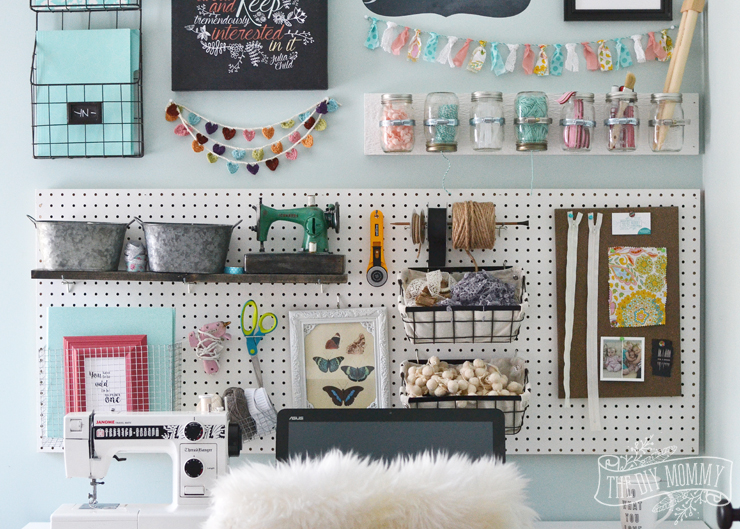
Let’s check out some ingenious ways to store your craft supplies on the wall! From using pegboards as versatile organizers to repurposing mason jars for charming storage solutions, I’ve got tons of creative ideas to maximize your space. So, get ready to make your craft room feel like a Pinterest dream come true.
Pegboards
So, first things first, let’s talk about pegboards. After all, they are the superheroes of craft room organization. Hang one up on your wall and watch the magic happen! You can add hooks, baskets, and shelves to store everything from scissors to skeins of yarn. Plus, they’re totally customizable, so you can arrange things exactly how you like them. It’s like a DIY dream come true!

Mason Jars
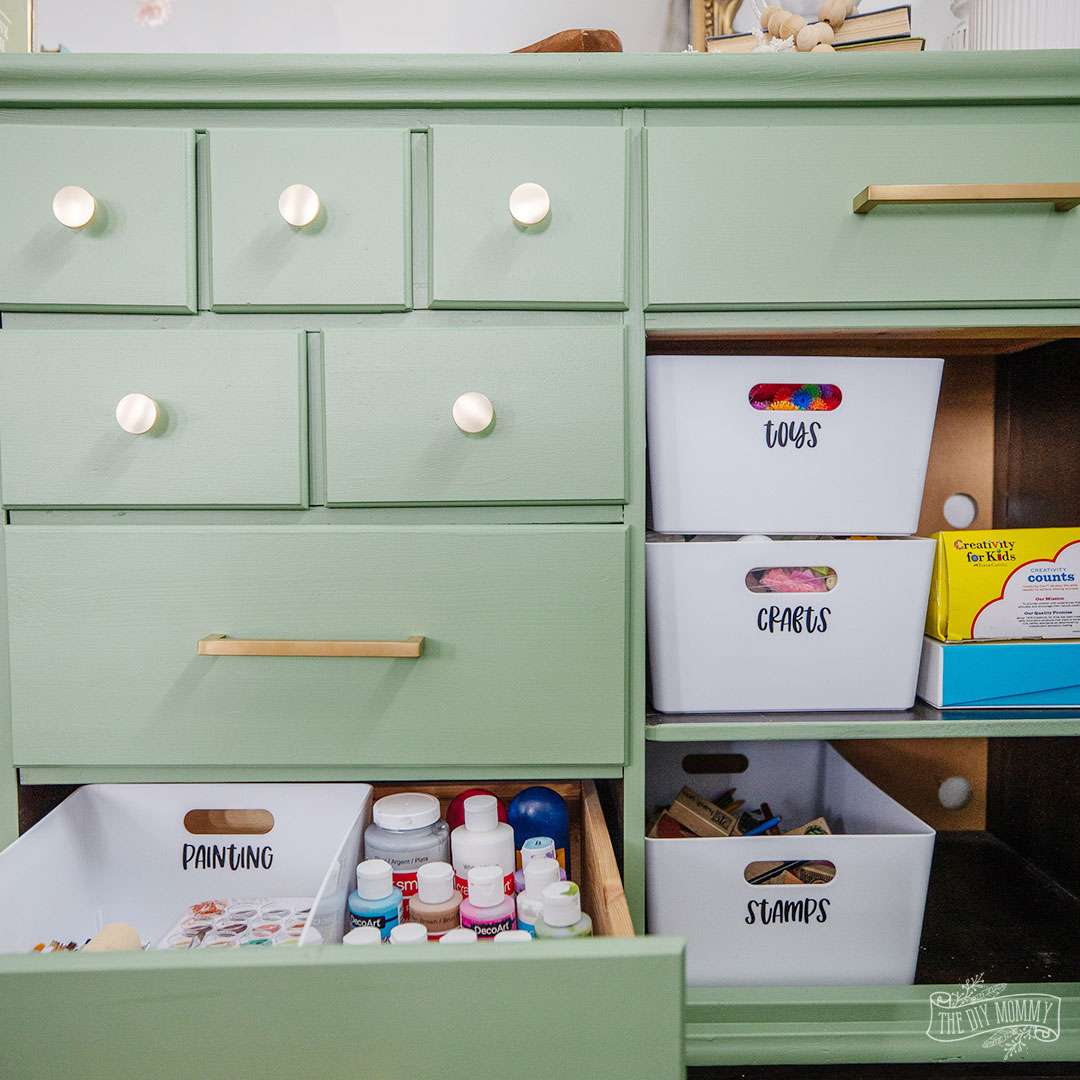
Next up: mason jars. These little gems aren’t just for jam anymore! Attach the lids to a board or directly onto the wall and fill ’em up with all your tiny treasures – pens and pencils, beads, buttons, paintbrushes – you name it! It’s like having your own mini craft store right at your fingertips. Bonus points for breaking out your trusty Cricut and applying vinyl labels for added organization!

Floating Shelves
We can’t talk about wall storage without a quick chat about floating shelves. These things are like magic – they seem to defy gravity! Install a few on your wall and voila – instant storage space for all your paint bottles, paper storage (think scrapbook paper and cardstock), and other odds and ends. Plus, they’re a great way to show off your prettiest supplies as craft room decor and add a little flair to your space! Why not install LED strip lights underneath the shelves to illuminate your workspace and highlight your favourite things?
PVC Pipe
What about repurposing some leftover PVC pipe for storage? Cut PVC pipes into various lengths and mount them horizontally on the wall. Go ahead and customize the arrangement by varying the lengths of the pipes to accommodate different-sized supplies like knitting needles, scissors, or rulers.
Fabric Organizers
Don’t forget about hanging fabric organizers – they’re one of the best-kept secrets of craft room organization. Whether you repurpose a shoe organizer or craft your own fabric pockets, these organizers are a game-changer. Each pocket is a little treasure trove, holding everything from embroidery floss to paint tubes to markers. And because they hang on the wall, your supplies are always in plain sight, making it easy to grab what you need and get down to business. You can say goodbye to cluttered drawers and bins – with hanging fabric organizers, your craft room is officially under control!
Repurposed Kitchen Items
You can also change things up by raiding your kitchen cabinets and give those old kitchen items a new lease on life. Spice rack? Hang it on the wall and fill it with small bottles of glitter or paint for easy access. And magnetic knife strips? They’re not just for knives! Use them to hold metal tools like scissors or paper punches, keeping your workspace clutter-free and your supplies within reach. It’s like giving your kitchen items a crafty makeover – and who doesn’t love a good makeover?
Hanging Wire Baskets
Lastly, hanging wire baskets. Make the most of your vertical space by hanging baskets on hooks or a rod mounted to the wall, and be sure to mix and match the sizes and shapes to create some visual interest. These baskets are perfect for storing larger items such as yarn, fabric scraps, or rolls of ribbon. You can label each basket for easy identification of contents and even add S-hooks or clips to the baskets’ edges to hang scissors or tape rolls – every inch counts when you’re tight on space!
There you have it – a few easy ideas to help get your craft supplies off the table and up onto the wall! Just remember to consider the available space, your own personal preferences, and (I think most importantly) the types of craft supplies you use most frequently when choosing a storage solution. Get creative, have fun, and let your inner DIY guru shine! The possibilities are endless!
How do I organize my craft room?
Organizing a craft room can feel like a daunting task, but with a little motivation and a solid plan, you can tackle it like a pro. Here are a few simple craft room ideas to help you get started and stay organized:
- Set Your Intentions: First things first, let’s set the mood. Take a moment to imagine your dream craft room. What does it look like? How does it make you feel? Envisioning your ideal space will help you stay motivated and focused as you tackle the organizing process.
- Declutter and Purge: Let’s face it – craft supplies have a way of multiplying when we’re not looking! Start by taking inventory of your craft supplies and asking yourself, “Do I really need this?” If the answer is no, it’s time to bid it farewell. Consider donating or selling items that are still in good condition – after all, one crafter’s trash is another crafter’s treasure!
- Sort and Categorize: Once you’ve decluttered, it’s time to sort and categorize. Group similar items together – yarn with yarn, paints with paints, etc. This will make it easier to see what you have and prevent duplicates. And don’t forget to get creative with storage solutions! Think shelves, pegboards, and hanging organizers. The key is to maximize every inch of space and find storage solutions that work for your specific needs.
- Maximize Storage Space: Utilize vertical space by installing shelves, pegboards, or hanging organizers on the walls. Make use of underutilized spaces like the back of doors or inside closet doors with hooks, racks, or hanging organizers. The key is to think outside the box and find storage solutions that work for your specific needs and space constraints.
- Create Functional Zones: Creating functional zones within your craft room will make it easier to find what you need and streamline your workflow. Designate specific areas for different activities or types of crafting – sewing, painting, storage, you name it. Organizing your space into functional zones will make it easier to find what you need when you need it.
- Maintain Regular Maintenance: And finally, don’t forget to regularly maintain your beautiful new craft room. Organizing is a journey, not a destination, so make sure to set aside time each week or month to tidy up, put away supplies, and reassess your storage needs. Keeping your craft room organized will make it more enjoyable to work in, and that means it’s worth the effort.
And now you know how to organize your craft room like a boss! By following these simple steps and staying focused on your vision for your craft room, you can create a space that inspires creativity and productivity. Before you know it, you’ll have a space that’s as functional as it is fabulous!
How do you maximize space in a small craft room?
When it comes to maximizing space in a small craft room, it’s all about thinking smart and getting creative. First things first, let’s talk about vertical space. In a small space, every inch counts, so don’t let those walls go to waste! Pegboards are your secret weapon here. They’re like the Swiss Army knife of craft room organization. Hang ’em up and deck ’em out with hooks, baskets, and shelves to store all your supplies in style. You’ll be amazed at how much stuff you can fit on a single pegboard!
Also super important: furniture that pulls double duty. Say hello to your new best friend: storage ottomans. Not only are they comfy to sit on while you’re crafting up a storm, but they also double as a place to stash your yarn, fabric, or whatever else you need to tuck away. Plus, they come in all sorts of cute designs, so you can find one that fits your style to a T.
Another space-saving trick? Rolling carts. They are like the Swiss Army knife’s cooler cousin. You can wheel them around wherever you need, and when you’re done, just tuck them away in a corner. They’re perfect for storing supplies that you need easy access to, like paints, brushes, or sewing notions.
And, like we discussed earlier, don’t forget about the power of hooks, storage bins, and baskets. Stick them on the back of doors, hang them on walls, or tuck them under shelves – the possibilities are endless! They’re great for corralling all those small bits that tend to clutter up your crafting space, like ribbons, trim or buttons.
Last but definitely not least, don’t be afraid to get ruthless with your decluttering. If you haven’t used it in the past year, chances are you don’t need it cluttering up your precious space. So channel your inner Marie Kondo and let go of anything that doesn’t spark joy.
Maximizing space in a small craft room is all about creativity and efficiency. Whether you’re hanging up pegboards to unlock vertical potential, snuggling up with multifunctional storage ottomans, or rolling around with handy carts for your crafting essentials, there’s no shortage of clever tricks to make every inch count. And remember, decluttering is key – letting go of items that no longer serve you will free up valuable space for the supplies that truly inspire you.
Transforming your craft room into an organized and functional space doesn’t have to be complicated. Whether you’re hanging pegboards, repurposing mason jars or spice jars, or getting crafty with floating shelves, there’s no shortage of clever solutions to help you make the most of your wall space and keep your supplies tidy and easily accessible.
Here’s a mini video tour of my new office craft room pegboard wall:
I hope I’ve inspired you with these craft room organization ideas! Now it’s time to roll up your sleeves, grab your tools, and turn your craft room into a functional and inspiring space!
Happy crafting, and may your walls be as vibrant as your imagination!