How to Make a Homemade Balloon Arch (Seriously Easy!)
This post may contain affiliate links · This blog generates income via ads
Are you ready to elevate your party décor game with a stunning homemade balloon arch? Whether it’s for a birthday bash, baby shower, or any celebration, creating a beautiful balloon garland is easier than you might think. Today, I’m thrilled to guide you through every step of the process, so you can craft a beautiful balloon arch that your guests will love. Let’s get started!
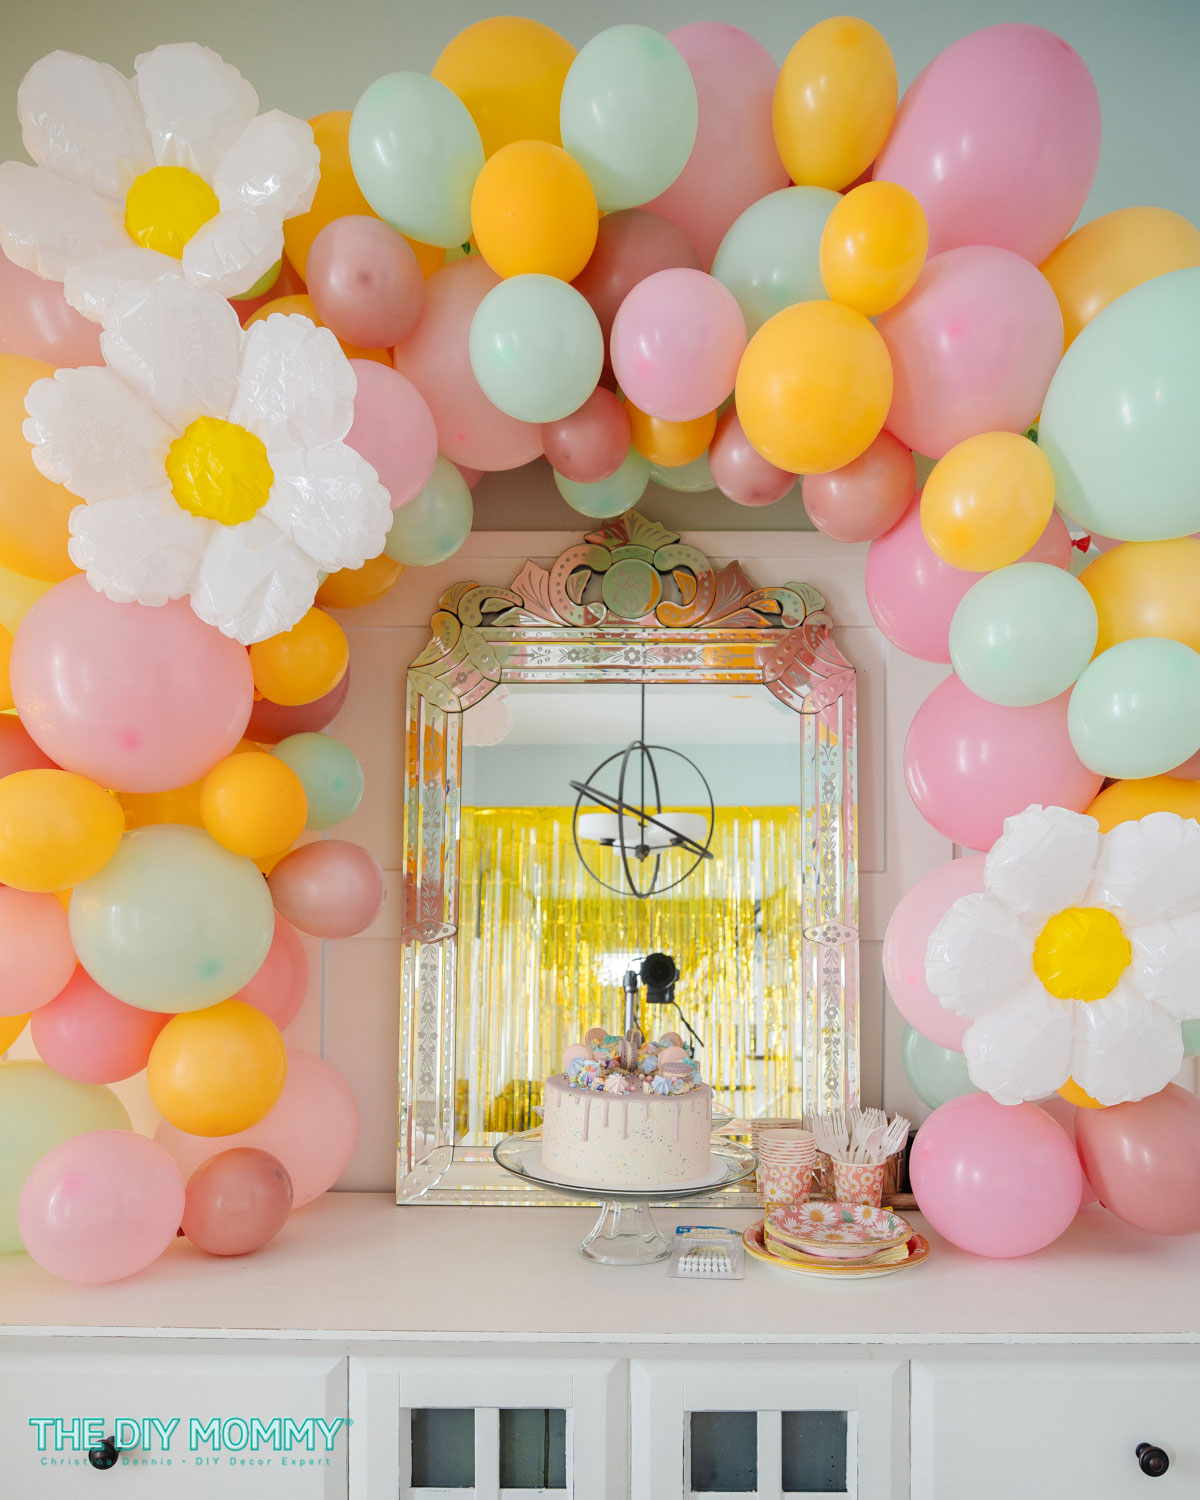
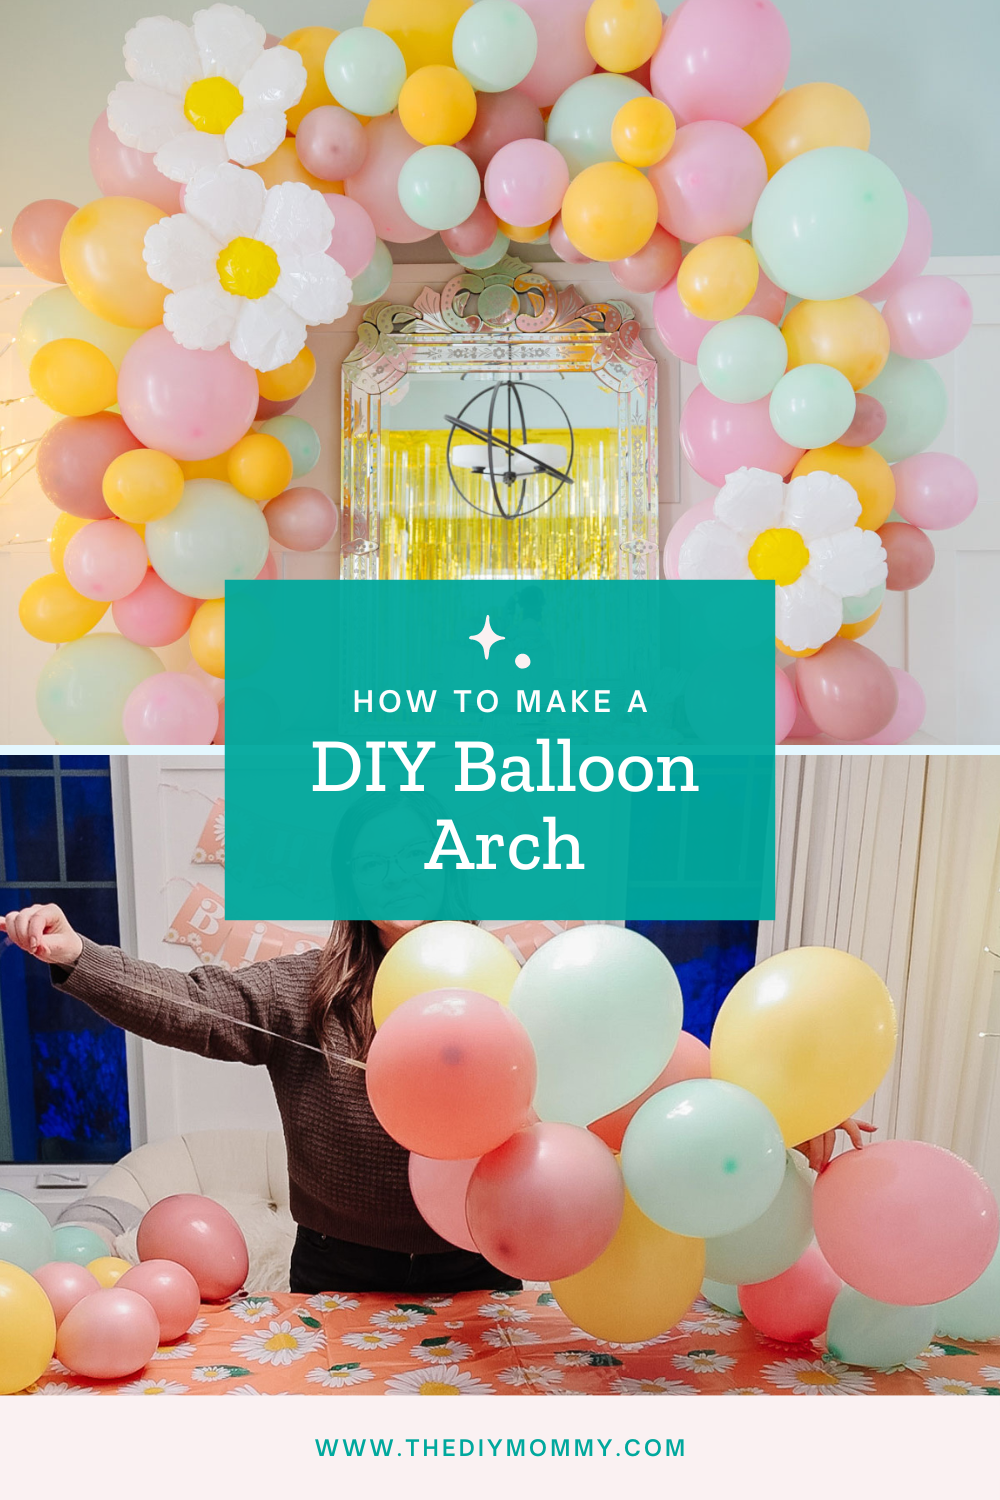
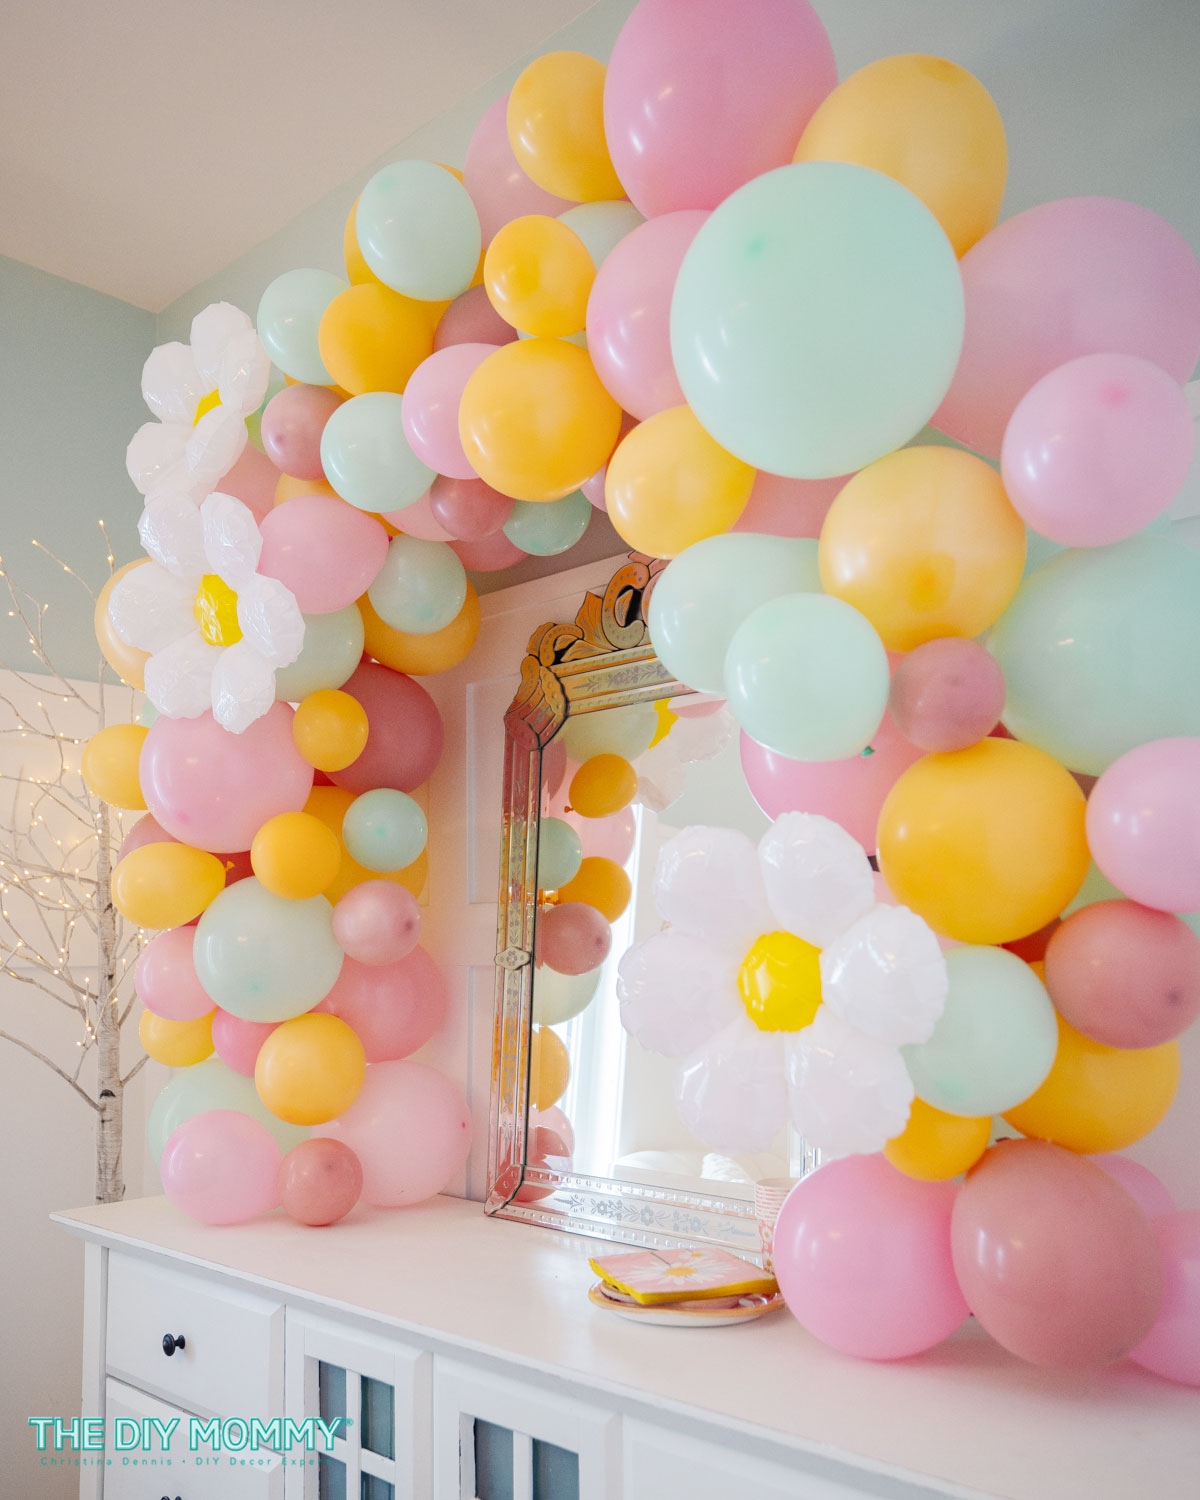
If you’re looking for an impactful decoration for your next party, a balloon arch or garland is a beautiful and budget-friendly choice for that extra wow factor. We made this cheerful pink, mint green, yellow & daisy balloon arch for my daughter’s 10th birthday party, and it was the crown of the party decor! I can’t wait to show you how easy these are to make.
Watch my balloon arch video tutorial on YouTube by clicking here!
Materials You’ll Need
First things first, gather your materials & tools to make your garland.
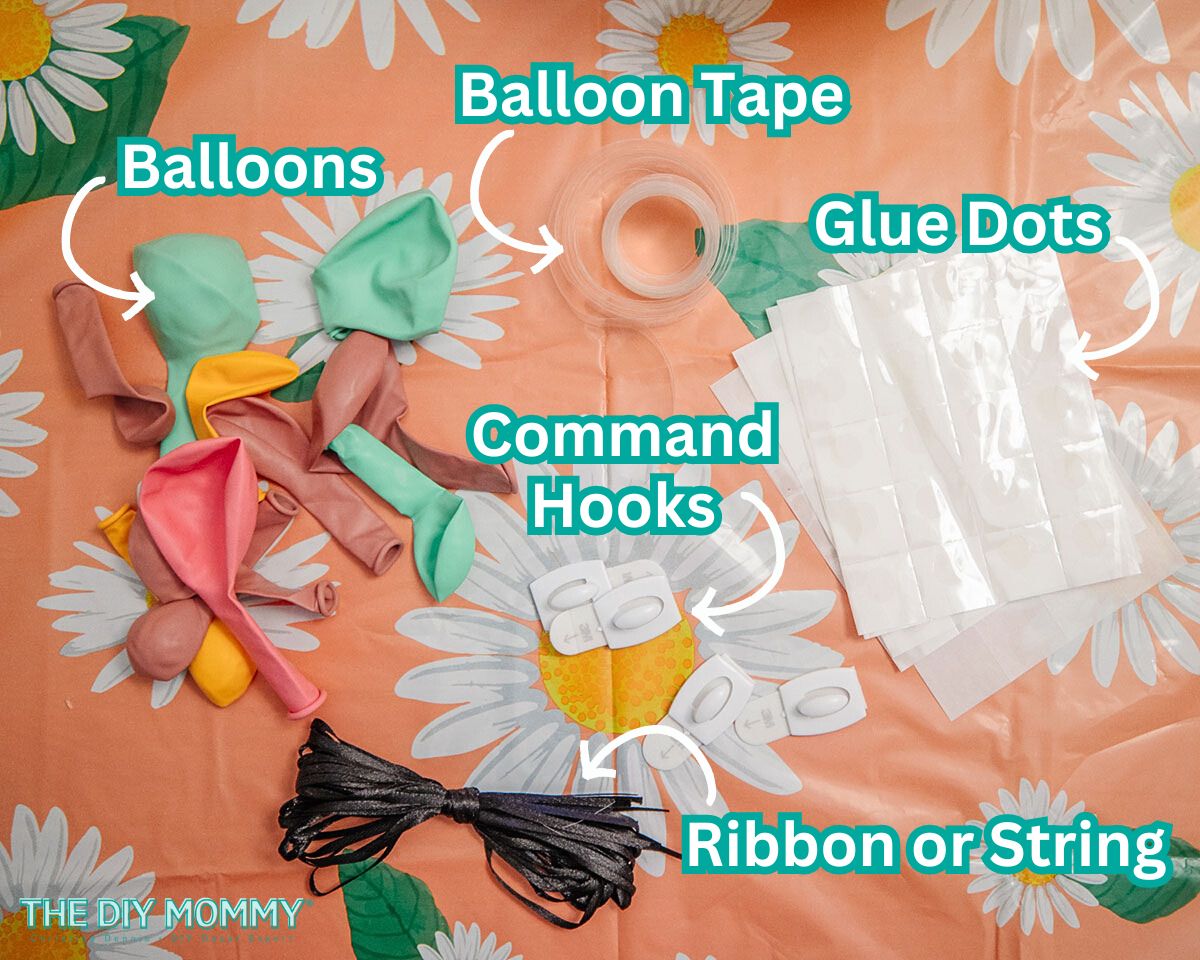
Materials you’ll require:
- Balloons in various sizes (I recommend 5-inch, 10-inch, and 12-inch balloons for a dynamic effect; I made a 7 ft garland and used about 90 balloons)
- Balloon tape (a thin acrylic band with holes)
- String, ribbon, or twine for hanging
- Command Hooks for easy installation
- Glue dots for securing balloons
- Optional: Additional themed balloons for extra flair
You can conveniently purchase all these supplies in a balloon arch kit from Amazon just like this, making your shopping experience a breeze.
Tools you’ll require:
- scissors
- electric balloon pump or manual balloon pump (optional)
Step-by-Step Guide to Make a Homemade Balloon Arch
Prepare Your Balloon Tape
Lay out your balloon tape on a flat surface, or between chairs if you prefer. Cut it to your desired length, slightly longer than the size of the garland you want.
Inflate Your Balloons
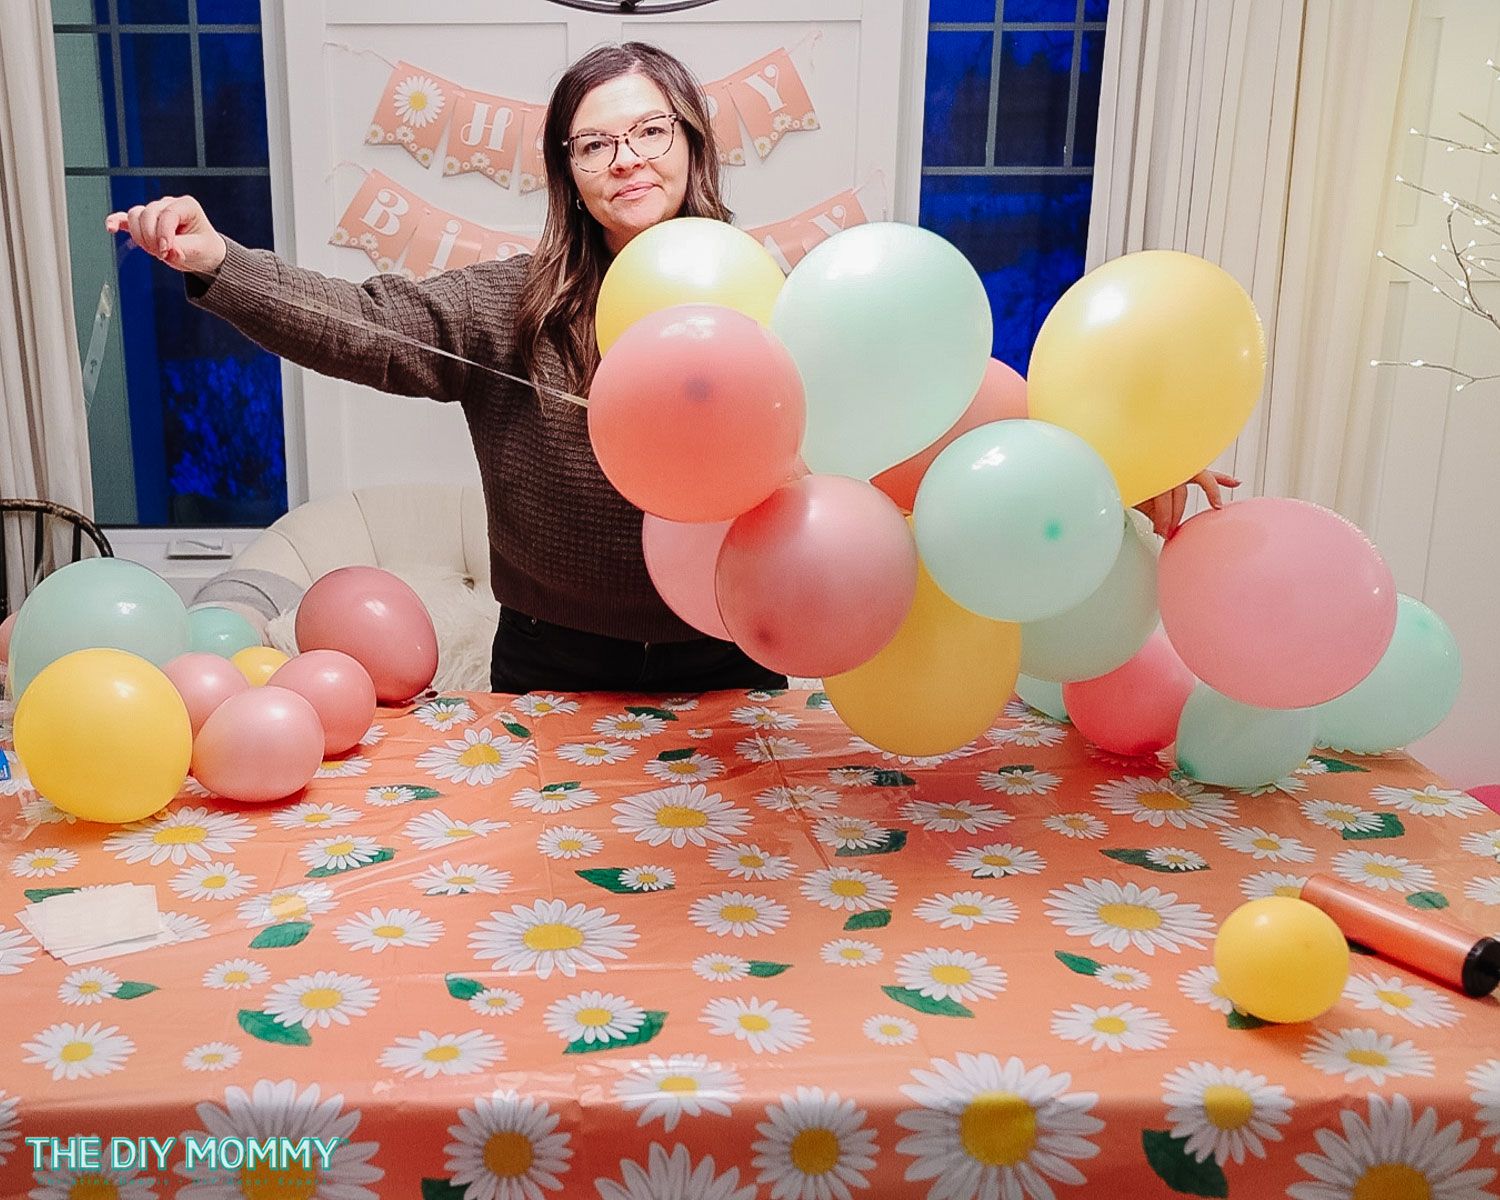
Begin by inflating the larger balloons first, such as the 12-inch ones. Remember not to overinflate them; aim for a rounded shape for a more aesthetically pleasing look. You can inflate them the old fashioned way – by mouth – or use a electric or manual balloon inflator. You’ll have to blow up a lot of balloons, so pace yourself if doing it by mouth! Get the kids, the partner… get the whole family involved.
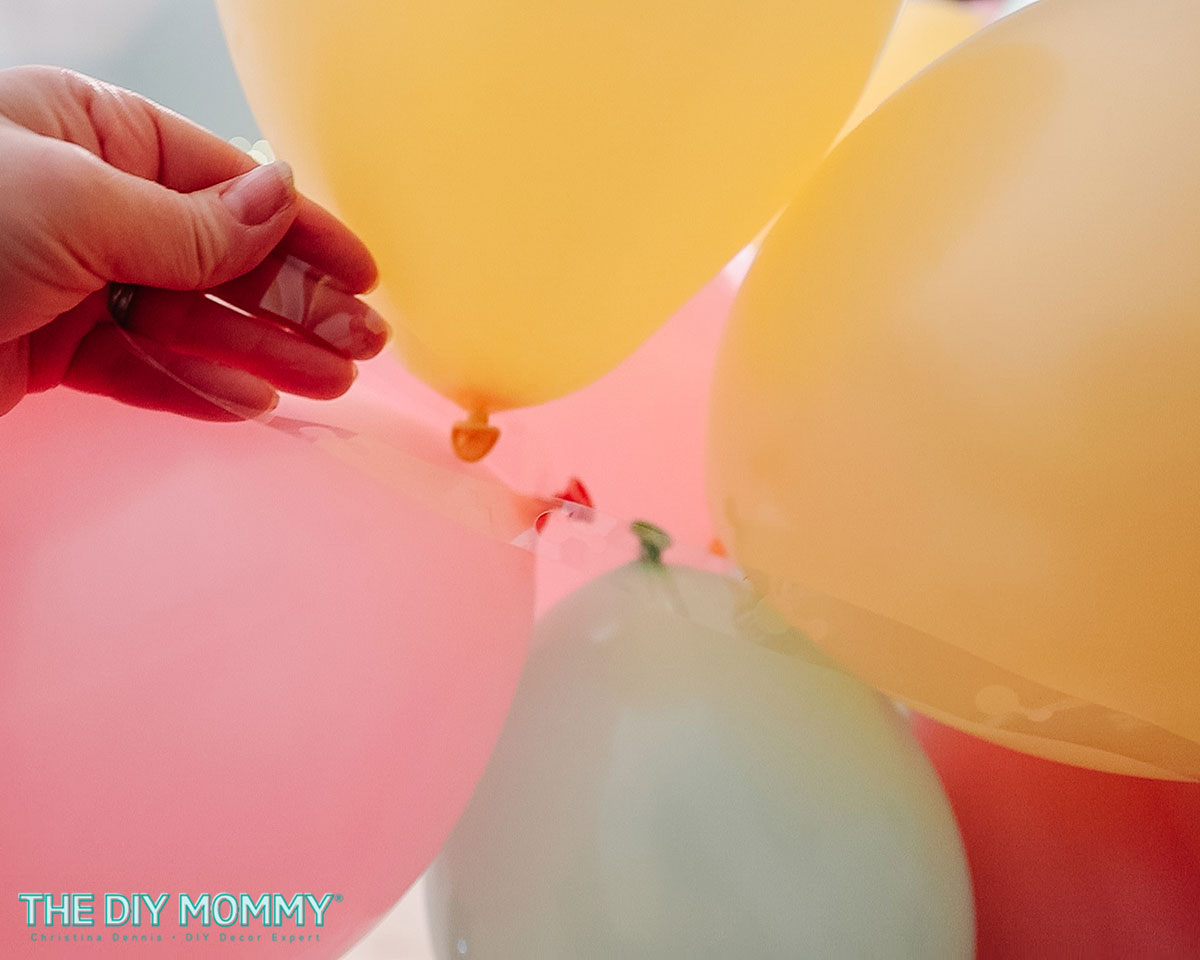
Secure Balloons onto the Tape
Once inflated tie the bottom of the balloons in a knot, and attach the larger balloons to the balloon tape / balloon strip by pulling the knot of the balloon through the provided holes. Ensure each hole is filled with a balloon for a full and balanced garland.
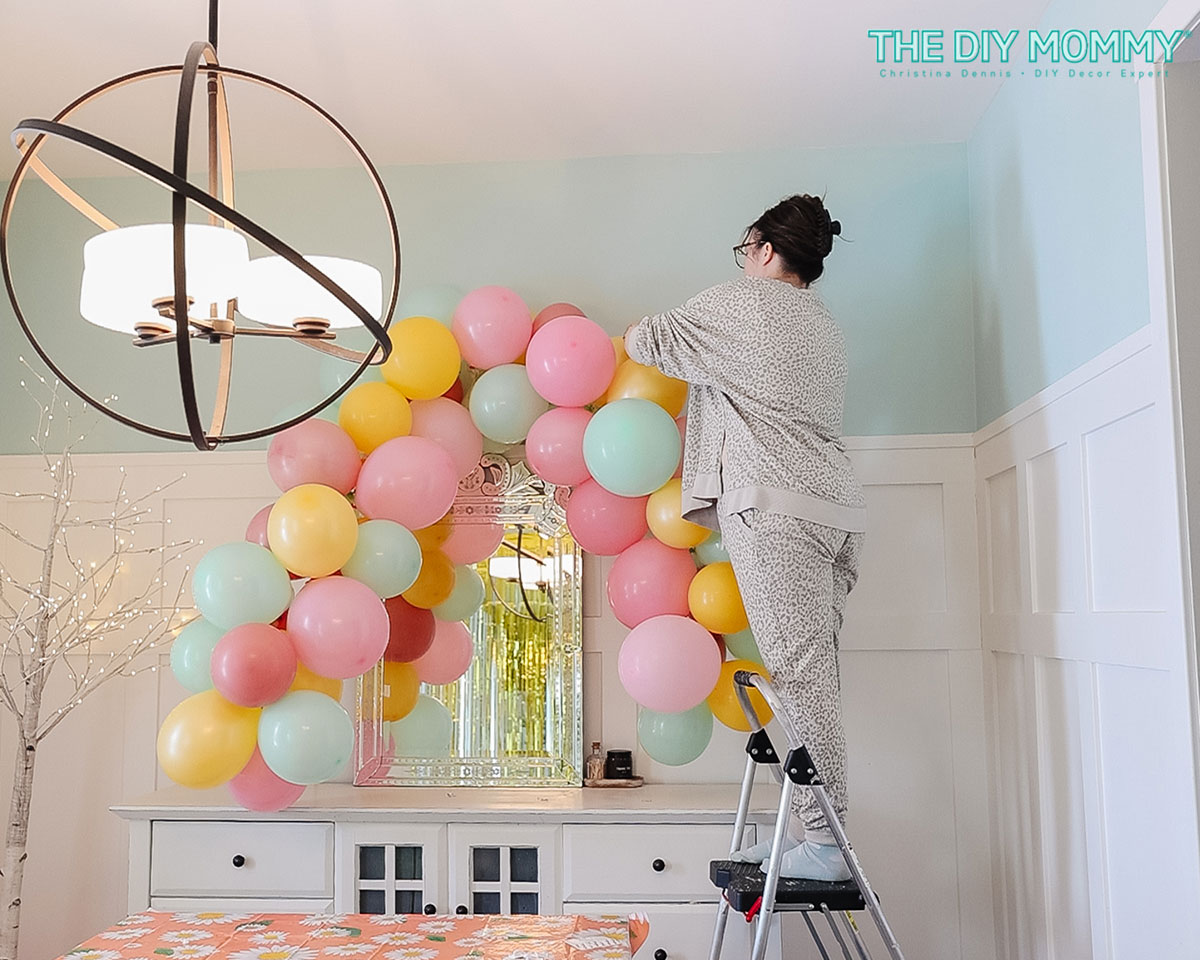
Hang Your Garland
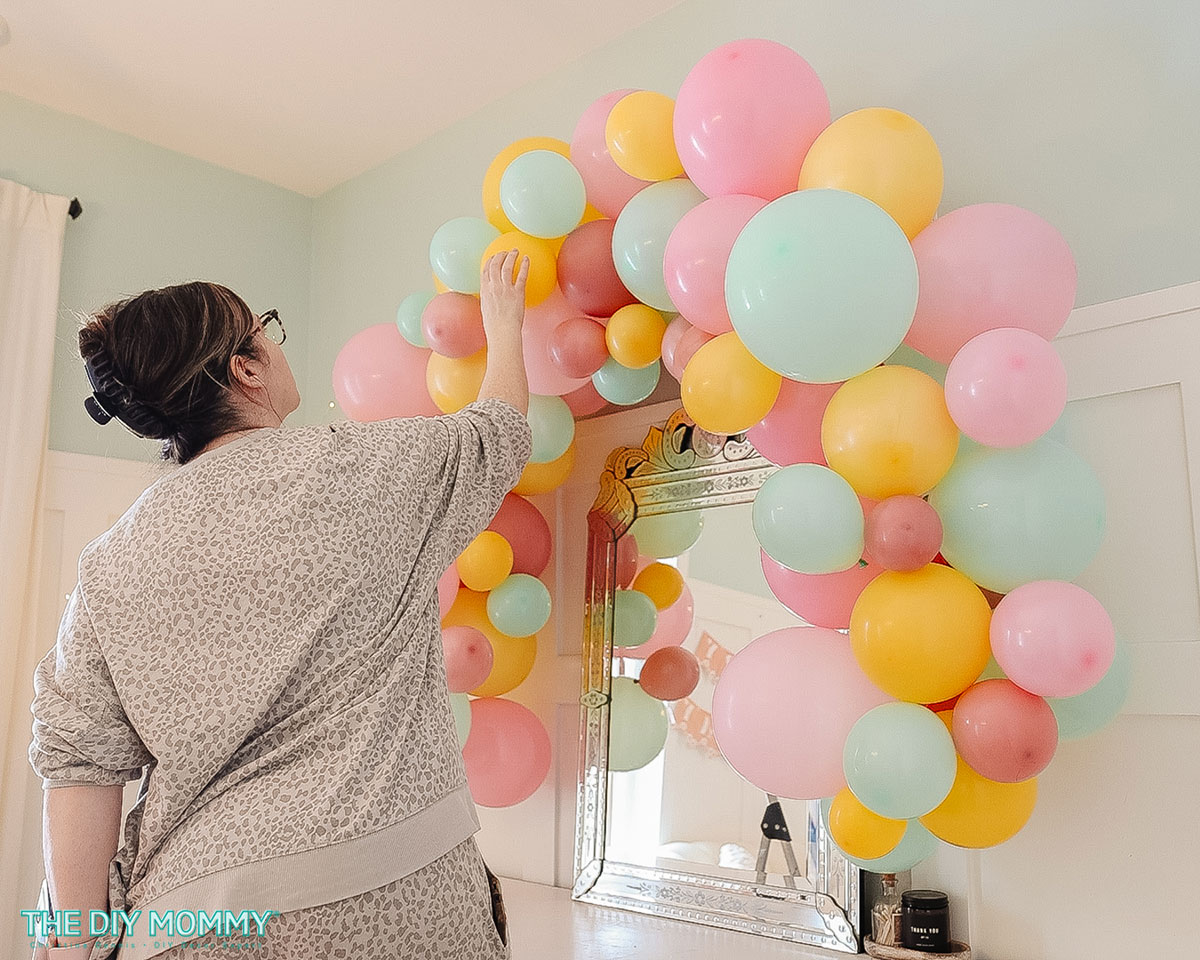
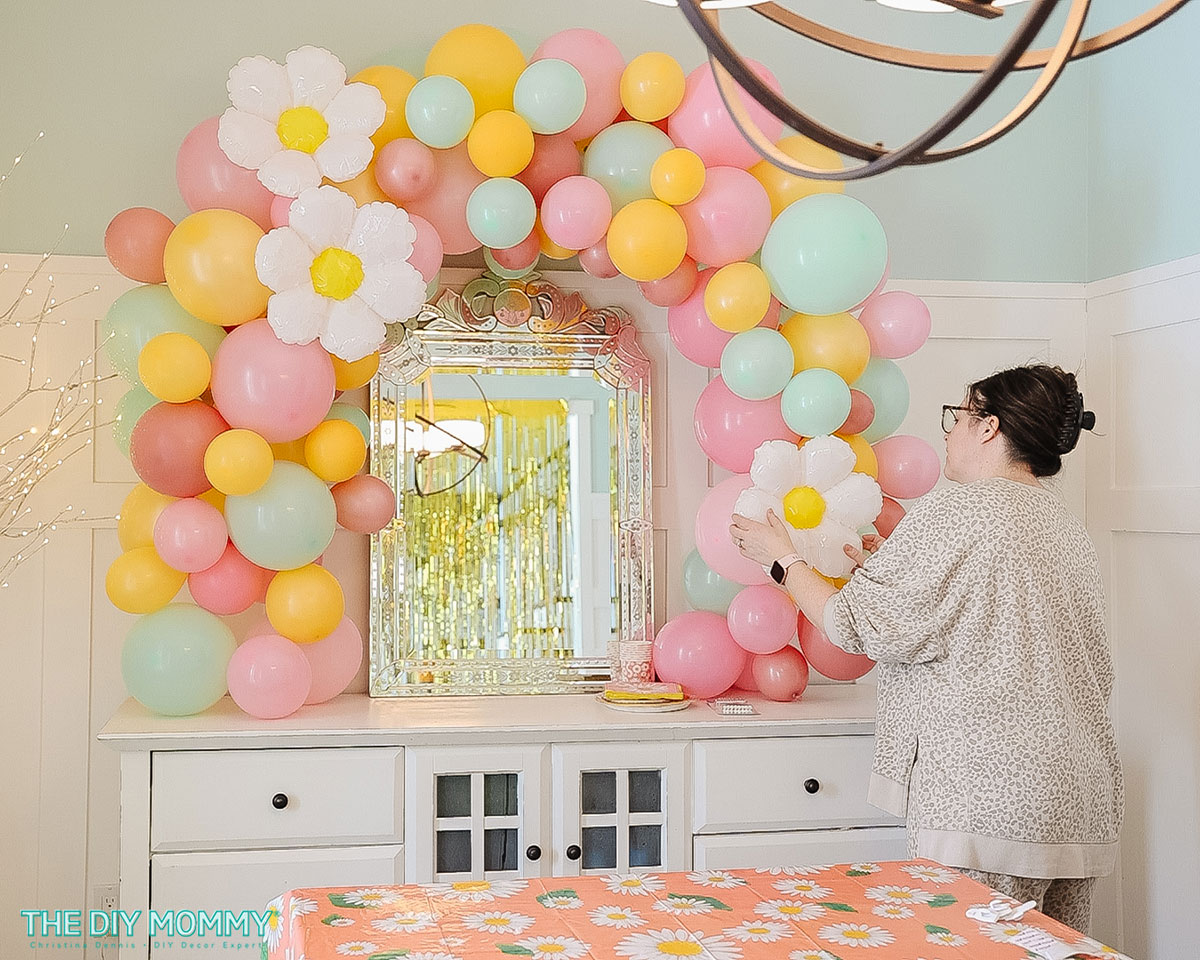
Install Command Hooks at strategic points where you want your balloon arch to curve. Then, carefully hang your balloon garland, adjusting the arch shape as needed to achieve your desired look. I decided to apply Command Hooks over our sideboard mirror to create a feature dessert table highlighted by my DIY balloon garland. These also look fabulous over a doorway to highlight a party entryway.
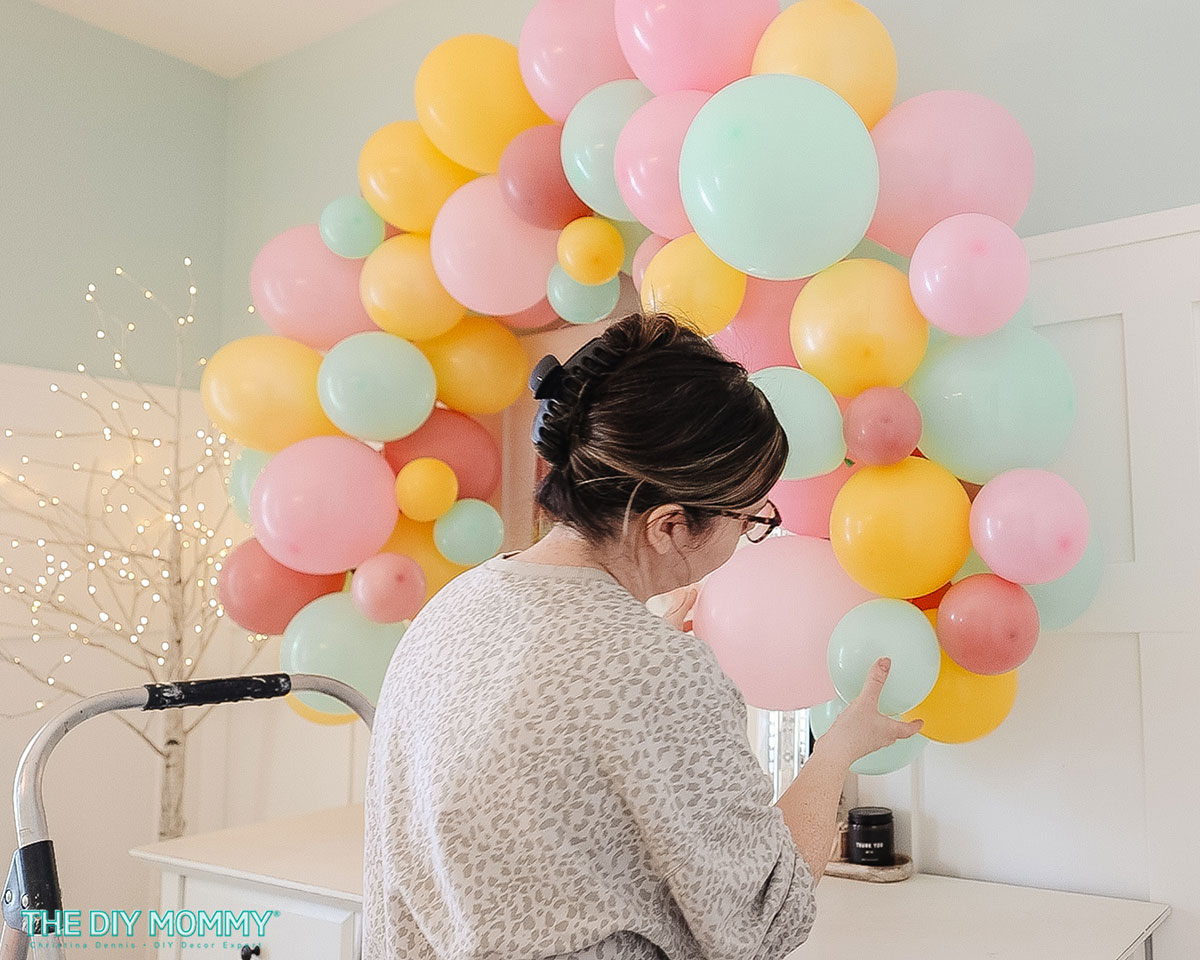
Add Medium-Sized Balloons
Now, it’s time to incorporate the medium-sized balloons (e.g., 10-inch). Inflate them to a round shape and attach them to the garland using glue dots, spacing them out evenly for a cohesive design. Incorporating different sizes of balloons is what will make your homemade balloon arch look full, beautiful, and take it to the next level.
Final Touches with Small Balloons
Complete your balloon arch by adding the smallest balloons (5-inch) to fill in any gaps and enhance the overall fullness and color scheme of your garland.
Get Creative
Feel free to unleash your creativity! Experiment with different balloon arrangements and groupings to achieve your desired aesthetic. You can draw inspiration from Pinterest or social media platforms for unique ideas. I’ve seen people group bunches of small balloons together and layer them over the larger balloons. I’ve also seen bands of balloon colours for a more “striped” look. Have fun with it!
Finishing Touches
Once your balloon arch is complete, step back and admire the end result! You can leave it as is for a vibrant and eye-catching display, or add themed balloons for an extra pop of charm. I’ve even see people add some faux greenery or faux flowers into their own DIY balloon arch for a textured look.
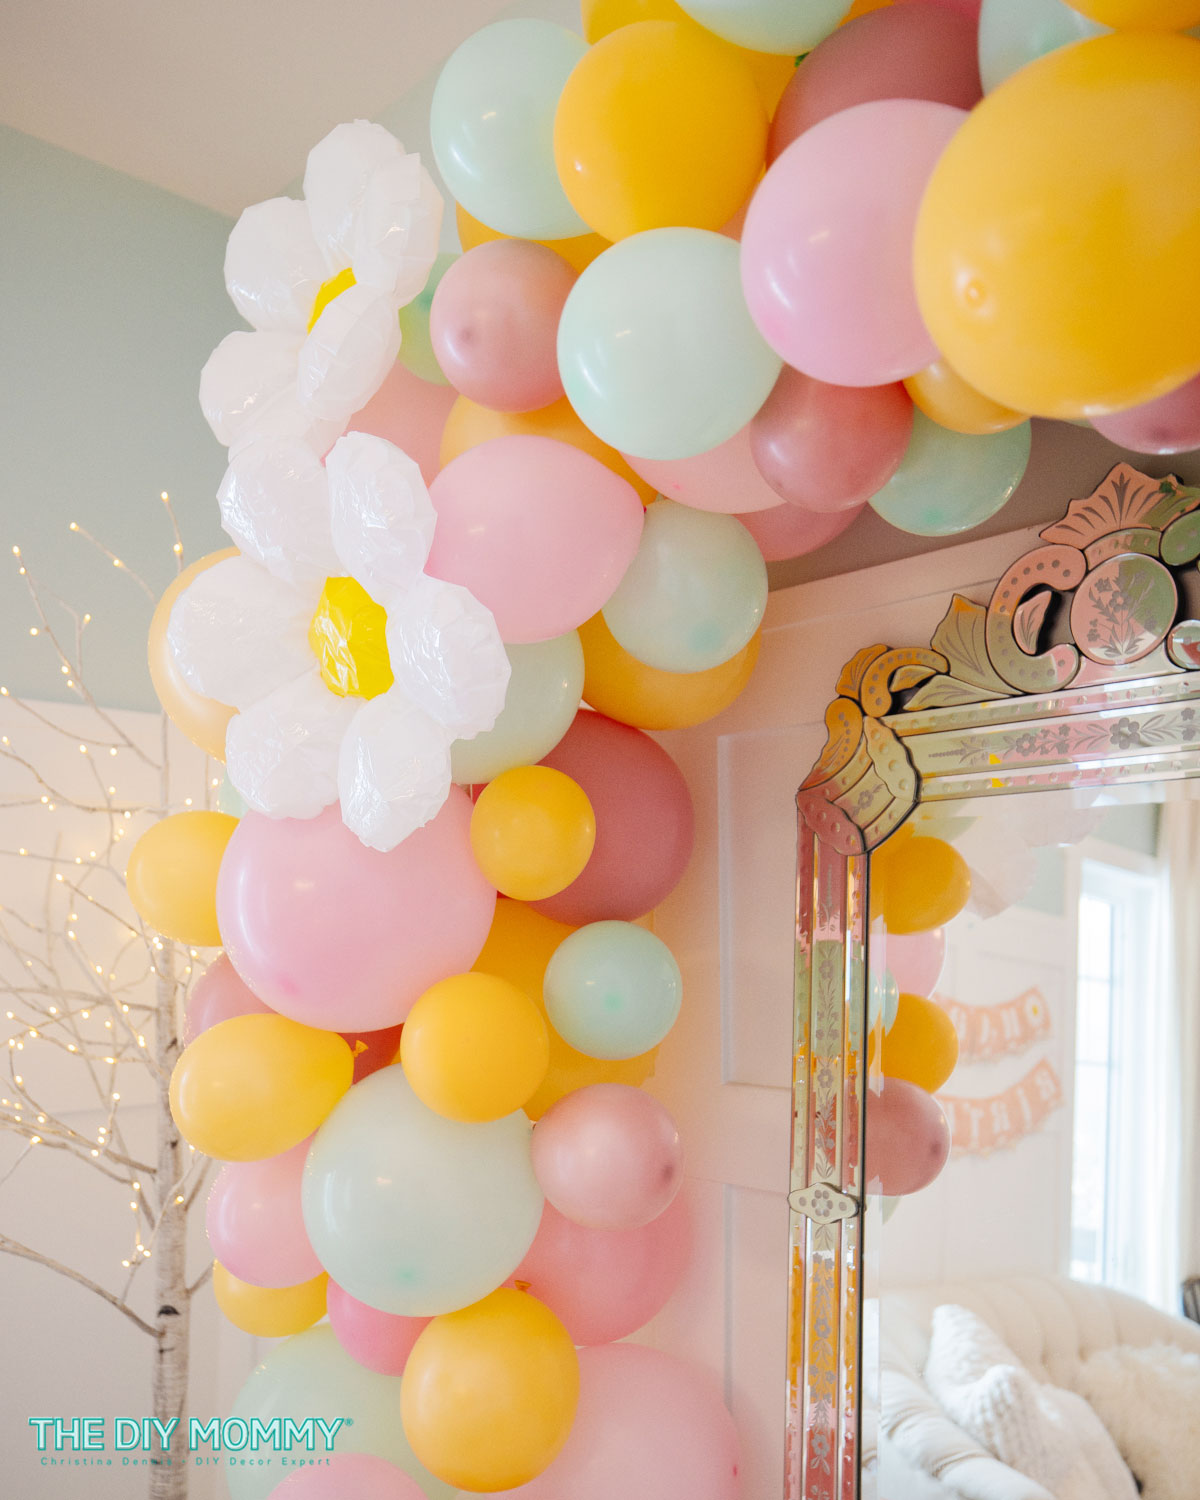
To complete this backdrop for my daughter’s birthday party, I love the addition of these daisy shaped balloons.
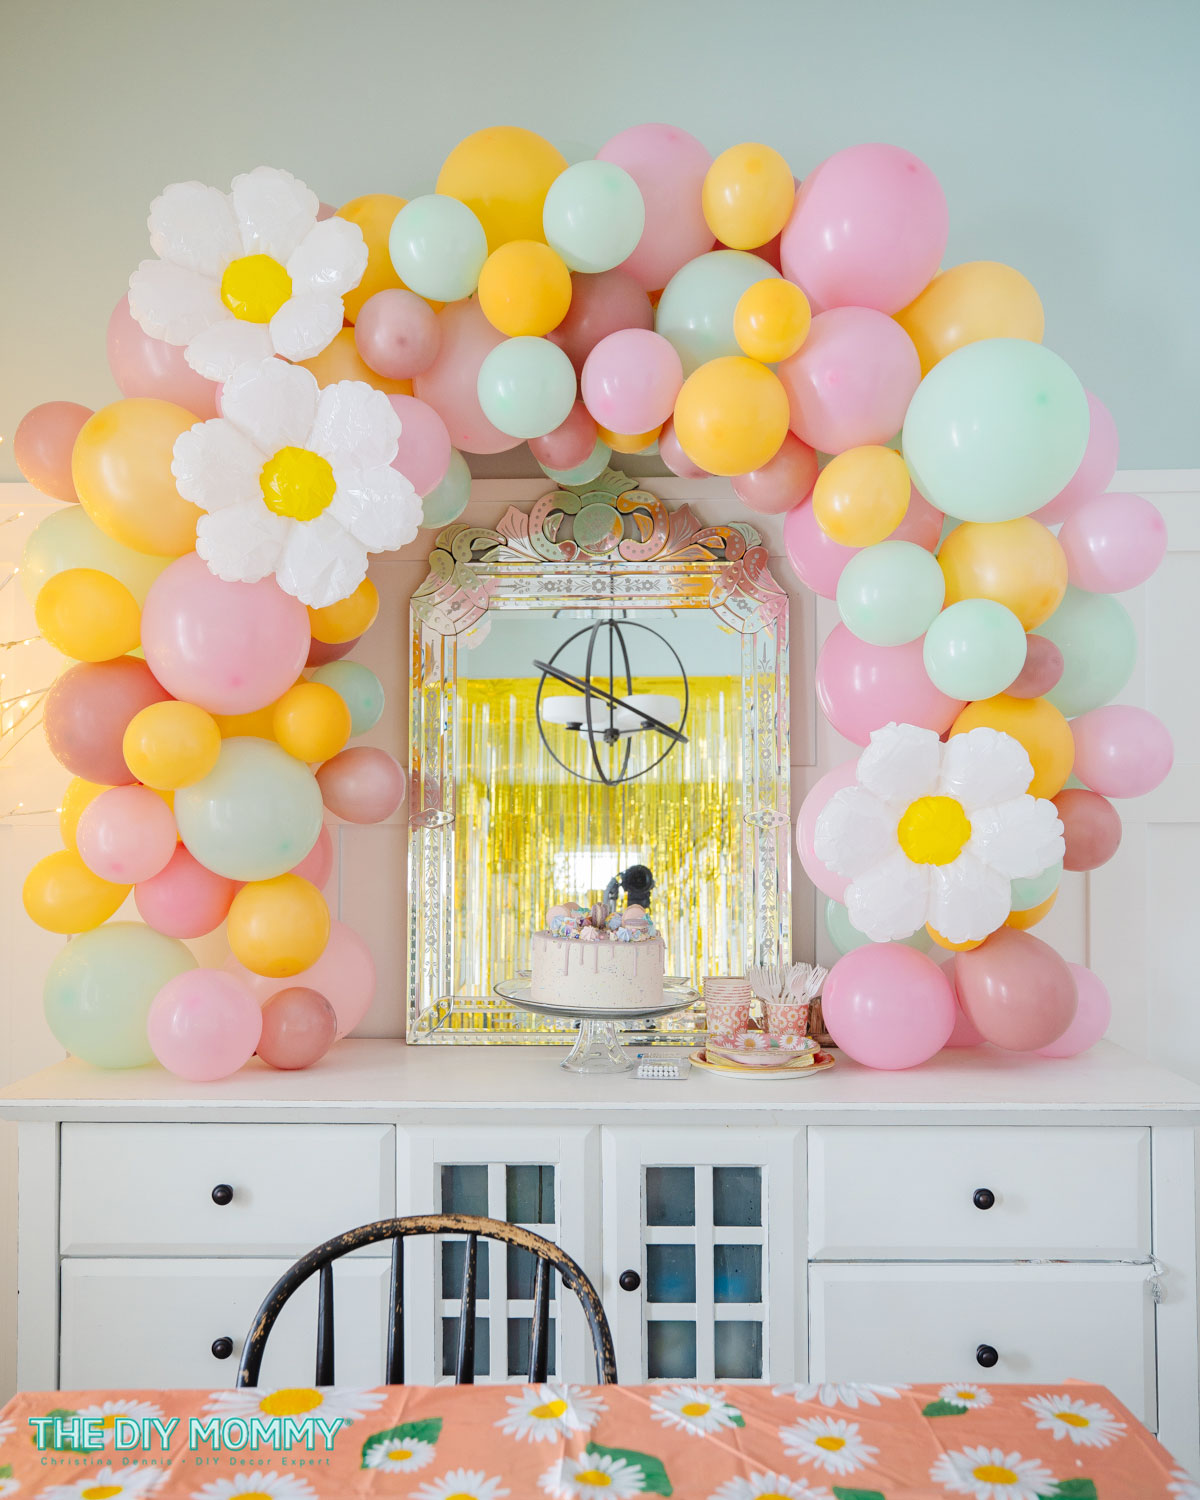
Voila! You’ve successfully crafted a stunning homemade balloon arch that will undoubtedly be the hit of your next celebration. Wasn’t that easier than you thought? Feel free to leave your thoughts and feedback in the comments below—I’d love to hear from you! Happy entertaining and DIYing!
PIN ME: