Easy DIY LED Wall Art for Halloween
This post may contain affiliate links · This blog generates income via ads
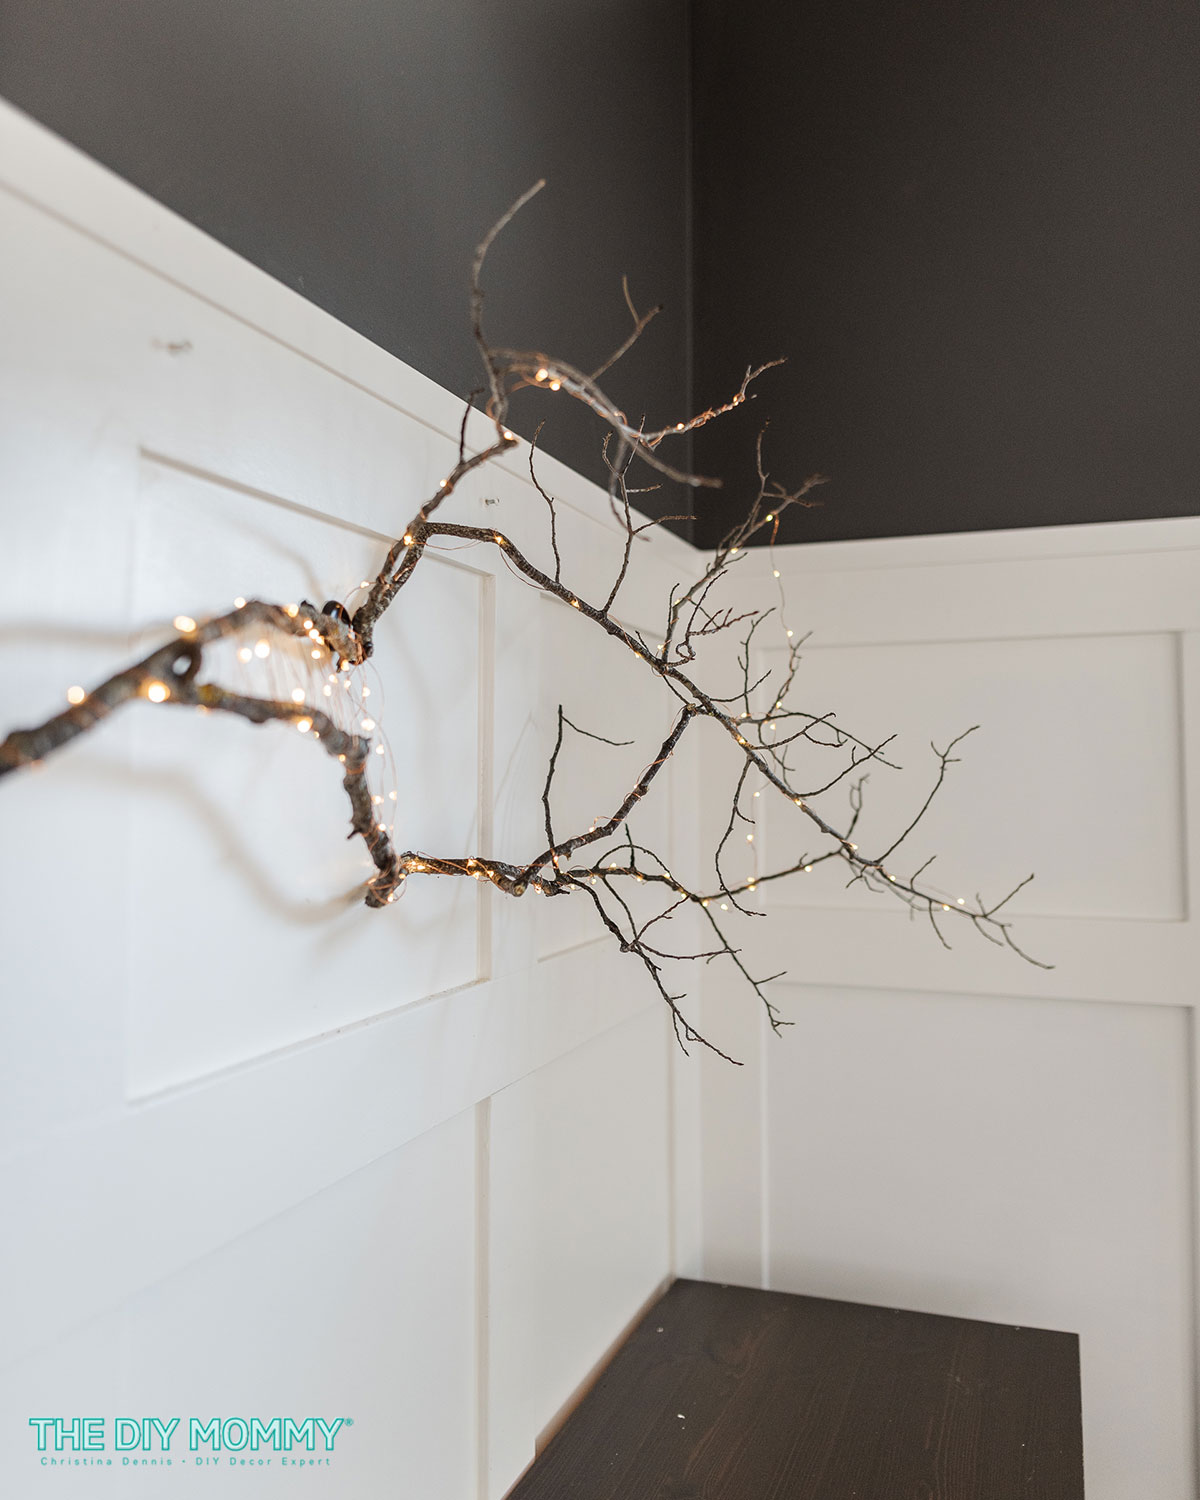
Looking for a cheap and creative way to decorate your walls for Fall or Halloween? Look no further than this DIY LED wall art that’s SO easy and inexpensive to make! All you’ll need is an old branch, some dollar store twine, and some $13 LED twinkle lights. Let’s get started!
You Will Need:
- a large dead branch
- a small hand saw
- LED string lights long enough to wrap around your branch
- dollar store twine (you can find it at Dollarama or Dollar Tree)
- hot glue gun
- acrylic black paint, Mod Podge & black glitter (optional)
Find a Branch
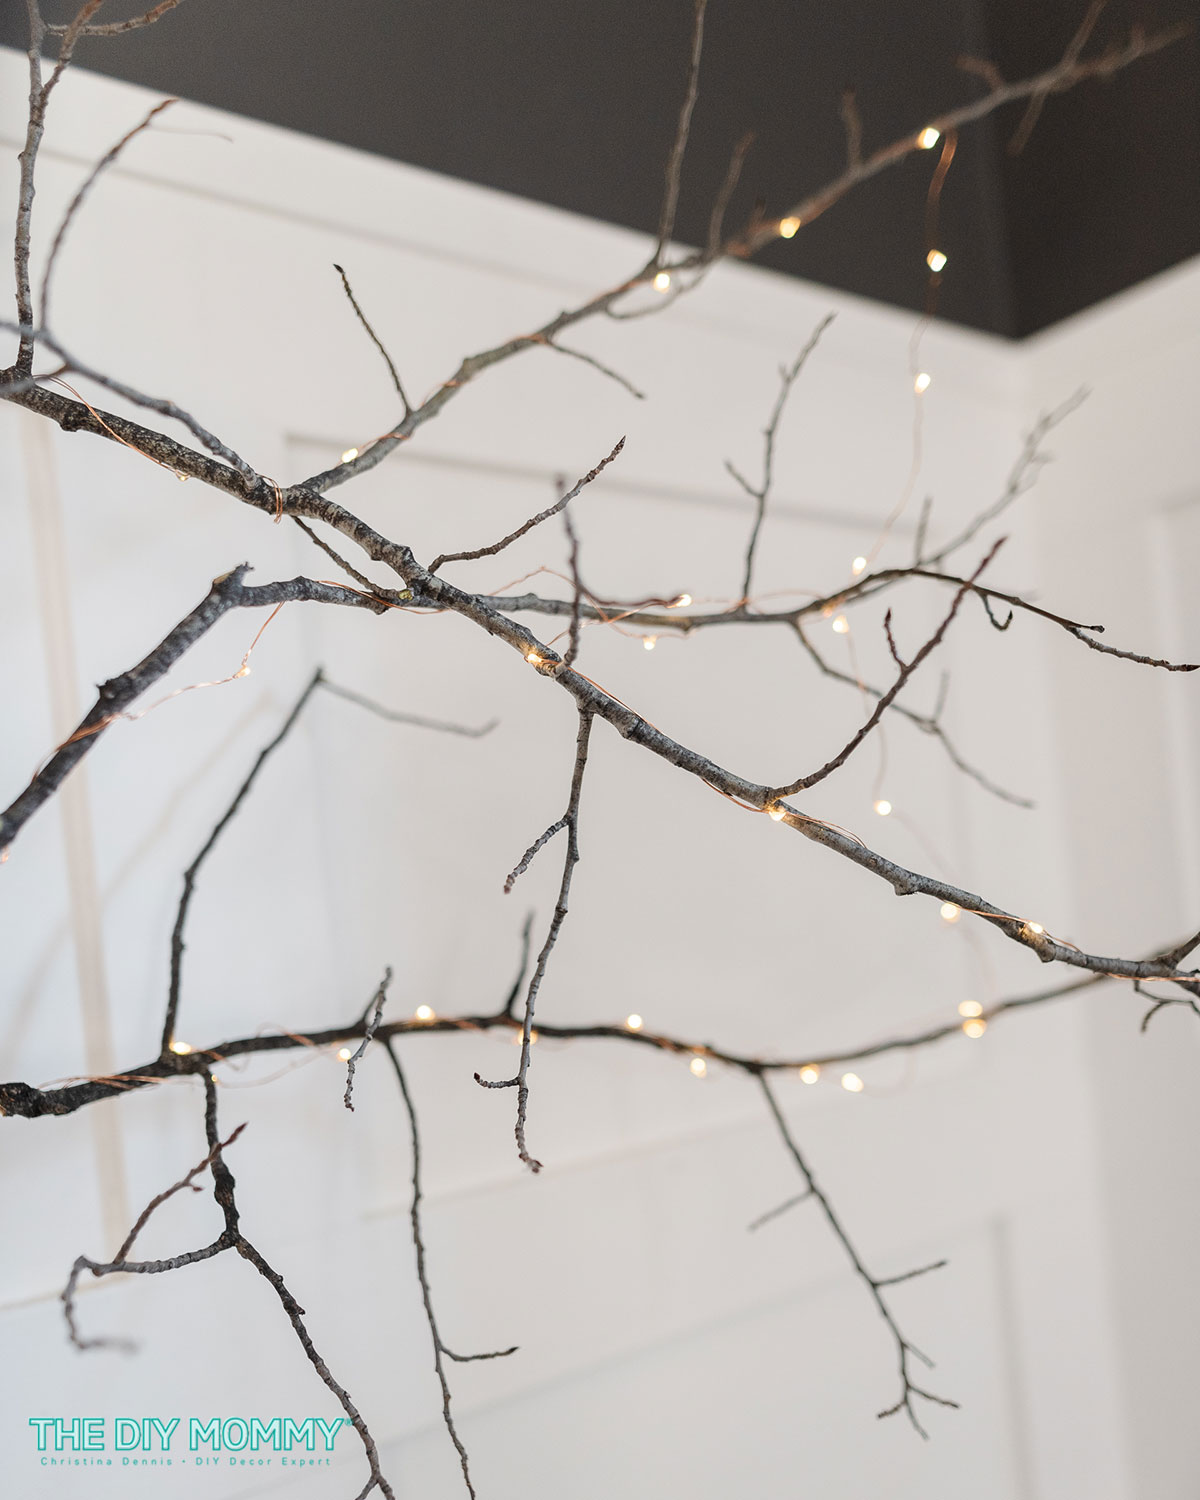
To begin this simple DIY wall art, find a dead branch that’s close to the size you’d like for your wall. We’re pretty lucky because we have a lot of forested sections in our yard, so I found a dead tree and chopped a branch off with my small hand saw. If the branch is too big, you can use a small saw to cut off portions to make it the size and shape you like. The more spindly ends, the better for this Halloween inspired DIY! Wipe the branch with a microfiber cloth to get any dust and debris off of it.
I left my branch natural, but you could paint yours with black acrylic paint to give it even more of a Halloween vibe. After the paint is dry, you could even apply a thin layer of Mod Podge and some black glitter to add a mysterious, glamourous touch!
Wrap LED String Lights Around It
Next, wrap some LED twinkle lights around the branch. Battery-operated lights with a copper wire work best and look fantastic against the wood of the branch. I used these battery operated LED string lights from Amazon. Leave the battery pack / power supply at the end of your branch and tack it there with a dab of hot glue. Then, wrap the rest of the lights around all of the sections of your branch so that the entire thing will be sparkly when you’re all done!
Conceal the Battery Pack
Now, take some twine from the dollar store and wrap it around the end of your branch to conceal the battery pack. You can finish by tying the two ends of the twine together with a couple of strong knots at the back of your work.
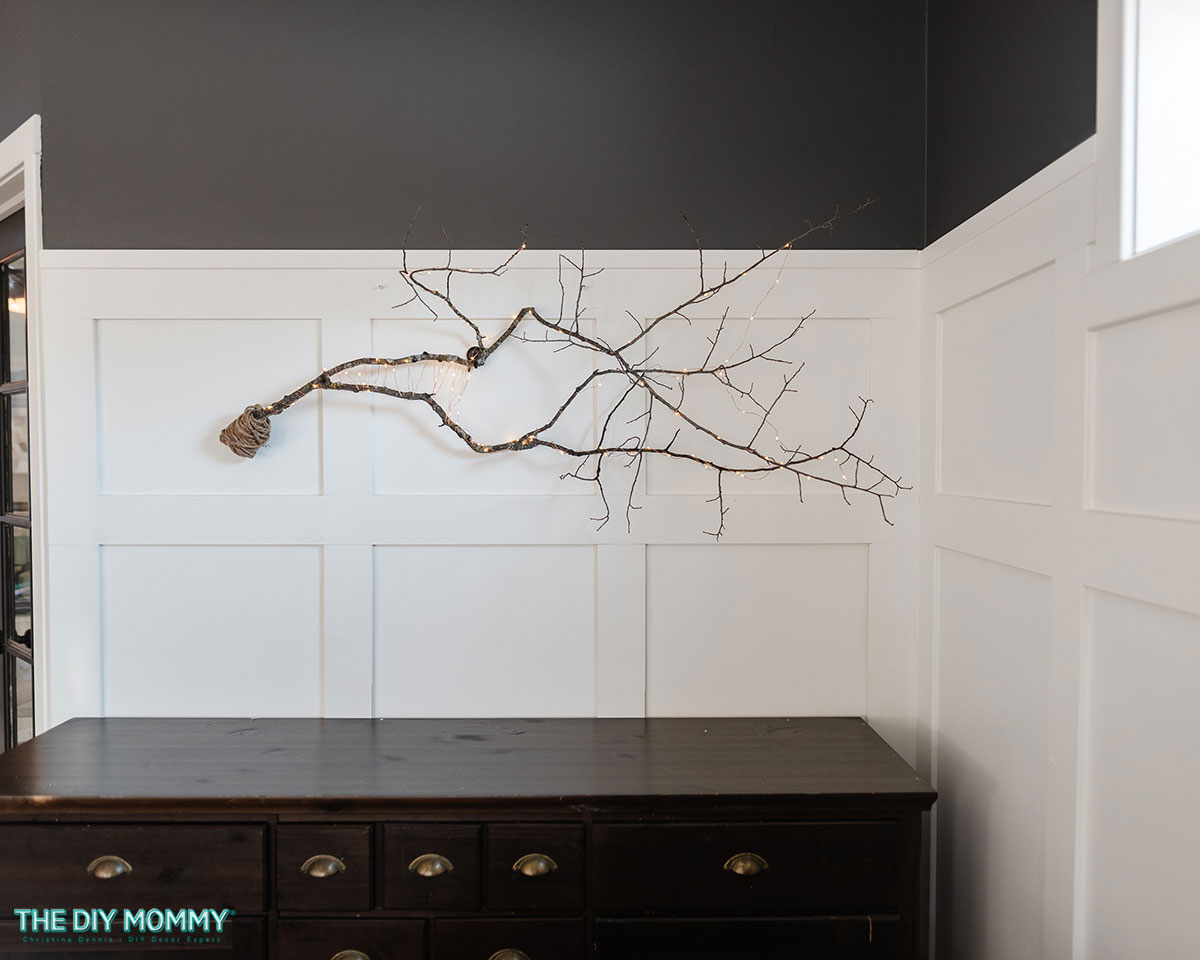
Mount the Lit Branch
To hang the branch from your wall, use a large adhesive hook. Apply it in the center of your wall. Then, place the branch onto the hook, balancing it as needed. If required, you can use 2 or three adhesive hooks to make sure the branch is stable.
Tip: Use this for next season, too!
This lit branch isn’t just good for Halloween or Fall. Hang some Christmas ornaments off of it and repurpose or upcycle it as wall art for the Holiday season as well!
Now, sit back and enjoy your simple DIY LED wall art! I love the spooky, sparkly mood this piece gives off. The best part is that it’s such an easy and fun DIY to put together! You can even get all of your family members involved and have a fun Halloween craft night. Get your creative juices flowing and make this art your own with paint and glitter, too! Happy crafting!