The Easy Way to Decorate Easter Eggs with Paper Napkins
This post may contain affiliate links · This blog generates income via ads
Happy Easter month! Today, we’re diving into the fun world of Easter egg decorating using a surprising material: paper napkins. With just a few simple supplies and a dash of creativity, you can transform ordinary eggs into stunning works of art that will add beauty your Easter and spring decor. So, let’s roll up our sleeves and make this beautiful Easter craft!
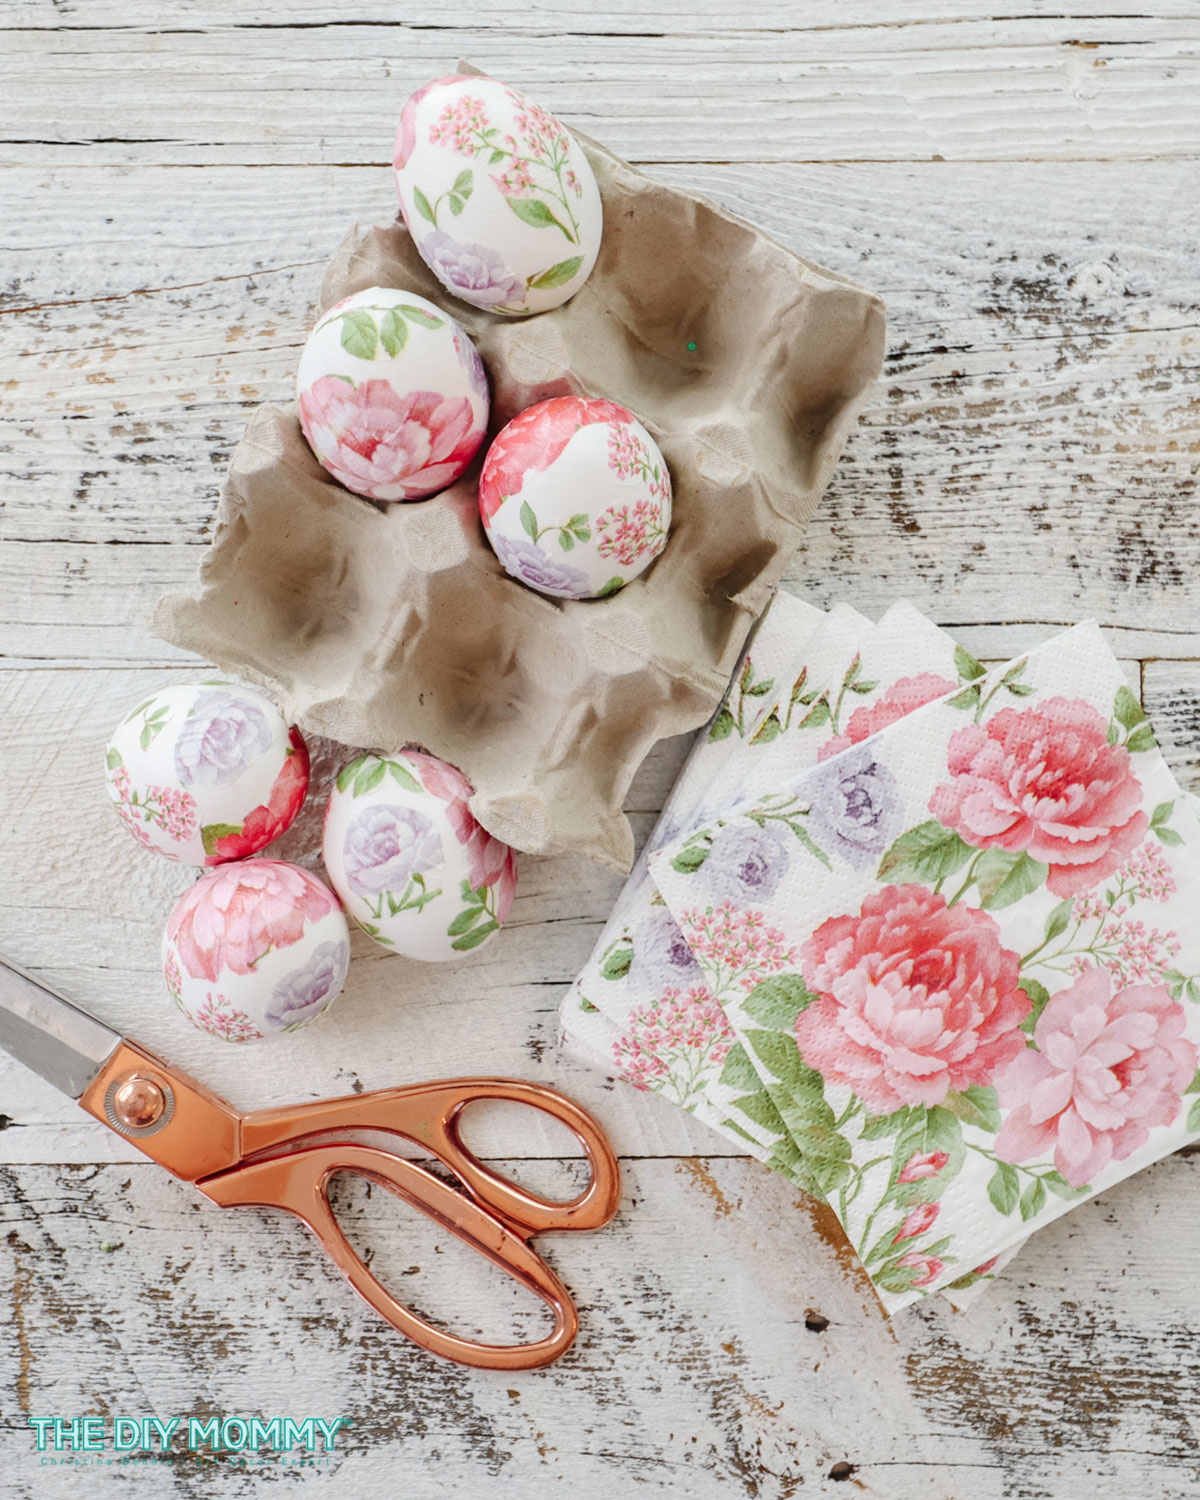
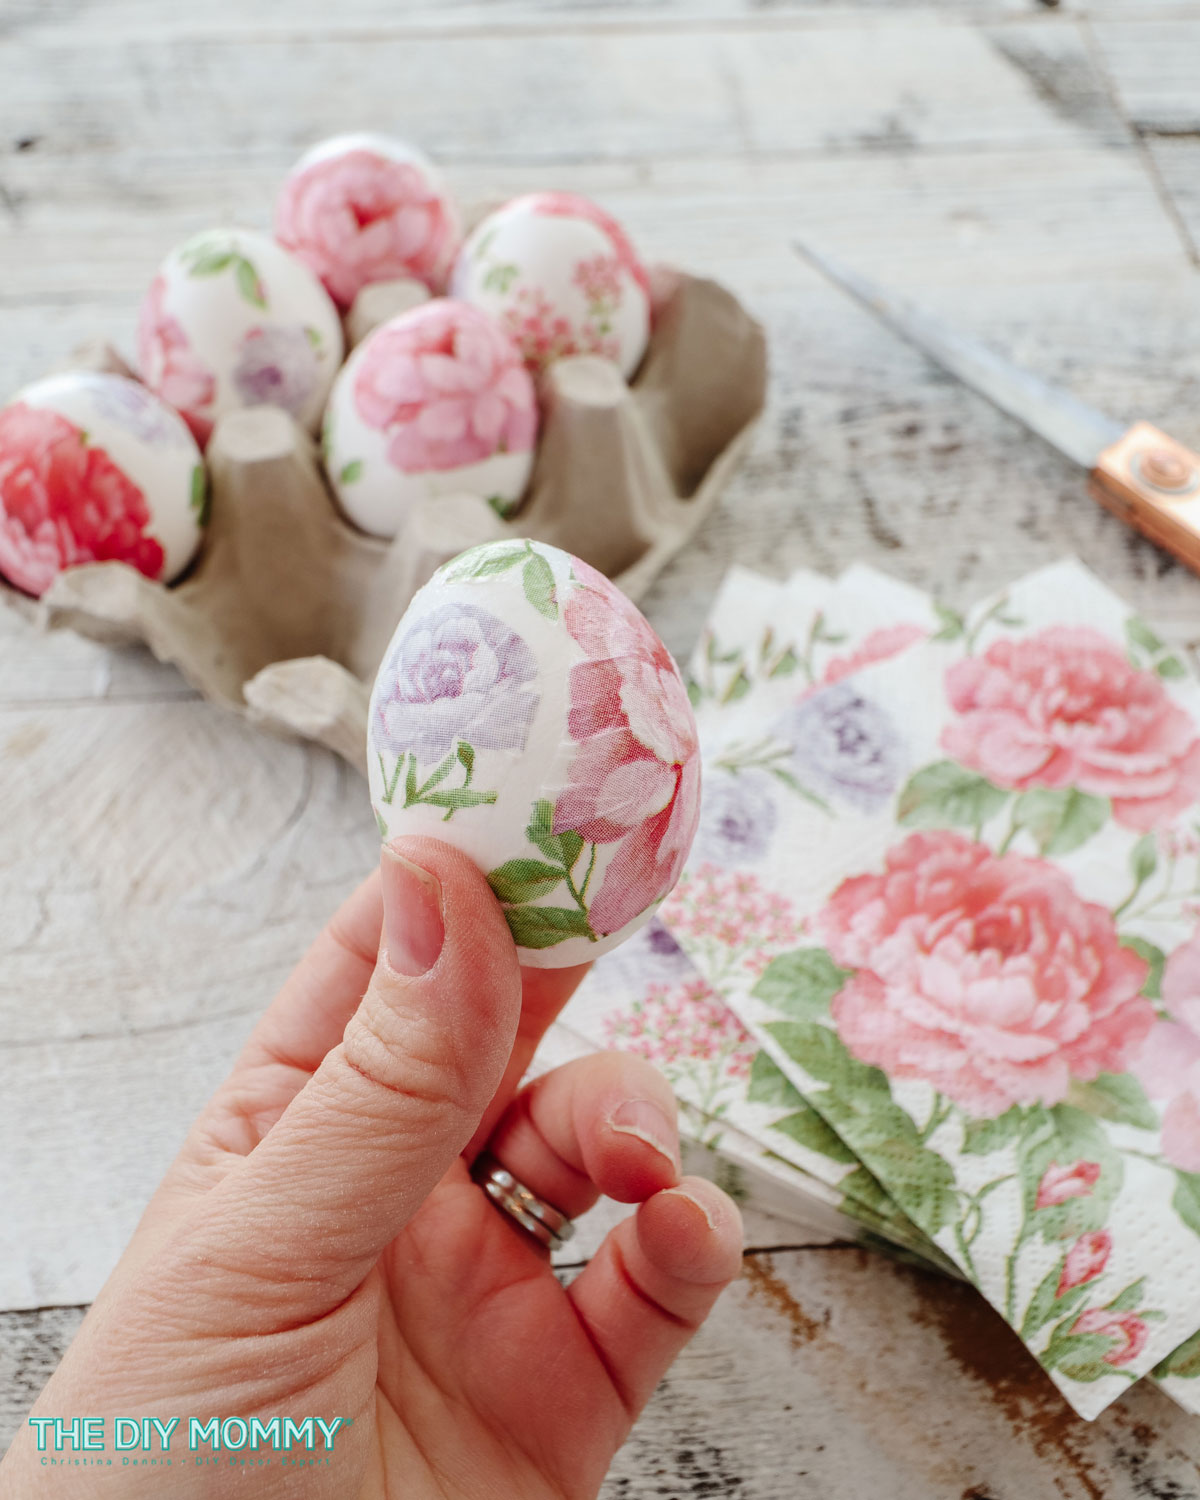
These decoupage Easter eggs are a fun craft for everyone – kids to adults! Play around with the napkin patterns and colours you use. I’m a floral girl, so of course I had to use a pink & purple floral napkin. However, these would look pretty with a more geometric design, too! Alternatively, you could cut random shapes out of coloured tissue paper, thin scrapbook paper, patterned fabric, sheet music, wrapping paper, or thin book pages for a completely different look. The options are endless!

Materials You’ll Need
- Eggs (real boiled or faux craft eggs)
- Matte Mod Podge
- Foam brush
- Paper napkins with small-scale designs (2-ply is easiest)
- Scissors
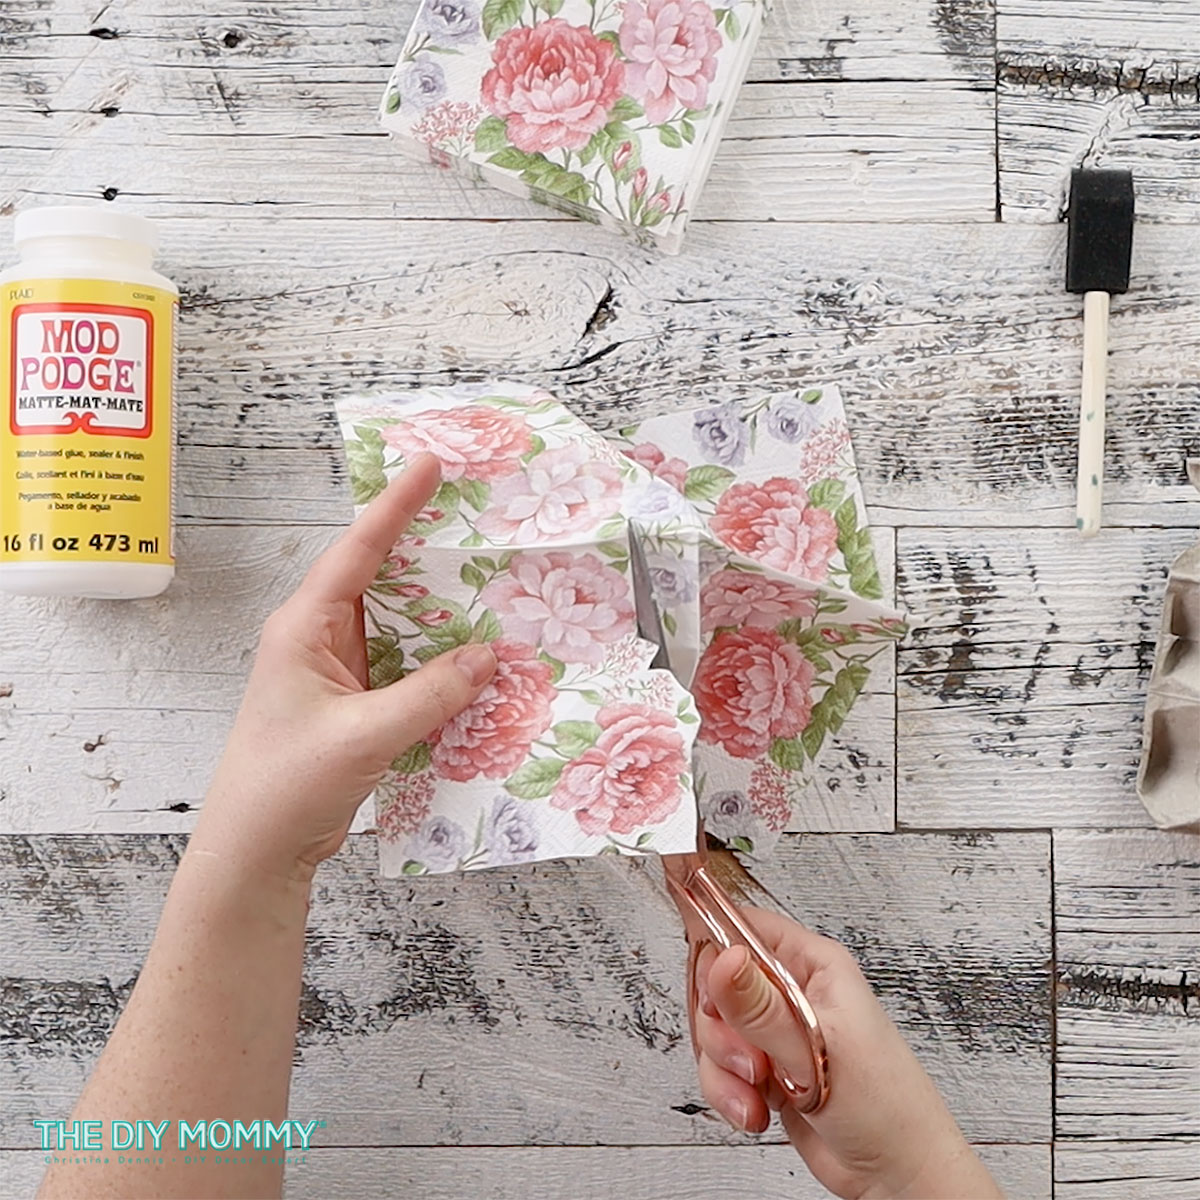
Step 1: Choose Your Napkins and Cut Out Motifs
The key to successful egg decoration with paper napkins is selecting napkins with intricate, small-scale designs. Think delicate florals, charming patterns, or whimsical motifs that capture the essence of spring. For this project, I’ve opted for napkins featuring large flowers, small flowers, and leaves. Carefully cut out these motifs from the napkin layers, ensuring clean edges and detailed shapes.
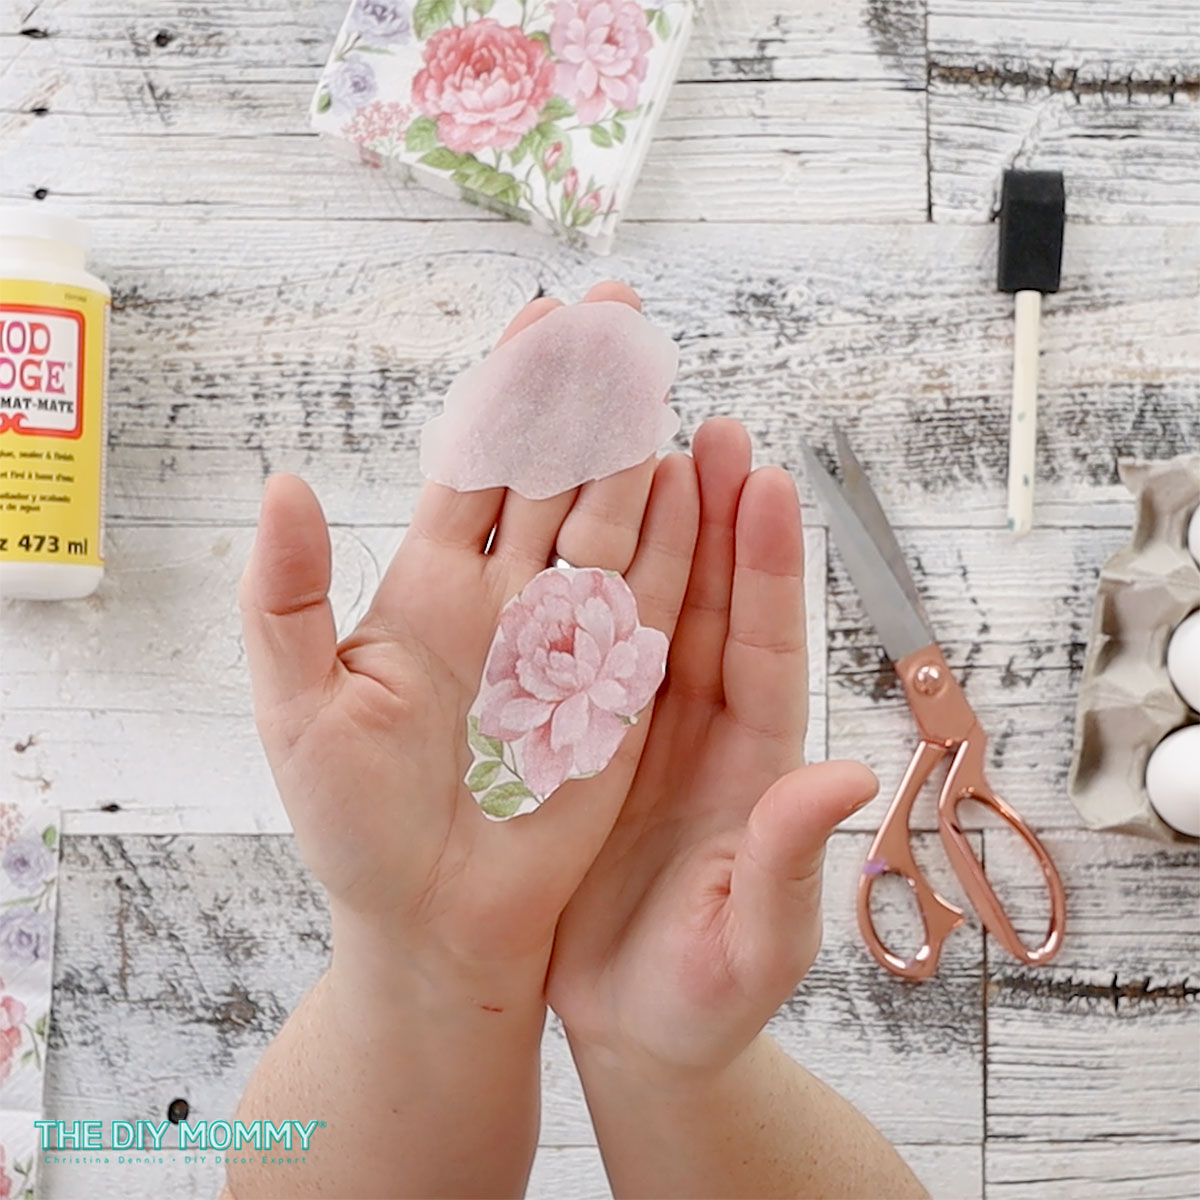
Step 2: Separate the Napkin Plys
To achieve a seamless application, gently separate the layers of the napkin so that you’re left with only the printed layer on one ply. This will ensure that the napkin adheres smoothly to the egg surface without any bulky layers.

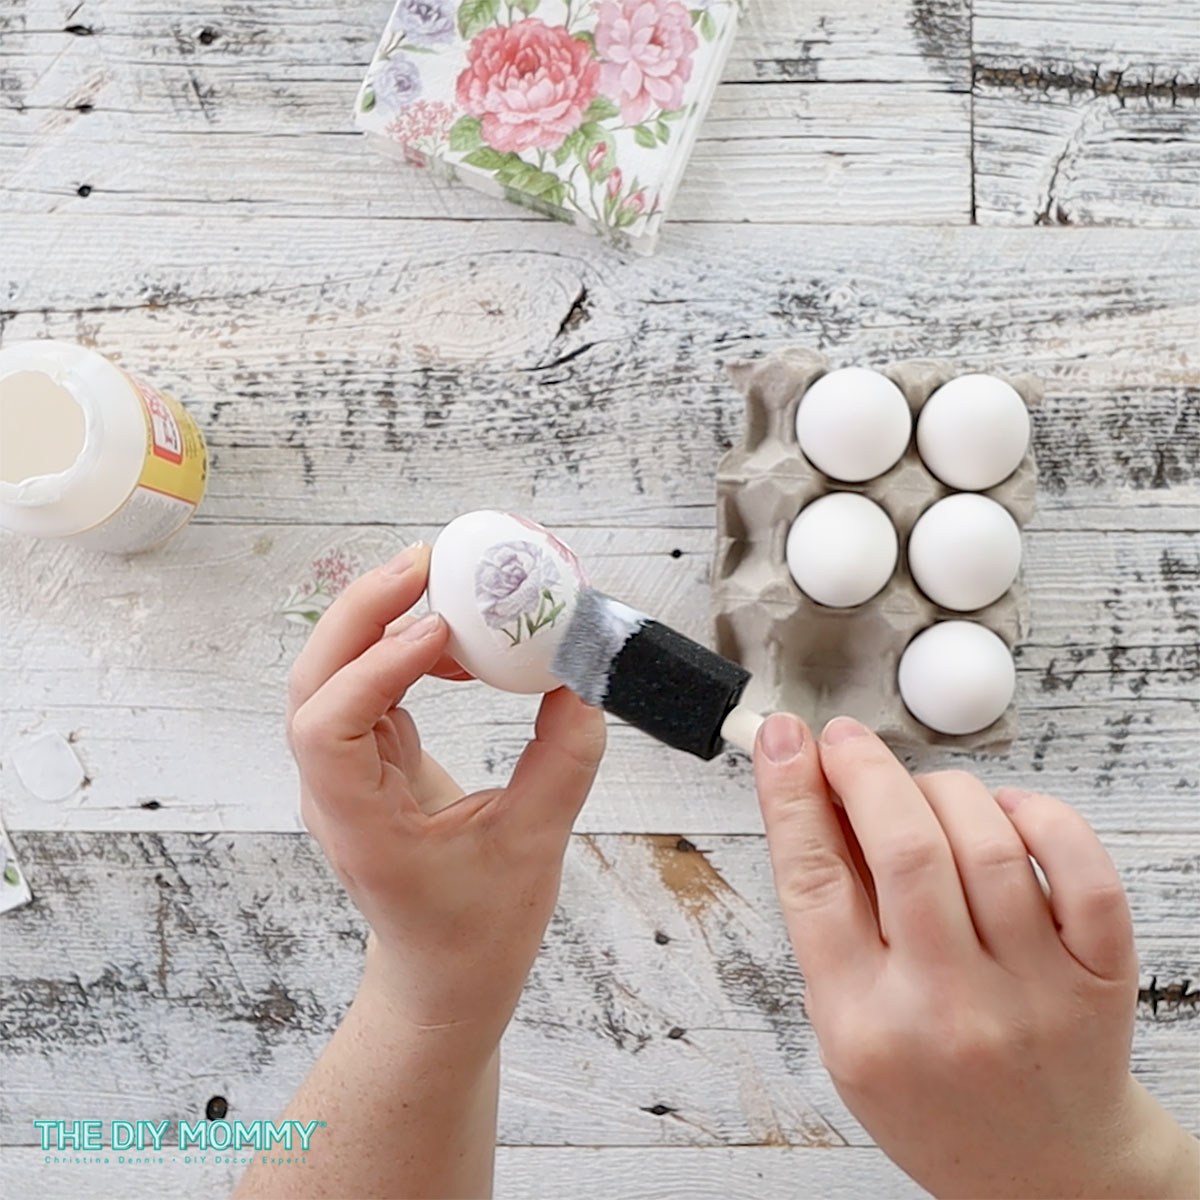
Step 3: Apply Mod Podge to the Egg
Using your foam brush, coat a portion of the egg with a thin layer of matte Mod Podge. I prefer the matte sheen over gloss because it’s better at hiding imperfections. This acts as the glue to which you’ll attach your napkin motifs. Be sure to work in small sections to prevent the Mod Podge from drying too quickly.
Step 4: Apply the Napkin Motif
Carefully place one of your cut-out napkin motifs onto the coated section of the egg. Gently press down, smoothing out any wrinkles or air bubbles. Take care not to tear the delicate napkin cutout during this process.
Step 5: Seal with Mod Podge
Once the motif is in place, apply another coat of Mod Podge over the top to seal it onto the egg surface. This not only secures the piece of napkin but also adds a protective layer that enhances its durability.
Step 6: Continue Decorating
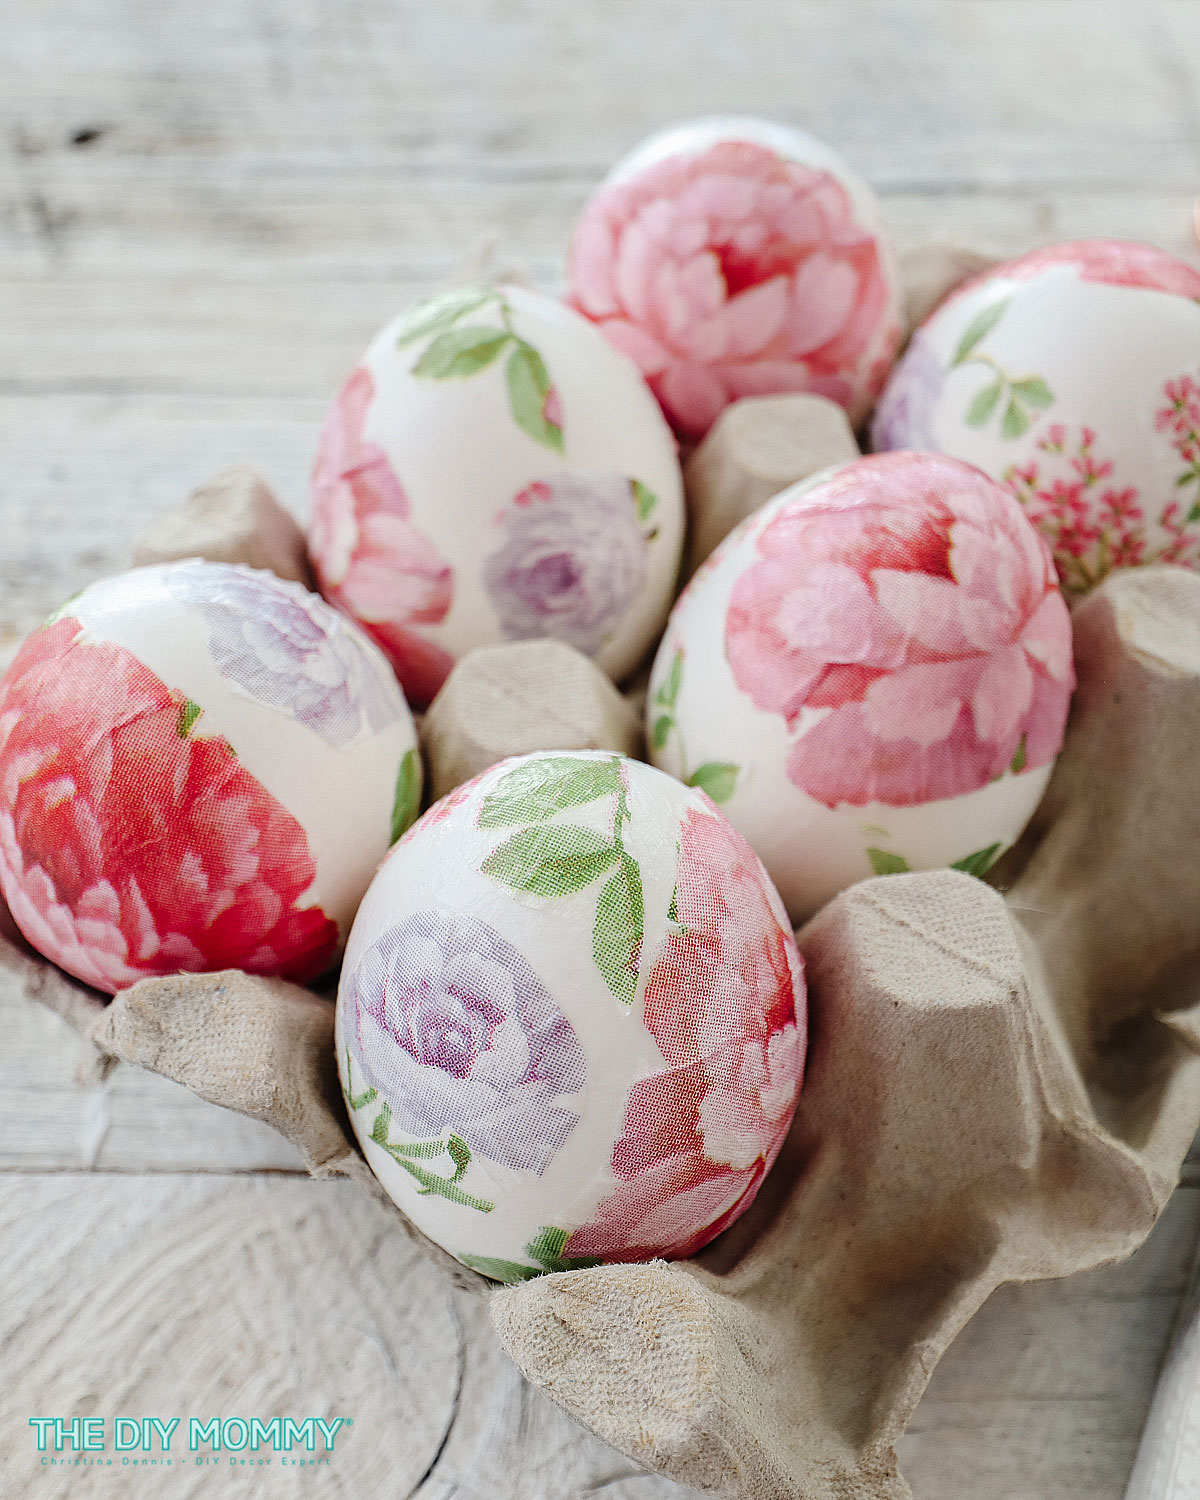
Repeat the process, applying Mod Podge to small sections of the egg and adhering napkin cutouts until the entire surface of the egg is covered. I find starting from the top of the egg and moving down is the easiest method. Get creative with placement, mixing and matching motifs to create a visually captivating design. Don’t worry about perfection—imperfections like little wrinkles add charm and character to this Easter egg craft!
Step 7: Let Dry
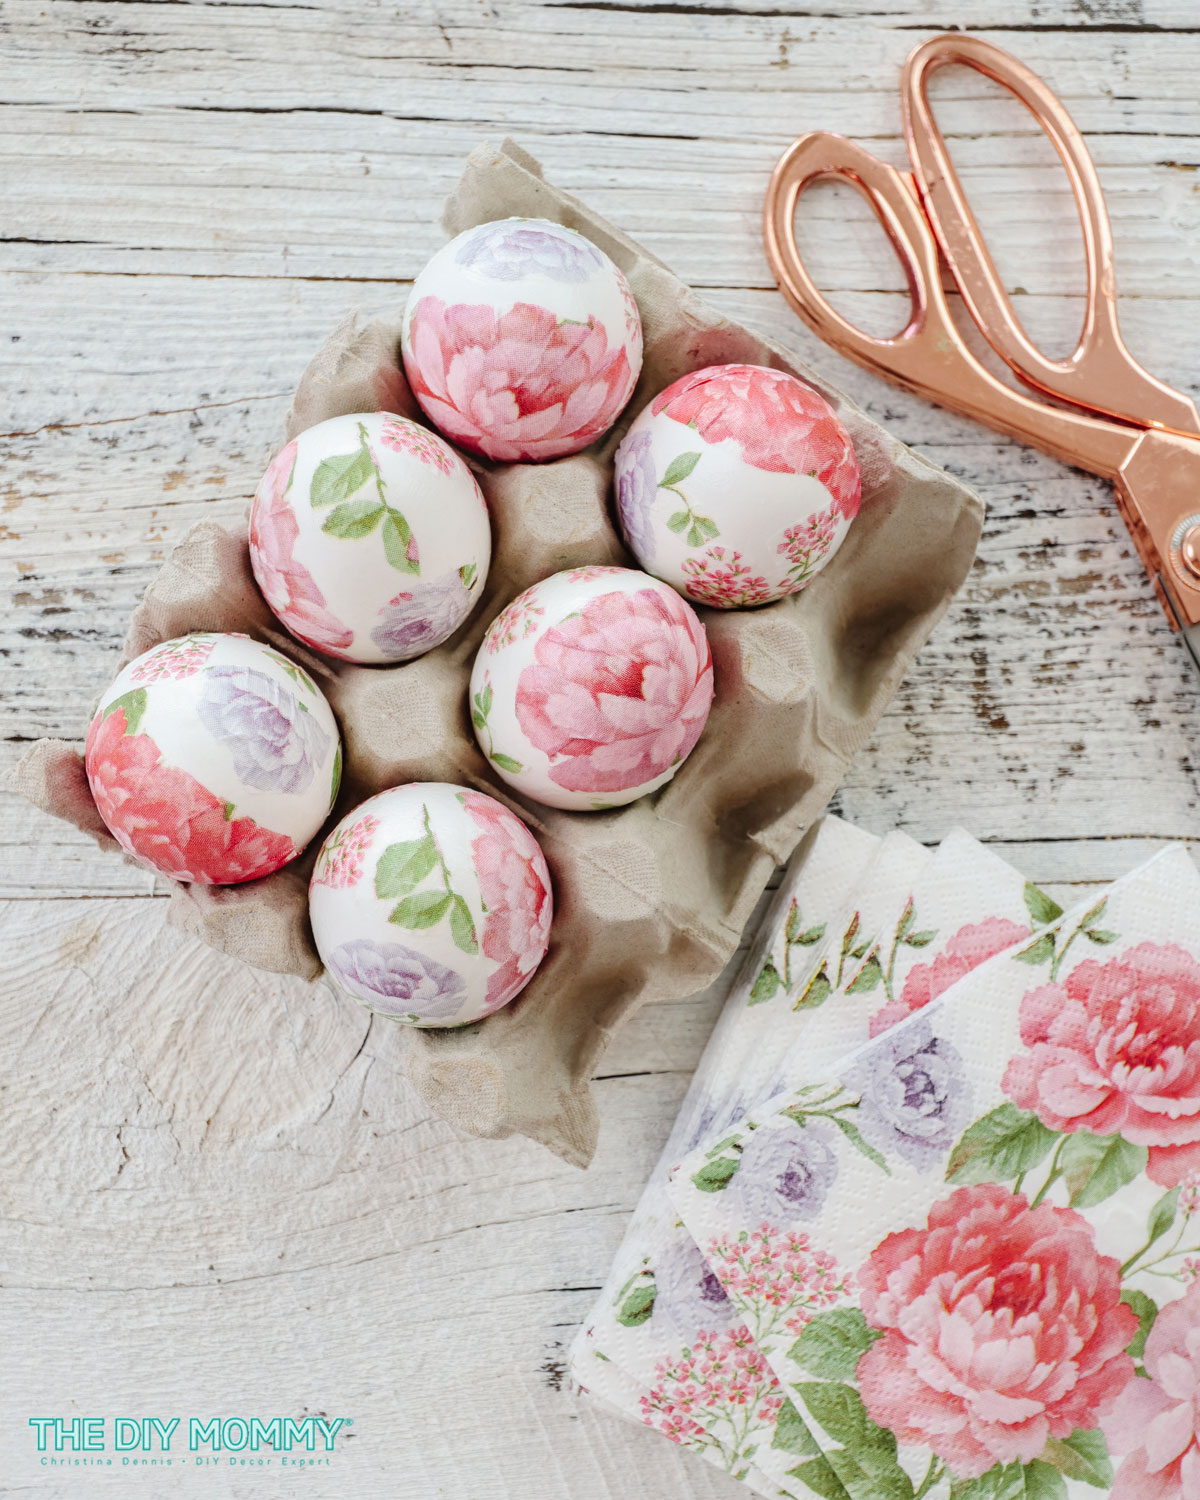
Place your decorated eggs in an egg carton or on a cardboard ring to dry. Allow ample time for the Mod Podge to fully set and the eggs to dry completely. Patience is key here, but the end result will be well worth the wait!
Step 8: Display and Enjoy
Once your decoupage eggs are dry, marvel at your handiwork and find the perfect spot to display them in your home. These gorgeous eggs are not only beautiful Easter decorations but also delightful accents that usher in the spirit of spring. I love that these floral eggs have the look of watercolor Easter eggs, but they were much easier to make!
And there you have it—your step-by-step tutorial to decorating Easter eggs with paper napkins! With just a few simple supplies and a touch of creativity, you can transform humble eggs into stunning works of art that will delight friends and family alike. So, let the Easter crafting begin! Happy decorating! 🐣🌸
Want more Easter DIYs?
Click here to get more Easter crafting, baking & entertaining inspiration!
This is beautiful!! Going to try it. Thanks for all the diy projects because these days it’s hard to find bloggers that still do these things.
Christina – I love how the eggs turned out so beautiful! The floral napkins really were a good choice. Could you tell me where you got them? I’ve done a quick search but haven’t located these exact ones. Thanks for your help and all your wonderful blog posts! Karen