How to Make an Easy DIY Succulent Wreath with Paper
This post may contain affiliate links · This blog generates income via ads
Succulents add a touch of freshness to any room, but have you ever thought of incorporating them in a wreath design? Better yet, creating your own DIY succulent wreath? You might be surprised at how easy it is to make one with paper and a Cricut machine. In this blog post, I’ll show you the simple steps to create your own DIY succulent wreath using your Cricut and paper. Get ready to spruce up your living space or party with this fresh, vibrant decor element!

Succulents are always a beautiful addition to decor at any time of year, but I especially love them in the summer! This wreath would be a lovely addition to your seasonal decor, or use it year-round. The succulents are made from paper, so you can store it and use it again and again. If you’re looking for wedding or shower decor, this would also be a lovely addition! I hope you enjoy this fun tutorial.
If you’re new to Cricut, you can check out my blog post all about a Cricut and what it does, right here!
Materials Needed
The first step in creating your DIY succulent wreath is to gather your materials. Here’s what you’ll need:
- A Cricut machine (I used a Cricut Explore 3)
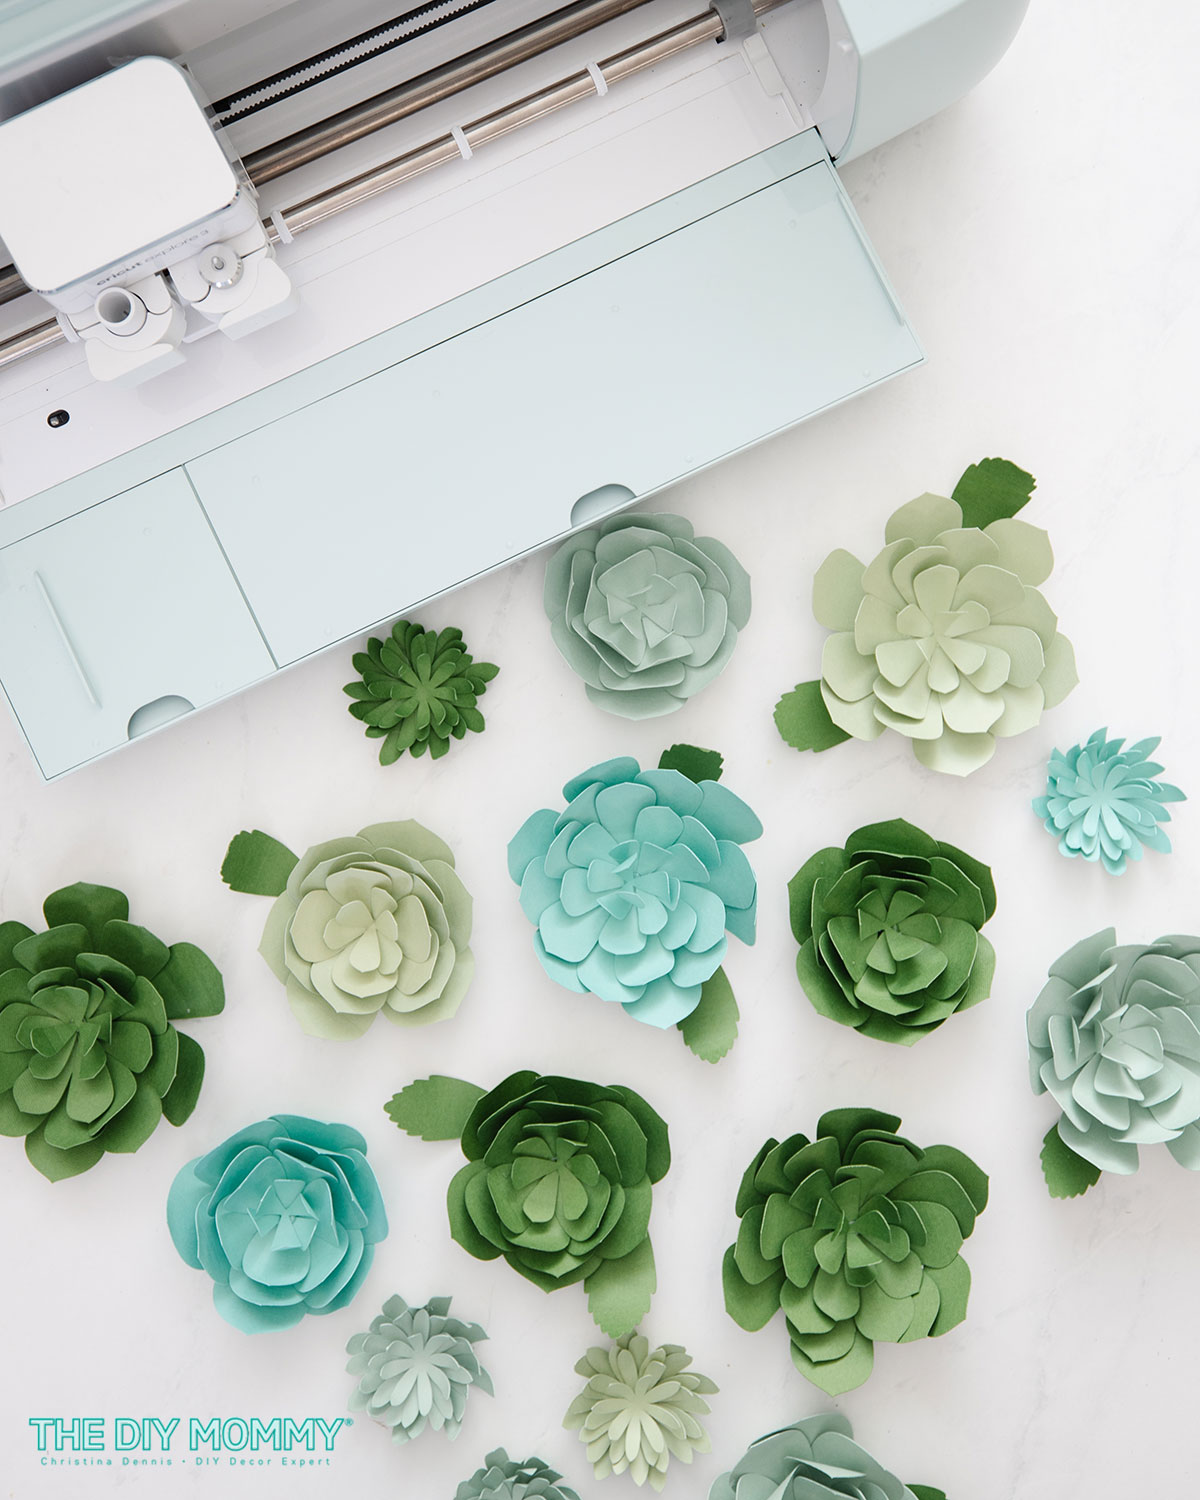
- 3 sheets of 12 x 12” cardstock paper in shades of greens and blues for the succulent leaves (I used a dark green, medium green, and a turquoise)
- 10-12” grapevine wreath form
- Short length of battery operated twinkle lights (I found mine at Dollar Tree on beautiful copper wire)
- A hot glue gun & hot glue sticks
- Wooden dowel, pencil or pen (to curl the leaves)
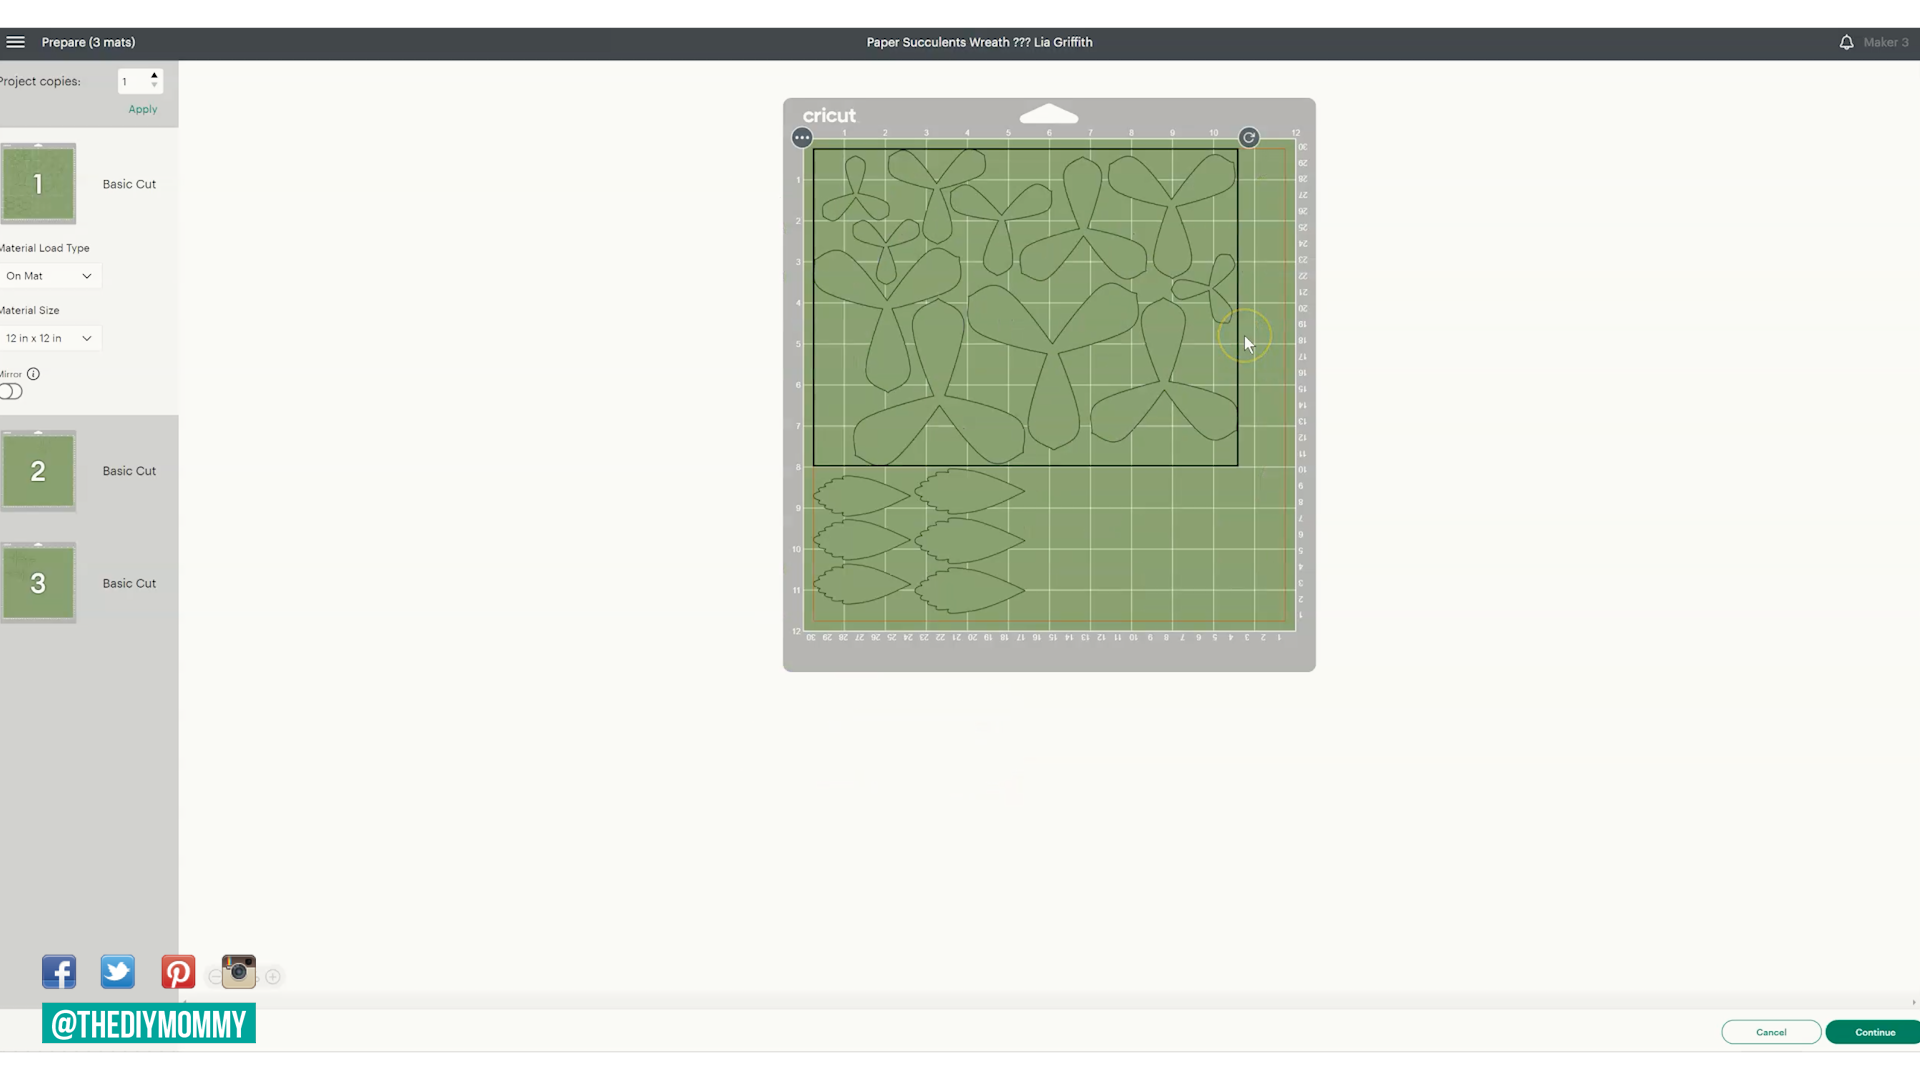
Setting up the project in Design Space
Next, click here to access my Cricut Design Space Project for this DIY succulent wreath. If you have Design Space installed, my Project File will open up in Design Space and the succulent leaves will be ready to cut. Simply click on “Make It”, and follow the prompts to cut your succulent shapes onto the 3 different colours of cardstock paper with your Cricut.
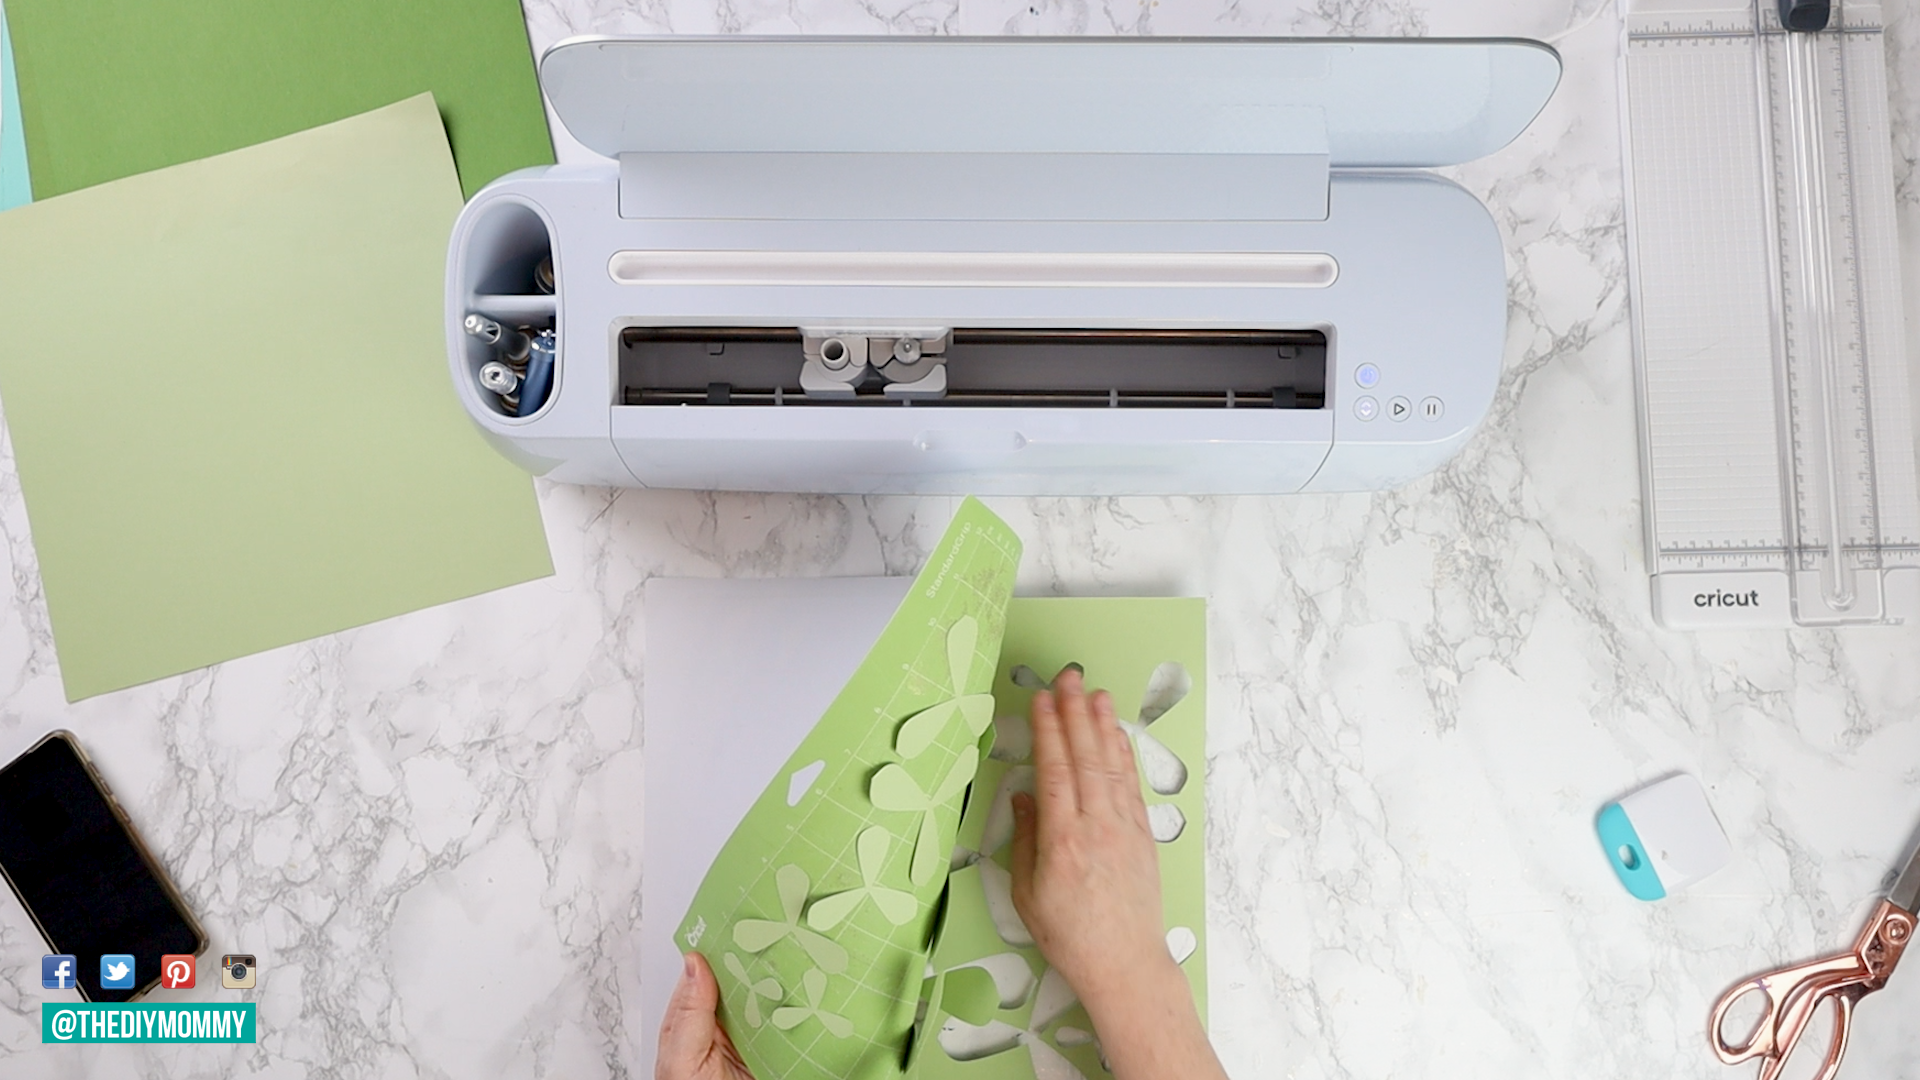
After each sheet of cardstock has been cut, remove the excess cardstock from your Cricut machine mat. Then, remove the leaves from the mat. It’s a good idea to stack the leaves by size to make assembly easier.
Assembling the succulents
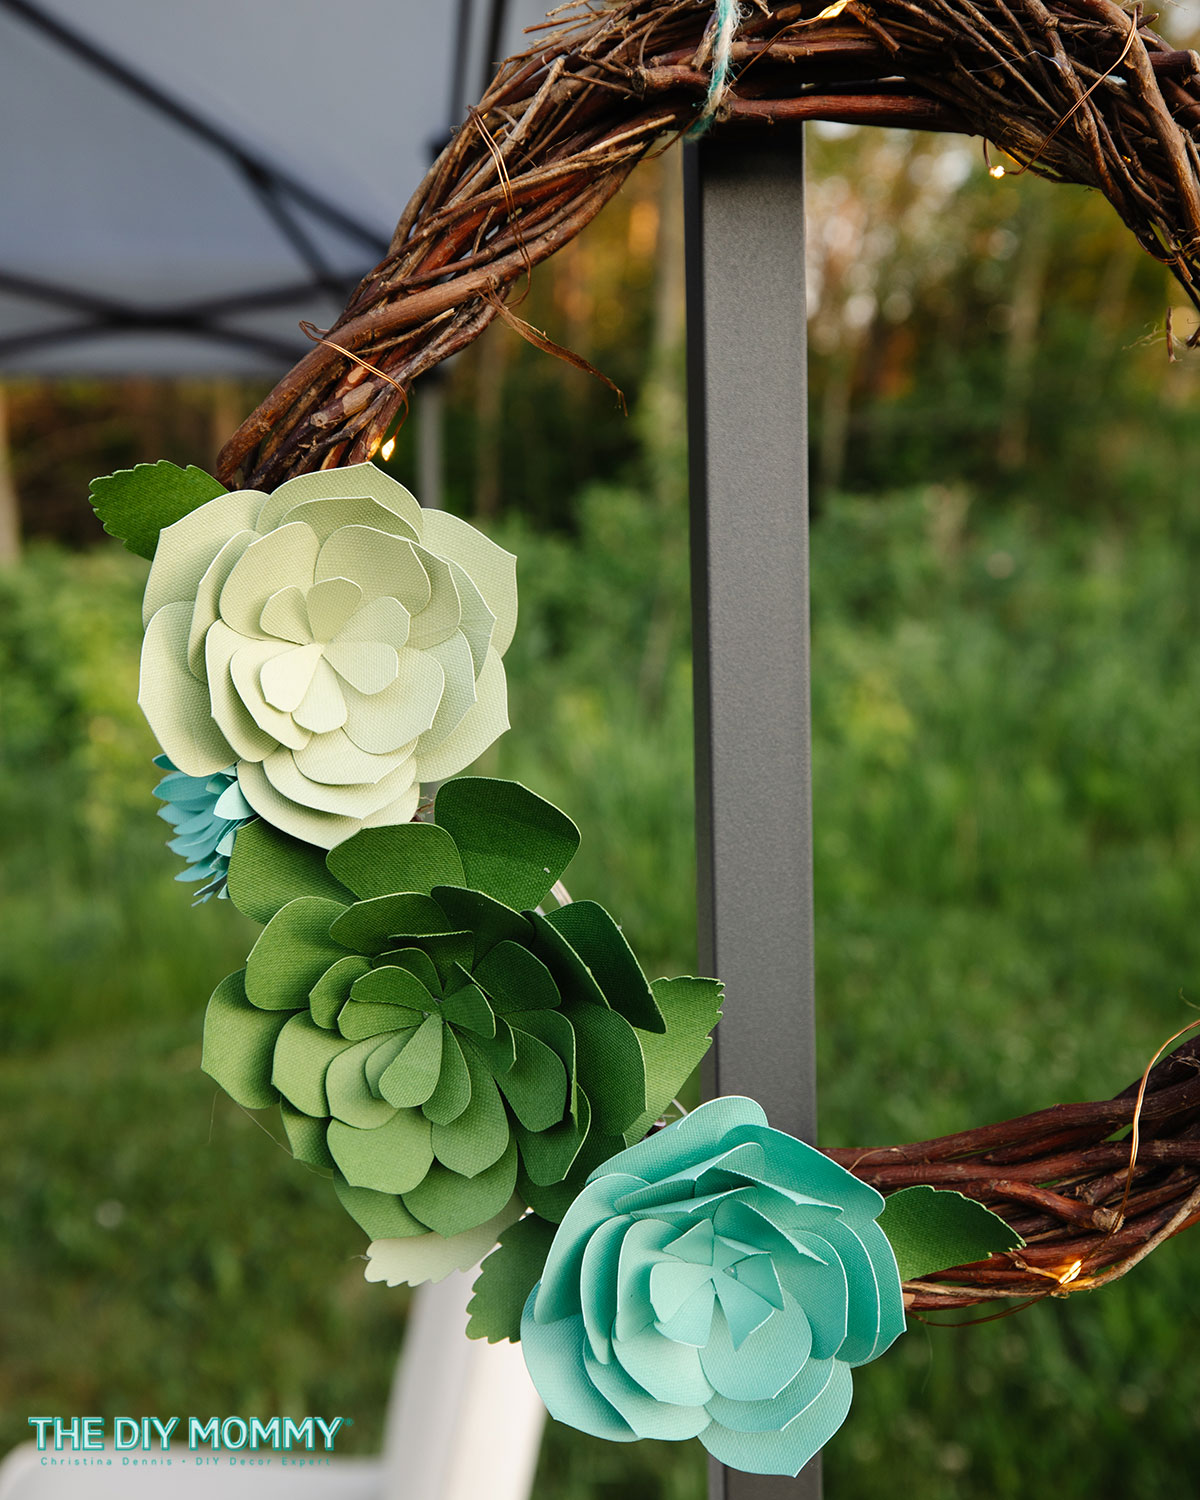
Once all the succulent leaves and flowers are cut out, it’s time to assemble the succulents. There is one large succulent, two medium sized ones, a small one, and a few leaves. However, you can make multiples like I did above to use in other projects!
To make the large & small succulent:
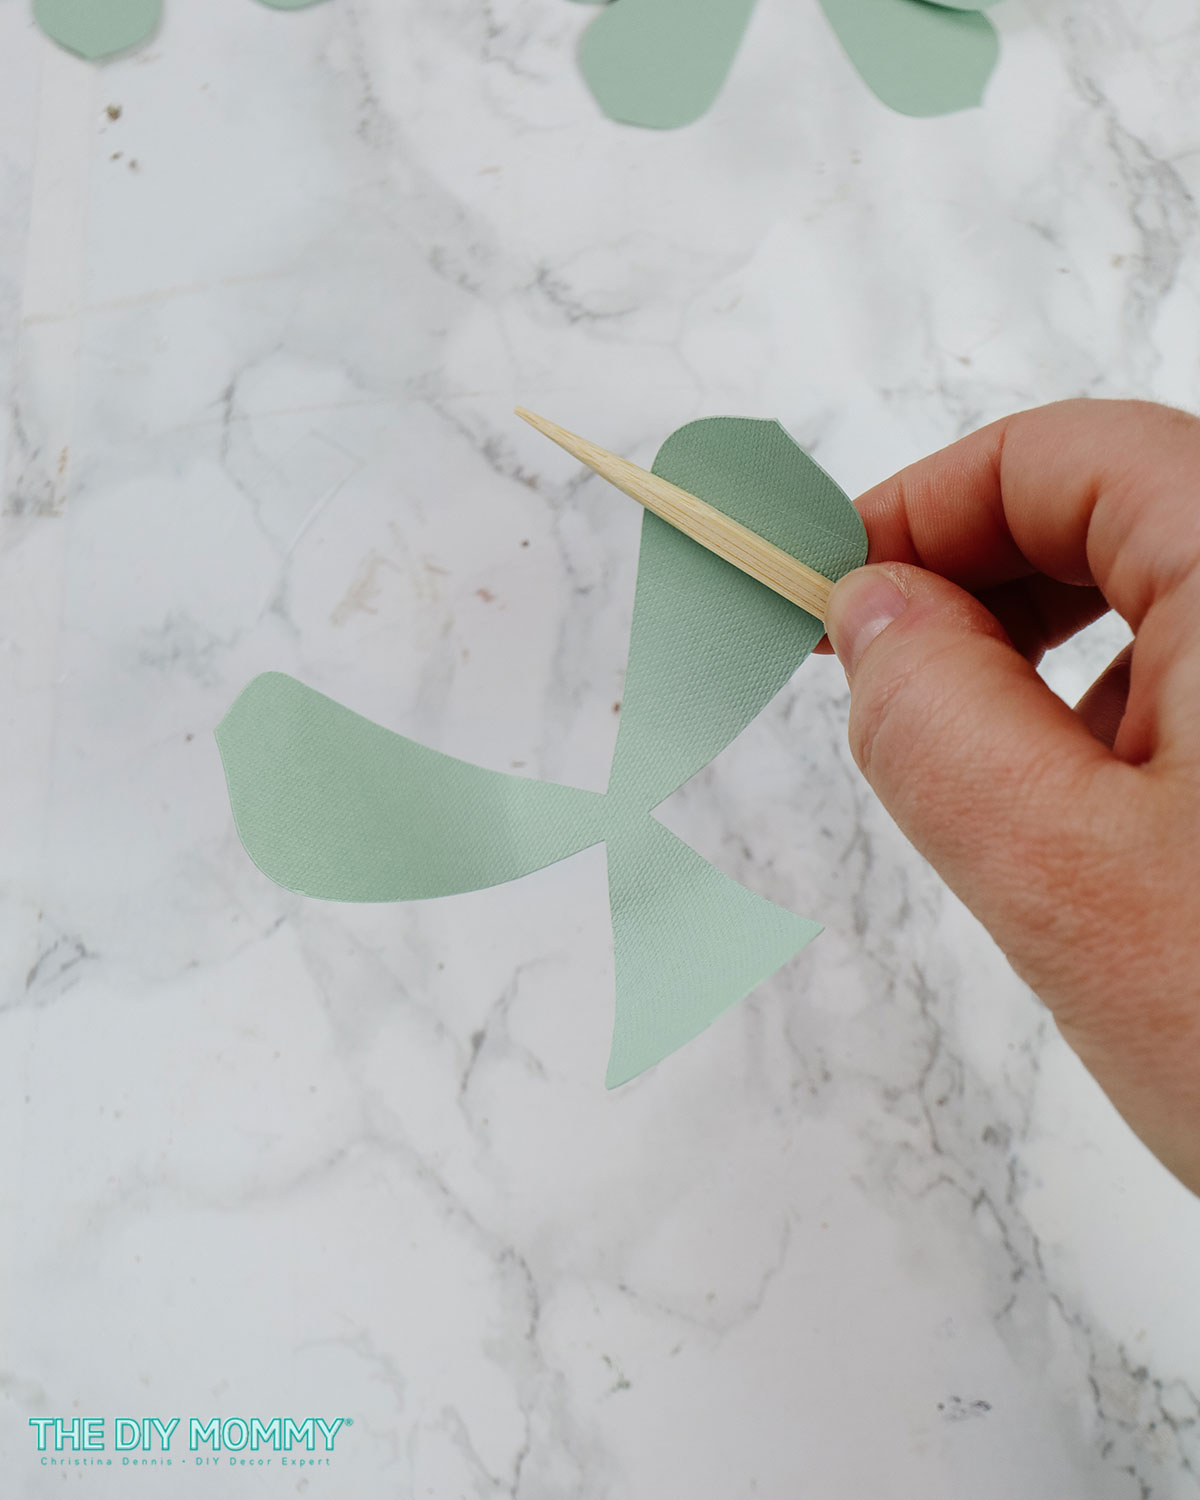
Work on a flat surface like a countertop or desk. Begin by curling all the leaves on all the pieces slightly with a wooden dowel or pen. This helps give dimension to the paper succulent.
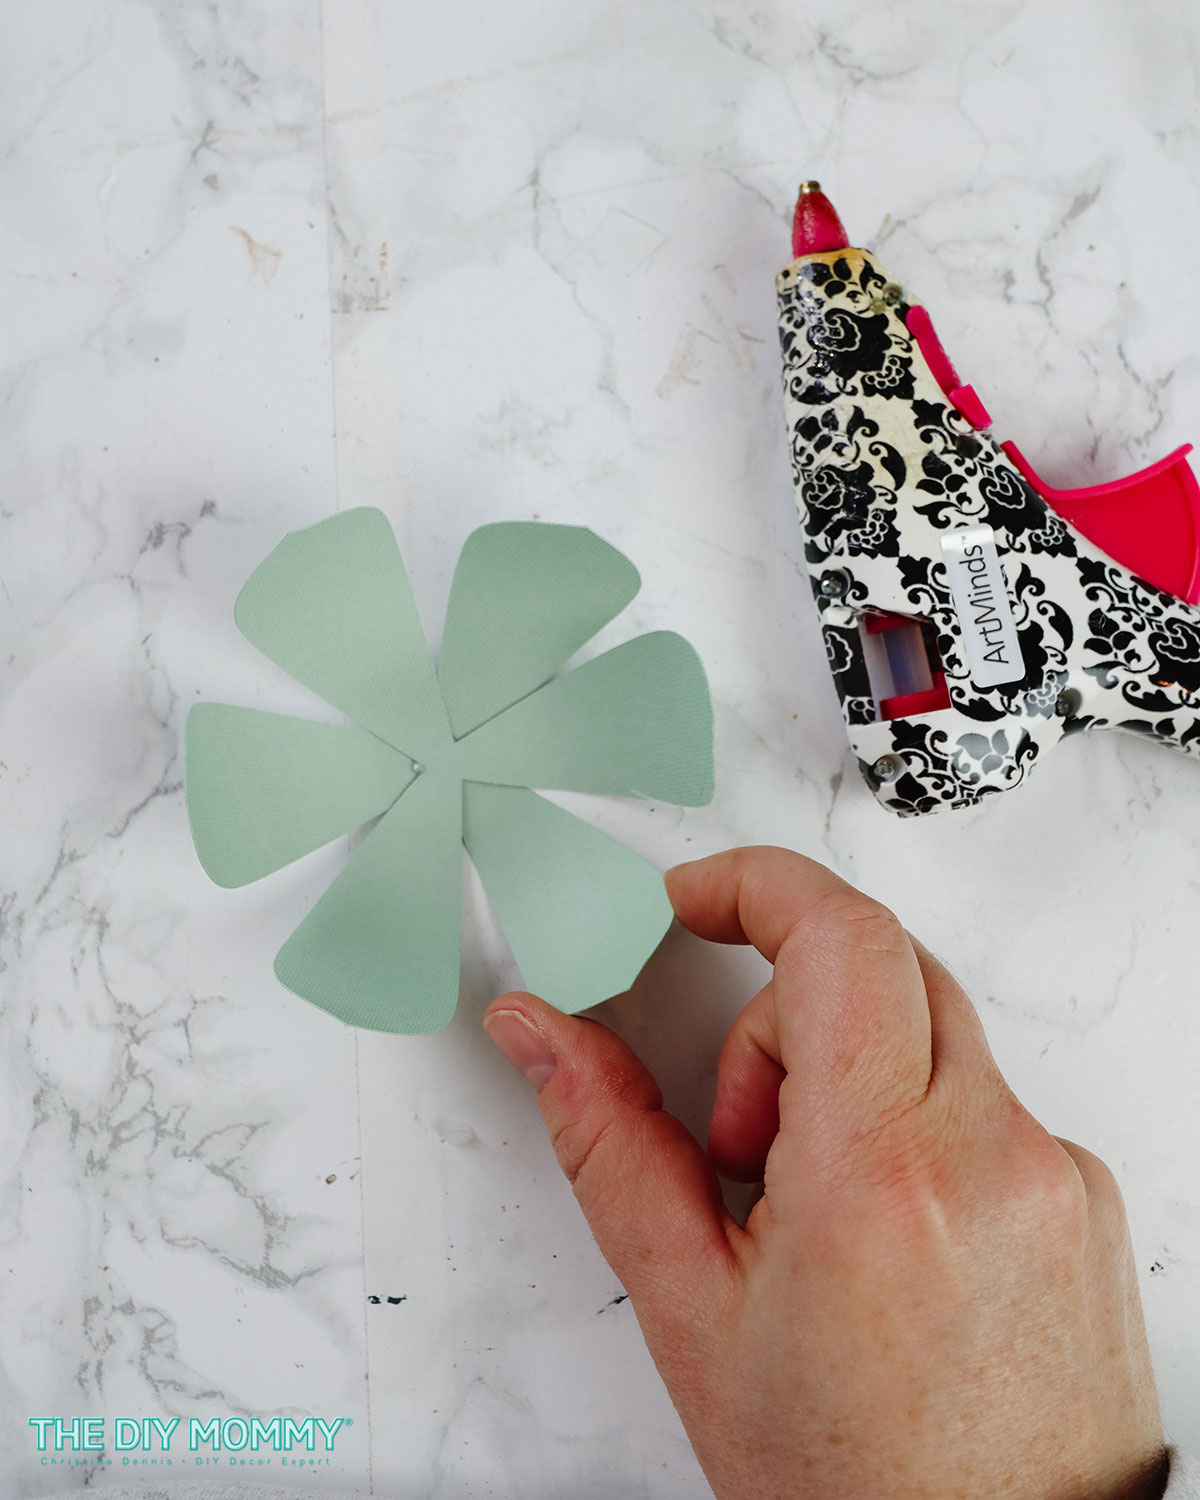
Now, lay the largest layer down on a table, put a dab of hot glue on the bottom of the next largest layer, and place it on top of the first one. Ensure the leaves are rotated so that you see the lower leaves underneath.
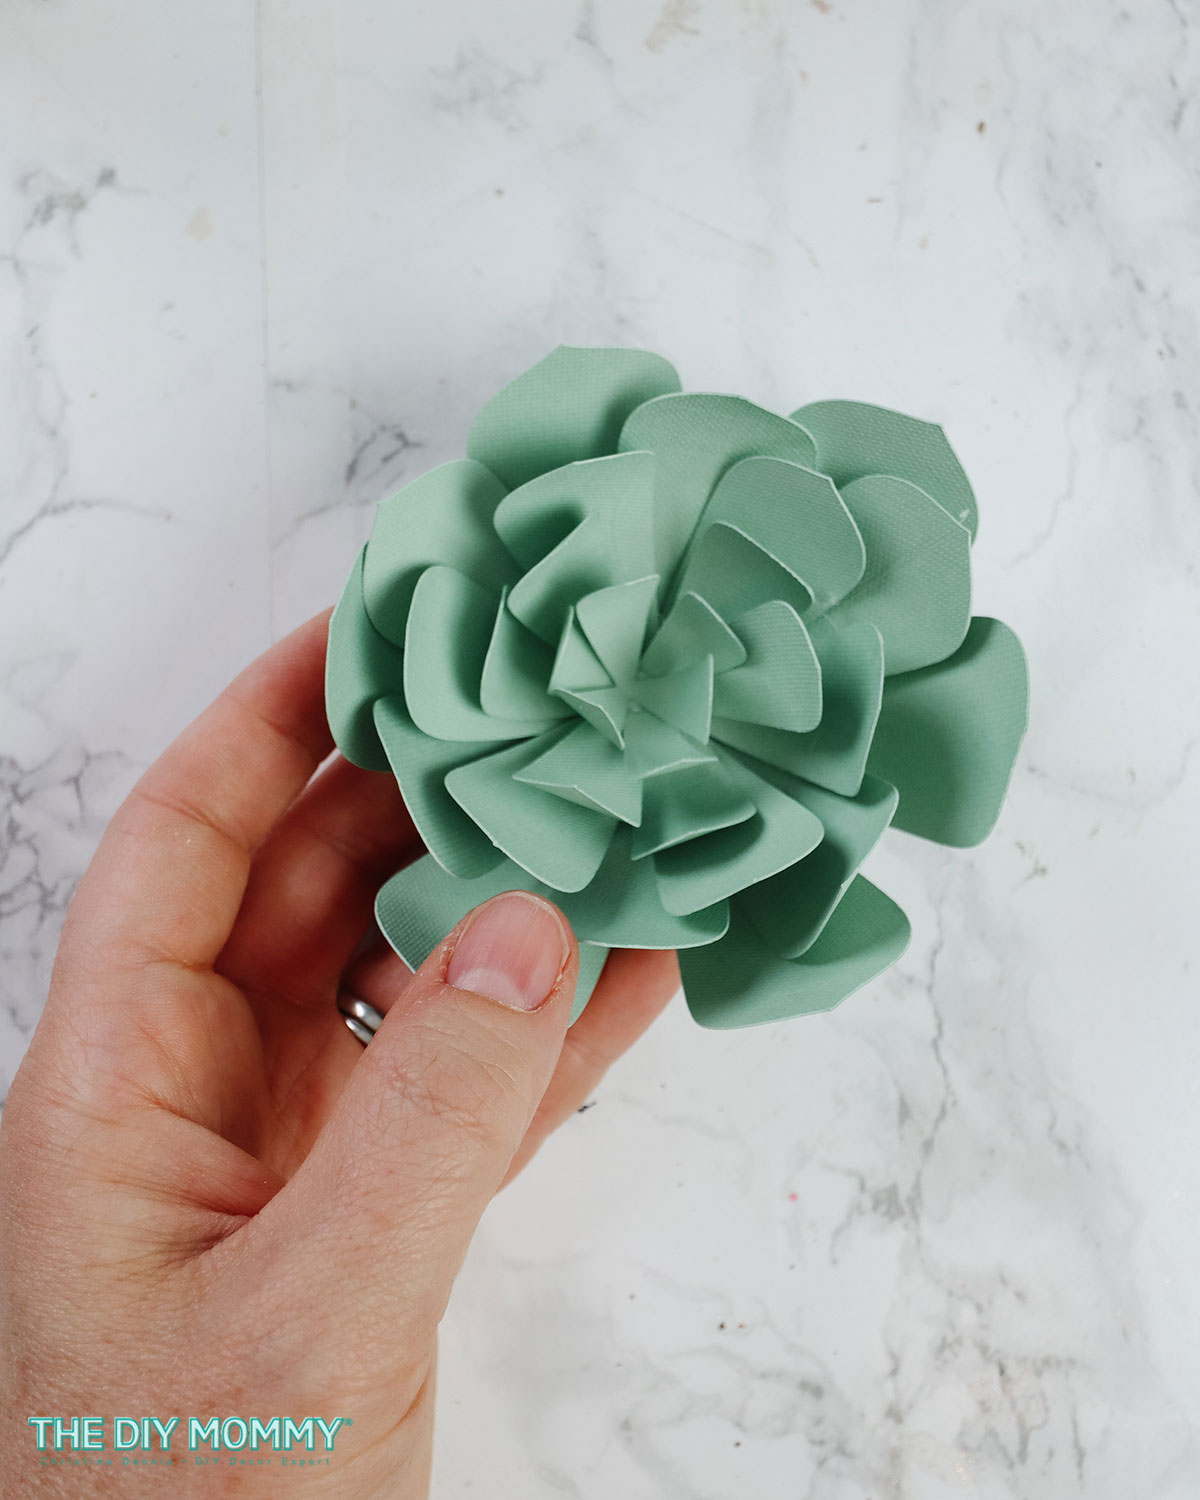
Repeat these steps with all the remaining layers, going from largest to smallest. Keep rotating the layers so that the leaves are offset from the previous layers’ leaves.
To make the medium sized succulent:
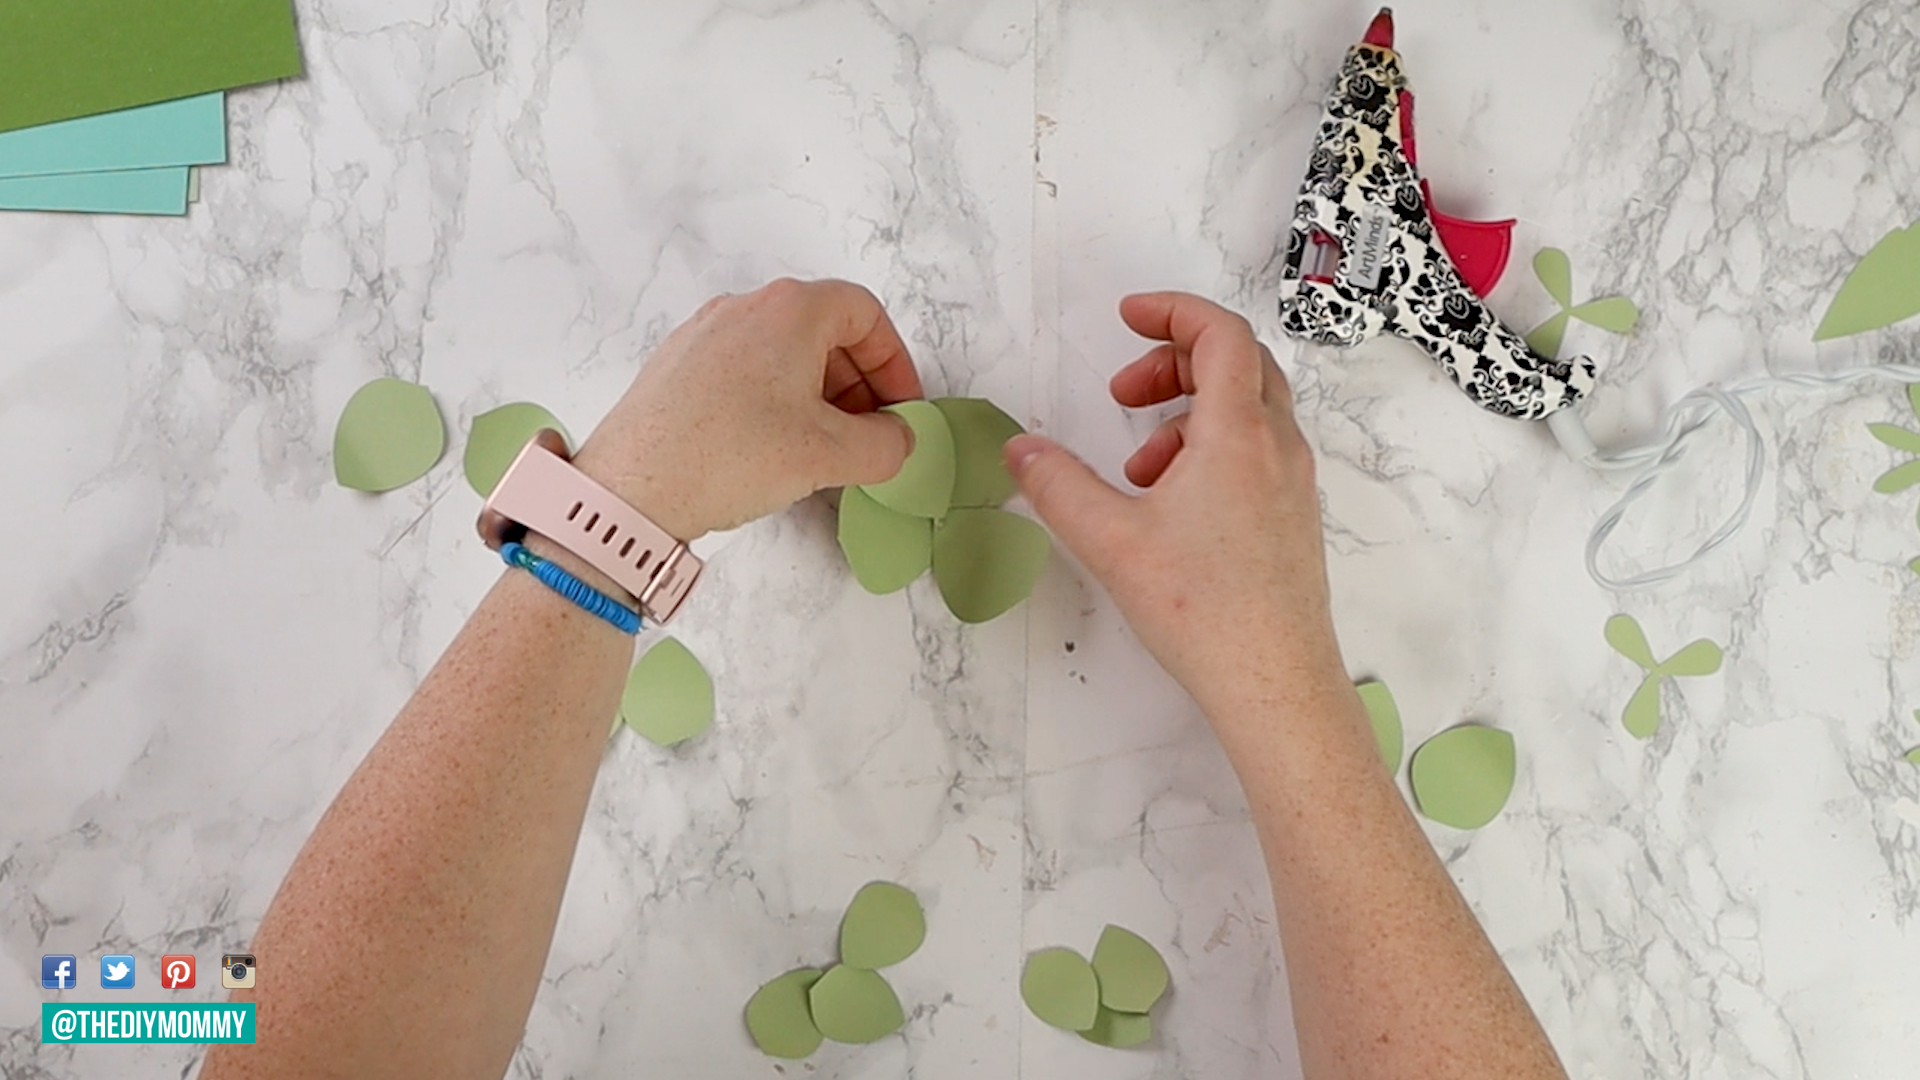
Begin by curling all of the leaves upwards slightly with a wooden dowel or pen. All of the leaves are separate pieces on the medium sized succulent, so you simply start with the largest 3 leaves, and glue them together at the end point. Then, find the next 3 largest leaves and attach them in the center over the first layer.
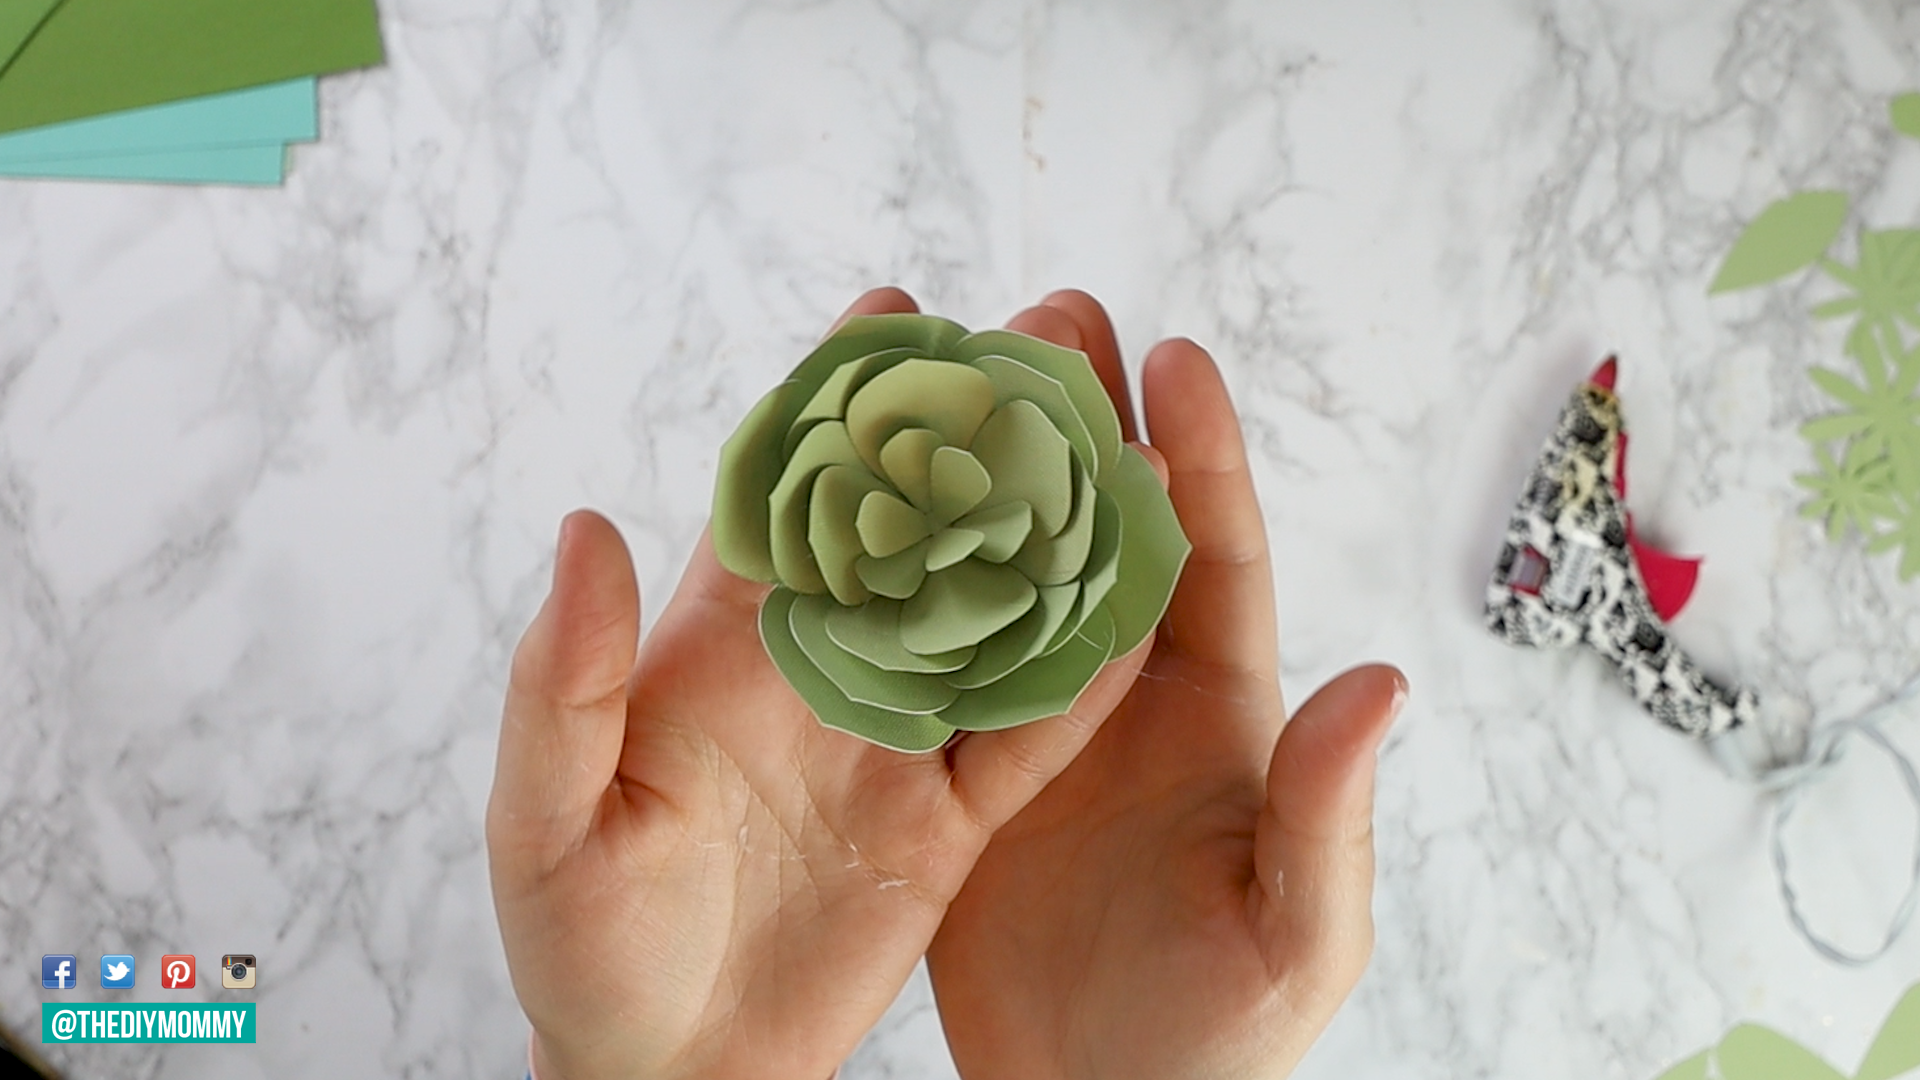
Again, you want to rotate them so that you see the previous layers’ leaves underneath. Continue until you have finished gluing on all the layers.
Adding the succulents
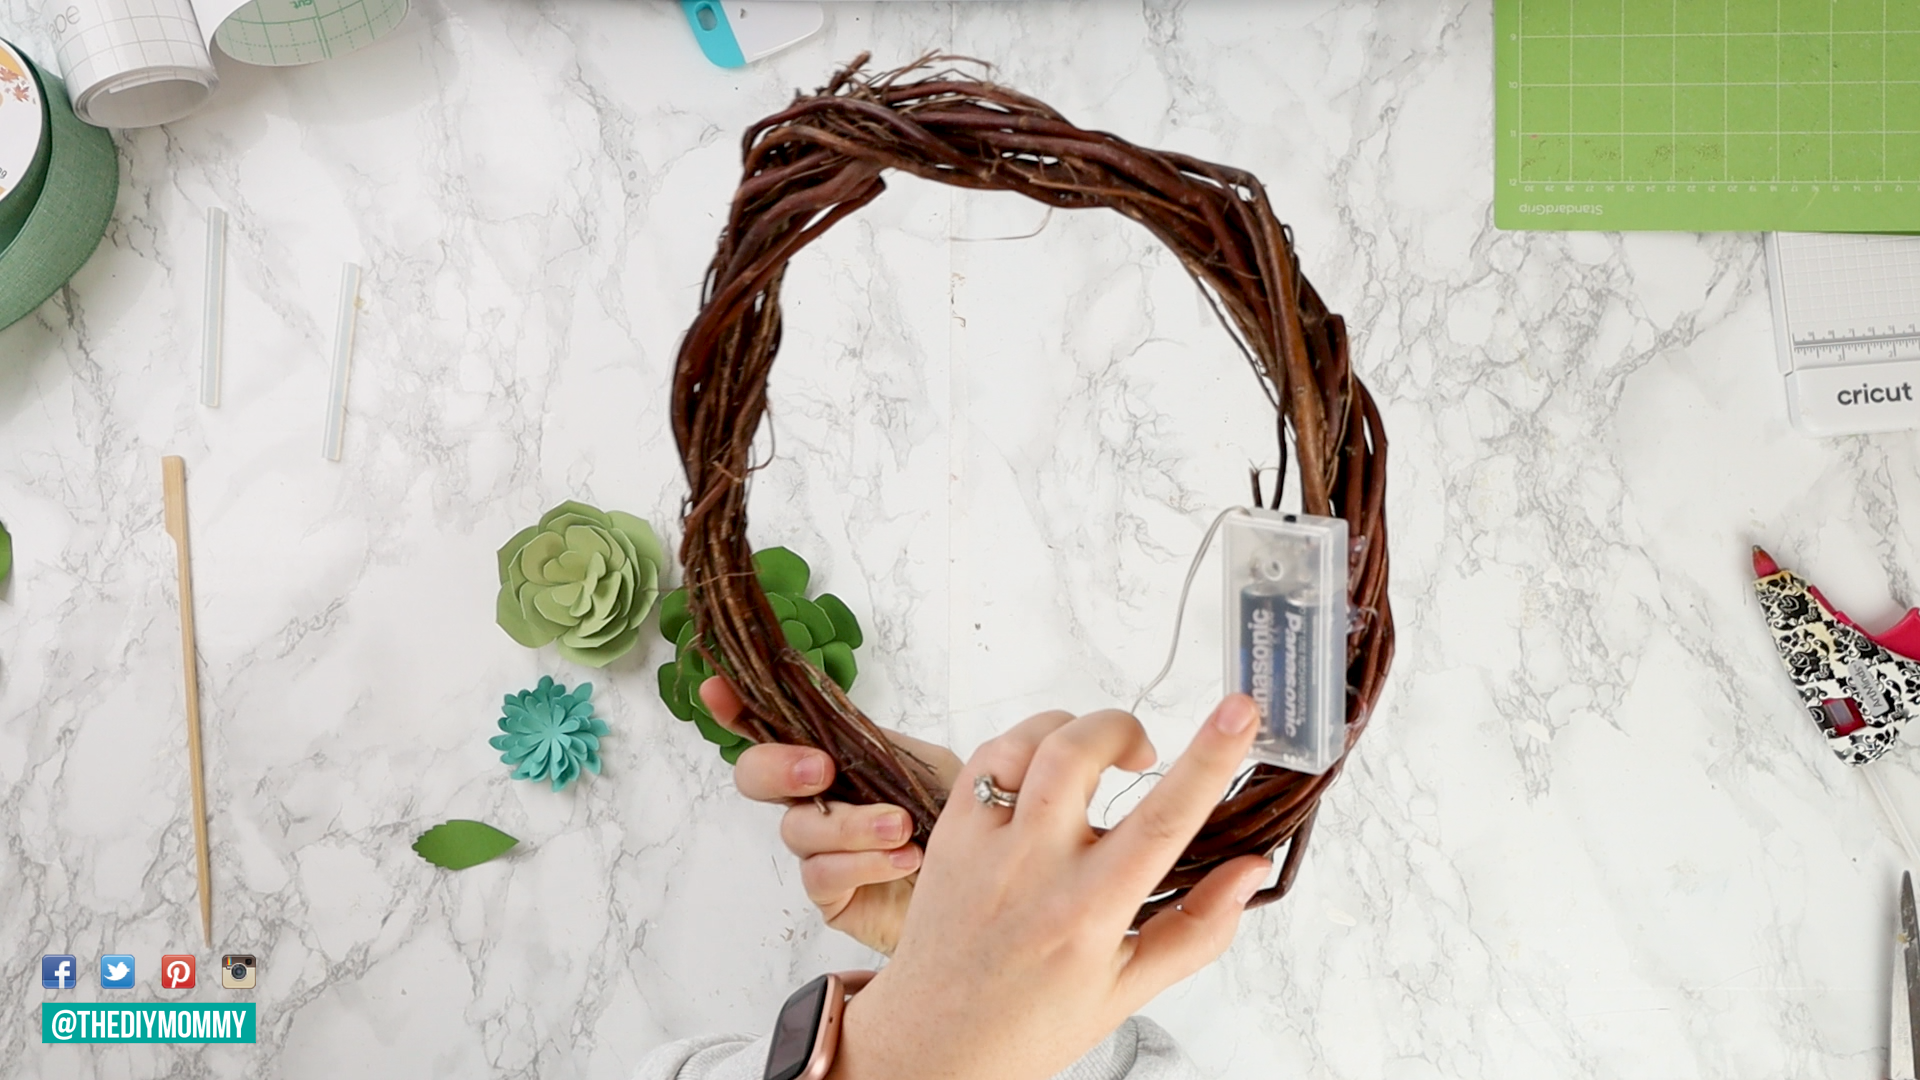
To create your beautiful succulent wreath, begin by attaching the twinkle lights battery pack to the back of the wreath frame with hot glue.
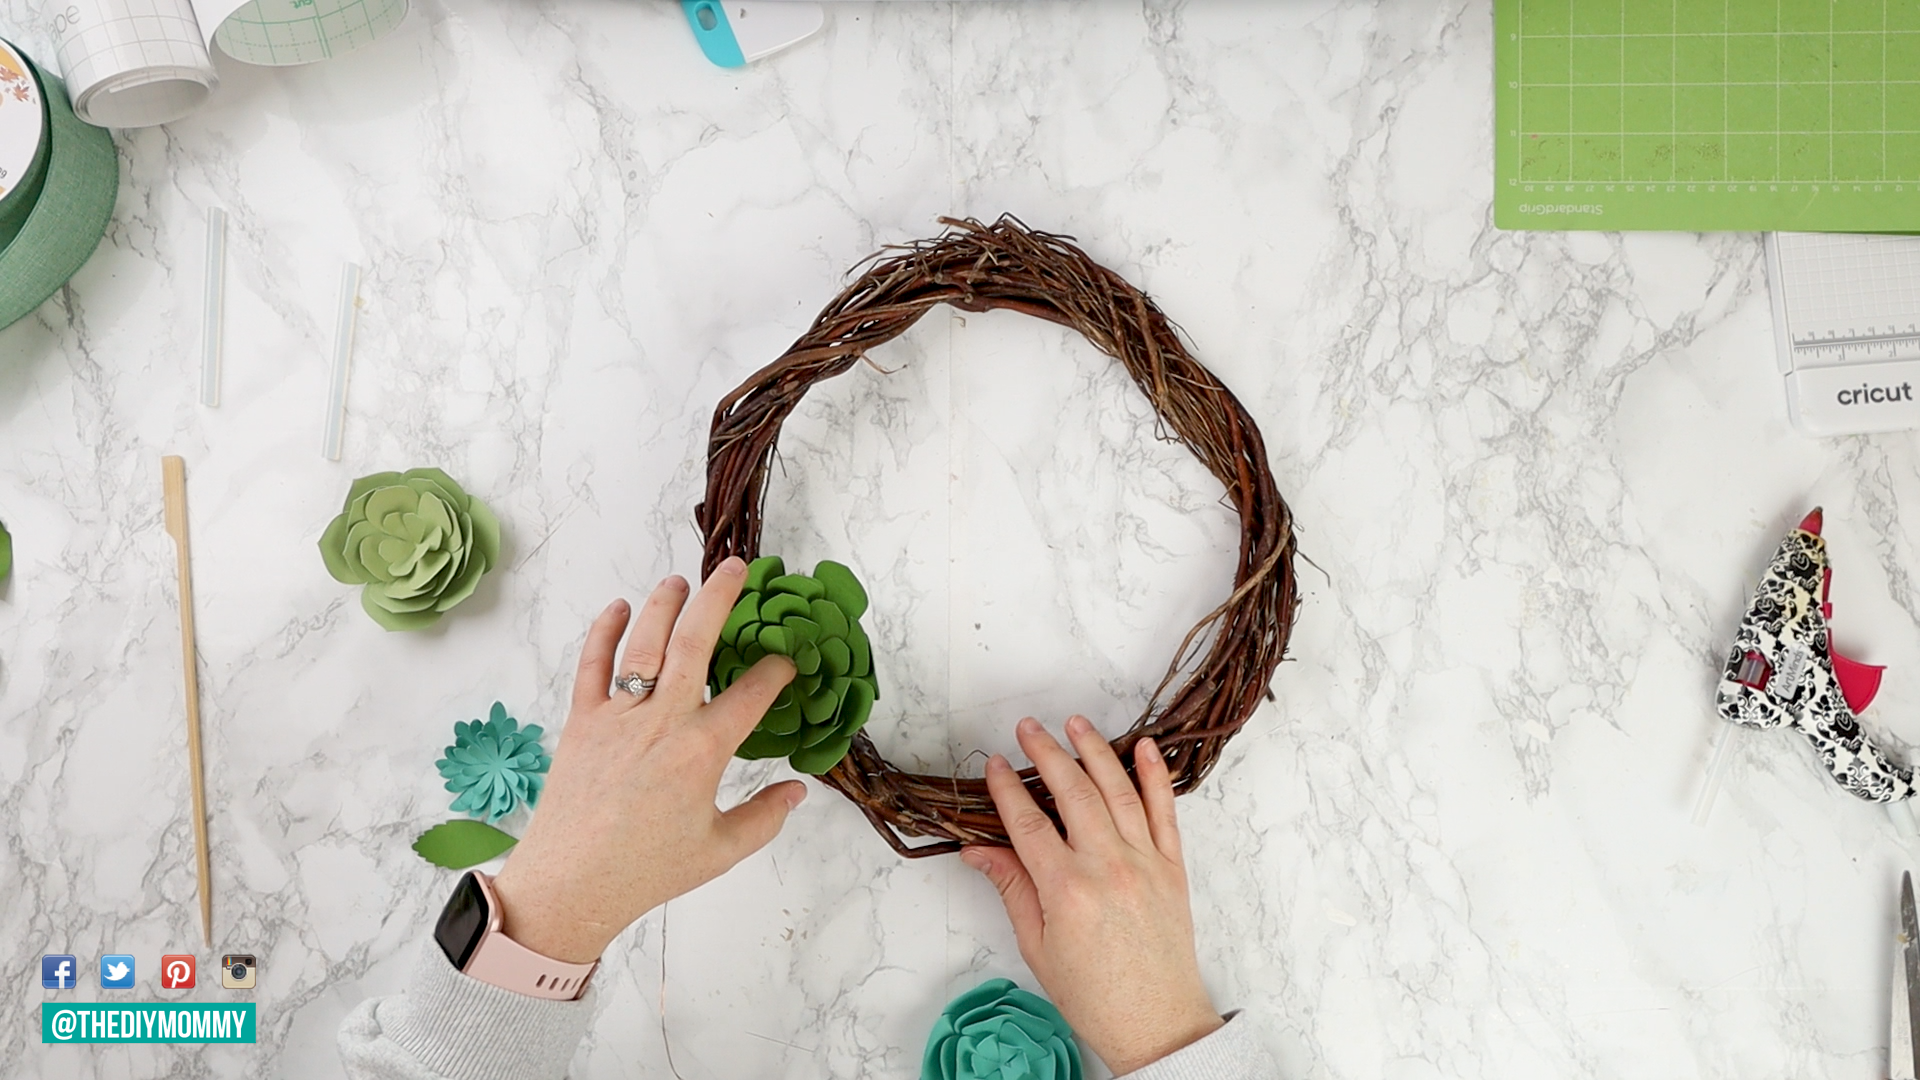
Now it’s time to start placing the succulents onto the grapevine wreath base. Begin with the larger succulent and use hot glue to secure it to the bottom left of the wreath.
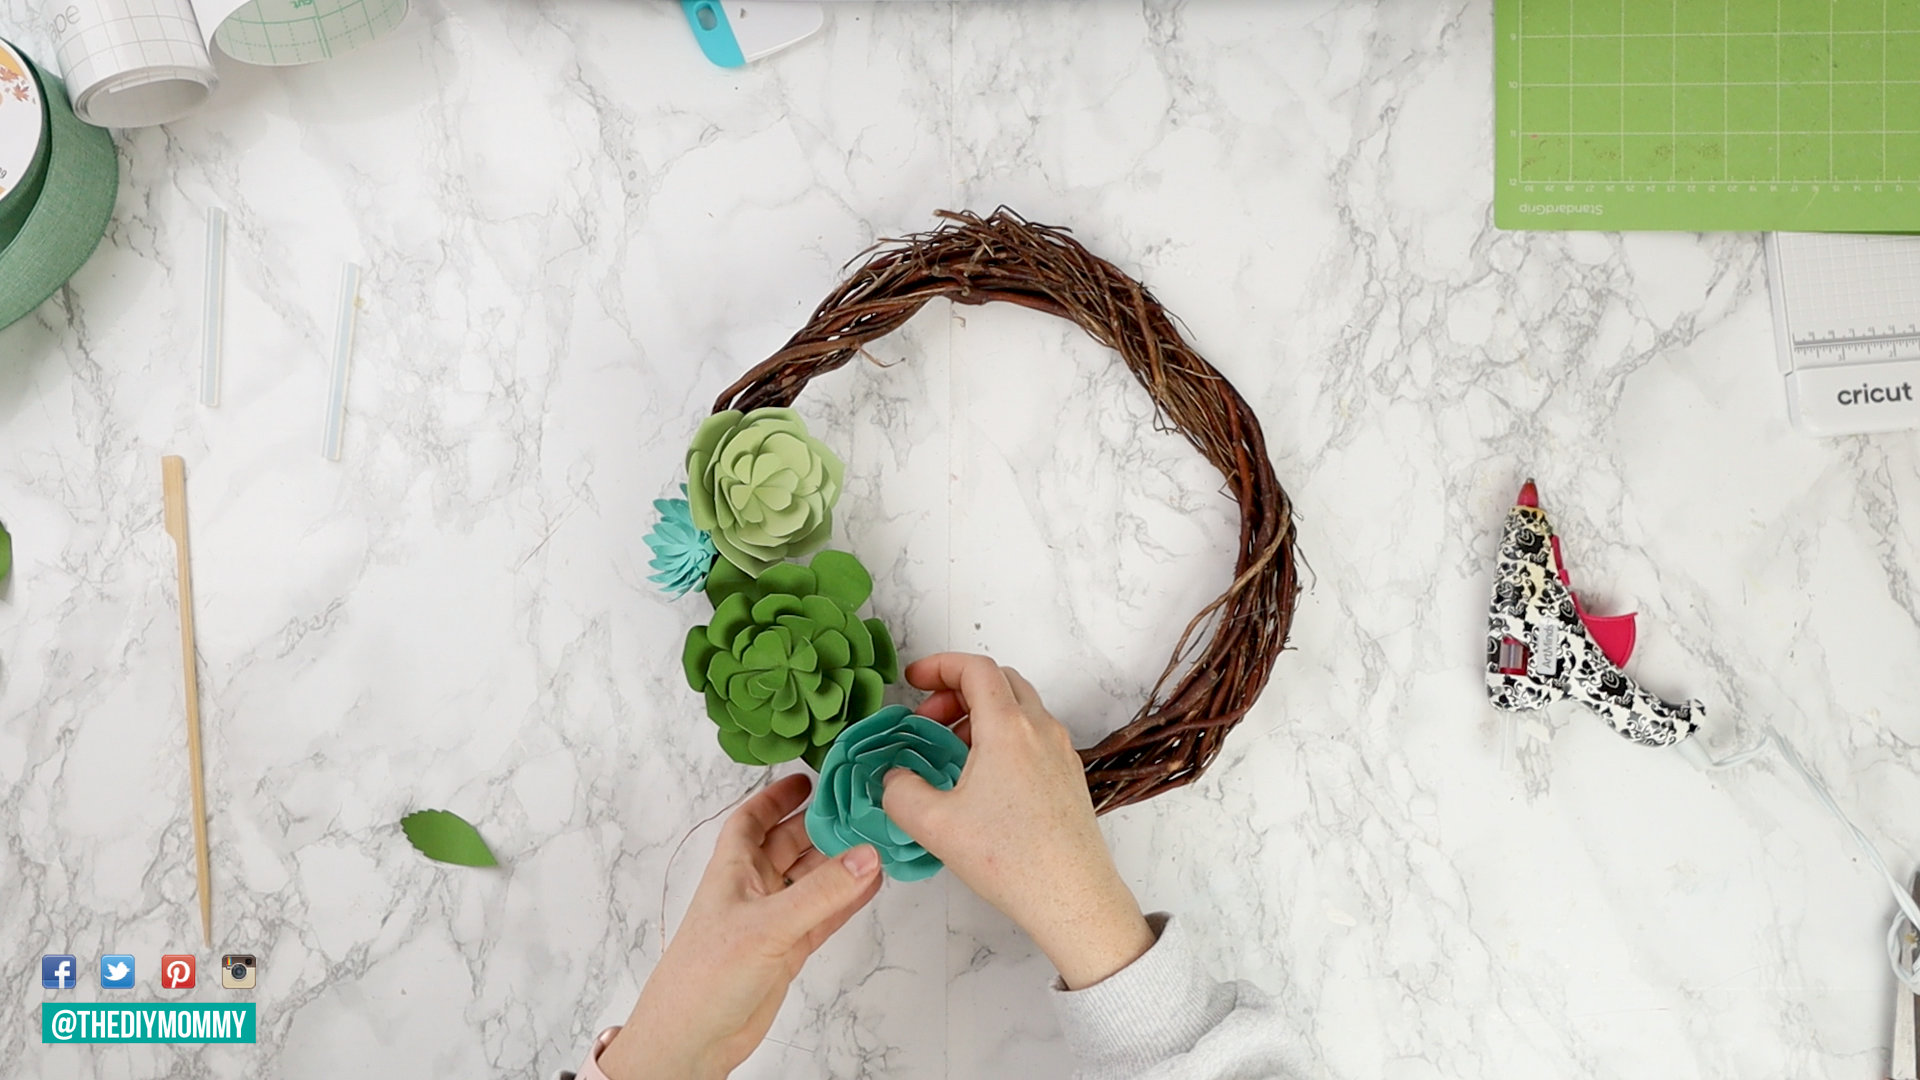
Next, add in the medium sized succulents on top and underneath the large succulent already in place on the frame. Add the smallest succulent to the left of the top medium succulent. You can arrange these in whatever pattern you like- my arrangement is just a suggestion!
Adding the finishing touches to your wreath
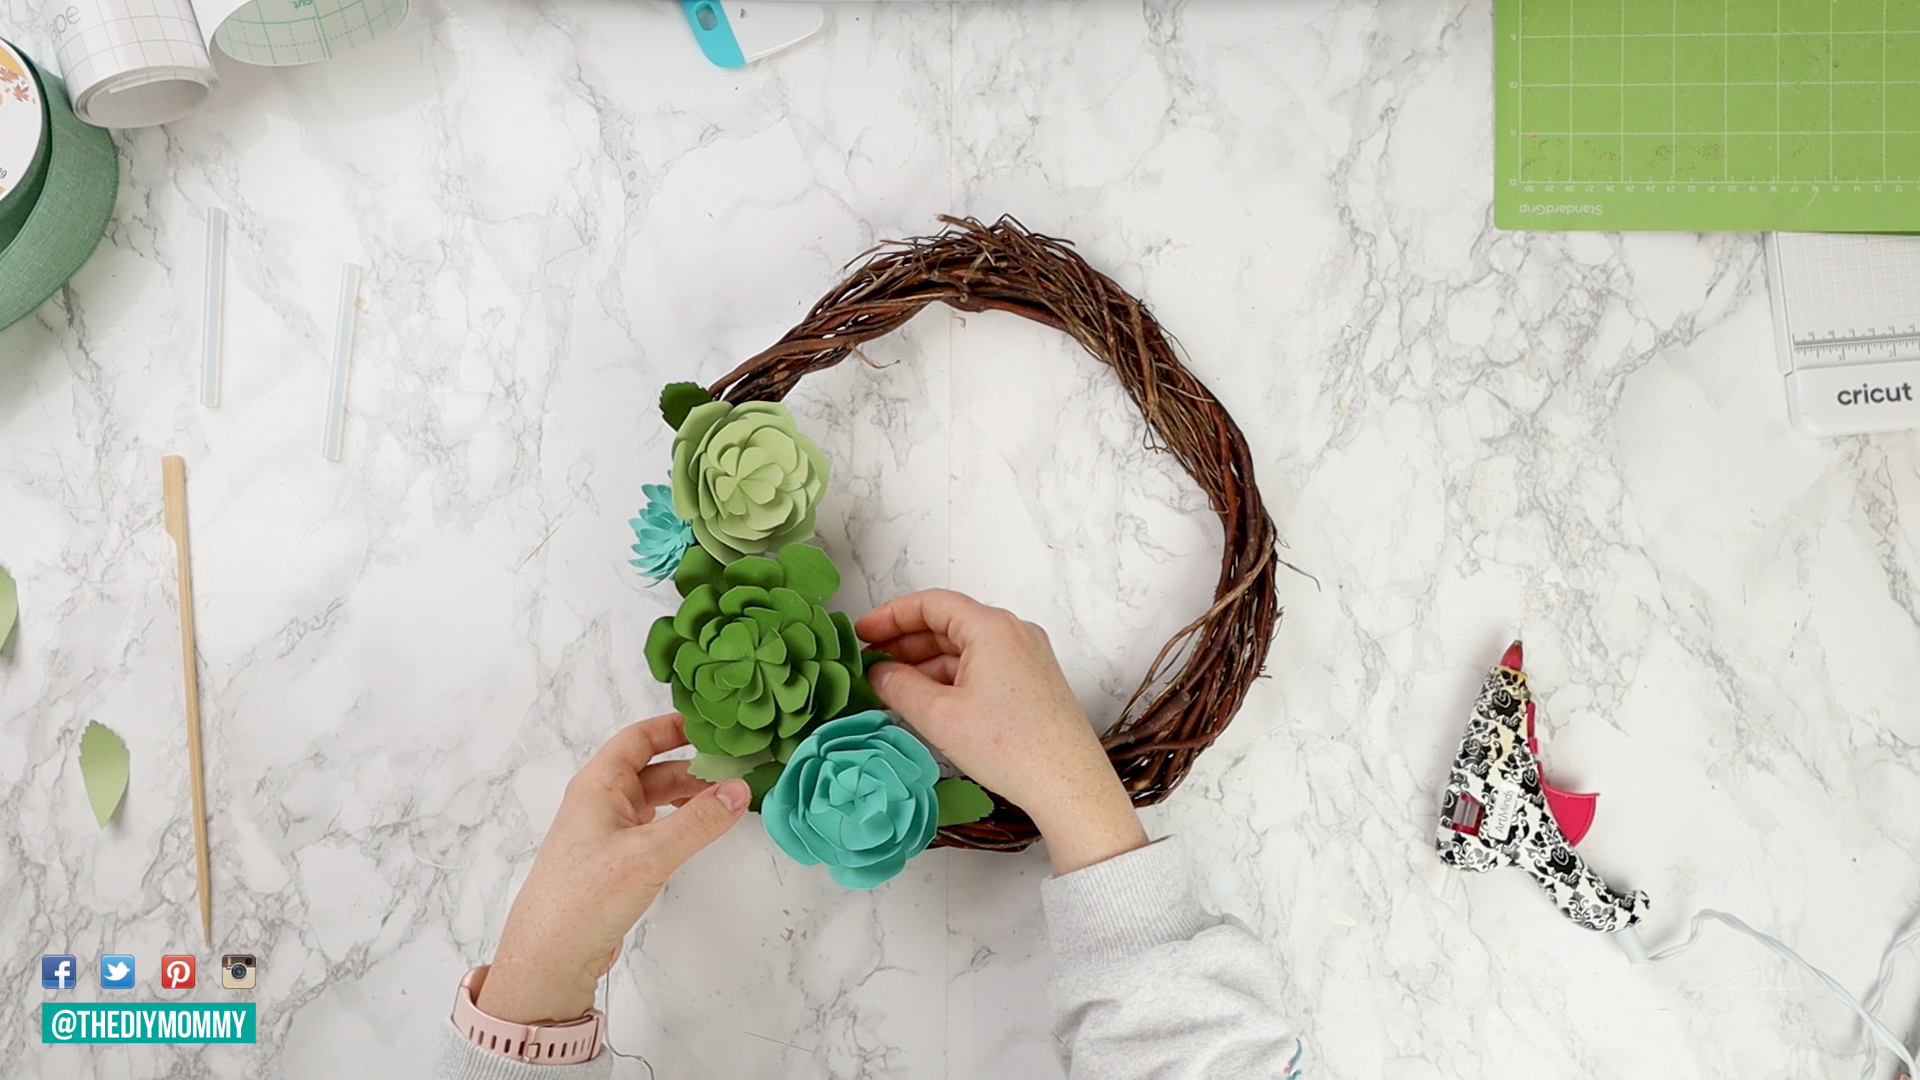
Finish the succulent arrangement by curling the leaves with a wooden dowel or pen, and then hot gluing them around the succulents on the wreath. This adds some dimension. You could further add dimension by gluing bits of sphagnum moss or reindeer moss between the succulents if you wish, too. However, I like it without!
Tip: If you’d like to cover the entire wreath with succulents, simply cut out multiples of my Cricut Design Space project.
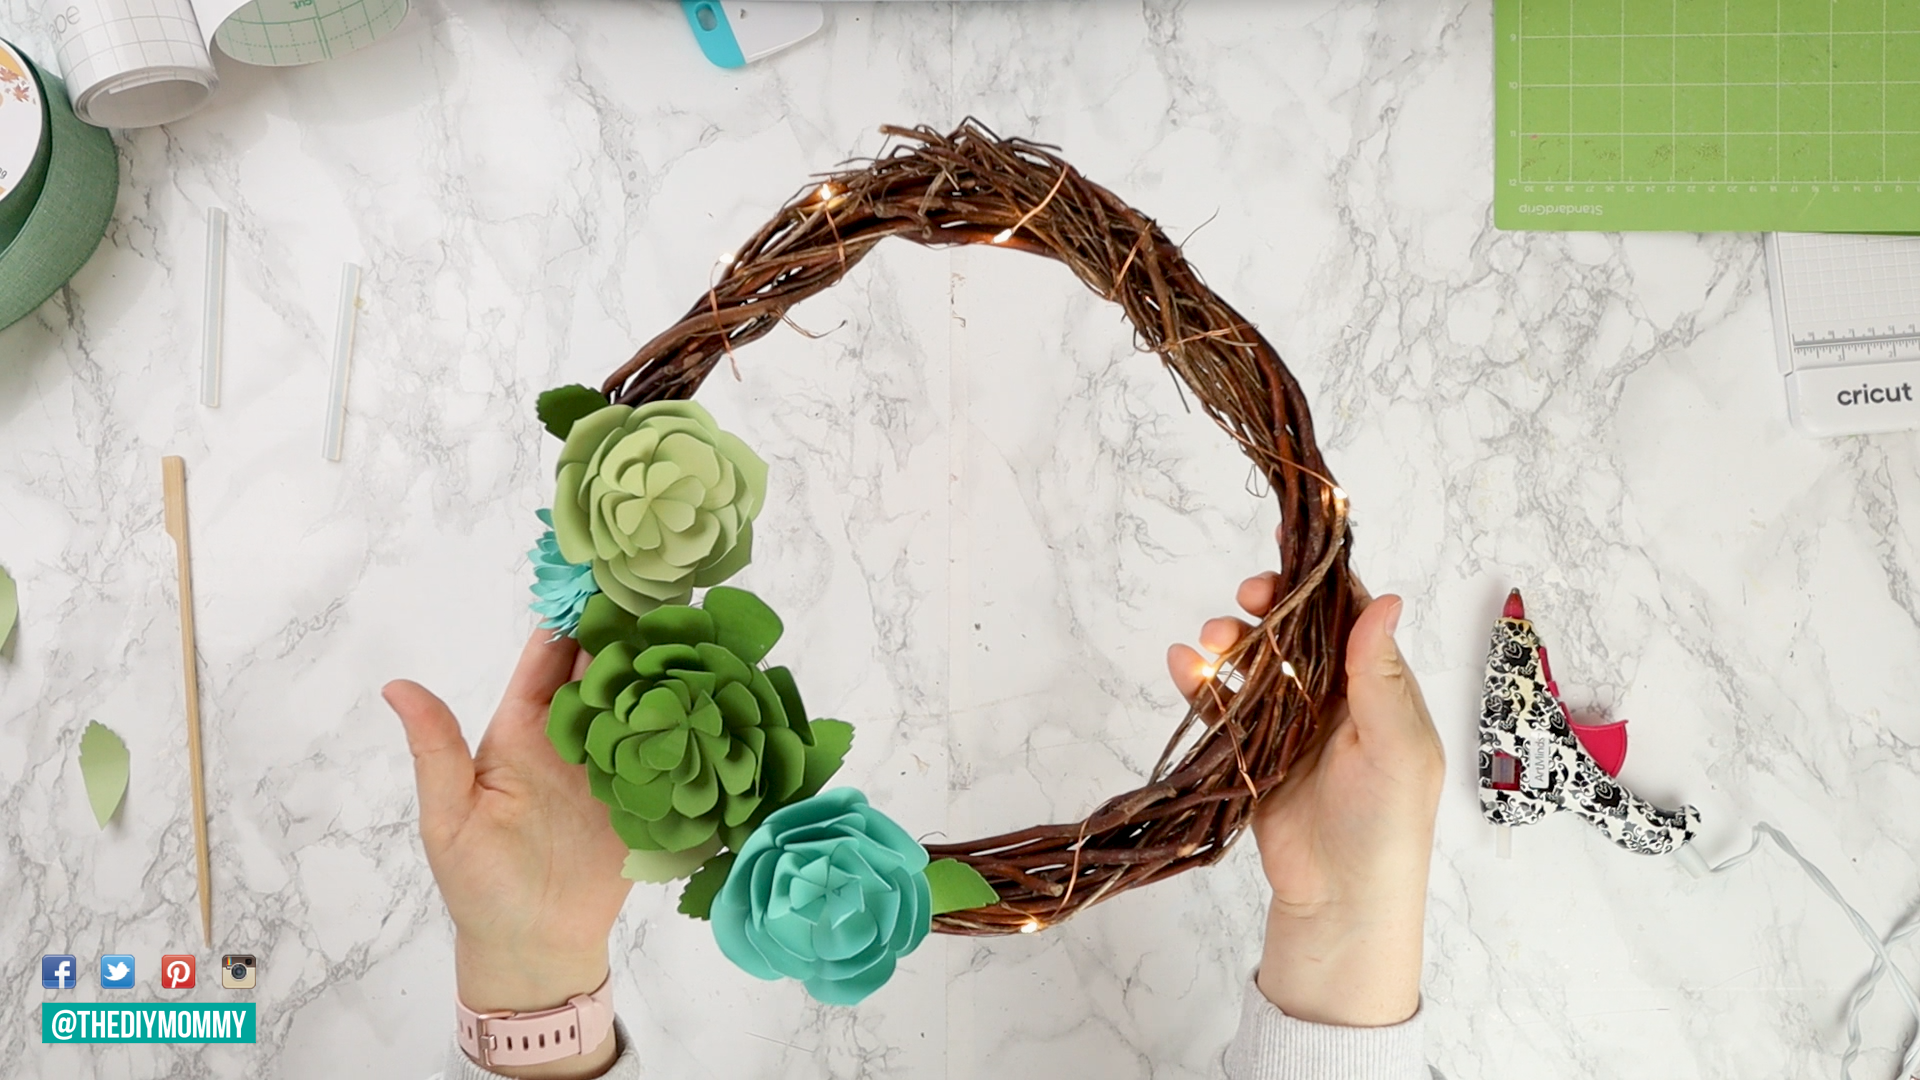
Now, wrap the twinkle lights around the wreath. Finally, add a ribbon or string if you want to hang your DIY succulent wreath, or you can simply display it on a decorative plate or on a small easel. Admire your new creation and feel proud of your DIY!
Creating a DIY succulent wreath with paper and a Cricut is an easy, fun project to add a touch of greenery and a colorful flair to any room in your house. With just a few materials and some creativity, you can create a unique and beautiful wreath that can be displayed all year round. Don’t be afraid to experiment with colors and arrangements as you create your wreath. The possibilities are endless! Happy DIYing & don’t forget to post your creative DIY projects and tag me on social: @thediymommy.