DIY RV Dinette Cushion Covers – Reupholster in 6 Steps!
This post may contain affiliate links · This blog generates income via ads
Our DIY Camper has been a bigger project than I first anticipated, but we’re nearing the finish line! In today’s blog post, I want to show you how I made DIY RV dinette cushion covers, repuholstering them in 6 easy steps. This has made such a difference in the look of this little breakfast nook. Plus, it’s relatively easy DIY that I think you’ll enjoy!
I’m keeping the dining benches in this little breakfast nook area because the bases are in great shape. The table also folds down, and the dinette cushions turn into a bed where one of our girls can sleep. This is much needed in this smaller camper!
The fabric on the camper cushions was in desperate need of replacing. It was worn, stained, and smelly. The foam felt like it was still in good condition. Reupholstering these cushions was a budget-friendly way to give them new life.
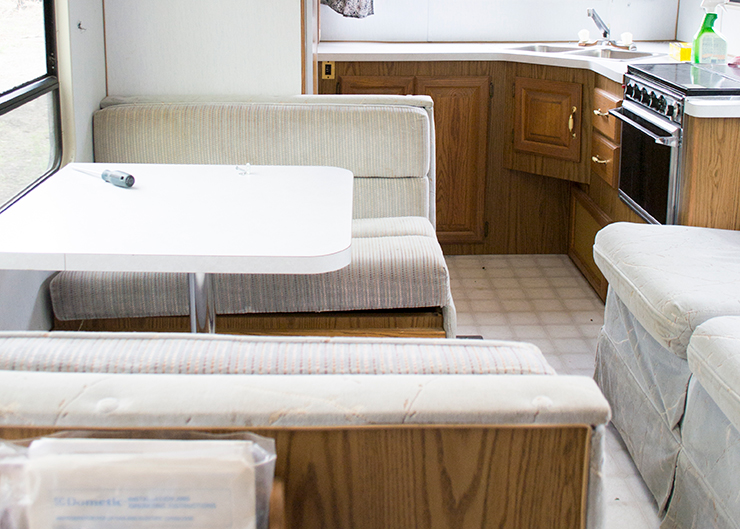
Here’s how the dinette cushions looked before:
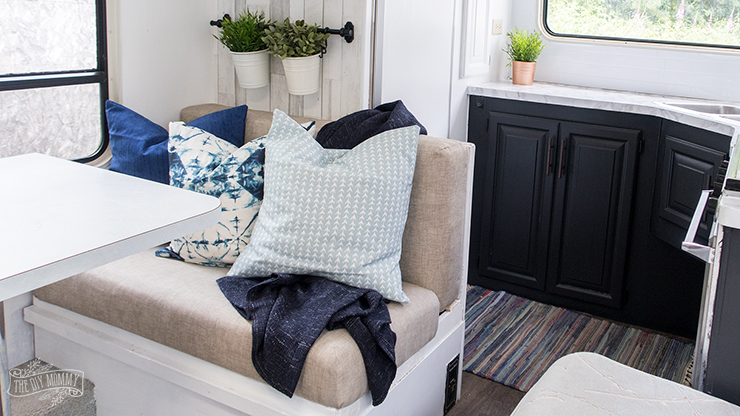
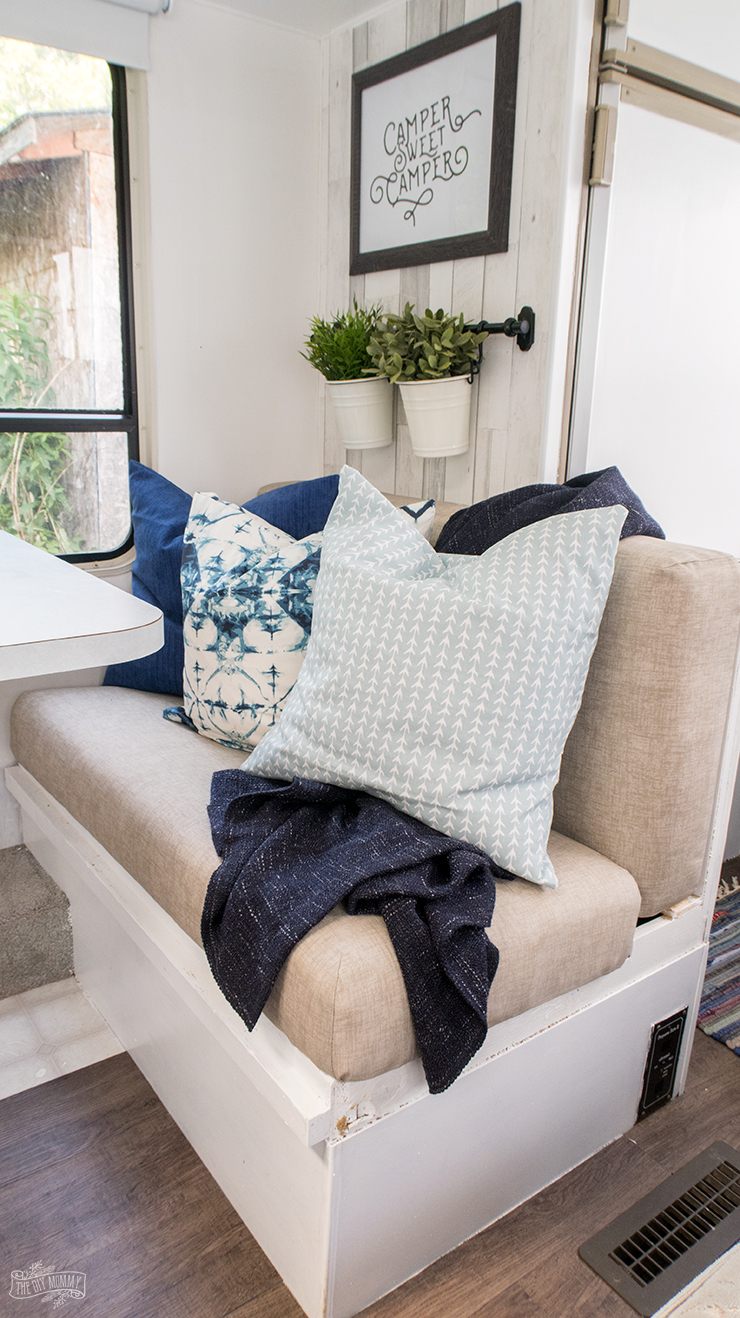
And here’s how the dinette cushions look now:
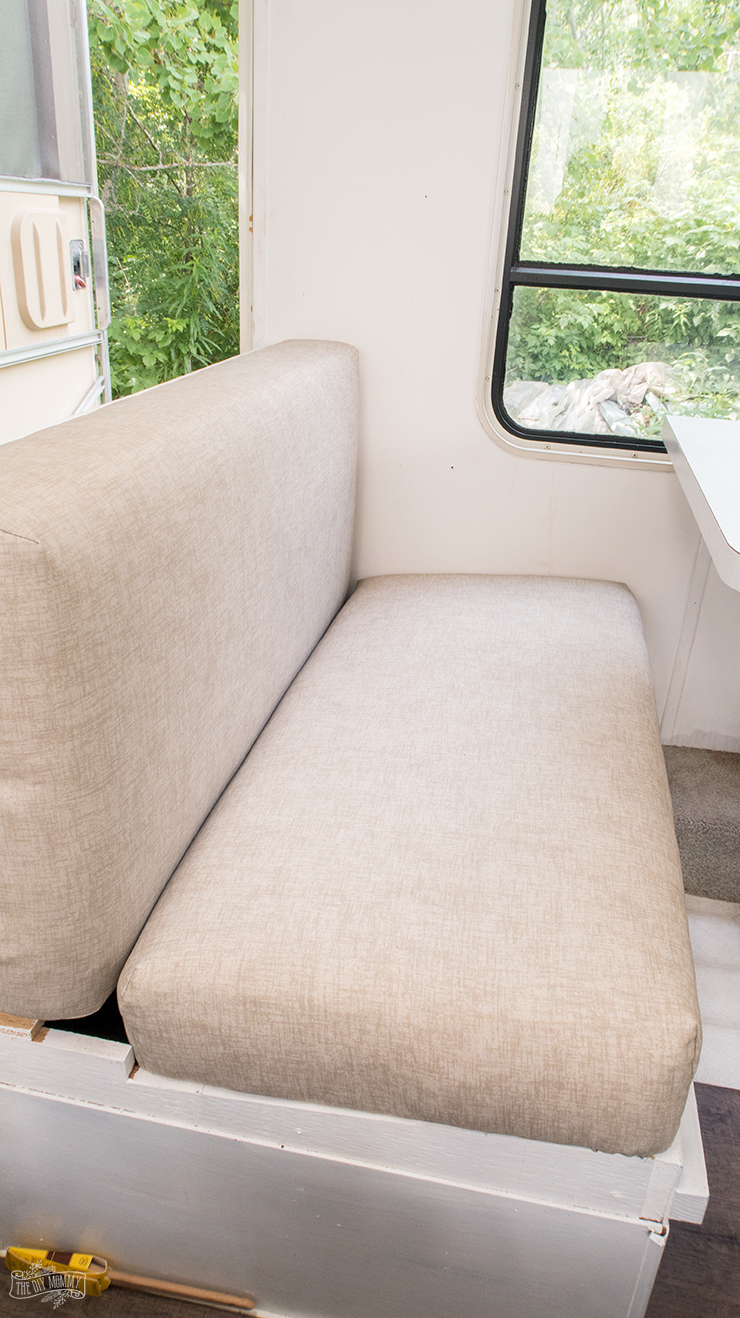
The original foam on the old cushions was still in great shape. I removed all of the old chenille fabric and covered the original foam with a layer of batting. Then, I cut out a rectangular piece of fabric and sewed darts in all of the corners. Next, I stapled it over the foam and onto the plywood backing. I covered the back with the original seats’ backing fabric as it was still in good shape.
I still need to add some paint touch-ups trim to the dinette frame, but the recovered cushions already make this nook look so much better!
You can watch the entire tutorial on how to reupholster camper dinette foam cushions here:
How to make DIY RV Dinette Cushion Covers
- Remove the old upholstery fabric: Turn the cushion to the back. Remove the staples with needle nosed pliers or a staple removal tool. Remove the old upholstery and inspect the foam.
- Add new batting: Cover the foam with some new upholstery batting cut to size. This will give your dinette cushion a fresh, plush look. Cut just enough to sit on top of the cushion. It doesn’t have to wrap down the sides (unless you want it to).
- Cut out the new upholstery fabric piece: Measure a piece of durable indoor/outdoor upholstery fabric that’s the length of your dinette cushion + 2 x the depth of the cushion + 4 inches. For the width, measure out the width of the dinette cushion + 2 x the depth of the cushion + 4 inches. Use a ruler and a straight edge to make sure everything’s square. Use fabric scissors to cut out the shape.
- Measure & sew the darts: Measure out darts making them 6″ square and fold the darts in half to make a triangle. Pin to secure if desired. Then, sew the layers together on the marks with a sewing machine. Go over the seam a couple of times to make it secure. Then, trim off any excess fabric to create fitted corners.
- Staple the new fabric piece in place: Place the piece of fabric over your dinnette cushion with the batting. Flip the cushion over, and use a heavy-duty staple gun to staple the bottom of the fabric to the bottom of the dinette cushion. Pull the fabric tight in the middle, staple, and then pull the opposite side tight and staple. Continue in this manner to make sure the cushion looks even and doesn’t ripple. Use a generous amount of staples. For the corners, pull them nice and tight and gather slightly as you go around the corner. Make even gathers and pull tightly as you staple it well.
- Replace the dinette cushion backing: You can use the old backing and place it back on the back of the dinette cushion with a staple gun. You can also use some new heavy-duty fabric and serge or hem the edge to create a new backing. Staple fabric to the back of the cushions.
Repeat these steps for all the top cushions and bottom cushions of your dinette benches.
DIY RV Dinette Cushion Covers AFTER
I’m so happy with how modern and sleek these RV cushions look! They look like brand new cushions with the new covers, and they feel so comfy. I decided to go with a dirt-coloured indoor/outdoor fabric (Premier Prints Jackson Indoor/Outdoor Beech Wood) so that they were easy to keep clean. With two dogs and three kids, I wasn’t about to use light coloured or ultra textured fabric on these! Some different fabric ideas? Try a faux leather (you’ll need heavy-duty thread and a solid sewing machine), washable polyester velvet, or a decor chenille.
You can see the entire kitchen makeover in this camper right here!
Tell me: Would you ever try reupholstering RV dinette cushions?
Your camper is looking seriously cute! Great sewing job!
Thank you, Monica.
You made the camper very comfortable place. I like it.
Thank you so much, Ruby 🙂
I watched the video. And it was great.
Thank you, Macs ?
Does your dinette make into a bed of so does the wood on the back make the bed harder?
That’s my question also. But my seat and back are connected to slide out for a bed. It’s an old 1958 camper. Original everything.
No, the girls slept on it and they seemed to find it quite comfy!
Where did you get the dinette table? I didn’t see a post about that. I love it and would like something like that. Your renovation is amazing, you are so talented.
That was perfect timing for me and a great video, easy to follow. I want to ask how you got the measurement for the corners, is it the height of the cushion and did you measure 6” as a square in the corner? If mine is 4” do I just measure 4” in from the corner and 4” up? I am totally new at this, sorry.
Hi! Is this still holding up well? Also how many yards did you end up using for your seats? I would like to use this for my dinette as well
Hi! im am just now finding your DIY and love it! I have the same question as Lori. i watched the “corner” section of your video twice and am still not sure how you came up with 6″. you said just make sure it is the height and width of your matress but i dont understand that. my cushions are 4″ standard so i wondered if yours were too and you just added the 2″ extra that you had factored in for each side at the beginning. i would love to know as i am getting ready to redo mine using your method. i just removed my jack knife sofa and replaced it with upholstered boards just like this but didnt have the dart corners – it looks ok but this looks so much better and easier! thanks in advace!