Make a 3D Sign with the Cricut Knife Blade
This post may contain affiliate links · This blog generates income via ads
Learn how to make a farmhouse inspired 3D sign using the Cricut Knife Blade, chipboard & vinyl!
This is a sponsored conversation written by me on behalf of Cricut. The opinions and text are all mine.
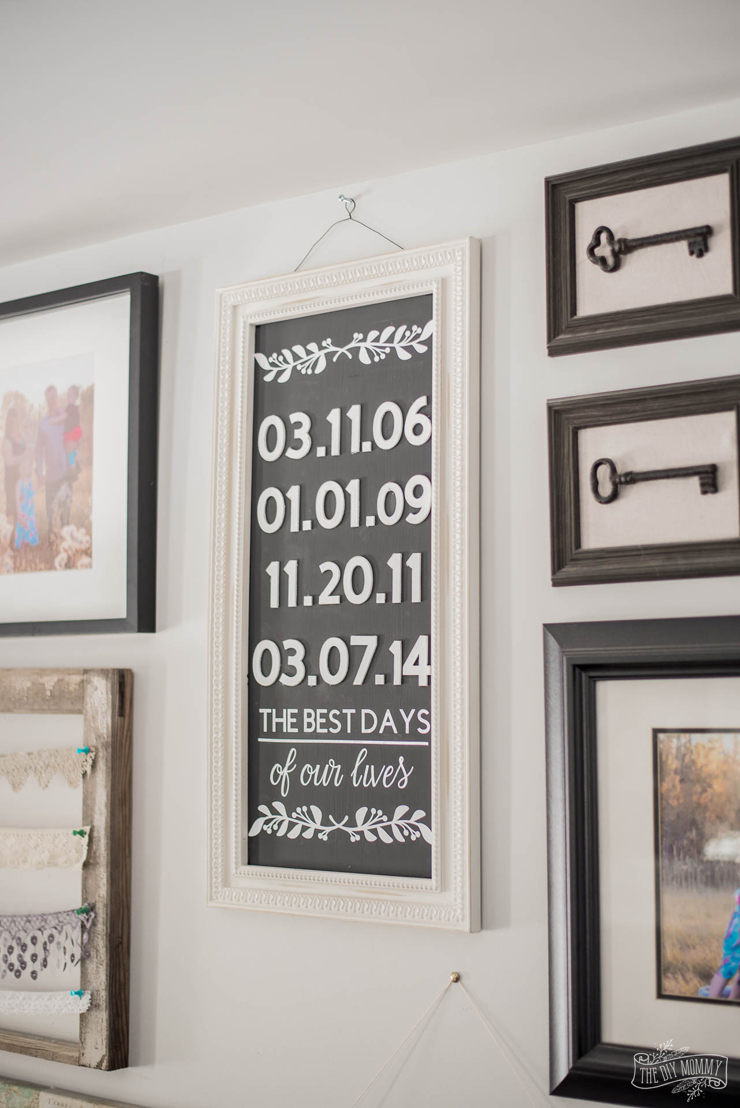
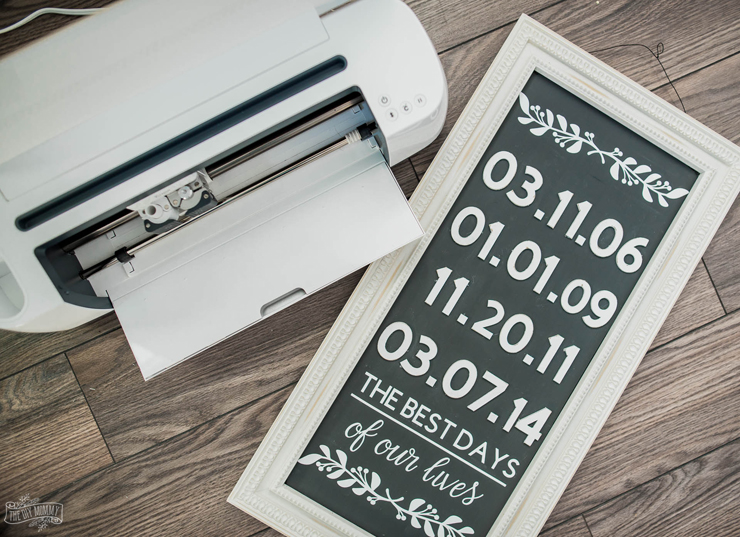
One of my favourite pieces of art was a poster I made of all of our family’s special dates – our anniversary and the kids’ birthdays. The other day, I thought it would be fun to give this art a revamp – a 3D revamp! – with my Cricut Maker and Cricut Knife Blade.
In case you missed it, I talked all about how to use the Cricut Knife Blade and Cricut’s Adaptive Tool System in last week’s post. You can check that out right here! That post will teach you the basics on how to use the Knife Blade with the Maker to cut thick materials like the chipboard I’m going to be using in this project.

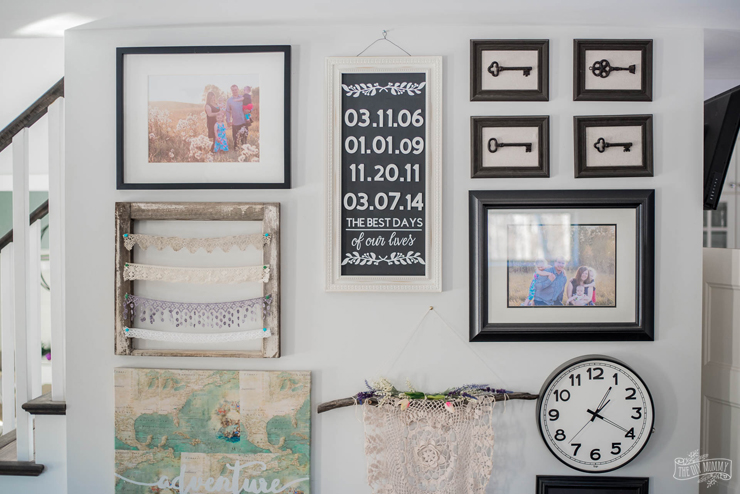
I’m loving how this sign looks on our living room gallery wall! Want to make a 3D sign from chipboard too? Let me show you how!
Materials:
- Cricut Maker and Cricut Knife Blade
- Cricut Chipboard
- StrongGrip mat
- Premium Vinyl (I used white)
- Vinyl Transfer Tape
- old sign, photo frame, or DIY a sign base with this tutorial
- leftover white latex or chalk style paint
- charcoal coloured latex or chalk style paint
- paint brush
- sanding sponge
- painters tape
- glue gun
Instructions:
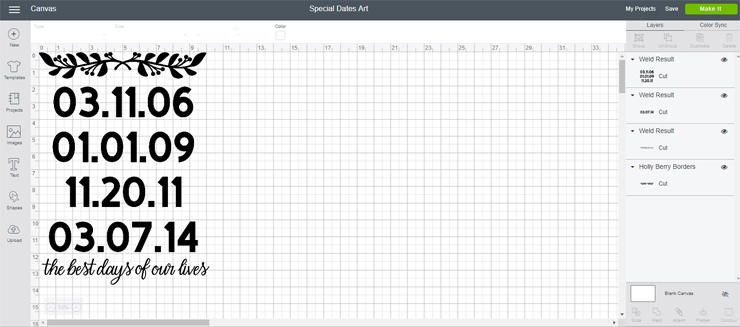
Start by designing your sign in Cricut Design Space.

I used some inexpensive graphics (the Holly Berry Borders), a pretty script font and a free font right in design space to embellish my design. You can find my design here if you like it and want to edit it for your own use. Make sure to adjust your design to fit your picture frame or whatever you’re using as a base. Also ensure that the art is no more than 10″ wide if cutting on chipboard like me.
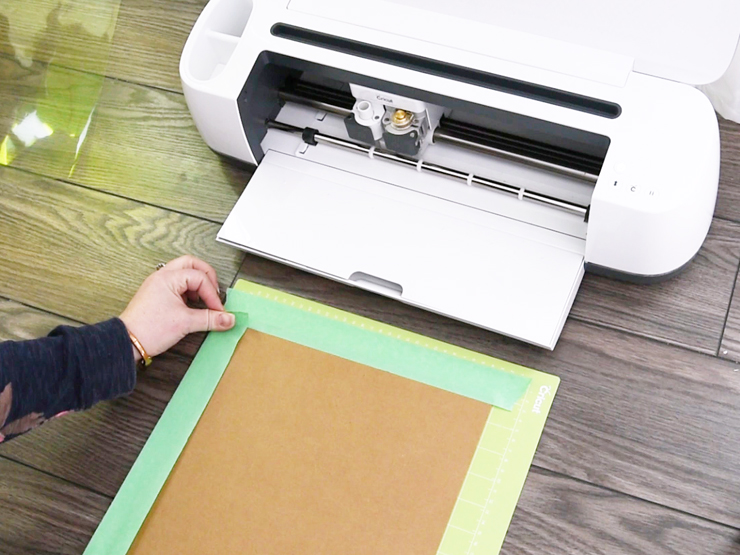
Next, prep your chipboard for cutting by centering it on a cutting mat and taping it with painter’s tape to the mat. You’ll also need to move all of your star wheels on your Cricut maker over to the right so that they don’t leave tracks on your chipboard.
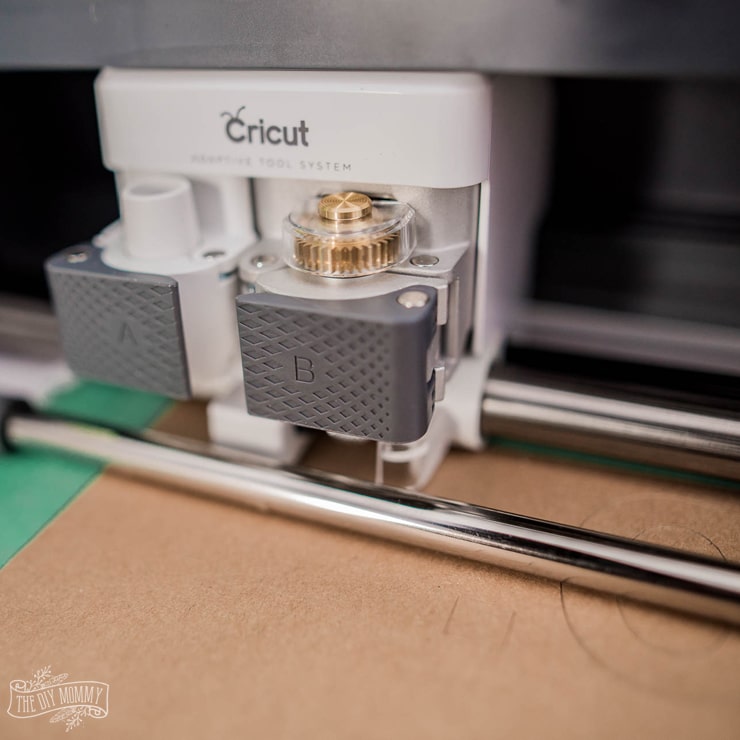
Hide the pieces in your art that you want to make in vinyl (I hid the smaller letters & the holly berry art – that’s too thin to cut with chipboard), and then send the rest of your art (in my case, the numbers) to cut on your Cricut Maker. Choose the heavy chipboard 2.0mm option and make sure your Knife Blade is installed in your Cricut. Press your Cricut start button and go!
Once your chipboard numbers are cut, you can hide them on Design Space, and show the rest of the art that you want to cut in vinyl. Load a sheet of Premium Vinyl into your maker, setup your cut, and cut the rest of your designs onto the vinyl.
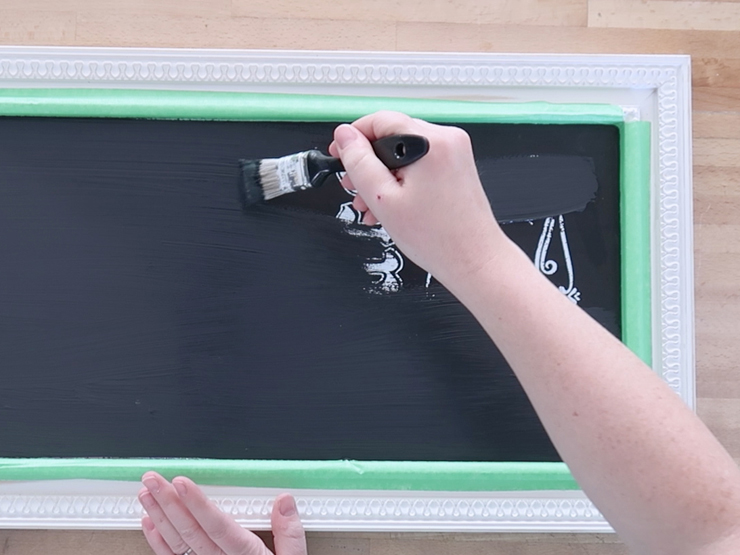
If you’re upcycling old art like I did, tape off the frame of the art and paint the back with charcoal coloured chalk style paint. You could also use a photo frame as a base for this artwork, or DIY a sign base with this tutorial.
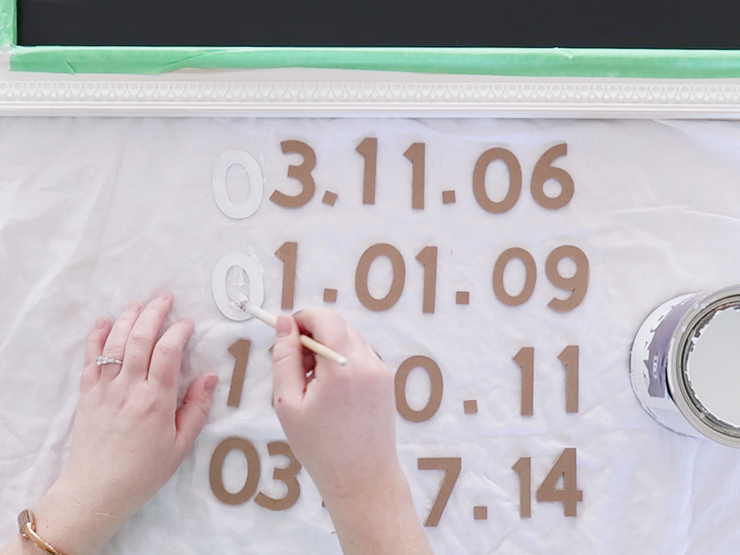
While that dries, paint the chipboard numbers you cut with white latex or chalk style paint. Make sure to paint the sides of the numbers, too. After they’re dry, you can distress their edges slightly by running a sanding sponge over them.
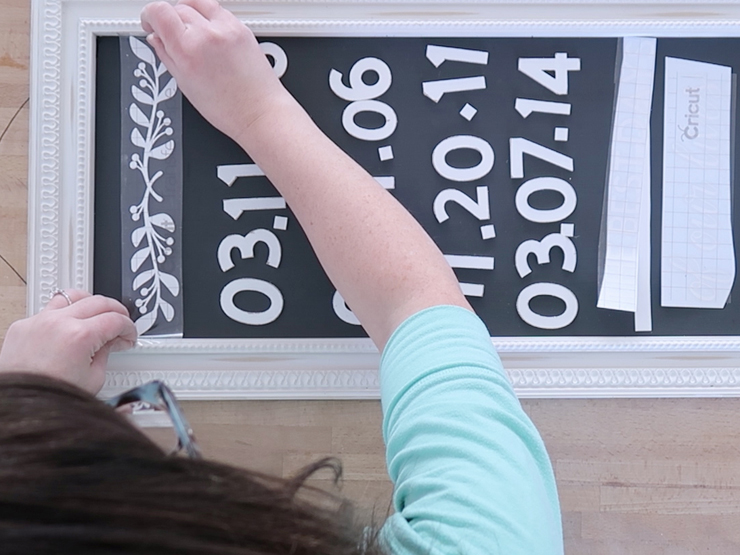
Once all the paint is dry, prepare your vinyl pieces by cutting them, weeding out the excess vinyl, and spreading a piece of transfer tape over them. Then, position all of your vinyl pieces and chipboard letters roughly on your frame to get an idea of where you want all of the elements. At this point, you can adhere your top and bottom vinyl pieces to your art as placeholders.
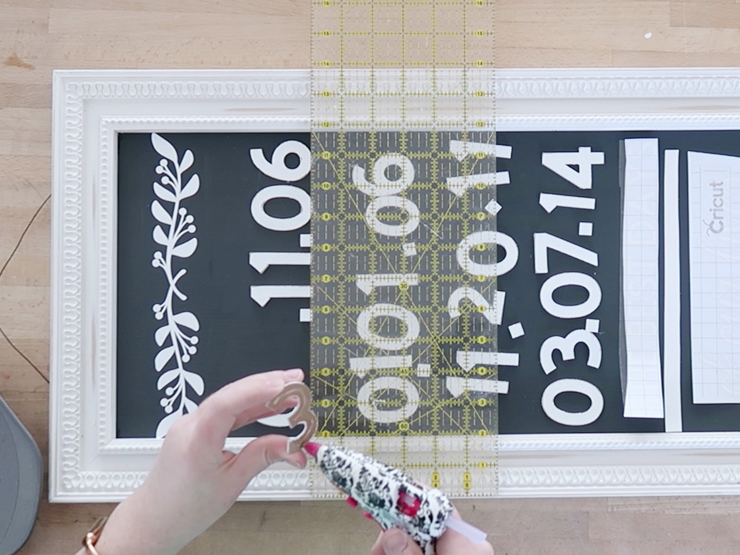
Use a clear ruler to position your chipboard letters on your art, and use a glue gun to adhere them to the back of the art.
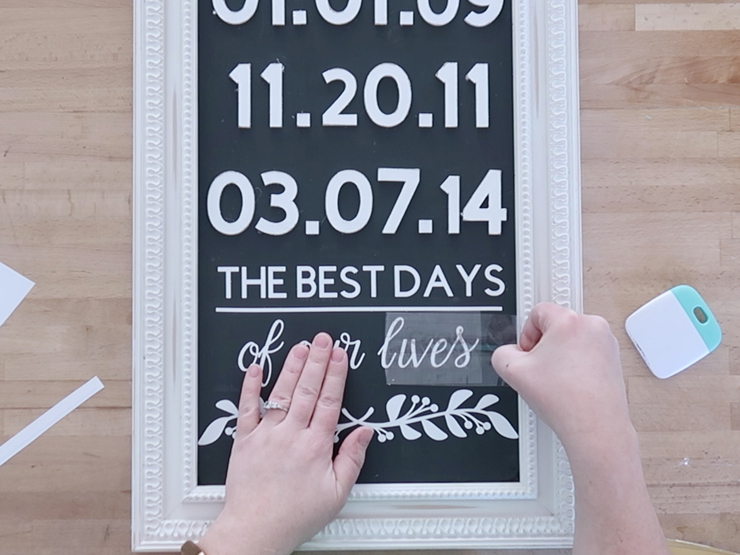
Finish the piece by placing and adhering your final pieces of vinyl.
All done!

This piece was a lot of detailed work, but the Knife Blade on my Cricut Maker makes it simple and fun! I really like the 3D effect I got with the use of the thick chipboard for the numbers on this piece.

Happy DIYing!
Now tell me: Would you ever try to make a 3D sign with chipboard and a Cricut Maker? Do you have any questions about the Maker; I’d love to hear in the comments below!
Hey Christina, This is an amazing article! Thanks for sharing the great content with us and I must tell you that 3D Sign looks so elegant in the picture. Keep posting like this.
Thank you!