Our DIY Camper: Renovated RV Tour
This post may contain affiliate links · This blog generates income via ads
It’s the last long weekend of summer, and it’s so bittersweet! I’m happy the kids are going back to school next week, but I’m sad too. We’ve had such a fun summer, and what’s made it the most memorable summer ever has definitely been Our DIY Camper. I’m SO glad that we bought what looked like a piece of junk, and put lots of elbow grease into it to turn it into a comfy and cute camper for our little family. All of the blood, sweat and tears were worth it! Today, I want to give you a full photo & video tour of Our DIY Camper including a list of what we did and links to our materials sources. I hope you find this fun and helpful in case you want to do a camper renovation of your own!

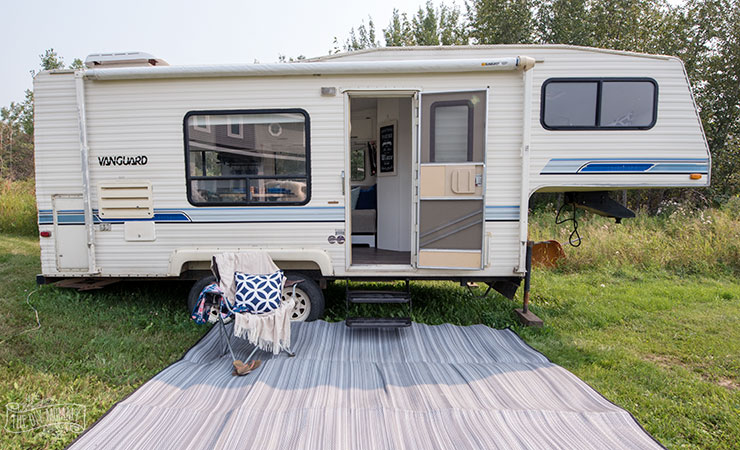
Here’s what Our DIY Camper looked like when we bought it in May of this year:

You can read more about the state of it when we purchased it in this blog post. There’s also a “before” video tour! It’s a 1993 Vanguard 5th wheel that had some water damage and a really dated interior that we purchased off Kijiji for $1000 CDN.
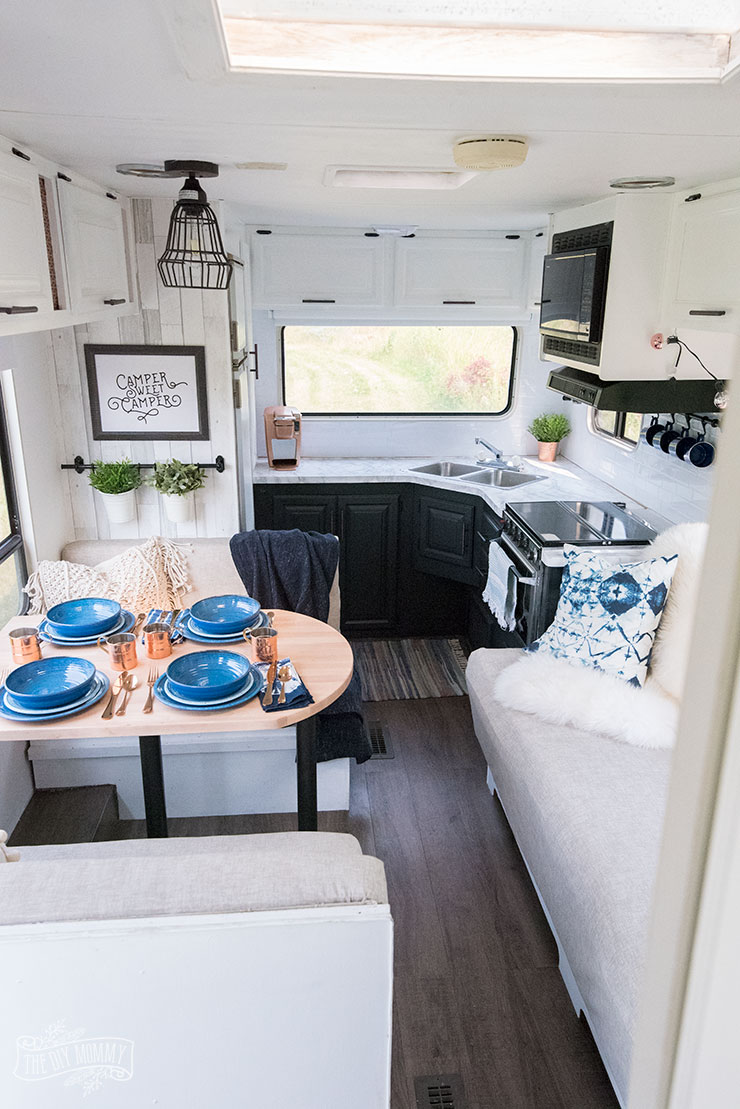
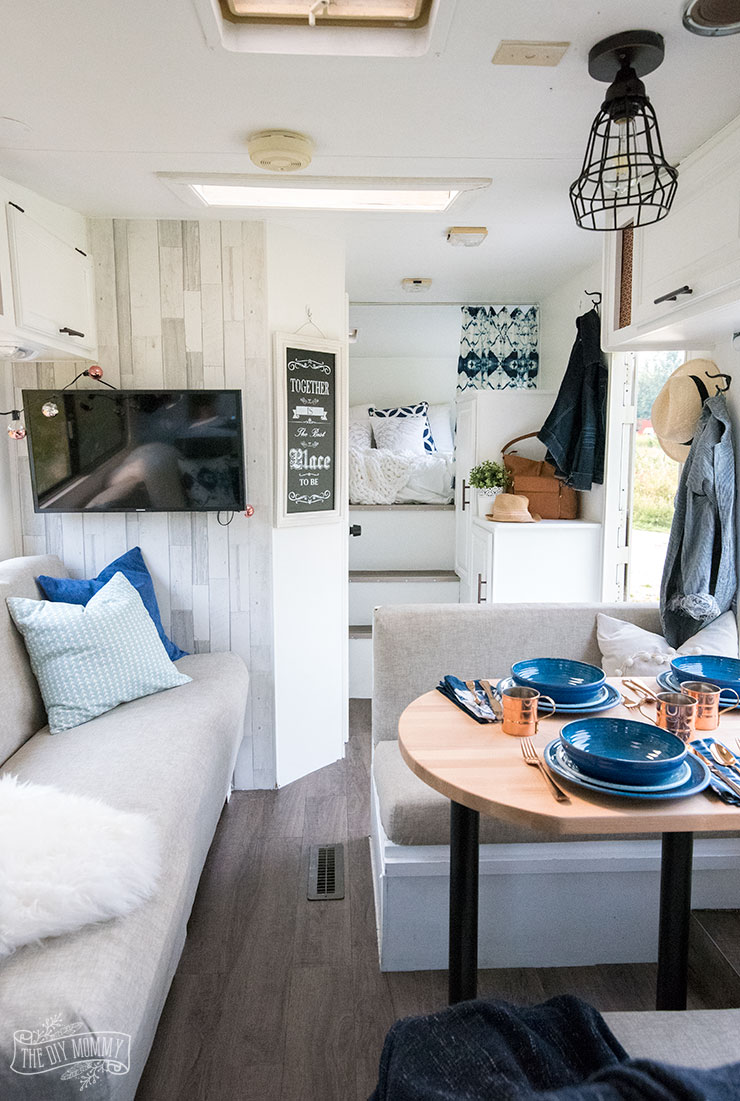
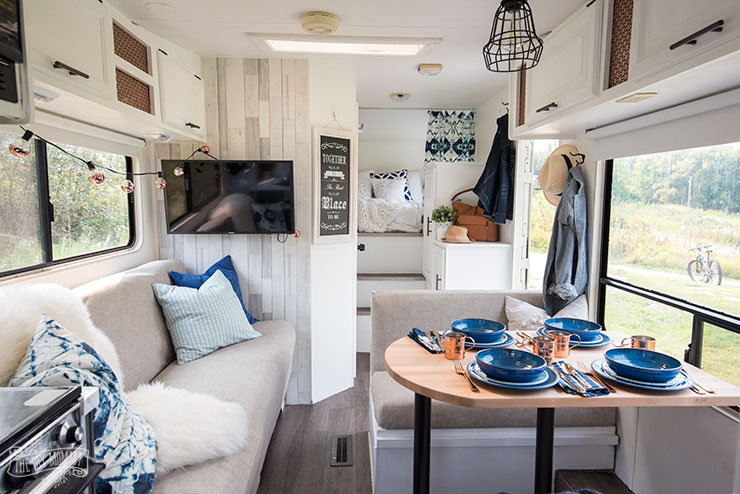
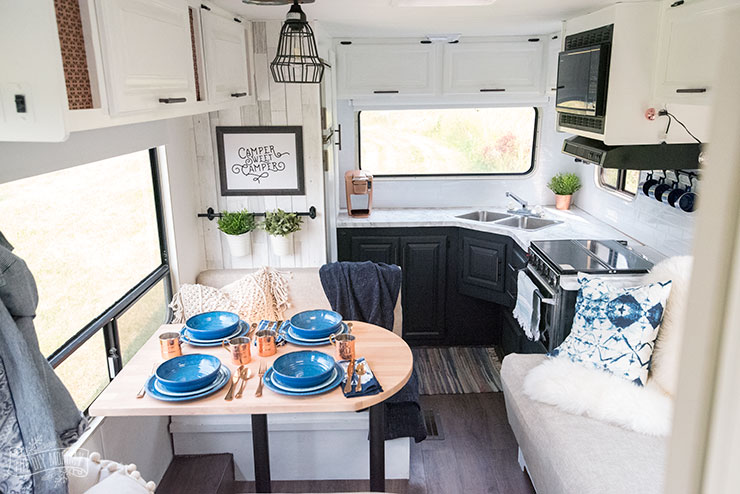
Here’s what Our DIY Camper looks like now:
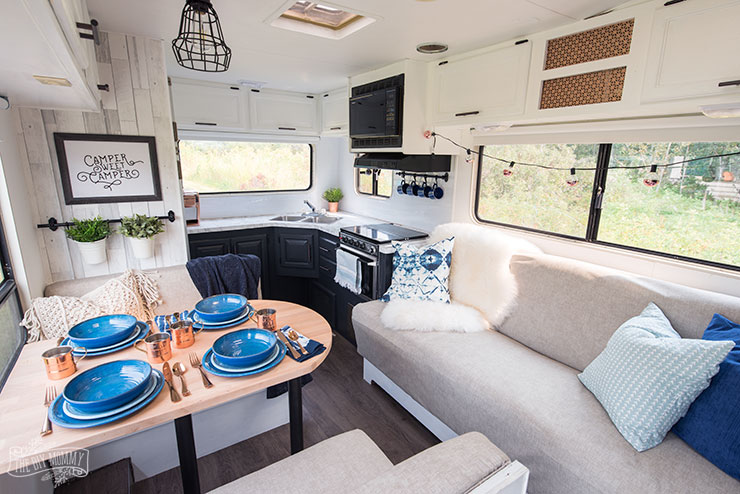
It looks a lot different, doesn’t it?! I’m so happy with how it’s turned out!
I had a lot of fun styling it and staging it for this tour, but if you want to see how it fairs during a real life camping trip, you can catch glimpses of it in this video of our camping trip to Whitecourt a couple of weeks ago.
Here’s a quick list of what we did to this camper over the past 4 months:
(Find a source list of the products we used & a video tour at the bottom of this blog post.)
First off, my husband Sean ripped off the entire back (kitchen) wall of the camper along with the floor in the back. There was extensive water damage in that area, so he replaced the entire thing with new wood and resealed the exterior. We managed to keep the kitchen cabinets intact, which was a miracle!
Next was all the painting. For me, this was the most labour intensive and frustrating job. The camper is small, but there are so many cupboard doors and nooks and crannies… it took a really long time! I think this step made the biggest difference in the look of the camper, though.
I painted the ceiling first, and then I painted the walls. I used leftover white latex paint I had in storage for everything. Finally, I removed all of the cabinet doors and painted the doors and the cabinets. I primed those first with an oil based primer, then I painted them with a latex paint, then I sealed them with Varathane. You can read more details on my camper cabinet paint job right here in the kitchen makeover blog post. The cabinets all got new, modern looking pulls which updated the look of the camper instantly!
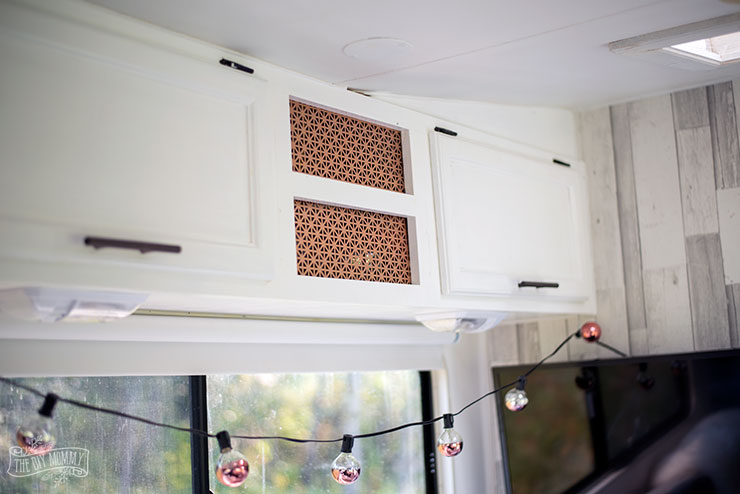
I filled any holes in the cabinets (that were previously filled with fabric) with some decorative aluminum I spray painted.
Spray paint also came in handy to give all of the hooks, door knobs, table legs, and cabinet hinges in the camper a low budget makeover. Everything was originally a bright brass, and I spray painted them an oil rubbed bronze.
Next, I created a couple of faux barn wood feature walls with some inexpensive wallpaper. I made the mistake of putting one up without priming the wall behind it first, and soon learned that you need to prime a camper wall before you paper it! Another helpful tool is a dehumidifier when you’re renovating an RV – it can get so humid that things like wallpaper and paint can take forever to dry.
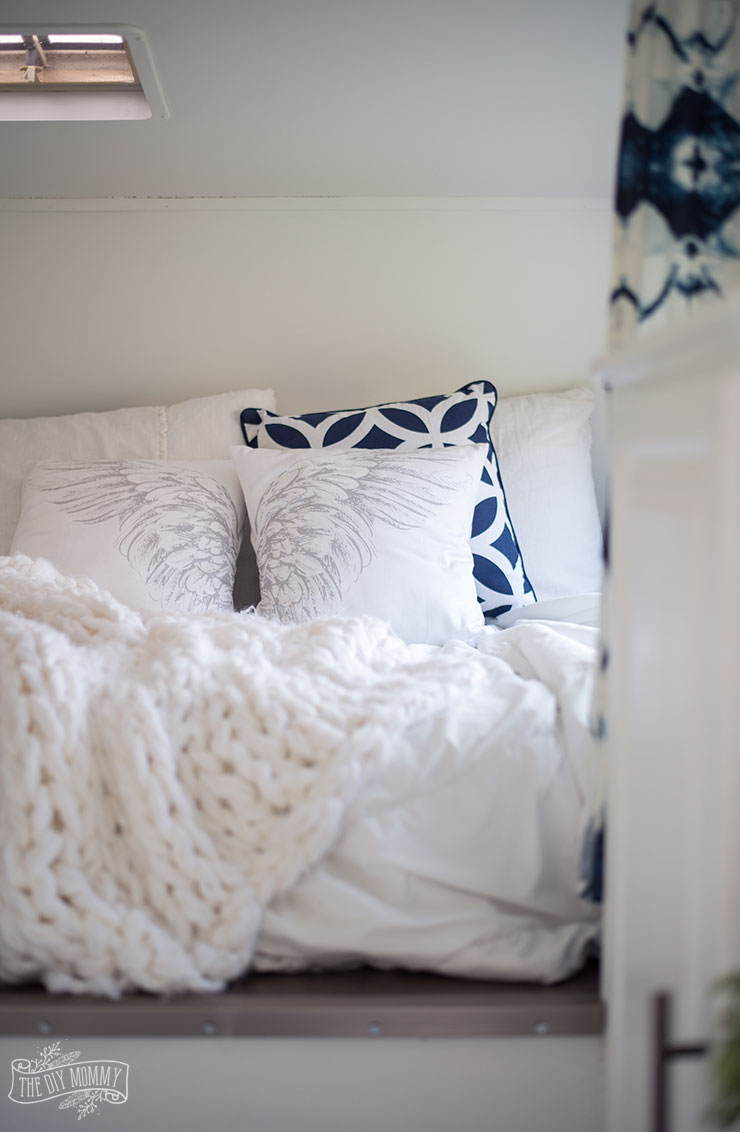

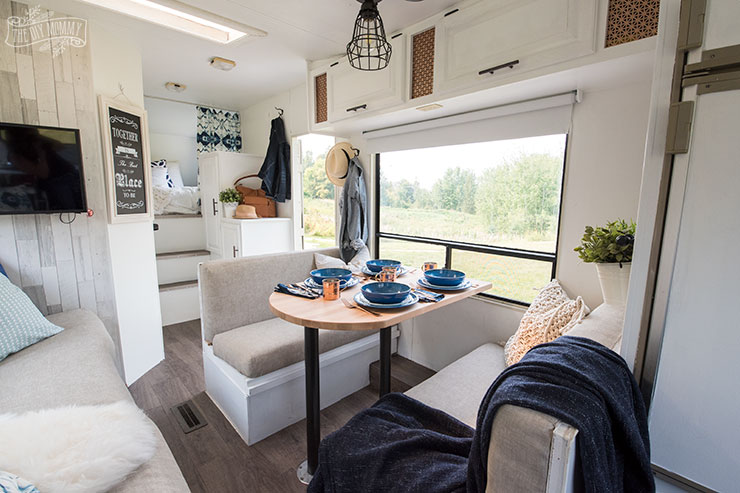
We put a new, comfy mattress in the “master bedroom”, and I sewed a little curtain for it.
To update the floors, I laid some wood-look vinyl plank right over the old linoleum. It was difficult to cut around lots of the angles, but I think the overall look is nice!
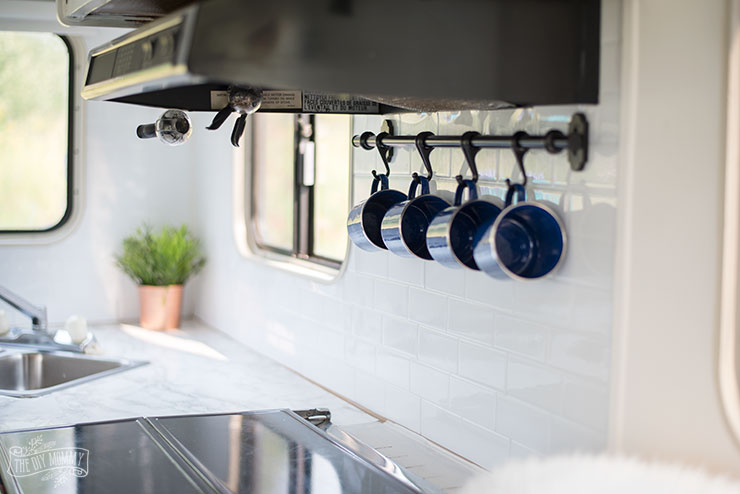
Some peel-and-stick tile on the walls in the kitchen give it a bright, modern look and I’ve been really happy with how this tile has held up this summer! I used a couple of hanging rods here and by the dinette for extra storage.
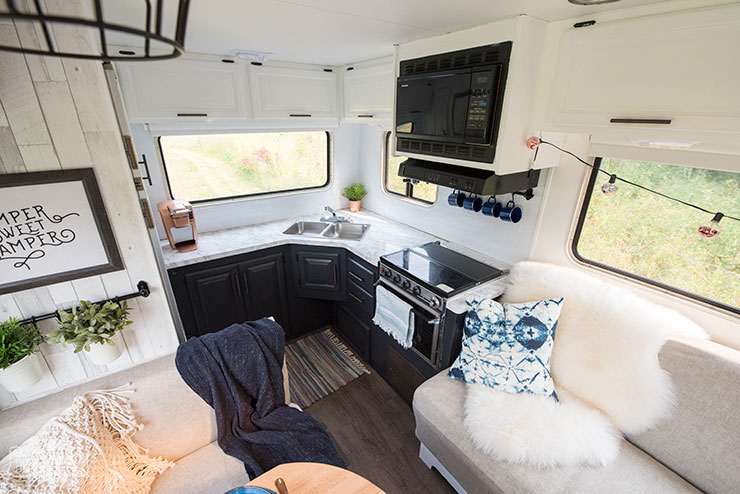
I covered the kitchen counter tops with some marble contact paper to add instant glam. They’re also holding up fairly well, though I don’t think I’d suggest using this method for a counter or table that gets more use than a camper.
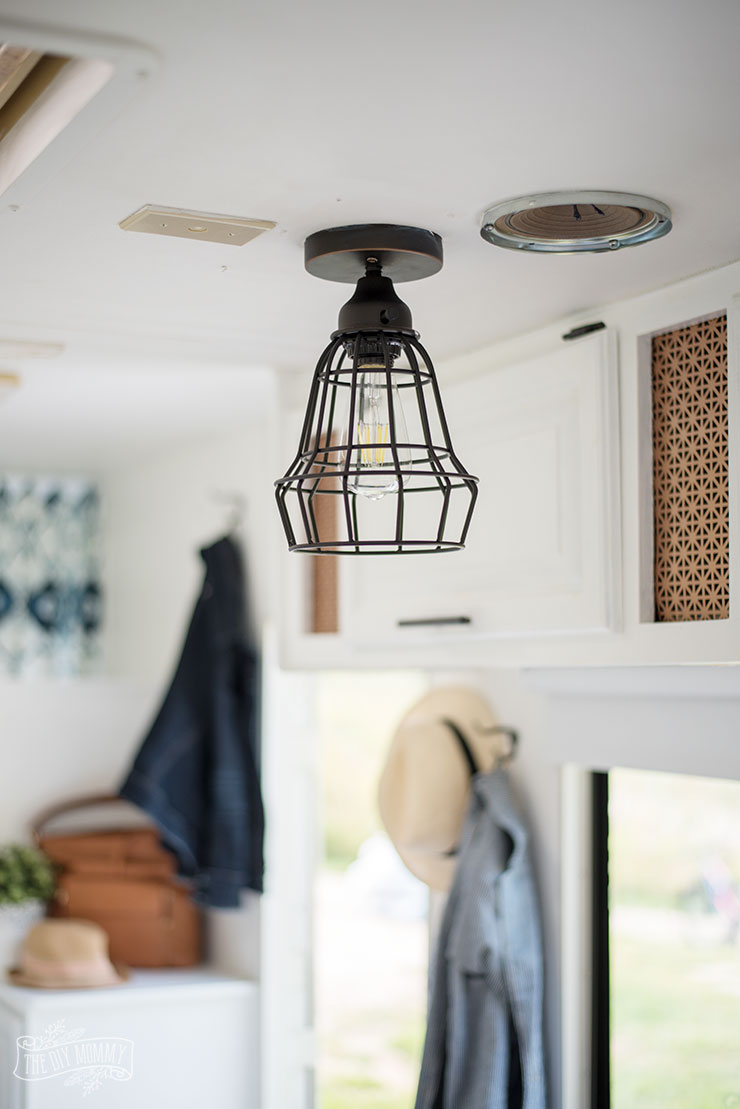
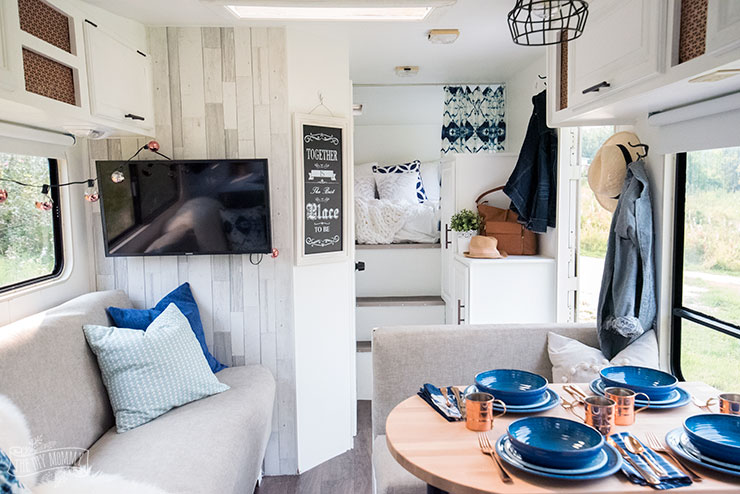
Next, we replaced most of the lighting in our camper with new LED lighting found online, and I ordered this light fixture as a feature over the table. It’s a regular fixture that we hacked a little to make it shorter, and we added a special 12V bulb that was suitable for the camper.
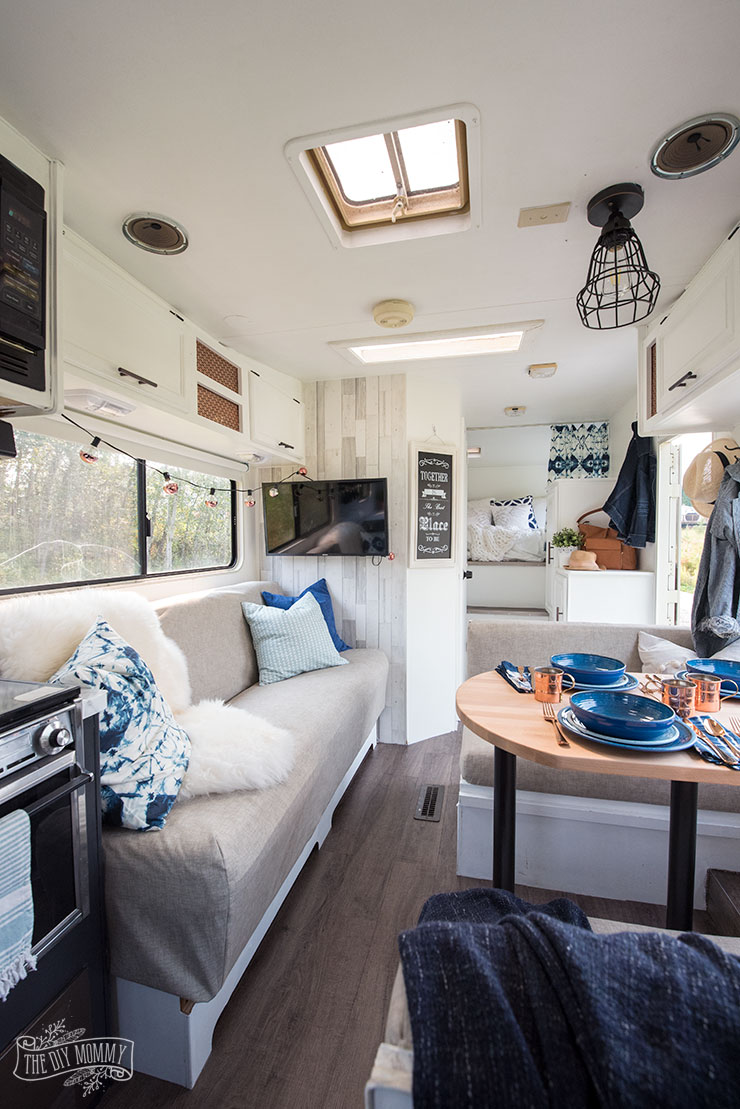
The foam in the jackknife sofa and dinette cushions was still in great shape, so I sewed a slipcover for the sofa and I recovered the dinette cushions in indoor / outdoor fabric. You can find a tutorial for the dinette cushion reupholstery here, and a video for the jackknife sofa slipcover here.
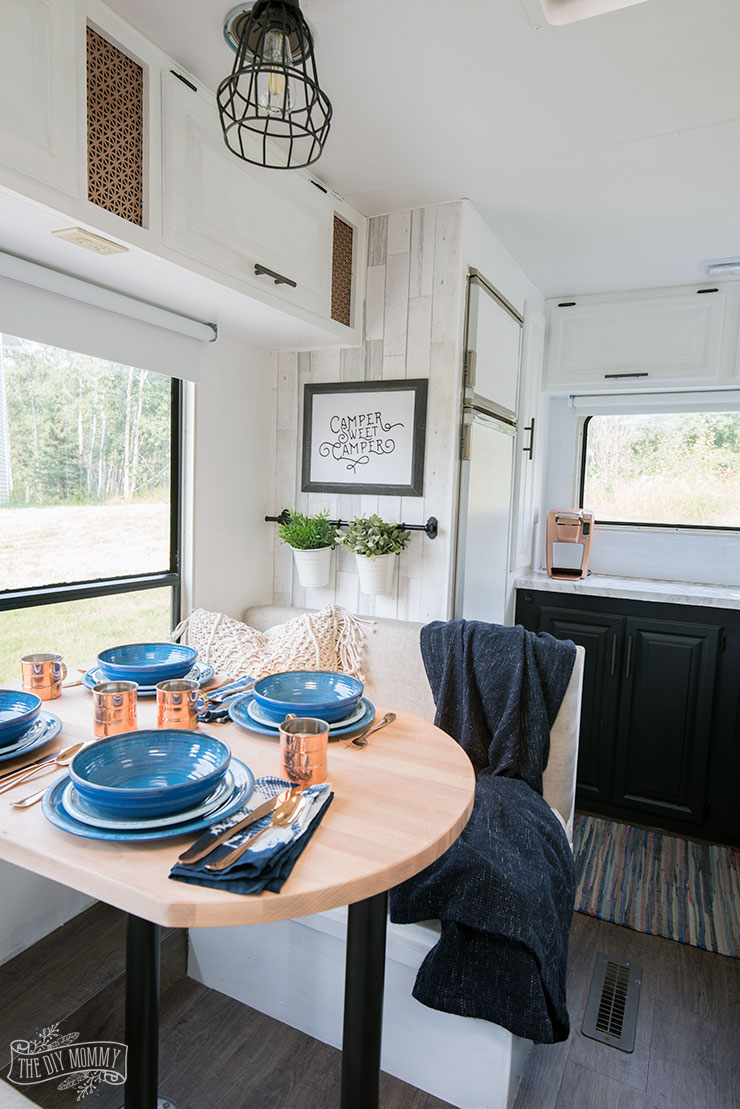
We replaced the dinette table with an Ikea butcher block desktop cut to size, and this tabletop also serves as a base for another bed when we want to fold the dinette down at night.
The final touches?
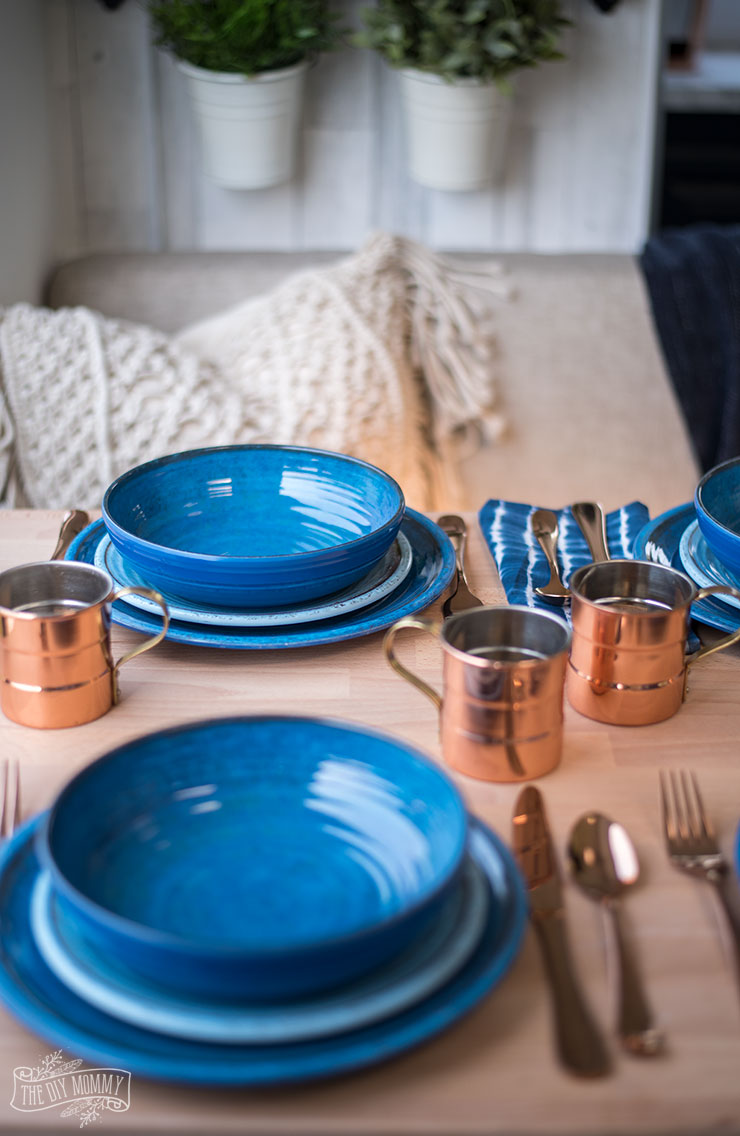
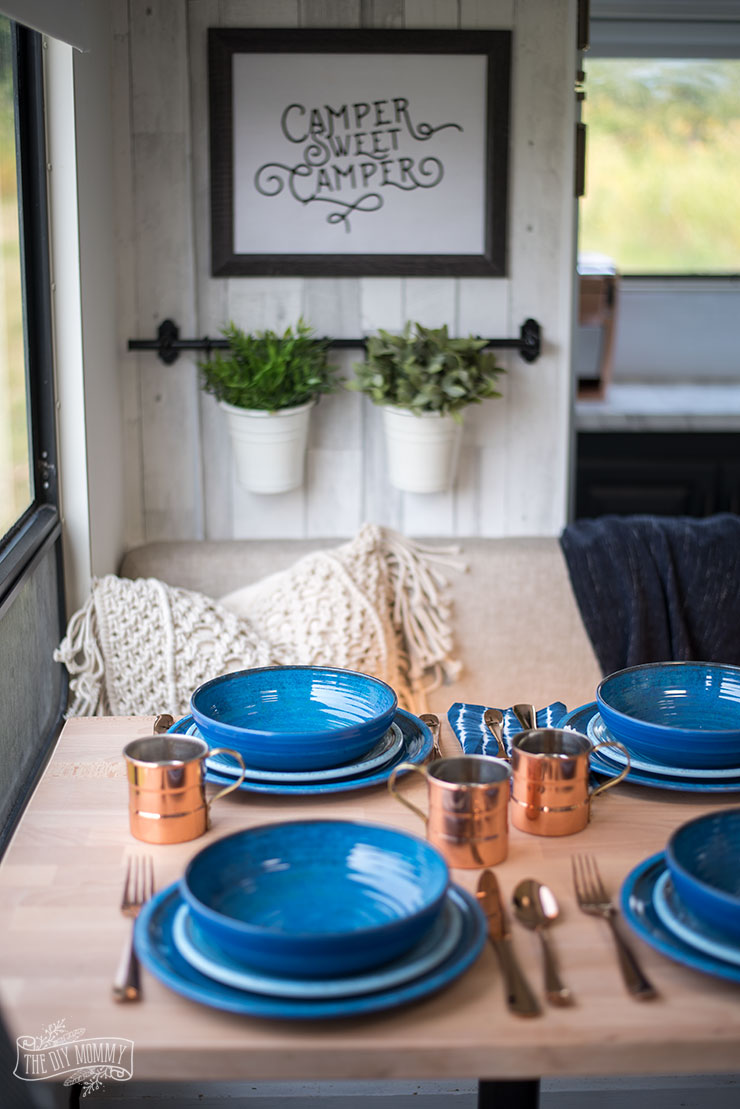
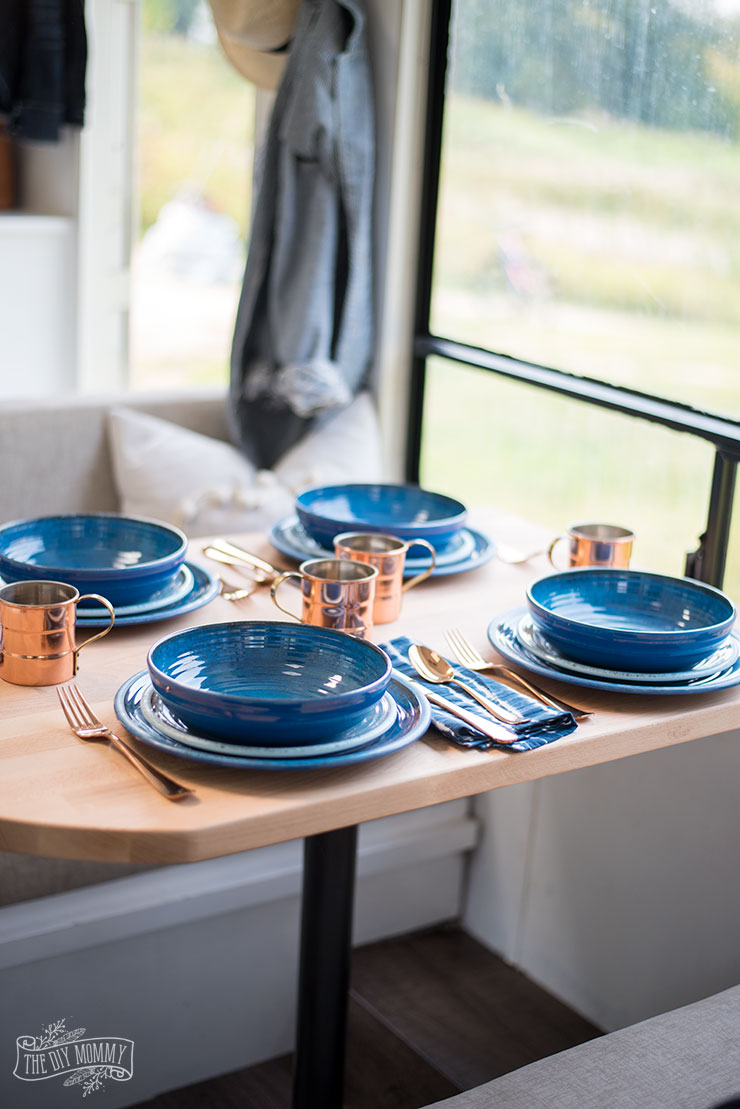
Melamine dinnerware in boho blues with copper cutlery and cups…
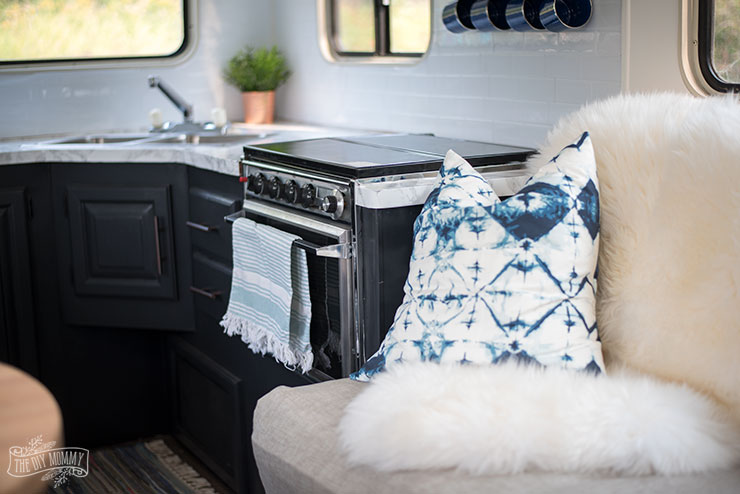
… a whole herd of throw pillows that can double as sleeping pillows in indigos and whites…
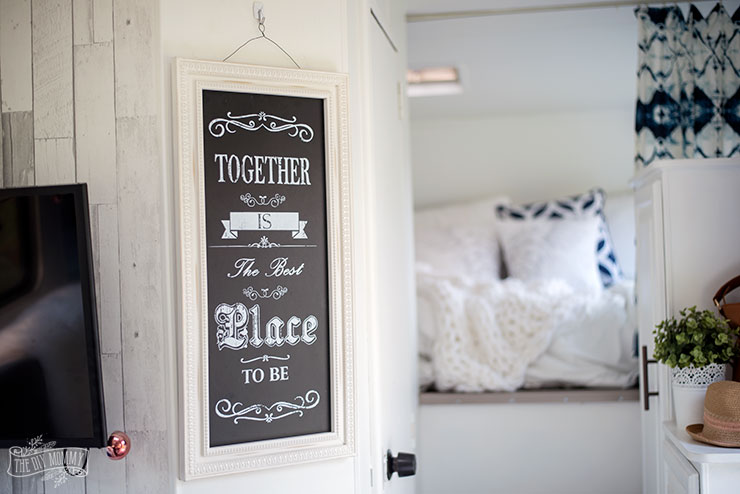
… some cute artwork…
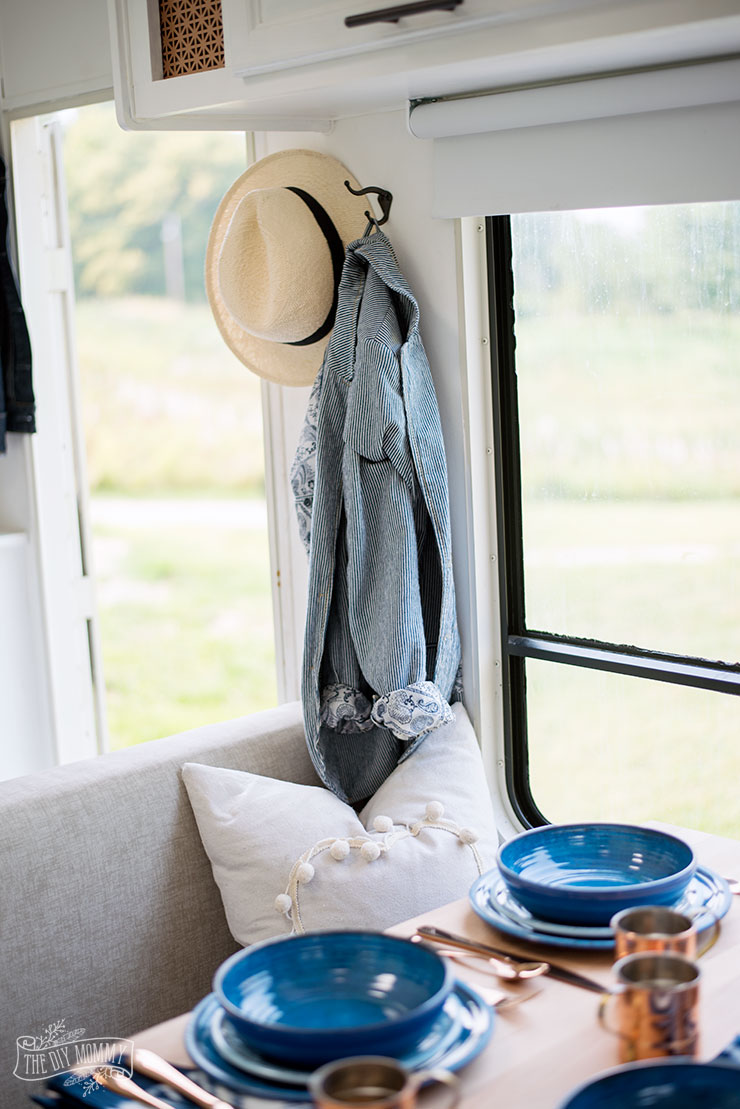
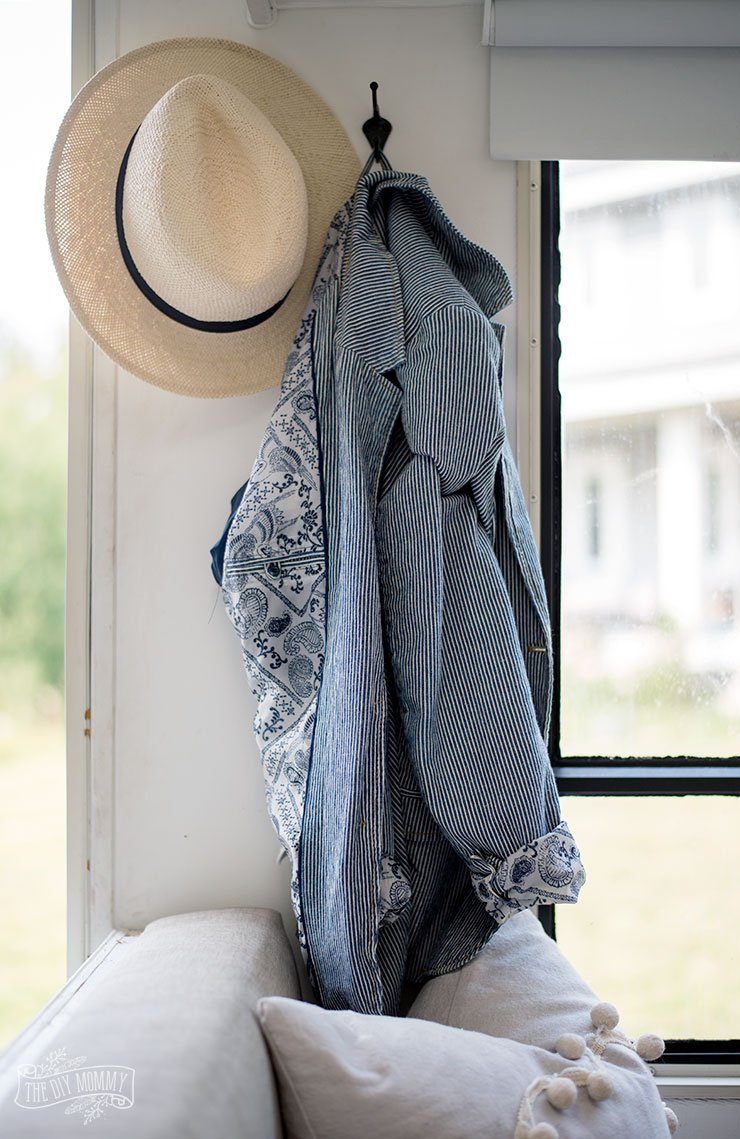
… and some string lights, blackout blinds, hats and jackets.
We are so in love with this camper, and the girls are already asking when we’re going to go again next! (We might just sleep in it in our yard this weekend!)
I wasn’t able to renovate the little bathroom in the camper this year, but that’s on the to-do list for next Spring as-is replacing some of the windows and the rest of the lights!
Our DIY Camper Source List:
- Paint: Valspar Ultra White, Benjamin Moore Simply White, Valspar Noir (lower cupboards)
- Wood Wallpaper: Home Depot (found in store; I can’t find a link online)
- Peel & Stick Tile: Smart Tiles Metro Blanco
- Marble Contact Paper for Counter
- Fabric: Shibori Design, Indigo Velvet, Indoor / Outdoor Griege Linen Look from Fabric.com
- Flooring: Allure Stayplace from Home Depot
- Cupboard Pulls
- Dinette Light Fixture (we hacked it to make it flush)
- Dinette 12V Edison Bulb
- TVs: 32″ Samsung Smart TVs from The Brick
- Mattress: Springwall Endeavour 3 Euro-Top Firm Queen Mattress from The Brick
- Melamine Dinnerware: Costco, in-store
- Copper Flatware: Walmart, in-store
- Copper Mugs: vintage
- Blue Enamel Mugs
- Spray Paint: Rustoleum Copper Rose & Oil Rubbed Bronze Metallic
- Aluminum Sheet (for cupboard inserts)
- Butcher Block Table Top: Gerton Desk top
- Black Out Blinds
- Hanging Rods
- LED Ceiling Lights
- Navy Bed Sheets
Take a video tour of Our DIY Camper:
Disclosure: This post contains affiliate links. When you purchase a product via these links, I receive a small commission at no extra cost to you.
Looks fantastic!! You did a great job.
Thanks, Erin.
This looks terrific, Christina! Just loved how you and your husband updated and modernized the interior using basic supplies and materials. The peel and stick options that are out there now are so lovely!
Thank you, Jelica.
I am obsessed with this! Such a great job! How much do you think you spent on the renos (besides your time)?
Prettiest trailer ever!! Who says trailers can’t have white kitchens?? Love all of it!!!!
Thank you, Kendra!
Where did you find your artwork?
Christina made it. Watch for the printable as she will be sharing it soon ?
I love this! We just purchased a 5th wheel and I can’t wait to update it as well! Thanks for the awesome ideas. I would love to know where the cage light and how to make the camper sweet camper sign!
How wonderful! Your family will have so many wonderful memories.
Keep an eye out for the printable of the camper sign ?
Just awesome. I wish I was as resourceful as you and your husband. I love your simple and elegant tips. Amazing kitchen you have there.
Thanks for sharing.
Thank you, Susan.
The camper reno looks great! I just saw the before post and had to search for the after because I wanted to see how it turned out. Great work! my family loves out camper and i’m sure yours will too.
Thank you, Jason!
Hi,
Super helpful tips. Never thought one could have an RV tour look so classy. Awesome job – you inspire many.
Thanks for sharing great tips.
Thank you, Jane.
Wow! Huge space and cool interior design. It is even better than my room. haha
Thanks, Sarah!
What you accomplished is nothing short of incredible. Well done!
Thank you, Neil!
It’s looking amazing. This is really great information. I like your article. Thank you for shear a great information.
Gr8 ideas. Thanks for sharing. Yep – prep and the right equipment is everything when it comes to camping! Took me years to perfect our checklist and I recently put that on my site to help other fellow campers. Stop by if you like. Camp more, worry less. 🙂
Thank you, Michael
Lindsay, the change is nothing short of awe-inspiring. And I think the help from your husband is what made this possible. I can’t imagine how daunting it would be to do this on your own just as you echoed here: “Next was all the painting. For me, this was the most labour intensive and frustrating job.”
Thanks for being a motivation to the rest of us!
Thanks! I would have to agree, Christina and her husband did an amazing job! Their hard work definitely paid off.
I love the renovated rv. Great deco. Do tell where you got the pinstripe and paisley jacket or at least the brand name. Thanks for sharing the wonderful rv pics.
I love the renovated rv. Great deco. Please Do tell where you got the pinstripe and paisley jacket or at least the brand name. Thanks for sharing the wonderful rv pics.
Love what you have done to our old trailer!! So bright and fresh. Definitely a lot of sweat required to get it updated. Can’t wait to see what you do with the bathroom.
So many memories were made while using this unit with our boys. Enjoy making memories with your family!
Inside looks really awesome, you shared the great pieces of information. loved it!
Thanks, Alan
I LOVE your RV Remodel, it is gorgeous, thanks so much for sharing! The link to your Butcher Block Table Top Desk isn’t working. I would love to use this idea in my trailer remodel but couldn’t find anything like it at ikea.com. Do you have a different link or do they not sell them anymore?
Thanks so much!!
They no longer carry it ?
Your renovation is a complete 360. Thanks for sharing. I plan on starting with painting my Class C just so I don’t have to see the cheap wood paneling. Definitely will paint it a white shade of color. Appreciated you sharing the paint colors: Valspar Ultra White, Benjamin Moore Simply White, Valspar Noir (lower cupboards). i will probably use the same as I have been wondering what white color to go with.
Thanks so much!!
Brilliant article. My partner and I have been wanting to renovate a campervan for years and this gives us the inspiration we need. Fantastic article.
You will love to results! It takes work but creates so many new memories
I love all of these ideas! How do you get your dinette table to fold down for a bed? Do you have to take the legs off? Or are they on hinges?
Hi, I love you remodel! I would like to do something similar with our dinette table. How does yours fold down? Does that middle support come off easily?
Hello, you did amazing!! I am curious about that light fixture over the table. Did you have to rewire it for a 12v bulb? I’m wanting to upgrade mine but am wondering how to be able to use a normal fixture with the rv bulbs? Thank you in advance!!
Wow! I even never thought I can organize our RV in a campaign this way! Yours is looking great and clean. I never did ours like you. But, in our next campaign, I will definitely follow your tips and hope will get an organized RV! Thanks, Christina for sharing such a wonderful idea!
I love the remodel! We just completed our first remodel on our camper.
Lovely space! Please tell me more about this light fixture hack!! Is the fixture 12v or 120v and if the latter, please explain how you made it compatible w the RV wiring. I’m stuck at this point in my camper renovation. Thank you
Great one! Love it.
I am getting ready to remodel a 34ft Class A motorhome and I am curious how you hang stuff ? I have used the Velcro command strips for a few things but not anything real heavy like your coffee cups under the microwave! You did a beautiful job!!
Christina used short wood screws
Hi!!! Great job! I love it. Would you be able to share what you used for the dinette table legs? I want to use black but can’t find much.
Thanks for sharing!
When replacing floor i think you said to lay the stick on flooring over vinyl
I have vinyl then carpet then vinyl again. If i remove carpet do i need to removed vinyl too? Who’ll the vinyl make the flooring i even where i take out the carpet?
What is the best way to refloor?
How did you hang the curtain for the bedroom? Love the makeover! And, so excited to try some ideas on our RV that we are renovating! Thank you
Love the whole Scandinavian feel with the fit-out. I’m in the process of fitting out a campervan with a similar interior style, but I’m on a really tight budget so trying to buy stuff that looks good but doesn’t hurt the pocket.
Hi there, looks great! How well have the black table legs held up? I want to do this but we will be putting it down nightly for A bed
They held up well!
Hello! Can you please tell me as much info about your stove/oven?
We are trying to find a propane one for our motorhome and id prefer a stainless look
Sorry! This is the one that it came with 🙂