Step-by-Step Guide to a Beautiful TARVA Dresser Makeover
This post may contain affiliate links · This blog generates income via ads
Does your closet need a little something? Maybe you need a fresh new look or some extra storage and you’re just not sure how to achieve it. Today I’m sharing a fun and easy IKEA TARVA hack to help you turn your boring storage into a beautiful piece of furniture.
I had the opportunity to partner with Brookfield Residential and turn one of their builder grade walk-in closets into something special with a modern industrial makeover! The part of this makeover that I want to share with you today involved adding more storage by using an inexpensive IKEA dresser. Follow along to learn how to turn a dresser from a simple piece of furniture into a beautiful high end-looking piece of furniture! Inside this DIY TARVA dresser makeover tutorial I’m going to share how I used some inexpensive paint and stain, thrift store accents and some simple tools to create the perfect modern dresser for this space.
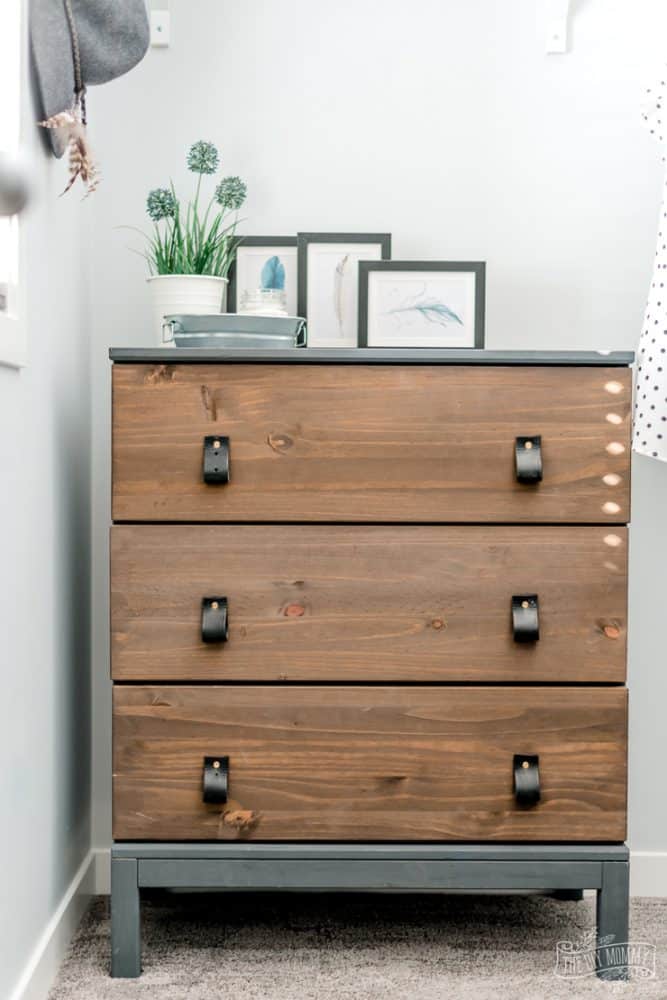
First, I found an inexpensive dresser at IKEA, from the TARVA line. It is simple with clean lines, which made it the perfect candidate to make over and turn into the industrial piece I wanted.
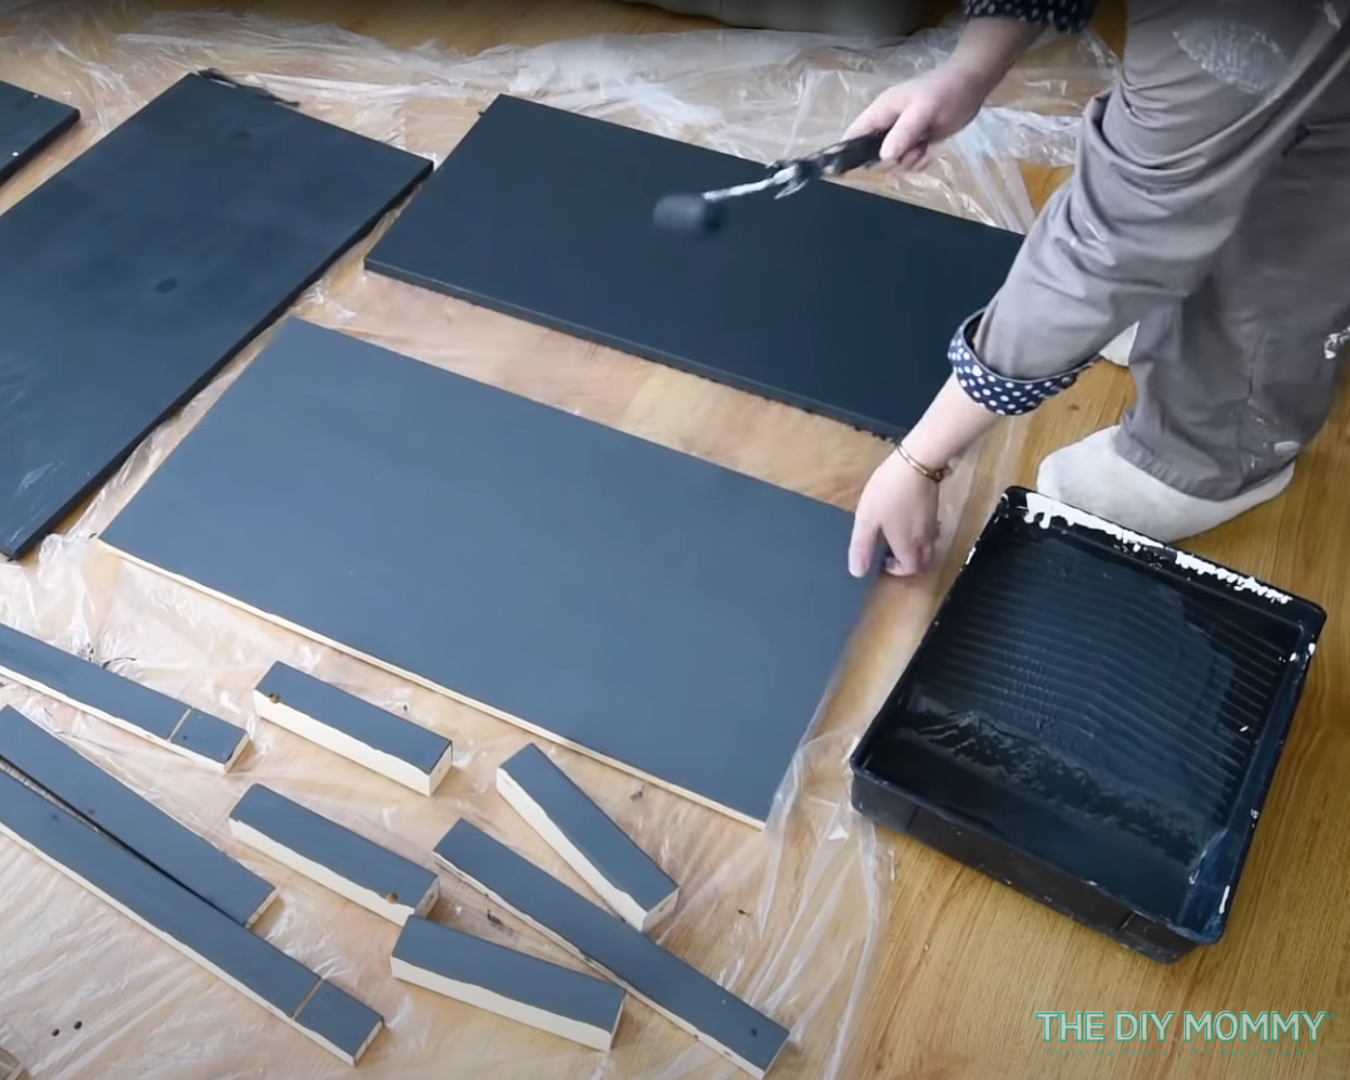
I decided I wanted to change the color and make it darker to go with my industrial theme. The color I chose was Charcoal from the Chalked Paint brand. I really wanted it to stand out against the white paint on the wall and create an interesting focal point. I laid all the outside pieces out: the top of the dresser, the back and each of the sides. Basically everything except the drawer fronts. I used one coat of paint with a foam roller to paint over the solid wood. And because it was a dark color and has such good coverage, I didn’t need to use primer first. This was so easy!
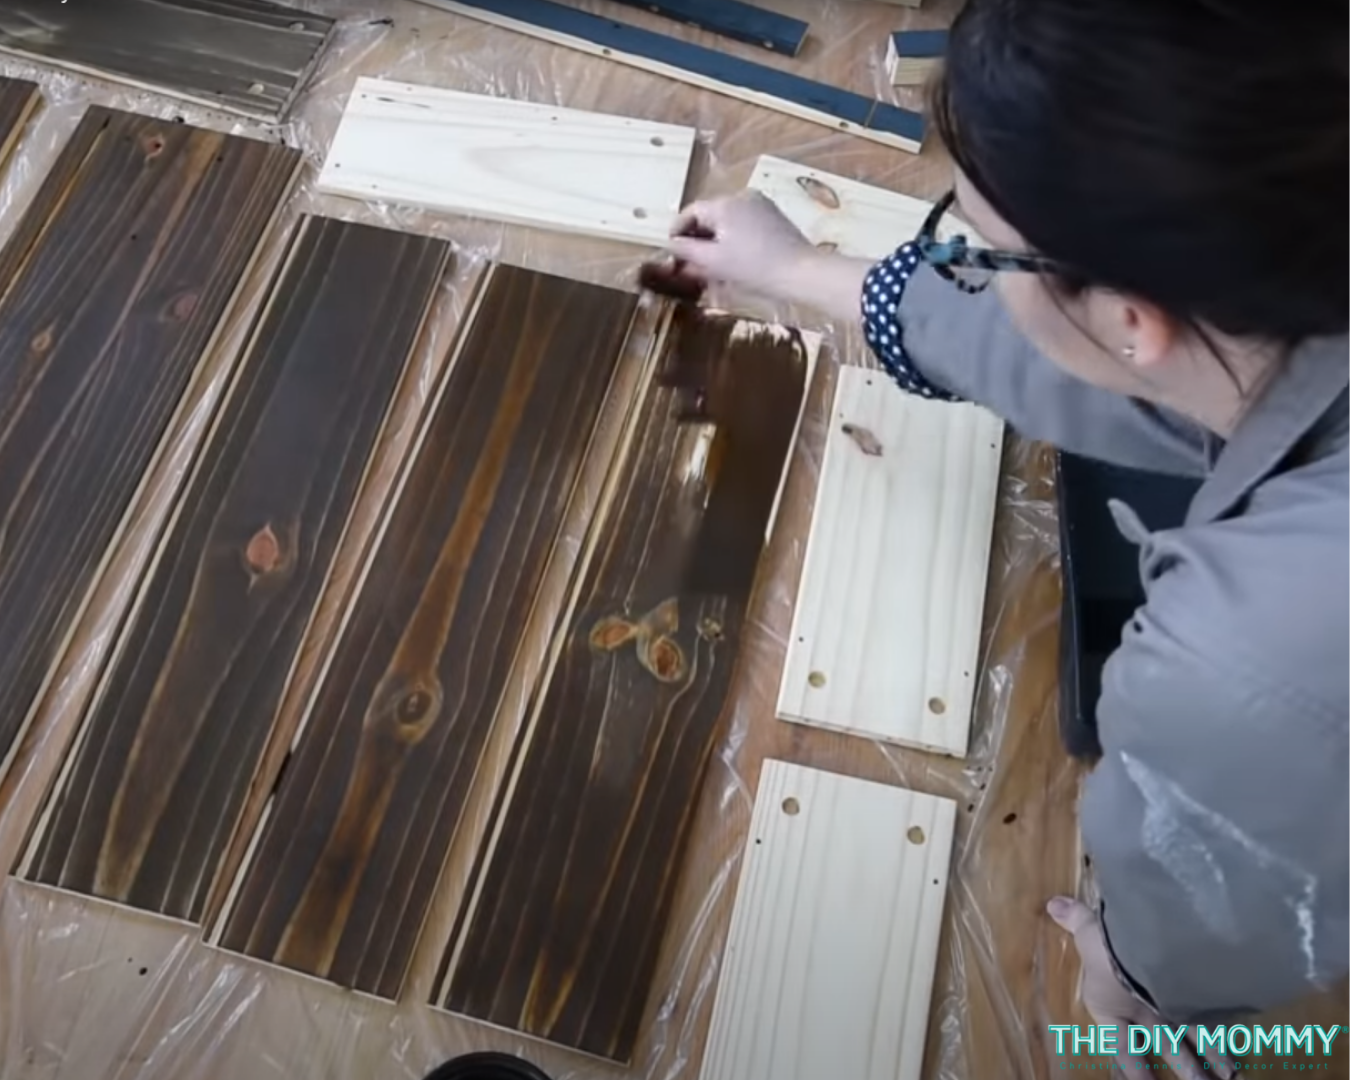
For the next step, I used an age accelerator wood stain on the front and sides of the drawers. I wanted to keep some natural wood for this dresser, and this stain turned out exactly as I had hoped. I love the classic industrial look this created and the greyish-brown tone. It was much better in the space than the original pine look.
For this TARVA dresser makeover, I also wanted to create new drawer pulls rather than handles or knobs. So, I went to my local thrift store and found a vintage leather belt that had the perfect industrial look. I cut the belt into 5 1/2″ pieces, folded them in half, and then used a leather punch to make a hole in the top and bottom of each piece. Then I folded each piece in half and threaded a brass bolt into each hole, securing it to the dresser with a nut. I was so impressed with how this turned out! It’s amazing what new hardware can do for a piece of furniture, and I love the texture the leather adds.

I love that the entire dresser was transformed before I even put it together! I followed the instructions from IKEA and assembled the dresser. Then, it was ready to put in the closet and accessorize.
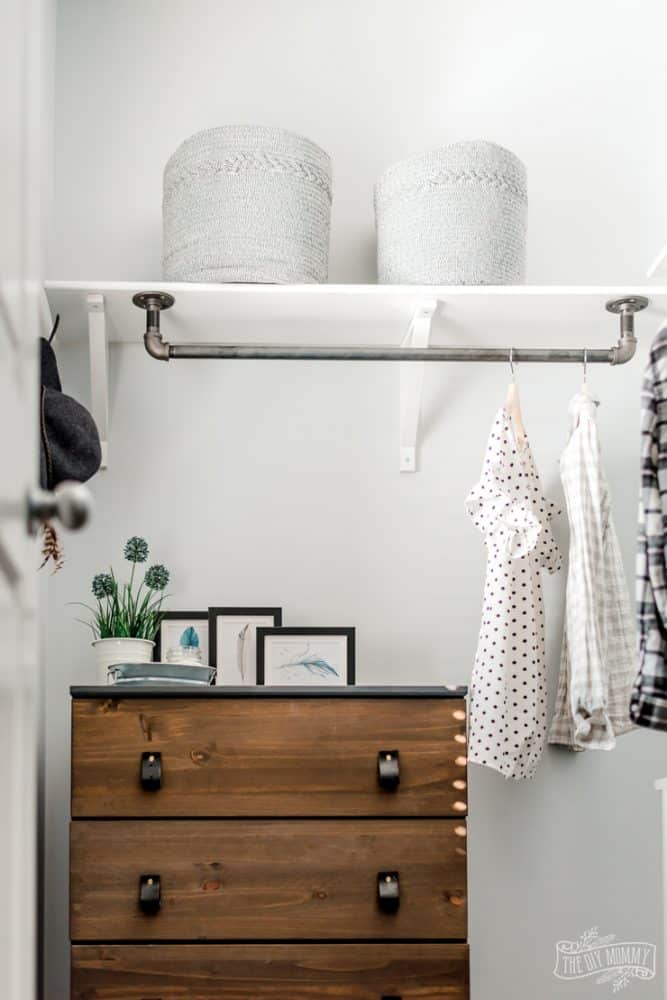
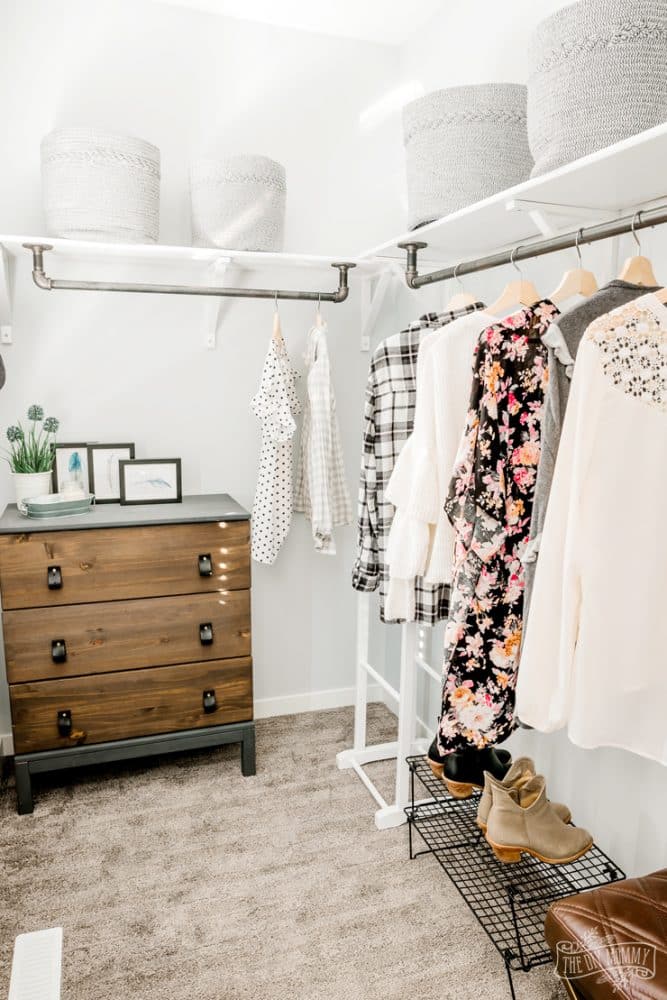
This DIY industrial piece looks amazing in my industrial closet makeover, alongside the new shelves and closet rods made out of plumbing pipes which add to the industrial look. But of course, I couldn’t leave the top of the dresser bare! I found some beautiful free printable feather art online, printed it out and framed it in some affordable IKEA frames. These art pieces along with a faux plant and a tray (for holding items like jewelry or keys) completed the look perfectly, and even added to the function of the piece in the space.
This TARVA dresser was so easy to make over! This IKEA dresser hack would also look great as a nightstand in your primary bedroom, or in a nursery, or kid’s room. You could also swap out the paint color and use different drawer fronts to create your own DIY project. I would love to see this dresser with blue paint on the sides and cane webbing on the drawer fronts. Use your imagination!

I hope you love this DIY TARVA dresser makeover and get the chance to make your own! If you do, make sure to share it with me by tagging me on Instagram @thediymommy. I would love to see your finished result.
If you’re looking for more DIY inspiration on a budget, come take a look at all my favourite IKEA hacks!
PIN ME!