The Best DIY Boho Headboard Hack (Make it in a weekend!)
This post may contain affiliate links · This blog generates income via ads
Want to know a simple hack on how to create a gorgeous DIY boho headboard in a snap? Let me show you how I made one for my daughter’s bedroom!
A unique headboard can absolutely make a bedroom. It can be a beautiful focal point that defines the style of a space and draws the eye. One of my favourite styles of headboards (and rooms in general!) is the boho style. The bohemian decor style features vintage and retro elements, lots of nature-inspired accents, and intricate carvings and art.
To make a boho styled bedroom, a bohemian inspired headboard is a must. However, intricately carved headboards can be expensive and knock-offs difficult to create. When I was decorating my daughter’s bedroom a few years ago in a rich & moody boho theme, I discovered a simple hack to create an absolutely gorgeous headboard! This headboard would look beautiful in a kids’ room, or in a primary bedroom, and can easily be made in a weekend.
Sourcing a carved wood screen
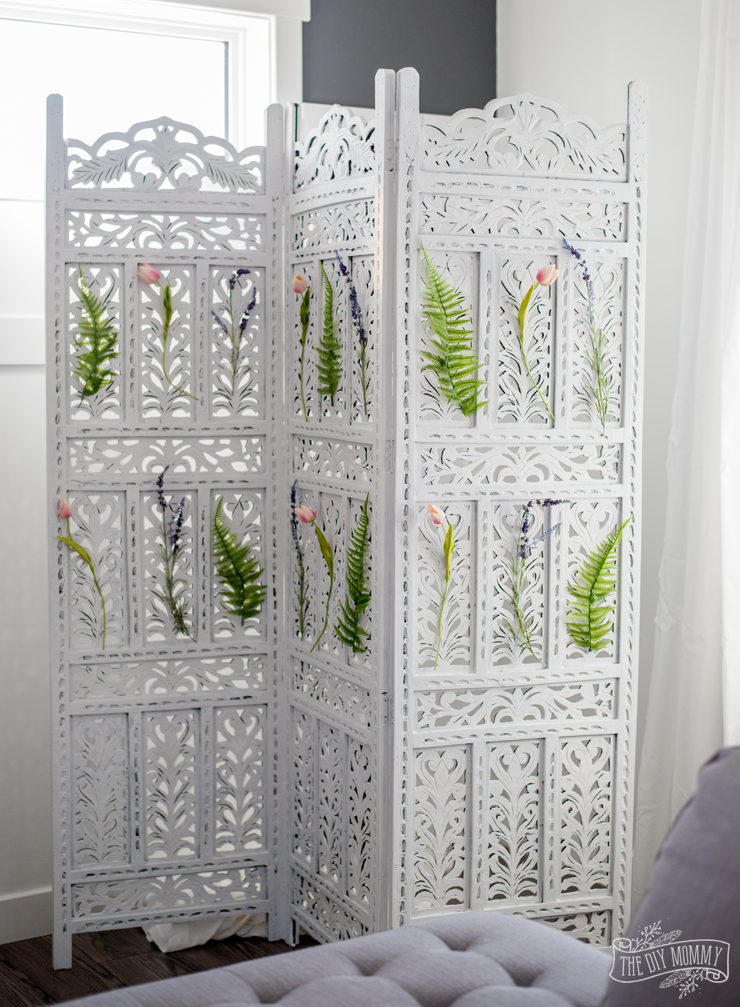
A few years ago, I found a vintage wood screen at my local antique store. It’s a carved wooden room divider that’s actually very similar to this budget-friendly one at Wayfair if you want to do a similar hack! First, I painted it with white chalk style paint and I used it as decor in my living room to fill a corner:
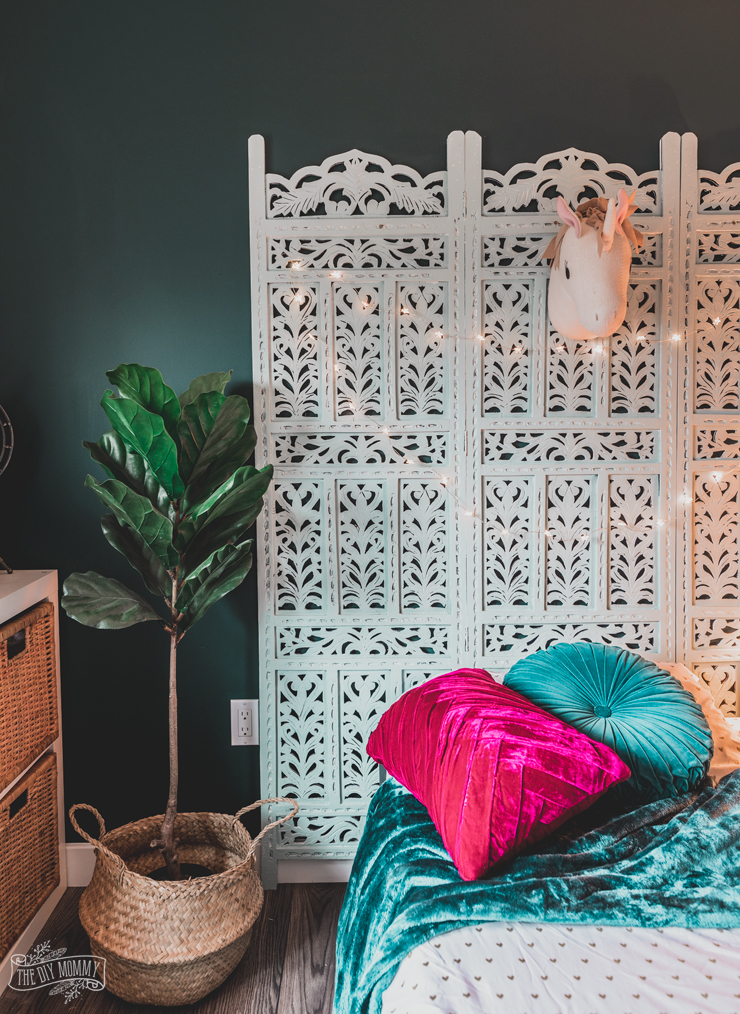
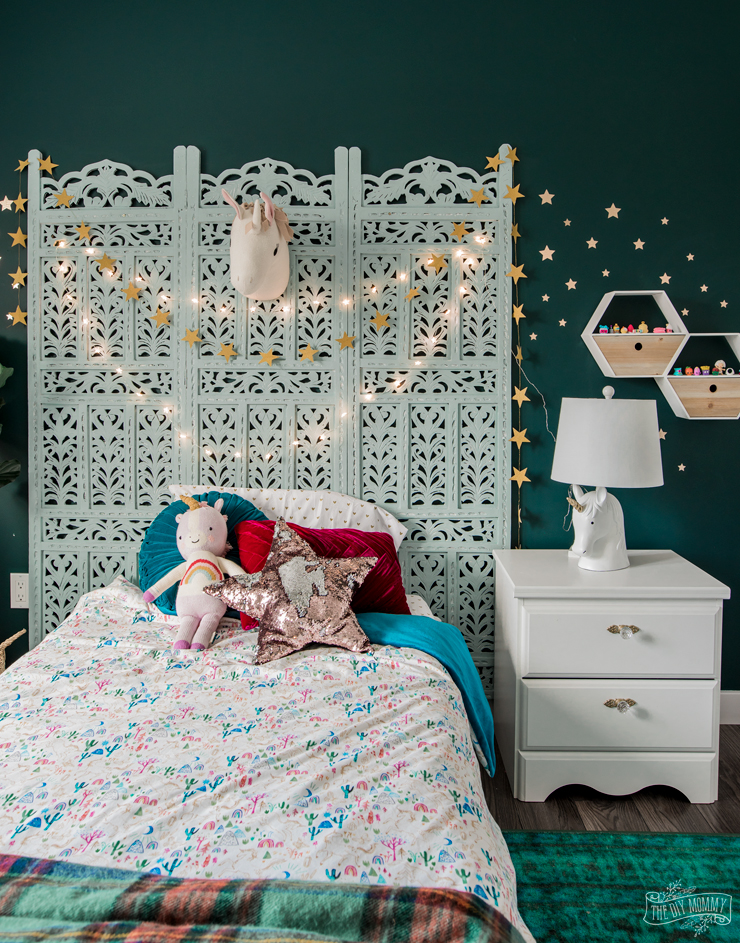
However, when I redecorated my daughter’s room I wanted to makeover this screen into a DIY bohemian headboard! My daughter wanted rich & magical colours in her room like deep teal, burgundy and gold. She loves lots of texture and interest, so I thought a boho theme was perfect for her room makeover.
Creating the headboard (the simplest tutorial ever!)
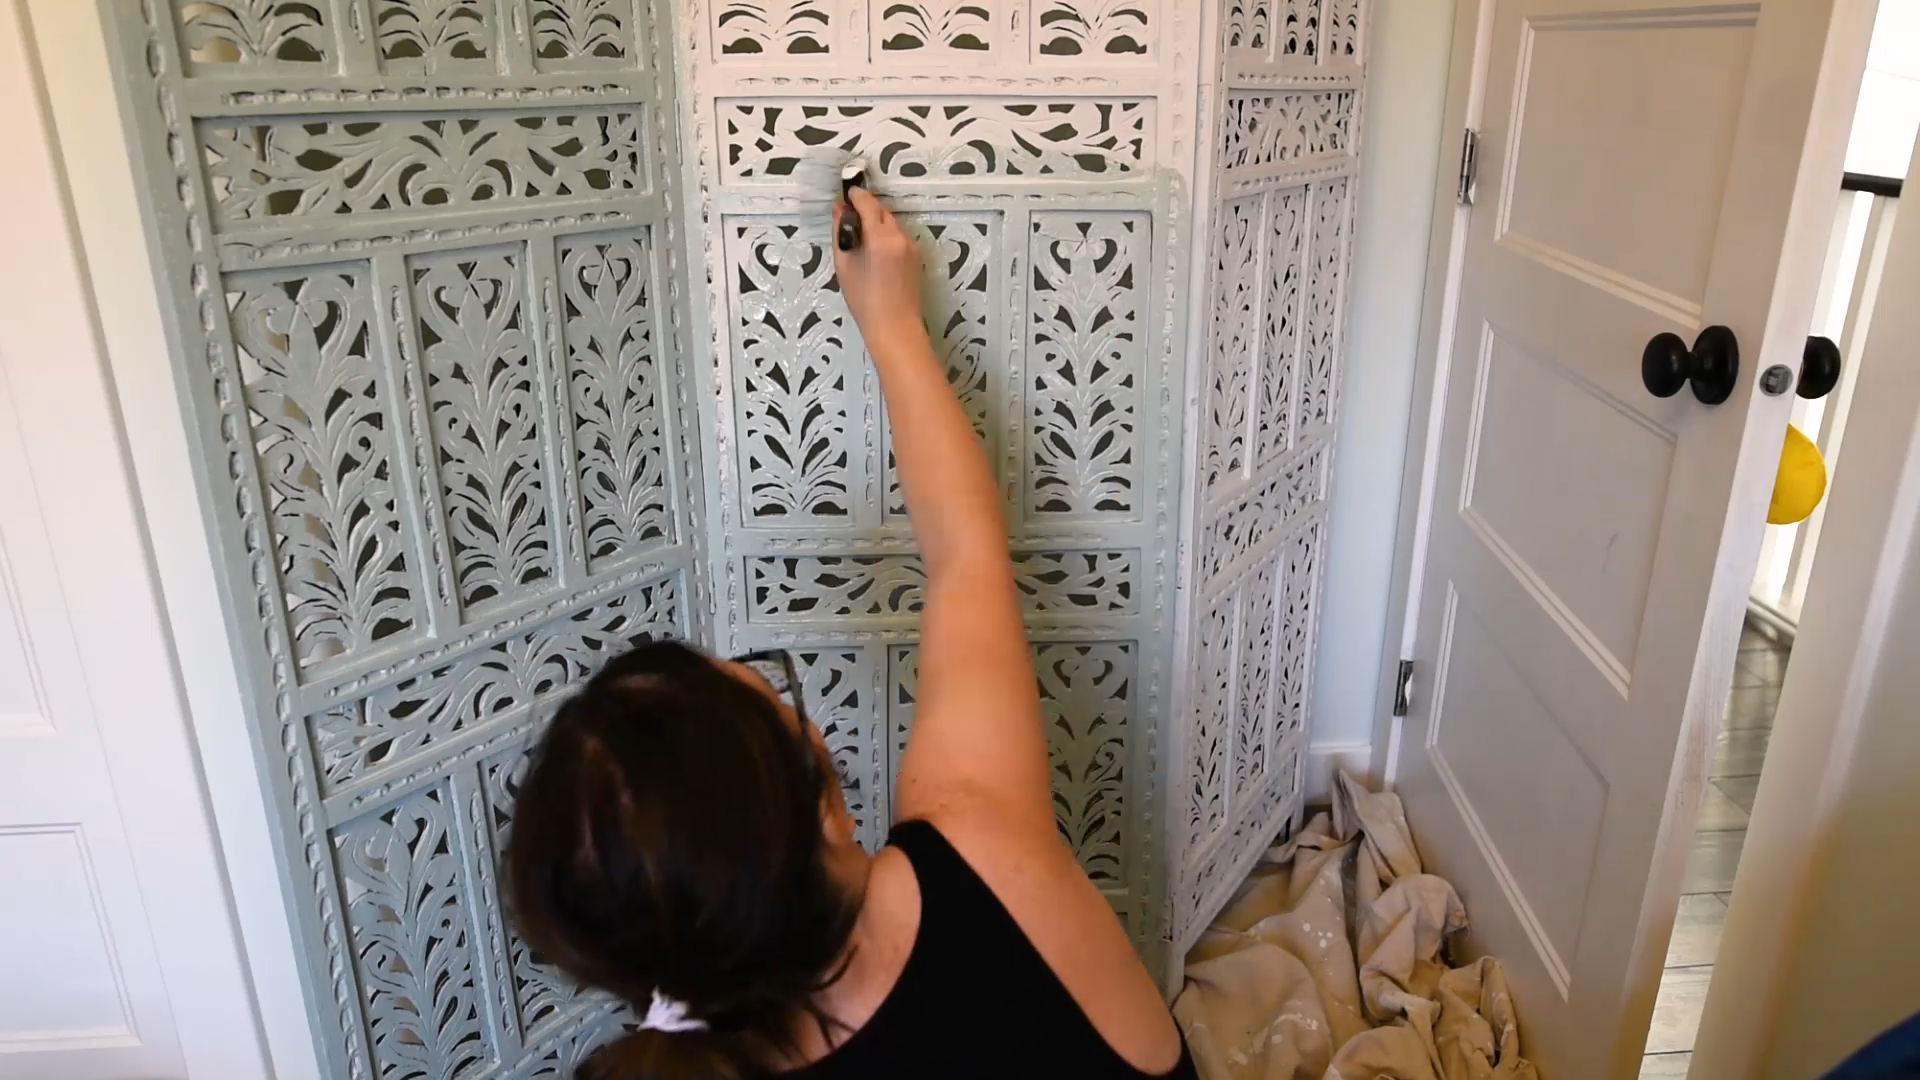
First, I painted my vintage screen a beautiful grey-green-blue called “Dreaming of the Day” by Cloverdale Paint. Because this is a carved piece with lots of detail, I used a paint brush to get in all the nooks and crannies. A paint sprayer like this one would also be a great tool to use when painting a screen. I only painted one side of my screen. A wooden headboard like this would look beautiful in bold colours like jewel tones, or it would also look lovely in a white!

After the screen was dry, I moved it behind my daughter’s bed. She has a twin mattress on a simple frame, so this headboard extends beyond either side of her bed. I like this substantial look, and I recommend making sure that any screen you choose is at least a little wider than your bed. You could also shorten your DIY boho headboard by cutting of the legs with a miter saw, but I chose to leave mine as-is.
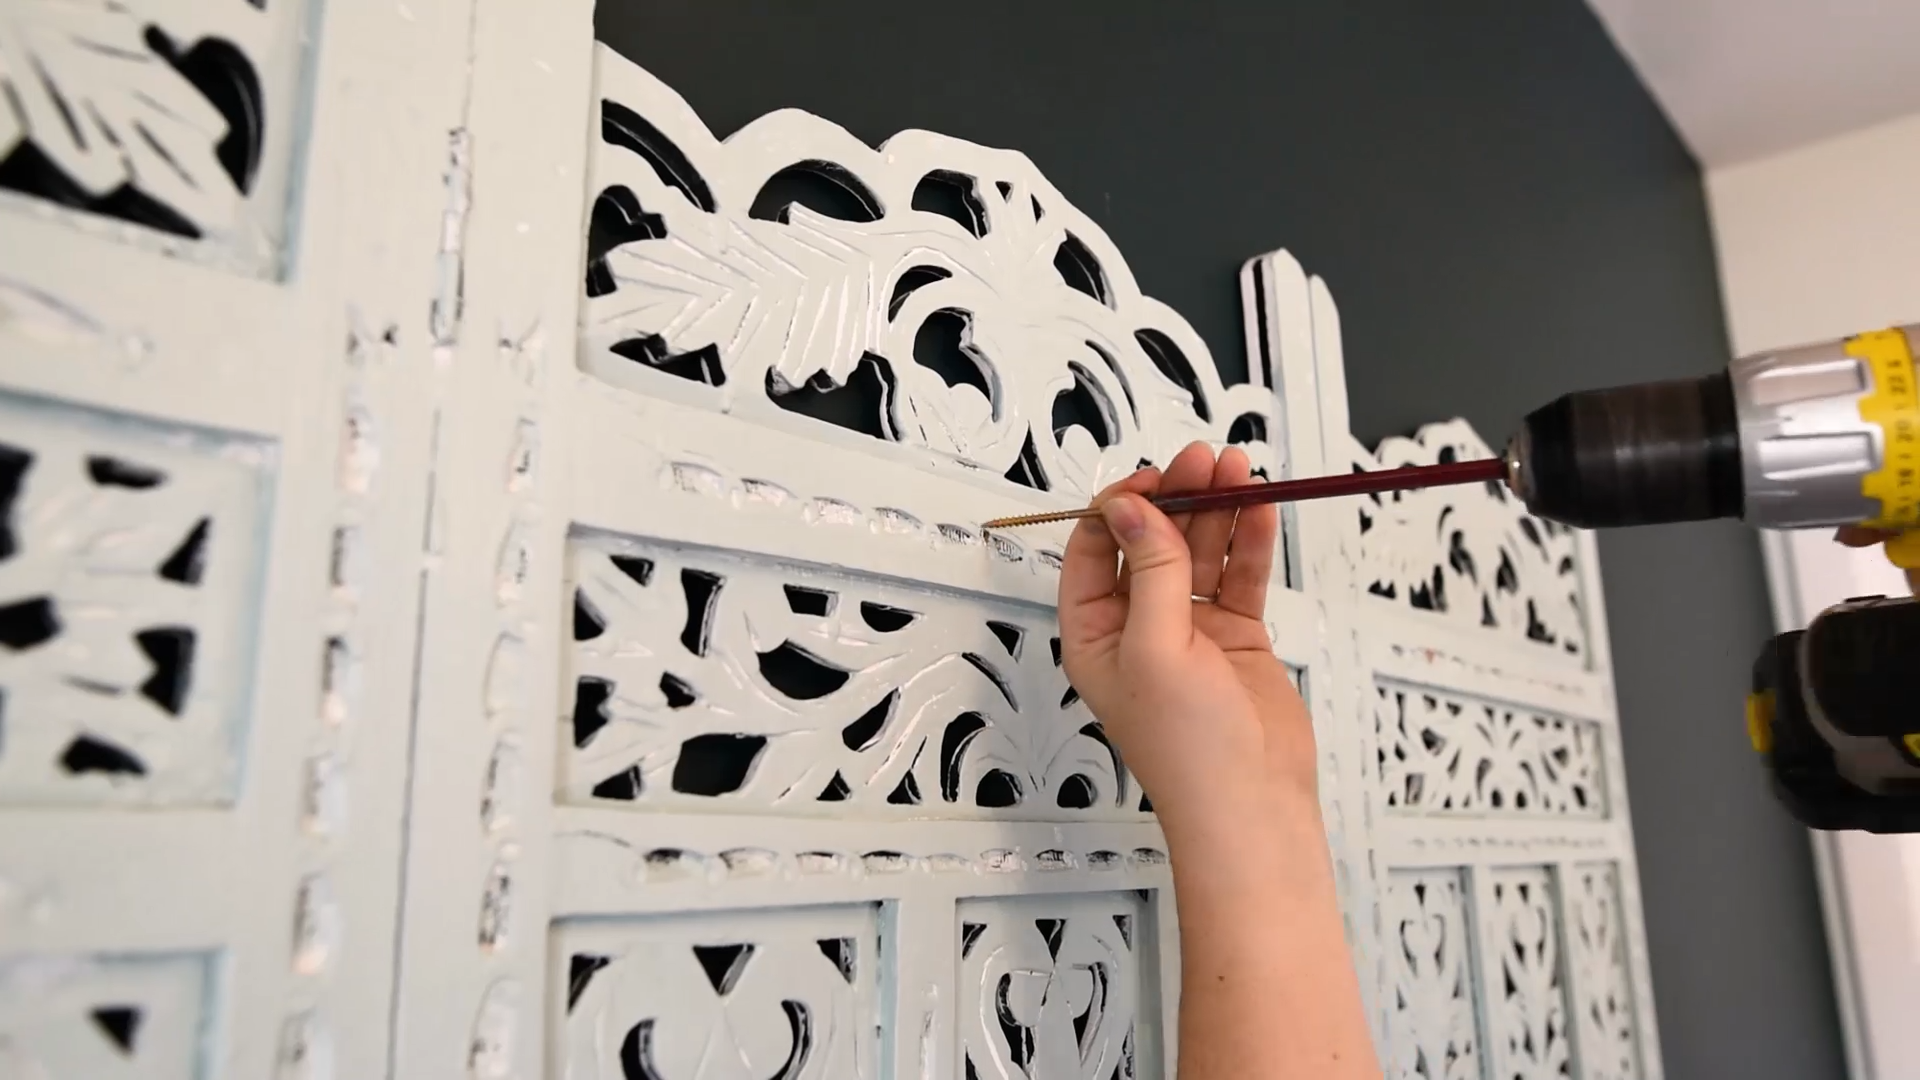
Next, I used a stud finder to locate the studs in the wall behind the headboard screen. Then, I used a drill to make pilot holes through the screen into the wall & studs behind it. To secure the screen to the wall, I used wood screws and drilled them through the screen and into the studs using my pilot holes as guides.
Tip: If you’re concerned about the screen scratching your wall, you could apply a few felt pads to the back of the headboard before affixing it to the wall.
Accessorizing the headboard
A vintage screen DIY boho headboard looks fantastic as-is, but you could also add some accessories like I did. I added a cute stuffed unicorn head to the center of the screen, and then hung some star shaped twinkle lights and a glittery gold star banner across the headboard.
I love how this headboard turned out, and how it looks against the bold color of the wall behind it. It was SO simple to make, and it’s truly the focal point of my daughter’s room.
To see how the whole room makeover turned out, click right here!
More DIY headboard ideas:
- use foam, fabric and plywood to create an upholstered inexpensive headboard
- hang pillows from a curtain rod for a simple headboard solution
- make a DIY can headboard with wood and cane webbing
- build a modern King sized headboard with storage shelves
- make an arched fabric headboard with pool noodles
- create a DIY wallpaper headboard (an easy craft with no major tools required!)