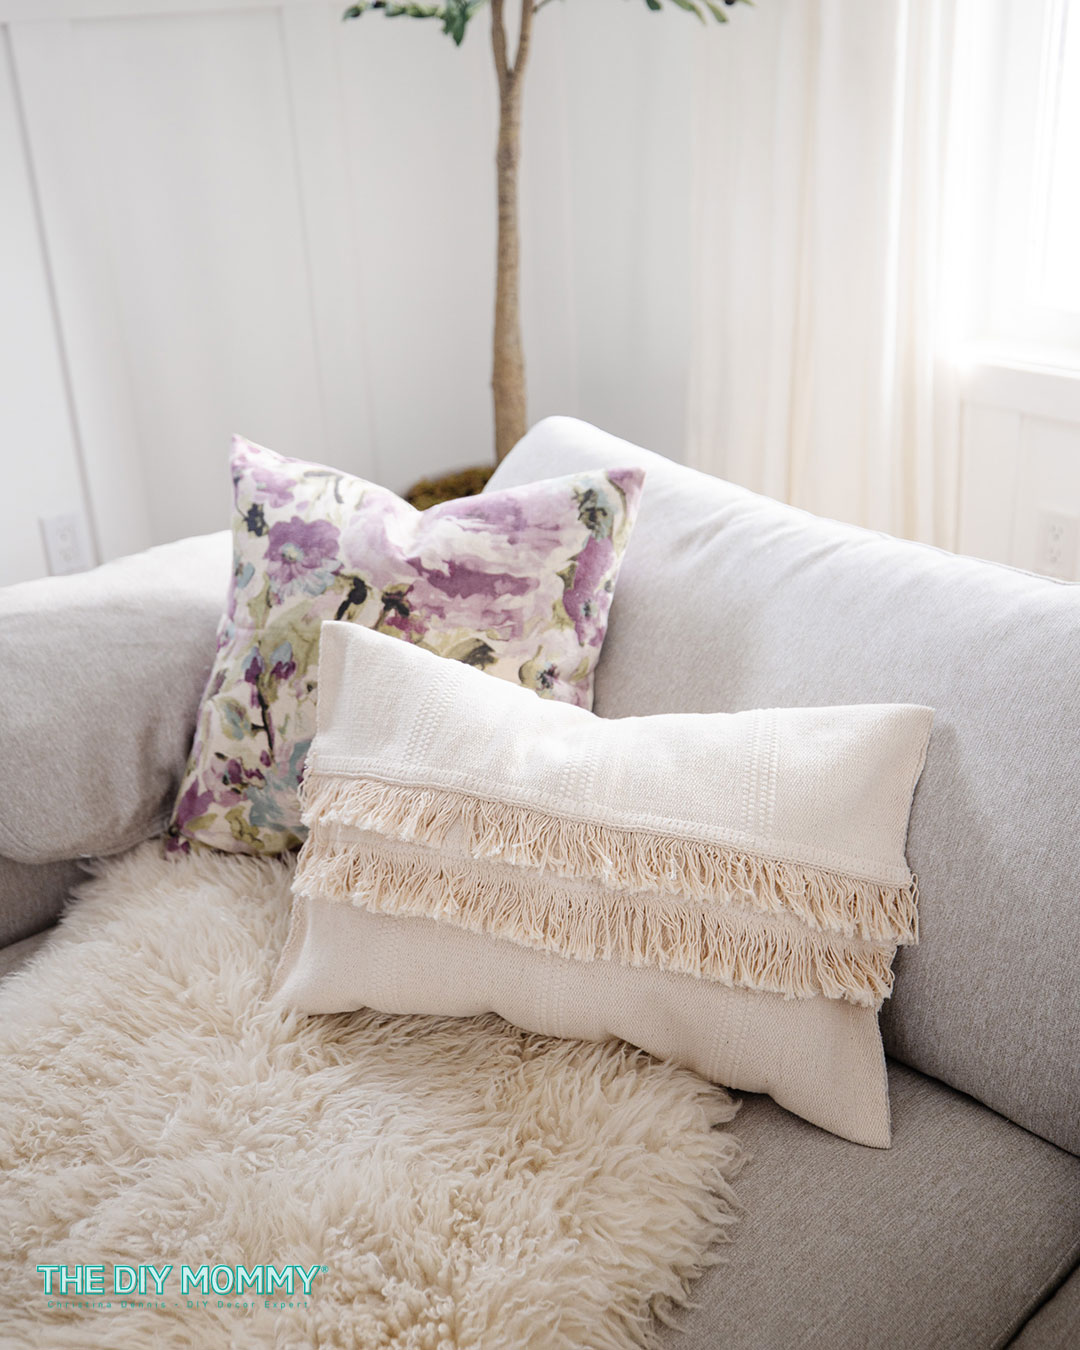
Turn an IKEA SORTSO rug into a gorgeous pillow
This post may contain affiliate links · This blog generates income via ads
Looking to add some budget-friendly new decor to your home this Spring? This textured pillow is so easy to make from an inexpensive IKEA SORTSO rug… no sewing required!
When I saw this video by @kjg_home on TikTok, I was inspired to create the same pillow from an IKEA SORTSO rug. I’m always a huge fan of IKEA hacks, so trying this one out was a no-brainer!
I love this method because both fringed edges are at the front of the pillow when it’s finished. Plus, a textured neutral pillow looks great in so many decor styles!
How to make a pillow from an IKEA rug
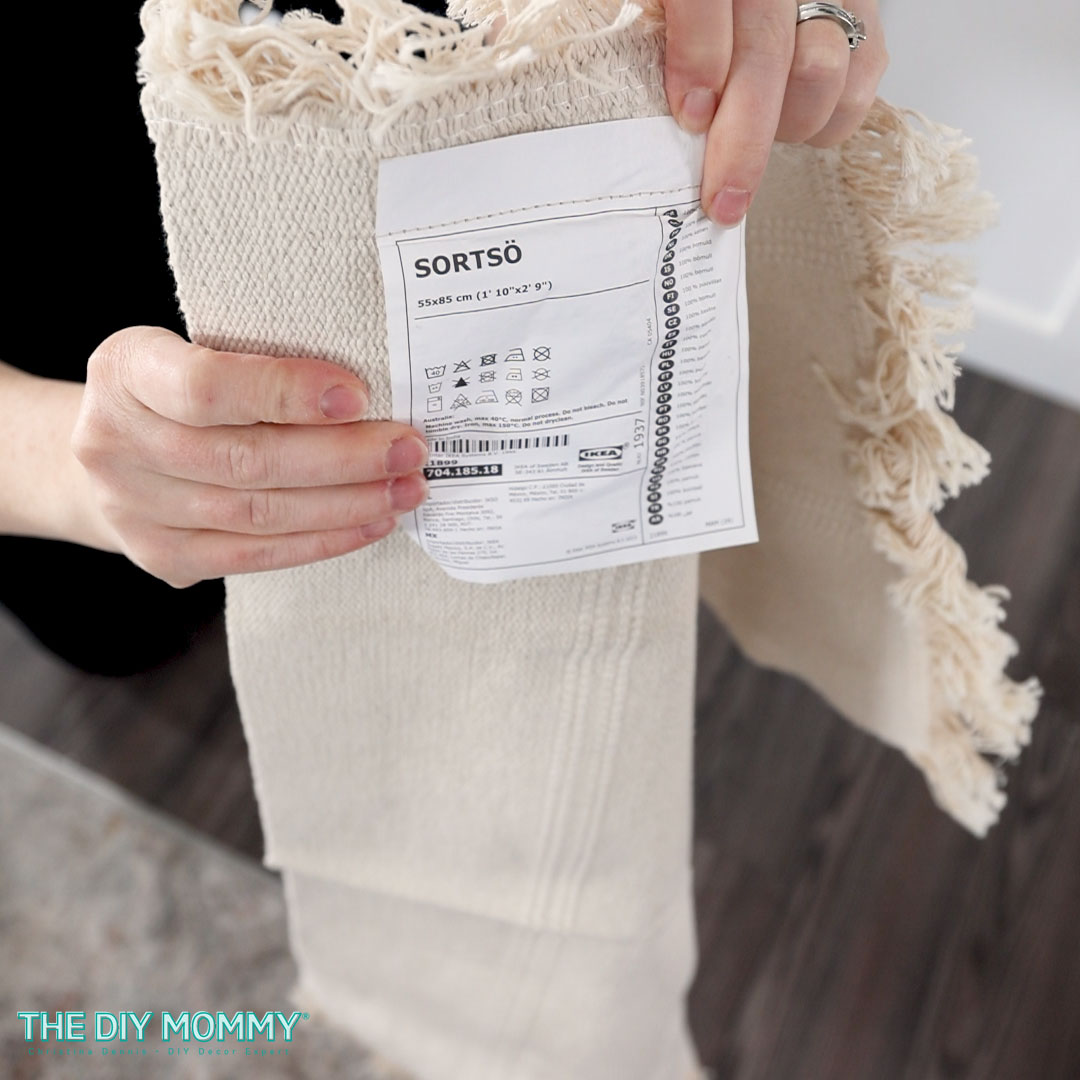
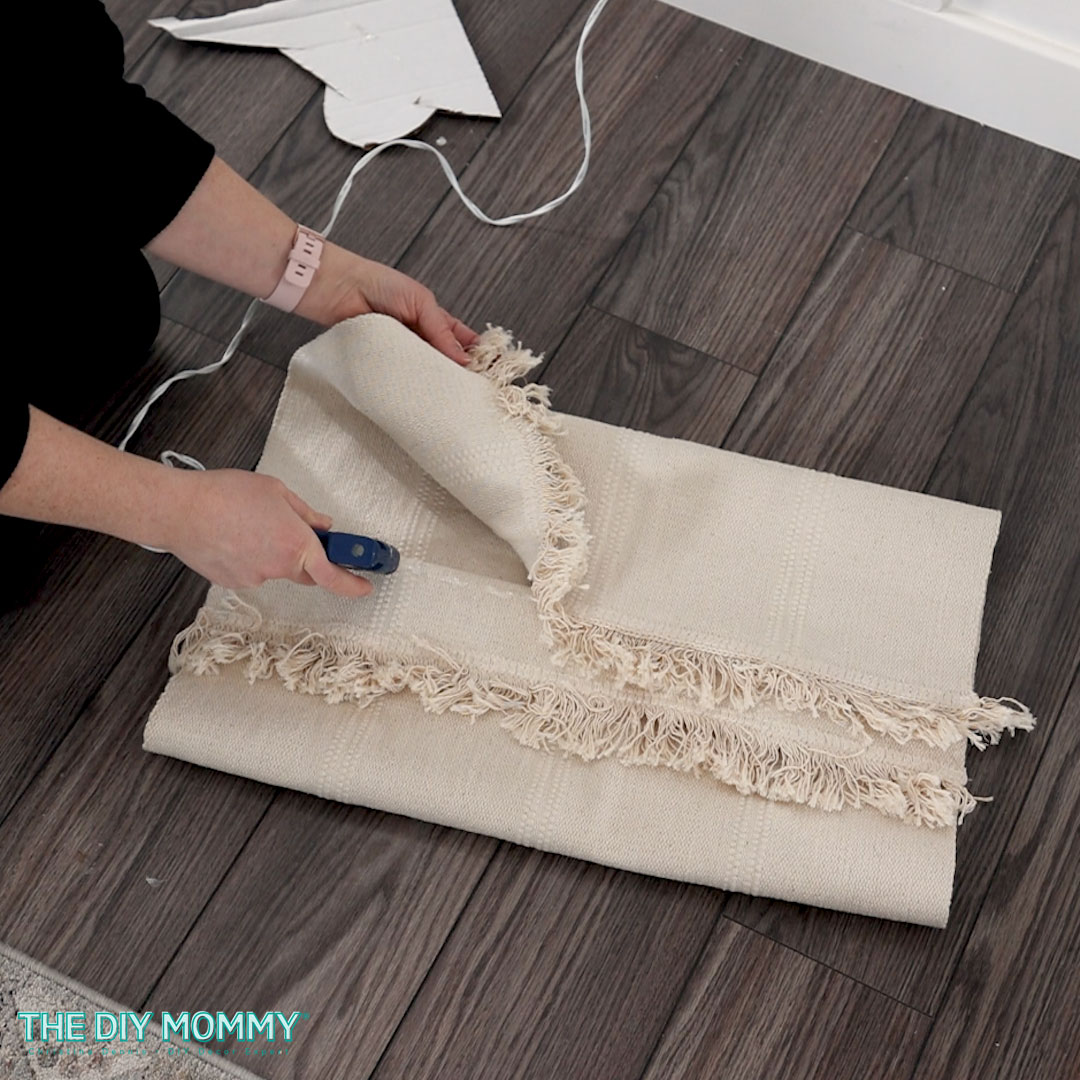
Buy an IKEA SORTSO rug; it’s currently only $7.99 CDN. You could use any sort of flatwoven cotton rug with fringes on each side that’s around the same size – 1’10” by 2’9″.
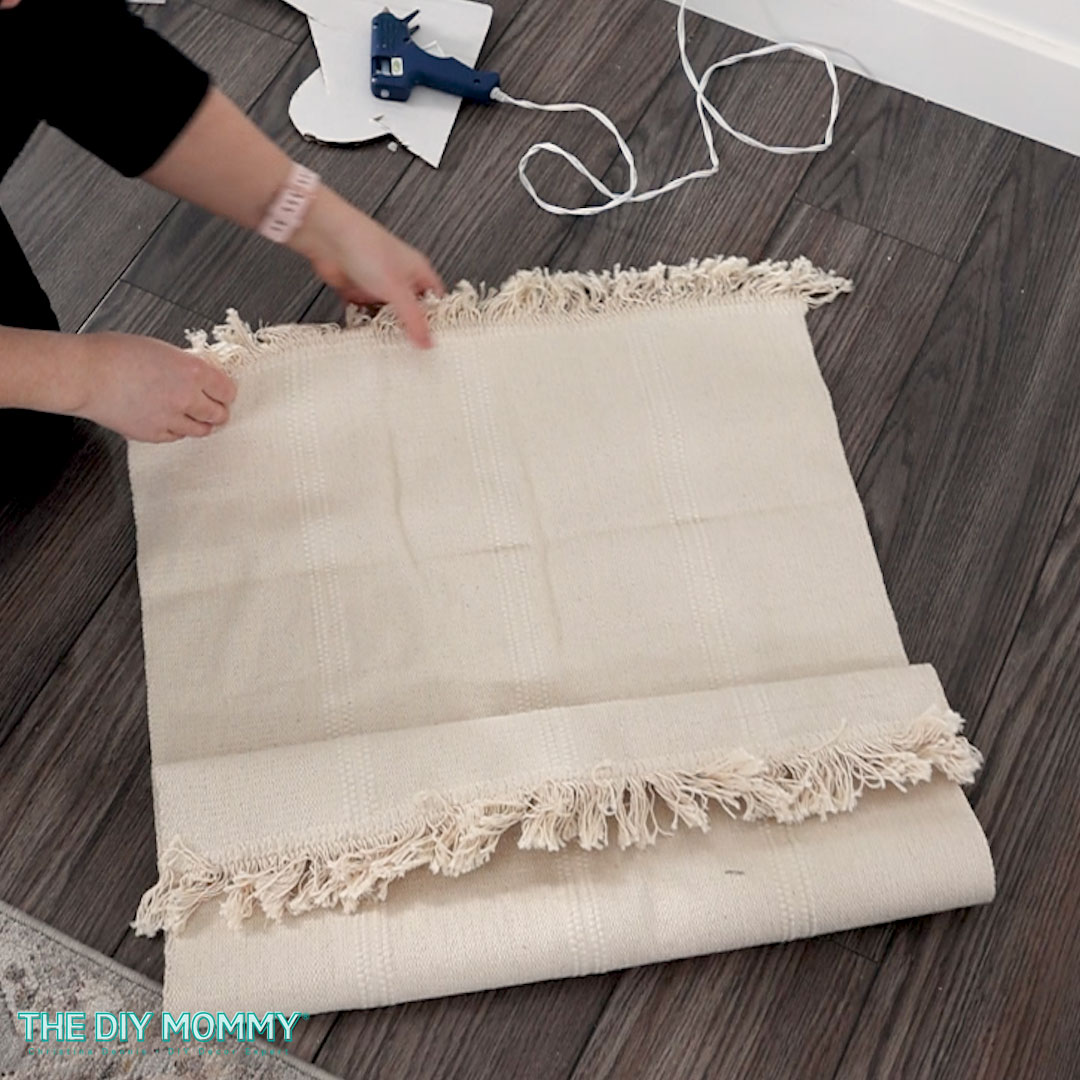
Fold one side of the rug over about 1 ft (12 inches) from the end. Then, fold the rug back over itself 3″ from the edge as shown in the photo above.
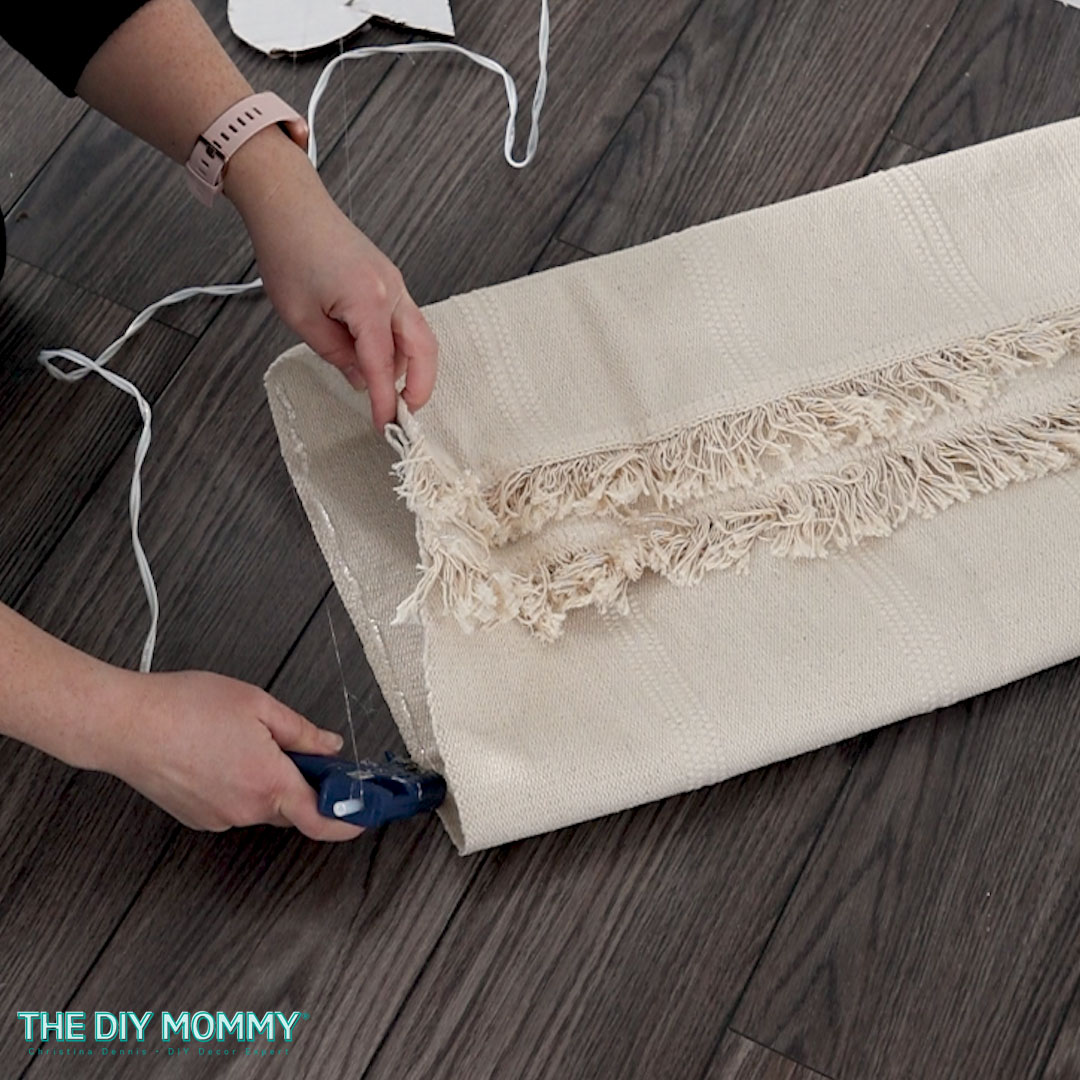
Next, fold the opposite side of the rug over so that it just overlaps the fold of the first side, as shown above.
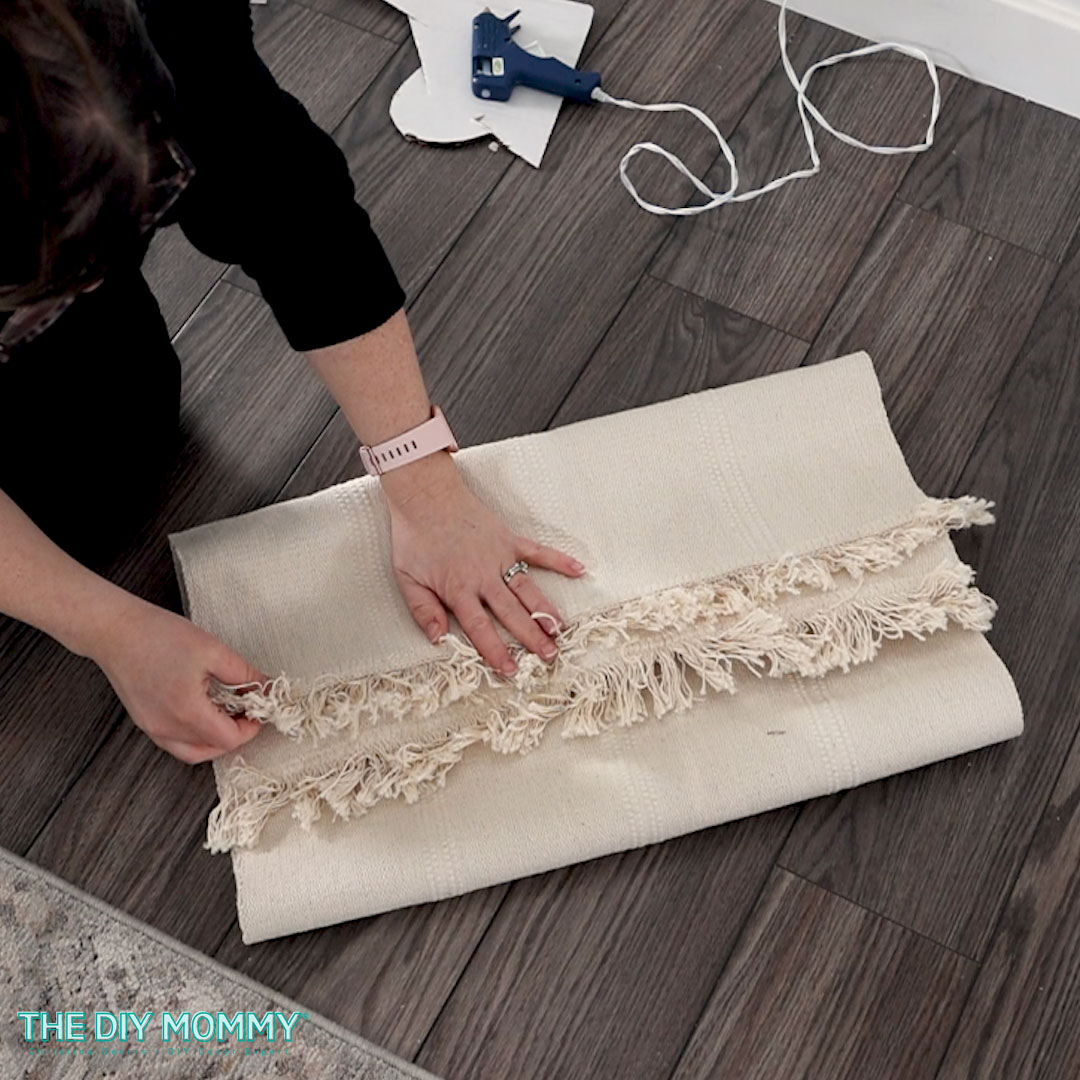
Now, place some fabric hot glue sticks in a glue gun and place a bead of hot glue along the bottom fold of the rug. Firmly push the top layer of the folded rug down onto the glue. Repeat this process with the folded layer beneath, tacking everything in place.
Then, glue one side of the pillow cover shut with the fabric hot glue as shown above.
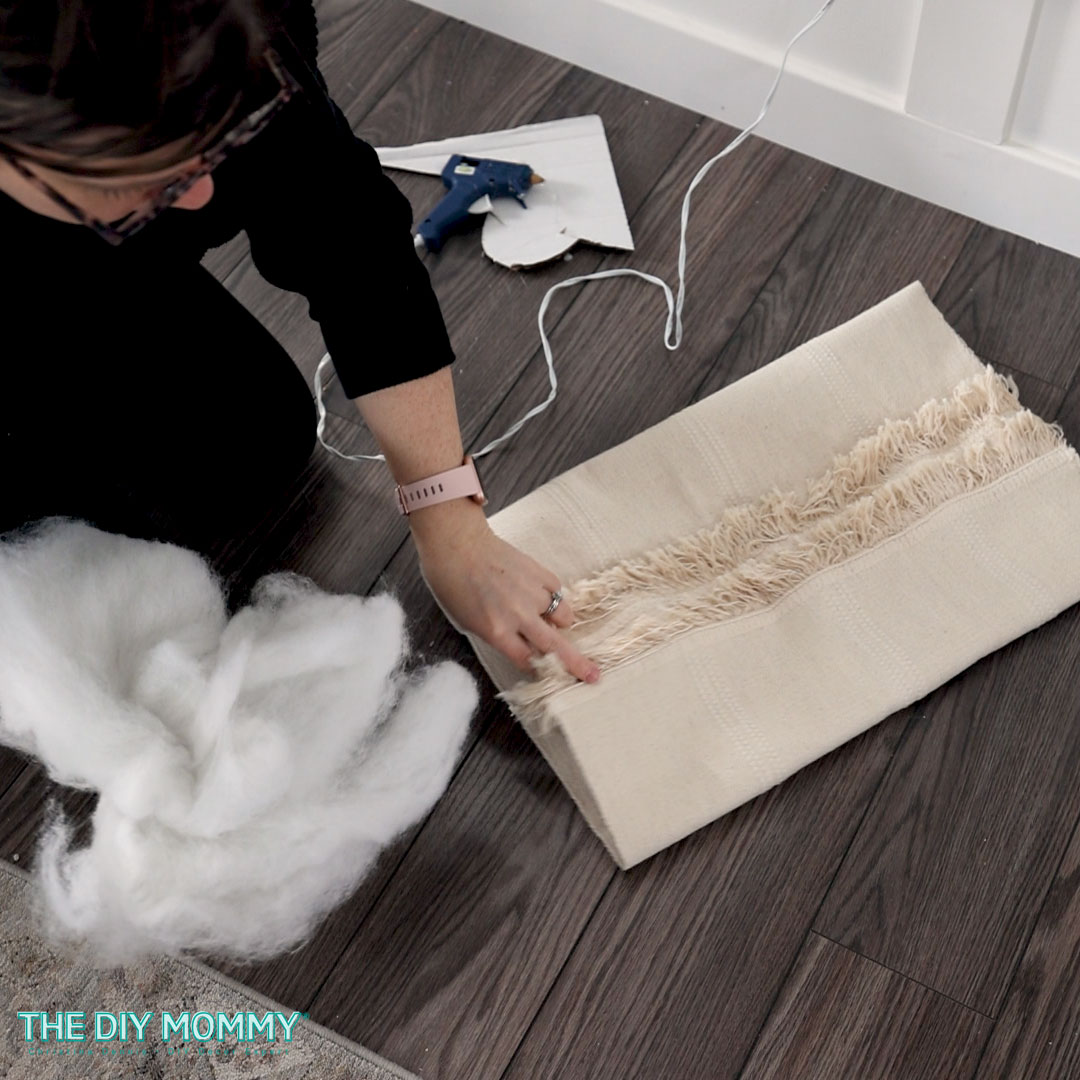
Stuff the pillow cover you’ve created with some polyester fiber fill to your desired firmness.

Finally, glue the other side of the pillow shut with the fabric hot glue. That’s it – your pillow is now finished!
To wash this pillow, use the hand wash setting on your washing machine and lay it flat to dry. I find this works with most of my fabric glued items, but if you’re concerned you can spot clean it instead.
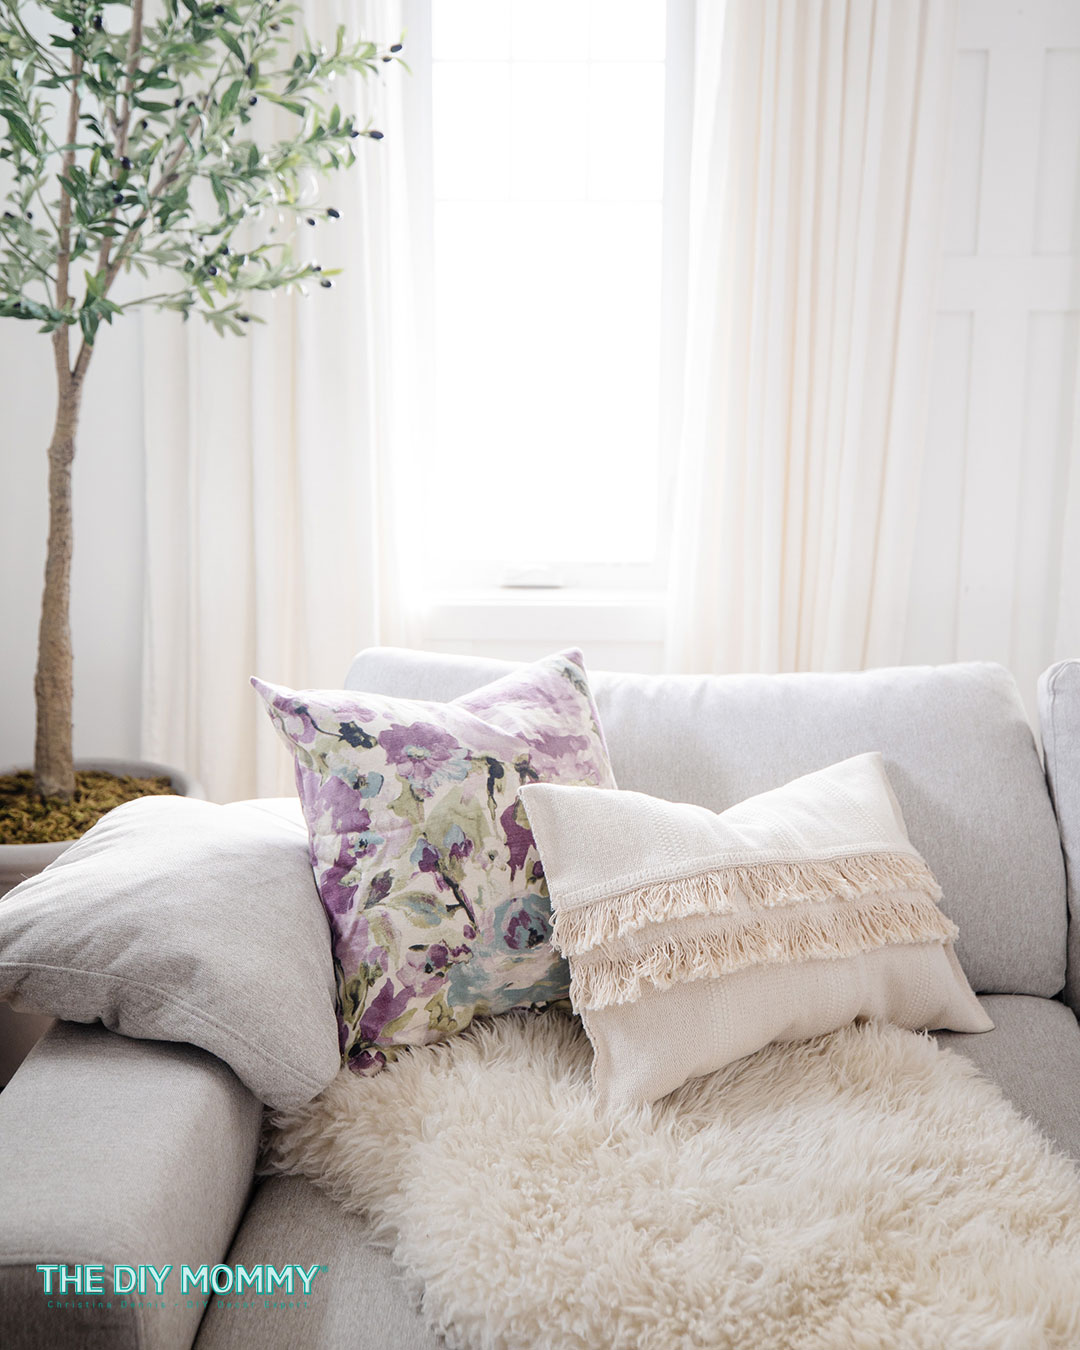
I think this IKEA SORTSO rug pillow looks so pretty in my Spring living room this season, and I love that it was so easy to make.
What do you think: Would you try this easy DIY pillow?!
Wow, I almost skipped by this thinking ‘I don’t sew’, but hot glue I can do! Love it!