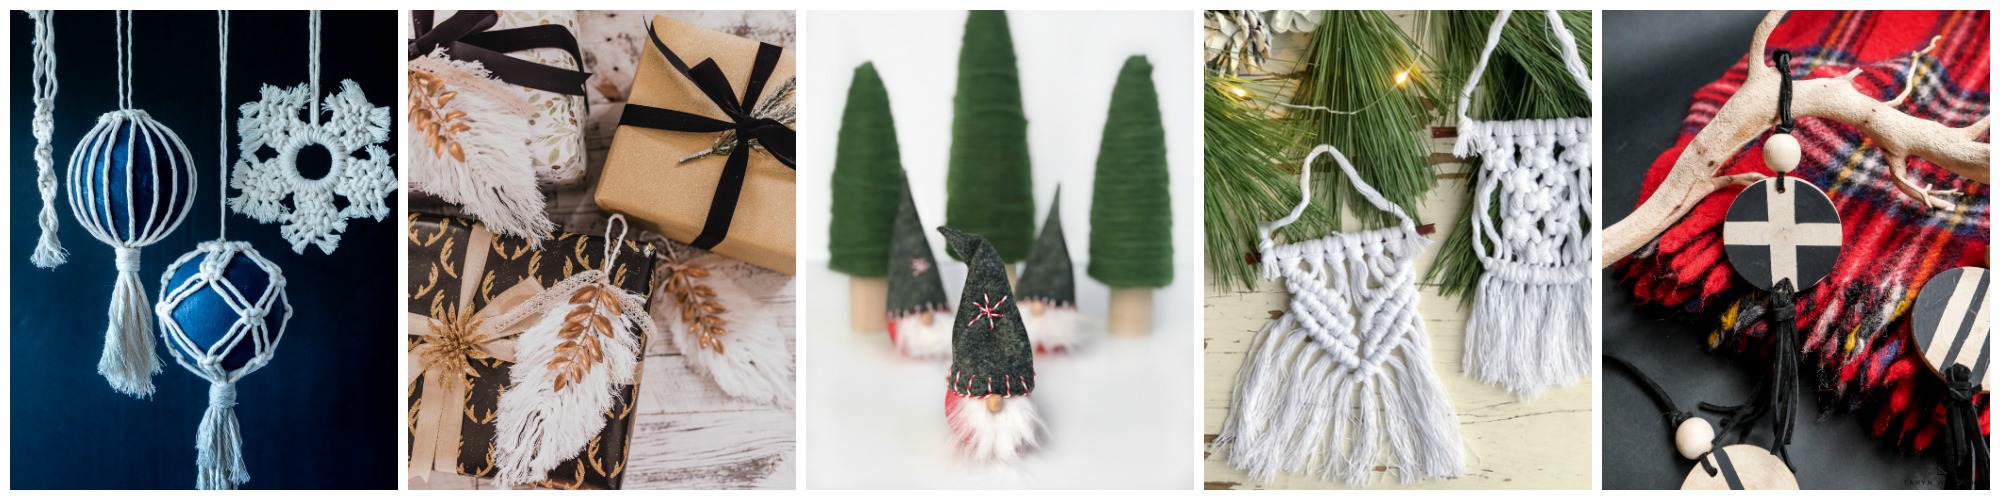
DIY Macrame Feather Christmas Ornaments
This post may contain affiliate links · This blog generates income via ads
Learn how to make easy DIY macrame feather Christmas ornaments for your glamorous or boho holiday home this year!
Today’s Christmas DIY is part of the Seasonal Simplicity blog hop hosted by The Happy Housie, so make sure to check out all of the other Christmas ornament ideas at the bottom of this post once you’re done reading!
The past couple of years, I have been loving experimenting with macrame. You might remember my macrame table runner from last Fall or my macrame pillow from last Christmas? Today’s macrame project is just as beautiful, but it’s the easiest one yet! This is a fabulous project to make if you’ve never tried macrame before, or if you have some leftover scraps of macrame cord from another larger project.
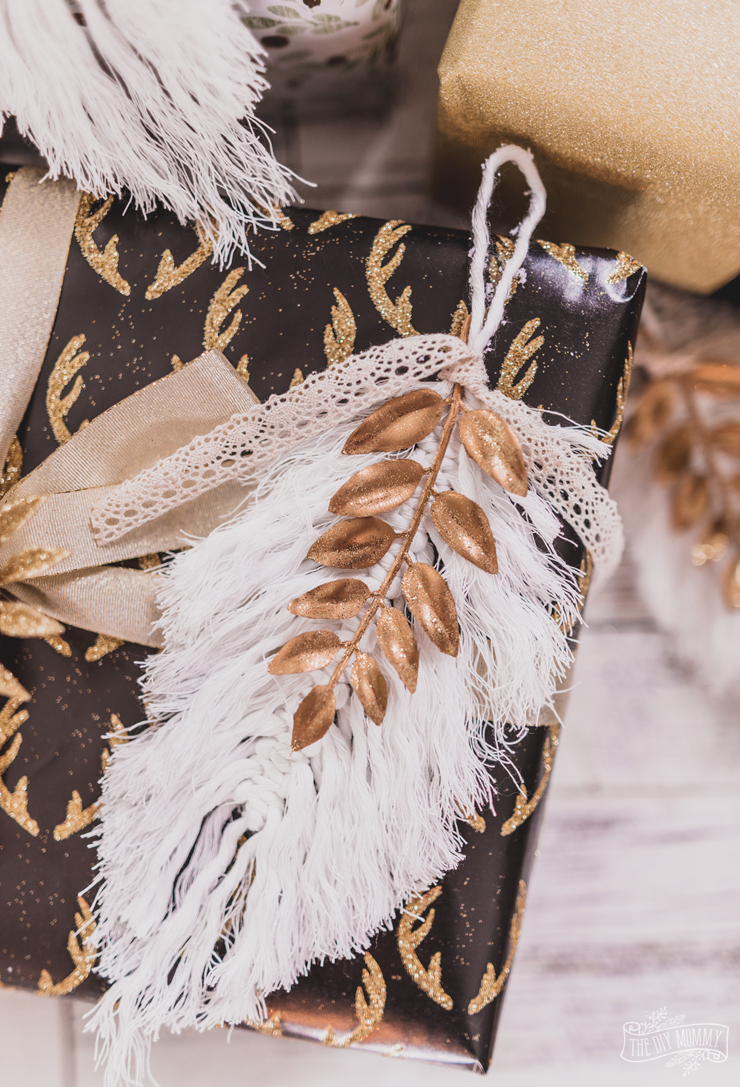
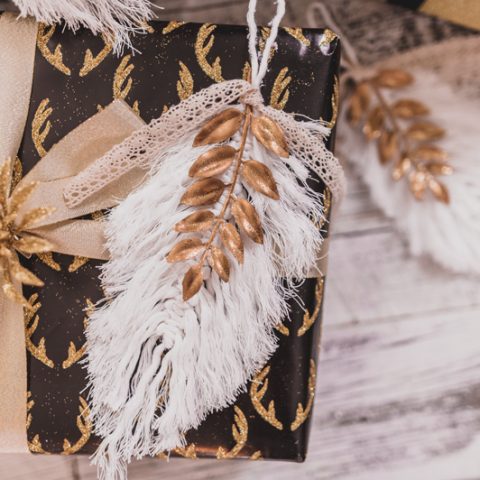
I’m going to use these macrame feather Christmas ornaments in the art deco inspired theme I’m using for the Homes for the Holidays house I’m decorating this weekend (make sure to buy your tickets for that RIGHT HERE if you live in the Edmonton area!), but these would look equally as at home in a boho themed home.

I based these off of a brilliant tutorial I found by HonestlyWTF.
Watch my YouTube video to learn how to make these DIY macrame feather Christmas ornaments, or follow the written directions below:
To make these DIY macrame feather Christmas ornaments:
Cut one 24″ long and 36 6″ long pieces of single twist macrame cord. I use a triple twist cord I found at Michaels and divided it into three single twist sections.
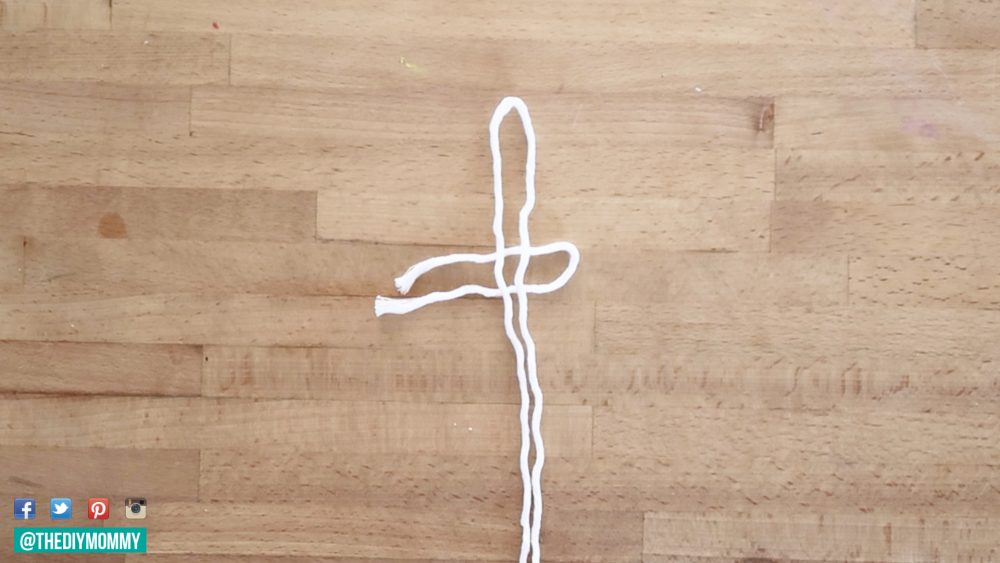
Fold the long piece of cord in half. This will be your feather’s stem. Take one of the 6″ pieces of cord and fold it in half. Slip it under and perpendicular to the long cord as shown above. Leave a couple inches of loop above this cord for the feather to hang.
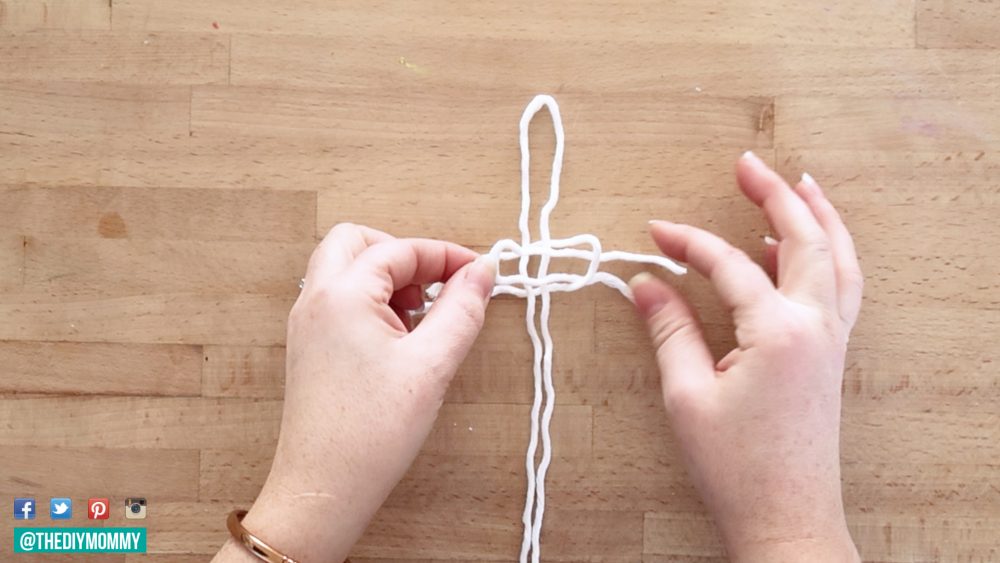
Take another 6″ long piece of cord, fold it in half, place it underneath the loop you created with your first 6″ cord, and pull it up through the loop and over top of the center stem.
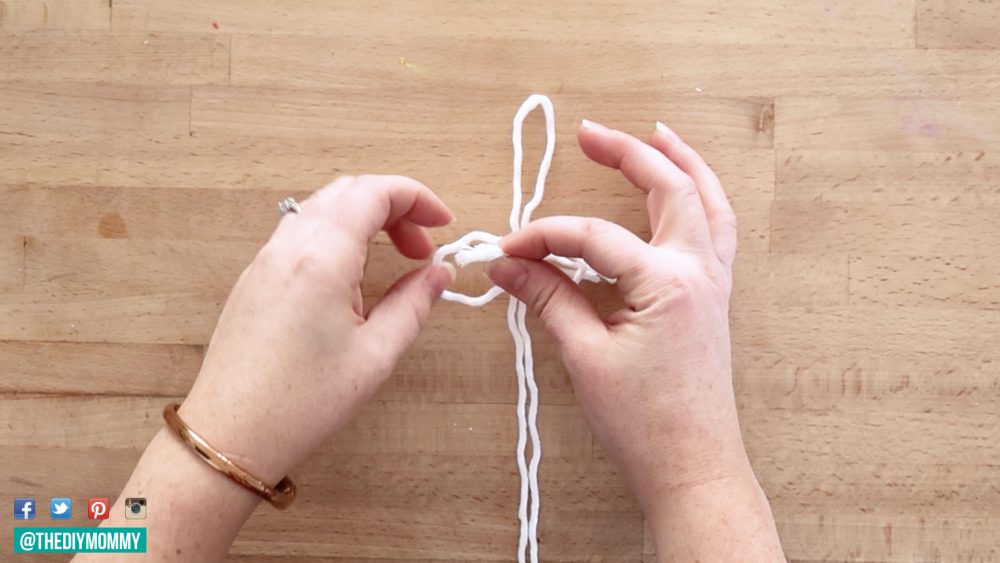
Then, pull the two tails of your first 6″ cord up through the loop of your 2nd 6″ cord as shown above.
Pull the tails of both 6″ cords tightly to create a square know that wraps around your center stem.

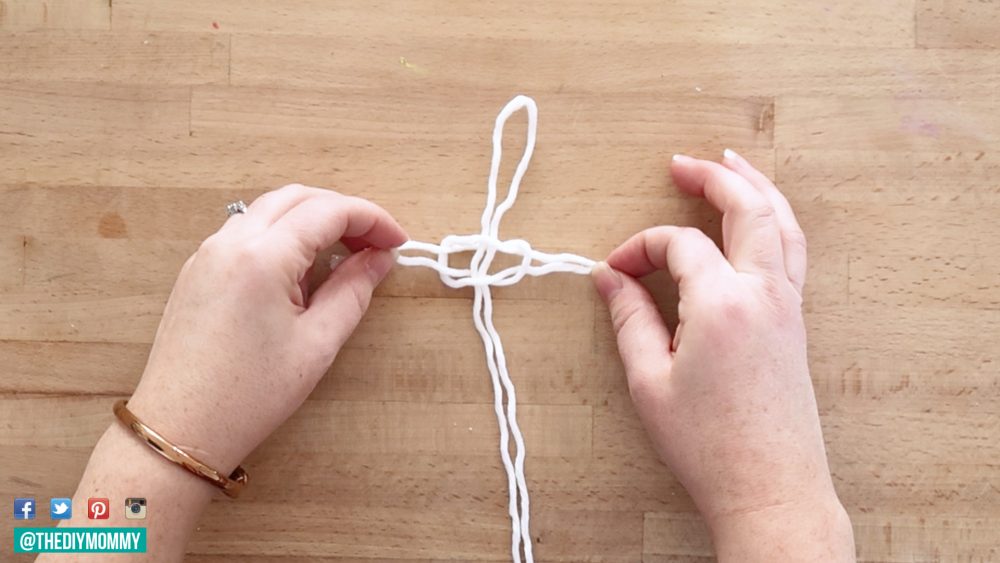
Continue knotting the short cords to the center stem in the same way, but alternating which side of the stem your first cord goes under.
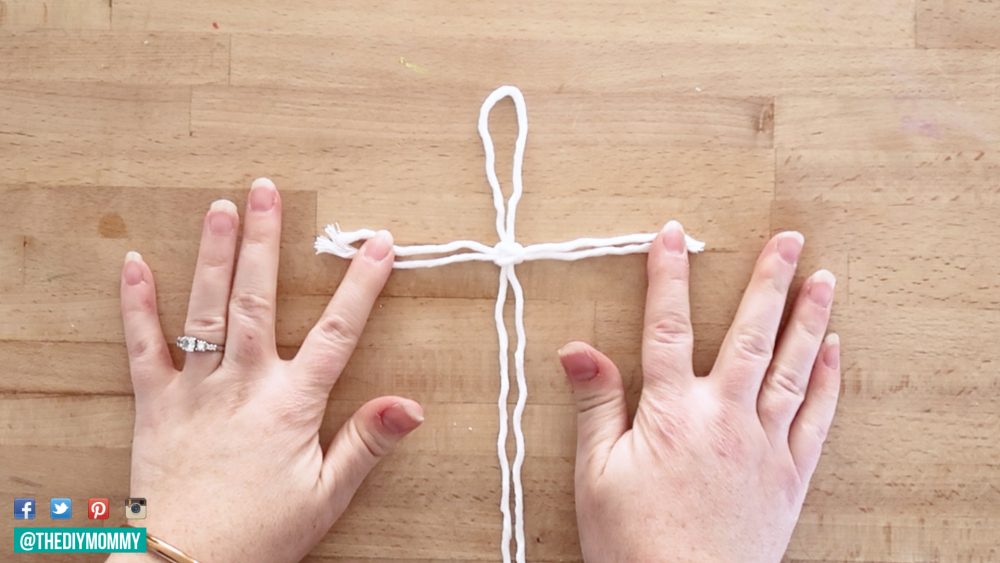
Once you’ve used up all 36 short cords, you’ll have created 18 rows of fringe. Tie the two tails of the stem with a square knot to secure your feather.
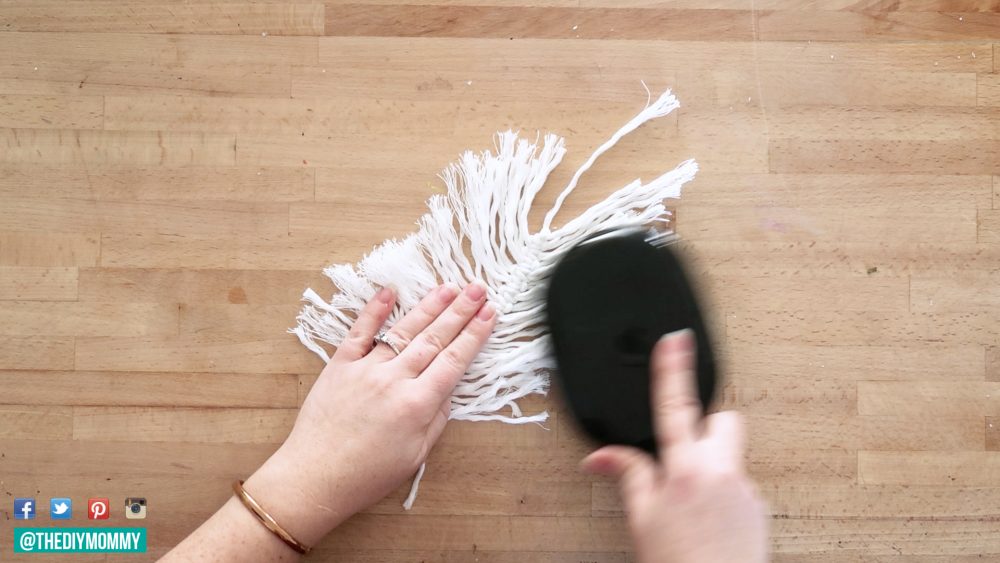
Next, brush out your twisted cords with an animal brush or a hair brush to give them a fringed look.

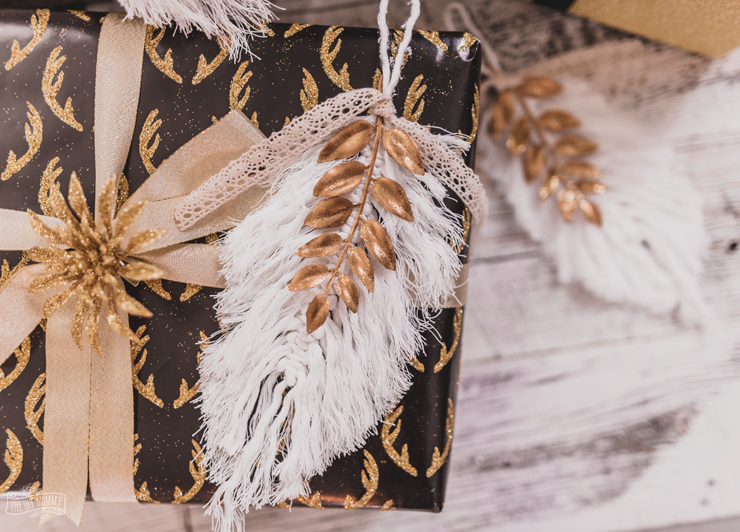
Cut your feather with sharp scissors to your desired feather shape. I made mine narrower at the bottom and top and wider in the middle.
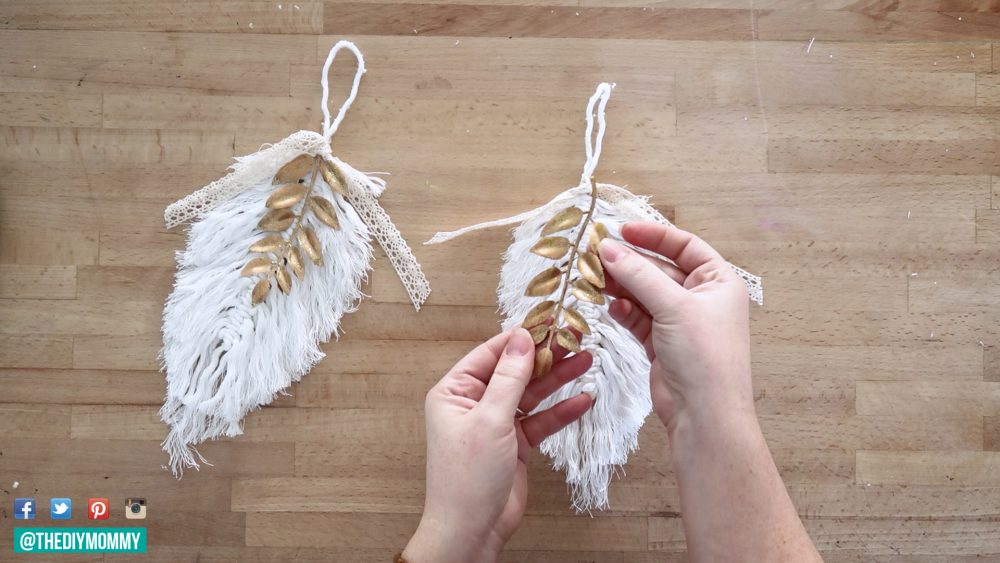
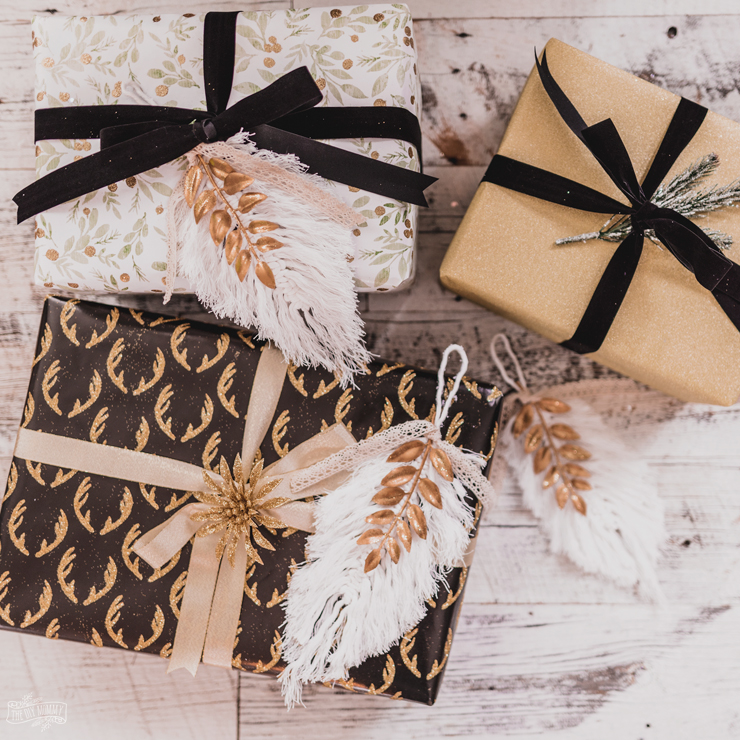
If you want, you can embellish your feather Christmas ornmanents like I did with some metallic stems and lace ribbon. Hang them on your tree or use them to embellish your gifts!
DIY Macrame Feather Christmas Ornaments
Learn how to make easy DIY macrame feather Christmas ornaments for your glamorous or boho holiday home this year!
Materials
- Single twist macrame cord
- Metallic stems
- Lace ribbon
Tools
- Scissors
- Hair brush
Instructions
- Cut one 24" long and 36 6" long pieces of single twist macrame cord.
- Fold the long piece of cord in half to create your feather's stem.
- Take one of the 6" pieces of cord and fold it in half, then slip it under and perpendicular to the long cord.
- Leave a couple inches of looped stem cord above this cross-piece for the feather to hang.
- Take another 6" long piece of cord, fold it in half, place it underneath
the loop you created with your first 6" cord, and pull it up through the
loop and over top of the center stem. - Then, pull the two tails of your first 6" cord up through the loop of your second 6" cord.
- Pull the tails of both 6" cords tightly to create a square know that wraps around your center stem.
- Continue knotting the short cords to the center stem in the same way, alternating which side of the stem your first cord goes under.
- Repeat until you have used up all 36 short cords, creating 18 rows
of fringe. - Tie the two tails of the stem with a square knot to secure your feather.
- Next, brush out your twisted cords with an animal brush or a hair brush to give them a fringed look.
- Cut your feather with sharp scissors to your desired feather shape.
- You can embellish your feather Christmas ornmanents with some metallic stems and lace ribbon.
- Hang them on your tree or use them to embellish your gifts!
Now, come take a look at the DIY Christmas ornaments my blogging friends have created:

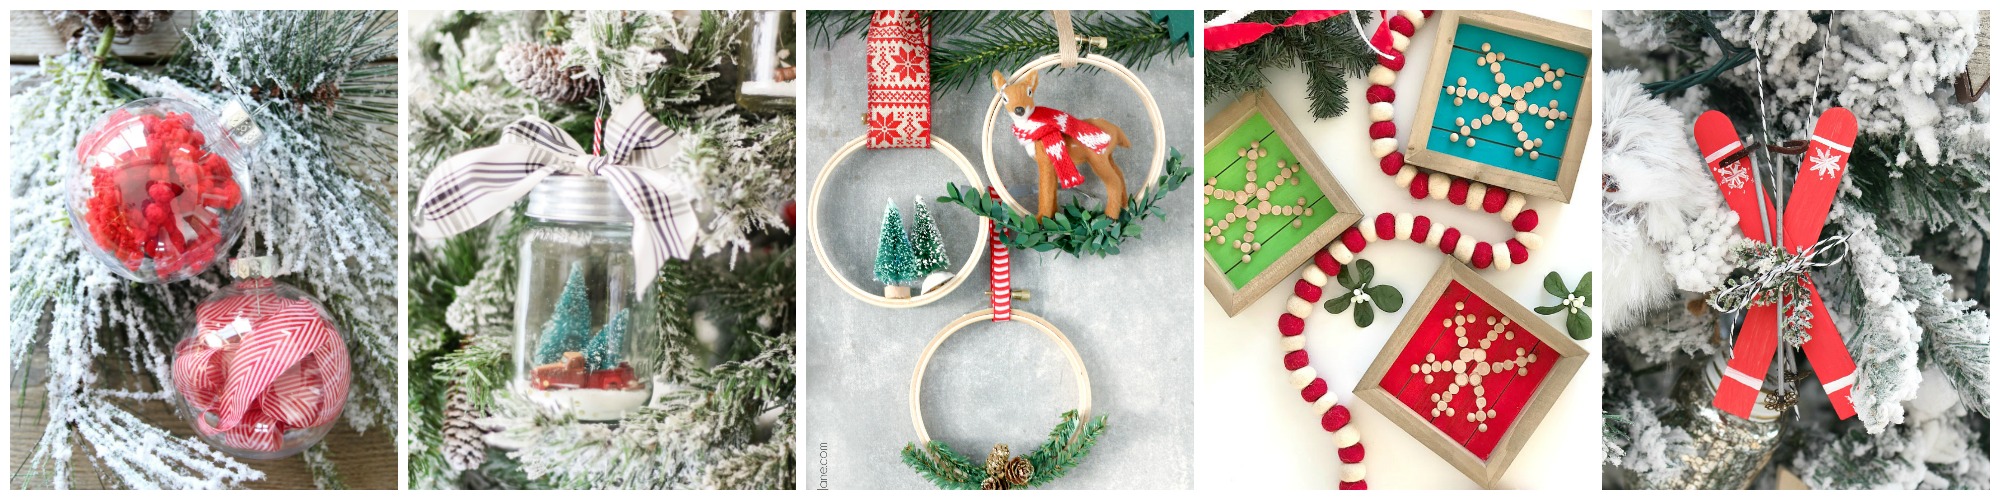
The Happy Housie // The Turquoise Home // Lolly Jane // tatertots and jello // Clean and Scentsible
Place of My Taste // The DIY Mommy // Tauni Everett // Life is a Party // Taryn Whiteaker
Home Made Lovely // Town and Country Living // Sincerely, Marie Designs // Grace Gathered Home // Deeply Southern Home
Finding Silver Pennies // Heathered Nest // Jenna Kate at Home // All Things With Purpose
Summer Adams
These feathers are gorgeous! I don’t have the attention to detail that you do, but I sure wish I did. I’d love to be able to recreate something like this. Love.
Awe, thanks Tauni!!
These are gorgeous!! I’ve never tried macrame before, but now I just might have to give it a go!!
These are so fun!! I’ve never seen macrame used to create a feather like this – it’s super cool!
Thanks, Sarah. We were pretty excited with how they turned out
These are such a cute idea to add to your gifts. Thank you for sharing and being a part of the hop Christina!
I love DIY ornaments. I have never tried macrame and love the fact that it is coming back in to style. So Cute!!
These turned out so cute them! Hope you’re sharing some pics from the home tour on the blog!
I absolutely love these! I also love that you paired them with gifts as well. I love ornaments that can be used in both ways. I can’t wait to give these a try!
Thanks, Amanda!
These are so whimsical!
Does it hold up by itself or should one treat it with liquid starch or something like it to stiffen the ornament? They definitely look great as ornaments or as decorations. 🙂