DIY Raised Garden Beds on a Budget – 3 Tools Only!
This post may contain affiliate links · This blog generates income via ads
Are you looking to start a garden but afraid it will cost a fortune? Fear not, with just 3 tools and a bit of effort, you can create your own raised garden beds on a budget! In this post, I’ll walk you through the steps to build your cheap DIY raised garden bed and create a beautiful outdoor space that you can enjoy for years to come.
You don’t need a large backyard to enjoy a vegetable garden. In fact, I’m going to create some raised planters that will fit perfectly in front of my little studio at the front of our property. This is a simple DIY project that even a beginning woodworker can make. I like to keep things cheap & easy when it comes to working with lumber, so I’m only using 3 tools – a miter saw, a brad nail gun, and a drill – for these raised planters.
You could arrange several of these in your backyard and design a full-fledged garden. Alternatively, one or two would also look beautiful flanking a patio or in front of a porch.
Step 1: Choose the Right Material
The first step to building your DIY raised garden bed is selecting the right material. While there are many options available, I suggest using MicroPro Sienna treated lumber as it is cost-effective, rot-resistant, easy to work with, and can be found at most home improvement stores. I’ve used it on a few DIYs before like these beautiful planter boxes. Cedar is also a good choice for planters as it’s naturally resistant to rot and insects, but MicroPro Sienna is more cost effective.
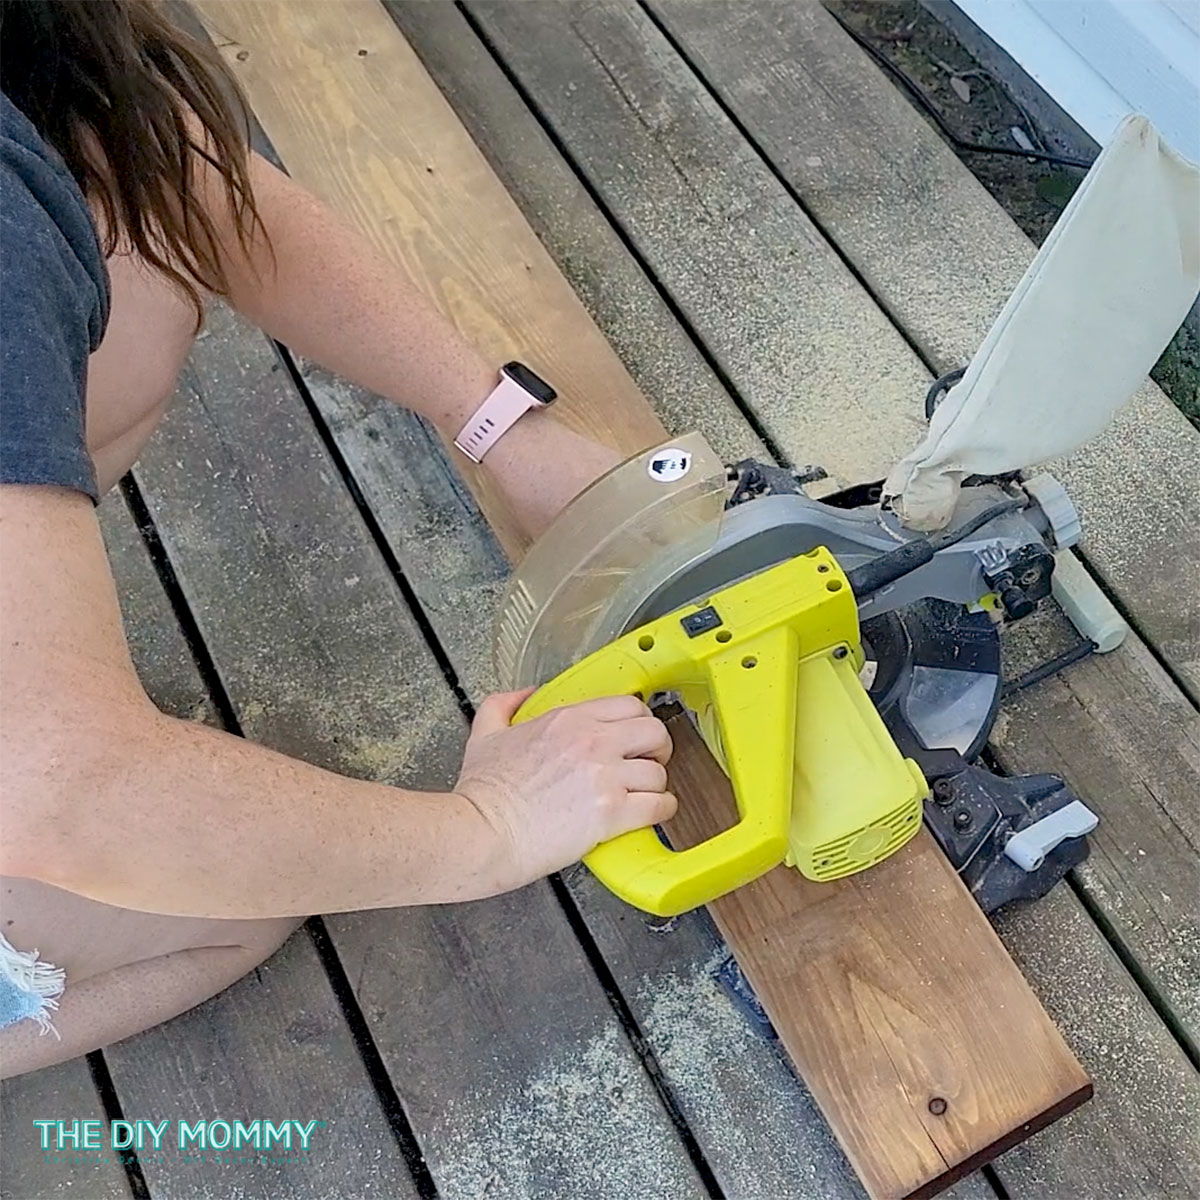
Step 2: Cut the Lumber to Size
Once you have your lumber, the next step is to cut it to size. You will need four pieces for each side of your garden bed, so plan accordingly. Measure and mark the length and width of each piece of lumber, then use a miter saw to make your cuts. Remember to wear safety goggles while cutting the lumber!
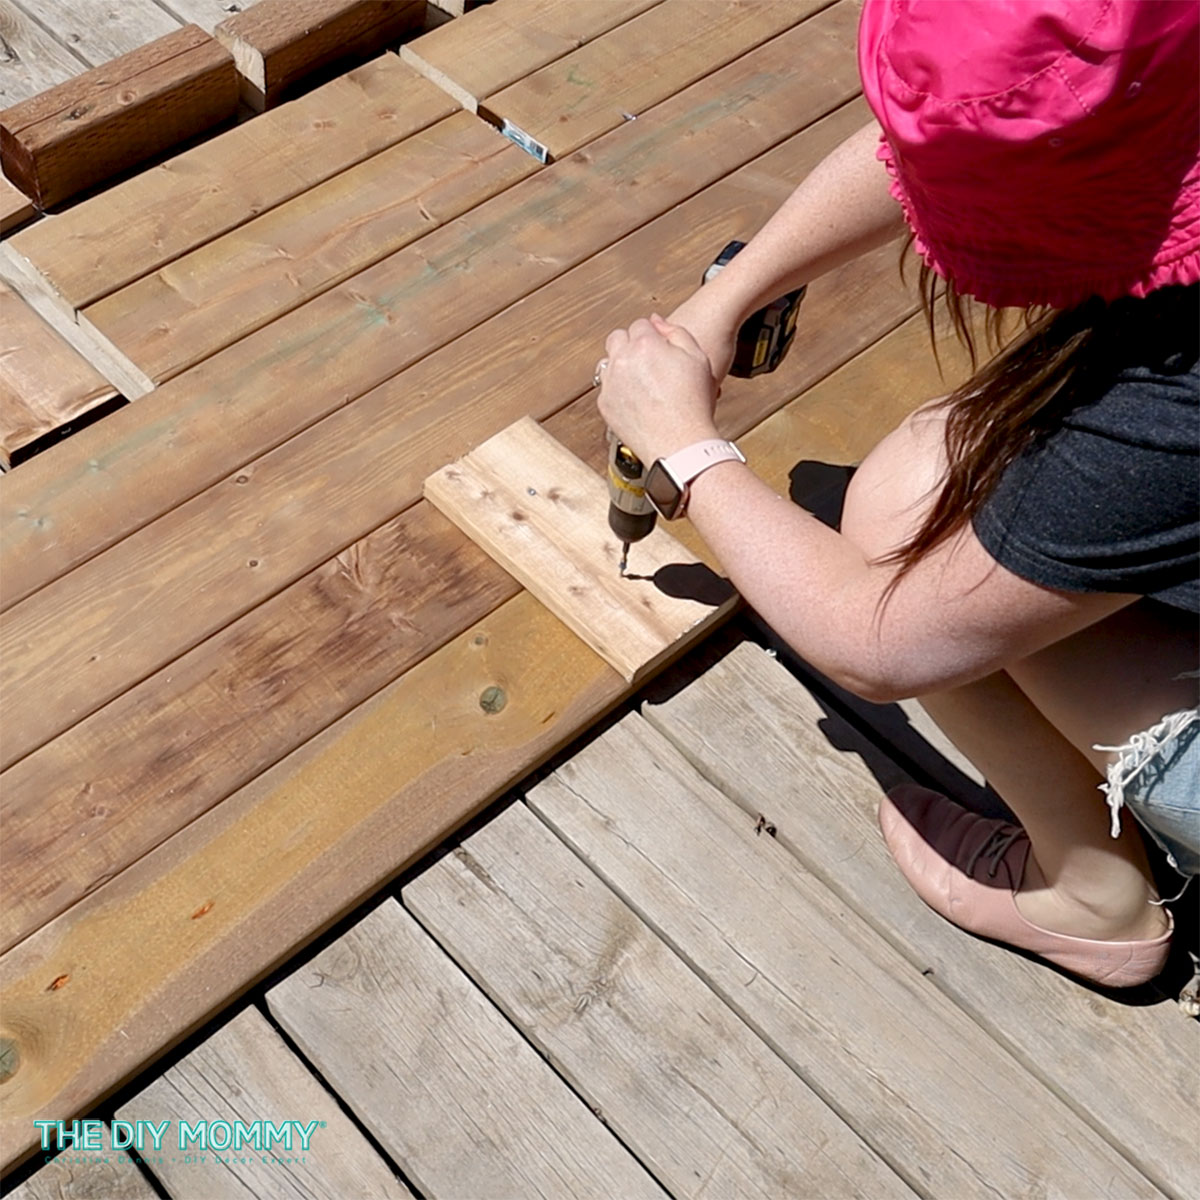
Step 3: Assemble the Garden Bed
With your lumber cut to size, it’s time to assemble your garden bed. To do this, you’ll need to screw the boards together at the corners using wood screws or nails. Pre-drill the holes to prevent the lumber from splitting and to make the job easier. Assemble the sides first, then attach them to the corner posts to create a sturdy frame.
Before placing your raised bed in its spot, I recommend covering the ground with landscape fabric to prevent weeds from growing up into the bed.
Step 4: Add Soil and Plants
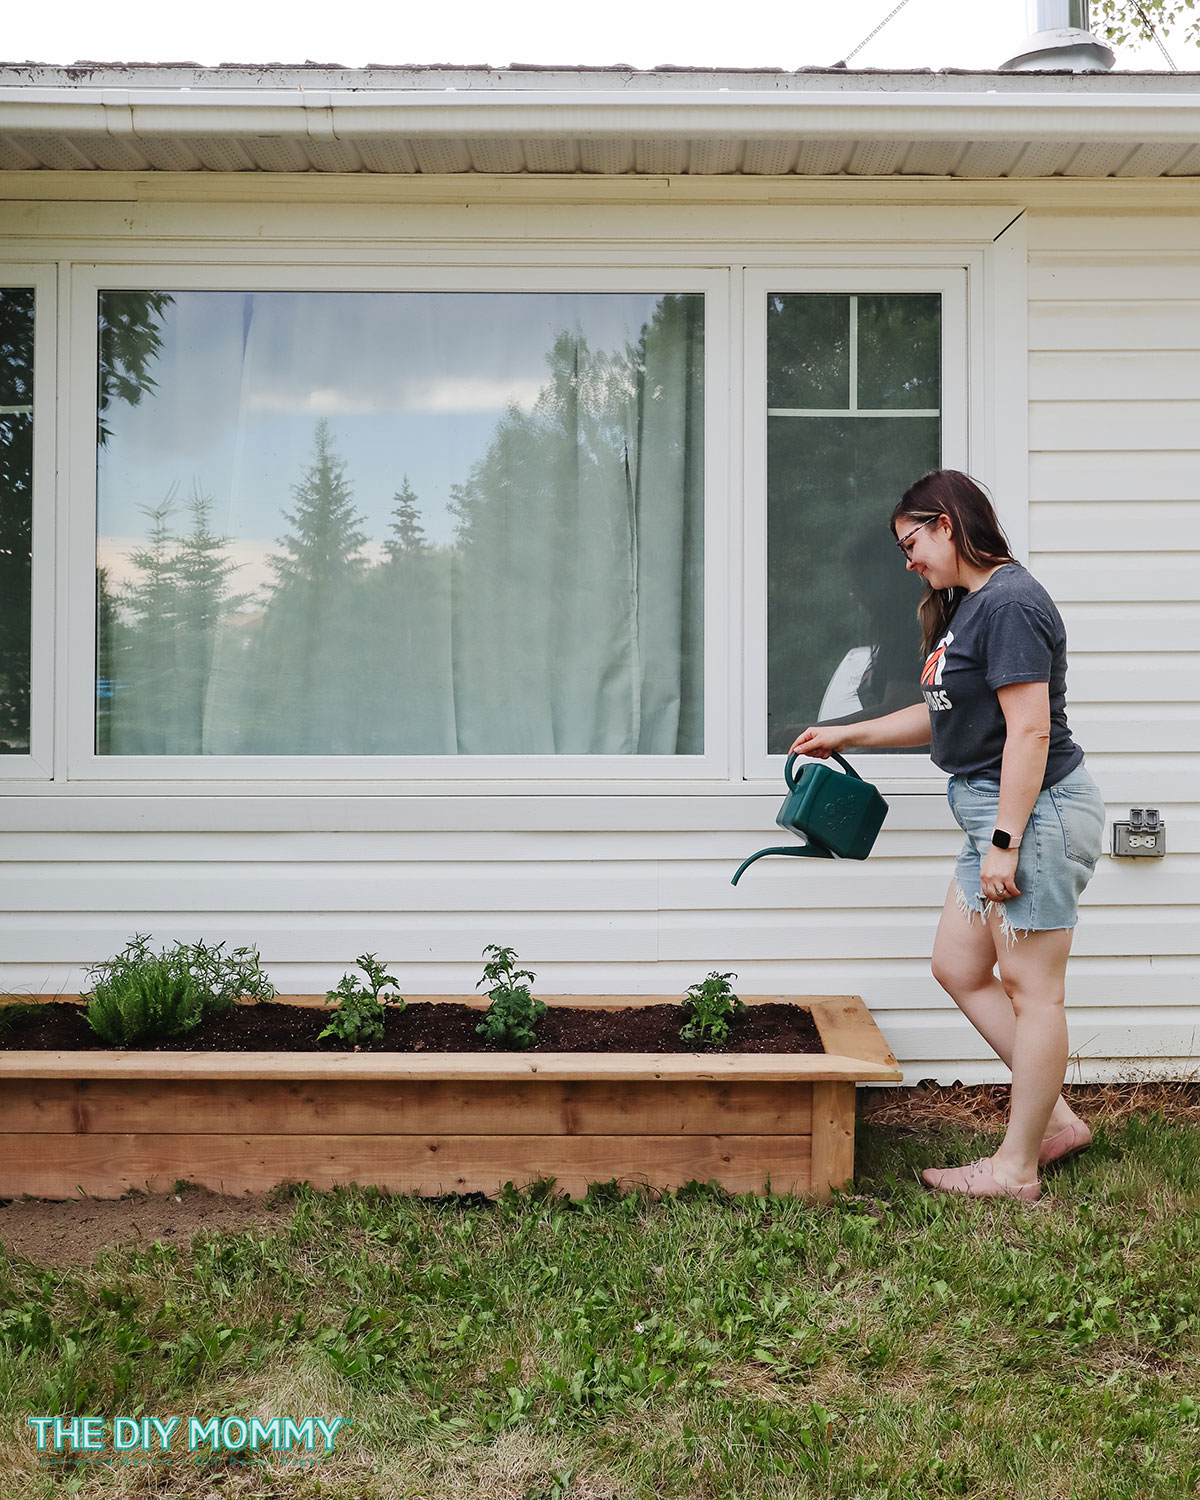
Now that your garden bed is complete, it’s time to add some soil and plants! To save money, you can add some random organic matter to the bottom third or half of the planter first. Use things like branches, compost, mulch or straw bales. Then, fill the rest bed with a high-quality soil mix, leaving a few inches of space at the top. Then, choose the plants that you want to grow and add them to the bed. Popular choices include tomatoes, potatoes, cucumbers, carrots, lettuce, peppers, herbs, onions and flowers. Water your plants regularly and watch them grow into a beautiful garden!
Cheap DIY Raised Garden Bed Step-by-Step Instructions
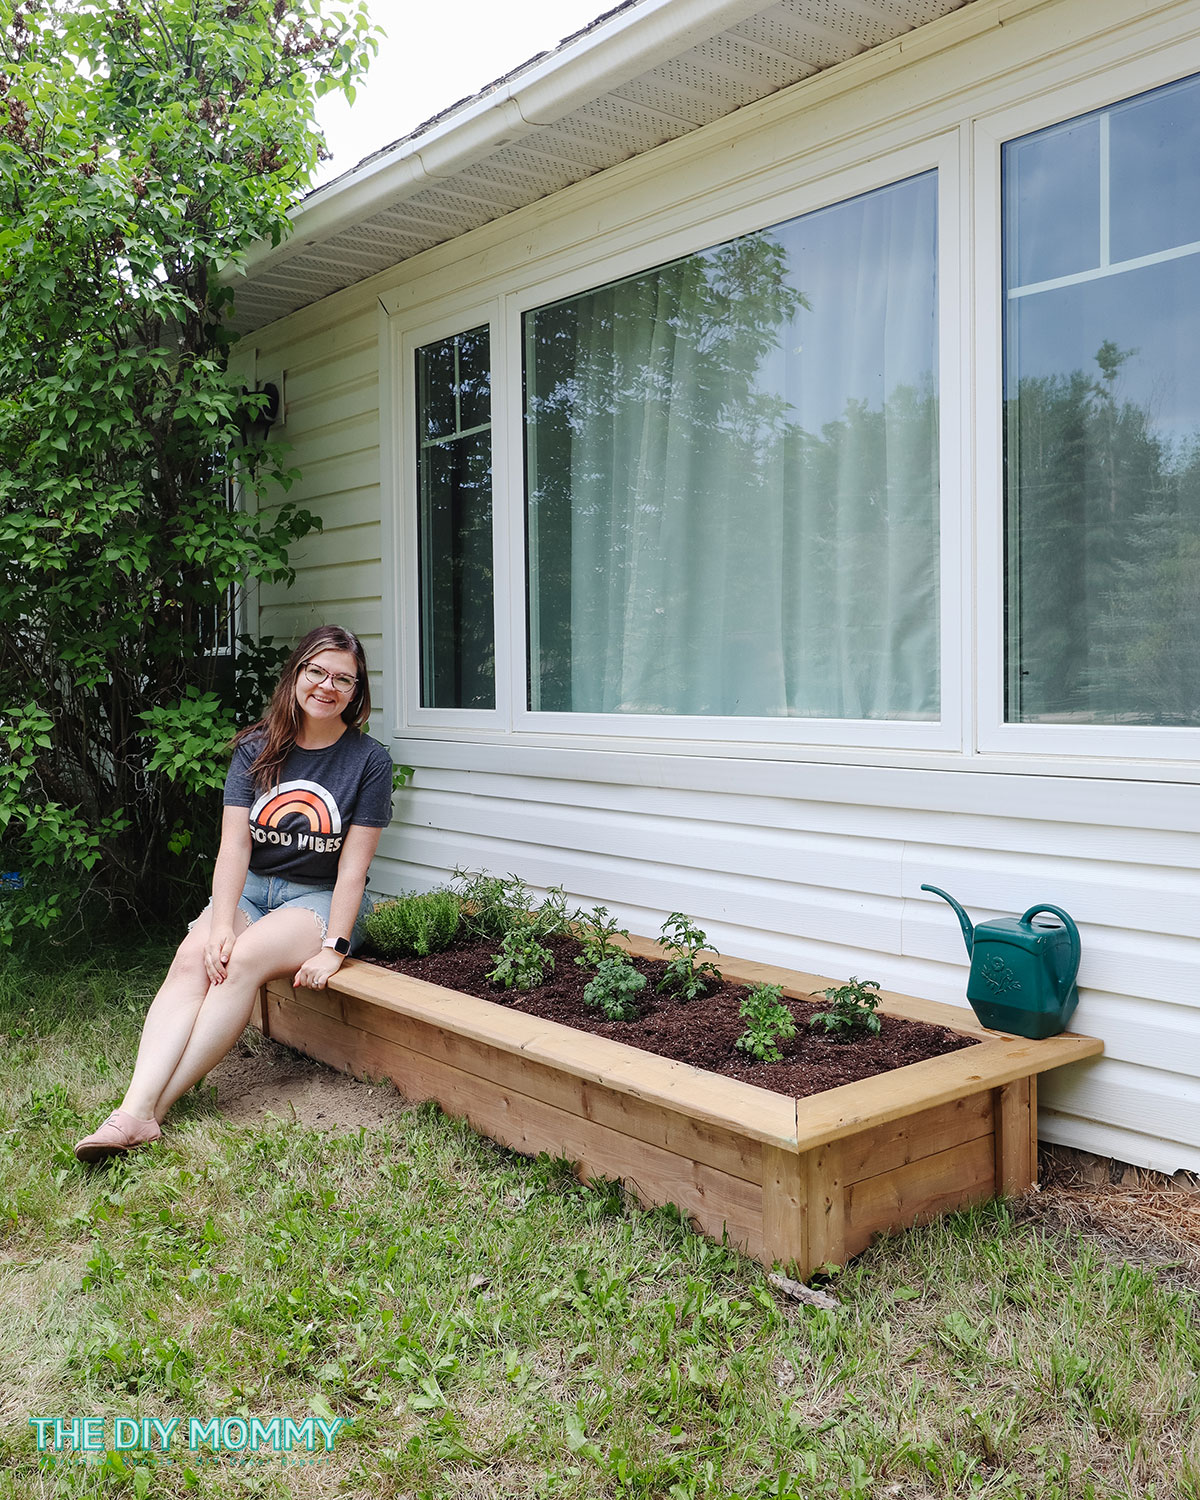
Finished raised garden bed size is approximately 7 feet long by 2 feet wide by 1 foot high.
Materials & Tools List
- (9) 5/4 x 6 x 8 deck boards (I used MicroPro Sienna treated lumber for everything)
- (1) 1 x 3 x 8 lumber
- (1) 4 x 4 x 8 lumber
- 1 1/2″ wood screws
- 2″ wood screws
- miter saw
- drill
- brad nail gun
- brad nails
- measuring tape
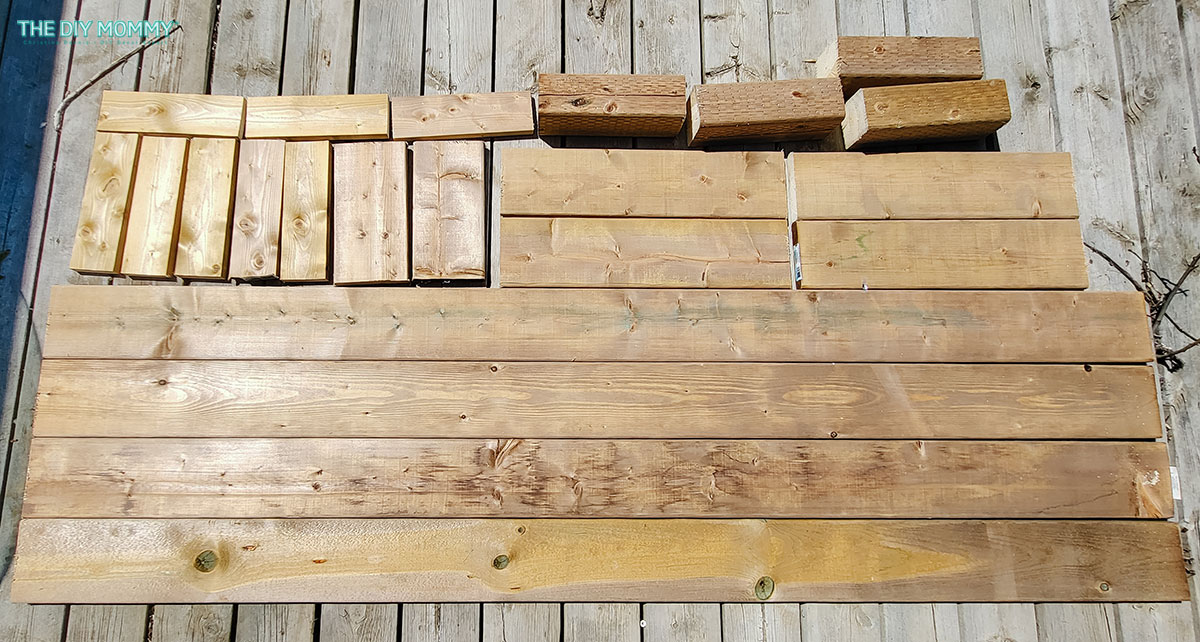
Cut List
Here are all of the pieces you will need to cut with a miter saw from your materials:
- (4) 5/4 x 6 deck boards at 7 feet long
- (4) 5/4 x 6 deck boards at 2 feet long
- (2) 5/4 x 6 deck boards at 1 foot long
- (2) 5/4 x 6 deck boards at 7 feet long with a mitered corner extending past the 7 ft (not shown in photo above)
- (2) 5/4 x 6 deck boards at 2 feet long with a mitered corner extending past the 2 ft (not shown in photo above)
- (8) 1 x 3 at 1 foot long
- (4) 4 x 4 at 1 foot long
Instructions
Here’s how to assemble your raised garden bed
Assembling the long sides
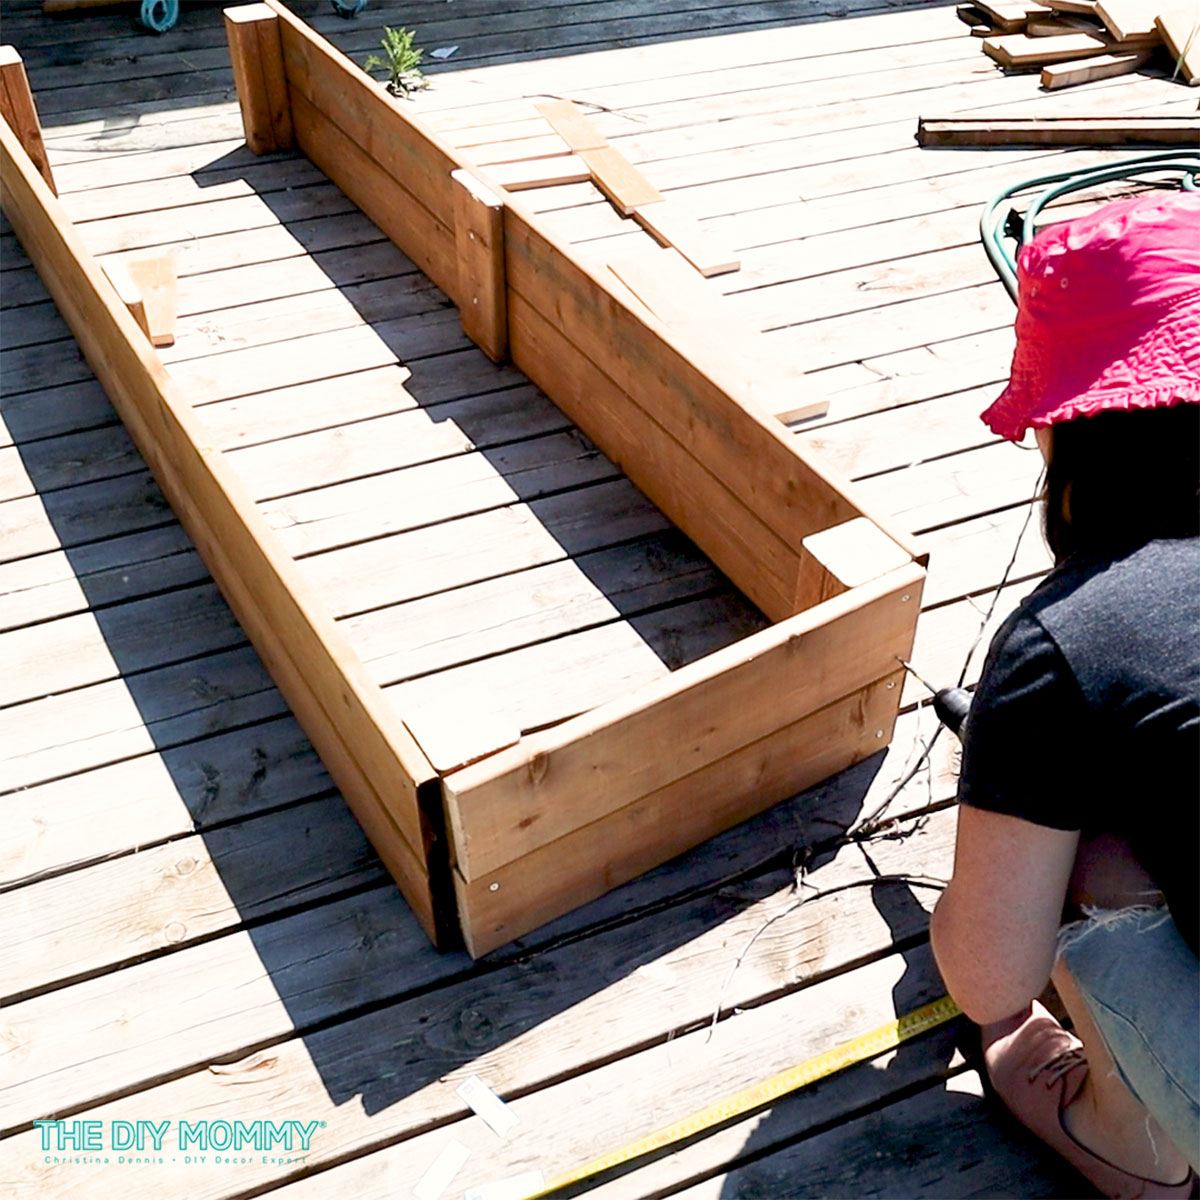
After you’ve cut all of your lumber, place two of the 7 foot long deck boards parallel to each other and secure them together in the middle using a 1 foot long deck board and 1 1/2″ wood screws. Repeat with the other two 7 foot deck boards to create the second side of your raised garden bed.
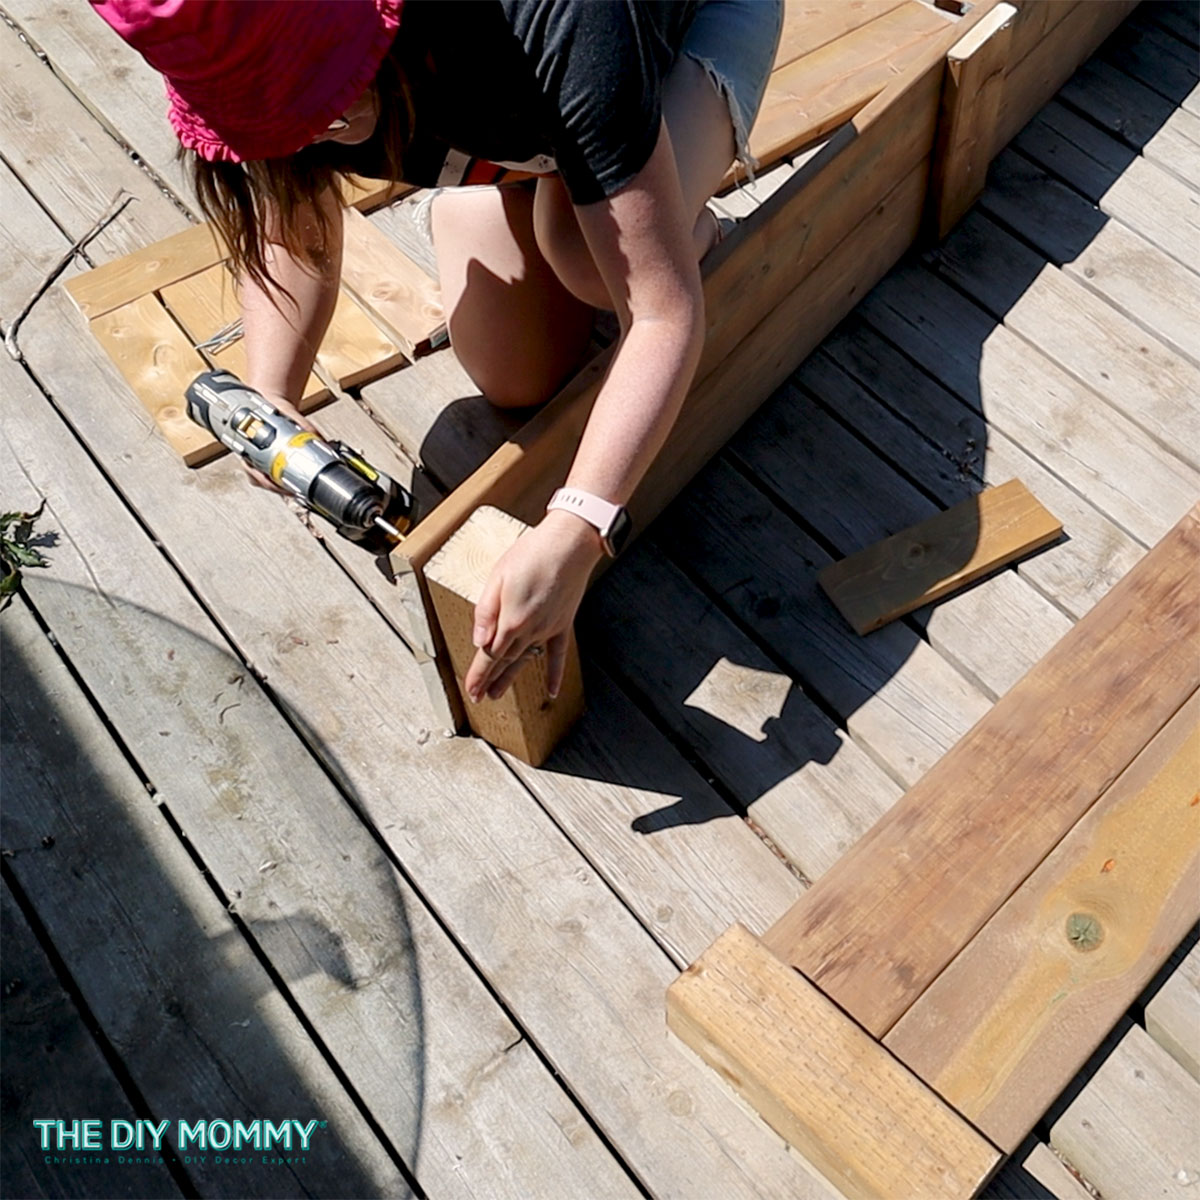
Next, use 2″ wood screws and your drill to attach two of the 4×4 posts to either inside end of your garden bed sides as shown above. I used two screws – one near the top and one near the bottom. Repeat this with the second side and remaining two 4×4 post pieces.
Assembling the short sides
Now it’s time to add the two remaining sides to the raised garden bed. Place the two long planter sides perpendicular to the ground, parallel to each other and about 2 feet apart. Using 2″ wood screws, attach the ends of two of the 2 foot long deck boards to the bottom of one of the 4×4 posts as shown above. I used 2 wood screws on each board. Then, attach a second 2 foot long deck board above the first one with wood screws. Repeat with the final side of the garden bed.
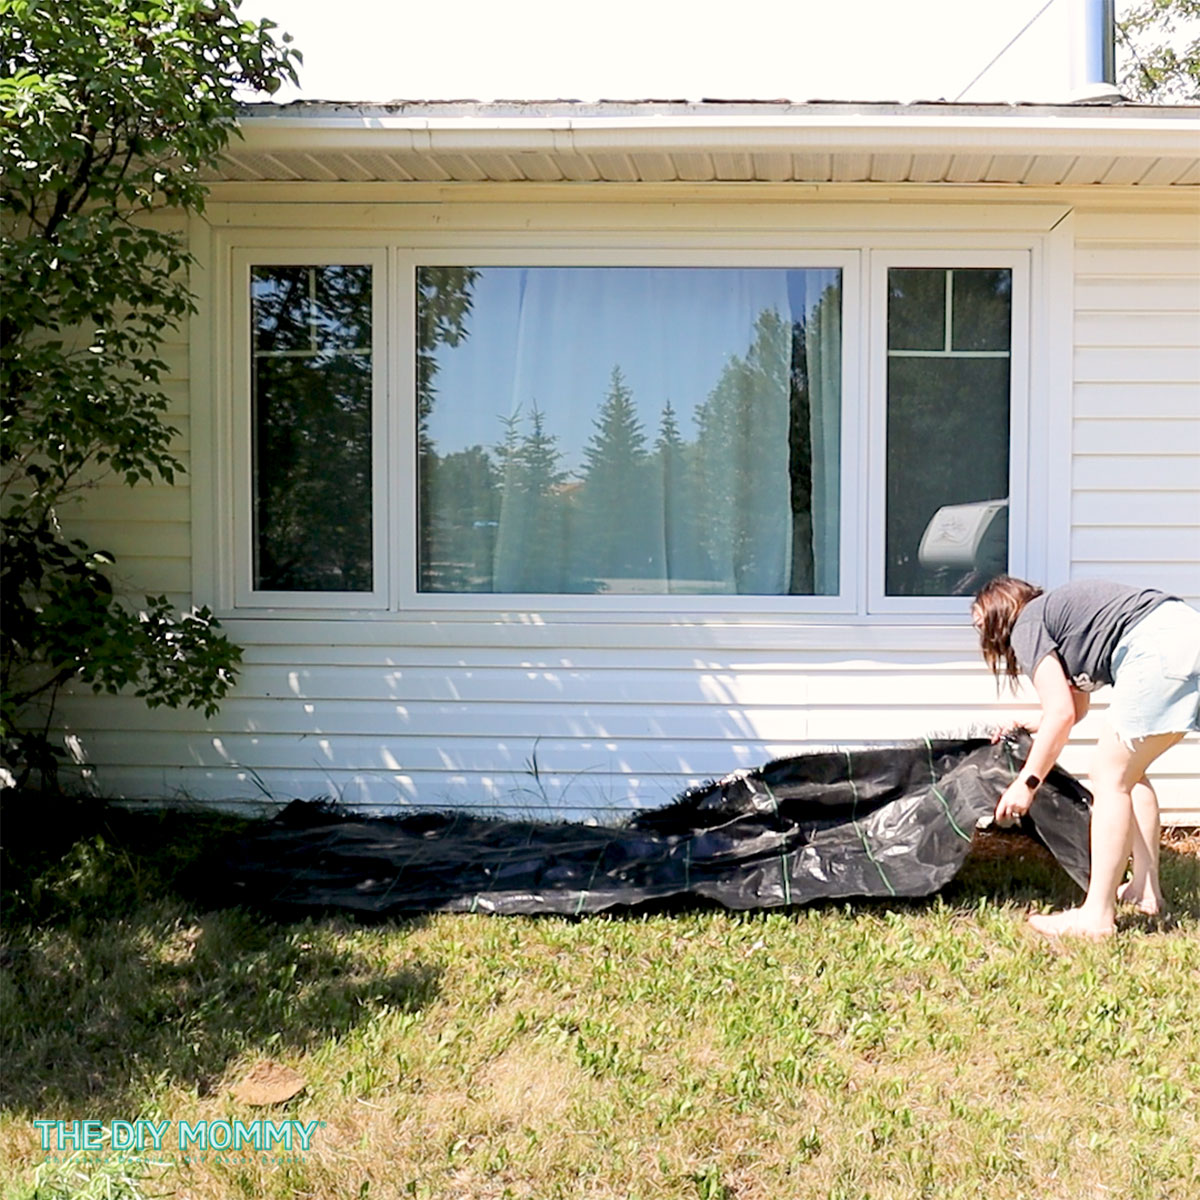
Preparing the site
Next, prepare the site where the garden bed will sit by laying down some landscaping fabric that’s at least the same size as the bed. When siting your garden bed, think about the plants you want to grow and what sort of exposure will work best for them.
I’m placing my raised garden beds in front of my little studio. It’s been hard to grow anything here, so not only are these functional but they’re beautiful, too. I love how the warm wood colour of the planters looks against the black and white colours of my studio’s exterior.
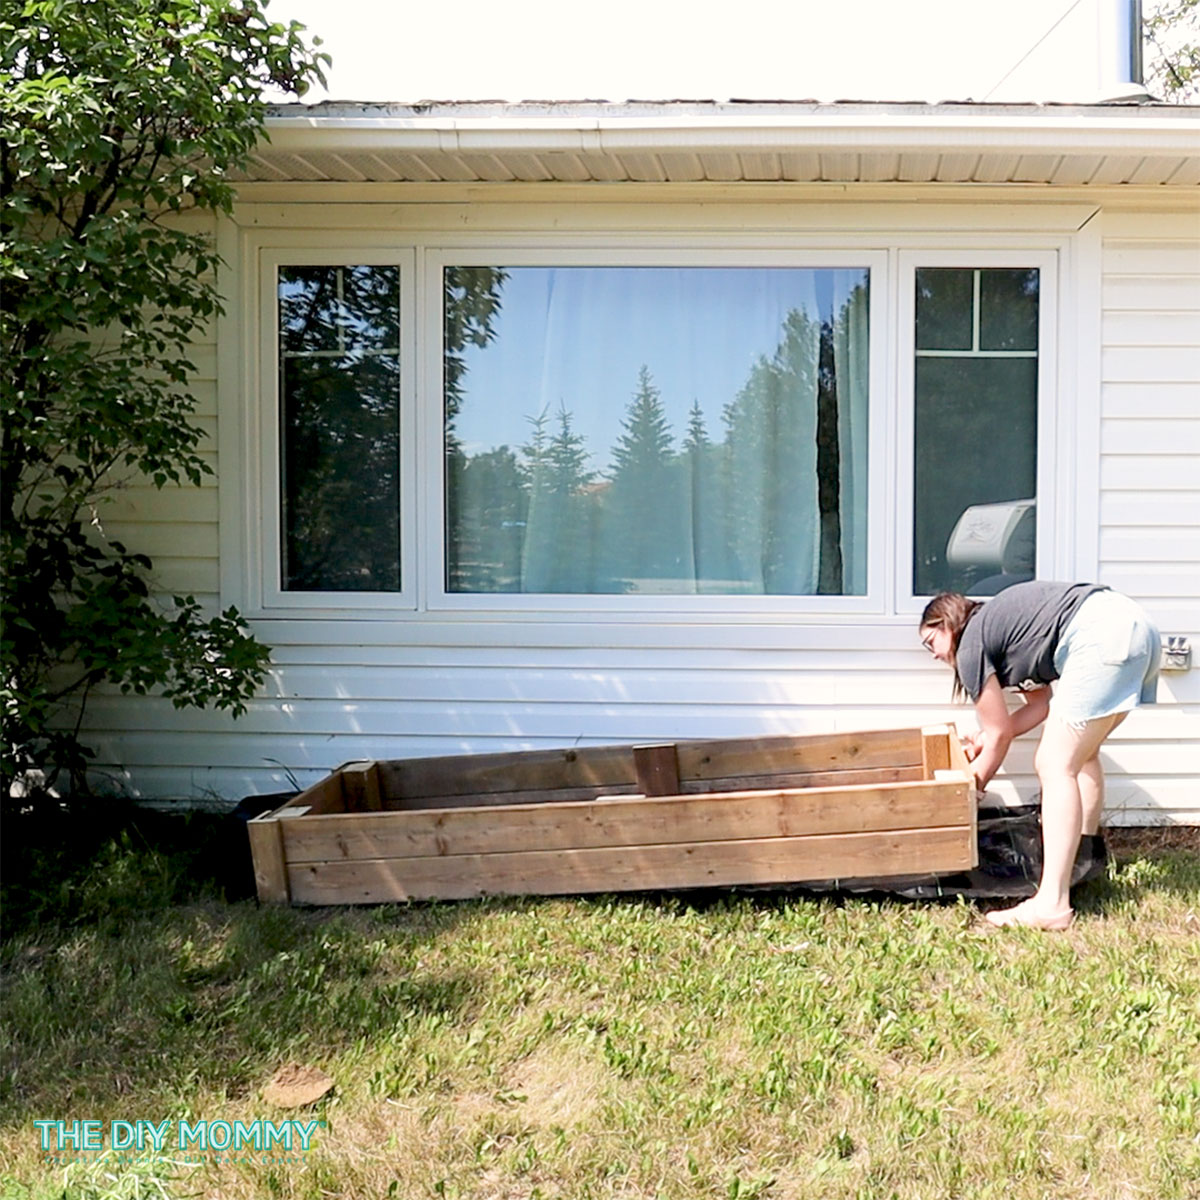
Then, carefully move the raised garden bed and place it on top of the landscaping fabric.
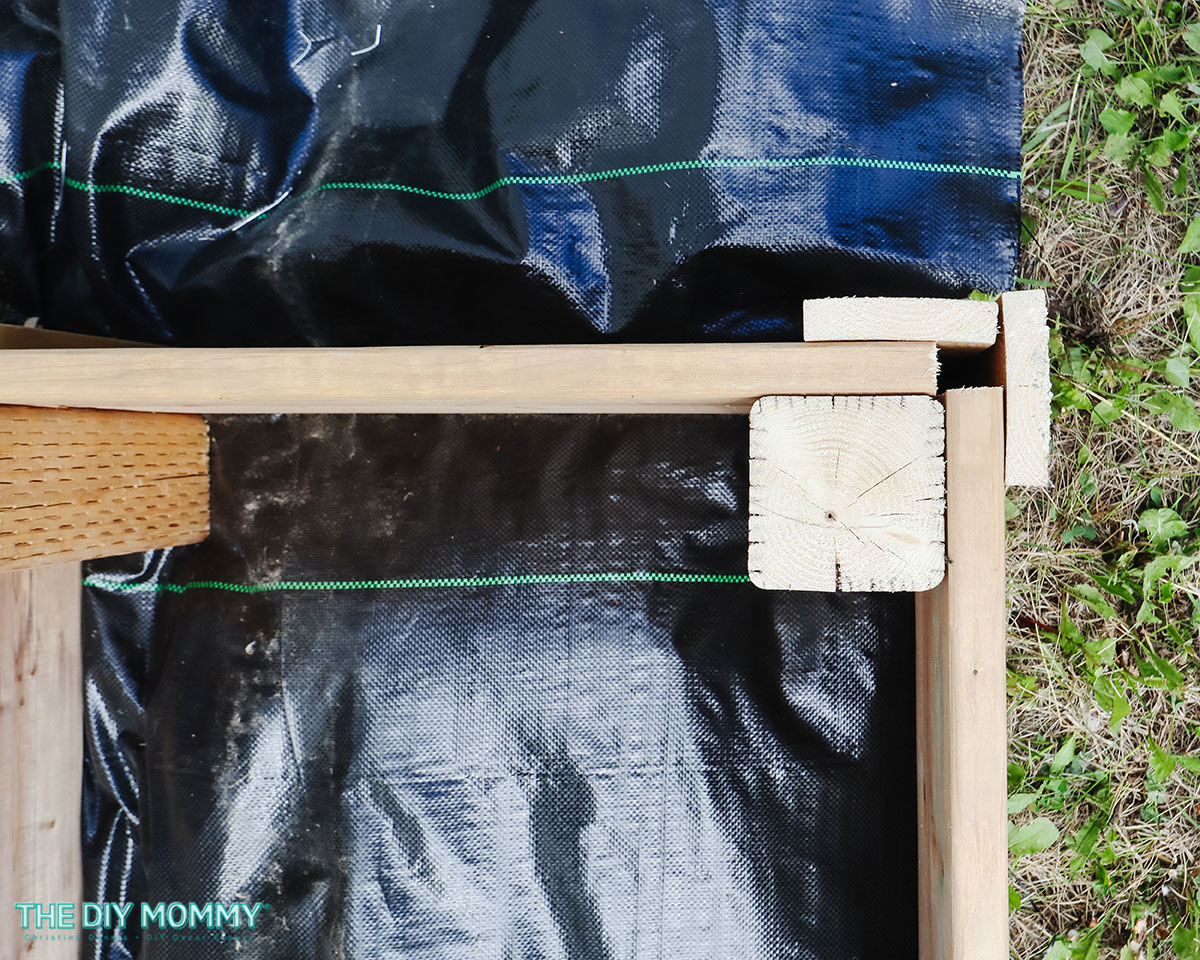
Adding the trim details
Now that the bed is in place, you can add the trim details to make it look finished. First, use a finishing nail gun to apply the 1×3 lumber pieces to the outside corners of the bed as shown above. These will hide the unsightly seam at the corners of the bed.

Then, use your finishing nailer to apply the mitered deck boards to the top of the garden bed as shown. These give the raised bed a beautiful, finished look and they hide the unfinished tops of the corner posts. You can seal any wood that needs protection from soil at this step if desired.
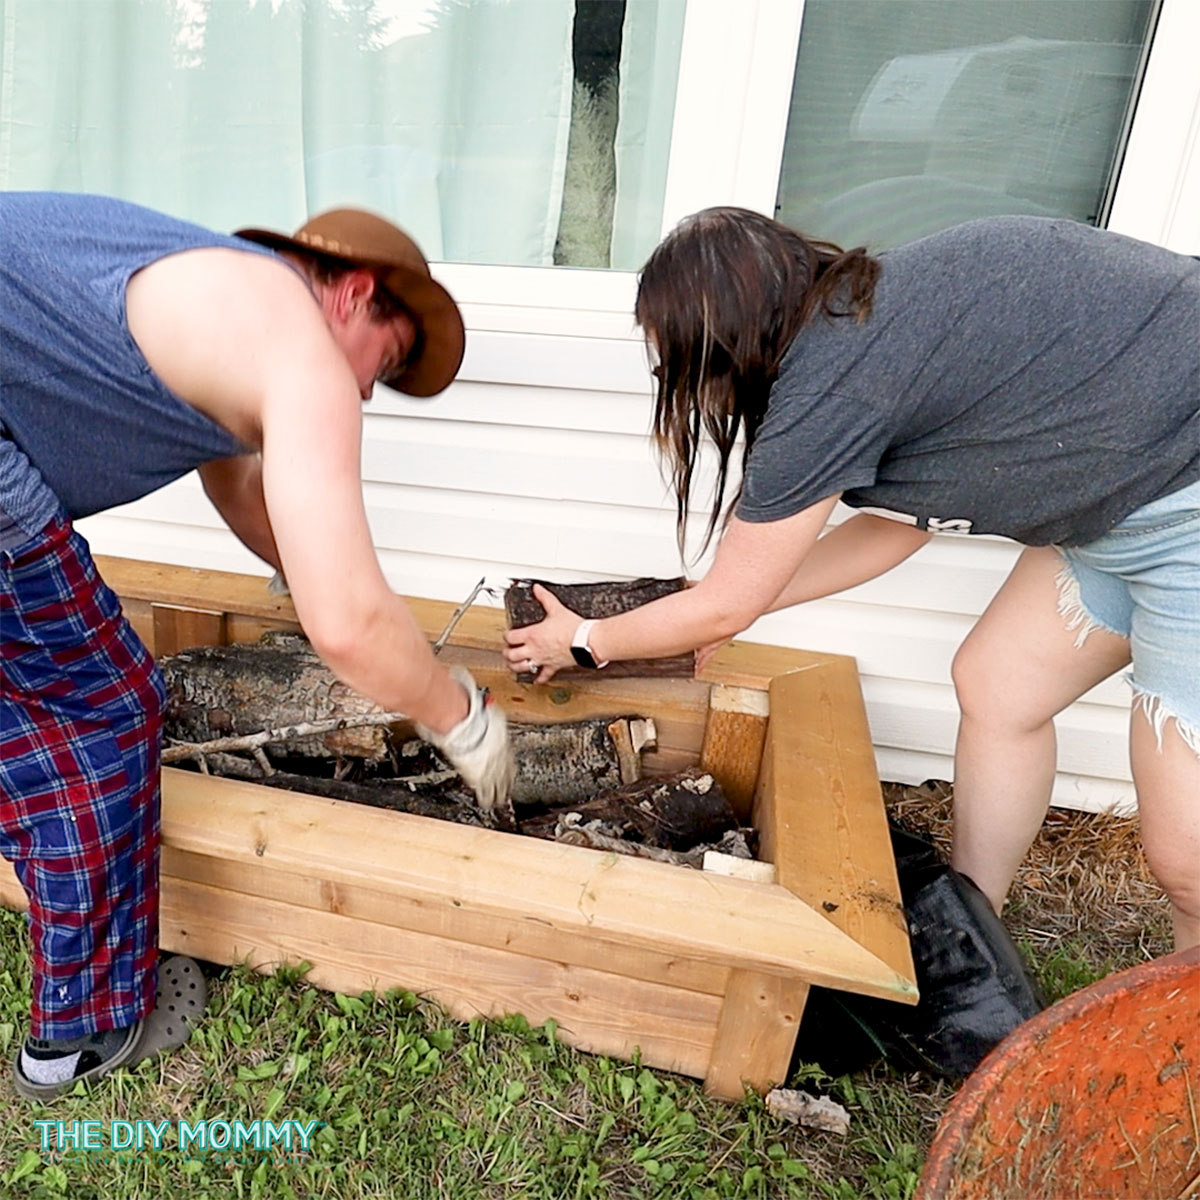
Filling your cheap DIY raised garden beds
To fill the garden bed, you can use organic matter at the bottom so you don’t have to use as much soil. We used some wood from some trees we had to cut down in our yard.
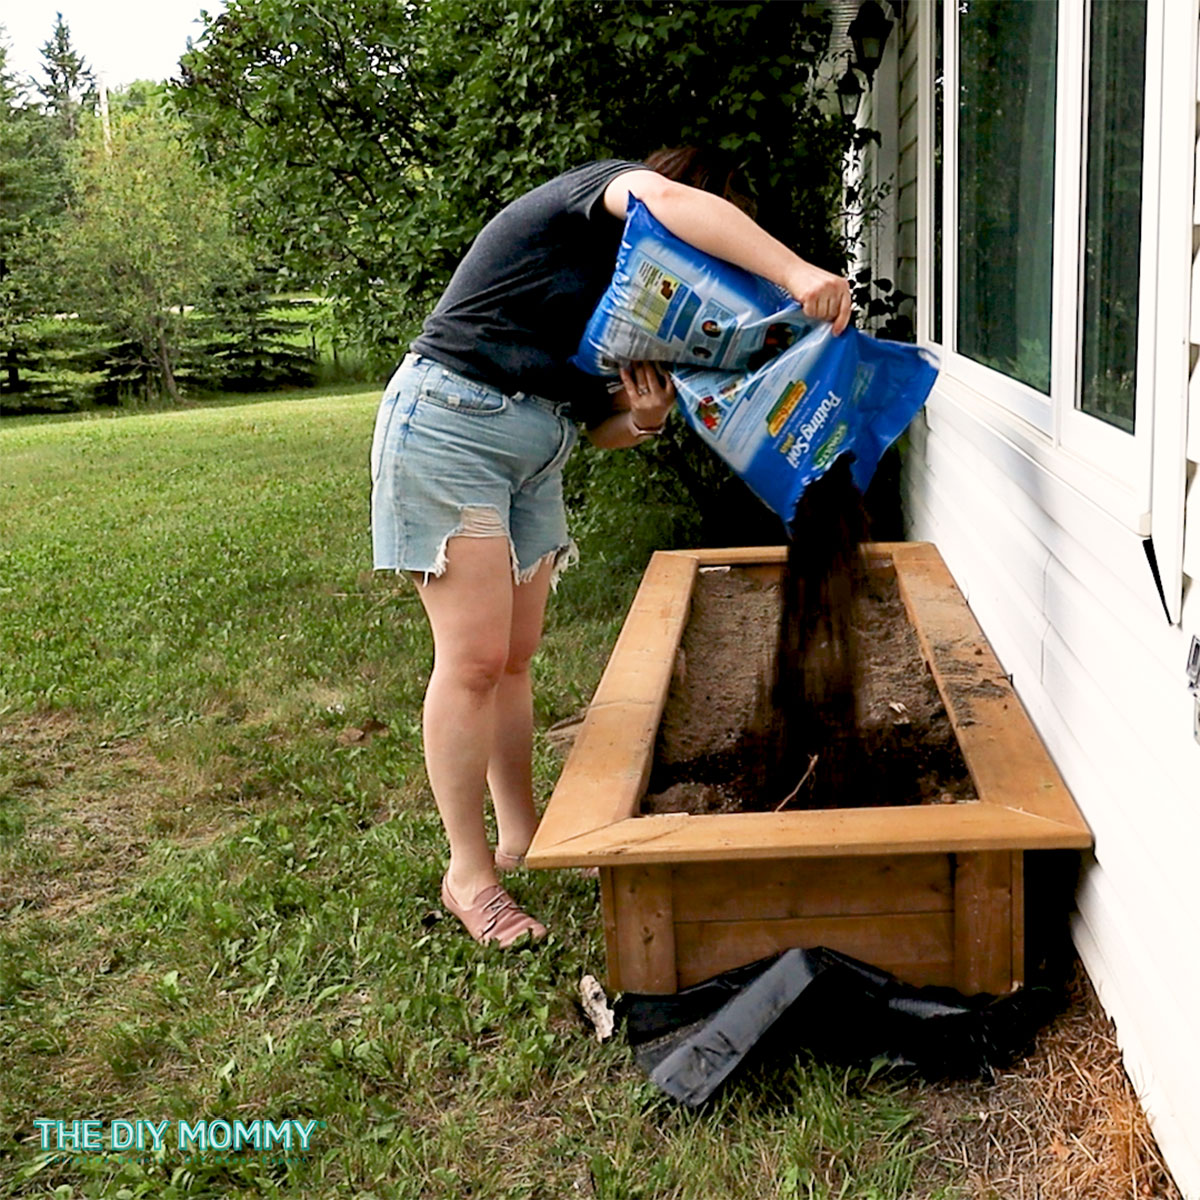
Next, fill the rest of the garden bed up with some soil. We used a layer of sandy soil, then a final layer of potting soil.
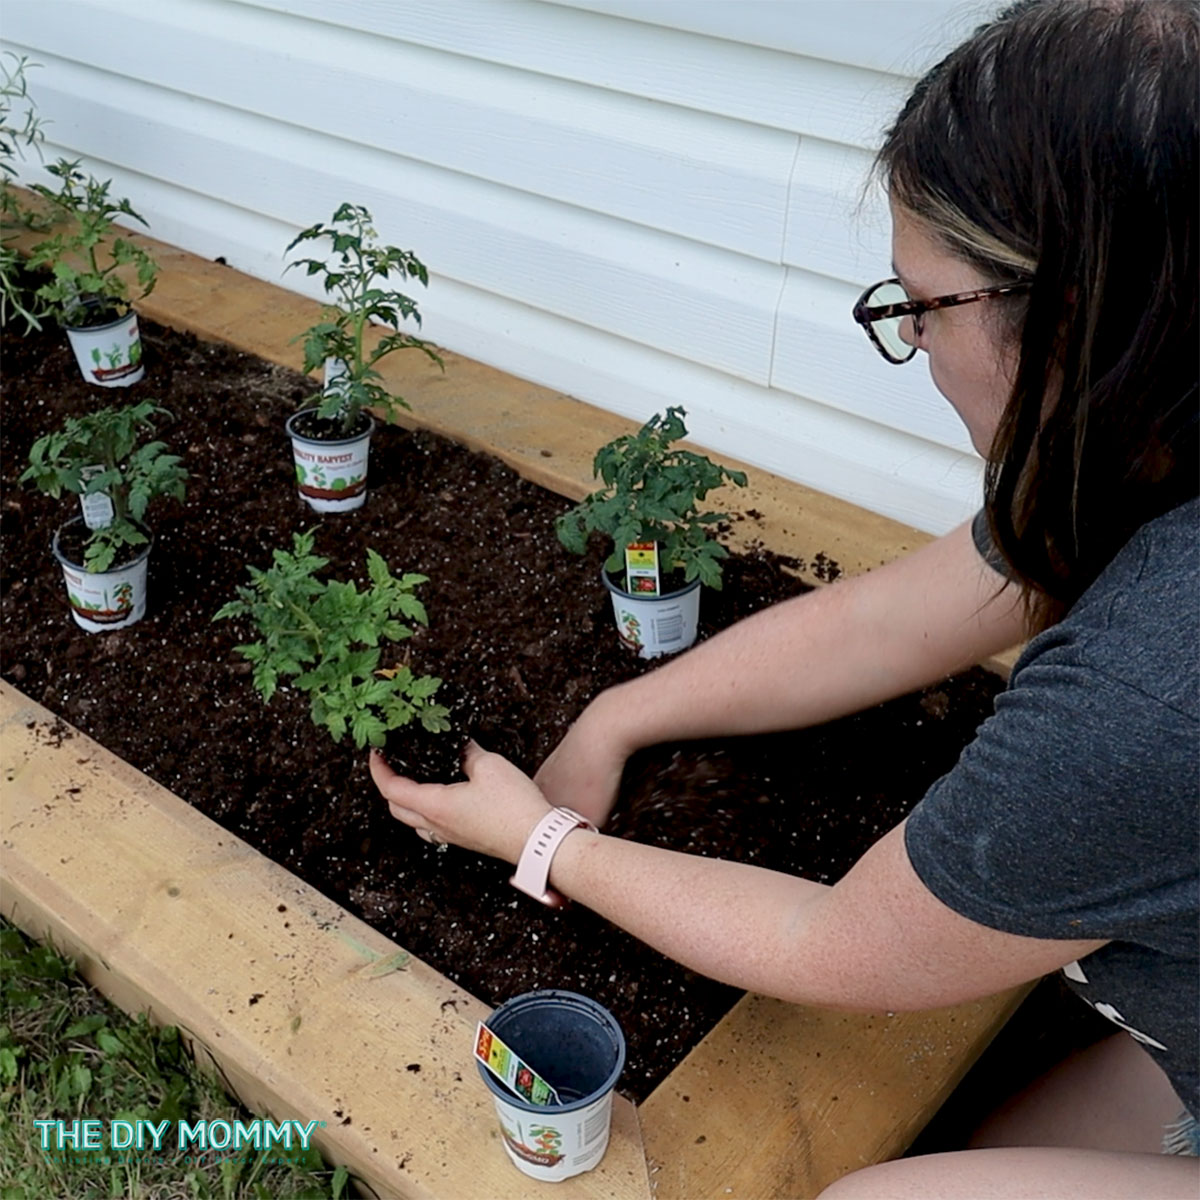
Planting your garden bed
Finally, it’s time to plant! Create holes in your soil that are slightly larger than your plant, insert the plant, and pat down the soil around it. Don’t forget to water your plants and fertilize them as needed. Enjoy gardening in your cheap DIY raised garden beds!
FAQs
Raised beds warm up quicker in the spring and usually drain better. This allows for a longer growing season. Raised beds can also be easier on the back for the gardener!
I’d be wary of using old pallets to make raised planters. Sure, they can be cheap or even free, however it’s hard to know what treatment chemicals have been used on them. These chemicals can leach into the soil and affect the plants.
Here are some clever ways to control pests naturally in your raised garden.
Yes, just like any container gardening you’ll need to ensure your raised garden bed has proper drainage. Use a special potting soil mix, and/or add amendments and earthworms to improve aeration and drainage in your garden bed. Since these particular DIY raised beds don’t have a bottom, drainage holes aren’t required.
More inexpensive raised garden bed ideas:
- build a raised garden with cinder blocks
- use corrugated metal to create a beautiful insert in your raised garden bed
- add a beautiful and practical trellis to your garden bed
- build a tiered garden bed with even more room for plants
- use reclaimed bricks to build gorgeous raised beds