How to Install a Sliding Barn Door for a Closet
This post may contain affiliate links · This blog generates income via ads
Are you looking to update your closet doors with something stylish and functional? Look no further than a sliding barn door! With a little bit of planning and some basic tools, you can easily transform your closet into a chic and functional space. In this blog post, I’ll take you through a step-by-step guide on how to install a sliding barn door for your closet. Don’t worry if you’re new to DIY projects – I’ve got you covered with this simple tutorial!
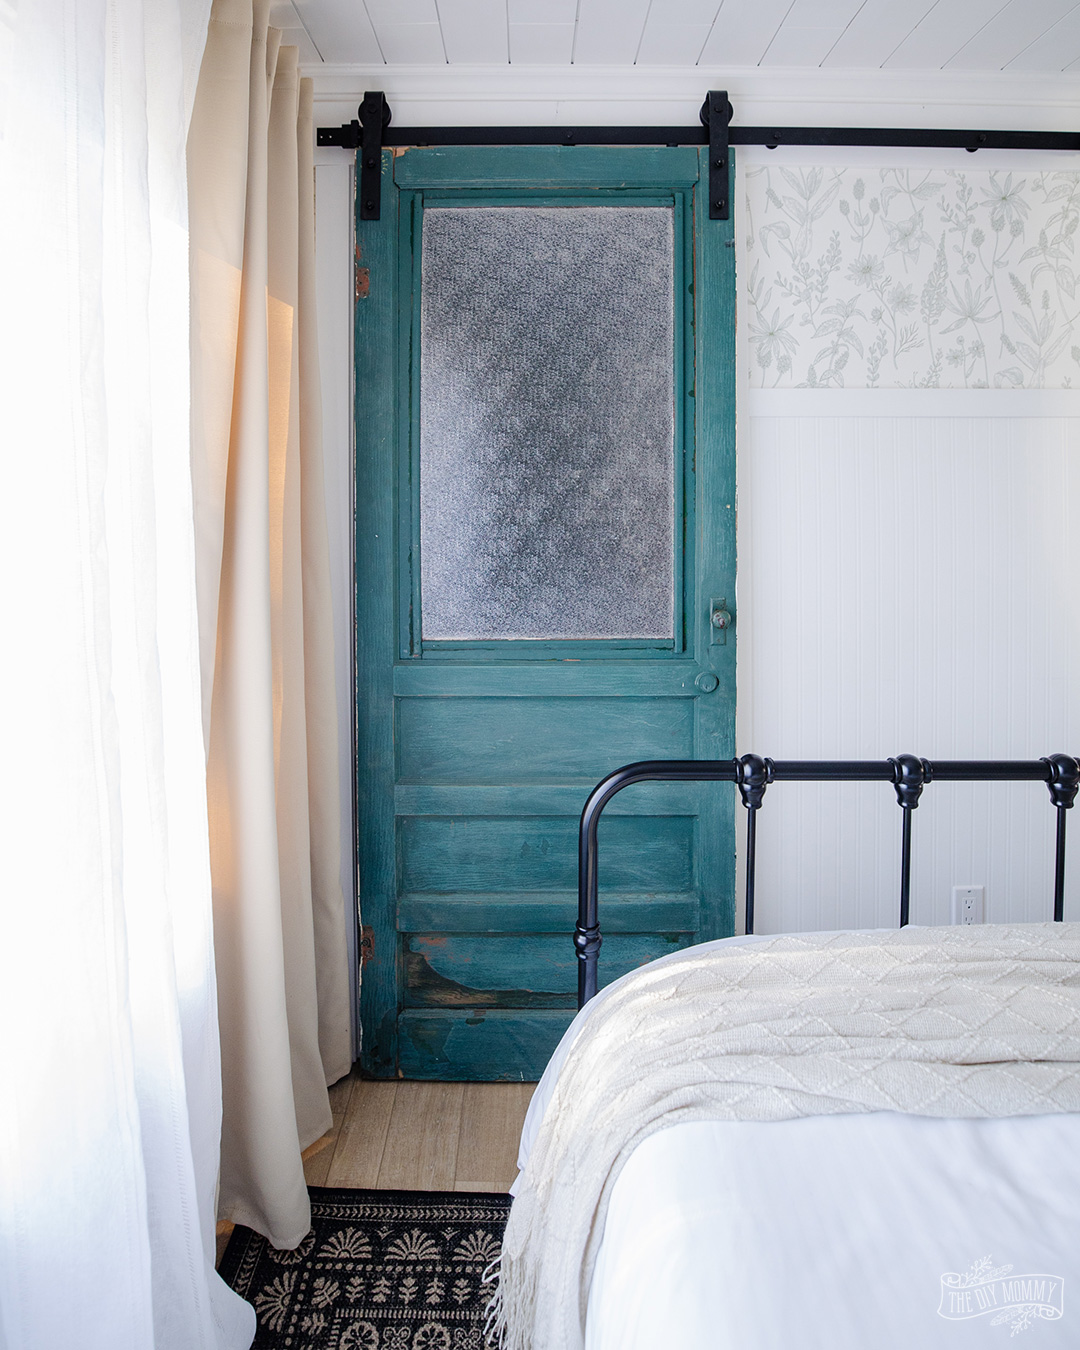
Barn doors are a fun way to add some personality to a room, and we’ve installed a few over the last several years. You can make them look modern or rustic… whatever style you love the best! Closet barn doors are also a great solution for tight spaces in which you can’t fit a standard swing door. In this tutorial, I’ll share how we installed a barn door to the closet in our Tiny Lake House bedroom.
You will need:
- slab door that’s a little larger than your opening
- barn door hardware kit
- door handle
- measuring tape
- drill
- level
Step 1: Measure the Doorway
The first step to installing a sliding barn door is to measure the doorway of your closet. Measure the width and height of the door frame and add 2 inches to the width and 1 inch to the height to allow for clearance. You’ll want a slight overlap. This will be the size of the door you will need to purchase or make.
Step 2: Make or Source the Barn Door
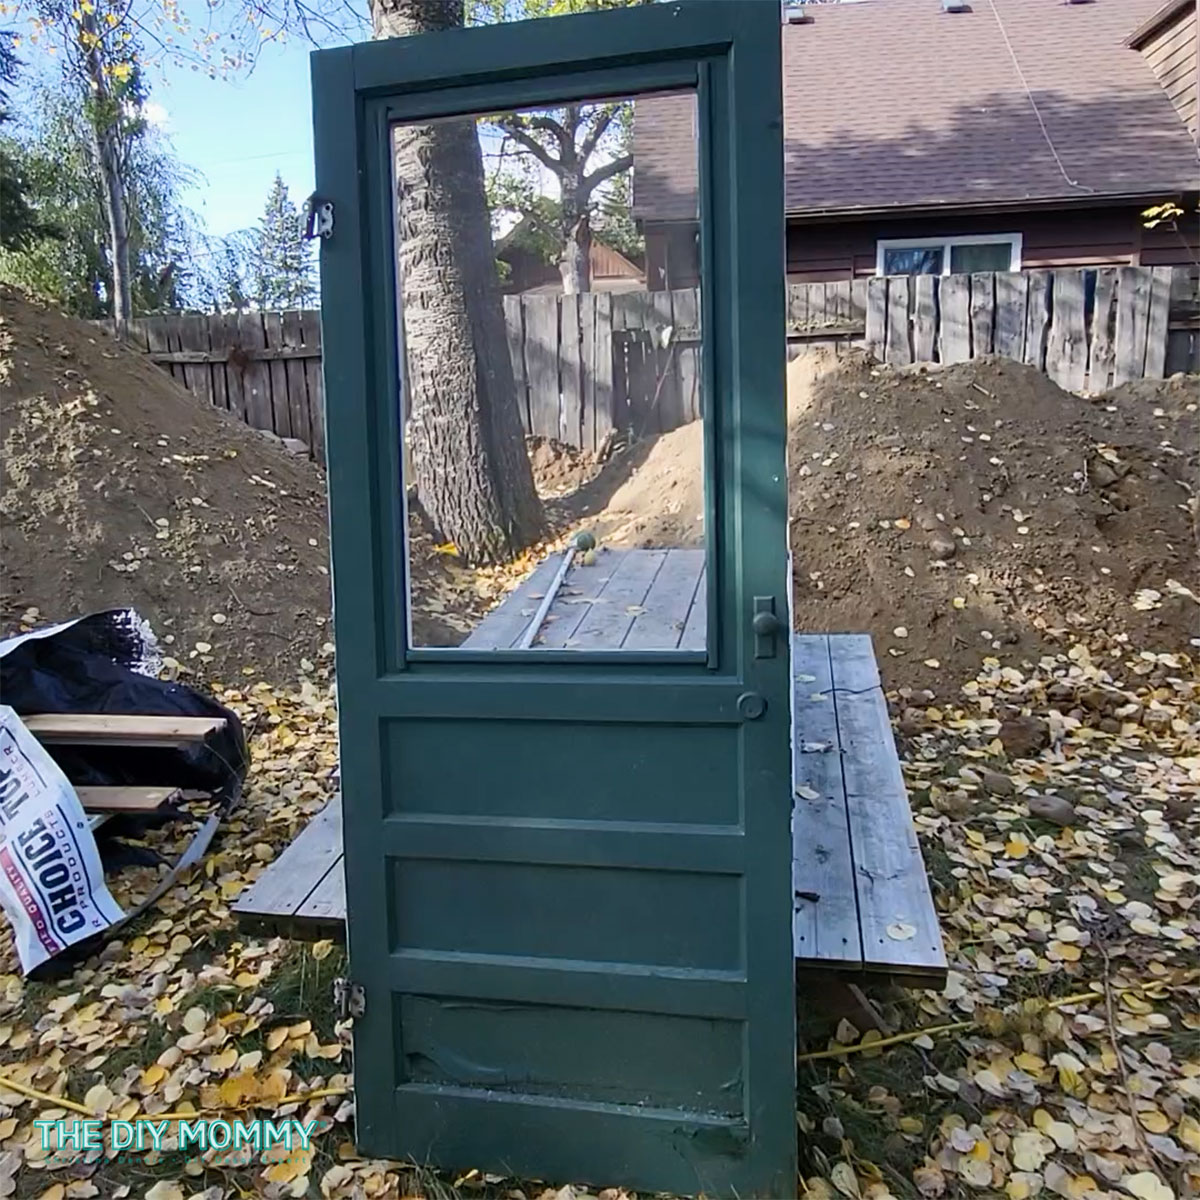
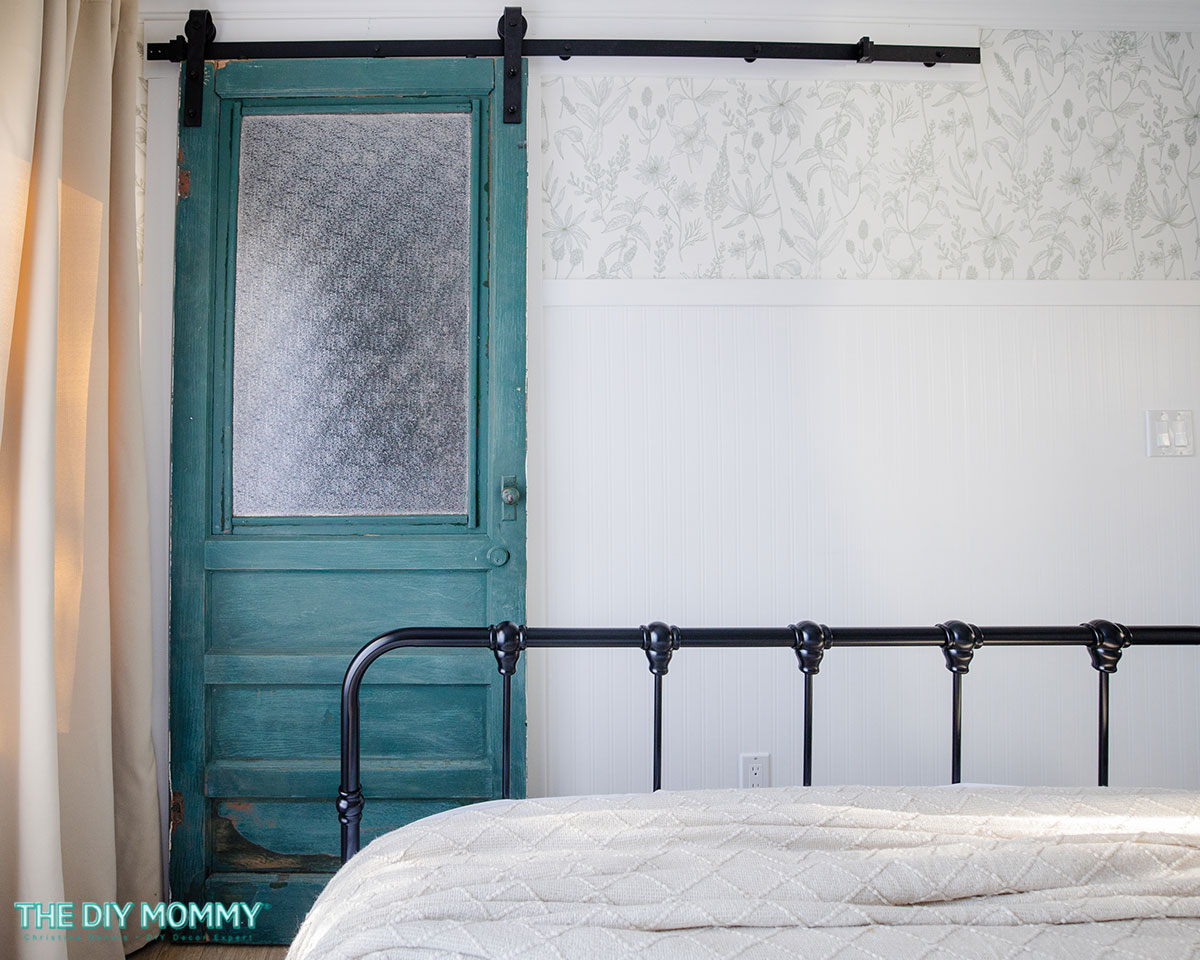
You can purchase pre-made barn doors from most home improvement stores, build your own, use a slab door, or upcycle a door you already have. For this utility closet off the bedroom in our Tiny Lake House, we repurposed the original exterior screen door! I cleaned it, gave it a good sanding, and then added some heavy plastic to the old screen opening.
In our own primary bedroom makeover, we used an interior slab door for the sliding barn door to add privacy into our bathroom. We have built a barn door from scratch before with some pine boards & wood glue, and we used some stain to give it a rich look. You can see that one on this under-stairs nook here!
Step 3: Install the Hardware
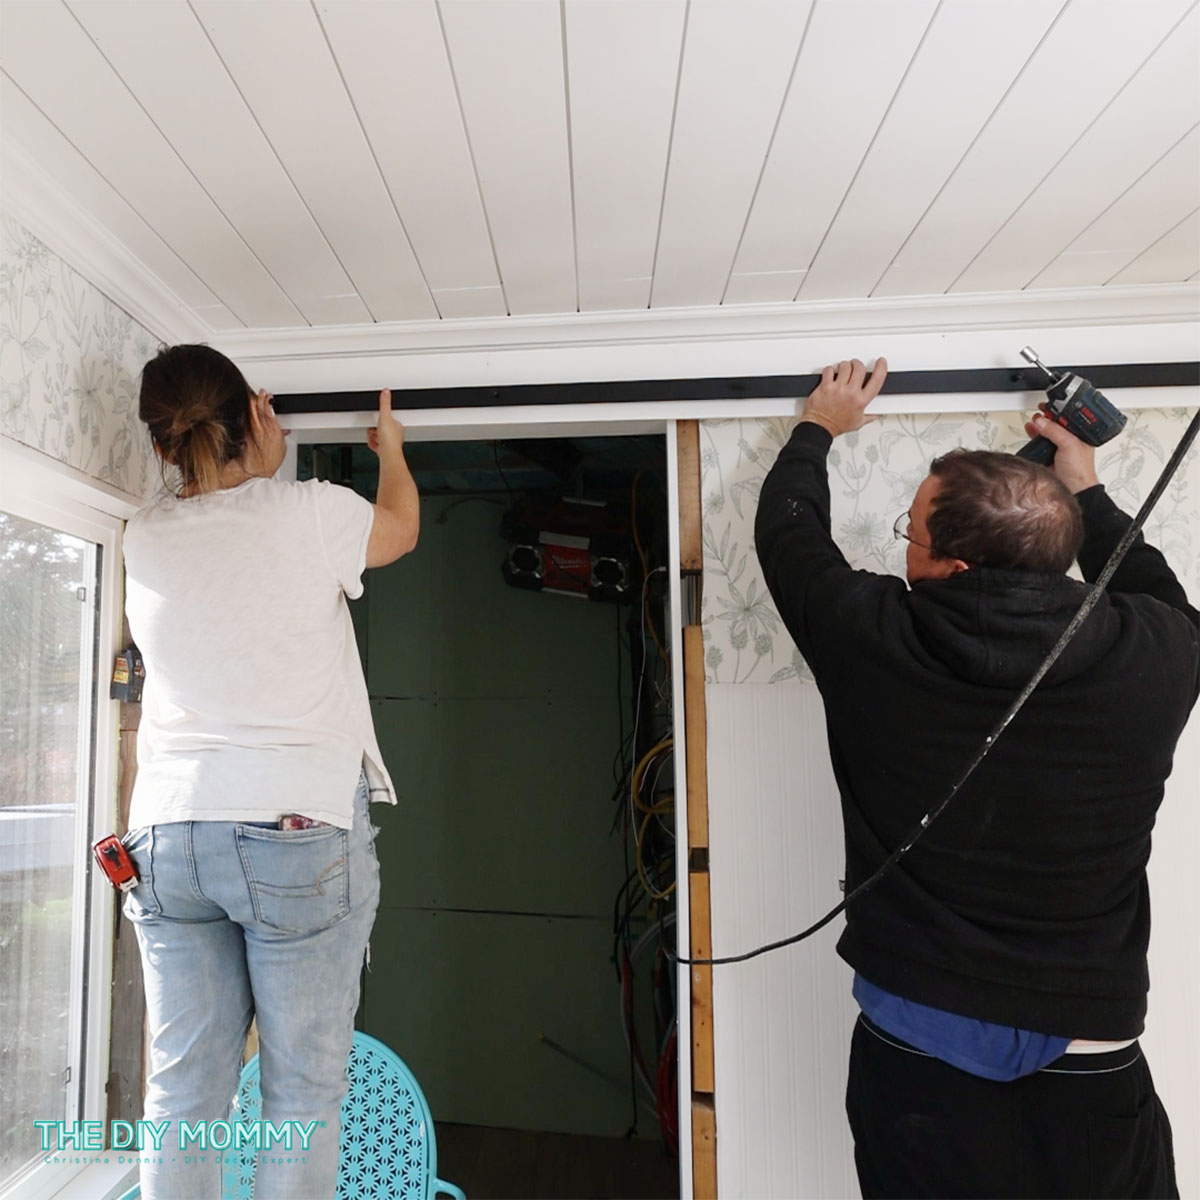
The next step is to purchase & install the hardware that will hold the sliding door in place. Most barn door hardware kits include a track, rollers, and brackets that will be attached to the wall above the doorway. Here’s the sliding barn door hardware from the Home Depot that we used for this closet. You can also find barn door hardware on Amazon, here. Make sure you purchase a sliding barn door kit that more than twice the width of the door you’re using with room for stoppers on each end.
Follow the manufacturer’s instructions for your specific hardware kit to install the hardware securely to the wall. Make sure to use a level to ensure that the hardware is straight and level. Ensure that the top rail is securely fastened to studs in your wall so that your barn door will be safe and stable.
Tip: Fasten it Properly!
If you can’t fasten your hardware into studs, you can first mount your hardware on a piece of wood like we did with this door. Then, attach the wood to studs in the wall for a sturdy door structure.
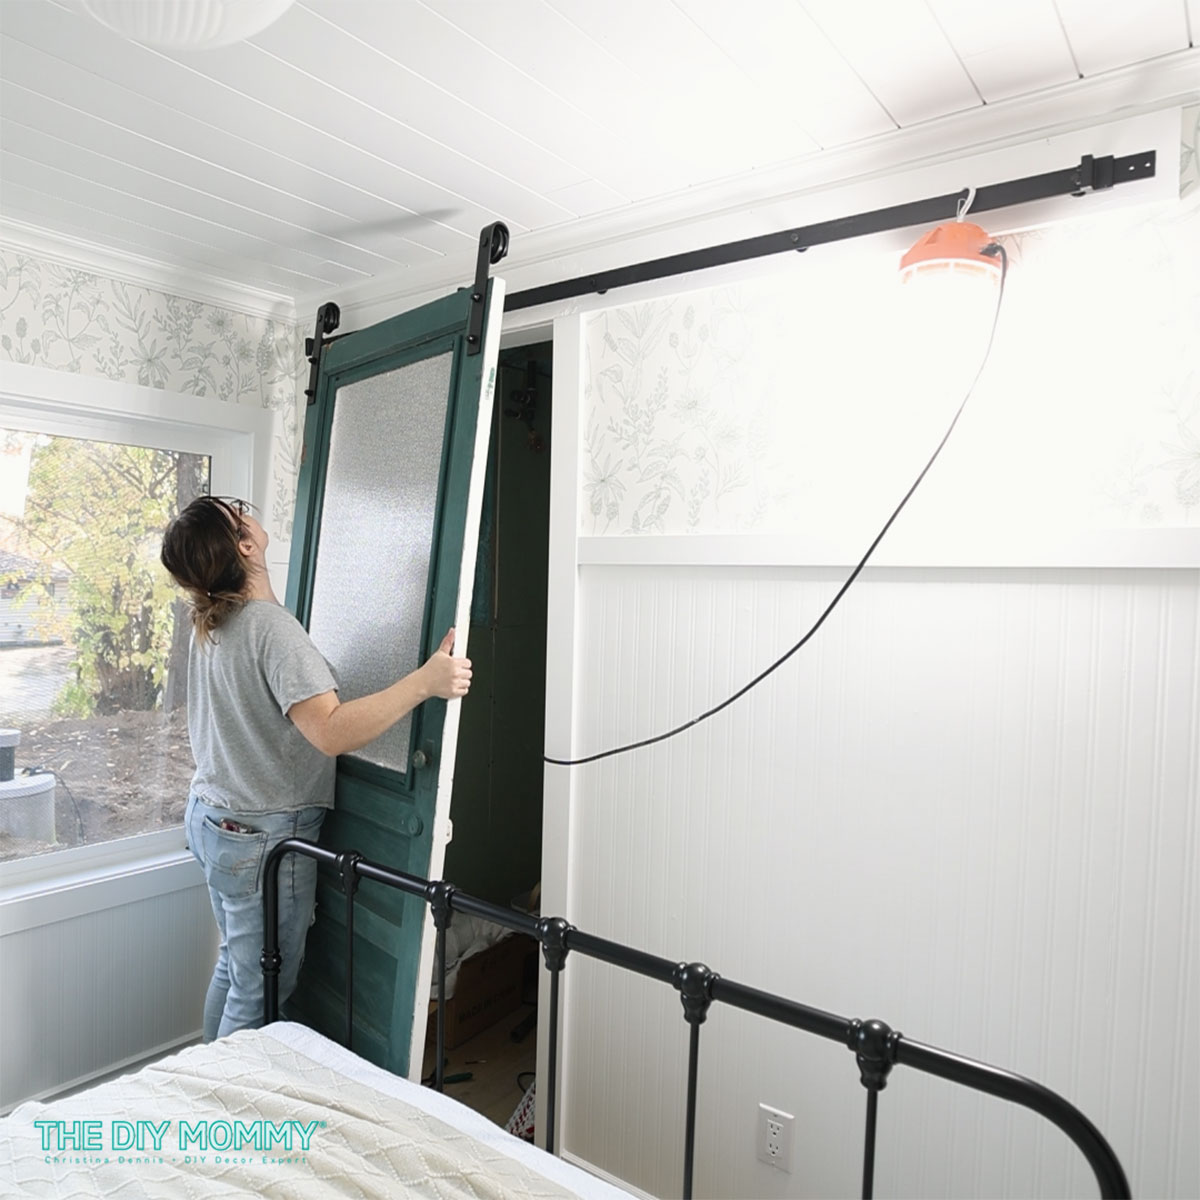
Step 4: Attach the Door & Floor Guides
Once the hardware is securely attached to the wall, it’s time to attach the door to the rollers. Place the rollers onto the track and gently lift the door into place. The door should hang securely from the rollers and slide along the track without any resistance. Adjust the rollers as necessary to ensure a smooth sliding motion.
Most barn door hardware kits will come with metal floor guides that you can fasten to the floor. These will help you door guide smoothly to the left and right without it wobbling from front to back.
Step 5: Install the Handle
Now that the door is securely in place, it’s time to add a barn door handle to help slide the door open and closed. Choose a handle that matches the style of your sliding door and screw it into place on the door. Make sure that the handle is securely attached and easy to grab. For this project we simply used the hardware that was already on this vintage screen door.
Step 6: Enjoy Your New Sliding Barn Door!
Congratulations, you’ve successfully installed a sliding barn door for your closet! Enjoy the benefits of a stylish and functional new door that maximizes your space and adds a touch of rustic charm to your home.
Want to see the rest of this small bedroom makeover in our Tiny Lake House? Click here!
Other great places to install a DIY barn door
I love barn doors for closets, but they’re also great for these spaces:
- into a laundry room
- between a primary bedroom and an ensuite bathroom
- under the stairs into a storage area
- double barn doors into a flex room or office area on the main floor
Installing a sliding barn door in your home is an easy DIY project that can be completed in just a few hours with basic tools and materials. Follow my step-by-step guide to transform your closet into a stylish and functional space that reflects your personal style. With just a little bit of effort, you can enjoy the benefits of a sliding barn door that maximizes your space and adds a touch of rustic charm to your home. Don’t be afraid to get creative and customize your sliding barn door to match the rest of your home decor. Happy DIYing!
This is a helpful tutorial. I’m considering adding a barn door over my pantry in a new build. My main concern is that every barn door I’ve seen swings out a little at the bottom when you push it open or closed. How do you keep it from banging against the wall on the bottom as you move it?
Most barn door kits come with a guide you can install on the floor to help stabilize the door.