How to Knit a Chunky Blanket for Beginners: No Needles Required!
This post may contain affiliate links · This blog generates income via ads
As the temperatures drop and the days get shorter, there’s nothing better than snuggling up under a warm and cozy blanket. But what’s even better than that? A chunky knit blanket that you made yourself! And the best part is, you don’t need any knitting needles to make one. That’s right, even if you’re a beginner, you can make a beautiful, chunky knit blanket in no time. In this blog post, I’ll go through everything you need to know to learn how to knit a chunky blanket for beginners.
I’ve seen these finger knitted blankets all over TikTok, Instagram and YouTube over the past couple of years. Since I’ve been a knitter for at least 10 years, I was skeptical that these would actually be easy to knit and would turn out well. I have to say – now that I’ve made one I’m pleasantly surprised!
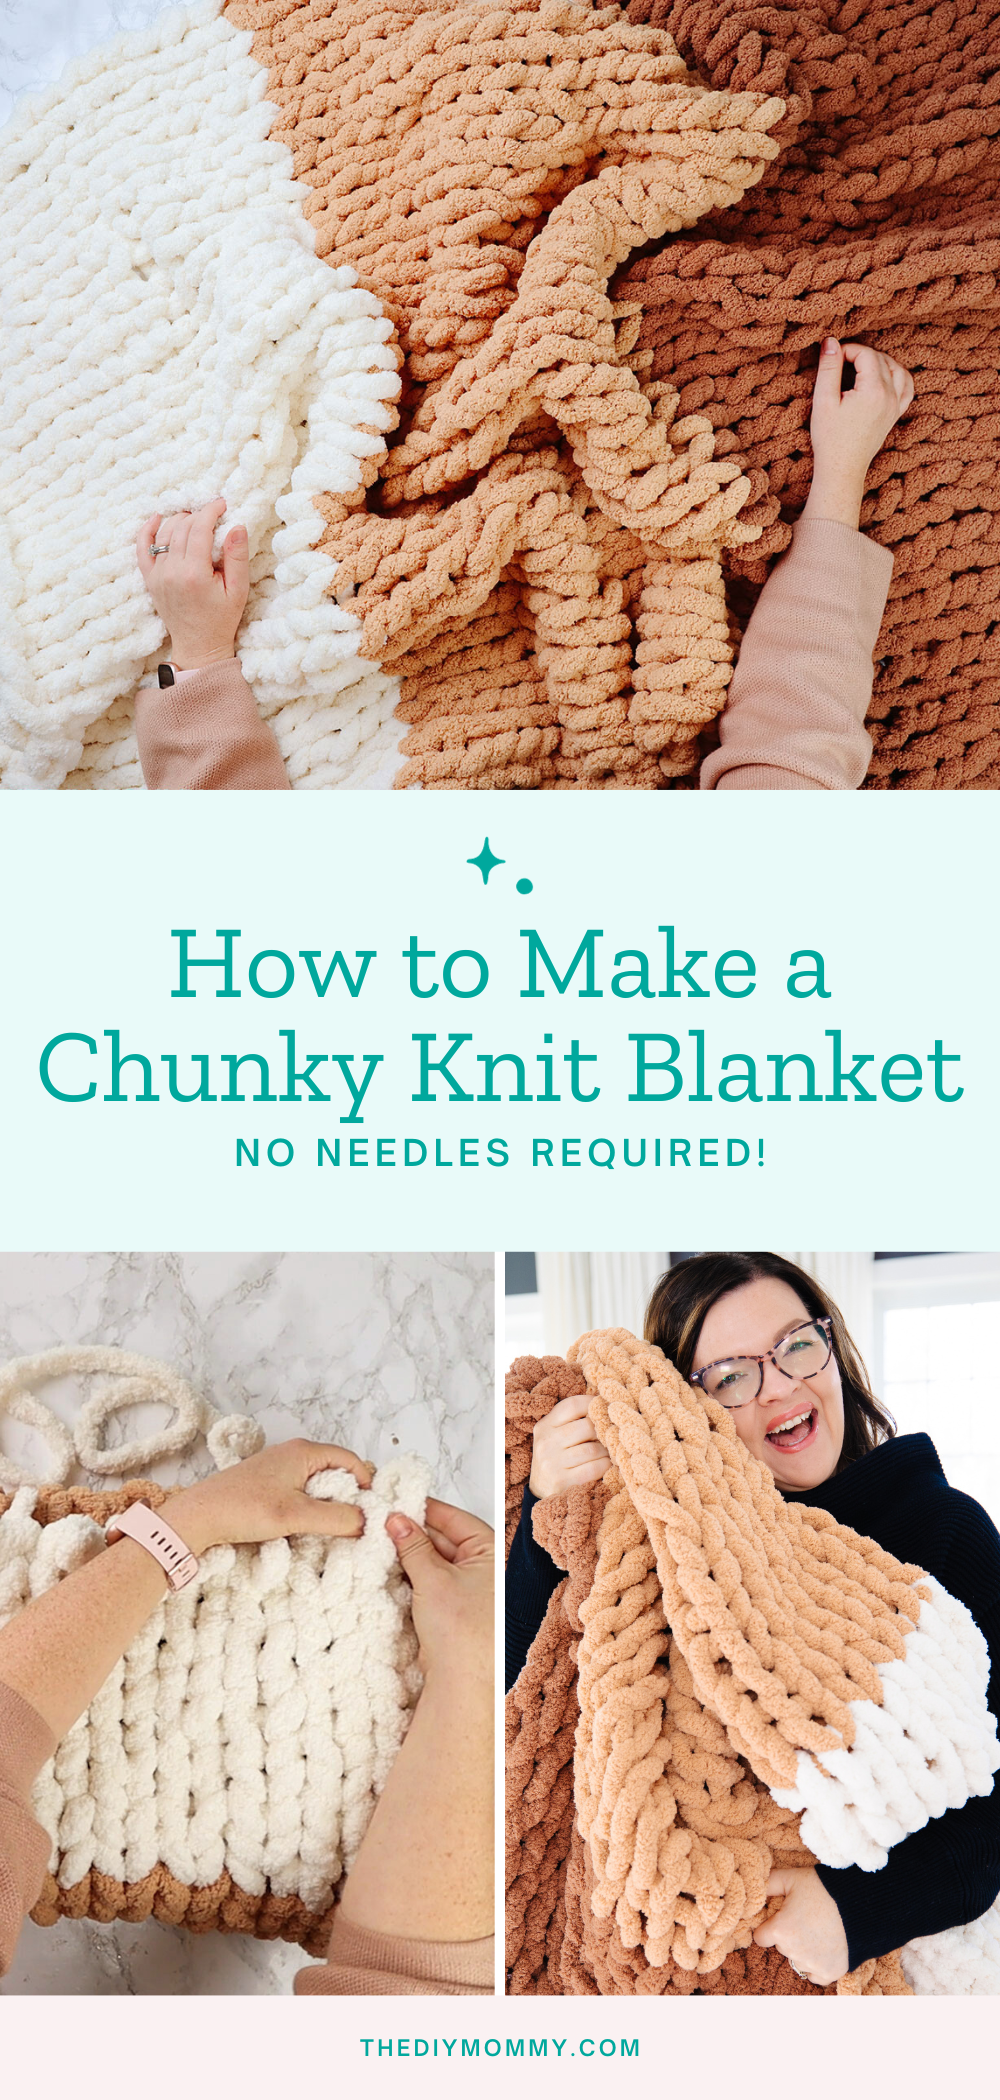
Not only was this DIY chunky hand knit blanket easy to make, but I didn’t have to buy a that much yarn to make it in a HUGE, luxurious size! It’s a full 4 feet by 6 feet, which is the perfect oversized throw blanket. I was able to use my hands to get relatively even knit stitches, and the whole thing only took me a few hours to craft. This blanket would make a stunning gift, or make it in your favourite colours to match your own seasonal decor.
If you’ve tried arm knitting like I have, this method is like its baby cousin. You’ll be using your hands and fingers instead of your hands and your arms to knit.
You Will Need:
- 6 skeins of Yarnspirations BERNAT Blanket BIG chunky chenille yarn (I chose 2 skeins each of 3 different colours for a striped blanket)
- scissors
Watch my video tutorial to for the chunky knit blanket instructions
Choose your yarn
The first step in creating your chunky knit blanket is to choose your yarn. The yarn you choose will depend on the weight and texture you want for your blanket. A chunky blanket requires super bulky yarn, and you’ll want to choose a soft yarn that’s comfortable against your skin. Merino wool roving is a popular choice for its natural warmth and durability, but there are plenty of acrylic and vegan options to choose from as well.
For this blanket, I’m using some Yarnspirations BERNAT Blanket BIG yarn I found on sale at Michaels for 30% off. I love the feel of this chenille yarn. It’s SO soft! You can find Bernat Blanket BIG here on Amazon, but I find the best place to buy it is at Michaels. Don’t buy it at regular price; it’s often on sale!
Buy the right number of skeins of yarn for the size of your blanket
Purchase enough skeins of the chunky yarn to create the blanket size you want. I want my blanket to be about 4 feet wide by 6 feet long, so I’m buying 6 skeins of Bernat Blanket BIG yarn. I also want it to have 3 stripes in different colours. I’m purchasing two skeins of Caramel (a brown-orange), two skeins of Scone (an orange-beige) and two skeins of Vintage (a cream colour).
Tip: find a good working surface!
To make this blanket, you’ll need a large flat surface on which to work. I’m making my blanket on the island top in my studio, which is a 4 x 2 foot counter-height surface. You’ll also want to find a spot where you can leave your blanket safely if you want to take a break from knitting. This blanket took me about 4 hours to make, but it may take you longer if you have no prior knitting or crochet experience.
Making the first chain
Now it’s time to start making the loops for the first chain of your blanket. Holding the yarn, make a loop about 8 inches from the end.
Take the loop and place it over your 4 fingers, then loop the yarn over your fingers again, pulling it through the first loop you made. You’ve created a loose slip knot.
Continue doing this until you have a long chain of loops. These loops will be the foundation for your blanket. I made a chain of 24 stitches / loops with this yarn for my 4 foot wide blanket.
Tip: use your fingers for gauge!
To keep your loops a consistent size, use your fingers to help. For the first chain row and the last cast-off row, use your four fingers and tighten each loop around them. For the next rows, use only 3 fingers and tighten each loop around them.
Working the blanket
Once you have your loops, it’s time to start working your blanket. Flip your chain so that its tail is on the left hand side. Take the final loop you made and pull some more of the working yarn through it, creating a new loop. This is the first stitch of your next row. If you’d like, place three fingers through the loop and tighten the working yarn gently around your fingers. You can do this with each loop so that they’re a consistent size.
Then, put your fingers through the next chain over on the row below, and pull another loop of the working yarn through that. Repeat this process until you’ve finished creating new loops for your next row across the entire chain. For this blanket, that’s 24 loops. Congratulations – you’re hand-knitting!
Once you’re finished your first row, repeat this process going the opposite direction to create your second row. Continue in this manner going back and forth creating new loops until you only have about 3-6 inches of yarn left on your skein.
Adding on new yarn
When your first skein of yarn is almost done with about 3-6 inches left, attach some new yarn from a new skein. You can do this by tying the end of the new yarn to the previous one with a simple square knot. The nice thing about this Bernat Blanket BIG yarn, is that you can leave small tails in the knots because it has a lot of texture to keep the knots in place.
Continue knitting back and forth until you either want to add more of the same colour of yarn, or start a new row in a new colour. See the next step to learn how to do this.
If you want to start a new row in a new colour, finish an entire row before adding on the new colour of yarn. Otherwise, continue knitting in this manner until you’ve reached the desired length for your blanket. Mine is about 6 feet long, and that was using all of the 6 skeins of Bernat Blanket BIG yarn.
Changing yarn colours
If you want to start knitting with a new colour of yarn, make sure your previous row has been completed. Then, simply start finger knitting with your new yarn, leaving a 6 inch tail at the end. You will be tying the two yarn tails together once you finish knitting your blanket. Continue in this manner until you’ve either reached the desired length of blanket, or want to add a third colour of yarn.
If the latter, repeat this process to start knitting with the new colour. For my blanket, I’m adding a third row in a third colour – Vintage (a creamy off white).
Tip: fold your work!
Once your blanket gets longer, it may start sliding off of your work surface. Try folding it accordio- style as you work. This will make it easier to knit as your blanket gets larger.
Finishing your blanket
Once you’ve reached the desired length, it’s time to finish your blanket. Finish your row, and make sure you have enough yarn left on your skein to cast off your blanket. The length of yarn left will need to be about twice the width of your blanket. For example, if you’re making a 4 foot wide blanket, you’ll need to make sure there’s still at least 8 feet of yarn left to do this final cast-off row.
Start the final cast-off row by creating two loops into the previous row as per usual.
Then, pull the first loop over the second loop, holding onto the second loop. Make sure that these loops are on the larger side so you don’t have a gathered / tight finish to your blanket. I use all my four fingers to measure inside each loop to make sure they’re big enough.
Continue this final row in the same manner – creating another loop, and then pulling the previous loop over it. Make sure each loop is generously sized so you have a nice, relaxed edge.
When you are done the final stitch, cut the yarn leaving a long tail. Then, pull the end through the last loop to secure it.
Finally, weave in the loose ends to make sure your blanket looks neat and tidy. Make sure that you’re tying any yarn ends together first as needed. Also ensure that you’re weaving the ends through their same colour in the blanket so that you don’t see them as easily.
Now you’re all done! Isn’t this a stunning, thick & cozy blanket? I absolutely love how big this one is made with the 6 skeins of Bernat Blanket BIG yarn. I also love that the colour combination reminds me of a pumpkin spice latte. It’s perfect for Fall. I’m definitely tempted to make another one in a different colour combo for the Christmas season ASAP!
Creating a chunky knit blanket without needles may seem intimidating, but it’s actually quite easy! With some thick, soft yarn and a little bit of patience, anyone can make a beautiful, cozy blanket that will last for years to come. Whether you’re a beginner or a seasoned crafter, give this project a try and you’ll have a gorgeous new blanket to snuggle up in this Fall and Winter. Happy crafting!
PIN ME:
Do you know how to shorten an already made blanket? I don’t want to cut it and risk ruining the entire blanket. Any suggestions?
Can you use smaller size for maybe scarfs? Coasters, trivet?
Sure you could. If you do I would love to see how it turned out. Tag me @thediymommy on Instagram.
I have tried several times and it keeps unraveling after a row or 2 and idk what I’m doing wrong.