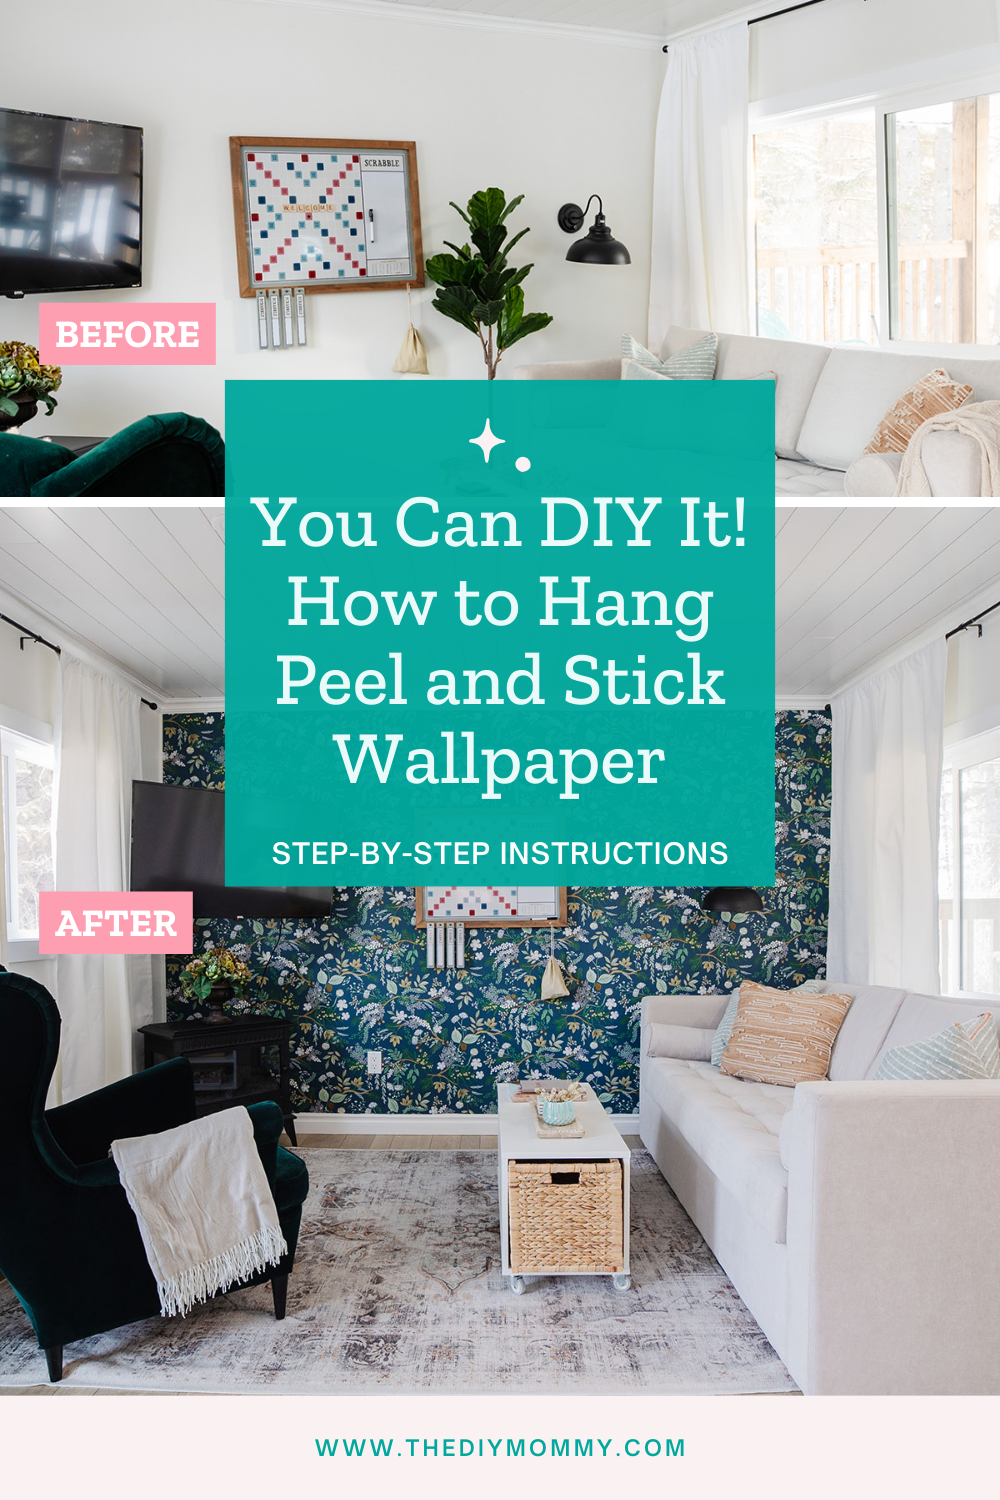
You Can DIY It! How to Hang Peel and Stick Wallpaper
This post may contain affiliate links · This blog generates income via ads
With so many pattern and color options available, you can create a truly unique and personalized look for your home. Today, I’m going to guide you through the step-by-step process of installing a stunning peel and stick wallpaper DIY accent wall.
If you’re like me and always on the lookout for creative ways to transform your living space without breaking the bank, you’re going to love this! This project is perfect for adding a touch of charm and character to any room. And the best part? Peel and stick wallpaper is easy to remove without damaging your walls. This makes it a perfect solution for a rental or for those who like to DIY and switch up their wall decor on a regular basis.
Can you do peel and stick wallpaper yourself?
Yes! I did this project by myself in just a few hours. If I was installing it in a larger space or needed to make lots of cuts, I’d have enlisted help! However, keep in mind that you don’t need to finish this project in just one day. If you’re working alone, take your time and don’t rush.
Choosing Peel and Stick Wallpaper for Your DIY Feature Wall
One of the best things about peel and stick wallpaper is the plethora of options available. Whether you’re drawn to bold geometric patterns or delicate floral prints, there’s a design out there for you.
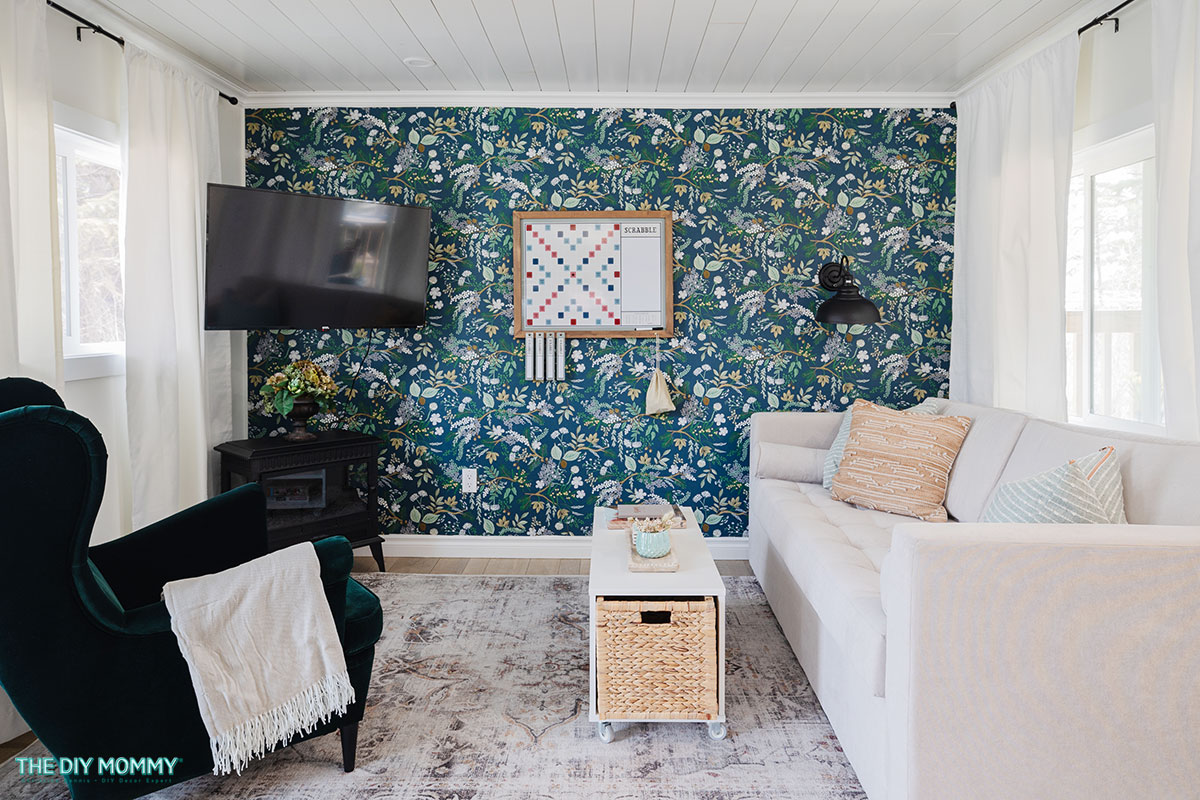
Personally, I found my dream wallpaper, a beautiful creation by Rifle Paper Co., on Wayfair. It perfectly captured the cottage feel I desired, tying in the rich tones of dark green, copper, and mint in my cabin. When choosing your wallpaper, think about the ambiance you want to create and how the colors and patterns will complement your existing decor.
How do you calculate how much peel and stick wallpaper you need?
Before you order your wallpaper, it is important to measure your wall and calculate how much you need.
- First, calculate the number of square feet by measuring both the height and the width of your wall. Add a couple of extra inches to both of those measurements to allow for cutting and trimming.
- If you’ve chosen a large pattern, add even more inches so that you will have extra for matching.
- Then, the formula is: (width x height) ÷ roll coverage = number of rolls.
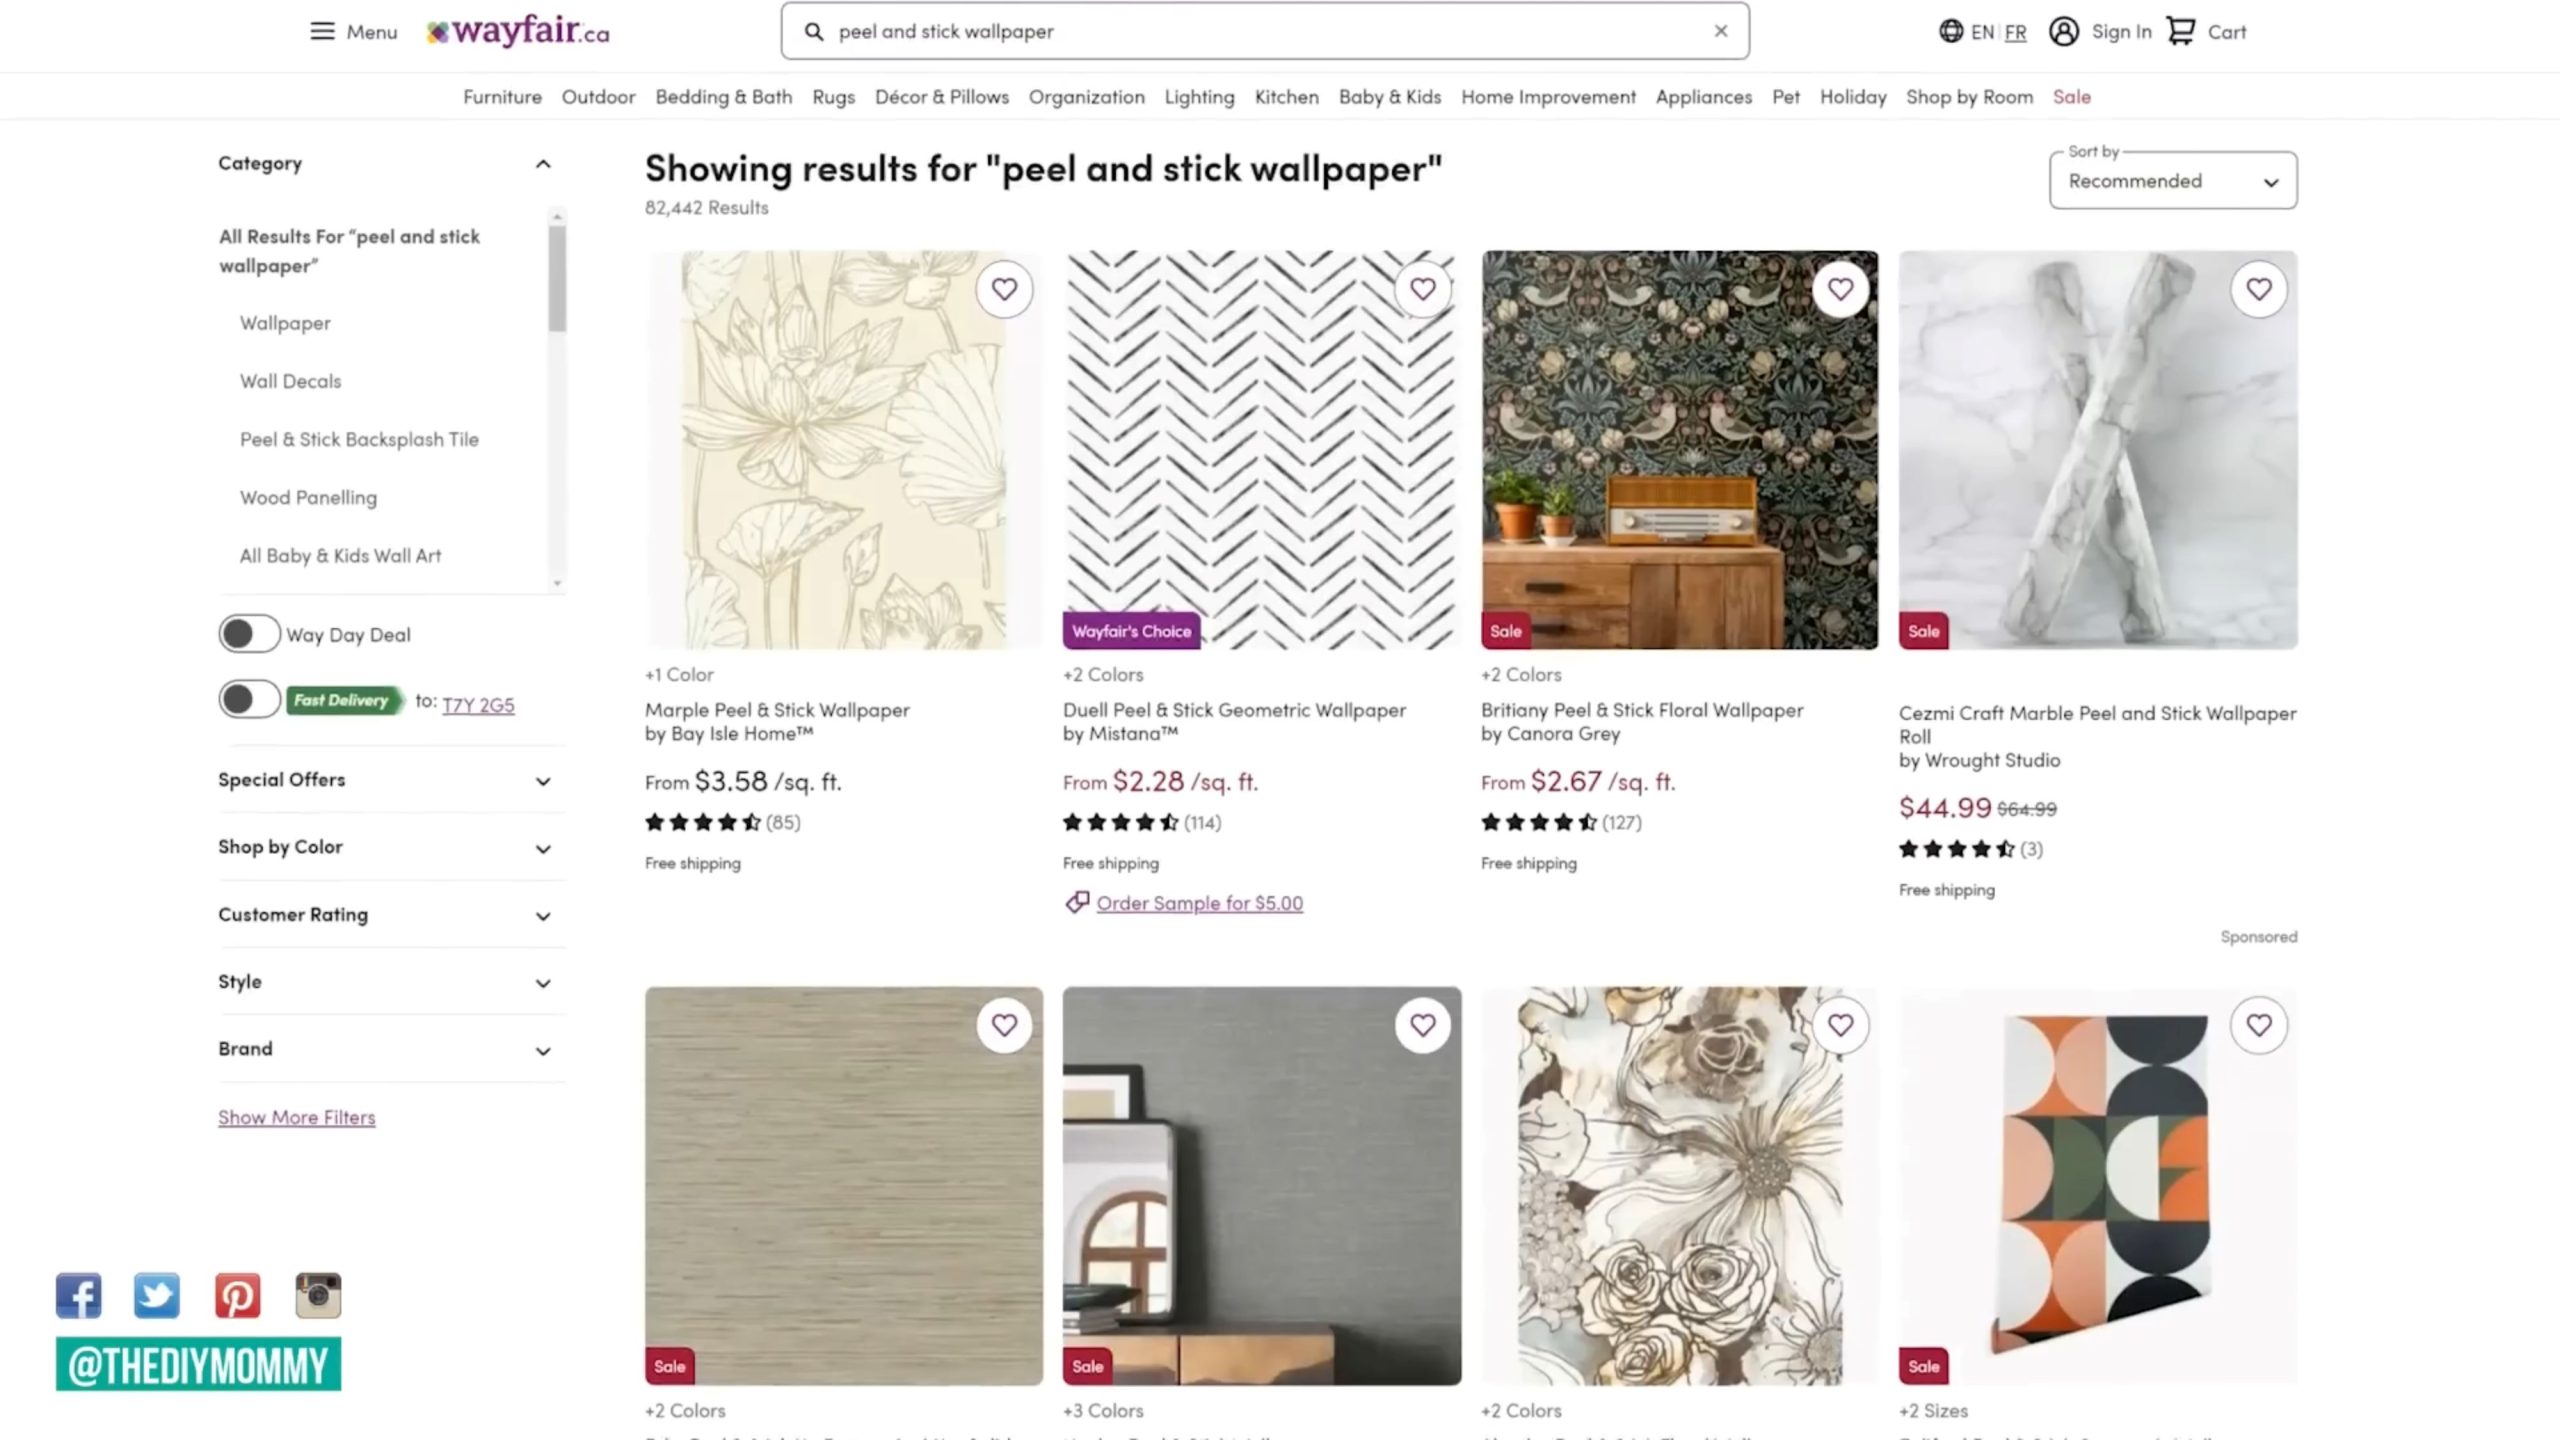
Wayfair also has a calculator right on their site to show you how many rolls to order.
How do you prepare a wall for peel and stick wallpaper?
Once your wallpaper arrives, it’s time to prepare your wall. Begin by cleaning the surface thoroughly. Remove any residue and ensure it’s free from dirt, debris, or dust. If your wall has crown molding or baseboards, you can remove them and install the wallpaper underneath for a cleaner finish. However, if you prefer an easily removable option like I did, leave the trim intact and put the wallpaper up to it.
What do you need to put up peel and stick wallpaper?
- Peel and stick wallpaper
- Scissors
- Utility knife or X-acto knife
- Tape measure
- Level and pencil or laser level
- Ladder
How do you hang peel and stick wallpaper easily?
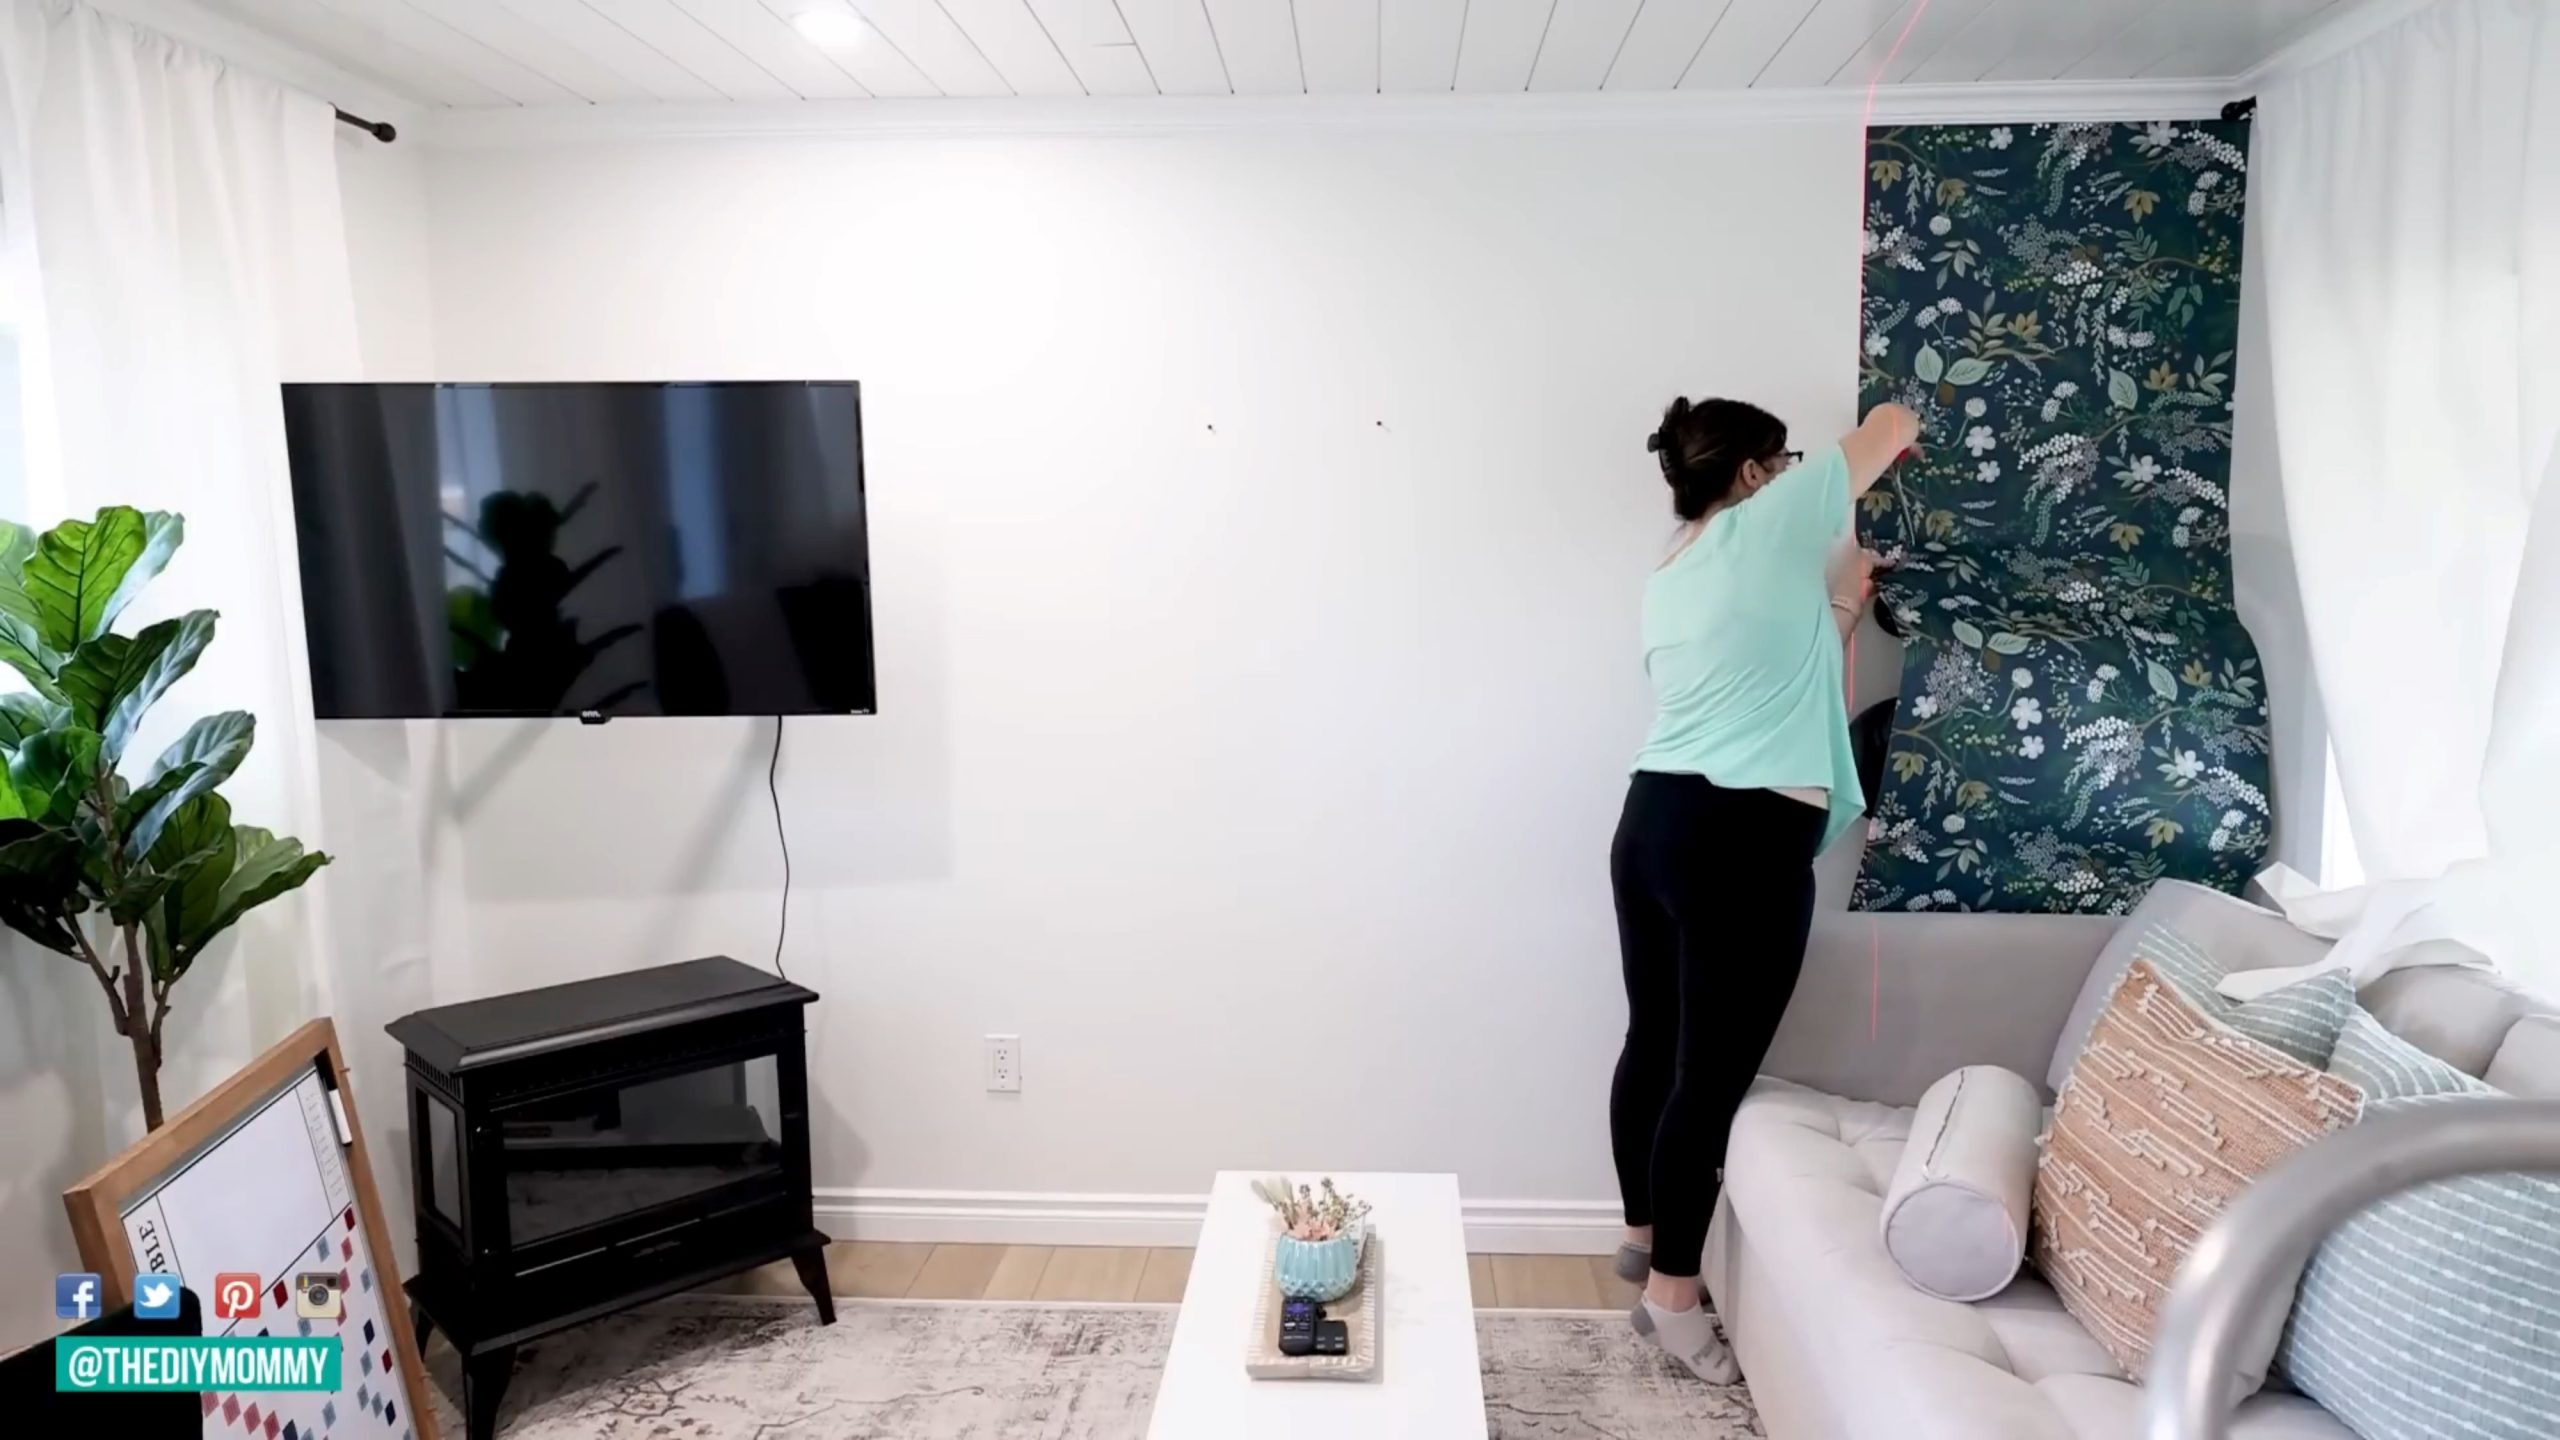
First, measure and cut strips of wallpaper to the height of your wall. Add some extra inches so there will be excess at the top and bottom of the wall.
Always start with a level and square off the first strip of wallpaper. Use a laser level or a traditional level and pencil to create a vertical guideline for your first piece.
Tip: Do not go off the corner of your wall. This might not actually be straight and level!
When applying the wallpaper, peel off the backing gradually, smoothing out the paper as you go.
- I like to remove the backing off the top 6″ or so.
- Next, I smooth those top few inches of the wallpaper on the wall.
- Then, I continue peeling off the backing just a few inches at a time, and smoothing the paper as I go.
I find this method gives me so much more control than if I peeled the backing all at once. I use my hand to smooth out any air bubbles because it’s nice and soft and doesn’t scratch the paper. You can use a plastic smoothing tool if you prefer!
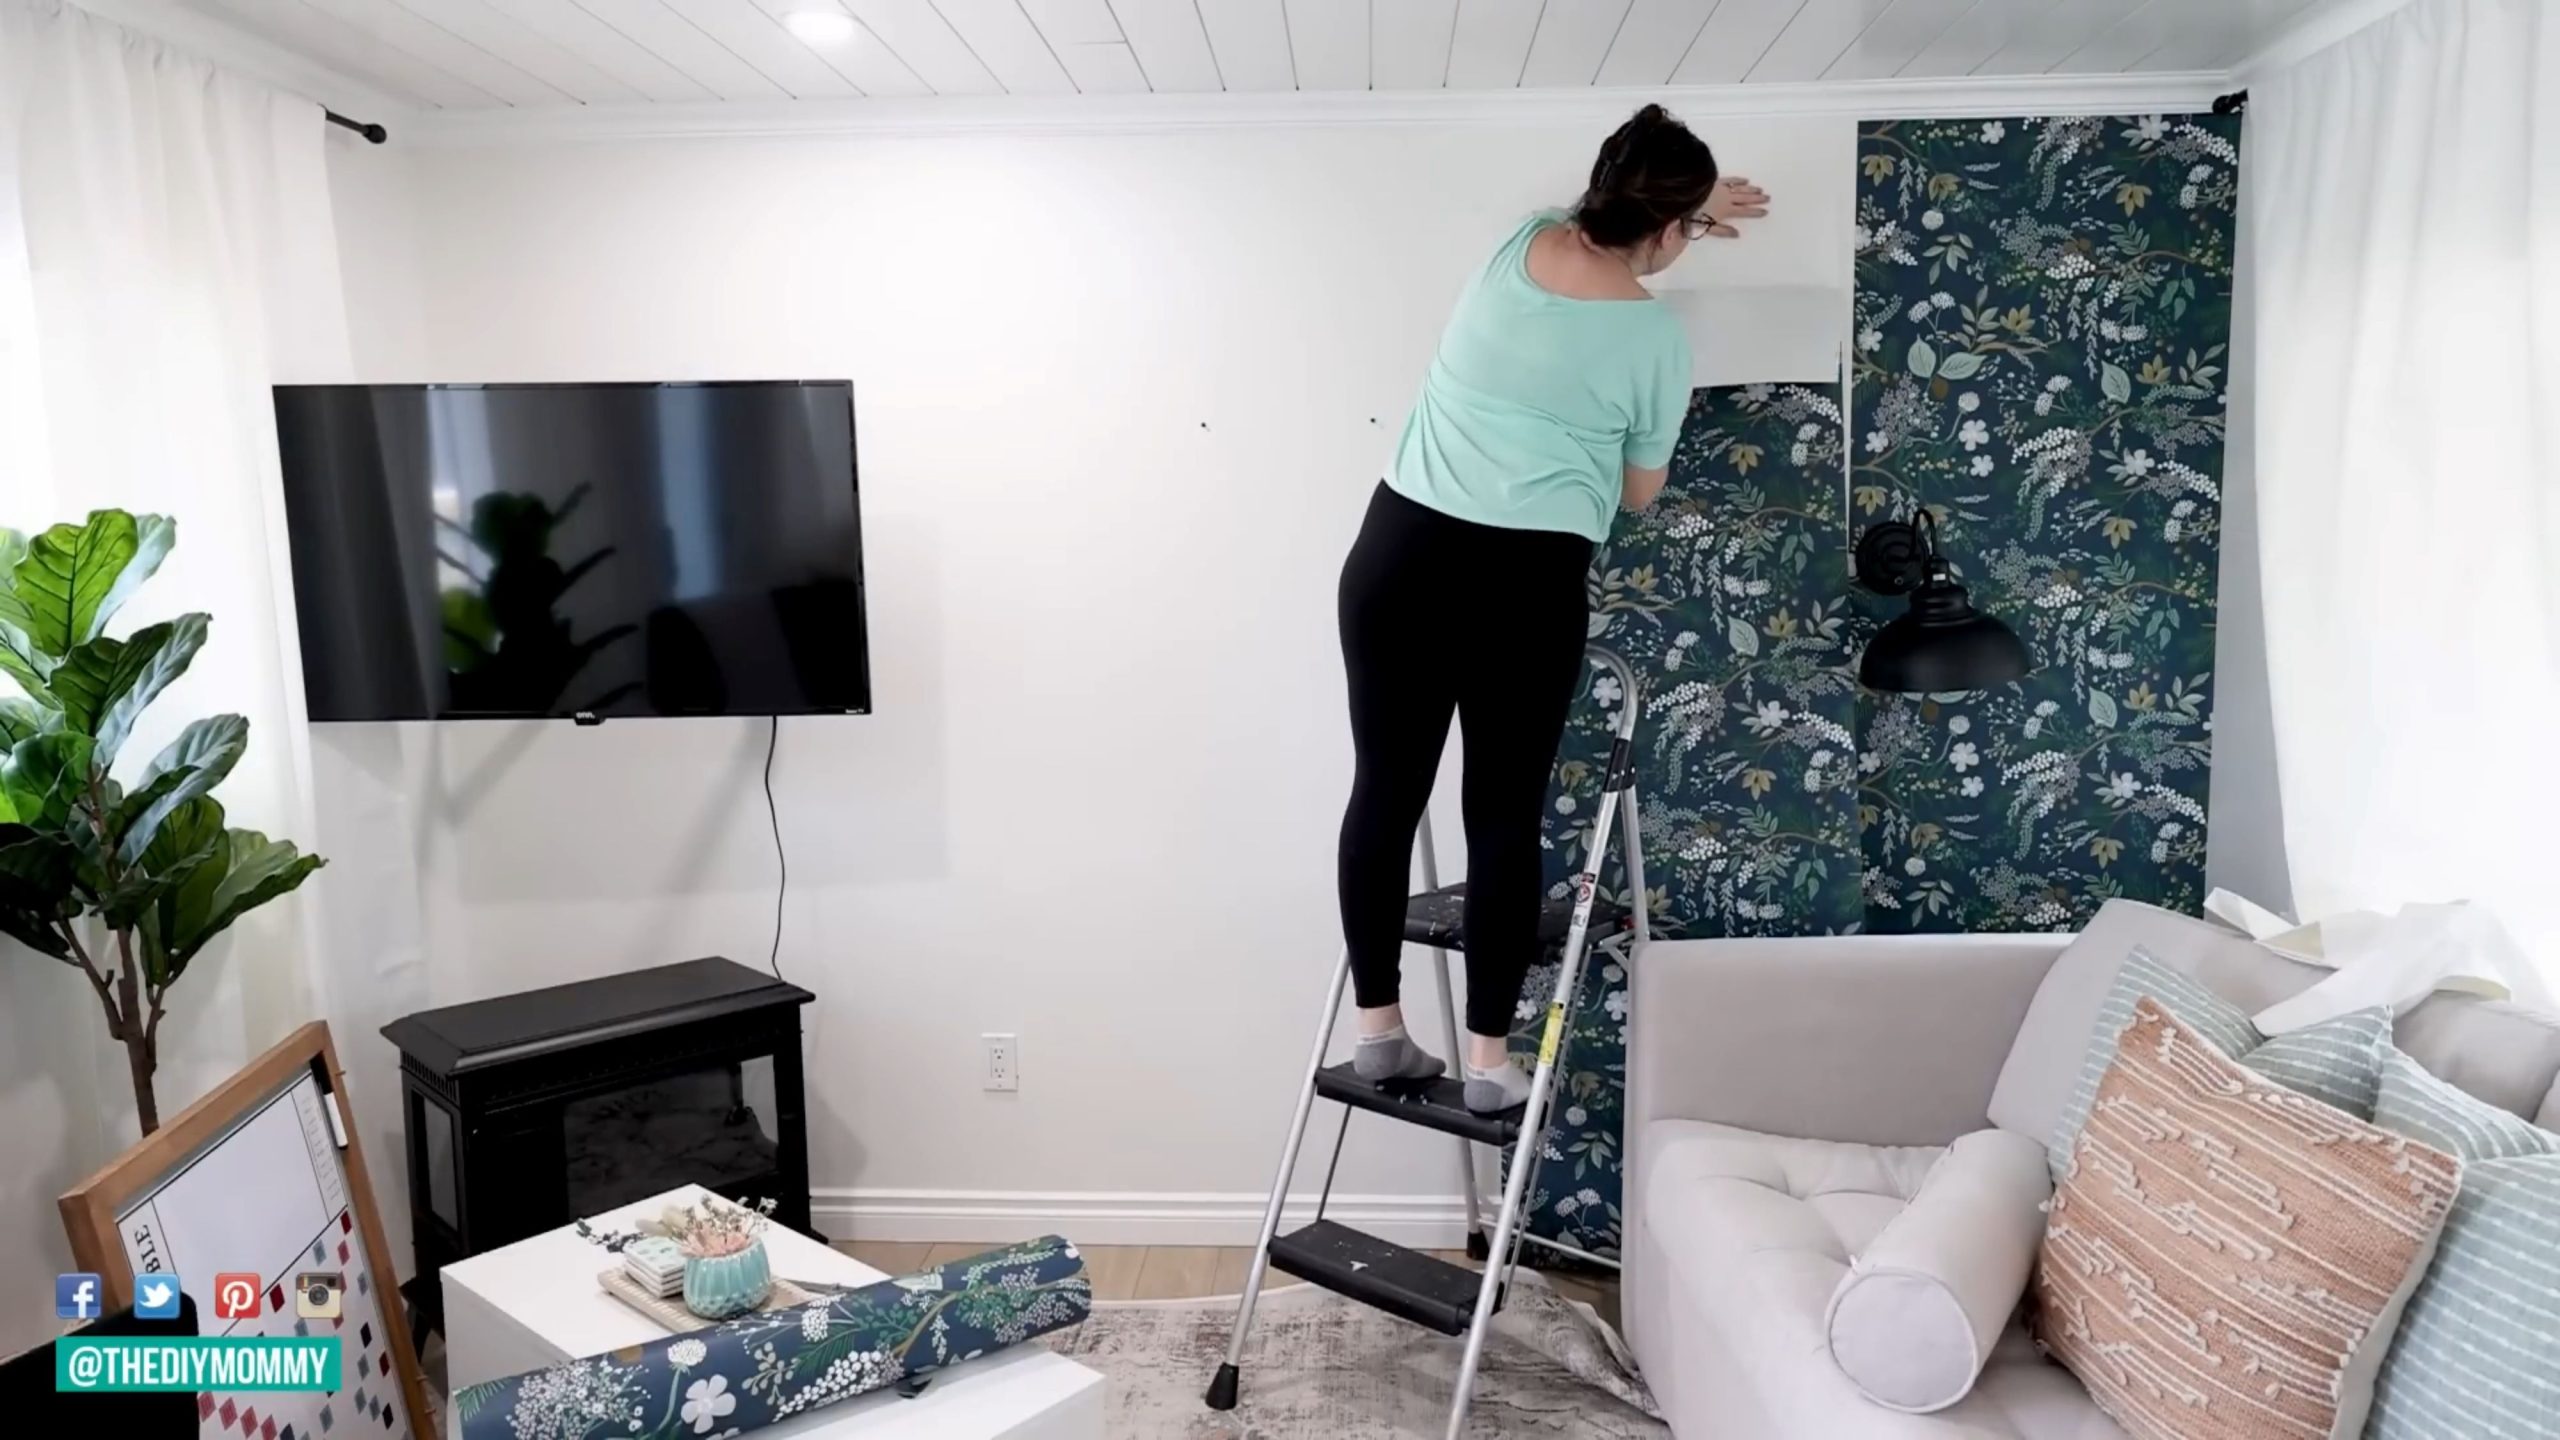
Now continue to apply the wallpaper and strips, overlapping each one and making sure to line up the pattern as best you can.
Continue working your way across the wall smoothing down each strip as you go with your hand or with a wallpaper smoothing tool to make sure it’s all evenly adhered and there’s no wrinkles.
Instructions for cutting around light switches, fixtures and outlets
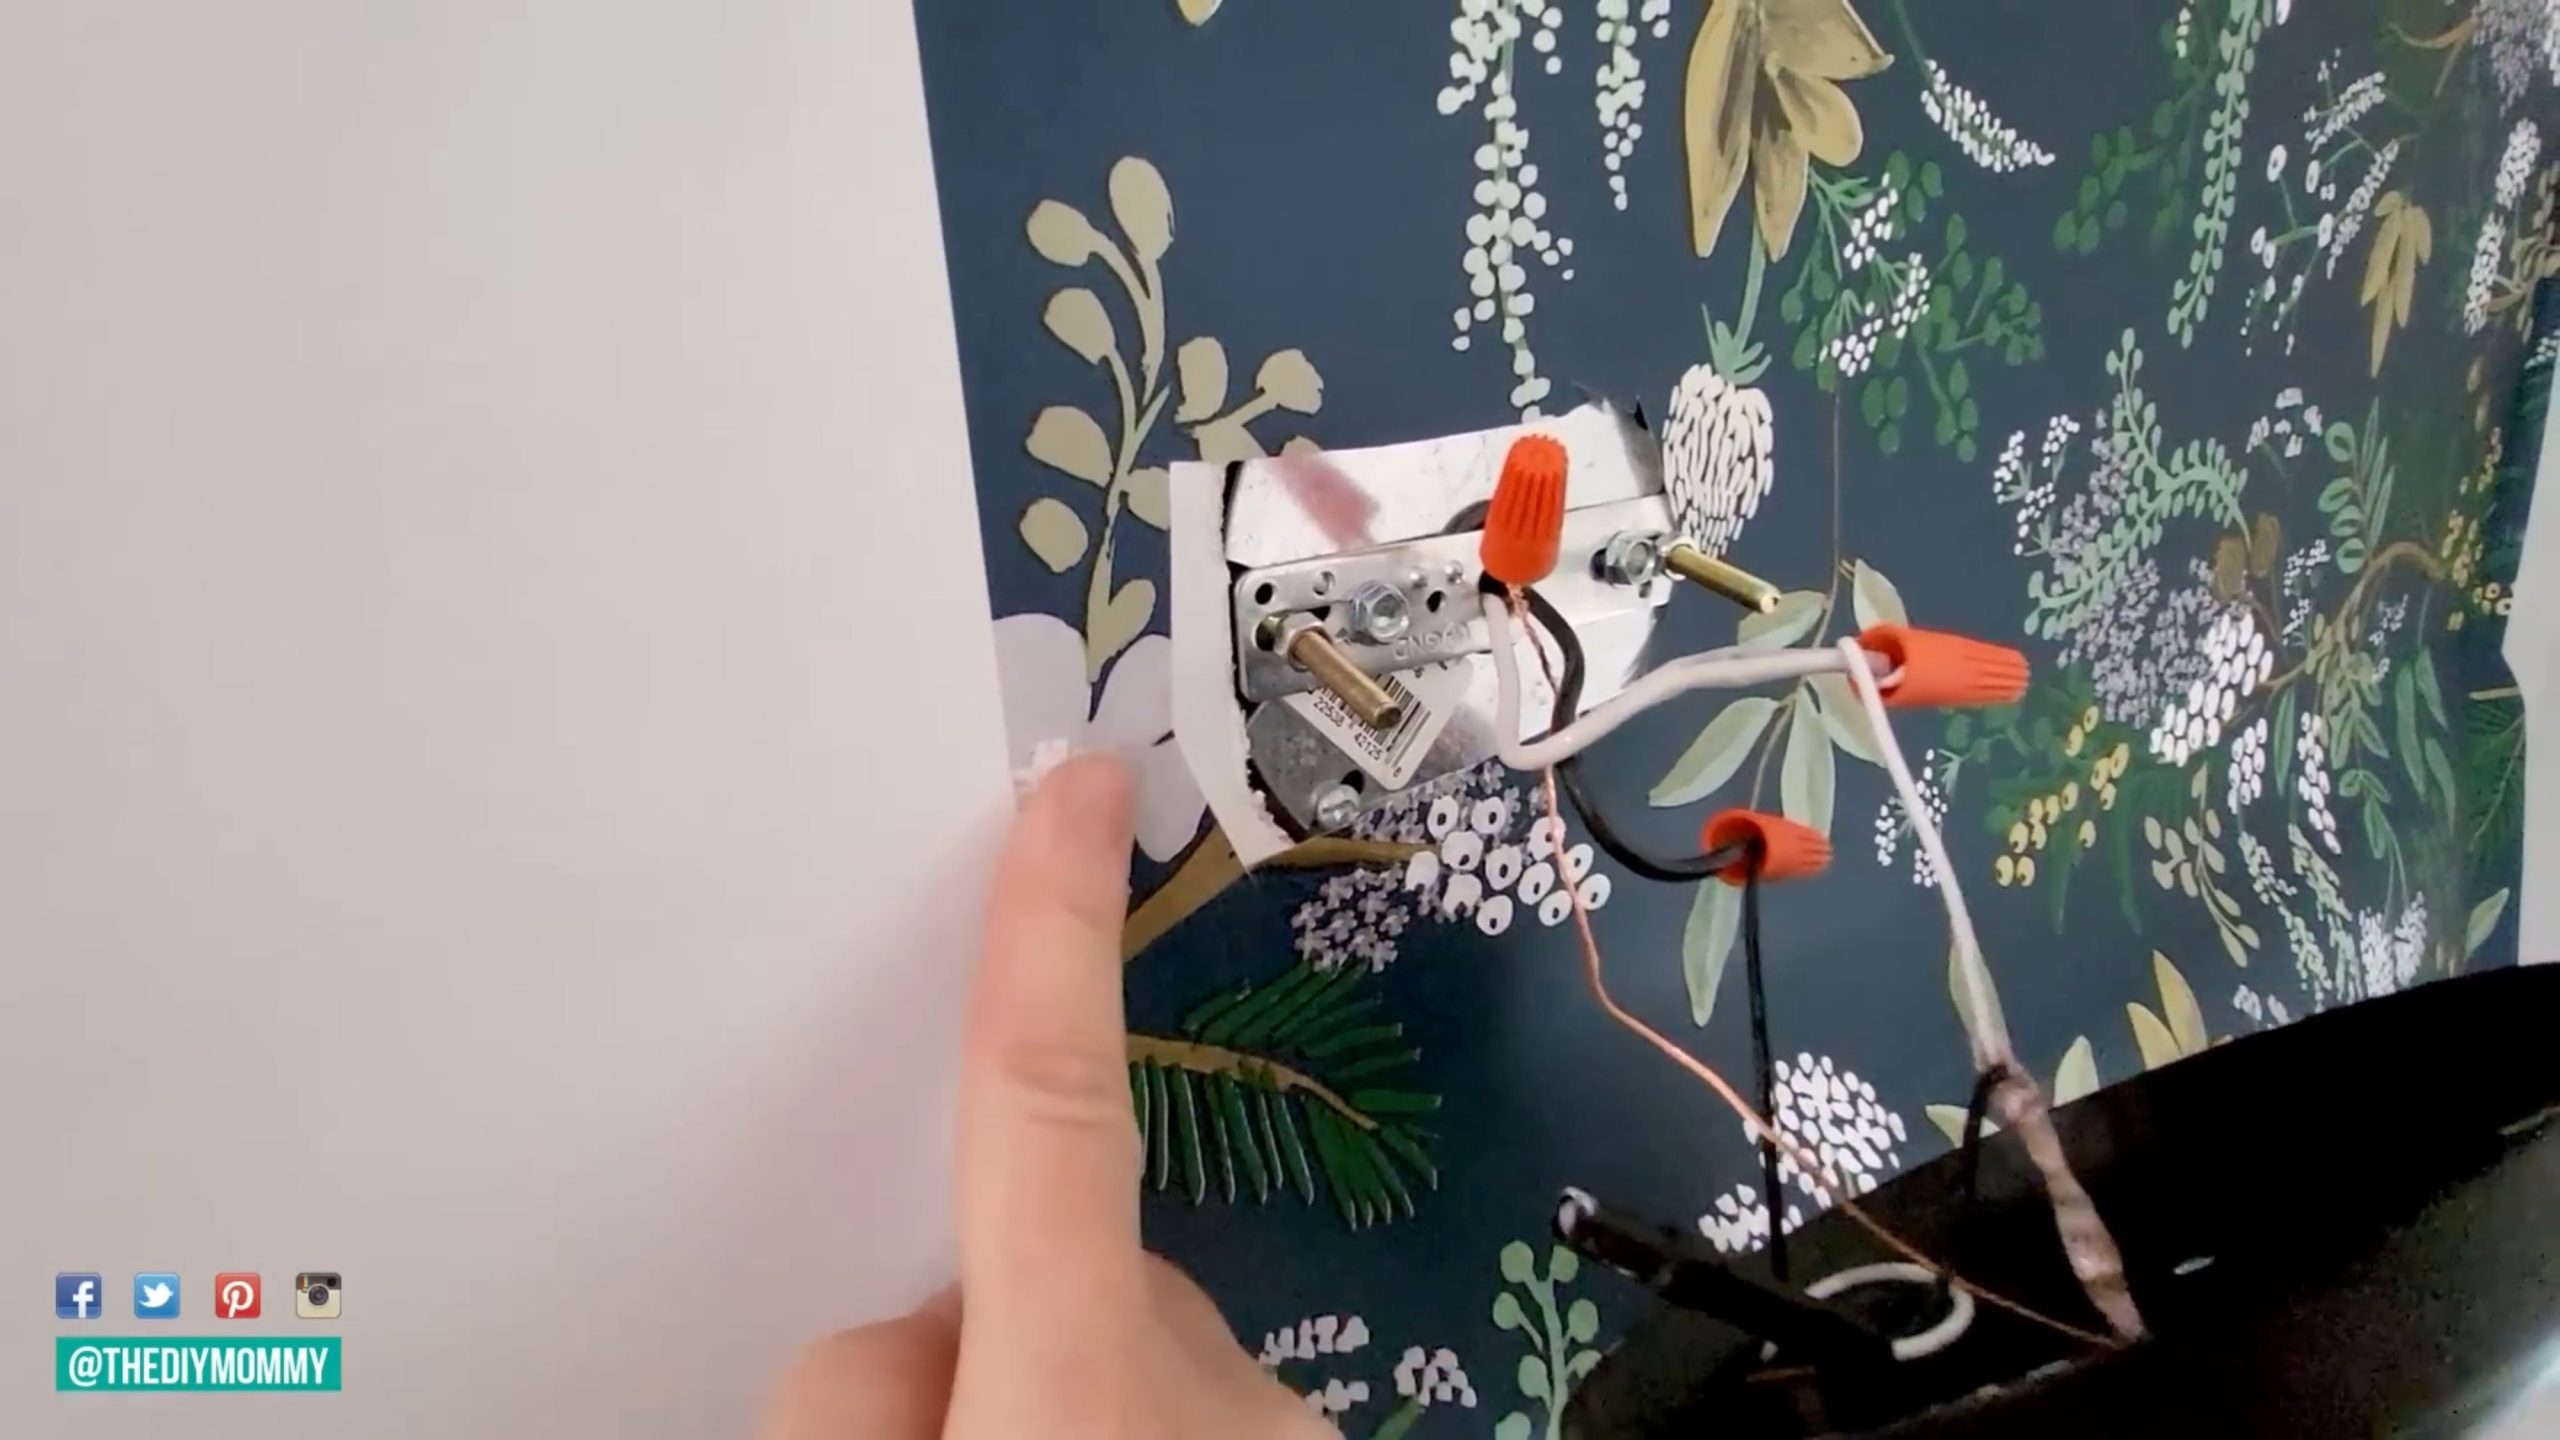
If you encounter tricky areas that require cutting like fixtures and outlets, remove the covers first. Then, trim the wallpaper around them and reinstall the covers once the wallpaper is in place. Take your time during this step to avoid accidental tears or uneven cuts.
To cut around my light fixture, I:
- Gently bent the paper
- Made a slit
- Then, cut around the fixture.
You don’t have to make this cut look too fantastic because it’s going to be covered by the outlet cover.
Finishing Touches
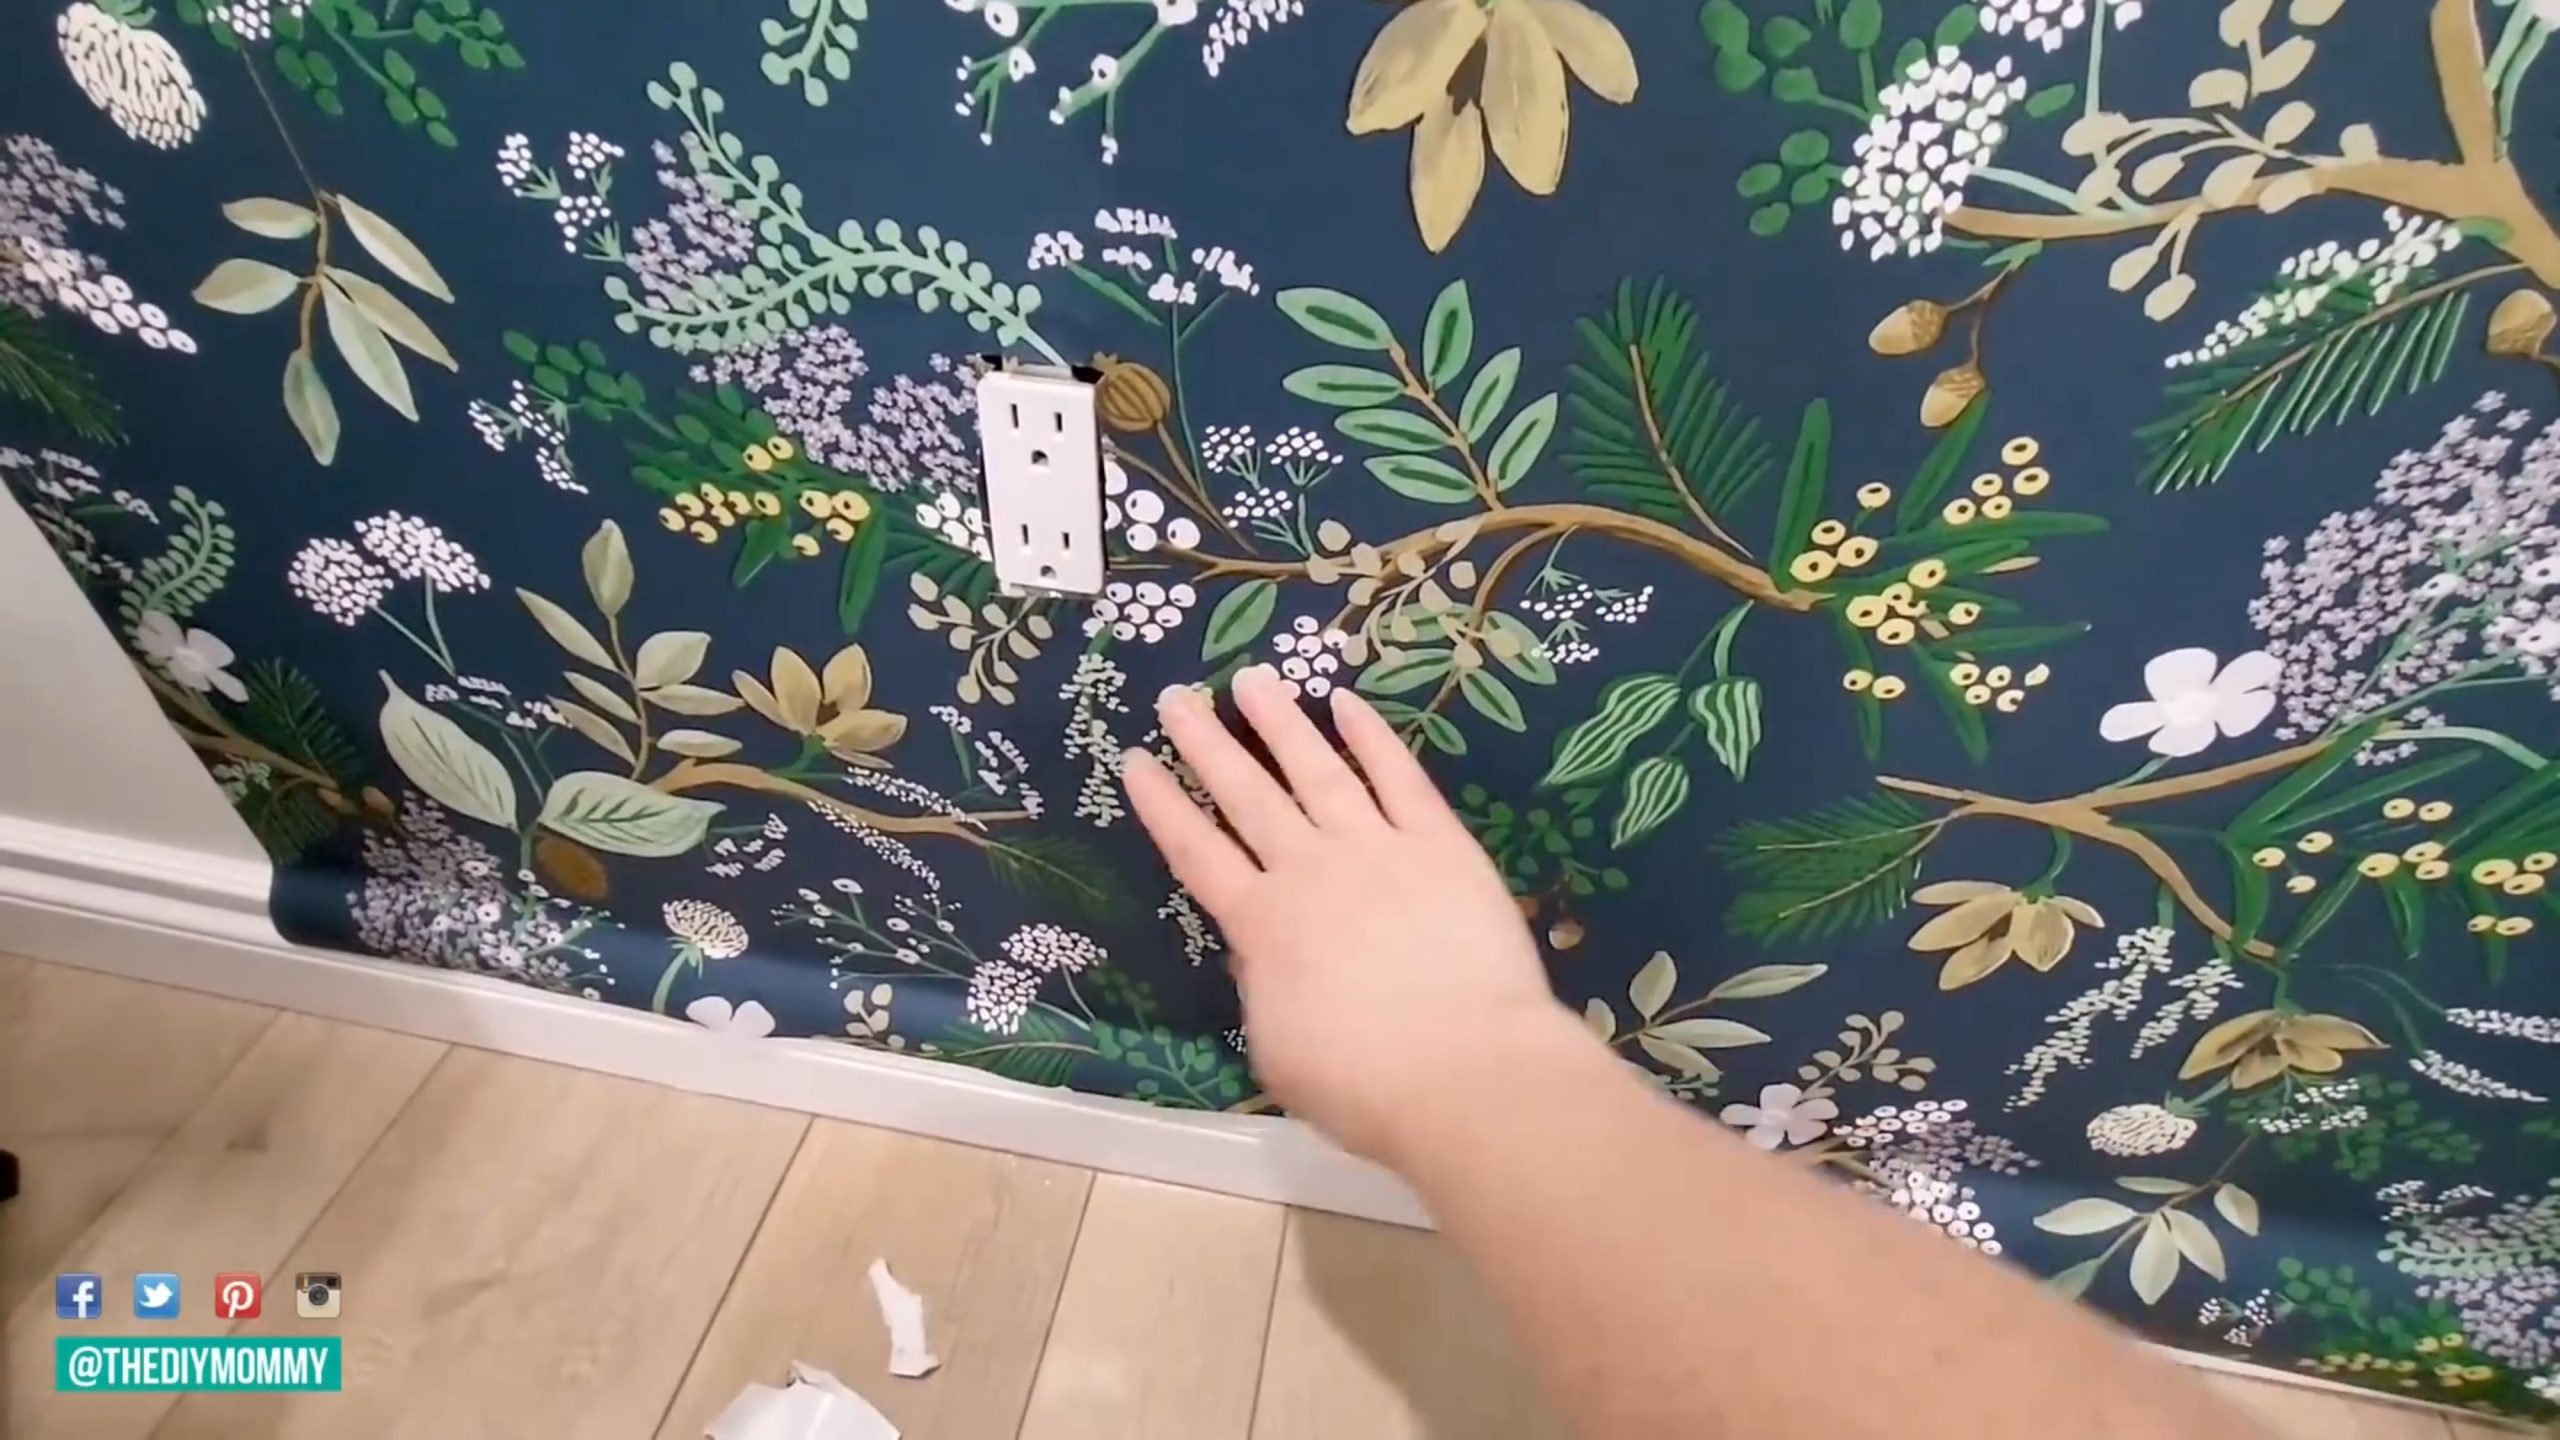
After applying all the strips, use a sharp utility knife to trim off any excess wallpaper around the edges, crown molding, and baseboards. Precision is key here, so work slowly and don’t rush this step. A clean, straight cut will give your feature wall a polished and professional appearance.
This peel and stick wallpaper DIY has breathed new life into this room, adding depth and interest. The dark wallpaper not only camouflaged the TV but also brought all the colors and tones together, creating a harmonious and inviting atmosphere.
How forgiving is peel and stick wallpaper?
Peel and stick wallpaper usually has a bit of give, especially the kind that I’m using here. It’s a high quality paper, so if you happen to make a mistake you can usually carefully remove a piece and then reapply it once or twice.
Is Peel and Stick Wallpaper DIY a good idea?
What makes peel and stick wallpaper truly magical is its versatility. Not only does it allow you to experiment with different texture, patterns and colors, but it also offers the freedom to change your mind whenever you please. If you ever grow tired of your current design, simply peel it off and replace it with a new one, instantly giving your room a new personality.
Installing peel and stick wallpaper is a fantastic DIY project that allows you to transform your space without the hassle and commitment of traditional wallpaper. It’s a budget-friendly option that will empower you to unleash your creativity and experiment with various styles. So, if you’re looking to add a low-commitment feature wall to your room, peel and stick wallpaper is undoubtedly the best way to go.
I hope you’re feeling inspired to embark on your own wallpapering journey. If you have any questions or want to share your own experiences, feel free to drop a comment below.
Pin me!
More Peel and Stick DIY Projects:
Peel & stick home improvement products have come a long way in recent years. Products like peel & stick tile, wallpaper, contact paper and even peel and stick wood are easy to install and can give your home a ton of personality!
How to install Peel and Stick Tile Backsplash & Product Review
After a few installations of peel and stick backsplash, I have to say that it’s one of my favourite budget-friendly updates for a kitchen! Installing peel and stick backsplash is very easy, and the result looks great.
How to Install a Rustic Wood Ceiling with Stikwood
This ceiling is still one of my most popular posts on Pinterest! Let me show you how I installed this ceiling all by myself with the help of a few tools and Stickwood.